How to Fix a Pitted Concrete Garage Floor Before It Gets Worse
You can stop small pits from becoming bigger by acting fast: clear and dry the area, chip away loose concrete, and test for moisture. For shallow spots use a cementitious patch; for 1/2–2″ pits pick a polymer-modified mortar; for deep or widespread damage grind and apply a bonded resurfacer or epoxy filler in high-traffic zones. Wear PPE and follow curing times. If you want step-by-step methods, tool lists, and when to call a pro, keep going.
How to Fix a Pitted Concrete Garage Floor Before It Gets Worse
If your garage floor is starting to pit, act quickly to stop small spots from turning into bigger problems.
You’ll want to assess the damage, clean the area, and use a concrete patch or resurfacer within days for best results.
Waiting lets moisture and freeze-thaw cycles make the pits worse and more expensive to repair.
Quick Answer When and How to Act Now
When you notice small pits or flaking on your garage floor, act now to stop damage from spreading—addressing minor surface issues quickly prevents larger cracks, uneven wear, and costly repairs.
You should inspect, clean, and fill pits promptly. For guidance on how to fix pitted concrete garage floor, use a patching compound or epoxy, follow manufacturer steps, and seal the area to protect it.
Understanding Concrete Pitting
You’ll learn what pitting is and how it differs from cracks so you can spot the right problems.
I’ll explain common causes, the signs that need immediate repair, and the long-term risks if you ignore pitted areas.
Knowing these details helps you prioritize fixes and prevent bigger damage.
What Is Pitting and How It Differs from Cracking
Pitting is localized surface erosion that leaves small, often shallow depressions across your concrete rather than long, linear breaks.
You’ll notice a textured, peppered look and feel when you run a hand over affected areas.
Cracks are continuous separations that can widen and penetrate deeper.
Pitting mainly affects the surface, while cracking signals structural movement or stress beneath the slab.
Common Causes of Pitted Garage Floors ()
Now that you can spot pitting and tell it from cracking, let’s look at what causes those tiny surface holes.
You’ll usually see pitting from poor mix or finishing, chemical attack, or water/freeze cycles.
Check these common causes:
- Weak or overly wet concrete mix
- Deicing salts and fuel spills
- Repeated freeze-thaw or standing water
Signs Your Floor Needs Immediate Repair ()
How do you know when pitting has crossed the line from cosmetic to urgent? You should act when damage interferes with use or safety.
Check for:
- Deep pits you can catch with a fingernail or leave debris.
- Water pooling in depressions after rain or washing.
- Cracks radiating from pits or spalling edges that crumble under pressure.
Long-term Risks If You Ignore Pitting
If you leave small pits alone, they’ll grow into bigger problems that affect safety, function, and cost; water, freeze-thaw cycles, and traffic will widen holes, undermine the slab, and accelerate cracking and spalling.
You’ll face trip hazards, damaged vehicles, harder cleaning, and rising repair bills as corrosion of reinforcements and slab settlement follow.
Act early to prevent escalation and higher expenses.
Assessing the Damage How to Inspect Your Garage Floor
Grab a few basic tools—flashlight, tape measure, stiff brush, and a straightedge—so you can inspect every pit clearly.
Measure depth and width to separate shallow surface pits from deeper, structural ones that may need patching or grinding.
If pits are widespread, deep, or near structural cracks, call a professional; otherwise you can usually handle small, shallow repairs yourself.
Tools and Materials for a Proper Inspection ()
Before you start measuring and probing, gather a few essential tools and materials so the inspection goes quickly and accurately.
You’ll need basic items to identify pits, moisture, and contamination:
- Measuring tape, straightedge, flashlight
- Wire brush, screwdriver/probe, hammer for loose concrete
- Concrete cleaner/test kit, marker, notebook for notes and photos
Wear gloves and eye protection.
How to Measure Severity: Shallow vs. Deep Pits
When you’re evaluating damage, classify pits as shallow or deep by measuring depth and spread: shallow pits are surface-level hollows less than 1/4 inch deep that mainly affect appearance, while deep pits extend 1/4 inch or more and can compromise strength or create tripping hazards.
Use a straightedge and caliper or ruler to gauge depth, note pit density per square foot, and photograph areas for records.
When to Call a Professional vs. DIY
Decide whether to tackle repairs yourself by matching the damage to your skills, tools, and time—shallow, scattered pits and cosmetic repairs are often DIY-friendly, while widespread deep pitting, structural cracks, or evidence of moisture/settling usually warrant a pro.
Inspect for depth, extent, and moisture; test for hollow areas and unevenness. If repairs exceed your confidence or require structural fixes, call a contractor.
Preparation Before Repair
Before you start repairing pits, take safety seriously by wearing proper PPE and clearing the area of cars and obstacles.
Clean and degrease the surface, remove loose concrete and contaminants, and follow a moisture test to confirm conditions are right for patching.
Also check temperature and humidity to make sure the repair materials will cure properly.
Safety Precautions and Personal Protective Equipment ()
Safety matters most: protect yourself with the right gear and simple precautions before you touch the concrete.
You’ll want PPE and safe practices to avoid dust, chemicals, and injury. Follow these essentials:
- N95 respirator, safety goggles, and durable gloves.
- Knee pads and slip‑resistant shoes for posture and traction.
- Use proper ventilation and keep a first‑aid kit nearby.
Clearing, Cleaning, and Degreasing the Surface (Step 1)
Now that you’re properly protected, clear the work area so you can see and reach every pitted spot; remove vehicles, tools, and loose debris and sweep thoroughly.
Next, mop with a concrete cleaner or degreaser per label instructions, focusing on oil stains and tire marks.
Rinse well, let dry, and inspect for remaining contamination before moving to mechanical cleaning.
Removing Loose Material and Contaminants (Step 2)
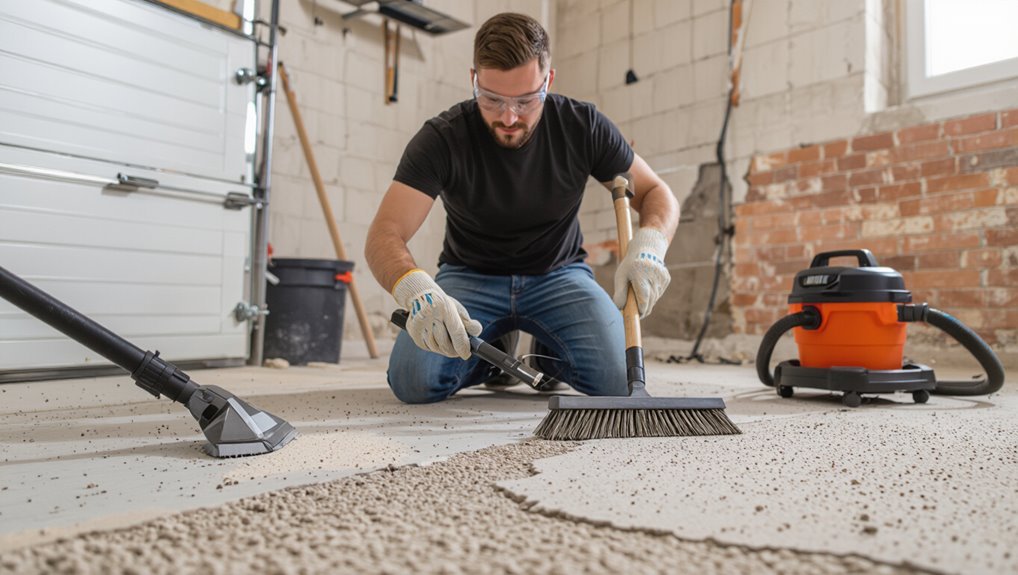
Scrape and chip away any loose concrete, paint, or old patch material so you’ll have a solid edge to bond the repair to.
Use a hammer and cold chisel or an angle grinder with a masonry wheel to remove flaky bits.
Vacuum debris, brush residue from pits, and wipe with a damp cloth.
Confirm no dust, oil, or loose particles remain before patching.
Moisture Test and Environmental Considerations
Before you patch, check for moisture and confirm the job conditions will let the repair cure properly.
Use a plastic sheet or calcium chloride test to detect dampness.
Verify temperature and humidity match product specs—most epoxies and cementitious repairs need 50–80°F and low humidity.
Delay work if moisture, freezing temps, or rain risk will prevent proper bonding and curing.
Step-by-Step Repair Methods
Now you’ll work through specific repair methods based on pit size and severity, from quick patching small shallow pits to full resurfacing for deep or widespread damage.
I’ll cover materials and step-by-step procedures for quick patches, polymer-modified mortars, grinding/resurfacing, and when to use epoxy or polyurethane fillers, plus finishing techniques like troweling and texturing.
Follow these steps in order to get a durable, smooth garage floor.
Small/Shallow Pits Quick Patch Method (Materials, Steps) (Step 3)
Gather the lightweight patching compound, a putty knife, a stiff brush, and a water bottle so you can quickly fill shallow pits in your garage floor.
Sweep debris, brush dust from pits, mist with water, then apply compound slightly proud of the surface.
Smooth flush with surrounding concrete, allow manufacturer-recommended cure time, and lightly sand any high spots before sealing the floor to protect the repair.
Medium Pits Polymer-Modified Repair Mortars (Materials, Steps) (Step 4)
If shallow patches won’t hold for medium-sized pits (about 1/2 to 2 inches deep), you’ll want a polymer-modified repair mortar that’s formulated for greater bond strength and flexibility.
Clean and remove loose debris, etch or prime per product instructions, mix mortar to a trowelable consistency, pack into pits in layers if needed, tool smooth, and cure as directed to prevent cracking.
Deep or Widespread Pitting Resurfacing and Grinding Approach (Materials, Steps) (Step 5)
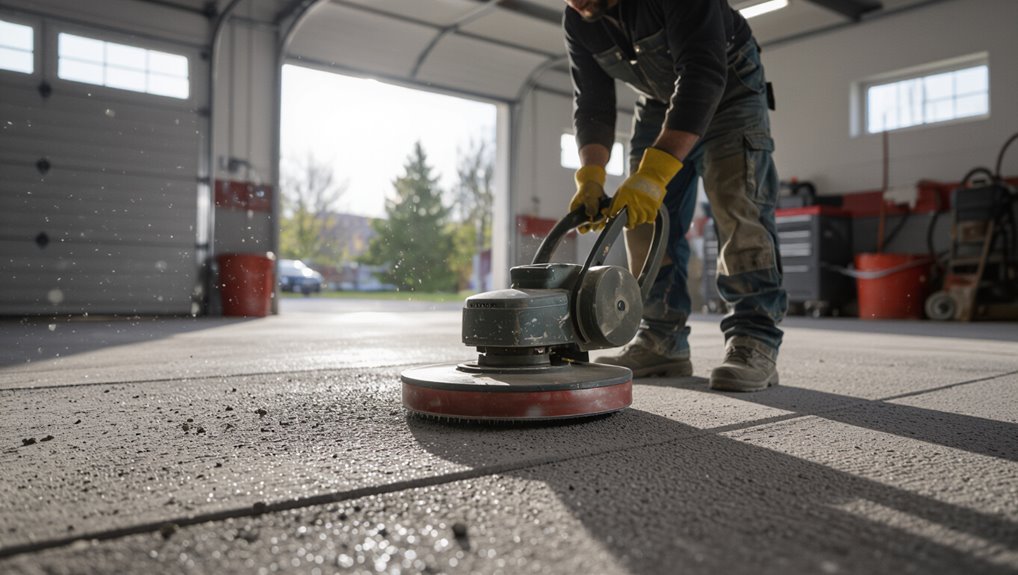
When pitting is deep or covers large areas, you’ll take a combined resurfacing and grinding approach to restore a level, durable surface; this means removing loose material, grinding to sound concrete, and applying a bonded resurfacer or skim coat formulated for heavy wear.
Clear debris, etch if needed, grind to feather edges, vacuum dust, prime per product, trowel on resurfacer in thin layers, cure.
Using Epoxy or Polyurethane Fillers for Durability (When to Use, Application Steps)
After grinding and resurfacing, you’ll often want a tougher top layer in high-traffic zones or to fill deep pits before the final skim coat; epoxy and polyurethane fillers offer the abrasion resistance and chemical resistance concrete toppings lack.
Use epoxy for structural fills and polyurethane for flexible, moisture-tolerant repairs.
Clean, etch, patch voids, mix per instructions, pour or caulk, level, and allow full cure before traffic.
Finishing Techniques: Troweling, Smoothing, and Texturing
Start by planning your finishing sequence so each pass—troweling, smoothing, and texturing—builds on the previous one for a uniform, durable surface.
After filling pits, float the patch to consolidate, trowel edges for level, then back-trowel for a dense finish.
Use a broom or texture brush for slip resistance while material’s plastic.
Cure per product instructions to avoid cracks.
Tools, Materials, and Cost Comparison
Now you’ll look at the specific tools you’ll need for each repair type and the material choices—cementitious patches, epoxies, or overlays.
I’ll compare typical costs and how long each option usually takes so you can pick the best fit for your budget and schedule.
With that info, you’ll know what to buy and how much time and money to plan for.
Recommended Tools for Each Repair Type ()
Whether you’re patching small pits or resurfacing a large area, choosing the right tools and materials will save time and money; this section breaks down what you’ll need for each repair type and compares costs so you can pick the best option for your budget and skill level.
| Repair Type | Essential Tools | Estimated Cost |
|---|---|---|
| Small patches | Grinder, trowel, patch mix | $20–$60 |
| Medium repairs | Chisel, grinder, mixer | $50–$150 |
| Full resurfacing | Floor grinder, squeegee, compressor | $200–$800 |
Material Options: Cementitious Patches vs. Epoxy vs. Overlays ()
Having picked the right tools for the scope of your repair, you’ll next choose the material that best fits the job—cementitious patch, epoxy, or a full overlay. You’ll pick patch for small pits, epoxy for chemical resistance and adhesion, overlay for widespread damage. Compare properties:
| Type | Strength | Use case |
|---|---|---|
| Cementitious | Moderate | Local repairs |
| Epoxy | High | Spot protection |
| Overlay | High | Large areas |
Typical Cost Estimates and Timeframes
Expect to spend between a few dozen and a few thousand dollars on tools and materials depending on the scope: small pit repairs with basic cementitious patch kits and a chisel/trowel run $30–$150 and take a few hours to a day,
while epoxy spot treatments or full resurfacing overlays—including primers, multiple coats, and rental of grinders or mixers—can push costs to $300–$2,500 and require one to several days (plus curing time) to complete.
Plan labor, disposal, and contingency costs; DIY saves money but pros speed completion and guarantee warranty-backed results.
Common Mistakes to Avoid
Don’t rush through prep or you’ll trap debris and weaken the repair.
Pick a product matched to pit depth and use, and cure it correctly while watching temperature and moisture.
Also check for moisture or structural problems first, because cosmetic fixes won’t hold if the slab has underlying issues.
Rushing Without Proper Surface Prep
If you rush into filling pits without proper surface prep, the repair won’t bond and will fail quickly.
You need to clean, remove loose debris, and etch or roughen smooth concrete so patch material adheres.
Skipping drying, dust removal, or primer wastes effort and money.
Take time to prep each pit correctly, or you’ll redo the job sooner than expected.
Wrong Material Choice for Depth or Use
Because different patch products are formulated for specific depths and stresses, choosing the wrong one can leave you with a repair that crumbles or sinks.
You should match product specs to pit depth and expected traffic. Don’t use thin skim coats for deep voids or heavyweight mixes for hairline cracks.
Read labels, consult tech data, and pick a material designed for the load and thickness.
Poor Curing Practices and Weather-Related Errors
Choosing the right repair material is only half the job; how you cure it and how weather behaves while it sets will determine whether the patch holds up.
Don’t rush drying or expose fresh patches to freezing, heavy rain, or direct sun that causes rapid evaporation.
Follow manufacturer curing times, keep temperatures stable, and use coverings or moisture-retaining blankets as recommended.
Ignoring Underlying Moisture or Structural Issues
When you skip diagnosing moisture or structural problems, patched areas can fail quickly—blisters, delamination, or new pitting often follow when water, salts, or movement are still active beneath the surface.
Don’t assume surface fixes suffice. Test for moisture, check slab settlement, and inspect joints and drains.
Address leaks, subgrade erosion, or structural cracks before repairing so your work lasts and won’t require repeats.
Prevention and Best Practices to Stop Pitting from Returning
To keep pitting from coming back, you’ll want a simple routine of regular cleaning and inspection plus timely repairs.
Use the right sealer, coating, or overlay for your garage and protect the slab from salts and harsh chemicals.
Also check drainage and slope so water never sits on the surface.
Routine Maintenance and Cleaning Schedule ()
A simple, consistent maintenance routine will keep small defects from becoming pitting hazards and help whatever repair you’ve done last longer.
You should inspect, clean, and address issues regularly. Follow a simple schedule:
- Sweep weekly and remove debris.
- Wash monthly with pH-neutral cleaner; rinse thoroughly.
- Inspect quarterly for hairline cracks or drainage problems and repair promptly.
Sealing, Coating, and Protective Overlay Options (When and How)
If you want pitting to stop coming back, choose the right sealer, coating, or overlay and apply it correctly for your garage’s use and condition.
Pick a breathable silane/siloxane sealer for mild protection, epoxy or polyaspartic coatings for heavy use, and thin polymer overlays for cosmetic repair plus durability.
Follow manufacturer surface prep, curing times, and recoat windows to guarantee lasting protection.
Preventing Chemical and Salt Damage
When you stop corrosive chemicals and deicing salts from sitting on your garage floor, you cut off the main cause of recurring pitting. Rinse spills promptly, avoid salt tracking inside, and use mats or trays under vehicles and batteries to catch leaks.
Wipe damp areas, store cleaners and salts off the concrete, neutralize acid spills, and apply compatible floor sealers to limit penetration and simplify cleanup.
Design and Drainage Tips to Reduce Water Exposure
Since water is the primary vehicle for salts and chemicals that attack concrete, plan your garage layout and drainage so moisture never pools against the slab; slope floors toward drains or the driveway, install a trench drain or channel at the door, and seal gaps where runoff can enter.
Add gutters, downspout extensions, and a perimeter French drain; maintain seals and clear drains regularly to prevent recurrence.
When to Replace Instead of Repairing
If your floor has widespread deep pitting, major structural cracks, or repeated repairs that keep failing, you’ll want to contemplate replacement because it can be more cost-effective long-term.
You’ll weigh full slab replacement—best when the slab is compromised—against an overlay, which can be cheaper if the slab is still sound.
We’ll compare costs, disruption, and durability so you can pick the right option.
Signs Replacement Is More Cost-Effective
Wondering whether to repair or replace your pitted garage floor?
If pits are widespread, deep, or penetrating rebar, replacement often costs less long-term than repeated repairs.
You should replace when moisture damage, heaving, or foundational cracks threaten structural integrity, or when repair downtime and frequent maintenance outweigh replacement expense.
Calculate lifecycle costs and choose the option that limits recurring repairs.
Options for Full Replacement: Slab Replacement vs. Overlay
Decide whether to replace your garage slab or lay an overlay by weighing the extent of damage, budget, and long-term goals:
If cracks, heaving, or contamination compromise structural integrity, full slab replacement restores strength but costs more and takes longer.
Overlays suit superficial pitting and cosmetic upgrades, cost less, and install faster, yet they rely on a sound base and won’t fix deep structural issues.
FAQ Common Questions About Pitted Garage Floors
You’ll probably have a few practical questions after repairing pitted spots—like how long a patch will last and whether you can paint or epoxy over it.
You’ll also want to know if pitting can return after freeze-thaw cycles, when it’s safe to drive on repairs, and how to match color and texture to the rest of the floor.
Below are clear answers to those common concerns so you can plan the right next steps.
How long will a patch repair last?
How long a patch repair lasts depends mostly on how well you prepare the surface and the type of repair material you use.
With proper cleaning, sound substrate, and a quality polymer-modified patch, a repair can last many years under normal garage use.
Poor prep, moisture, or heavy chemical exposure will shorten life; expect more frequent touch-ups if conditions are harsh.
Can I use concrete paint or epoxy over patched areas?
A good patch gives you a smooth, stable base for a coating, but you’ll still need to check a few things before painting or epoxying over it.
Make certain the patch is fully cured, clean, and bonded to the surrounding concrete.
Use a primer compatible with the patch material, sand high spots, and select paint or epoxy rated for concrete and garage traffic to guarantee adhesion and durability.
Will pitting return after a freeze-thaw season?
Will pitting come back after a freeze‑thaw cycle? It can if moisture still reaches the concrete and freezes, expanding and loosening material.
You’ll reduce recurrence by sealing cracks, improving drainage, and using quality patch materials designed for freeze‑thaw resistance.
Regular inspections and timely maintenance stop small defects from becoming recurring problems during future cold seasons.
Is it safe to drive on repaired areas immediately?
Curious whether you can drive over a freshly repaired patch right away? You should wait until the patch reaches its recommended cure time—often 24–72 hours for light traffic, longer for heavy loads.
Check the product label for specific cure and compressive-strength milestones. Avoid driving on repairs too soon; doing so can dislodge material, create weak spots, and force a redo.
How do I match patch color and texture to the rest of the floor?
Once the patch has cured, you’ll want it to blend with the rest of the floor so repairs don’t stand out.
Match color by using concrete stain or alkali-resistant pigments, testing on a scrap first.
Texture-match with a broom finish, trowel technique, or light sanding.
Feather edges and apply a sealer to unify sheen.
Adjust in thin layers until satisfied.
Resources and Next Steps
Use the checklist to confirm you’ve gathered tools, materials, and safety gear before starting repairs.
If the damage is extensive or you’re unsure about structural issues, schedule a professional inspection right away.
These steps will keep your project on track and help you avoid costly mistakes.
Checklist for Your Repair Project ()
Before you pick up a trowel, get organized with a short checklist that covers the tools, materials, safety gear, and cleanup supplies you’ll need so the job goes smoothly and you don’t get stuck midway through.
Gather basics, estimate quantities, and plan work stages.
- Tools: chisel, grinder, trowel, brush
- Materials: patch mix, primer, sealant
- Safety/cleanup: gloves, goggles, trash bags
When to Schedule a Professional Inspection
If you spot deep cracks, widespread pitting, or water seeping through the slab, call a professional for an inspection so you get an accurate diagnosis and repair plan.
You should also schedule one when:
- DIY fixes haven’t stopped deterioration.
- You smell mold or see efflorescence.
- The floor shifts after freeze/thaw.
A pro will assess structure, moisture, and recommend durable repairs.