Can You Install Laminate Flooring Over Vinyl? What You Need to Know First
Yes — you can usually install laminate over vinyl if the vinyl is flat, firmly glued, and not cushioned. You’ll need to inspect for damage, clean and de-grease the surface, fix bubbles or loose tiles, and verify the subfloor is stable and level. Choose an appropriate underlayment and check for moisture; leave expansion gaps and address height changes at doors. Follow manufacturer guidelines for warranty reasons, and keep going to learn the full prep and installation steps.
Can You Install Laminate Flooring Over Vinyl? Quick Answer
Yes — you can install laminate over vinyl if the vinyl is smooth, firmly adhered, and not cushioned.
You’ll gain quicker installation and less demolition, but you may face height issues, potential moisture concerns, and limited warranty options.
Check subfloor flatness, adhesive stability, and manufacturer guidelines before you start.
Short direct answer (yes/no and brief conditions)
Can you? Yes — you can install laminate flooring over vinyl if the vinyl is flat, firmly adhered, and not cushioned.
You’ll need to remove loose pieces, repair dips, and guarantee the subfloor is dry.
Don’t install over rippled, water-damaged, or cushioned vinyl.
Follow manufacturer guidelines and use proper underlayment to maintain warranty and performance.
One-sentence summary of pros and cons
If the existing vinyl is flat, firmly glued, and non-cushioned, you can save time and money by laying laminate over it for a smooth, quick upgrade.
However, you’ll risk problems (and void warranties) if the vinyl’s cushioned, rippled, water-damaged, or poorly adhered—so prep, repair, and follow manufacturer guidelines.
You’ll get faster installation and less mess, but potential height, moisture, and warranty trade-offs.
Basic Understanding What Are Laminate and Vinyl Flooring?
You’ll want to know that vinyl is a flexible, water-resistant sheet or plank floor with a durable surface and several backing layers, while laminate is a rigid, multi-layered board with a photographic wood layer and a protective wear layer.
They differ in structure and typical thickness—vinyl can be thinner and more compressible, laminate is thicker and stiffer—and that affects how each handles moisture and subfloor imperfections.
Those construction differences also guide installation methods: vinyl is often glued or floated, whereas laminate usually clicks together as a floating floor.
What is vinyl flooring?
Vinyl flooring is a resilient, synthetic floor covering made from PVC (polyvinyl chloride) that’s designed to mimic materials like wood, stone, or tile while offering durability and water resistance.
You’ll find it in sheets, tiles, or planks, and it’s low-maintenance and affordable.
- Waterproof performance for kitchens/baths
- Thin profile affects underlayment choice
- Surface texture impacts adhesion and appearance
What is laminate flooring?
Laminate flooring is a multi-layered, synthetic product that imitates real wood or stone by fusing a printed decorative layer and a protective wear layer over a dense fiberboard core.
You’ll find it durable, affordable, and easy to maintain, making it a popular upgrade over existing surfaces.
- Cost-effective visual upgrade
- Scratch- and stain-resistant wear layer
- Floating installation option
Key differences in structure, thickness, and installation methods
Now that you know what laminate is and why people choose it, let’s compare how laminate and vinyl actually differ in build, thickness, and how they’re installed. You’ll see laminate has rigid core layers, greater thickness, and floating installs; vinyl’s flexible, thinner, and often glued or click-locked.
| Feature | Laminate | Vinyl |
|---|---|---|
| Structure | Multi-layer rigid | Flexible sheet/plank |
| Thickness | 7–12 mm | 2–5 mm |
| Installation | Floating/underlayment | Glue/click/downcloak |
When It’s Appropriate to Install Laminate Over Vinyl
You can install laminate over vinyl when the existing floor is flat, firmly adhered, and free from excess moisture.
If the vinyl is loosely attached, buckled, or sits over a moisture-prone subfloor, you shouldn’t overlay—remove it instead.
Also check local codes and the laminate manufacturer’s warranty, since some policies void coverage if you install over certain substrates.
Acceptable conditions for overlying (level, adhesion, moisture)
If the existing vinyl is flat, firmly adhered, and dry, you can often install laminate over it without tearing the old floor out.
You should check three key conditions before proceeding.
- Level: no dips or high spots beyond manufacturer tolerance.
- Adhesion: vinyl mustn’t peel or bubble.
- Moisture: substrate and vinyl must test dry within acceptable limits.
Situations where overlay is not recommended
Although overlaying laminate atop vinyl can save time, you shouldn’t do it when the existing floor shows problems that will compromise the new installation—like significant unevenness, loose or bubbling vinyl, or moisture issues that could trap water and warp the laminate.
Also avoid overlay if vinyl is heavily damaged, vinyl tiles are lifting, adhesive remains uneven, or subfloor movement exists; remove and repair first.
Building codes and manufacturer warranty considerations
When considering overlaying laminate over existing vinyl, check local building codes and the laminate manufacturer’s installation requirements first.
Since they can mandate substrate conditions, moisture barriers, or prohibit installation over certain floor types, failing to follow them can void warranties or lead to code violations that complicate resale or insurance claims.
You should document approvals, follow specified underlayment and moisture controls, and save receipts to preserve warranty coverage.
How to Prepare Vinyl Flooring for Laminate Step-by-Step
Before you start laying laminate over vinyl, you’ll want to inspect the existing floor for damage, adhesion issues, and seams. Then measure the space to calculate materials.
Next, clean and de-grease the surface and repair or remove any problem areas like bubbles, loose tiles, or old adhesive.
Finally, choose and install the proper underlayment—considering type, thickness, and whether a vapor barrier is needed—so your laminate performs correctly.
Step 1: Inspect and assess existing vinyl (damage, adhesion, seams)
Start by closely inspecting the vinyl surface to identify any tears, bubbles, loose edges, or uneven seams that could compromise the laminate’s stability.
Check adhesion, flex, and levelness; note soft spots and moisture. If problems exist, repair or remove affected areas before proceeding.
- Record damage locations and types.
- Test adhesion at edges.
- Mark high/low spots.
Step 2: Measure and calculate materials needed
Measure the room carefully so you buy the right amount of laminate, underlayment, and trim—take length and width at three points for each wall, note alcoves or closets, and add 5–10% for waste and pattern matching.
Calculate square footage, convert to cartons using manufacturer coverage, and include threshold strips, quarter round, vapor barrier (if required), and adhesive or fasteners in your material list.
Step 3: Clean and de-grease the subfloor surface
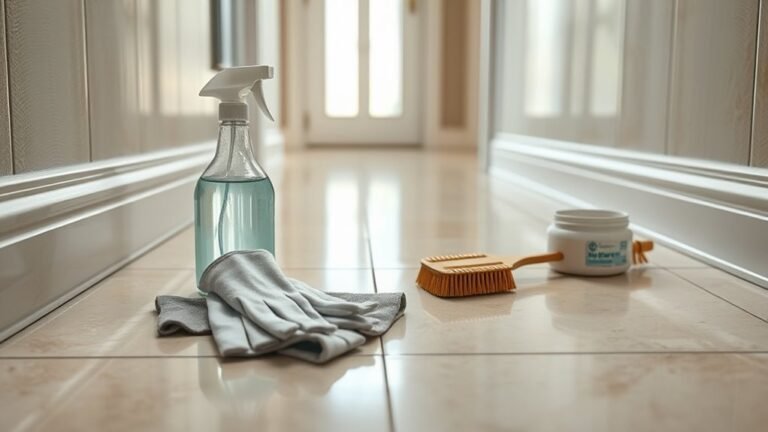
Tackle the cleaning thoroughly so the laminate locks and underlayment sit on a sound, grease-free surface.
Remove loose debris, vacuum, then mop with a degreasing solution suited to vinyl.
Scrub stubborn spots with a soft brush, rinse well, and let the floor dry completely.
Avoid harsh abrasives or wax removers that leave residue; the surface must be clean and non-slippery.
Step 4: Repair or remove problem areas (bubble repair, loose tiles, adhesives)
Address problem areas now so your laminate will sit flat and lock properly—repair bubbles, re-secure loose tiles, and remove old adhesive residue before you lay underlayment.
Pop and glue bubbles with a syringe and adhesive, hammer down or replace loose tiles, and scrape stubborn glue.
Sand low spots and fill gaps with a floor patch compound so the surface is smooth, stable, and ready.
Step 5: Install proper underlayment (types, thickness, vapor barrier)
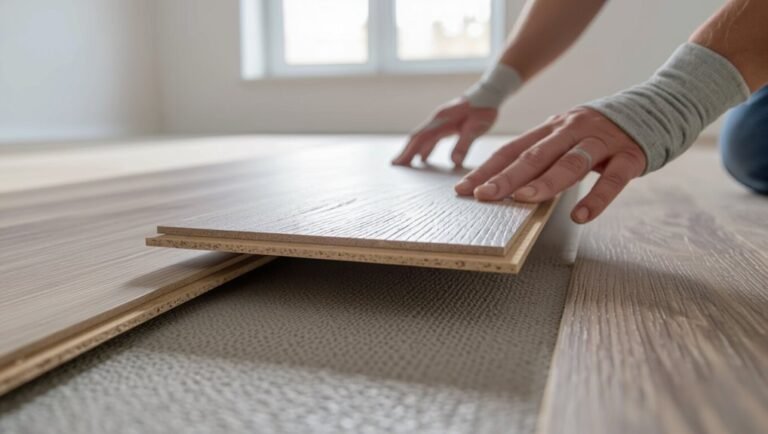
Once the surface is clean and level, install an underlayment designed for laminate so your floor performs and lasts as planned.
Choose product by type and thickness: foam for basic cushioning, cork for sound control, or combination with a vapor barrier where moisture is a concern.
Roll seams tight, tape edges, and keep underlayment continuous under the entire floor.
- Foam
- Cork
- Vapor-barrier combo
Step 6: Acclimate laminate and begin layout planning
After the underlayment’s down and seams taped, let the laminate sit in the room for at least 48 hours so it acclimates to the local temperature and humidity; this prevents gaps or buckling later.
While panels adjust, plan your layout: measure room, decide plank direction, stagger end joints at least 8–12 inches, locate thresholds and focal lines, and mark starting wall so cuts are balanced.
Laminate Installation Over Vinyl Installation Process Overview
You’ll choose between a floating or glue-down laminate based on the condition of the vinyl and the room’s moisture and traffic levels.
Follow a clear installation sequence—check tolerances like expansion gaps and junction placement, lay underlayment over the vinyl, then install the laminate—and have a tape measure, spacers, tapping block, pull bar, utility knife, and adhesive (if gluing) on hand.
A simple cross-section diagram should show subfloor → vinyl → underlayment → laminate so you can visualize layer order and thicknesses before you start.
Floating vs. glue-down laminate: which method to use over vinyl
Wondering whether to float your new laminate over existing vinyl or glue it down?
You’ll usually choose a floating install: it’s faster, allows underlayment for moisture and comfort, and tolerates minor substrate irregularities.
Glue-down can work on very stable, smooth vinyl but adds permanence and complicates removal.
Pick floating for DIY ease; consider glue-down only with pros and proper prep.
Installation sequence and crucial tolerances (expansion gaps, transitions)
Because laminate needs room to expand and a consistent sequence, start your install by prepping the vinyl, laying underlayment, and planning changes before you snap boards together; maintaining specified expansion gaps at walls, around obstacles, and at changes is essential to prevent buckling and noisy joints.
Work row-by-row, staggering end joints, keeping gap tolerances (usually 1/4″–3/8″), and installing proper transition strips at doorways.
Common tools and materials checklist
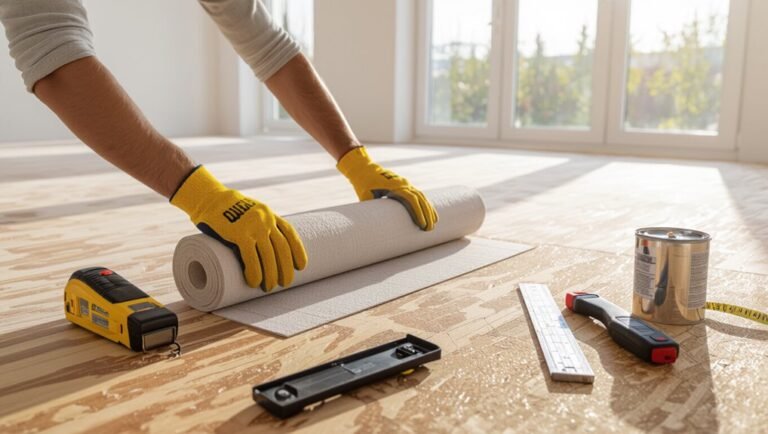
Start with a concise toolkit and the right materials so your laminate-over-vinyl job goes smoothly:
you’ll need a utility knife, tapping block, pull bar, carpenter’s square, tape measure, spacers, a saw (miter or circular with fine blade), hammer, pry bar, and a vacuum;
for materials bring the laminate planks, underlayment compatible with vinyl, moisture barrier if recommended, connector strips, adhesive or seam sealer where specified, and replacement trim or baseboard for reinstallation.
- Plan layout and tools.
- Inspect vinyl for damage.
- Stock spare planks and trim.
Diagram: layer cross-section (subfloor → vinyl → underlayment → laminate)
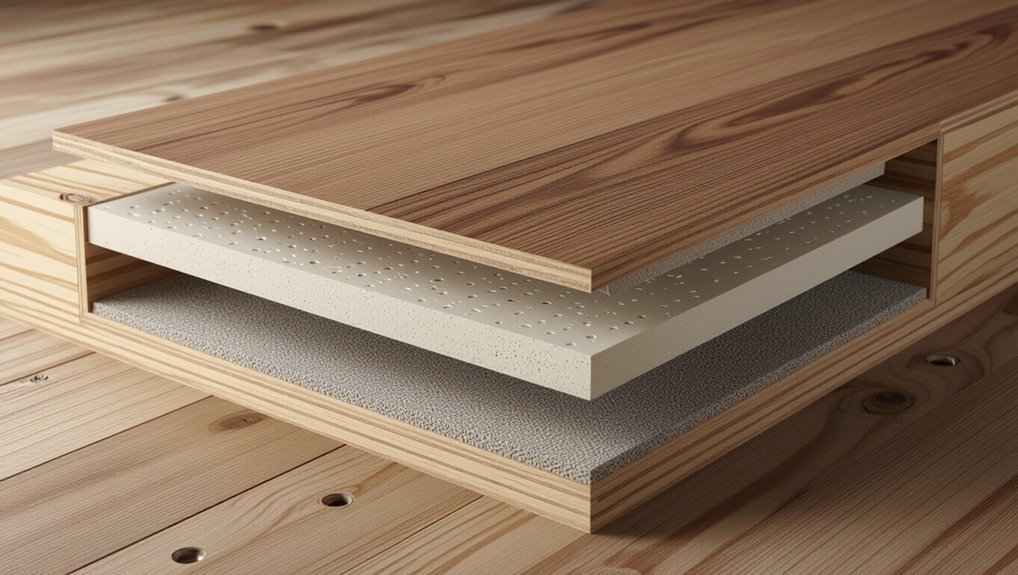
A clear cross-section diagram shows each layer and how they interact so you can assess thickness, flatness, and moisture control before you lay planks.
You’ll see subfloor (structural), existing vinyl, underlayment (foam or cork for sound and minor leveling), and laminate planks.
Use the diagram to verify vinyl is intact and level, underlayment suits laminate type, and total height fits doorways and connections.
Comparison Install Laminate Over Vinyl vs. Removing Vinyl First
You’ll save time and money by laying laminate over existing vinyl, but that shortcut can mean more labor later if moisture or subfloor issues show up.
Removing vinyl first adds upfront cost and work but gives you better long-term performance and lower moisture risk.
Also consider how added floor height will affect thresholds and door clearances before you decide.
Time, cost, and labor comparison
Comparing time, cost, and labor for installing laminate over existing vinyl versus removing vinyl first helps you decide the smarter route for your project. Installing over vinyl usually saves time and money, with less labor and waste. Removing vinyl adds prep time, disposal costs, and skilled labor but yields a cleaner substrate.
| Option | Impact |
|---|---|
| Over vinyl | Faster, cheaper |
| Remove vinyl | Slower, costlier |
Long-term performance and moisture risks
Because moisture and substrate stability determine how long your laminate will hold up, you should weigh the risks of leaving vinyl in place versus stripping it out.
Leaving vinyl can trap moisture, promote mold, and hide deterioration of the subfloor, shortening laminate life.
Removing vinyl lets you inspect and address dampness, install proper underlayment, and improve long-term performance and warranty compliance.
Impact on floor height, thresholds, and doors
If you leave vinyl in place, expect the finished floor to sit higher and require adjustments at thresholds and door clearances; removing the vinyl first keeps the profile lower and simplifies changes but adds labor and downtime.
You’ll need to trim doors, raise or replace connector strips, and adjust appliances or built-ins for clearance.
Plan for measuring thresholds and budgeting for carpentry or replacement parts.
Common Problems and Mistakes When Installing Laminate Over Vinyl
When you install laminate over vinyl, small bumps or dips in the old floor can telegraph through and ruin the finish.
You’ll also risk trapping moisture that leads to mold if the vinyl and subfloor aren’t dry and sound.
Ignoring manufacturer rules or using the wrong underlayment can void warranties and cause noise or comfort problems.
Uneven subfloor and telegraphing of imperfections
Although laminate can mask minor flaws, an uneven subfloor will quickly telegraph through the new surface and make gaps, squeaks, and visible bumps more obvious.
You’ll notice ridges and depressions showing through planks, joints separating, and stress on locking mechanisms.
Check and level the vinyl or remove it, use a proper underlayment, and fix high/low spots before installing to avoid problems.
Trapping moisture and mold risks
Because vinyl can act as a vapor barrier, installing laminate directly over it can trap moisture beneath the new floor and create a breeding ground for mold and mildew.
You’ll risk hidden rot, musty odors, and health hazards.
Inspect for existing dampness, guarantee proper moisture mitigation, and consider removing vinyl or adding an appropriate vapor-permeable underlayment to allow drying and prevent mold growth.
Ignoring manufacturer guidelines and voiding warranties
If you skip the manufacturer’s installation instructions or ignore their specified conditions, you can easily void your laminate warranty and lose recourse for defects or moisture damage.
You’re responsible for following approved subfloor prep, acclimation times, expansion gaps, and fastening methods.
Ignoring those requirements leaves you paying for repairs, replacements, or liability for failures that would’ve been covered had you complied.
Improper underlayment choice and noise/comfort issues
When you pick the wrong underlayment for laminate over vinyl, you’ll quickly notice louder footsteps, hollow-sounding boards, and a less comfortable floor underfoot.
Choose an underlayment with adequate cushioning, moisture barrier if needed, and proper thickness for laminate. Poor choices amplify sound, cause uneven settling, and reduce insulation.
Test samples, follow manufacturer specs, and prioritize underlayment rated for floating laminate installations.
Tips, Best Practices, and Preventive Measures
Before you lay laminate over vinyl, make sure the subfloor is flat and stable by repairing bumps, filling low spots, and removing loose or soft vinyl.
Choose the right underlayment for cushioning and moisture control, perform moisture tests and use a vapor barrier or sealant if needed, and plan for changes and thresholds to accommodate height differences.
Address these points up front and you’ll prevent common problems and make installation smoother.
How to ensure a flat, stable surface before installation
Although vinyl can seem like an acceptable base, you’ll get the best results by confirming the subfloor is flat, clean, and firmly secured before laying laminate.
Inspect for soft spots, gaps, and high spots; sand, fill, or replace as needed. Remove debris and adhesive. Check moisture.
Then:
- Level high spots and fill low areas.
- Repair or replace damaged subfloor.
- Secure loose boards.
Best underlayment types for installing over vinyl
Because vinyl can trap moisture and hide unevenness, choosing the right underlayment is critical to protect your laminate and guarantee a stable, long-lasting floor.
Use a vapor-barrier underlayment when moisture risk exists, dense foam or cork for sound reduction and minor levelling, and 3-in-1 felt for added cushioning.
Always match underlayment thickness to your laminate specifications and follow manufacturer guidelines.
Moisture testing and mitigation strategies
When you’re installing laminate over vinyl, test for moisture at multiple spots and address any dampness before you lay down underlayment or planks; failing to do so risks cupping, warping, and adhesive failure.
Use a reliable moisture meter, check after cleaning and during humid conditions, fix leaks, improve ventilation, and consider a vapor barrier or moisture-resistant underlayment to protect your new floor.
How to handle transitions, thresholds, and room height changes
If your new laminate sits higher or lower than adjacent floors, plan passages and thresholds that protect edges, allow expansion, and create a smooth walkable surface; pick joining strips sized to the height difference, leave proper expansion gaps, and secure thresholds only to the subfloor so the floating floor can move.
Use reducer, T-mold, or ramp profiles, shim door jambs if needed, and test clearance before finishing.
Cost Considerations and Time Estimates
You’ll want to budget for materials (laminate planks, underlayment, trim) and any labor if you’re not doing it yourself, since each piece contributes to the final price.
Compare that to the cost of removing vinyl and replacing the subfloor if needed, which can raise labor and disposal fees.
Also estimate time: prepping over existing vinyl can take a few hours to a day, while full removal and replacement often adds a day or more depending on room size and repairs.
Typical cost breakdown (materials, underlayment, labor)
Budgeting smartly makes the project much easier: plan for three main costs—materials (the laminate itself), underlayment, and labor—and know that each can vary widely based on quality, room size, and local rates. Estimate low, mid, high ranges to pick what fits.
| Item | Typical cost | Notes |
|---|---|---|
| Laminate | $1–$5/ft² | Quality varies |
| Underlayment | $0.20–$0.75/ft² | Thickness matters |
| Labor | $1–$3/ft² | Rates vary locally |
Estimated time for preparation vs. full removal and replacement
Although prep-only jobs can shave days off the schedule, choosing between preparing the existing vinyl and fully removing it changes both time and cost considerably.
If you prep, expect 1–2 days for cleaning, leveling, and underlayment. Full removal adds 1–3 days for stripping, disposal, and subfloor repairs.
Labor rates and room size determine the final timeline and expense, so get quotes.
When to Call a Professional
If you notice structural damage, persistent moisture, or the project needs extensive repairs, this isn’t a DIY job and you should call a pro.
They’ll assess the subfloor, identify moisture sources, and tell you whether vinyl must be removed or leveled.
Expect a written quote that breaks down recommended repairs, timeline, and costs before any work begins.
Signs the job is beyond DIY (structural, moisture, extensive repair)
When you peel back the old vinyl and find soft spots, buckling, widespread seams, or persistent damp, that’s a clear sign to stop and call a professional—these issues often point to structural problems, trapped moisture, or damage that a DIY install won’t fix safely or lastingly.
Also call help if subfloor rot, major level differences, mold, or plumbing leaks appear; extensive repairs need pros.
What to expect from a professional assessment and quote
Curious what a pro will actually do on-site? They’ll inspect subfloor level, moisture, and vinyl adhesion, flagging repairs or removal.
Expect moisture readings, gap and squeak checks, and recommendations (underlayment, acclimation, threshold strips).
They’ll give a written quote outlining scope, timeline, materials, labor, and warranty.
Ask questions, get references, and compare two to three bids before deciding.
Case Examples and Scenarios
You’ll see three common situations when evaluating existing vinyl: a smooth, well-adhered sheet that’s in good condition, sheet vinyl with seams and minor damage, and loose vinyl tiles or surfaces glued down heavily.
For each scenario you’ll want a different prep and installation approach to guarantee the laminate performs well.
Next we’ll look at what to do in each case and when to repair, overlay, or remove the vinyl.
Scenario A: Smooth, well-adhered vinyl in good condition
In a room where the existing vinyl is smooth, flat, and firmly glued down, you can usually install laminate directly over it with minimal prep.
Clean thoroughly, verify the surface is level, and repair any small imperfections.
Lay an appropriate underlayment for moisture and sound control, follow manufacturer spacing guidelines, and test a small area to confirm stable, click-fit installation before proceeding across the room.
Scenario B: Sheet vinyl with seams and minor damage
If the sheet vinyl has seams and small tears or lifting, you can still install laminate—but you’ll need to address those issues first so the substrate is flat and stable.
Repair seams with adhesive or seam tape, trim loose edges, and patch small tears with a compatible vinyl patch.
Sand high spots, clean thoroughly, and use an underlayment to guarantee a smooth, moisture-resistant base.
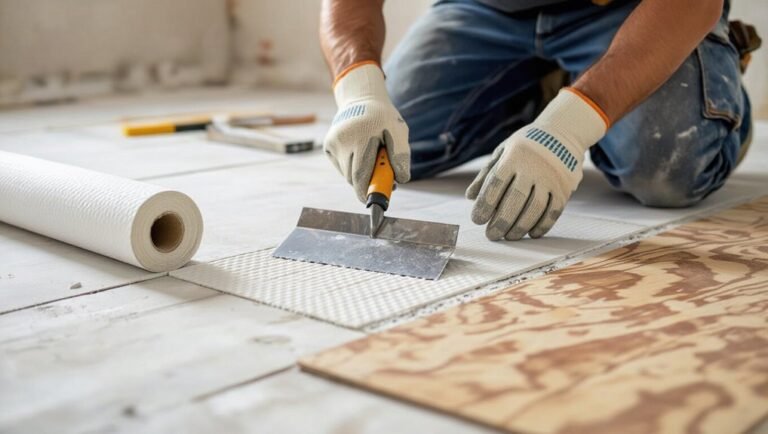
Scenario C: Loose tile vinyl or heavily glued surface
Because loose vinyl tiles or floors with heavy adhesive can shift and telegraph through laminate, you’ll need to evaluate and often remove or fully stabilize that substrate before installing new flooring.
Pull loose tiles, scrape remaining glue, and sand or grind high spots. If removal’s impossible, install a stable plywood or cement board underlayment to create a secure, flat base for laminate.
FAQ
You probably have a few practical questions before you start, like whether cushioned or cork-backed vinyl is suitable, how much the new floor will raise your thresholds, and whether laminate will last as long as a full replacement.
Also ask about moisture protection—do you need a vapor barrier?
Finally, consider location limits: are bathrooms or basements safe for laminate over vinyl?
Can laminate be installed over cushioned vinyl or cork-backed vinyl?
Wondering whether you can lay laminate over cushioned or cork-backed vinyl? You generally can, but only if the vinyl is securely glued, flat, and not too compressible.
Remove loose or bubbled sections, fix indentations, and verify the surface is dry and clean.
Use a quality underlayment recommended for laminate; avoid overly soft or spongy vinyl that compromises locking joints and stability.
Will installing laminate over vinyl raise floor height too much?
If the vinyl beneath is stable and thin, adding laminate usually only raises the floor by about 1/4 to 3/4 inch—including the laminate plank and underlayment—so most door clearances and thresholds stay manageable.
Measure existing clearances, account for changeover strips and baseboards, and trim doors if needed.
Verify appliance and cabinet clearances; small adjustments often resolve height changes without full vinyl removal.
How long will laminate over vinyl last compared to full replacement?
How long will laminate over vinyl last compared to a full replacement?
You’ll typically get 10–25 years from laminate installed over stable vinyl, depending on traffic, product quality, and installation.
A full replacement with new subfloor prep and high-end materials can extend longevity to 20–30+ years.
Proper care and moisture control matter most; shortcuts reduce lifespan regardless of method.
Do I need a vapor barrier when installing over vinyl?
Longevity depends a lot on moisture control, so you’ll want to contemplate whether a vapor barrier is necessary when laying laminate over vinyl.
If the existing vinyl is intact, non-porous, and on a dry subfloor, you can often skip a barrier.
But if moisture, spills, or a damp substrate are concerns, add a compatible vapor barrier under the laminate to protect joints and core layers.
Can I install laminate over vinyl in bathrooms or basements?
Wondering whether you can lay laminate over vinyl in bathrooms or basements? You can, but proceed cautiously.
Laminate dislikes persistent moisture and subfloor movement. Confirm vinyl is fully bonded, level, and dry; add a moisture barrier in basements and choose water-resistant or waterproof laminate for bathrooms.
Leave proper expansion gaps and follow manufacturer guidelines to avoid warping, cupping, or warranty voids.