How Much Does It Cost to Install Ceiling Tiles? A Room-by-Room Breakdown
You’ll typically pay $2–$6 per square foot to install ceiling tiles, so a standard 10×12 bedroom runs about $240–$720 for materials and labor. Costs vary by tile type, ceiling height and condition, accessibility, and local labor rates. Expect additional charges for vent boxing, light relocation, moisture‑resistant tiles, or HVAC hookups. Simple drop ceilings cost less than premium or high‑ceiling installs. Keep reading for a room‑by‑room breakdown and tips to estimate your total.
Quick Answer Typical Cost Range to Install Ceiling Tiles
You can expect a national average of about $2–$6 per square foot for basic ceiling tile installation, with a typical room costing roughly $100–$600 depending on size.
Low-end jobs use basic tiles and simple labor, keeping costs near the bottom of that range, while high-end materials and intricate installs can push you well above it.
Use these figures to quickly compare quotes and set a realistic budget.
National average per square foot and per room
Ceiling tile installation typically runs about $2 to $6 per square foot nationwide, which means a standard 10-by-12 bedroom (120 sq ft) will usually cost between $240 and $720 for materials and labor.
To estimate your project, multiply room square footage by $2–$6.
For common rooms, expect $200–$1,200 depending on size; pros can give precise quotes so you’ll know how much to install ceiling tiles.
Low-end vs high-end scenarios summary
While costs vary with materials and labor, expect a typical low-end install to run about $2–$4 per sq ft (simple tiles, basic prep) and high-end jobs to hit $6–$12+ per sq ft (premium tiles, custom layouts, repairs or drop-grid systems).
| Scenario | Typical Cost |
|---|---|
| Low-end | $2–$4/ft² |
| Mid-range | $4–$6/ft² |
| High-end | $6–$12+/ft² |
What Ceiling Tile Installation Includes
When you budget for ceiling tile installation, you’ll pay for materials like tiles, grid systems, adhesive, and fasteners.
Labor typically covers prep work, removal of old ceilings, the actual installation, and final cleanup.
You may also need extra services such as electrical work, added insulation, or drywall repairs, which can change the overall cost.
Materials (tiles, grid, adhesive, fasteners)
Installing ceiling tiles requires a few key materials: tiles themselves, a suspension grid or backing, adhesive for glue-up types, and fasteners or clips for secure attachment.
You’ll pick tiles by material and size—acoustic, mineral fiber, PVC—then choose a matching grid system or backer.
Add appropriate adhesive, corrosion-resistant fasteners, and any mold- or fire-rated components for code compliance.
Labor components (prep, removal, installation, cleanup)
Along with selecting tiles, grid, and adhesives, you’ll need to budget for the labor that turns those materials into a finished ceiling: prep work to protect surfaces and mark layouts, removal of any old ceiling or fixtures, the actual tile or grid installation, and final cleanup and disposal.
You’ll pay for skilled installers who measure, cut, fit, fasten tiles and grids, trash removal, and a tidy walkthrough.
Additional services (electrical, insulation, drywall repairs)
Although the visible work focuses on tiles and grid, your ceiling project often includes additional services like electrical hookup for lighting and speakers, adding or upgrading insulation for energy efficiency and sound control, and repairing drywall or joists so tiles sit flat and secure.
You’ll coordinate electricians, insulators, and carpenters; these trades add time and cost but guarantee safety, performance, and a clean final appearance.
Factors That Affect Total Cost
When budgeting for ceiling tiles, you’ll need to take into account the tile type and material—from popcorn cover and acoustic to metal or PVC—since that drives material cost and performance.
You’ll also account for ceiling size and room complexity (square footage, height, and shape) plus the existing ceiling condition—drop grid, drywall, or damaged—because prep work varies.
Finally, accessibility or structural issues like attic access, joists, or mold, along with local labor rates and permit requirements, can push the total higher.
Tile type and material (popcorn cover, acoustic, mineral fiber, metal, PVC)
Because the material you pick determines both appearance and price, you’ll want to weigh options like popcorn cover, acoustic, mineral fiber, metal, and PVC before budgeting.
Popcorn is cheap but dated; acoustic and mineral fiber balance sound control and cost; metal lasts longer and looks modern but costs more; PVC resists moisture and is mid-priced.
Choose based on budget and function.
Ceiling size and room complexity (square footage, height, shape)
Square footage and room complexity directly shape how much you’ll pay to install ceiling tiles: larger or taller rooms require more materials and labor, while irregular shapes, multiple ceiling levels, or lots of fixtures add cutting and installation time.
You’ll pay more per project for high ceilings, angled or vaulted areas, and rooms with many penetrations, since installers need extra scaffolding, precision cuts, and longer labor hours.
Existing ceiling condition (drop ceiling vs drywall vs damaged)
If your room has an existing drop ceiling, drywall, or visible damage, that condition will greatly change what you pay to install new ceiling tiles.
You’ll pay less if tiles simply replace an existing grid.
Removing drywall, repairing sagging panels, or replacing damaged substrate adds labor and disposal fees.
Expect higher costs when demolition, patching, or reinforcement’s required.
Accessibility and structural issues (attic access, joists, mold)
Beyond surface repairs, what’s behind the ceiling can change costs just as much.
If attic access is tight you’ll pay more for labor and equipment. Obstructing joists or uneven framing may require carpentry to level or add supports.
Hidden mold or water damage demands remediation and drying before tiling. Factor these inspections and fixes into your budget to avoid surprises.
Local labor rates and permits
Because labor usually makes up a big slice of the total, local rates and permit requirements can noticeably change what you’ll pay to install ceiling tiles.
You’ll find contractors charge more in high-cost areas, and some jobs need permits or inspections that add fees and time.
Get quotes from licensed pros, check local permit rules, and factor those costs into your budget.
Finishes and customization (paint, patterns, lighting integration)
When you pick finishes and customization—paint, patterns, or integrated lighting—you’ll directly affect material costs, labor time, and the final look; simple paint jobs are cheap, but custom patterns, specialty coatings, or recessed lighting add both materials and skilled labor.
You’ll pay more for designer patterns, color-matching, moisture-resistant coatings, and wiring for integrated fixtures; expect higher hourly rates and longer project timelines.
Room-by-Room Cost Breakdown (Typical Ranges and Examples)
You’ll see costs vary by room because each space brings its own challenges and options.
For example, a small bathroom or remodel can mean tight access and moisture-rated tiles, while kitchens often need ventilation and fixture adjustments.
Living rooms, bedrooms, and basements each offer choices—from high ceilings and acoustic upgrades to budget-friendly or premium tile and suspended grid versus direct-adhere systems—that change the price.
Bathroom small and remodel scenario
If you’re tackling a small bathroom remodel, expect ceiling tile costs to be modest but influenced by moisture resistance and accessory work like venting and lighting relocation. You’ll pay more for waterproof tiles and labor for small, awkward spaces. Plan $4–$12/sq ft materials plus $2–$8/sq ft labor; budget for mold-resistant options and minor drywall repairs.
| Item | Low | High |
|---|---|---|
| Tiles | $4/sq ft | $12/sq ft |
| Labor | $2/sq ft | $8/sq ft |
| Repairs | $20 | $150 |
| Extras | $30 | $200 |
Kitchen with ventilation and fixture adjustments
Because kitchens need good airflow and careful fixture placement, installing ceiling tiles there often costs more than in other rooms. You’ll pay extra for vent boxing, hood clearances, and relocating lights; expect mid-to-high range labor and materials. Plan for moisture-resistant tiles and coordinated electrician and HVAC work to avoid surprises.
| Item | Typical extra cost |
|---|---|
| Vent boxing | $150–$400 |
| Light relocation | $100–$300 |
| Moisture tiles | $2–$6/sq ft |
| HVAC hookup | $200–$600 |
Living Room high ceilings and acoustic options
When your living room has high ceilings, expect higher materials and labor costs for ceiling tiles—installers need scaffolding or lifts and often spend more time aligning panels at greater heights, which raises labor by roughly 20–50%. You’ll also consider acoustic tiles to reduce echo; budget mid-range acoustic panels for best value and hire pros for proper spacing and mounting.
| Ceiling Type | Cost/ft² | Benefit |
|---|---|---|
| Standard | $2–$5 | Basic cover |
| Acoustic | $4–$8 | Sound reduction |
| Premium | $8–$15 | Aesthetics/insulation |
| Installation | $3–$10 | Labor with lift |
Bedroom budget-friendly vs premium options
Although bedrooms are usually smaller than living rooms, your choices still span a wide cost range depending on style and function. You can save with basic gypsum or DIY panels, or upgrade to decorative, sound‑insulating tiles for a premium retreat. Consider labor, materials, and finish when budgeting.
| Option | Typical Cost/ft² |
|---|---|
| Budget | $1–$3 |
| Premium | $4–$10 |
Basement suspended grid vs direct-adhere
If your basement needs easy access to pipes and wiring, a suspended grid ceiling lets you lower the room and still reach systems without demolition; direct‑adhere tiles, on the other hand, stick to drywall or concrete for a cleaner look but hide utilities and require more work to remove.
| Option | Pros |
|---|---|
| Suspended | Accessible, hides ducts |
| Direct‑adhere | Sleeker, lower cost |
| Cost range | $2–$6/sq ft |
Garage and utility spaces durable and moisture-resistant choices
Garages and utility rooms need ceiling tiles that stand up to moisture, grease, and occasional bumps, so choose materials that resist mold, stains, and impact. You’ll favor vinyl, metal, or coated fiberglass for durability; expect moderate cost increases but long-term savings from low maintenance.
| Tough | Practical | Calm |
|---|---|---|
| Vinyl | Metal | Fiberglass |
Commercial spaces (office, retail) bulk pricing and code requirements
For commercial settings like offices and retail stores, you’ll typically buy ceiling tiles in large quantities, which brings bulk pricing but also stricter fire, acoustical, and accessibility codes to meet; you’ll need code-compliant materials, professional installation, and documented specs for inspections.
| Item | Benefit | Requirement |
|---|---|---|
| Bulk tiles | Lower unit cost | Fire rating |
| Acoustic panels | Noise control | NRC values |
| Suspended grid | Fast install | ADA & egress |
Step-by-Step Installation Cost Estimation Guide
Start by measuring your ceiling to get square footage.
Then pick a tile type to estimate material costs.
Next, evaluate labor needs and collect quotes, adding a 10–20% contingency for repairs or extras.
Finally, compare total DIY versus professional installation costs to decide the most cost-effective route.
Step 1: Measure the ceiling and calculate square footage
Measuring your ceiling accurately is the first and most important step, because your square footage determines how many tiles, adhesive, and labor you’ll need.
You’ll measure length and width, subtract obstructions, and calculate totals. Use a tape, laser, and simple math to avoid waste.
- Tape measure across the room
- Note vents and fixtures
- Subtract non-tiled areas
- Multiply length by width
Step 2: Choose tile type and estimate material costs
Now that you’ve got your square footage, pick the tile type—acoustic, mineral fiber, PVC, or metal—and list the per-tile and adhesive costs so you can estimate material expenses accurately.
Check pack counts and coverage per tile, then multiply by area. Include grid systems, adhesive, primer, and fasteners.
Factor in waste (usually 5–10%) to reach a realistic materials total.
Step 3: Assess labor needs and get quotes
Once you’ve totaled your materials, figure out the labor you’ll need by listing tasks (demolition, framing or grid installation, tile placement, finishing) and estimating hours for each so you can request accurate quotes.
Contact at least three installers, provide your square footage, tile type, ceiling height, access issues, and material list, and ask for itemized bids that separate labor, travel, disposal, and permit costs.
Then compare timelines, warranties, and payment terms.
Step 4: Add contingency for repairs and extras (10“20%)
Because unexpected issues often show up once work starts, add a contingency of about 10–20% to your estimated cost to cover repairs and extras.
Account for damaged drywall, hidden mold, replacement tiles, extra adhesive, and small tool rentals. Round up for unforeseen delays or matching materials.
Keep contingency separate in your budget and adjust it if inspection reveals major problems.
Step 5: Compare DIY vs professional installation costs
After you’ve allowed for materials, labor, and contingency, compare the cost differences between doing the ceiling tile install yourself and hiring a pro so you can pick the smarter route for your budget and timeline.
Estimate your hourly worth, factor tool rental, time, skill limits, and potential mistakes.
Pros add speed, warranty, and cleanup.
DIY saves labor but risks rework and longer disruption.
DIY vs Professional Installation Cost Comparison
You can save on labor by installing ceiling tiles yourself, but expect to pay for materials and spend several hours or a full weekend depending on room size.
A contractor’s quote will break costs into labor, materials, and markup, which often buys faster work, permits, and a clean finish.
Hire a pro when the job is complex, must meet code, or when you want a warranty and risk reduced.
Typical DIY material costs and time investment
Installing ceiling tiles yourself can cut costs considerably, but you’ll still need to budget for tiles ($0.50–$5 each depending on type), adhesive or grid components ($20–$200), basic tools you might not already own (utility knife, T-square, ladder — $30–$150), and extra supplies like primer or paint.
| Item | Typical cost |
|---|---|
| Tiles | $0.50–$5 each |
| Grid/adhesive | $20–$200 |
| Tools | $30–$150 |
| Extras | $10–$60 |
Typical contractor quote breakdown (labor, materials, markup)
While a DIY job mainly costs you materials and a few hours, hiring a contractor bundles labor, materials, and markup into a single quote that usually runs $2–$6 per square foot for basic ceiling tiles and $6–12+ for higher-end options or complex layouts.
You’ll see line items for materials, installation hours, disposal, and a contractor’s markup/profit; ask for itemized estimates and compare hourly rates.
When to hire a pro (complexity, code, warranty)
Because ceiling work can hide tricky wiring, uneven joists, or moisture damage, know when it’s worth paying a pro: choose a contractor if your job involves electrical fixtures, industrial or fire-rated tiles, structural repairs, or local code inspections that a permit requires.
If the job’s simple, you can save by DIY, but weigh warranty, liability, and finish quality before deciding.
Common Problems and Costly Mistakes
You can save money by measuring carefully and avoiding buying the wrong quantities of tiles.
Don’t ignore hidden issues like mold, rot, or outdated wiring that can balloon costs once work begins.
Also make sure tiles and adhesives are compatible and that you follow permits and code requirements so you don’t face costly rework or fines.
Mis-measuring and buying wrong quantities
If you mis-measure your ceiling or buy the wrong quantity of tiles, you’ll quickly see costs and timeline blowups that could’ve been avoided.
You’ll face rush orders, wasted tiles, and extra labor to patch mismatches. Measure twice, account for cuts, pattern repeats, and waste (usually 10–15%), and confirm tile sizes with suppliers so you order precisely once and avoid costly rework.
Ignoring hidden repairs (mold, rot, wiring)
When contractors pry up tiles and find mold, rot, or frayed wiring, costs and delays climb fast—so don’t assume ceilings are just cosmetic.
You should budget for inspections and remediation before installation. Ignoring hidden damage can double expenses, require permits, and force work stoppages.
Get a licensed assessment, factor in remediation quotes, and delay tile installation until repairs and safety checks are complete.
Choosing incompatible tiles or adhesives
Because ceilings face moisture, temperature swings, and structural movement, choosing tiles or adhesives that aren’t compatible can cause warping, delamination, stains, or outright failure—and that quickly turns a modest project into a costly repair.
You’ll want materials rated for your room (bath, kitchen, basement), verify adhesive specs, test a small area, and follow manufacturer installation limits to avoid redoing ceilings and wasting money.
Skipping permits or code checks
Choosing the right tiles and adhesives won’t save you from the headaches of skipped permits or ignored code checks.
If you bypass inspections, you could face fines, forced removal, or insurance denials. You’ll also risk unsafe installations that violate fire, electrical, or structural codes.
Always check local requirements, pull necessary permits, and schedule inspections to avoid costly rework and legal trouble.
Cost-Saving Strategies and Best Practices
To keep ceiling tile costs down, you’ll want to pick durable materials that offer long-term value and time installations to coincide with other remodeling to cut labor.
Buy in bulk or hunt for remnant tiles, prepare the ceiling yourself to reduce contractor hours, and get multiple bids so you can negotiate the best price.
These steps help you balance upfront savings with long-term performance.
Choosing the right material for value and longevity
When you pick ceiling tiles, focus on balancing upfront cost with durability and maintenance needs so you don’t pay more over time; a slightly higher initial investment in moisture-resistant or impact‑tough tiles often saves money by reducing replacements and repairs.
Choose materials matched to room conditions—acoustic options for noise control, mold-resistant for bathrooms, and durable vinyl for high-traffic areas—to maximize long-term value.
Scheduling with other remodeling work to save labor
If you coordinate ceiling tile installation with other remodeling tasks—like painting, HVAC work, or lighting upgrades—you’ll cut labor hours and avoid redoing finished surfaces.
Plan sequencing so electricians, HVAC, and painters work before installers. Bundle inspections and deliveries to minimize trips.
Communicate timelines with contractors, lock a shared schedule, and expect small trade-offs for bigger savings in labor and fewer delays overall.
Buying in bulk and sourcing remnant tiles
Although buying ceiling tiles in bulk or hunting remnant lots takes more planning, you’ll save substantially on material costs and often find premium styles at steep discounts.
Compare per-tile prices, factor shipping and returns, and confirm exact quantities to avoid waste.
Check contractor salvage, tile distributors, and online marketplaces for closeouts.
Inspect remnants for damage and match patterns before purchasing.
Preparing the ceiling to reduce contractor time
Because your installer bills by the hour, clearing the room, removing old fixtures, and marking out any irregularities beforehand can cut labor time and cost.
You should patch small holes, label joists or beams, and measure for tile layout so installers won’t guess.
Keep tools and access clear, turn off power at breakers for lighting work, and communicate special ceiling features before they arrive.
Negotiating quotes and checking multiple bids
When you shop multiple bids, you’ll not only compare prices but also spot inconsistencies in scope, materials, and timelines that can cost you later.
Ask contractors to clarify scope, warranty, and change-order policies, then negotiate price or added value.
Visualize finished work:
- Clean grid lines and even tiles
- Properly aligned seams
- Neat trim and caulk
- Minimal dust and debris
Materials and Installation Cost Cheat Sheet
You’ll find a quick-reference price table that breaks costs down by tile type and installation method so you can compare options at a glance.
Use the accompanying checklist to gather measurements, note ceiling access issues, and list contractor line items for accurate quotes.
Keep this cheat sheet handy when shopping or calling pros to avoid surprises.
Quick-reference price table by tile type and installation method
Below is a compact price cheat sheet so you can quickly compare ceiling tile options and typical installation methods — materials, labor, and total per square foot (or per tile) are shown so you can estimate costs at a glance. Use this to shortlist options and plan budget or DIY vs pro work.
| Option | Typical cost |
|---|---|
| Basic foam | $0.50–$2/sq ft |
| Mineral fiber | $1–$3/sq ft |
| PVC/plastic | $2–$5/sq ft |
| Tin/metal | $4–$10/sq ft |
Checklist for getting accurate quotes
If you want accurate ceiling-tile quotes, gather a clear scope: measure the room square footage, note tile type and size, record ceiling height and any obstacles (lights, vents, bulkheads), and decide whether you’ll keep existing grid or remove it.
Then provide these details plus access notes so contractors can bid fairly:
- Room dimensions and shape
- Tile material and finish
- Fixture locations and obstructions
- Grid condition and removal preference
FAQ
You probably have a few quick questions about cost, timing, and whether upgrades like acoustic tiles are worth it.
We’ll cover typical per-square-foot prices, whether you can install over popcorn ceilings, how long a job usually takes, and if permits are needed.
If you want answers to any specific point, tell me which one and I’ll get straight to it.
How much does installing ceiling tiles cost per square foot?
Wondering what ceiling tile installation will set you back per square foot?
You’ll typically pay $2 to $8 for basic tiles and $4 to $12 for higher-end options, plus $1 to $4 labor per sq ft for straightforward installs.
Specialty materials or complex layouts raise costs.
Always get multiple quotes and factor in adhesives, grid systems, and disposal to budget accurately.
Can I install ceiling tiles over existing popcorn ceilings?
Can you install ceiling tiles over existing popcorn ceilings? Yes—you can, but prep matters.
Light, well-adhered popcorn can serve as a substrate if it’s clean, dry, and level. Remove loose texture, repair defects, and use adhesive rated for uneven surfaces or furring strips/grid to guarantee flatness.
For heavy or asbestos-containing popcorn, hire a pro for testing and removal before tiling.
How long does a typical ceiling tile installation take?
If your popcorn prep is done or you’ve chosen a clean substrate, expect most ceiling tile installations to take anywhere from a few hours to a full day for an average-sized room.
You’ll spend extra time measuring, cutting tiles to fit edges, and installing trim or grid.
Larger rooms, multiple fixtures, or complex layouts can extend the job to a couple of days.
Are acoustic ceiling tiles worth the extra cost?
How much quieter and more comfortable will your space actually get with acoustic tiles? They reduce echo and background noise, improving speech clarity and concentration—especially in offices, classrooms, and media rooms.
You’ll pay more up front, but benefits include better acoustics, potential energy savings from insulation, and higher resale appeal. If noise matters, they’re usually worth the extra cost.
Do ceiling tile installations require permits?
Along with weighing acoustics and cost, you’ll also want to check local rules before starting a ceiling tile project—permit requirements vary by jurisdiction and the scope of work.
You usually won’t need a permit for simple drop tile swaps, but structural changes, electrical work, or fire-rated assemblies often do.
Check with your building department and consider hiring a licensed contractor if permits are required.
- replacing old tiles
- cutting into framing
- moving light fixtures
- installing fire-rated panels
Visual Examples and Before/After Cost Scenarios
You’ll see clear before-and-after photos alongside an itemized list showing costs for a small bedroom makeover, a basement conversion to finished space, and a commercial office retrofit per workstation.
Use these visual examples to compare material and labor breakdowns so you can estimate what your project might run.
If you want, pick one scenario and we’ll walk through adjustments for your room size or finish level.
Small bedroom makeover itemized costs and photos
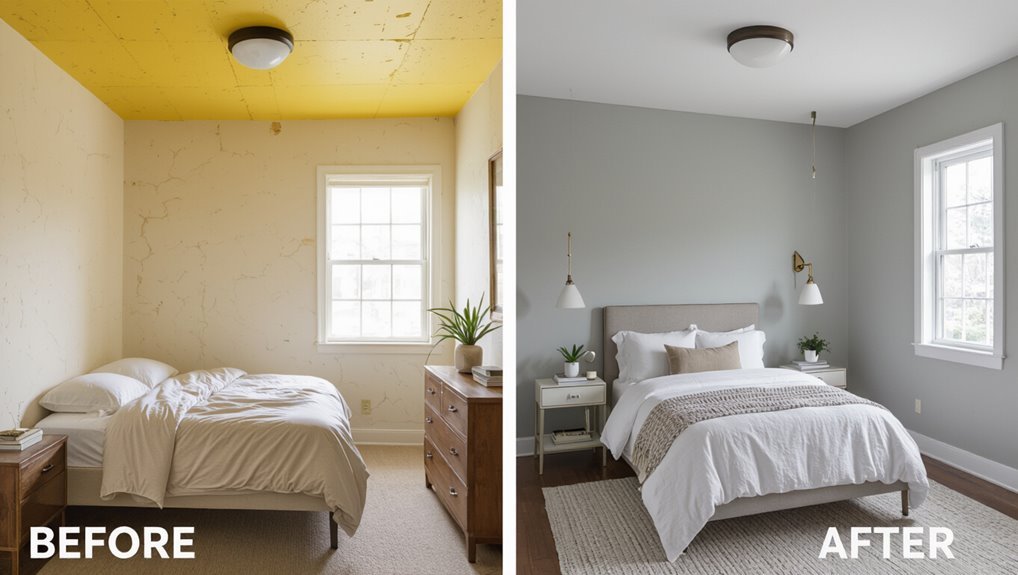
When planning a small bedroom makeover, start by lining up clear before-and-after photos and an itemized cost list so you can see exactly where your money goes; that makes it easier to prioritize paint, flooring, lighting, and ceiling tile updates.
Photograph current ceiling condition, note tile costs, labor, and fixtures, and compare totals to show impact. Use captions with prices for quick reference.
Basement conversion to finished space itemized costs
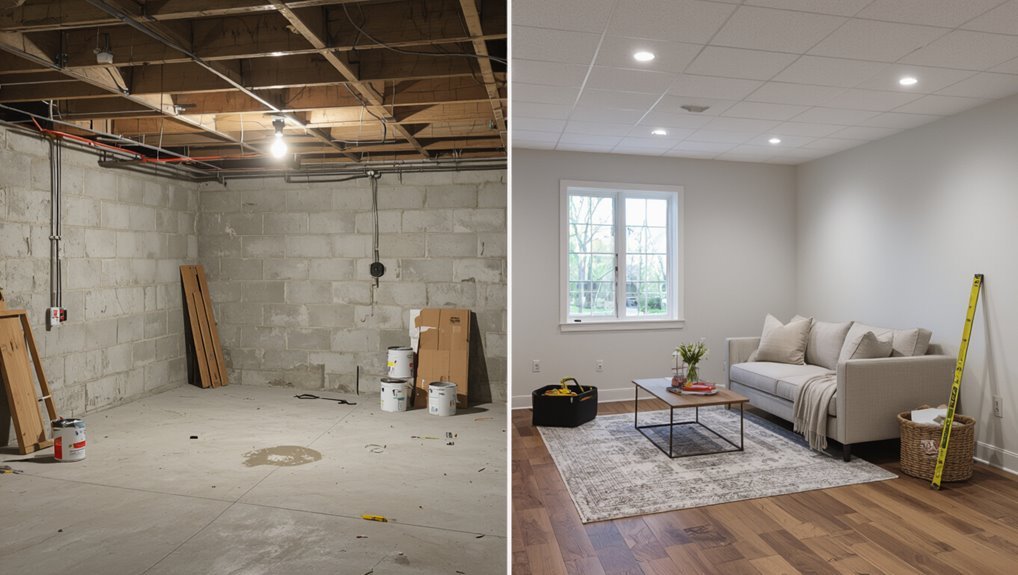
If you’ve already cataloged costs and photos for a bedroom refresh, apply that same itemized approach to a basement conversion to see how scope and budget expand.
List demolition, framing, insulation, drywall, ceiling grid/tiles, lighting, HVAC, electrical, plumbing, flooring, and finishes.
Include permits and moisture remediation.
Provide before/after photos alongside line-item totals to clarify choices and cost drivers.
Commercial office retrofit cost per workstation
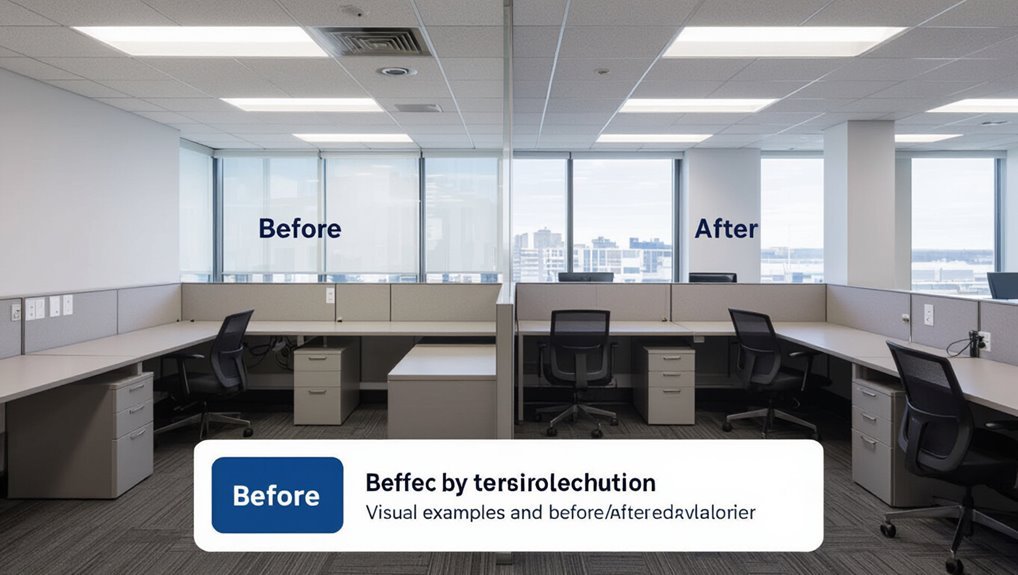
Start by breaking retrofit costs down to a per-workstation basis so you can compare layouts and ROI directly: calculate ceiling tile, grid, lighting, HVAC diffusers, and labor per desk.
Include seismic clips, sprinkler relocations, and access panels.
Show before/after visuals with typical costs — basic cubicle: $400–$700; upgraded open-plan: $800–$1,400 — so you can plan budget and timetable.