How to Clean Floors With Vinegar Safely on Any Surface Type
You can safely clean most floors with diluted white vinegar if you match the ratio to the surface, test a hidden spot first, and avoid vinegar on unsealed stone, waxed floors, or sensitive hardwoods. Use about 1 cup per gallon for general jobs, reduce to 1/4–1/2 cup for wood or laminate, ventilate, wear gloves, and rinse to remove residue. Follow surface-specific steps and precautions below to protect finishes and prevent damage.
How to Clean Floors with Vinegar Safely on Any Surface Type Quick Answer
Use diluted vinegar for most sealed hard floors but skip it on natural stone, waxed wood, and some laminate finishes.
You’ll reach for vinegar when you need a gentle, deodorizing cleaner and avoid it when acidity can damage the surface.
Always test a small area first and rinse well on sensitive floors.
One-sentence summary
If you need a quick answer: dilute white vinegar with water (about 1 cup vinegar to 1 gallon water), test a small area first, and avoid vinegar on unsealed stone, waxed floors, or certain hardwoods.
For a one-sentence summary, follow that dilution, spot-test, mop gently, and rinse where needed so you’ll know how to clean floor with vinegar safely without damaging finishes.
When to use vinegar and when to avoid it
That quick guideline works well for many sealed surfaces, but you’ll want to know when vinegar is a good choice and when it can cause harm.
Use vinegar on sealed tile, vinyl, and some laminate for grease and grime.
Avoid it on natural stone, waxed wood, unsealed grout, and some hardwoods—acid can etch, dull, or strip finishes.
Test first in an inconspicuous spot.
Basic Understanding What Vinegar Is and Why It Cleans
Household vinegar is a mild acid—typically 5% acetic acid in varieties like white, distilled, or apple cider—that you can use for cleaning.
It breaks down grime, dissolves mineral deposits, and neutralizes odors, but it’s not a disinfectant like bleach.
Be cautious: vinegar’s acidity can leave residue, react with sealants or natural stone, and may damage some finishes.
What is household vinegar (acidity, types: white, apple cider, distilled)
Vinegar is a clear, acidic liquid made when fermenting sugars into acetic acid, and you’ll find several common types—white (or distilled white), apple cider, and distilled vinegar—each with different strengths and flavors.
You’ll see household vinegar typically at 5% acidity; cleaning or pickling uses 5–8%, while higher concentrations exist for industrial uses. Choose type and strength for the task.
How vinegar works as a cleaner and deodorizer
Since you just looked at types and strengths, it helps to know what makes vinegar actually clean and deodorize.
Vinegar’s acetic acid breaks down mineral deposits, grime, and some organic residues, loosening them for wiping or mopping. Its acidic molecules neutralize basic odors and inhibit odor-causing bacteria.
You dilute it for safe use, let it sit briefly, then rinse or wipe to remove loosened debris.
Limitations of vinegar (pH, residue, interactions with sealants and stone)
Although acetic acid cleans many surfaces, it isn’t a cure-all: its low pH can dull or etch stone and damage some sealants, finishes, and adhesives.
You should avoid vinegar on natural stone, waxed wood, and unsealed grout. Rinse thoroughly to prevent sticky residue, test a hidden spot first, and never mix vinegar with bleach or ammonia because dangerous reactions and weakened sealants can result.
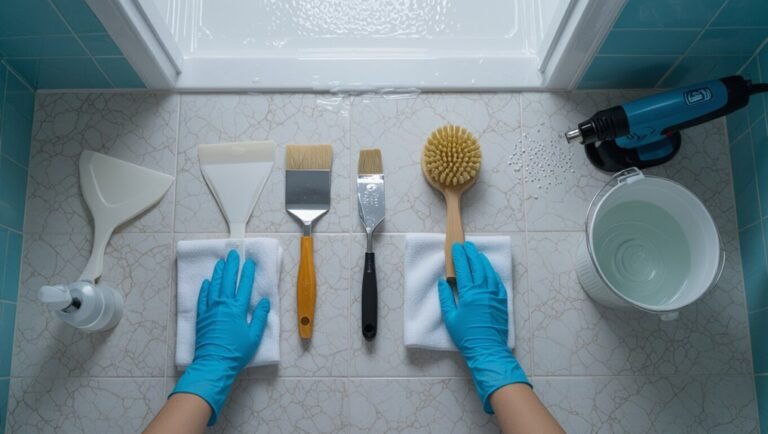
Before You Start Safety, Tools, and Preparation
Before you start, make sure the area’s well-ventilated, you’ve got gloves and eye protection, and pets are kept out of the room.
Gather your supplies—white vinegar, a bucket, mop or microfiber cloths, and a measuring cup—so everything’s ready.
Always spot-test a small, hidden area with your diluted solution and wait a few minutes to confirm the surface won’t be damaged.
Safety precautions (ventilation, skin/eye protection, pets)
When you’re cleaning with vinegar, take a few simple safety steps to protect yourself, your eyes and skin, and any pets in the home.
Open windows and run fans for ventilation. Wear gloves and goggles if splashes are likely.
Don’t let pets walk on wet floors; keep them out of the area until surfaces dry. Store vinegar away from pet reach.
Tools and supplies checklist
Now that you’ve handled ventilation, protective gear, and pet safety, gather the right tools so cleaning goes smoothly.
You’ll want simple, effective supplies to mix and apply vinegar solutions safely and avoid damage.
- Microfiber mop, bucket, and spray bottle.
- Soft-bristle brush, microfiber cloths, and squeegee.
- pH strips, measuring cup, and gloves.
How to test for surface compatibility (spot test method, timing)
Because vinegar can react differently on various finishes, always perform a spot test before you clean an entire floor.
Choose an inconspicuous area, dilute vinegar as planned, apply a small amount, and wait 10–15 minutes.
Check for discoloration, dulling, or finish softening. If no change appears, proceed; if damage shows, stop and use a pH-safe cleaner instead.
Surface-by-Surface Guide Safe Vinegar Methods for Every Floor Type
You’ll get clear, safe vinegar methods tailored to each surface so you won’t risk damage.
We’ll cover sealed hardwood, engineered hardwood, laminate, vinyl (sheet and LVP/LVT), and ceramic or porcelain tile and grout with practical dilution and technique tips.
Follow the simple steps for each floor type to clean effectively without harming finishes.
Sealed hardwood floors
While sealed hardwood floors handle moisture better than raw wood, you still need to be careful when using vinegar so you don’t dull the finish or leave residue.
Use a diluted solution (1/2 cup white vinegar per gallon of warm water), wring the mop until damp, and clean small sections.
Dry promptly with a microfiber cloth to prevent water penetration and restore shine.
Engineered hardwood
If your engineered hardwood has a factory finish, you can safely use a mild vinegar solution—but dilute it (¼ to ½ cup white vinegar per gallon of warm water).
Wring a microfiber mop so it’s damp, not wet. Test a hidden spot first.
Avoid soaked mops and steam cleaners.
Dry quickly with a soft cloth to protect the veneer and maintain finish longevity.
Laminate flooring
Laminate floors tolerate vinegar better than real wood, but you should still use a very diluted solution (about ¼ cup white vinegar per gallon of warm water) and keep the mop only damp—not wet—to avoid swelling the core and damaging seams.
Spot-test a hidden area first, wipe up spills quickly, and use a microfiber mop. Avoid soaking joints or leaving residue; rinse if needed.
Vinyl (sheet and LVP/LVT)
Moving from laminate, vinyl floors—both sheet and LVP/LVT—handle vinegar differently because they’re made of resilient synthetic layers rather than fiberboard; you can use a mild vinegar solution (about 1/4 cup white vinegar per gallon of warm water) but keep the mop just damp to avoid pushing liquid into seams or adhesive lines.
Rinse with plain water, dry promptly, and spot-test in an inconspicuous area first.
Tile and grout (ceramic and porcelain)
Tile and grout respond well to vinegar’s mild acidity, so you can safely use a diluted solution (about 1/2 cup white vinegar per gallon of warm water) to dissolve soap scum and light mineral deposits on ceramic and porcelain surfaces.
Mop or scrub grout lines with a soft brush, rinse thoroughly with clean water, and dry to prevent residue.
Repeat for stubborn spots.
Natural stone (marble, granite, slate) when to avoid vinegar
If your home also has natural stone floors, pause before reaching for vinegar: marble, granite, and slate react differently than ceramic or porcelain and can be damaged by acids.
Don’t use vinegar on polished or honed stone—acid etches, dulls, and stains. Instead, choose pH-neutral stone cleaners or plain water with a soft mop.
Test any product in an inconspicuous spot first.
Bamboo and cork flooring
Bamboo and cork floors can handle vinegar, but you’ll need to dilute it and limit exposure: mix 1/2 cup white vinegar with a gallon of warm water.
Wring your mop until it’s just damp, and never let liquid puddle on seams or edges.
Spot-test first, avoid waxed or untreated planks, dry quickly with a soft cloth, and repeat only as needed to prevent swelling or finish damage.
Concrete (sealed vs. unsealed)
Because sealed and unsealed concrete react differently to acids, you should treat them separately when using vinegar: sealed concrete tolerates a mild vinegar solution for routine cleaning, while unsealed concrete can absorb the acid and etch or darken if you don’t dilute and rinse thoroughly.
For sealed floors, mix 1/2 cup vinegar per gallon water and mop; for unsealed, avoid vinegar or spot-test, dilute more, rinse well.
Linoleum
Linoleum holds up well to vinegar when you use a gentle solution and don’t saturate the floor: mix about 1/2 cup white vinegar per gallon of warm water, mop with a lightly damp (not soaking) cloth or mop, and dry promptly to avoid warping or seams swelling.
Spot-test first, avoid waxed or polished surfaces, rinse if residue worries you, and ventilate while cleaning.
Step-by-Step Cleaning Processes (General + Surface-Specific Steps)
Before you start, sweep or vacuum to remove loose dirt so the vinegar solution can work on the actual grime.
Mix the right vinegar ratio for light, deep, or deodorizing jobs and choose an application method—mop, spray, microfiber, or a compatible steam mop—then treat stains with appropriate dwell time and gentle agitation.
Finish by rinsing and drying where needed, since some surfaces can be damaged or left cloudy if residue isn’t removed.
Step 1 Pre-clean: sweeping, vacuuming, and debris removal
Start by removing loose dirt and debris so your cleaning solution can actually reach the floor.
Sweep or dust-mop corners, edges, and under furniture first.
Vacuum rugs and hard floors with appropriate attachments to lift grit that could scratch.
Pick up pet hair, large crumbs, and sticky spots by hand.
A clean surface guarantees vinegar cleans effectively and evenly.
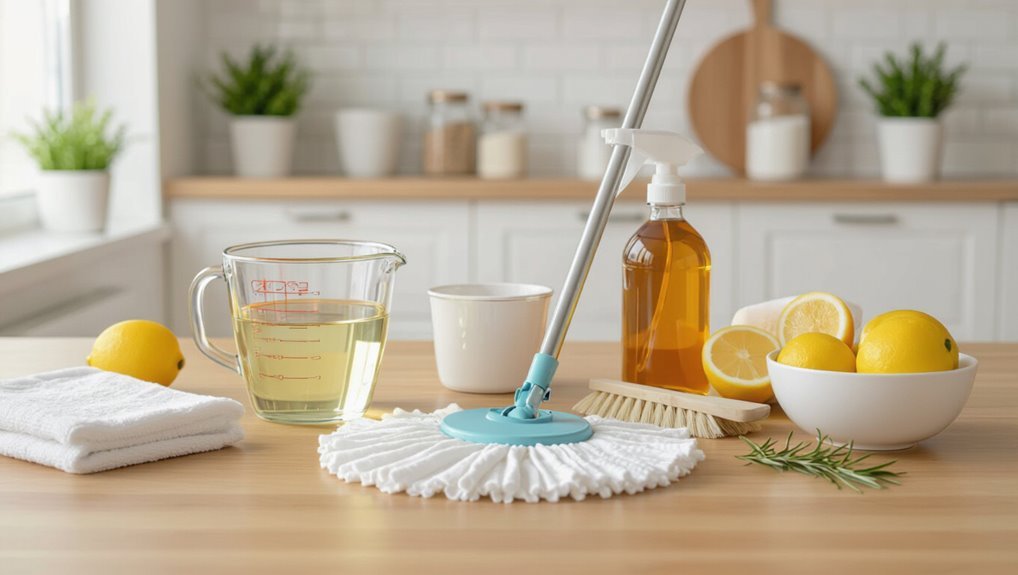
Step 2 Mixing recommended vinegar solutions (ratios for light cleaning, deep cleaning, deodorizing)
With loose dirt cleared, you’re ready to mix the right vinegar solutions for different cleaning needs.
For light cleaning, combine 1 cup white vinegar with 1 gallon warm water.
For deeper cleaning, use 1.5–2 cups vinegar per gallon.
For deodorizing, add ½ cup vinegar plus a few drops of essential oil to a gallon.
Always test first on a small area.
Step 3 Application methods (mop, spray, microfiber, steam mops compatibility notes)
1 good application method will make the vinegar solution work effectively on your floors: choose a mop for large areas, a spray for spot cleaning, or a microfiber cloth for delicate surfaces.
Know that most steam mops aren’t compatible with vinegar because it can damage internal seals and remove manufacturer coatings.
Use a damp—not soaking—microfiber or mop, spray lightly for spots, and rinse sensitive surfaces with plain water.
Step 4 Dwell time and agitation for stains
Give the vinegar solution a few minutes to work on spills and stains before you touch it, but don’t let it dry—generally 2–5 minutes is enough for mild soil, while tougher stains may need up to 10 minutes.
Then agitate gently with a soft brush, cloth, or microfiber pad, using short strokes.
Repeat dwell-and-agitate as needed, avoiding abrasive scrubbing on sensitive surfaces.
Step 5 Rinse and dry properly (why rinsing matters on some surfaces)
Why rinse after using vinegar—do you really need to? Yes. You should rinse to remove acidic residue that can dull finishes, harm grout sealers, or attract dirt.
Use clean water and a microfiber mop, rinse the mop frequently, then dry thoroughly to prevent streaks and water damage.
For porous or sealed floors, extra rinsing helps protect finishes without harsh chemicals.
Step 6 Post-clean care (conditioning, resealing, spot maintenance)
After rinsing and drying, take a few minutes for post-clean care to keep floors looking their best and to extend protective finishes:
inspect for damage, reapply recommended conditioner or sealer on wood, vinyl, or stone per manufacturer instructions, and buff lightly.
Spot-treat stubborn stains with a gentle, appropriate product.
Establish a routine maintenance schedule to prevent buildup and preserve finish longevity.
Concentrations, Recipes, and Alternatives
You’ll get best results when you match vinegar-to-water ratios to your floor type—lighter for sealed wood and tile, stronger for ceramic or concrete—and I’ll list exact mixes.
I’ll also explain safe additives like a drop of dish soap, when to use baking soda with caution, and recipes for stubborn stains and odors.
Finally, you’ll learn gentler alternatives to vinegar for sensitive surfaces so you don’t damage finishes.
Standard vinegar-to-water ratios by floor type
Different floors need different vinegar concentrations, so match the mix to the surface: You’ll use milder blends for sensitive finishes and stronger ones for tile or concrete. Start testing small areas first and never soak wood.
| Floor type | Vinegar:Water |
|---|---|
| Sealed hardwood | 1:10 |
| Tile/grout | 1:4 |
| Laminate | 1:8 |
| Concrete | 1:3 |
| Vinyl | 1:6 |
Additives you can safely combine (dish soap, baking soda use and cautions)
While vinegar cleans and deodorizes, pairing it with mild additives can boost effectiveness without harming most floors—use sparingly and always test first.
Add a few drops of mild dish soap per quart for greasy areas; avoid suds buildup.
Sprinkle baking soda dry for scuffs, then sweep or gently scrub; don’t mix baking soda directly into acidic solutions.
Rinse and dry thoroughly.
Cleaning recipes for stubborn stains and odors
For stubborn stains and persistent odors, use stronger but safe vinegar-based mixes and clear instructions so you get results without damaging floors.
Mix 1 cup white vinegar with 1 gallon warm water for general tough spots; add a teaspoon of mild dish soap for greasy marks.
For odors, combine ½ cup vinegar with 2 cups water in a spray, blot, then rinse.
Test first.
Safer alternatives to vinegar for sensitive surfaces
If your floors react poorly to vinegar—dulling finishes, etching stone, or warping wood—you’ll want gentler options and precise concentrations to protect sensitive surfaces.
Use diluted castile soap (1 tsp per gallon) for sealed wood and laminate, baking soda paste for grout spots, and pH-neutral stone cleaner for marble/granite.
Test a hidden patch, mop with minimal liquid, and dry promptly to avoid damage.
Comparison Vinegar vs. Commercial Floor Cleaners
You’ll want to weigh how vinegar and commercial cleaners handle common soils like grease, grime, and pet messes—each excels at different jobs.
Consider cost, convenience, and environmental impact since vinegar is cheap and green but some products save time.
Also check long-term effects on finishes and any warranty restrictions so you don’t unintentionally void coverage.
Effectiveness for common soils (grease, grime, pet messes)
Compare vinegar and commercial floor cleaners by looking at how each tackles common soils like grease, grime, and pet messes.
Vinegar cuts light grime and deodorizes, but struggles with heavy grease and dried protein stains.
Commercial cleaners often contain degreasers and enzymes that lift tough buildup and pet stains faster.
Use vinegar for routine maintenance; choose commercial products for stubborn, oily, or protein-based messes.
Cost, convenience, and environmental impact
1 simple way to weigh vinegar against commercial floor cleaners is to look at what you’re paying, how much effort it takes, and the environmental trade-offs.
Vinegar’s cheap, multipurpose, and leaves no toxic residues, but may need more elbow grease and occasional dilution.
Commercial cleaners cost more, often work faster, and may include fragrances or chemicals that raise disposal and indoor-air concerns.
Long-term effects on finishes and warranties
Though vinegar’s acidity can safely tackle grime on many surfaces, it can also dull, etch, or strip finishes over time on sensitive floors like natural stone, hardwood with wax or shellac, and some laminate seals, so you should check manufacturer guidance and test a small hidden area before regular use.
| Surface | Risk |
|---|---|
| Natural stone | High |
| Waxed hardwood | High |
| Laminate seal | Moderate |
| Commercial cleaner | Lower |
| Warranty impact | Possible |
Common Mistakes and How to Avoid Them
Don’t over-concentrate vinegar—too strong a mix can damage finishes and leave residues.
Avoid using vinegar on unsealed or acid-sensitive surfaces, always spot-test and follow manufacturer guidance first.
Rinse when required and use the right mop or nonabrasive tools to prevent etching and streaks.
Over-concentrating vinegar
If you pour undiluted or too-strong vinegar onto your floors, you’re asking for damage rather than a deep clean.
Always dilute vinegar with water—typically one cup per gallon for general cleaning—and test a small area first.
Use gentle application, avoid prolonged soaking, and rinse when needed.
Over-concentrating risks dulling finishes, weakening grout, and harming adhesives; stick to mild solutions.
Using vinegar on unsealed or acid-sensitive surfaces
After avoiding overly strong vinegar solutions, remember that some floors simply can’t handle any acidity.
You should avoid vinegar on unsealed stone, marble, limestone, travertine, waxed wood, and certain encaustic tiles.
Test a hidden spot first, use pH-neutral cleaners instead, and protect edges during spills.
If unsure, consult manufacturer guidance to prevent etching, discoloration, or finish loss.
Not rinsing when required
When you skip rinsing vinegar from floors that need it, a cloudy residue, sticky film, or long-term finish damage can follow—so always check surface recommendations and rinse when required.
After mopping with a vinegar solution, wipe again with clean water and a microfiber cloth or mop. Rinsing neutralizes acidity, removes leftover grime, and prevents buildup that dulls finishes or attracts dirt over time.
Using abrasive tools or wrong mops
Although vinegar is gentle, using abrasive scrubbers or the wrong mop can scratch finishes and wear away sealants, undoing the benefits of a proper cleaning.
You should choose soft microfiber mops or nonabrasive pads, avoid steel wool and stiff brushes, and match mop types to floor material.
Gentle agitation and regular mop replacement prevent grit buildup that causes scratches.
Incorrect spot-test or skipping manufacturer guidance
Scrubbing with the right tools won’t save you if you skip a proper spot-test or ignore your floor’s care instructions; manufacturers know what finishes and sealants their products tolerate.
Always test vinegar solutions in an inconspicuous corner for 24 hours, follow label guidance, and note dilution ratios.
If the manufacturer advises against acidic cleaners, respect that—use approved alternatives to avoid irreversible damage.
Best Practices and Maintenance Strategies
You’ll want a simple weekly and periodic deep-clean schedule tailored to each floor type so you don’t overuse vinegar or miss grime.
Use mats, furniture pads, and humidity control to protect finishes and stretch the time between resealing or refinishing.
Combine vinegar into a green routine—knowing when to stop and refinish will keep floors safe and looking their best.
Weekly and deep-clean schedules by floor type
Different floors need different rhythms of care, so set clear weekly and deep-clean schedules based on your floor type and traffic patterns.
You’ll tailor vinegar concentration, mop method, and drying time for each surface. Plan light weekly cleaning and periodic deep treatments to remove buildup without harming finish.
- Tile/linoleum: weekly mop, monthly deep scrub.
- Sealed hardwood: weekly gentle wipe, quarterly deep clean.
- Stone: weekly dry sweep, biannual professional deep clean.
How to protect and prolong finishes (mats, furniture pads, humidity control)
While regular cleaning tackles dirt, protecting and prolonging your floors’ finishes is mostly about preventing damage before it happens.
Use entry mats to trap grit, felt pads under furniture to stop scratches, and washable area rugs in high-traffic zones.
Control humidity to prevent warping or cupping, keep pet nails trimmed, and lift heavy items instead of dragging to preserve coatings and finishes.
When to reseal or refinish instead of repeated vinegar use
Protecting finishes with mats, felt pads, and humidity control will cut down on wear, but eventually cleaning alone—especially repeated vinegar use—won’t fix surface damage or worn seals.
If finish looks dull, peels, or water soaks in, plan resealing or refinishing. Test a small area, consult product guidelines, and hire a pro for hardwood or stone to restore protection rather than relying on cleaners.
Green cleaning routine integrating vinegar safely
If you want a reliable green cleaning routine that uses vinegar safely, start by matching solutions and methods to each floor type and damage level:
dilute white vinegar for routine cleaning on sealed tile or vinyl, avoid it on unsealed stone or fresh hardwood, and never mix it with bleach or ammonia.
Rotate weekly sweeping, spot-treat spills promptly, test new mixes in inconspicuous areas, and air-dry.
Troubleshooting Problems, Stains, and Repairs
If vinegar cleaning leaves a dull finish, etching, or residue, you’ll want targeted steps to restore the surface without causing more harm.
Learn how to remove watermarks and streaks, treat grout discoloration and reseal where needed, and spot-repair affected areas.
And know when a problem—especially deep etching or widespread damage—means it’s time to call a professional.
Removing vinegar damage (dull finish, etching, residue)
Start by evaluating the damage: vinegar can dull finishes, etch sensitive surfaces, or leave a filmy residue, and each issue needs a different fix.
For dull finishes, buff with a microfiber cloth and apply a manufacturer-approved polish.
For etching on stone, consult a pro; mild poultices sometimes help.
For residue, rinse thoroughly with clean water and dry immediately to restore shine.
Fixing watermarks and streaks
When watermarks or streaks appear after cleaning, you’ll usually need to remove mineral deposits and rebalance the surface so it dries evenly.
Wipe with a microfiber cloth dampened in distilled water, then buff dry.
For persistent marks, mix equal parts distilled water and white vinegar, apply sparingly, rinse with distilled water, and dry immediately to prevent new streaks.
Treating grout discoloration and seal restoration
After you’ve tackled watermarks and streaks, you’ll likely notice grout that’s dulled, stained, or losing its seal; addressing it restores both appearance and protection.
Scrub grout with a paste of baking soda and water or a vinegar-safe cleaner, rinse, and let dry.
Reapply grout sealer according to product instructions, working in small sections, and allow full cure before regular mopping.
When to call a professional
If a stain, discoloration, or damage won’t respond to your cleaning efforts or you’re unsure about using stronger products, call a professional—especially for porous stone, antique finishes, or large-area grout repair.
They’ll assess risks, test patches, and recommend appropriate cleaners, sealers, or restoration.
Call sooner for persistent odors, structural cracks, or when warranties or historic materials are involved to avoid worsening damage.
Frequently Asked Questions
You probably have a few quick questions about using vinegar on different floors, and I’ll answer the most common ones here.
You’ll learn whether vinegar is safe for hardwood, if it’s okay in a steam mop, whether it can strip wax or finish, how often you can clean with it, and the best vinegar ratio for pet urine and odor.
Keep these FAQs handy for safe, effective cleaning.
Is vinegar safe for hardwood floors?
Wondering whether vinegar will damage your hardwood floors? You can use diluted white vinegar (about 1/2 cup per gallon of water) sparingly on sealed hardwood to remove dirt and grime.
Avoid soaking or harsh scrubbing; mop lightly and dry promptly.
Don’t use vinegar on waxed, unsealed, or damaged finishes, and test a small inconspicuous area first to guarantee finish compatibility.
Can I use vinegar in a steam mop?
Since diluted vinegar can be safe for sealed hardwood when mopped lightly, you might wonder whether it belongs in a steam mop.
Don’t: steam’s heat intensifies acidity and can damage seals, finishes, and grout over time. Use plain water or manufacturer-approved solutions in steam mops.
If you choose vinegar, dilute heavily, test a hidden spot, and avoid frequent steam treatments to minimize risk.
Will vinegar remove wax or finish from my floor?
Will vinegar strip wax or finish from your floor? It can, if you use full-strength white vinegar repeatedly or leave it sitting.
Dilute vinegar (about 1/2 cup per gallon) and rinse quickly to minimize risk. Test in an inconspicuous spot first.
Avoid vinegar on floors with wax finishes or unsealed wood; opt for manufacturer-approved cleaners to preserve protective coatings.
How often can I clean floors with vinegar?
How often should you use vinegar to clean your floors? Aim for weekly mopping for high-traffic areas and monthly for low-traffic rooms.
Hard, sealed surfaces tolerate regular vinegar solutions; unsealed wood, waxed floors, or stone need less frequent use—spot-clean or dry-sweep instead.
Always dilute vinegar, test a small area first, and adjust frequency based on finish condition and manufacturer recommendations.
What is the best vinegar ratio for pet urine and odor?
If you’re already using diluted vinegar for routine mopping, you can use a stronger but still safe mix for pet urine and odor: combine one part white distilled vinegar with one part water (1:1) for fresh urine.
Apply it to the spot, let it sit 5–10 minutes, then blot and rinse.
For older stains, repeat or use undiluted vinegar briefly, then neutralize and ventilate.
Quick Reference Cheat Sheet
Keep a one-page cheat sheet on hand that shows the exact vinegar-to-water ratios and methods for each floor type so you can clean quickly and correctly.
You’ll find separate instructions for sealed hardwood, tile, laminate, vinyl, and stone, plus any precautions.
Use it to mix solutions, choose tools, and avoid damage.
One-page ratio and method guide by floor type
Cheat sheets save time, so use this one-page guide to mix vinegar solutions and clean safely by floor type:
- Hardwood — 1 cup white vinegar per gallon warm water; damp mop, dry quickly to avoid warping.
- Tile/linoleum — 1/2 cup vinegar per gallon; mop, rinse if residue shows.
- Stone/marble — avoid vinegar; use pH-neutral cleaner per label to prevent etching.