
How to Install Epoxy Floor Coating for a Durable, Glossy Garage Finish
You can get a durable, glossy garage floor by properly prepping concrete, choosing the right epoxy, and applying it carefully. Inspect for moisture and cracks, clean and profile the surface with grinding or etching, then prime for adhesion. Mix resin and hardener precisely, roll or squeegee the base coat in small sections, broadcast flakes if desired, and apply a clear topcoat after tack-free cure. Follow cure times and maintenance for long life, and continue for detailed steps and tips.
How to Install Epoxy Floor Coating for a Durable, Glossy Garage Finish
You can often DIY an epoxy garage floor and get a durable, glossy finish if you follow prep and application steps carefully.
Expect a few days of work, strict moisture checks, and results that look professional but may show minor imperfections compared with commercial installations.
Hire a pro for large areas, severe concrete damage, or when you need guaranteed warranties and factory-level consistency.
Quick answer can you DIY epoxy and expected results
Wondering whether you can DIY an epoxy garage floor? You can — with prep, patience, and the right kit.
Learn how to install epoxy floor coating: clean, etch, repair cracks, mix resin and hardener, apply primer and coats, and add flakes if desired.
Expect a tough, glossy finish that resists stains and light wear when you follow instructions carefully.
When to hire a professional vs. DIY
Deciding whether to DIY or hire a pro comes down to time, skill, and the condition of your floor.
If you’re confident, have time, and the slab is sound, DIY can save money.
Consider hiring a pro when humidity, cracks, or heavy use threaten results.
- DIY: small, simple garages
- Pro: structural or moisture issues
- Hybrid: prep yourself, pro coats
Basic understanding What is epoxy floor coating and why choose it
Epoxy floor coating is a resin-and-hardener system you’ll apply in different forms—water-based, solvent-based, or 100% solids—each with its own cure time and performance.
You’ll pick it for garage floors because it boosts durability, gives a high-gloss finish, resists chemicals and stains, and makes cleanup simple.
Keep in mind coatings have limits: prep matters, some types yellow or chip over years, and realistic lifespan is typically 5–15 years depending on use and maintenance.
Types of epoxy coatings (water-based, solvent-based, 100% solids)
Coatings come in three main types—water-based, solvent-based, and 100% solids—and each has different performance, odor, cure time, and application needs you should know. You’ll pick based on ventilation, downtime, and desired finish.
| Type | Quick note |
|---|---|
| Water-based | Low odor, easier cleanup |
| Solvent-based | Stronger, more VOCs |
| 100% solids | Highest durability, no shrinkage |
Benefits for garage floors (durability, gloss, chemical resistance, maintenance)
When you want a garage floor that stands up to daily wear, epoxy floor coating gives you a tough, glossy surface that resists stains, chemicals, and abrasion.
You’ll get long-lasting durability, enhanced light reflectivity for a brighter workspace, and easy cleanup—sweeping and occasional mopping.
Epoxy seals pores to prevent oil penetration and withstands vehicle traffic, simplifying maintenance while preserving appearance.
Limitations and realistic lifespan
Although epoxy gives you a tough, attractive finish, it isn’t indestructible and does have limits you should know before committing.
Expect 5–15 years of good service depending on prep, traffic, UV exposure, and chemical spills. Thin or poorly mixed coats chip sooner.
Heavy impact, prolonged sun, or oil soaking shorten lifespan. Plan maintenance, occasional recoat, and realistic use to maximize durability.
Preparation overview the foundation for a long-lasting finish
Before you start, gather a checklist of tools and materials so you won’t be interrupted mid-job.
Wear proper safety gear and guarantee good ventilation to protect yourself from fumes and dust.
Inspect the concrete for moisture, cracks, and any old coatings so you can repair or remove issues before applying epoxy.
Required tools and materials checklist
If you want a durable, professional-looking epoxy floor, gather the right tools and materials upfront so the job goes smoothly and you don’t have to pause mid-project.
You’ll need quality epoxy kit, concrete prep supplies, and application tools. Prioritize correct quantities and compatible products.
- Epoxy kit, primer, and sealer
- Grinder, squeegee, and rollers
- Patch compound, cleaners, and mixing buckets
Safety equipment and ventilation requirements
1 essential step for a durable epoxy floor is protecting yourself and controlling fumes—wear nitrile gloves, chemical-resistant goggles, a respirator rated for organic vapors, and long sleeves.
Make sure you set up cross-ventilation or use an exhaust fan to keep solvent and amine vapors from building up.
- Seal doors/windows to direct airflow.
- Use continuous ventilation during mixing and curing.
- Keep a fire extinguisher nearby.
Assessing concrete condition: moisture, cracks, previous coatings
Because your epoxy only performs as well as the concrete beneath it, you’ll need to check moisture levels, surface integrity, and any existing coatings before you mix a single batch.
Test moisture with a calcium chloride kit or plastic-sheet method, probe for delamination, and note hairline to structural cracks.
Grind or etch, repair cracks with epoxy filler, and fully remove old coatings for reliable adhesion.
Step-by-step installation process
Now you’ll follow a clear, step-by-step installation process so the epoxy bonds and lasts.
First you’ll inspect the concrete and test for moisture, then repair cracks and surface defects.
After cleaning contaminants and profiling the surface (grinding or acid etching as appropriate), you’ll finish by selecting and applying the right primer.
Step 1 Concrete inspection and moisture testing
Before you start applying epoxy, inspect the concrete thoroughly and test for moisture to guarantee the coating will bond and cure properly.
Check for efflorescence, oil stains, paint residue, and previous sealers. Use a calcium chloride or relative humidity test per manufacturer guidelines.
Record results across the slab; any elevated moisture readings mean you’ll need to address vapor before coating.
Step 2 Repairing cracks, spalls, and surface defects
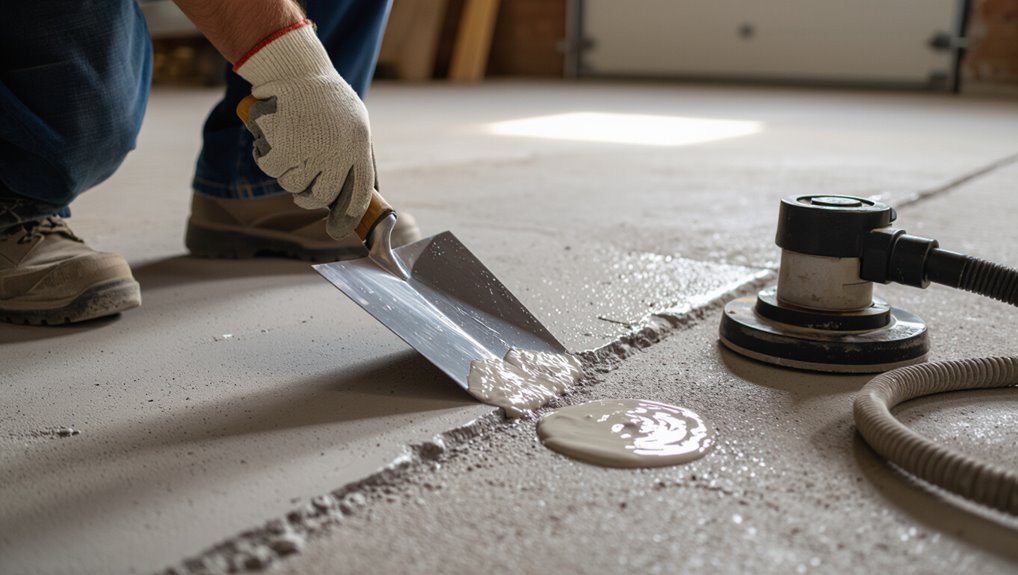
Address cracks, spalls, and surface defects next so the epoxy has a sound, level substrate to bond to.
Chip out loose concrete, widen hairline cracks slightly with a grinder, and vacuum debris.
Fill cracks and spalls with a suitable epoxy or polymer-modified patch, trowel smooth, and allow full cure.
Check for hollows and sand high spots for an even, stable surface.
Step 3 Cleaning: oil, grease, and contaminant removal
Step 3 focuses on removing oil, grease, and other contaminants so the epoxy can bond properly; you’ll clean thoroughly before coating.
Use degreasers, scrub brushes, and pressure washing if available. Follow these steps:
- Apply commercial degreaser, scrub, and rinse.
- Use solvent for stubborn spots, then ventilate.
- Let the slab dry completely before proceeding.
Step 4 Surface profiling: grinding vs. acid etching (when to choose each)
With the slab clean and fully dry, you’ll need to profile the concrete so the epoxy can mechanically bond to the surface. Choose grinding for heavy contamination, coatings removal, or uneven slabs; pick acid etching for light laitance and smooth, sound concrete. Follow safety rules and test a small area.
| Method | Best for | Notes |
|---|---|---|
| Grinding | Heavy contamination | Dust control required |
| Etching | Light residue | Safer on smooth floors |
| Test patch | Any | Confirms profile |
Step 5 Priming the concrete: product selection and application tips
1 primer coat makes a big difference: choosing the right concrete primer and applying it correctly guarantees your epoxy bonds evenly, reduces pinholes, and extends the coating’s life.
Pick a primer compatible with your epoxy and concrete condition (moisture-tolerant if needed).
Roll or squeegee thin, even coats, maintain manufacturer’s recoat window, and ventilate.
Avoid puddles and contamination for best adhesion.
Step 6 Mixing epoxy resin and hardener correctly (ratios, pot life, temperature)
Because proper mixing controls cure time and performance, you’ll follow the manufacturer’s exact resin-to-hardener ratio, monitor pot life, and work within the recommended temperature range to get a uniform, fully cured epoxy.
- Measure precisely; use scales or calibrated cups.
- Mix thoroughly, scraping sides and bottom for recommended time.
- Keep ambient and material temps within spec; mix smaller batches if warm to avoid shortened pot life.
Step 7 Applying base coat: roller vs. squeegee techniques
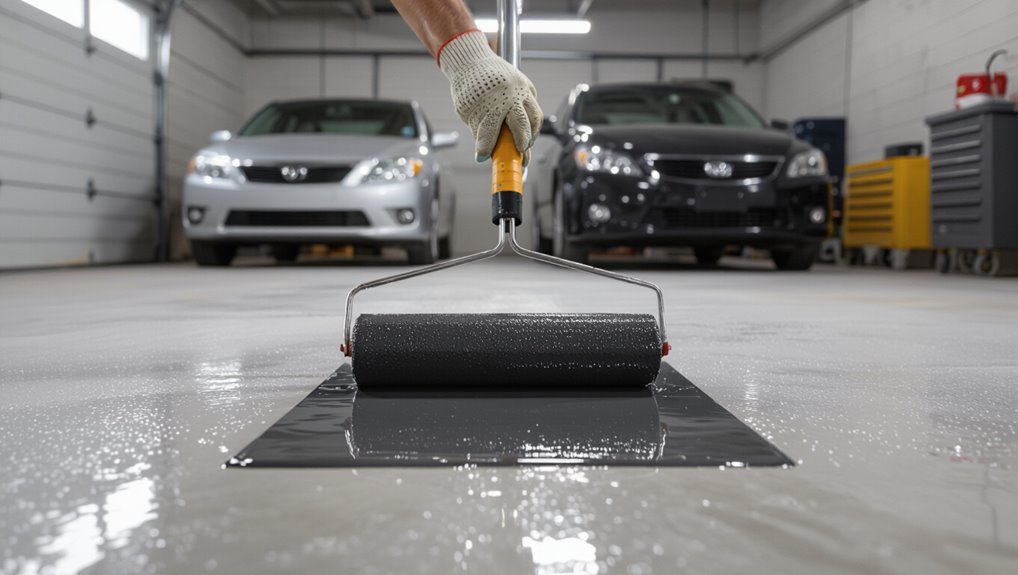
Once you’ve mixed the epoxy, decide whether you’ll roll or squeegee the base coat based on floor size, surface texture, and your comfort level—roller for even, thin coverage on smooth floors and squeegee for faster spread on rough or large areas.
Work in 3–4 foot sections, maintain a wet edge, apply consistent pressure, and backroll after squeegeeing to smooth lines and remove bubbles.
Step 8 Broadcasting decorative flakes or additives (timing and coverage)
When the base coat still feels tacky but isn’t pooling, start broadcasting decorative flakes or additives so they’ll adhere properly and lay flat; work in manageable 4–6 foot sections. Toss or broadcast evenly from about 12–18 inches above the floor, and keep a steady pace to maintain consistent coverage.
Overlap slightly at edges, avoid clumping, and monitor density so you achieve your desired look without wasting material.
Step 9 Allowing cure time between coats and tack-free testing
After broadcasting flakes, let the base coat cure long enough so it’s tack-free before you apply the next layer; this prevents trapped debris and guarantees proper adhesion for subsequent coats.
Check tack-free by lightly touching a hidden spot—no stickiness.
Follow manufacturer cure windows (temperature/humidity affect times). If tack-free, proceed; if not, wait and recheck hourly to avoid lift or contamination.
Step 10 Applying clear topcoat or sealer for gloss and UV resistance
With the base coat fully tack-free and any loose flakes removed, you can apply the clear topcoat or sealer to lock in gloss and add UV protection.
Mix per manufacturer instructions, roll a thin, even coat with a short-nap roller, and tip out overlaps.
Work in sections, maintain a wet edge, and inspect for bubbles or missed spots.
Allow specified pot life.
Step 11 Final cure, return-to-service schedule, and initial maintenance
Although the clear topcoat may feel dry to the touch, it still needs a full final cure before you expose the floor to traffic or heavy equipment; follow the manufacturer’s recommended cure time and temperature guidelines to guarantee full hardness and chemical resistance.
Plan return-to-service: light foot traffic after 24–48 hours, vehicles after 72 hours to 7 days depending on product.
For maintenance, clean spills promptly and use pH-neutral cleaners.
Common problems and how to fix them
You’ll likely run into issues like blushing, fish-eyes, or poor adhesion—know the causes and remedies so you can act fast.
Watch for bubbles, pinholes, or uneven texture and use proper surface prep and application techniques to prevent or correct them.
If you see yellowing, loss of gloss, peeling, or flaking, troubleshoot by checking product compatibility, cure conditions, and follow a targeted repair process.
Blushing, fish-eyes, and poor adhesion causes and remedies
When your epoxy shows milky blushing, craters from fish-eyes, or simply won’t stick, you need to diagnose environmental, surface, and application causes quickly so you can fix them before re-coating.
Check humidity/temperature, wipedown solvents, and contaminants.
Sand glossy or contaminated areas, remove oils, allow proper dwell times, and use recommended primers or adhesion promoters.
Mix thoroughly and apply within pot life.
Bubbles, pinholes, and uneven texture prevention and correction
Prevent and fix bubbles, pinholes, and uneven texture by controlling air, substrate, and technique from the start: work with proper temperature and humidity, degas and mix slowly to minimize entrapped air, and apply epoxy in thin, even passes while using a roller with the correct nap and a heat gun or propane torch to pop surface bubbles.
Sand and recoat any pinholed areas; use a skim coat for texture.
Yellowing or loss of gloss causes and preventive steps
Although epoxy’s tough finish can last years, yellowing or loss of gloss often shows up from UV exposure, high heat, chemical attack, or improper curing.
You can prevent most of it with the right product choices and application practices. Use UV-stable, high-quality epoxy or a clear polyurethane topcoat, control curing temperature and humidity, avoid strong solvents, and clean spills promptly to preserve shine.
Peeling or flaking diagnosis and repair process
Even with good products and careful curing, you may still see epoxy peel or flake—especially in areas with poor surface preparation, moisture intrusion, heavy impact, or chemical exposure.
Diagnose by checking adhesion, moisture vapor, and coating thickness.
Remove loose epoxy, diamond-grind to sound concrete, test for moisture, apply primer or moisture barrier if needed, then recoat with correct mix and cure time.
Best practices and pro tips for a durable, glossy finish
To get a long-lasting, glossy epoxy finish, you’ll work in the right temperature and humidity window, plan timing and crew coordination, and apply in manageable sections so the product levels smoothly.
Pick non-yellowing anti-slip additives that won’t dull the shine, and broadcast them consistently where needed.
After curing, stick to a gentle cleaning and maintenance routine to preserve gloss and durability.
Ideal temperature and humidity ranges for application
When you apply epoxy within the right temperature and humidity window, it cures evenly and stays glossy instead of hazing, bubbling, or peeling.
Aim for 60–80°F (15–27°C) substrate temperature and 40–60% relative humidity. Avoid applying below 50°F or above 85°F and during high humidity or condensation.
Stabilize conditions before and during cure for consistent gloss and adhesion.
Timing, crew coordination, and working in small sections
Once your temperature and humidity are steady, plan the work rhythm so the mixed epoxy gets spread before it starts thickening.
Epoxy pot life can shrink quickly in warm conditions, so you and your crew need synchronized tasks—mixing, pouring, rolling, and back-rolling—in tight sequence.
Work small, manageable sections and:
- Assign clear roles.
- Stage materials nearby.
- Time mixes to finish each bay before tack-up.
Choosing additives for slip resistance without sacrificing gloss
If you want slip resistance without dulling the sheen, choose additives that offer a controlled texture and match your topcoat’s refractive index; fine, spherical aggregates or ultra-fine aluminum oxide give grip with minimal light scatter, while angular quartz or larger grit will cut gloss noticeably.
Test small patches, measure texture (ASTM D2047 guidance), and broadcast sparingly for even coverage that preserves shine.
Maintenance routine to preserve gloss and durability
Although regular care seems simple, keeping an epoxy floor glossy and durable hinges on a consistent maintenance routine you can realistically follow.
Sweep daily, mop weekly with a pH-neutral cleaner, and spot-clean spills immediately.
Use non-abrasive tools, felt pads under furniture, and avoid harsh chemicals or petroleum solvents.
Recoat high-traffic areas every few years to restore gloss and protect the substrate.
Comparison: DIY epoxy kits vs. professional epoxy systems
You’ll weigh cost versus performance and warranty when choosing between DIY epoxy kits and professional systems.
Consider typical project time and household disruption—DIY can save money but often takes longer and risks uneven results.
Use a kit for small, simple garages or workshops, but hire pros for large areas, heavy use, or when a manufacturer-backed warranty matters.
Cost, performance, and warranty comparison
When weighing DIY epoxy kits against professional systems, cost, performance, and warranty are the key trade-offs you’ll want to evaluate:
| Factor | DIY Kits | Professional |
|---|---|---|
| Cost | Lower upfront | Higher upfront |
| Performance | Moderate, DIY-dependent | Higher, consistent |
| Warranty | Limited or none | Robust, transferable |
You’ll save money DIYing but accept variable results and limited protection; pros cost more but deliver durability and stronger warranties.
Typical project time and disruption
Cost, performance, and warranty affect your choice, but time and disruption often seal the deal.
DIY kits take a weekend plus cure time—prep, etching, and multiple coats mean you’ll live around fumes and equipment.
Pros finish faster: thorough prep, industrial primers, and rapid cures minimize downtime but require scheduled access.
Balance your schedule, tolerance for mess, and urgency before deciding.
When DIY kits suffice and when to invest in pros
If your garage sees light foot traffic, occasional cars, and you’re handy with basic tools, a DIY epoxy kit can deliver a durable, attractive finish at a fraction of pro pricing; choose pros when you need industrial-strength performance, complex repairs, or minimal downtime.
You should DIY for simple prep, small cracks, and tight budgets. Hire pros for moisture issues, coatings warranty, heavy loads, or precise color/textures.
Tools, materials, and product selection guide
Before you start, gather the right grinders, vacuums, rollers, and mixing gear so prep and application go smoothly.
You’ll also want to know how to read technical data sheets and warranty terms to match products to your site’s conditions and expectations.
Finally, I’ll list sample products across budget and performance tiers so you can pick what’s best for your project.
Recommended grinders, vacuums, rollers, and mixing equipment
You’ll want the right grinders, vacuums, rollers, and mixers to get a durable, professional epoxy finish—each tool affects surface prep, dust control, application speed, and final appearance.
Choose a 7–10″ planetary or diamond grinder for profiling. Use HEPA-rated vacuums to capture dust.
Pick solvent-resistant nap rollers and a paddle mixer or drill-mounted low-speed mixer for consistent batches.
- Grinders
- Vacuums
- Rollers & mixers
How to read technical data sheets and warranty terms
When choosing epoxy products and tools, read the technical data sheet (TDS) and warranty closely so you know exactly what performance to expect, what conditions are required, and which failures the manufacturer will cover.
Check pot life, cure times, coverage rates, surface prep, temperature/humidity limits, and compatible primers.
Note warranty duration, exclusions (improper prep, traffic, chemical exposure), and required registration or maintenance to keep coverage.
Sample product recommendations by budget and performance
Now that you know how to read technical data sheets and warranties, let’s look at specific tools and products that fit different budgets and performance needs.
For tight budgets, choose DIY epoxy kits (solvent-free, 1–2 mm solids) and basic rollers.
Midrange: two-part polyaspartic blends, diamond-grit flakes, quality squeegee.
Premium: high-solids epoxy primers, polyurea topcoats, professional grinders and silica sand for prep.
FAQ
You probably have a few practical questions before you start, like how long epoxy takes to cure and whether you can park on it the same day.
You’ll also want to know if epoxy can go over existing coatings, hide stains or cracks, be removed later, and stand up to motorcycles, lawn mowers, or oil-dripping cars.
I’ll answer each of those points so you can plan the prep, application, and use with confidence.
How long does epoxy take to fully cure and can I park on it the same day?
How long does epoxy take to fully cure, and can you park on it the same day?
Full cure usually takes 7 days at room temperature; light foot traffic is often safe after 24–48 hours, but vehicle weight and colder temps extend cure time.
Wait at least 72 hours for light cars in mild conditions, and a full week for maximum hardness and chemical resistance.
Can epoxy be applied over existing coatings or paint?
If your garage already has paint or an older coating, you can often apply a new epoxy over it—but surface prep and compatibility matter.
You’ll need to confirm the existing coating bonds well, remove loose or peeling material, clean thoroughly, and scuff or etch the surface for adhesion.
Test a small area first and follow manufacturer guidelines; some paints aren’t suitable as a base.
Will epoxy hide concrete stains and cracks?
Curious whether epoxy will conceal stains and cracks? You’ll find epoxy hides minor stains and hairline cracks by forming a continuous, glossy layer.
However, deep oil spots may bleed through unless cleaned and primed, and structural cracks need repair or filler first.
Proper surface prep—etching, degreasing, and patching—ensures the coating looks uniform and lasts longer.
How do I remove epoxy if I need to redo the floor?
Sometimes you’ll need to remove epoxy to fix damage or start fresh, and you’ve got a few reliable options depending on the coating type and your budget.
Grind or sand the surface with a floor grinder or planetary sander for thick coatings.
For thin or solvent-sensitive layers, use a chemical stripper rated for epoxy.
Clean thoroughly and repair concrete before recoating.
Is epoxy safe for motorcycles, lawn mowers, and cars with oil drips?
Worried about oil drips from your motorcycle, lawn mower, or car ruining an epoxy floor?
Epoxy is durable and resists stains, but fresh oil can penetrate if not cleaned quickly. Use a quality chemical-resistant epoxy and apply a nonporous topcoat.
Clean spills promptly, use absorbent pads or mats under machines, and reseal high-traffic areas periodically to maintain protection and sheen.
Visual aids and quick-reference resources
You’ll want a printable step-by-step checklist to keep prep, mixing, and application on track.
Include a troubleshooting flowchart that guides you through common adhesion and cure problems with clear corrective steps.
Keep both resources simple and laminated so they’re easy to use on the job.
Step-by-step checklist printable
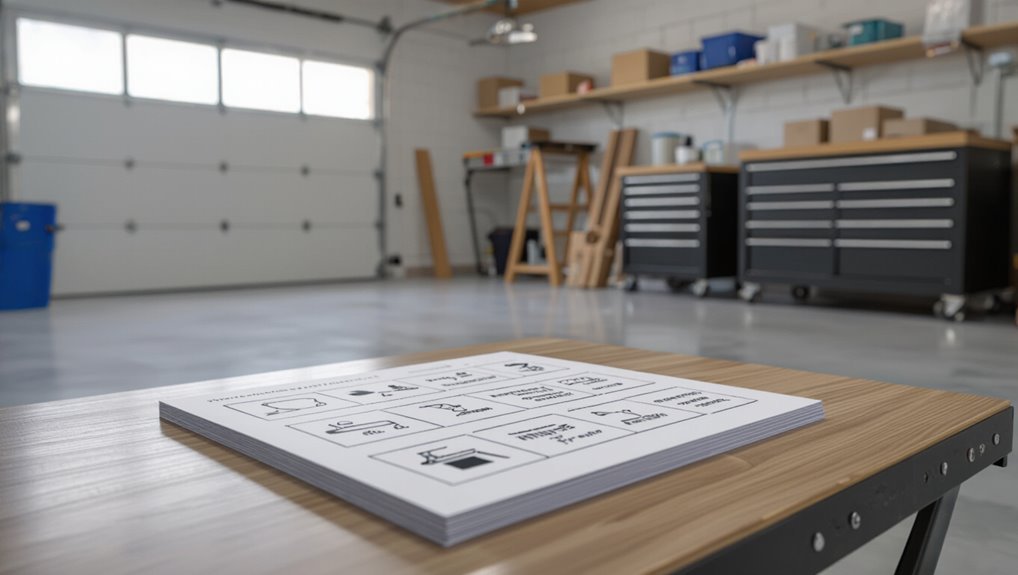
A single-page, printable checklist keeps your epoxy floor project on track from prep to cure, so you can follow each critical step without flipping through long guides.
Use concise items: surface cleaning, degreasing, repair, etching/grinding, vacuuming, primer, mix ratios, application order, ventilation, pot life, second coat timing, inspection, and cure time.
Laminate or hang it nearby for easy reference.
Troubleshooting flowchart for adhesion and cure issues
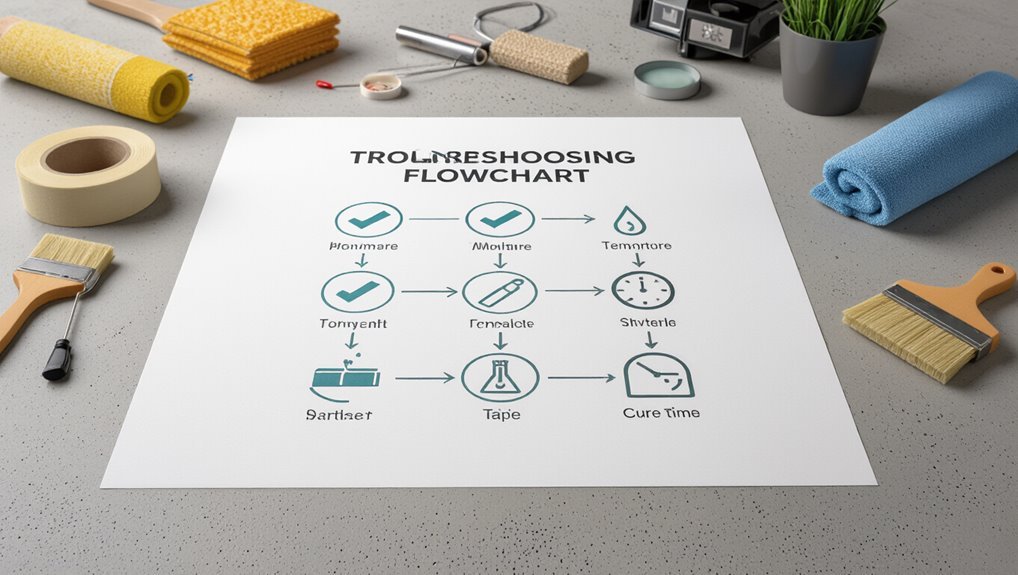
When adhesion or cure problems show up, follow a simple flowchart so you can quickly isolate the cause and take the right fix—start by checking surface cleanliness and profile, then verify mix ratio and pot life, inspect ambient temperature and humidity, and finally look for contamination or old coatings that block bonding.
Use a printed flowchart: test, decide, act (clean/profile, recoat, abrade, or strip), then retest.
