How to Polish Laminate Floors and Restore Their Original Shine
You can restore much of your laminate floor’s shine by thoroughly cleaning, spot-treating scuffs, and applying a thin, manufacturer-safe laminate polish or gloss restorer. Start by removing dust and debris, damp-mop with a pH-neutral cleaner, treat stains and adhesive spots, then apply polish sparingly with a microfiber applicator, let it dry, and buff lightly. Work in small sections and avoid excess water or abrasive pads. Keep going to learn proper products, timing, and upkeep tips.
Quick Answer Can You Polish Laminate Floors and How Fast to Restore Shine
Yes—you can restore some shine to laminate floors, but you won’t get a true polish like on hardwood; expect improved appearance rather than a factory finish.
With basic tools (microfiber mop, mild cleaner, and optional laminate polish), most rooms take 30–90 minutes and cost under $30 in supplies.
If the surface is deeply scratched or worn, professional repair or replacement will be faster and more effective than DIY shine restoration.
Short summary of feasibility and expected results
Although laminate isn’t true wood, you can still restore a nice, long-lasting shine using the right cleaners, polish products, and techniques.
You’ll find that knowing how to polish laminate floors yields reliable, streak-free results for light wear and dullness.
Deep scratches or delamination aren’t fixable by polishing; expect improved appearance and surface protection, not structural repairs.
Follow manufacturer guidelines.
Time, tools, and cost estimate
Expect to spend a few hours and a modest budget to restore shine: most rooms take 1–3 hours for cleaning and polishing.
You’ll need basic tools (microfiber mop, pH-neutral cleaner, laminate polish or spray, soft cloths), and costs typically range from $15–$60 if you buy supplies—more if you rent a floor buffer or hire pros.
- Time: 1–3 hours
- Tools: basic kit
- Cost: $15–$200
Basic Understanding What Laminate Floors Are and Why Shine Changes
Laminate floors are built from layered composite boards topped with a protective, printed surface and a clear wear layer, so you’re dealing with a surface finish rather than solid wood.
Over time that wear layer gets scuffed, filled with dirt, or chemically broken down, which is why your floor loses shine.
Polishing can restore surface gloss and mask light scratches, but it won’t repair deep gouges or structural damage to the core layers.
What laminate flooring is made of and surface characteristics
Flooring manufacturers build laminate from multiple bonded layers designed for durability and appearance, so understanding those layers explains why shine varies.
You’ll find a core of high-density fiberboard, a printed design layer, and a transparent wear layer—often melamine resin with embedded aluminum oxide.
Surface textures and factory-applied finishes control reflectivity and resistance, so you’ll tailor polishing and care to the specific wear layer type.
Common causes of dullness and loss of shine (wear, dirt, scratches, finish breakdown)
Those layered construction details explain a lot about why shine changes over time: daily use wears down the transparent wear layer, dirt and grime abrade and dull the surface, visible scratches scatter light, and the factory finish can chemically break down or thin with age.
- Wear: foot traffic thins the wear layer.
- Dirt: gritty buildup grinds the finish.
- Scratches/finish breakdown: light-scattering defects reduce gloss.
What polishing can and cannot fix (surface shine vs. deep damage)
Because the factory wear layer is thin and transparent, polishing can restore surface gloss but it can’t repair deep scratches, delamination, or areas where the decorative print or core are damaged.
You can remove light scuffs, haze, and minor abrasions with proper cleaners and polish.
For structural damage, replace affected planks or use repair kits for small chips; polishing won’t fix underlying defects.
Safety and Preparations Before You Start
Before you start, make sure the room is well-ventilated and you’re wearing gloves and a mask to protect against fumes and dust.
Don’t polish if your floor has active water damage, severe wear that needs repair, or a manufacturer warranty that prohibits polishing.
Gather a quick checklist of tasks and tools — clear the room, sweep and vacuum, and have a microfiber mop, polish recommended for laminate, and spare cloths ready.
Safety precautions (ventilation, protective gear)
When you’re getting ready to polish laminate floors, make sure the area is well ventilated and you’re wearing the right protective gear; open windows or run fans to disperse fumes from cleaners or polishes, and put on gloves, safety goggles, and a mask rated for vapors or fine dust.
Also wear non-slip shoes, keep children and pets out, and read product labels for specific safety instructions.
When NOT to polish (warranty, water damage, severe wear)
If your laminate is still under warranty, has visible water damage, or shows deep wear like peeling or swollen edges, don’t attempt to polish it yourself.
You’ll void warranties, mask underlying problems, or worsen delamination. Instead, contact the manufacturer or a professional.
Also avoid polishing when subfloor issues, active leaks, or significant scratches compromise structural integrity—these need repair, not shine restoration.
Checklist: room prep and tools needed
1 clear checklist will keep you efficient and safe as you prep the room and gather tools for polishing laminate floors.
Clear the area, remove rugs and furniture, and ventilate.
Gather microfiber mop, mild cleaner, polish, bucket, and gloves.
Don’t forget knee pads and a soft-bristled broom.
- Inspect and clear
- Ventilate and protect
- Collect tools and PPE
Direct-Answer: Best Method to Restore Original Shine
For most laminate floors, the best way to restore original shine is to clean thoroughly, use a manufacturer-approved polish or restorer, and buff by hand or with a low-speed floor machine.
You can save money with a DIY approach and handle minor dullness quickly, but DIY won’t fix deep wear and can risk damage if you use the wrong products.
Hiring a professional costs more but gives longer-lasting results and reduces the chance of mistakes on stubborn or heavily worn surfaces.
Overview of recommended approach
Because laminate isn’t true hardwood, you’ll restore its original shine best by cleaning thoroughly, addressing scuffs, and then applying a manufacturer-safe polish or restorative product designed for laminate surfaces.
Start by sweeping and mopping with a pH-neutral cleaner. Spot-treat scuffs with recommended solutions, and use a microfiber applicator to buff on polish sparingly.
Let layers dry fully before light re-buffing.
Pros and cons of DIY vs. professional refinishing
While you can often restore laminate’s original shine yourself with cleaning, spot treatments, and a manufacturer-approved polish, hiring a pro offers more consistent results for heavily damaged floors or tricky layouts; weigh your budget, time, and skill—DIY is cheaper and works well for surface wear, while professionals handle deep scratches, warped planks, or large areas faster and with warranty-backed products.
| Option | Cost | Best for |
|---|---|---|
| DIY | Low | Light wear |
| Pro | Higher | Major damage |
| Hybrid | Medium | Mixed issues |
Step-by-Step Guide How to Polish Laminate Floors
Before you polish, you’ll follow a clear sequence: clean thoroughly, tackle stains and scuffs, repair scratches, pick the right restorer, and apply it correctly.
You’ll learn which products and tools work best and what to avoid so the finish lasts.
Stick to each step and you’ll get a durable, even shine without damaging the laminate.
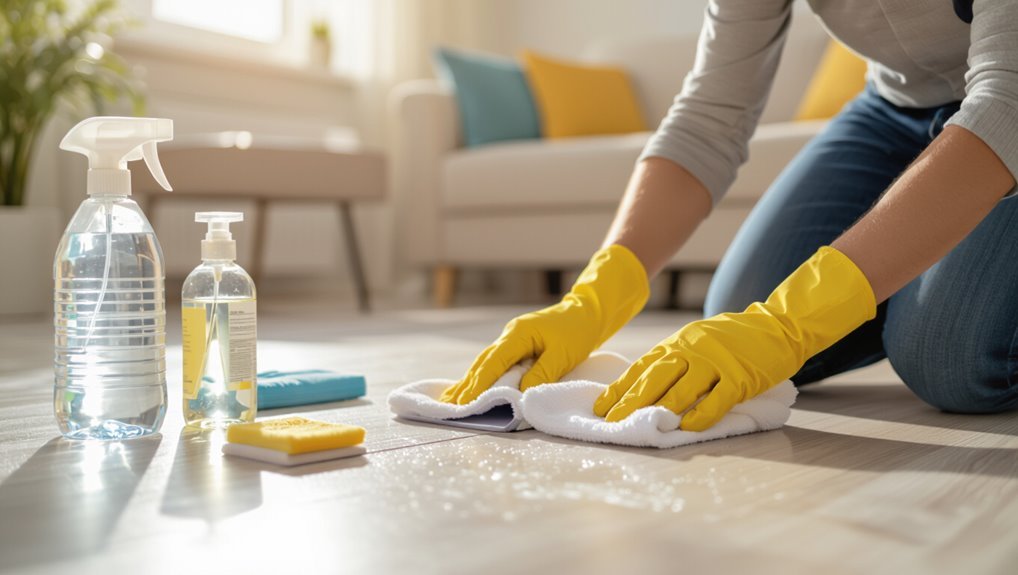
Step 1 Thorough cleaning (dust, vacuum, mop)
Start by removing loose dirt and grit so you don’t grind it into the surface during polishing. You should:
- Dust with a microfiber mop, reaching corners and baseboards.
- Vacuum using a hard-floor attachment to lift fine particles.
- Damp-mop with a pH-neutral laminate cleaner, avoiding excess water.
Let the floor fully dry before proceeding to the next step.
Step 2 Removing stains, adhesive residue, and scuff marks (products and techniques)
Tackle stains, adhesive residue, and scuff marks with targeted cleaners and gentle scrubbing so you don’t damage the laminate’s wear layer.
- Use a mild detergent or specialized laminate cleaner for spills; blot, don’t soak.
- Remove adhesive with rubbing alcohol or citrus-based adhesive remover; test first in an inconspicuous spot.
- Erase scuffs with a soft eraser or microfiber pad, then wipe dry and inspect before polishing.
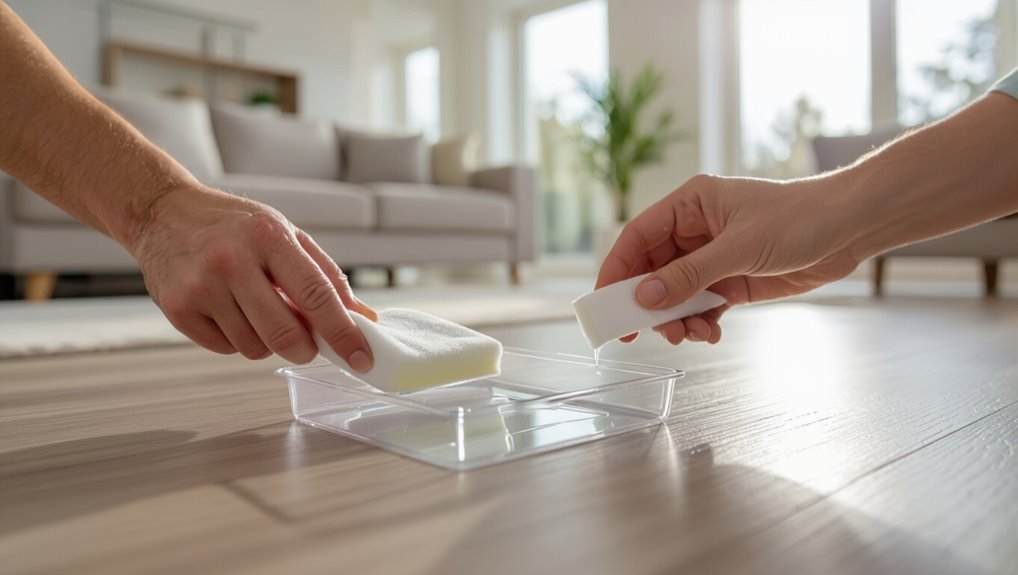
Step 3 Repairing minor scratches and chips (fillers, touch-up kits, color matching)
3 simple fixes can make small scratches and chips nearly invisible, and you can do them with a few affordable products and steady hands.
- Clean area, dry thoroughly.
- Use a laminate filler or wax pencil matched to color; apply thinly, smooth with a plastic scraper.
- Seal lightly with manufacturer-recommended clear compound or let touch-up cure before polishing to blend and protect the repair.
Step 4 Choosing the right polish or restorer for laminate (types, ingredients to avoid)
With scratches filled and repairs sealed, you’re ready to pick a polish or restorer that actually suits laminate—products vary widely, and the wrong one can leave a hazy residue or damage the wear layer.
Choose water-based, non-abrasive formulas labeled for laminate. Avoid wax, oil-based, silicone, or ammonia cleaners.
Compare labels and test a small patch.
- Water-based
- No wax/oil
- Patch-test first
Step 5 Application technique for polish/restorer (tools, amount, movement, drying times)
Start by gathering the right tools—microfiber mop or soft flat pad, a microfiber cloth for edges, and the manufacturer-recommended applicator—and make sure the floor is completely clean and dry before you apply anything.
Work in small sections, apply a thin, even coat per instructions, move with the grain using overlapping strokes, wipe edges, allow recommended drying time, and avoid heavy reapplication.
Step 6 Buffing and finishing for optimal shine (manual vs. machine buffing, pads to use)
Although you can buff by hand for small areas, using a floor buffer delivers more consistent shine across large rooms; choose soft microfiber or white polishing pads for laminate to avoid scuffing, and always work slowly in overlapping passes until the finish evens out.
Test a discreet spot first, keep pads clean, apply light pressure, and repeat passes until uniform gloss appears without heat buildup.
Step 7 Final cure time and post-care immediate do’s/don’ts
1 to 24 hours of careful waiting can make the difference between a durable shine and a tacky mess.
After polishing, avoid walking, placing rugs, or moving furniture until the surface feels dry. Keep ventilation on and low humidity for 24–48 hours.
Wipe spills immediately with a soft cloth, don’t use harsh cleaners, and resume gentle maintenance once fully cured to protect the finish.
Products Compared Popular Polishes, Restorers, and Finish Alternatives
You’ll compare commercial laminate polishes and restorers by features and best uses so you can pick one that matches your floor’s wear and sheen.
I’ll also cover simple DIY solutions, when they’re appropriate, and when they’re better avoided.
Finally, you’ll learn the risks and compatibility issues of using sealers or polyurethane over laminate so you don’t damage the surface.
Commercial laminate polish brands (features, best uses)
When choosing a commercial laminate polish, focus on the product’s finish, durability, and compatibility with your floor’s manufacturer recommendations. You’ll pick water-based polishes for light sheen, acrylic restorers for scratch blending, or matte finishes for low-glare rooms. Test first.
| Brand | Best use | Key feature |
|---|---|---|
| Brand A | High-traffic | Durable gloss |
| Brand B | Light touch-ups | Quick-dry |
DIY homemade solutions and when to use them
Although commercial polishes work well, DIY solutions can be a smart, budget-friendly option when you need light restoration or a temporary shine; mix mild ingredients like distilled water, a few drops of dish soap, or a splash of vinegar for cleaning, and use diluted floor polish or a tiny amount of olive oil sparingly for spot-treating scuffs.
- Test small area first
- Clean, then apply sparingly
- Avoid buildup and waxing
When to use a floor sealer or polyurethane over laminate (risks and compatibility)
If your laminate is deeply worn, damaged, or losing its protective layer, sealing or applying a polyurethane topcoat can temporarily restore appearance—but it’s not always safe or compatible with every laminate type.
You should test a small inconspicuous area, check manufacturer guidance, and consider risks: peeling, yellowing, trapped moisture, and voided warranties.
Use water-based sealers designed for laminate and proceed cautiously.
Common Mistakes That Ruin Shine and How to Avoid Them
Don’t use wax, oil soaps, or abrasive cleaners—they leave residue or strip the protective layer and will ruin your laminate’s shine.
Avoid over-wetting and excessive scrubbing, which can swell joints and dull the finish.
Also skip metal scrapers and rough pads that scratch; choose soft microfiber tools and the right polish applicator instead.
Using wax, oil soaps, or abrasive cleaners (why they harm laminate)
When you try shortcuts like wax, oil-based soaps, or abrasive cleaners, they can do more harm than good to laminate floors; waxes leave sticky residue, oils darken seams, and abrasives scratch the protective wear layer.
You should use pH-neutral cleaners and microfiber mops instead, test any product in an inconspicuous spot, and follow manufacturer guidelines to maintain shine without damaging the finish.
Over-wetting and excessive scrubbing
Although laminate resists stains, over-wetting the floor and scrubbing too hard will lift seams, warp boards, and wear away the thin protective layer.
You should use a damp, not soaked, microfiber mop and mild cleaner. Work in small sections, dry immediately, and avoid aggressive back-and-forth scrubbing.
Light, consistent pressure preserves finish and prevents moisture damage that dulls shine and shortens flooring life.
Wrong tools and pads that scratch or dull surfaces
One common mistake is grabbing the wrong tools or pads and thinking more abrasive equals better polish; in reality, rough brushes, steel wool, and gritty pads will scratch the wear layer and leave a dull, etched finish.
- Use soft microfiber pads only.
- Avoid scouring pads and metal brushes.
- Test any new tool in an inconspicuous spot first.
Prevention and Long-Term Maintenance to Keep Shine
Keep a simple routine—sweep or vacuum daily and mop weekly with a cleaner made for laminate to preserve the polish.
Use entry mats, felt furniture pads, and a humidifier or dehumidifier to prevent scratches and warping that dull the finish.
Reapply polish when you see increased wear, dull patches, or when water no longer beads on the surface—typically every 6–18 months depending on traffic.
Routine cleaning schedule and preferred products
If you stick to a simple routine—daily dry-mopping, weekly damp-mopping, and monthly deeper care—you’ll prevent grit buildup and keep laminate looking its best.
- Use a microfiber mop and pH-neutral laminate cleaner for daily/weekly tasks.
- For monthly care, apply a manufacturer-recommended polish or restorative product sparingly.
- Avoid waxes or oil soaps; they leave residue and dull the finish over time.
Protective measures: mats, furniture pads, humidity control
Daily cleaning and occasional polish will do a lot, but you’ll preserve that shine longer by preventing damage before it happens.
Use low-profile mats at entrances to trap grit, place felt pads under furniture legs, and swap casters for soft wheels.
Maintain indoor humidity around 35–55% to prevent warping or gaps.
These steps reduce scratches and prolong polished appearance.
Periodic maintenance: reapplication frequency and signs it’s time to re-polish
Because traffic patterns and home conditions vary, you’ll need to reapply polish on a schedule that matches how you use the floor.
Check every 3–12 months: high-traffic areas often need touch-ups quarterly, low-traffic rooms yearly.
Look for dullness, increased scratches, water beading failure, or uneven sheen.
When these signs appear, clean thoroughly and reapply a thin, even coat to restore protection and shine.
When to Repair or Replace Instead of Polishing
If your laminate shows deep wear-layer loss, buckling, or warped boards, you’ll need to weigh repair or replacement instead of polishing.
We’ll compare patch repairs, full plank swaps, and the cost-benefit of replacing the whole floor so you can choose the most economical option.
If you’re thinking of hiring a pro, I’ll outline common services they provide and key questions to ask before you hire.
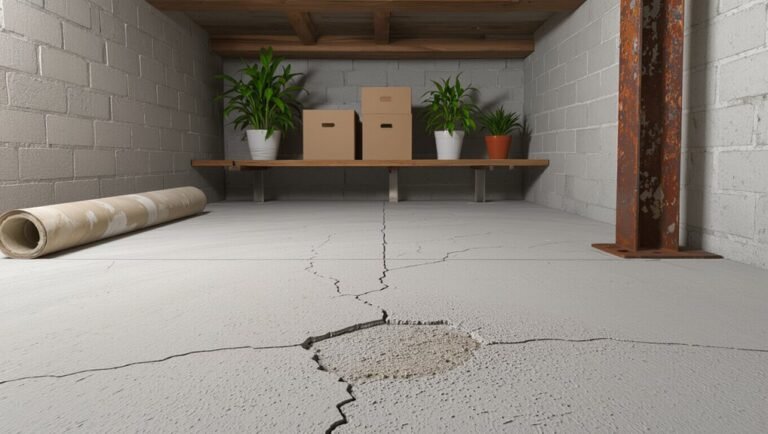
Signs of irreversible damage (deep wear layer loss, warped boards)
When wear goes beyond the surface and boards start to cup, buckle, or delaminate, polishing won’t save the floor — you’ll need repair or replacement.
Check for deep scratches that penetrate the wear layer, exposed core material, persistent swelling or gaps after drying, and loose or creaking planks.
Those signs mean structural damage; polishing only hides blemishes, it won’t restore integrity.
Cost-benefit: repair patches vs. full plank replacement vs. new flooring
Once you’ve confirmed damage goes past the wear layer and affects the boards’ structure, you’ll need to weigh cheaper spot repairs against replacing planks or installing new flooring. Consider cost, time, durability and aesthetics to decide.
| Option | When to choose |
|---|---|
| Patch | Small localized damage |
| Plank replace | Multiple adjacent boards |
| New flooring | Widespread wear or style update |
| Cost note | Factor labor and lifespan |
Hiring a pro: what services to expect and questions to ask
Wondering whether to call in a pro? Ask about assessment, patch versus plank replacement, moisture mitigation, and refinishing options.
Expect a clear diagnosis, cost estimate, timeline, warranty, and surface preparation steps.
Ask if they’ll match textures and colors, use compatible cleaners/polishes, and protect trim.
Get references and insurance proof.
Choose a contractor who explains trade-offs between repair, replacement, and polishing.
FAQ Common Questions About Polishing Laminate Floors
You’ll probably have a few practical questions before you start polishing—like whether a floor buffer is safe for laminate or if polish will make it slippery.
You’ll also want to know how often you can reapply polish, whether you can alter the color, and if it’s safe in high‑moisture areas.
Below are clear answers to those common concerns so you can protect your floor and get the finish you want.
Can I use a floor buffer on laminate?
Can you use a floor buffer on laminate? You can, but you must choose low-speed, light-pressure machines and non-abrasive pads designed for delicate surfaces.
Test an inconspicuous area first to confirm no finish damage. Avoid heavy rotary buffers, aggressive pads, or high heat buildup.
Move steadily, keep the floor clean, and follow manufacturer guidelines to prevent scratches or delamination.
Will polishing make laminate slippery?
Using a low‑speed buffer and gentle pads reduces the risk of surface damage, but you should also consider how polishing affects traction.
Polishes can fill microtextures, temporarily increasing slipperiness, especially when wet. Apply thin, even coats, buff lightly, and let products cure fully.
Choose polishes labeled non‑slip or textured for high‑traffic areas, and always test a small spot before treating the whole room.
How often can I reapply polish without damaging the floor?
How often you can reapply polish depends on the product and your floor’s wear, but most laminate needs touch-ups every 3–12 months rather than frequent full recoats.
Check manufacturer guidelines and test a small area first. Light traffic areas may go longer; high-traffic zones need more frequent touch-ups.
Overapplication or aggressive stripping can thin protective layers and cause damage.
Can I darken or change the color when polishing?
Want to change your floor’s shade while polishing? You can’t alter laminate color with standard polishes; they only add a protective sheen.
Tinted or color-infused products might slightly deepen tone, but results are temporary and uneven.
If you want a permanent color change, consider replacing planks or using specialized laminate paint kits following manufacturer instructions to avoid damage and warranty issues.
Is it safe to polish laminate in high-moisture areas?
If you’re thinking about changing color, you should also consider where the floor sits—high-moisture rooms like bathrooms and laundry areas pose extra risks when polishing.
Don’t polish laminate exposed to frequent water; moisture can penetrate seams, lift planks, or ruin polish.
Use moisture-resistant sealers only if compatible with your laminate, guarantee excellent ventilation, and spot-test in an inconspicuous area first.