How to Clean a Walk-In Freezer Floor Safely and Effectively
You should clean your walk-in freezer floor regularly with cold‑rated detergent, a stiff broom or scrub brush, and a squeegee to remove debris and standing water; sweep first, pre‑rinse, apply detergent at the manufacturer’s concentration, scrub, rinse thoroughly, then sanitize and extract water with a wet/dry vac or absorbent pads. Wear insulated gloves, non‑slip boots, eye protection, lock out heaters, and limit exposure time. Follow drying and slip‑testing steps to reopen safely, and keep going for detailed best practices.
Quick Answer How to Clean a Walk-In Freezer Floor Safely and Effectively
For a quick, safe clean, you’ll sweep up debris, mop with a food-safe disinfectant, and remove standing water to prevent slips and ice buildup.
Plan on about 20–30 minutes for a routine clean and do it at least once daily in high-traffic kitchens or 2–3 times a week for lighter use.
If you spot spills or heavy soil, clean them immediately to keep the floor safe and compliant.
One-sentence summary of the safest, quickest approach
When you need a fast, safe clean, sweep up loose debris. Mop with a food-safe detergent mixed in warm water, and rinse thoroughly while keeping the floor dry with a squeegee and absorbent pads to prevent slips and refreezing.
For how to clean a walk in freezer floor, work systematically from back to door. Ventilate briefly, wear insulated gloves, and remove standing water immediately.
Estimated time and frequency for routine cleaning
A routine clean of a walk-in freezer usually takes 15–45 minutes per session depending on floor size and dirt level.
You should sweep and mop high-traffic areas daily or every shift, deep-clean drains and corners weekly, and perform a full sanitation monthly.
Increase frequency for spills, heavy traffic, or regulatory requirements.
Track schedules so you don’t skip essential maintenance.
Basic Understanding Why Proper Cleaning Matters
You need to keep freezer floors clean to prevent food contamination, reduce slip hazards, and avoid damage to equipment and drains.
Different floor types—concrete, epoxy, and grated/drainage systems—require different cleaners and methods to protect their surfaces and maintain hygiene.
Knowing the risks and the floor material helps you choose the right tools and schedule for safe, effective cleaning.
Risks of improper cleaning (food contamination, slips, equipment damage)
If you skip proper cleaning, contaminants and standing water quickly create hazards that threaten food safety, worker health, and equipment function.
You’ll risk cross-contamination, bacterial growth, and spoiled inventory.
Wet, icy surfaces increase slip-and-fall accidents.
Corrosive residues and trapped moisture can damage seals, drains, and motors.
Regular, correct cleaning prevents recalls, injuries, costly repairs, and operational downtime.
Types of freezer floors and how they affect cleaning (concrete, epoxy, grated/drainage)
Because freezer floors vary in material and design, cleaning methods and risks change with them—concrete holds stains and moisture, epoxy resists spills but can hide scratches, and grated or sloped drainage floors channel liquids but trap debris in seams—so knowing your floor type tells you which cleaners, tools, and procedures will actually keep surfaces sanitary and slip-resistant.
| Concrete | Epoxy | Grated |
|---|---|---|
| Porous, absorbent | Smooth, sealed | Channels debris |
| Needs degreaser | Nonabrasive cleaners | Brush and flush |
Safety Precautions Before You Start
Before you start, make certain you’re wearing the right PPE—insulated gloves, non-slip boots, eye protection, and any respirators required for cleaning agents.
Lock out and tag out heaters, door motors, and electrical panels, and confirm temperature controls so workers won’t be exposed to extreme cold.
Check chemical labels and safety data sheets, guarantee adequate ventilation, and limit exposure times to stay within recommended worker temperature limits.
Personal protective equipment (PPE) checklist
You’ll want the right PPE lined up before you step into the freezer: insulated gloves, slip-resistant boots, eye protection, a warm hat or hood, and a high-visibility vest if others are nearby.
- Insulated, waterproof gloves
- Slip-resistant, insulated boots
- Safety goggles or face shield
- Warm hat or hood
- High-visibility vest
Put items on before entry, check fit, and replace damaged gear.
Lockout/tagout and electrical safety for freezer doors and heaters
After you’ve geared up, shift focus to electricity: lockout/tagout (LOTO) and electrical safety. Stop power to heaters, automatic door mechanisms, and any nearby equipment that could activate while you’re working.
Follow facility LOTO procedures, isolate circuits, lock switches, and apply tags. Verify zero energy with a tester.
Keep keys controlled, communicate with coworkers, and don’t remove locks until cleanup and checks are complete.
Temperature management and worker exposure limits
When you step into a walk-in freezer to clean, monitor and control temperature exposure so you don’t risk cold stress or hypothermia; know the facility’s safe-exposure limits, use timed work/rest cycles, and wear appropriate insulated clothing and gloves.
Check individual acclimatization and medical restrictions, rotate staff for longer jobs, limit single-shift cold exposure, and document exposure times to comply with workplace safety policies.
Chemical safety and ventilation considerations
Controlling cold exposure is only part of staying safe; you also need to manage chemicals and air flow before you start cleaning.
Choose low-odor, non-corrosive cleaners approved for food environments. Read labels and wear appropriate PPE.
Confirm ventilation: use fans or open doors briefly, monitor for fumes, and avoid enclosed spraying.
If strong chemicals are required, schedule during downtime with extra ventilation and an observer.
Tools, Cleaners, and Equipment You’ll Need
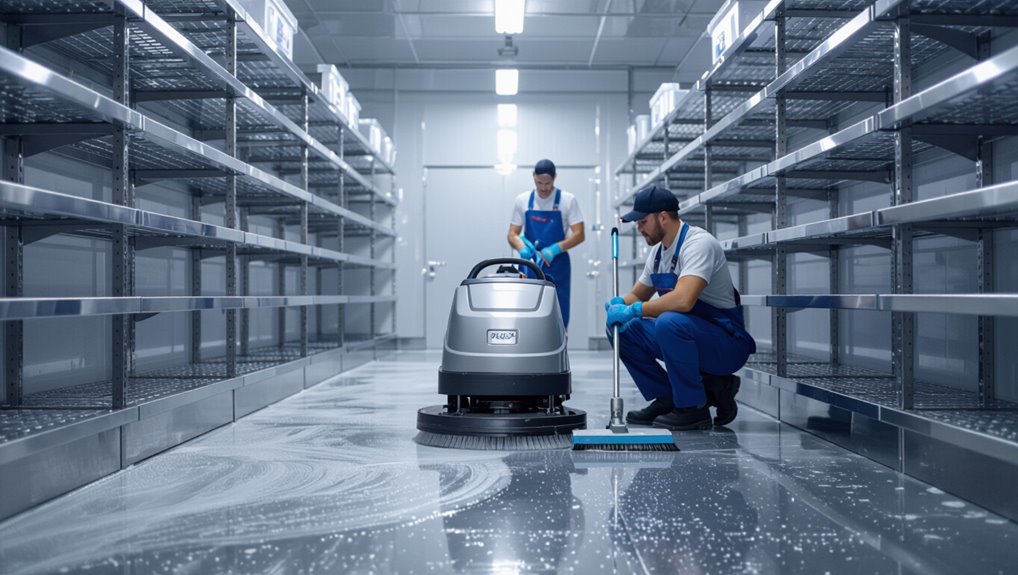
You’ll want the right tools—squeegees and push brooms for loosening and moving ice and debris, wet/dry vacs for water removal, and floor scrubbers for stubborn buildup.
Use cold-rated cleaners and EPA- or USDA-approved sanitizers formulated to stay effective at low temperatures.
Reserve mechanical equipment for large or heavily soiled areas and stick to manual methods for spot cleaning or tight spaces.
Recommended tools and their uses (squeegees, push brooms, wet/dry vacs, floor scrubbers)
A few well-chosen tools make cleaning a walk-in freezer faster and safer: a squeegee to push melted water and detergents toward drains, a stiff push broom to loosen grit and frozen debris, a wet/dry vacuum to extract slush and chemical runoff, and a floor scrubber for larger areas or stubborn residue.
- Use rubber squeegees for quick drainage
- Stiff brooms reach corners
- Vacs remove liquid and debris
- Scrubbers save time on scale
- Bring long-handled tools to avoid bending
Approved cleaning agents and sanitizers for cold environments
Now that you’ve picked the right tools, pick cleaning agents that actually work at low temperatures and won’t damage the freezer or stored food.
Choose EPA-registered sanitizers rated for cold use, low-foam degreasers, and non-corrosive floor cleaners compatible with stainless steel and concrete.
Avoid bleach on metal, strong acids, or residues that attract pests.
Rinse thoroughly and follow label contact times.
When to use mechanical equipment vs. manual methods
When deciding between mechanical equipment and manual methods, weigh factors like floor size, soil level, downtime limits, and staff skill so you pick the most efficient, safe option.
Use scrubbers or pressure washers for large, heavily soiled floors or fast turnaround; choose mops, squeegees, and brushes for small areas, delicate surfaces, or limited power access.
Always prioritize non-slip footwear and training.
Quick Pre-Clean Checklist (Step 0)
Before you start scrubbing, remove all food, shelving, and any obstructions so the floor is clear and accessible.
Check drains for clogs or damage and make small repairs or note issues for maintenance.
Put up signs and barriers to keep people out while you work.
Remove food, shelving, and obstructions
Start by clearing the floor area of all loose items—move food, bins, carts, and any portable shelving out of the space so you can work safely and efficiently.
Bag or label perishables, stack boxes neatly, and relocate heavy equipment with help.
Keep a clear path to exits and drains, and set aside nonfixed racks or tools so you won’t trip or contaminate cleaned surfaces.
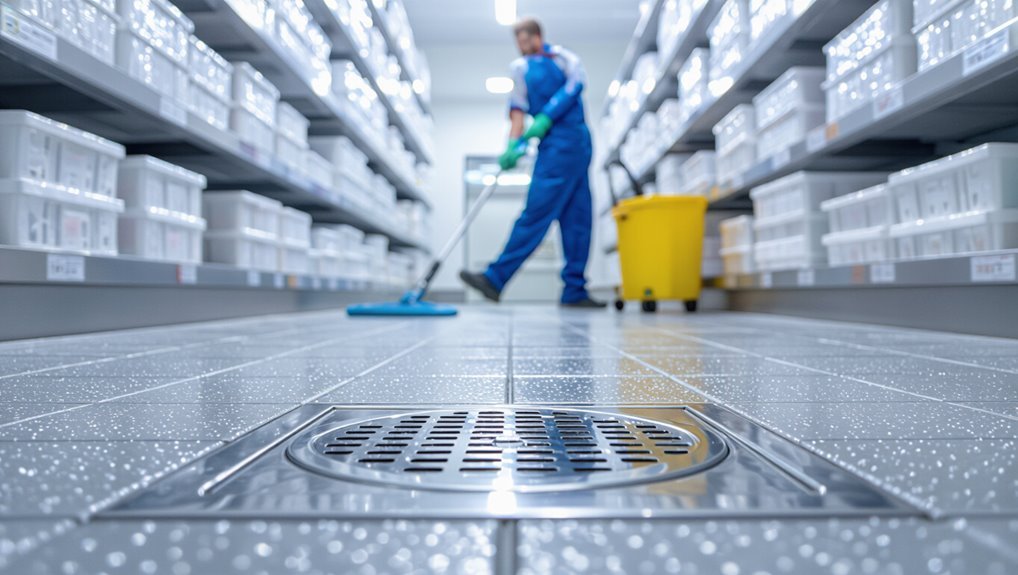
Inspect drains and repair minor issues
If you want cleaning to go smoothly, check the floor drains and nearby fittings for clogs, loose grates, and visible damage before you mop or power-wash.
Remove debris with gloves and a drain snake, clear hair and grease, tighten or replace loose grates, and seal small cracks with approved epoxy.
Note any major issues for maintenance and verify water flows freely toward drains.
Set signage and barriers to prevent entry
1 clear step: cordon off the area and post visible signs so no one accidentally walks into a wet, slippery freezer while you’re cleaning.
You’ll prevent slips and interruptions by setting barriers and clear warnings before work begins.
- Place cone or tape barriers
- Hang waterproof “Wet Floor” signs
- Lock or prop doors open safely
- Assign a watcher
- Use reflective markers
Step-by-Step Cleaning Procedure (Main How-To)
Start by lowering the temperature and allowing enough time to defrost so you can work safely and get effective cleaning results.
Sweep or vacuum dry debris, pre-rinse and flush drains, then apply the correct detergent at the recommended concentration and temperature and let it dwell.
Finish by scrubbing—use manual brushes for edges and machines for open areas—matching the method to your floor type.
Step 1 Defrosting and temperature preparation
Before you begin cleaning, you’ll need to defrost the freezer and bring the temperature up safely so surfaces are workable and ice removal is effective.
Turn off cooling, post warning signs, and move product to a temp-controlled area.
Open doors slightly for gradual thaw, monitor with a reliable thermometer, and wear insulated gloves and non-slip boots.
Collect meltwater with buckets or drains.
Step 2 Dry debris removal and sweeping technique
Once the ice’s mostly gone and the floor’s dry enough to walk on, remove loose crumbs, packaging bits, and other dry debris with a stiff-bristle broom or push broom, working from the farthest corner toward the exit so you don’t recontaminate cleaned areas.
Sweep in overlapping strokes, collect debris into dustpans, and transfer material into sealed trash bags.
Check drains and corners for remaining particles.
Step 3 Pre-rinse and drain flushing
After sweeping, give the floor a quick pre-rinse to loosen remaining residue and flush the drain lines; use a low-pressure hose or mop bucket to wet the floor from the farthest corner toward the drain so contaminants flow with the water.
Direct flow into floor drains, working methodically. Flush drain strainers, check for blockages, and remove visible debris.
Collect excess water with a squeegee toward the drain.
Step 4 Applying detergent and dwell time (concentration and temp notes)
Step 4 is where you apply the cleaning solution: dilute a food‑safe detergent to the manufacturer’s recommended concentration, warm it to around 90–110°F (32–43°C) if allowed, and spread it evenly from the farthest corner toward the drain so it can penetrate soils and flow with the rinse.
Let the detergent dwell per label instructions—typically 5–15 minutes—keeping surfaces wet but avoiding excess runoff.
Step 5 Scrubbing methods for different floor types (manual vs. machine)
With the detergent given time to loosen soils, it’s time to remove that loosened grime by scrubbing—choose the method that matches your floor type and available equipment.
For textured concrete or quarry tile, use stiff brushes or a rotary floor machine with a scrubbing pad.
For smooth epoxy, use soft-bristle brushes or a low-speed machine to avoid damage.
Scrub systematically, overlapping passes.
Step 6 Rinsing and ensuring thorough detergent removal
1 rinse pass won’t cut it—you’re aiming to remove all detergent residue to prevent slippery floors and chemical buildup.
Use multiple rinse passes with clean, warm water, moving from cleanest to dirtiest areas.
Agitate with a mop or low-speed floor machine, then extract or squeegee water toward drains.
Check for suds, repeat rinsing until water runs clear, and dry thoroughly.
Step 7 Sanitizing application and contact time
Before applying sanitizer, make certain the floor is visibly clean and the surface temperature is within the sanitizer’s recommended range so the product can work effectively.
You’ll also want to check that drains and seams are free of pooled water.
Apply the approved sanitizer evenly, follow label dilution, and guarantee full coverage.
Maintain the required contact time without disturbing the surface, then document product, concentration, and timing.
Step 8 Dehumidifying, drying, and verifying slip resistance
After the sanitizer’s contact time is complete and you’ve documented concentration and timing, start removing excess moisture to prevent ice buildup and slippery surfaces.
Use industrial dehumidifiers and fans, squeegees and wet-vacs, and low-temperature-rated drying equipment.
Monitor humidity and surface temperature, dry to a non-slip condition, and test traction with a calibrated slip meter or a controlled walk test before continuing.
Step 9 Reassembly, inspection, and safe reopening
Reinstall fixtures, shelving, and drains in the reverse order you removed them, checking each component for damage or contamination as you go; tighten fasteners to spec, reconnect utilities, and replace gaskets or seals that show wear so the freezer returns to full function and hygiene.
Inspect seams, drains, and floor coatings for defects, verify temperature and airflow, perform a final slip-resistance check, then reopen gradually with signage.
Special Scenarios and Adjustments
You’ll face a few special scenarios that need different tactics—targeted methods for heavy grease, oil, or chemical spills; safe ways to remove ice build-up without harming the floor; and careful cleaning around seams and drains.
You’ll also need to know when low-temperature sanitizers are appropriate and how to apply them effectively.
The next sections will give specific, practical steps for each situation.
Heavy grease, oil, or chemical spills targeted approach
Tackle heavy grease, oil, or chemical spills with a focused, safety-first plan: isolate the area, shut down refrigeration if needed, and put on appropriate PPE like chemical-resistant gloves, goggles, and slip-resistant boots.
Contain runoff with absorbents, neutralize chemicals per label instructions, scrape or lift congealed residues, clean with a degreaser rated for low temperatures, rinse, and dispose of wastes per regulations.
Frozen ice build-up removal without damaging flooring
After containing and removing heavy spills, you may face frozen ice buildup that needs a different, gentler approach to protect floor coatings and seams.
Chip cautiously with plastic or rubber-edged tools, never metal.
Apply warm (not hot) water or a low-temperature heat gun in short bursts to loosen ice.
Mop up melt promptly and dry surfaces to prevent refreeze and coating damage.
Cleaning around drains, floor seams, and drains
When working near drains and floor seams, move slowly and use tools that won’t push debris into openings or damage seams; a soft-bristled brush, narrow squeegee, and flexible scraper work well for loosening grime without widening joints.
Sweep loosened debris away from seams, vacuum or scoop it up, then flush with minimal warm water toward drains.
Inspect seams for gaps and report repairs promptly.
Low-temperature sanitizers and when to use them
Although many sanitizers need warm water to work best, low-temperature sanitizers let you disinfect surfaces safely when you can’t warm the wash water—like during cold snaps, in remote sites without hot water, or when thawing would harm stored product.
Use EPA- or NSF-approved cold‑temperature formulas, follow contact time instructions, apply at recommended concentrations, and rinse only if label requires.
Validate efficacy periodically with ATP or microbial swabs.
Common Mistakes and How to Avoid Them
Watch out for common errors like using the wrong chemicals or concentrations, over-wetting equipment, and skipping PPE or lockout steps.
If you don’t dry the floor properly you’ll risk ice buildup and bacterial growth.
Follow correct dilution, drying, and safety procedures to avoid these hazards.
Using wrong chemicals or concentrations
Mixing the wrong cleaners or using incorrect concentrations can damage the freezer floor, harm seals, and leave slippery residues that create safety hazards.
You should always check product labels and follow manufacturer dilution guides, test cleaners on a small area first, and avoid bleach with ammonia or acid-based products.
Use approved, food-safe formulations and calibrated dosing to protect surfaces and staff.
Inadequate drying causing ice or bacteria growth
If you don’t dry the floor thoroughly after cleaning, standing water can freeze into slick ice or seep into cracks where bacteria multiply, creating both safety and sanitation risks.
Use squeegees, industrial wet vacs, and high-airflow fans to remove moisture.
Inspect joints and drains, dry them with cloths or low-heat blowers, and recheck before restoring freezer operation to prevent hazards.
Ignoring PPE and lockout procedures
One of the biggest mistakes you can make when cleaning a walk-in freezer is skipping personal protective equipment and lockout procedures, because that’s when accidents and injuries happen fastest.
Always wear insulated gloves, non-slip boots, and eye protection.
Lock out power to doors, lights, and equipment before cleaning.
Don’t rush—verify tags and test locks to guarantee a safe work environment.
Over-wetting electrical components and equipment
Because moisture and electricity don’t mix, you shouldn’t let cleaning solutions or runoff reach outlets, motors, thermostats, or control panels.
Cover or isolate electrical gear, use drip pans, and route wastewater away. Turn power off and tag locked components before cleaning.
Use damp—not soaking—cloths and low-pressure rinses. Inspect seals and dry components thoroughly before restoring power to prevent shorts and corrosion.
Prevention and Best Practices
Set up clear daily, weekly, and monthly cleaning schedules so you’ll keep the floor safe and prevent heavy build-up.
Use simple maintenance steps and train staff with an SOP checklist to cut down on big cleanings.
Keep records, run regular audits, and verify completion to prove the job’s done right.
Daily, weekly, and monthly cleaning schedules
When you follow a clear daily, weekly, and monthly cleaning schedule, you’ll prevent grime buildup, reduce safety risks, and keep your walk-in running efficiently.
You should:
- Sweep and spot-mop daily for spills and debris.
- Sanitize high-traffic zones weekly.
- Deep-clean drains and corners weekly.
- Inspect seals and gaskets monthly.
- Schedule a thorough monthly floor scrub and rinse.
Stick to logs and adjust as needed.
Maintenance tips to reduce heavy-cleaning frequency
Keeping up with daily, weekly, and monthly tasks will cut down on heavy cleanings, but proactive maintenance habits will do even more to prevent buildup and extend the time between deep scrubs.
Inspect seals and door sweeps regularly, fix leaks immediately, use mats to trap debris, schedule defrosts, keep drains clear, and rotate stock to avoid spills.
Monitor humidity and temperature consistently.
Staff training and standard operating procedures (SOP) checklist
Although preventing messes starts with good habits, training your team and having clear SOPs makes those habits consistent and reliable.
You’ll teach proper spill response, safe chemical use, PPE, de-icing and floor-drying steps, equipment handling, and lockout/tagout for refrigeration.
Provide hands-on demos, quick-reference checklists, competency checks, and refresher sessions so everyone follows the same safe, efficient cleaning routine.
Record-keeping, audits, and verification methods
Because audits and records turn routine cleaning into verifiable safety, you should document every step of your walk-in freezer floor program—who cleaned, when, what products and concentrations were used, temperatures, and any incidents or corrective actions.
Use checklists, timestamped logs, and photos.
Schedule regular internal audits, keep records accessible for inspectors, and verify corrective actions with follow-up checks to close the loop.
Cost, Time, and Resource Considerations
You’ll want to budget for both labor and supplies—expect a small walk-in to run $50–$150 per clean and a large unit $200–$600 depending on local labor rates and materials.
Decide how often to clean versus how deep each session should be, since more frequent light cleanings save time and effort compared with infrequent intensive jobs.
Factor in staffing availability and any downtime costs so you can choose the most efficient balance for your operation.
Approximate labor and supply cost estimates for small/large freezers
Estimating labor and supply costs for cleaning a walk-in freezer starts with sizing the job: a small unit (up to 200 sq ft) typically takes 1–2 hours and one cleaner, while a large unit (500+ sq ft) can take 3–6 hours and two people.
Plan supply costs from $15–$50 for a small job to $50–$150 for a large one depending on cleaners, degreasers, floor sealant, and disposable PPE.
For budgeting, expect labor rates of $20–$40/hour per person; factor travel, disposal fees, and occasional equipment rental.
Time-saving trade-offs: frequency vs. intensity of cleaning
Having sized the job and budgeted for labor and supplies, you’ll face a key scheduling choice: clean more often with lighter effort, or less frequently with deeper, more time-consuming scrubs. You’ll balance downtime, labor cost, and sanitation risk; frequent quick cleans reduce buildup, while infrequent deep cleans cut routine labor but demand longer closures.
| Option | Impact |
|---|---|
| Daily light | Low downtime |
| Weekly deep | Higher closure |
| Hybrid | Balanced cost |
| Emergency | High labor |
Tools and Chemicals Comparison
Now you’ll compare common cleaners and sanitizers by effectiveness, safety, and cost so you can pick what works for your walk-in.
You’ll also weigh equipment choices—from hand tools to scrubbers to floor machines—to match the job size and your budget.
This comparison will help you choose combinations that clean well without damaging floors or raising costs.
Comparison of common cleaners and sanitizers (effectiveness, safety, cost)
Because floors in walk-in freezers face unique cold, moisture, and food-safety challenges, you’ll want cleaners and sanitizers that balance effectiveness, worker safety, and cost. Choose per soil type, temperature, and dwell time; always follow label instructions and PPE.
| Cleaner/Sanitizer | Notes |
|---|---|
| Quaternary ammonium | Good low-temp sanitizer, mild cost |
| Chlorine bleach | Potent, corrosive, short-lived |
| Enzymatic cleaner | Breaks organic soils, safer |
| Alcohol-based | Fast-drying, flammable |
| pH-neutral detergent | Gentle, everyday cleaning |
Comparison of equipment options (hand tools vs. scrubbers vs. floor machines)
When you pick tools for a walk-in freezer floor, match the equipment to soil type, space constraints, and your crew’s size and training; hand tools give control in tight spots, battery scrubbers speed large areas, and industrial floor machines handle heavy build-up but need more room and maintenance.
Choose hand tools for precision and low cost, scrubbers for balance of speed and maneuverability, and machines for stubborn residue.
##
I don’t see a subtopic listed—please tell me which specific aspect of cleaning a walk-in freezer floor you want covered (e.g., removing ice buildup, disinfecting after spills, choosing the right cleaning solutions, floor safety and signage), and I’ll write the first paragraph right away.
| Cold | Quiet | Risk |
|---|---|---|
| Slick | Isolating | Urgent |
| Stubborn | Careful | Reassure |
| Clean | Confident | Safe |
Frequently Asked Questions (FAQ)
You’ll find quick answers here to common concerns like how often to deep-clean, whether bleach is safe to use, and how to stop ice from forming after cleaning.
You’ll also learn which sanitizers are safest for food-contact floors and how long the area should stay closed after sanitizing.
Use these FAQs to keep your walk-in both sanitary and operational.
How often should I deep-clean a walk-in freezer floor?
Because the floor endures constant traffic, spills, and frost buildup, you should deep-clean a walk-in freezer floor at regular intervals to keep it sanitary and safe.
Aim for a thorough deep clean monthly in high-use operations and every 2–3 months for light use.
Inspect weekly for buildup and spot-clean as needed, and increase frequency after spills, pest sightings, or health inspections.
Can I use bleach in a walk-in freezer?
Wondering whether bleach is safe to use in your walk-in freezer? You can use diluted bleach for disinfecting hard, nonporous floors, but avoid puddles and prolonged contact that can corrode metal or damage seals.
Rinse thoroughly with clean water to remove residue, ventilate while working, and never mix bleach with ammonia or other cleaners.
Test a small area first.
How do I prevent ice from forming after cleaning?
After rinsing bleach and other cleaners thoroughly, take steps to stop water from freezing back into ice on the floor.
Wipe and squeegee surfaces dry, use absorbent mops or towels, and remove standing water with a wet/dry vacuum.
Improve air circulation with fans, briefly raise the thermostat if possible, and keep traffic minimal until the floor is completely dry to prevent refreeze.
What is the safest sanitizer for food-contact floors?
Which sanitizers are safest for food-contact floors depends on your facility’s needs and the products’ approvals.
Choose EPA-registered or FDA-accepted sanitizers labeled for food-contact surfaces, like quaternary ammonium compounds or peracetic acid, and follow dilution and contact-time instructions.
Verify compatibility with freezer temperatures and flooring materials, and keep records of product use, concentrations, and employee training to guarantee consistent, safe application.
How long should the floor remain closed after sanitizing?
Because sanitizers need time to work and to dry, keep the floor closed for the full contact time specified on the product label plus any additional drying time recommended for your floor material and temperature conditions.
Generally, that means waiting at least 15–60 minutes, longer in colder or more humid freezers.
You’ll also ventilate, verify dryness, and only allow traffic once surfaces are non-slippery and residue-free.