What Is Underlayment for Laminate Floors and Do You Really Need It?
You’ll usually need underlayment under laminate floors because it cushions impacts, reduces noise, evens minor subfloor flaws, and blocks moisture that can warp boards or cause mold. Some smooth, dry subfloors or existing resilient floors may allow skipping it if the manufacturer permits, but doing so can void warranties. Choose materials (foam, cork, felt) based on sound, moisture resistance, and cost. Keep following sections for practical selection, installation, and maintenance tips to help you decide.
Quick Answer Do You Need Underlayment for Laminate Floors?
Yes — you usually need underlayment for laminate floors.
It’s required when your subfloor is uneven, you need moisture protection, or the manufacturer specifies it; it’s optional if your subfloor is smooth, dry, and the flooring is approved for direct install.
Check the flooring manufacturer’s instructions to be sure you meet warranty and performance requirements.
Short direct answer
you usually do need underlayment for laminate floors—it’s required for moisture protection, sound reduction, and to help the floating floor perform properly.
In short: underlayment for laminate floors is a thin layer that cushions, evens minor subfloor imperfections, blocks moisture, and reduces noise.
You should install it unless manufacturer or subfloor conditions explicitly state it’s unnecessary.
One-sentence summary of when it’s required vs optional
While some manufacturers and perfectly flat, dry subfloors let you skip it, underlayment is required whenever moisture protection, sound reduction, or leveling are needed—otherwise it’s optional if the floor maker explicitly says the laminate has built-in underlayment and your subfloor meets their specs.
You should follow manufacturer instructions, inspect for moisture or unevenness, and add underlayment whenever warranty, acoustics, or comfort matter.
What Is Laminate Underlayment?
Laminate underlayment is a thin layer you put between the subfloor and the laminate to cushion the floor, reduce noise, and provide moisture protection.
It comes in materials like foam, cork, felt, or combinations that blend sound control and moisture barriers.
Typical thicknesses range from about 1mm to 6mm, with higher compressive strength needed under heavy traffic or floating installations.
Definition and core functions
Underlayment is the thin layer you lay between your subfloor and laminate planks to improve performance and longevity.
It cushions impact, reduces noise, evens minor subfloor imperfections, and provides a moisture barrier where needed.
You’ll get better under-foot comfort, extend plank life by lowering stress on joints, and prevent moisture-related warping when you choose and install appropriate underlayment.
Common materials (foam, cork, felt, combination)
Now that you understand what underlayment does, you’ll want to know which materials are available and how they differ.
- Foam: lightweight, inexpensive, basic moisture and sound control.
- Cork: natural, durable, better sound dampening and thermal properties.
- Felt: dense, excellent noise reduction, often recycled fibers.
- Combination: layers combining foam, vapor barrier, or cork for balanced performance.
Typical thicknesses and compressive properties
Most underlayments come in thicknesses between 1mm and 6mm, and that range affects comfort, leveling, and durability.
You’ll choose thinner 1–2mm products for minimal height addition and firmer support, while 3–6mm options add cushioning and help hide minor subfloor imperfections.
Check compressive strength (kg/cm² or psi); higher values resist indentation under heavy furniture and traffic.
Why Underlayment Matters Benefits Explained
You’ll notice underlayment does a lot more than sit under your floor: it blocks moisture, reduces sound, and gives the planks a bit of cushioning for comfort and stability.
It also adds a layer of thermal insulation that can lower energy loss and helps smooth out minor subfloor imperfections for a flatter finish.
Understanding these benefits helps you pick the right underlayment for your room’s needs.
Moisture protection and vapor barrier functions
Because moisture can quietly ruin a laminate floor from below, a proper underlayment works as your first line of defense, blocking ground dampness and limiting vapor transmission through the subfloor.
You’ll prevent cupping, warping, and mold growth by choosing an underlayment with a reliable vapor barrier or compatible polyethylene film.
Install seams tightly and tape edges to maintain continuous protection.
Sound reduction and acoustics

When you walk across laminate, the underlayment quietly controls how much noise reaches the rooms below and how lively the space sounds, so picking the right pad matters more than it seems.
You’ll notice less footfall, hollow echoes and impact transfer with denser or specialized acoustic pads.
Choose materials and thickness rated for your building’s noise requirements to meet local regulations and neighbor comfort.
Cushioning, comfort, and plank stability
Comfort starts beneath your feet: underlayment softens each step, reduces fatigue, and keeps planks from feeling brittle or hollow.
You’ll get a slightly sprung surface that improves walking comfort and reduces joint strain.
It also evens minor subfloor irregularities, helping locking joints seat correctly and preventing plank movement, squeaks, and premature wear so your floor stays stable and feels solid underfoot.
Thermal insulation and energy impact
If you want a warmer floor and lower energy bills, the right underlayment can make a noticeable difference by adding a thermal barrier between the subfloor and your living space.
You’ll reduce heat loss through cold concrete or joists, improving comfort and cutting HVAC runtimes.
Choose materials with higher R-values for colder climates, and remember proper installation guarantees consistent performance and energy savings.
Subfloor leveling and minor imperfection compensation
Because even small dips or bumps in your subfloor can telegraph through laminate, a quality underlayment smooths out minor imperfections so your floor looks and performs better.
It fills tiny gaps, evens slight height differences, and prevents stress on plank joints. You’ll reduce squeaks, prolong laminate life, and avoid costly repairs—especially important on older or uneven subfloors.
When Underlayment Is Required vs Optional
You’ll need underlayment when the laminate manufacturer or certain subfloor types—like concrete or uneven plywood—require it for moisture control, support, or sound reduction.
In some cases, such as smooth, flat plywood or when the laminate has an integrated pad, you can skip extra underlayment.
Check local building codes and your flooring warranty before deciding, since they can mandate underlayment and void coverage if you don’t follow them.
Scenarios where underlayment is mandatory (manufacturer/subfloor types)
When a manufacturer specifies underlayment, follow that requirement—doing otherwise can void warranties and cause performance issues.
You must use underlayment on uneven subfloors like concrete, OSB with gaps, or radiant-heated systems that mandate vapor barriers.
Also install it when instructions call for soundproofing, moisture protection, or height adjustments to meet door clearances.
Ignore shortcuts—manufacturer specs guide longevity and warranty coverage.
Situations where you can skip underlayment
Although many installs call for underlayment, you can skip it in clear-cut cases where the subfloor is flat, dry, and matches the manufacturer’s requirements—like smooth, level plywood or tongue-and-groove OSB with no gaps and no moisture issues.
You can also omit underlayment over existing resilient flooring if it’s firmly adhered and even, and when floating-plank systems permit a direct install per product guidance.
Local building codes and warranty considerations
Even if your subfloor meets the practical conditions for skipping underlayment, local building codes and manufacturer warranties can still require it.
Check codes and warranty terms before you install. If a code mandates moisture barriers, sound control, or fire ratings, you must comply.
Ignoring warranty requirements can void coverage for damage or installation defects, so document compliance and get written clarification when in doubt.
How to Choose the Right Underlayment (Step-by-Step)
Start by identifying your subfloor—concrete, plywood, or existing flooring—so you know what performance you need.
Then check your laminate maker’s requirements and warranty, match underlayment properties (moisture control, sound reduction, thickness) to those needs, and compare materials for price versus performance.
Finally, decide whether you need a separate vapor barrier or a combination product that includes one.
Step 1 Assess your subfloor type (concrete, plywood, existing flooring)
Step 1 is to identify what kind of subfloor you’re working with—concrete, plywood, or an existing floor—because that choice determines the underlayment properties you’ll need.
For concrete, pick a moisture barrier and vapor-resistant underlayment.
For plywood, focus on sound control and slight cushioning.
Over existing vinyl or tile, guarantee flatness and consider a thin isolating underlayment to prevent telegraphing and moisture issues.
Step 2 Check laminate manufacturer requirements and warranty
Once you’ve identified your subfloor type, check your laminate manufacturer’s underlayment requirements and warranty rules before buying anything.
You must follow specified materials, vapor barriers, and installation methods to keep the warranty valid. If the manufacturer mandates a specific foam, cork, or composite underlayment or an added moisture barrier, use it.
Document compliance with receipts and photos for future claims.
Step 3 Match underlayment properties to needs (moisture, sound, thickness)
Because different underlayments address distinct problems, you’ll want to match their moisture resistance, sound control, and thickness to your specific subfloor and room needs.
Choose a vapor barrier for concrete or damp areas, higher-density foam or cork for noise reduction, and the thickness that compensates subfloor imperfections without breaking manufacturer tolerances.
Balance comfort, sound, and moisture protection.
Step 4 Compare materials and price-performance
As you narrow choices, weigh material properties against cost so you get the best value for your situation. Compare durability, sound reduction, and installation ease versus price; prioritize what matters most for your room. Use the table to clarify options.
| Material | Typical Benefit |
|---|---|
| Foam | Cheap, easy |
| Cork | Sound, eco |
| Rubber | Durability |
| Felt | Comfort |
| Combination | Multi-use |
Step 5 Select vapor barrier or combination products
Step 5 is where you decide whether you need a dedicated vapor barrier or a combination underlayment that includes one—your choice will depend on the subfloor type, moisture risk, and warranty requirements.
Inspect moisture levels, follow manufacturer specs, and pick a product rated for your conditions.
Combination rolls save time and offer cushion, but separate barriers let you address high-moisture slabs more reliably.
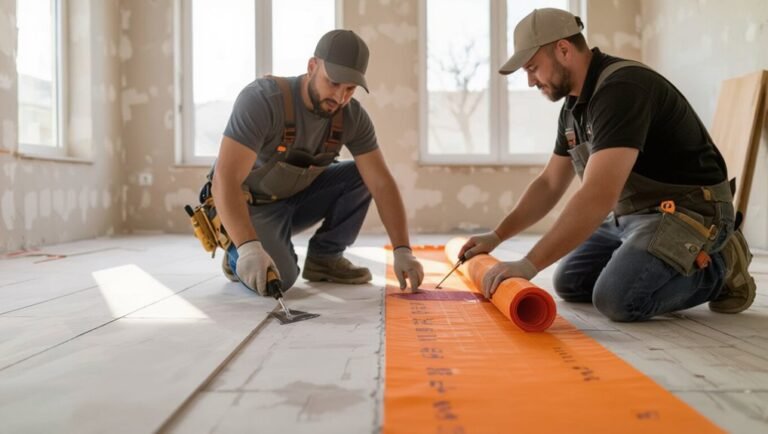
Installation Overview and Best Practices (How-To Summary)
Before you start, check and prep the subfloor for level, dryness, and cleanliness so the underlayment lays flat and performs correctly.
Roll out and secure underlayment with proper seam overlaps and tape, minding changes, thresholds, and required expansion gaps, and follow special instructions when working over radiant heat.
Gather the right tools and materials—utility knife, tape, straightedge, spacers, and any manufacturer-specified accessories—so the job goes smoothly.
Pre-install checks and subfloor preparation
Once you’ve chosen the right underlayment, check the room and subfloor thoroughly so the installation goes smoothly.
- Remove trim, doors, and fixtures that block flooring.
- Clean debris, nails, and adhesive residue; vacuum thoroughly.
- Verify subfloor is level within manufacturer tolerance; sand high spots, fill low spots.
- Confirm moisture levels with a meter; address dampness or vapor barriers before laying underlayment.
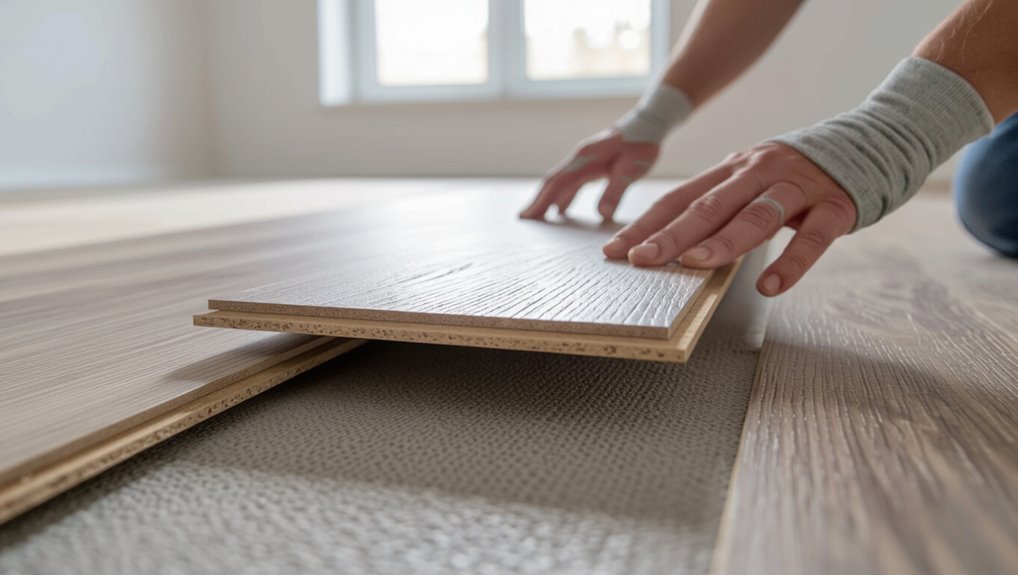
Laying underlayment: seams, overlaps, and taping
1. Lay rolls parallel to flooring direction, butted tightly. Stagger end joints across rows, not aligned.
Overlap foam edges only if manufacturer permits; otherwise butt seams and tape with recommended underlayment tape. Smooth wrinkles, trim excess at walls, and tape seams to create a continuous vapor barrier when instructed.
Work steadily, keeping seams flat so laminate clicks together without gaps.
Handling transitions, thresholds, and expansion gaps
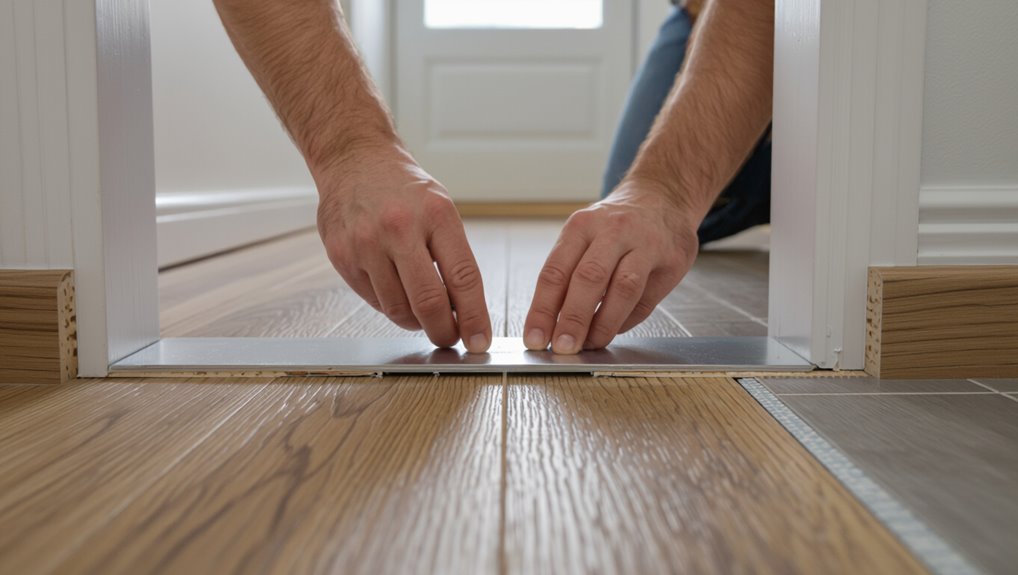
When you reach doorways, room joins, or changes in subfloor height, plan for proper connections and generous expansion gaps so the laminate can move without buckling; choose thresholds and connection strips that match floor height and traffic needs, and set gap widths per the manufacturer’s spec (typically 1/4″–3/8″ at walls and 1/4″–1/2″ at long runs or sunlit areas).
Use junction profiles for height differences, secure but don’t fasten flooring through the gap, and cover gaps with trim or thresholds that allow easy removal for repairs.
Installing underlayment over radiant heat systems
If your home uses a radiant heat system, choose and install underlayment that’s compatible with the heat source and rated for the laminate you’ll lay over it; improper underlayment can trap heat, reduce efficiency, or damage the flooring.
Check manufacturer specs for max surface temperature, use thin, vapor-permeable products designed for radiant heat, avoid insulation layers that block heat, and maintain expansion gaps.
Common tools and materials needed
Tools and materials set the stage for a smooth underlayment install, and you’ll want to gather them before you start: utility knife, straightedge, measuring tape, chalk line, seam tape, underlayment rolls or foam, vapor barrier if needed, adhesive or double-sided tape, spacers, and a roller or weighted board to smooth seams.
Also have knee pads, safety glasses, and a broom for prep.
Comparison: Popular Underlayment Types
Now you’ll compare common underlayments so you can pick the best fit for your laminate.
I’ll cover foam, cork, felt/fiber, rubber and acoustic options, plus vapor-barrier and combo products, noting key pros and cons of each.
Foam underlayment pros and cons
Foam underlayment is one of the most common choices for laminate floors because it’s lightweight, inexpensive, and easy to install—you’ll often just roll it out and snap boards over it. It cushions, reduces minor subfloor imperfections, and lowers sound, but it’s less durable and offers limited moisture protection. Pick foam for budget installs; avoid high-moisture areas.
| Feature | Benefit | Drawback |
|---|---|---|
| Cost | Low | Less durable |
| Sound | Improves | Limited moisture protection |
| Install | Easy | Thin cushioning |
Cork underlayment pros and cons
If you liked foam for its price and ease but want better durability and natural sound control, cork is worth a look. You’ll get natural cushioning, moisture resistance, and eco-friendly credentials, but it costs more and can compress under heavy furniture. Consider longevity versus price for your space.
| Texture | Sound | Cost |
|---|---|---|
| Dense | Dampens well | Higher |
| Natural | Warm | Durable |
Felt/fiber underlayment pros and cons
Though less flashy than cork or foam, felt/fiber underlayment gives you reliable thickness, excellent sound absorption, and strong moisture-wicking properties, making it a go-to for high-traffic areas and multi-story homes. It’s durable, compresses less, and suits laminate over uneven subfloors, though it can be thicker and pricier than basic foam.
| Advantage | Drawback |
|---|---|
| Sound reduction | Higher cost |
| Moisture wick | Thicker |
| Durability | Heavier |
| Stable support | Limited insulation |
| Good for stairs | Installation effort |
Rubber and specialty acoustic underlayments pros and cons
Felt and fiber underlayments excel at durability and moisture control, but when you need top-tier sound isolation or thinner profiles with high performance, rubber and specialty acoustic underlayments offer different strengths. You’ll get superior impact noise reduction and longevity, but pay more and handle heavier material.
| Pro | Con |
|---|---|
| Excellent sound dampening | Higher cost |
| Thin, high-performance options | Dense, heavier installation |
Vapor barrier and combination products when to use
When moisture is a concern—or you’re installing over a concrete slab—choose an underlayment with a built-in vapor barrier or a dedicated vapor layer to protect your laminate from dampness and adhesive failure.
You’ll use combination underlayments when you need sound reduction, thermal insulation, and moisture protection in one product.
Always verify compatibility with your laminate manufacturer and seal seams for an effective vapor barrier.
Common Mistakes and Problems to Avoid
Don’t skip manufacturer specs or local codes—you’ll void warranties and create safety risks.
Make sure you pick the correct thickness and compressive strength, seal seams to prevent moisture, and never install over uneven or contaminated subfloors.
Also follow special handling rules for radiant-heat installations to avoid warping or failure.
Skipping manufacturer or code requirements
Because manufacturers and building codes set specific underlayment and installation requirements to protect your warranty, safety, and the floor’s performance, skipping them can lead to costly problems and denied claims.
If you ignore specs or local codes, insurers or manufacturers may refuse coverage. Follow required materials, vapor barriers, and fastening methods so your warranty stays valid and inspections pass without surprises.
Using wrong thickness or compressive strength
If you pick underlayment that’s too thick or too soft, your laminate can feel spongy, click, or even buckle over time.
You should match thickness and compressive strength to the flooring and traffic load.
Too thin offers poor sound control and instability; too soft compresses under furniture.
Check manufacturer specs and test a small area so your floor stays stable, responsive, and durable.
Poor seam sealing and moisture ingress
When you leave underlayment seams unsealed or use the wrong tape, moisture can creep up from subfloors and edges, causing swelling, mold, and delamination of your laminate.
You should seal seams with compatible vapor barrier tape, overlap edges per manufacturer instructions, and inspect penetrations.
Don’t ignore perimeter gaps or compromised seams—fix them promptly to protect flooring integrity and indoor air quality.
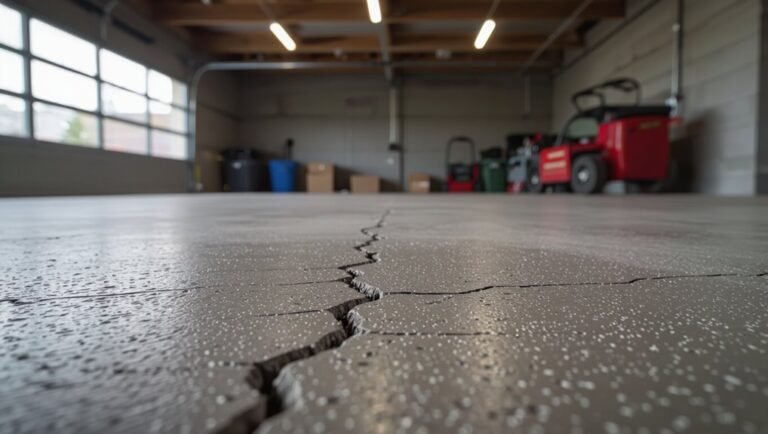
Installing over uneven or contaminated subfloors
Although you might be tempted to lay underlayment over a “good enough” subfloor, doing so over uneven or contaminated surfaces invites squeaks, premature wear, and bonding failures.
You should always clean, level, and repair subfloors first. Remove debris, adhesive residue, and moisture sources, then sand high spots and fill low areas.
Proper prep prevents movement, gaps, and costly warranty voids.
Incorrect handling with radiant floor heating
Having prepped the subfloor properly, you still need to handle radiant floor heating with care—mistakes here can warp laminate, void warranties, and create hot spots.
Use underlayment rated for radiant systems, follow manufacturer temperature limits, and allow expansion gaps.
Don’t place insulation that traps heat or exceed recommended surface temps.
Test the system gradually and document settings for warranty claims.
Maintenance, Longevity, and When to Replace Underlayment
Watch for sagging, persistent creaks, damp spots, or uneven seams—those are clear signs your underlayment has failed and needs replacing.
Your choice and condition of underlayment directly affect how long laminate lasts by controlling moisture, cushioning, and stability.
When revitalizing flooring, you can sometimes reuse underlayment if it’s clean, dry, and undamaged, but most installs benefit from new underlayment to guarantee peak performance.
Signs underlayment has failed or needs replacement
When your laminate starts creaking, buckling, or transmitting unusual hollow sounds, it’s a clear sign the underlayment isn’t doing its job and needs inspection or replacement.
Check for damp spots, mold, or mildew, uneven seams, visible compression, or sagging under panels.
You’ll also notice increased cold, drafts, or shifting boards.
Replace underlayment if repairs don’t stop movement or moisture damage.
How underlayment affects laminate lifespan
Because the underlayment sits directly beneath your laminate, it strongly influences wear, comfort, and moisture protection over time; choose the right type and keep it in good condition, and your floor will resist squeaks, edge swelling, and premature surface wear.
Regularly inspect for compression, tears, or mold; replace damaged underlayment to prevent accelerated plank wear, uneven settling, and reduced warranty coverage.
Reusing underlayment during a flooring refresh
If your laminate needs a refresh, you’ll want to inspect the existing underlayment before reinstalling new planks.
Check for compression, moisture damage, mold, and seam integrity. If it’s flat, dry, and intact, you can reuse it to save time and cost.
Replace underlayment that’s crushed, stained, or smells; compromised pads shorten laminate life and void some warranties.
Cost Considerations and Value Analysis
You’ll want to weigh typical price ranges for foam, cork, rubber, and felt underlayments against the benefits each provides.
Consider how improved sound proofing, comfort, and warranty requirements can justify higher upfront costs.
Also factor in whether you’ll DIY or hire a pro, since labor and prep can considerably change the overall price.
Typical price ranges by material
When comparing underlayment options, expect prices to vary from about $0.20 to over $2.50 per square foot depending on material and performance—basic foam sits at the low end, cork and rubber run midrange, and premium insulated or sound-reducing underlays cost the most. Choose based on budget and needs.
| Material | Price/ft² | Notes |
|---|---|---|
| Foam | $0.20–0.40 | Economical |
| Felt | $0.30–0.60 | Moisture control |
| Cork | $0.80–1.50 | Durable |
| Rubber | $1.00–2.00 | Sound reduction |
Cost vs benefit: sound, comfort, warranty protection
Because underlayment affects much more than just floor feel, weigh its upfront cost against real benefits like noise reduction, walking comfort, and keeping your laminate warranty intact.
You’ll save on noise complaints, reduce fatigue from hard floors, and avoid voiding warranties that often require specific underlayment types.
Choose quality that matches your priorities—sound control, cushioning, or manufacturer requirements—to maximize long-term value.
DIY vs professional installation cost factors
If you’re weighing DIY vs. professional installation, focus on labor, time, and risk—DIY saves on labor costs but can add hours and potential mistakes, while pros charge more up front yet cut installation time and errors.
You’ll pay for tools, underlayment quality, and disposal; pros may bundle materials and warranty.
Choose DIY if confident and time-rich; hire pros for speed and guaranteed results.
Tips and Best Practices (Checklist)
Before you buy underlayment, run through a quick checklist: room moisture levels, flooring type compatibility, thickness, and any needed vapor barrier.
Use time-saving installation shortcuts—like pre-cutting pieces and working in sections—that don’t compress or gap the underlayment.
Finally, follow manufacturer prep and fastening guidelines closely so you don’t void warranty coverage.
Quick checklist before buying underlayment
When you’re ready to buy underlayment, check a few key things to make sure it suits your laminate, subfloor, and lifestyle:
- Thickness and compressive strength match your laminate specs.
- Vapor barrier needed for moisture-prone subfloors or basements.
- Acoustic and thermal ratings for sound control and comfort.
- Compatibility with radiant heat, adhesive, and local building codes.
Installation shortcuts that don’t compromise performance
Although you’ll be tempted to rush, smart shortcuts save time without cutting performance — focus on prepping a clean, level subfloor, roll out the underlayment seam-side down, and overlap or tape seams only as the manufacturer recommends so your vapor barrier and sound control stay effective.
Trim edges neatly, stagger underlayment joints with plank seams, use a straightedge for cuts, and keep the room temperature stable.
How to preserve warranty coverage
To keep your laminate floor warranty intact, follow the manufacturer’s installation and maintenance instructions exactly, use approved underlayment and adhesives, and document every step with photos and receipts.
Keep records of purchases, installer certifications, and inspection reports.
Use specified expansion gaps, recommended cleaners, and climate controls.
Report issues promptly, avoid unauthorized repairs, and get written approvals for any deviations to preserve coverage.
FAQ Common Questions About Underlayment for Laminate Floors
You’ll have common questions when choosing underlayment, like whether you can lay laminate directly on concrete or use carpet padding instead.
You’ll also want to know if underlayment affects how the floor feels, prevents mold and mildew, or what thickness works over radiant heat.
Let’s answer those points clearly so you can pick the right underlayment for your project.
Can I install laminate directly on concrete without underlayment?
Can you lay laminate straight on concrete? Yes, but only if the slab is dry, level, clean, and smooth.
Without underlayment you risk moisture transfer, cold floors, sound issues, and reduced warranty coverage.
Use a moisture barrier or vapor-retarding underlayment when concrete might emit dampness.
Follow manufacturer specs—some laminates require specific underlayments for performance and warranty protection.
Will underlayment make my floor feel softer or less stable?
Wondering whether underlayment will make your laminate feel spongy or unstable? Proper underlayment adds a slight cushion for comfort and sound reduction but won’t make floors feel unstable if you pick the right type and thickness for laminate.
Too-thick or compressible options can cause movement; choose manufacturer-recommended foam or cork underlayment to maintain firmness while improving comfort and acoustics.
Does underlayment prevent mold and mildew?
How well an underlayment prevents mold and mildew depends on its material and moisture-management features.
You’ll want a moisture-resistant or vapor-barrier underlayment in damp areas; it blocks ground or subfloor moisture from reaching the laminate.
Proper installation and drying control are essential — underlayment helps, but it isn’t a cure if you already have leaks, high humidity, or poor ventilation.
Can I use carpet padding as laminate underlayment?
Curious whether you can save money by using carpet padding under laminate? You can, but it’s usually a bad idea.
Carpet padding compresses, lacks vapor barrier consistency, and can void laminate warranties.
Use underlayment designed for laminate to guarantee moisture protection, sound control, and stable support.
If you consider padding, confirm manufacturer approval and use a suitable moisture barrier beneath it.
How thick should underlayment be for laminate over radiant heat?
Want your radiant heat to work efficiently without damaging the laminate? Choose underlayment 2mm to 3mm thick with high thermal conductivity and a compatible vapor barrier.
Thinner options transfer heat better; thicker ones insulate too much. Always follow the laminate and heating manufacturer’s specs and verify the underlayment is rated for radiant systems to maintain warranty and performance.