How to Install Deck Tiles: The Easiest Way to Upgrade Your Outdoor Space
You can transform your patio or balcony in a weekend by installing interlocking deck tiles that snap together for a quick, durable upgrade. Start by measuring and cleaning the surface, fix any damage, and guarantee proper drainage and slope. Dry‑lay tiles to plan seams, cut edge pieces to fit, then connect or fasten per the manufacturer’s instructions. Finish edges and seal or oil wood tiles as needed, and keep up regular cleaning; keep going to learn detailed steps and tips.
How to Install Deck Tiles Quick Answer and Overview
You can often install interlocking deck tiles in a weekend with basic tools and a bit of planning.
Start by preparing the surface, lay tiles from a corner, secure edges, and finish with trim or sealant.
This quick guide is for DIY beginners, renters looking for a nonpermanent upgrade, and pros who want a fast solution.
One-sentence quick answer: installing deck tiles in a weekend
Finish a dozen or so interlocking or snap-together deck tiles and you’ll have a new surface by Sunday: with basic tools, a clean level substrate, and a few hours of straightforward cutting and fitting, most DIYers can install a small to medium deck in a weekend.
If you want to know how to install deck tiles quickly, plan layout, gather tools, and work methodically.
Summary of steps (prepare, lay, secure, finish)
If a weekend install sounds doable, here’s the practical roadmap to get it done: prepare the subfloor (clean, level, and add underlayment or spacing clips as needed), lay tiles from a planned starting point and stagger seams for strength, secure edges and cut tiles to fit around obstacles, and finish with trim, sealant, or a protective oil depending on the material.
- Clear and measure precisely
- Dry-fit layout
- Fasten edges and trims
- Seal and inspect
Who this guide is for (DIY beginners, renters, pros)
Whether you’re a DIY beginner tackling a weekend project, a renter wanting a temporary upgrade, or a pro looking for a fast-install solution, this guide gives clear, practical steps and honest expectations so you can decide if deck tiles fit your skill level, timeline, and space.
You’ll find tool lists, surface checks, quick tips for renters, and time-saving tricks for experienced installers.
What Are Deck Tiles and Why Use Them
Deck tiles are modular squares you can snap or lay down in wood, composite, rubber, stone, or interlocking plastic varieties to change the look and feel of a surface without rebuilding a deck.
You’ll often choose them because they’re cheaper, faster to install, and portable compared with traditional decking. They’re great for patios, balconies, and temporary setups, though they may not match the longevity or structural options of full deck construction.
Types of deck tiles (wood, composite, rubber, stone, interlocking)
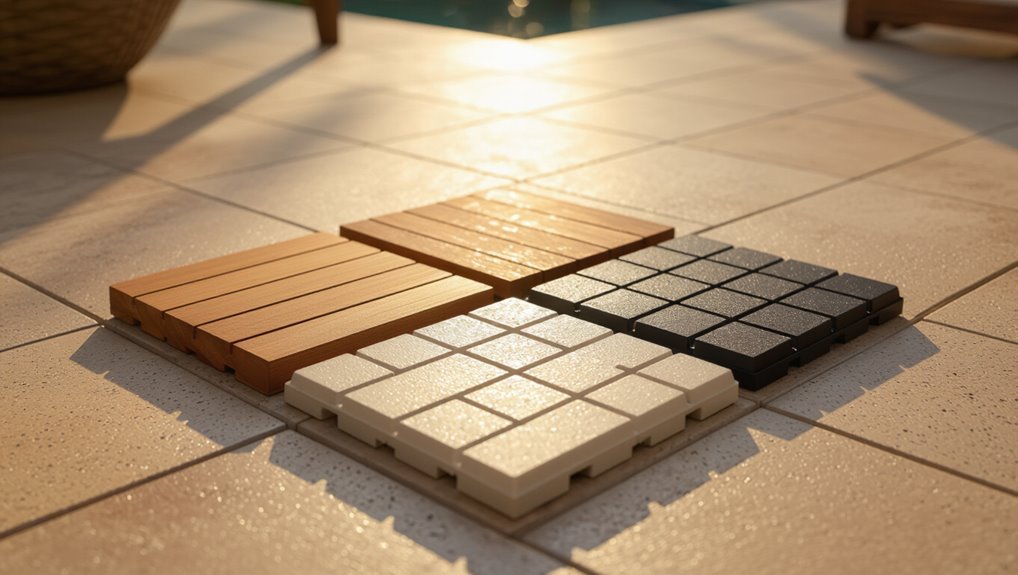
When choosing tiles for your outdoor space, you’ll find options that suit different budgets, maintenance levels, and looks—from warm wood and low-upkeep composites to cushioned rubber, natural stone, and easy-click interlocking systems.
You’ll pick based on feel, durability, slip resistance, and style.
Consider these quick distinctions:
- Wood: classic, needs sealing.
- Composite: low maintenance.
- Rubber: soft, slip-resistant.
- Stone: durable, upscale.
Benefits of deck tiles vs traditional decking (cost, install time, portability)
Think of deck tiles as a quick, budget-friendly way to get a finished outdoor floor without the time and permanence of traditional decking. You’ll spend less, install in hours not days, and move or replace tiles easily. They’re ideal for rentals, balconies, and DIY upgrades.
| Benefit | Quick takeaway |
|---|---|
| Cost | Lower materials/labor |
| Time | Fast install |
| Portability | Reusable |
| Flexibility | Easy changes |
Common use cases and limitations
Although they look like miniature floors, deck tiles are modular panels—usually wood, composite, or interlocking plastic—that snap or float over an existing surface so you can create a finished outdoor floor without rebuilding a deck.
You’ll use them on balconies, patios, rooftop terraces, or temporary event floors. They’re quick, portable, and low-maintenance but aren’t ideal for structural repairs, steep slopes, or long-term heavy-traffic areas.
Tools, Materials, and Cost Estimates
Before you start, gather the essentials: a measuring tape, spacer clips, a rubber mallet, a saw for trimming, and any fasteners or adhesive your tile type requires.
You can also use optional tools like a power saw, table saw, or rubberized roller to speed the job and get more professional edges.
Below I’ll outline typical material costs and time estimates per square foot and for whole projects so you can budget accurately.
Essential tools and supplies checklist
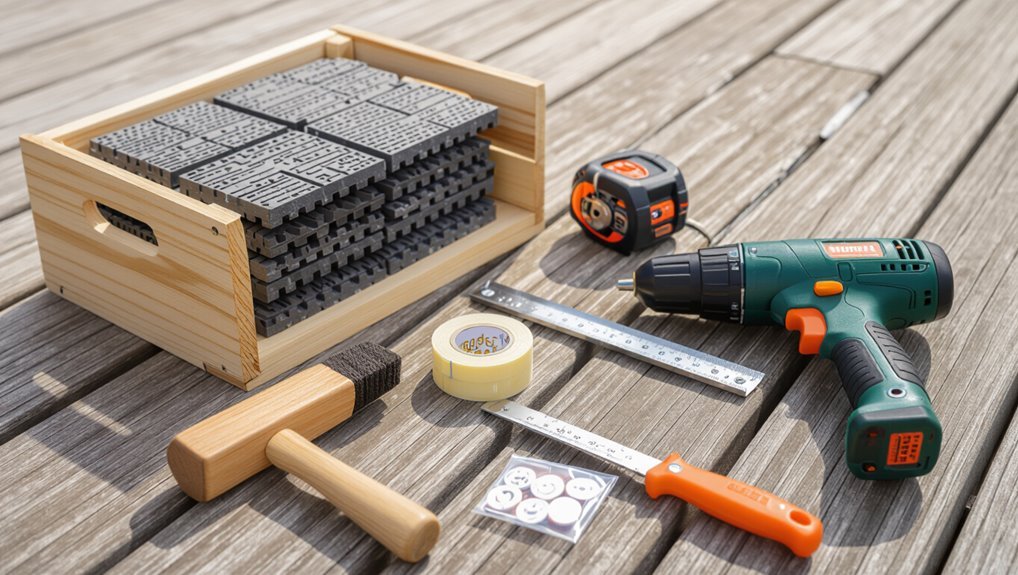
When you’re ready to lay deck tiles, gather the right tools and materials so the job goes quickly and correctly; this checklist covers what you’ll need, quantities to expect, and rough cost ranges to budget for.
You’ll need basics, safety gear, and tile supplies—skip extras for now.
- Tape measure, pencil, utility knife — $5–$25
- Level, mallet — $15–$60
- Drill/screwdriver, screws — $20–$80
- Deck tiles (per sq ft), spacers — $2–$8
Optional tools for faster or professional results
You’ve already covered the basics; if you want quicker, cleaner, or more professional-looking results, consider adding a few optional tools to your kit.
Rent or buy a tile cutter or circular saw with a fine-tooth blade for precise cuts, a rubber mallet for snug joints, a pry bar for adjustments, spacers for uniform gaps, and a surface leveling system to eliminate low spots.
Typical material costs and time estimates (per sq ft and per project)
Expect deck tile materials to run roughly $2–$12 per sq ft depending on material—composite and porcelain sit at the higher end, wood and plastic at the lower—and plan labor and prep to add another $1–$6 per sq ft if you hire help. You’ll budget per project: small 50 sq ft jobs take a day; larger installs take several days.
| Item | Typical |
|---|---|
| Cost/sq ft | $2–$18 |
| Time | 1–3 days |
Preparation: Assessing and Preparing Your Surface
Before you lay any tiles, inspect the existing surface—whether it’s a balcony, concrete slab, or wood frame—to spot damage or structural issues.
Measure the area carefully to calculate how many tiles and edge cuts you’ll need, and confirm the surface meets drainage, slope, weight limits, and local building codes.
Clean and repair as required, and install moisture barriers where needed so your tiles sit on a sound, compliant base.
Inspecting the existing surface (balcony, concrete, wood frame)
When evaluating your balcony, concrete slab, or wood frame, start by looking for structural problems, drainage issues, and surface irregularities that could affect tile stability and longevity.
Check for cracks, spalling, rot, loose boards, or soft spots. Confirm proper slope and drainage paths.
Note moisture sources, existing waterproofing, and attachment points.
Plan repairs or reinforcement before installing tiles.
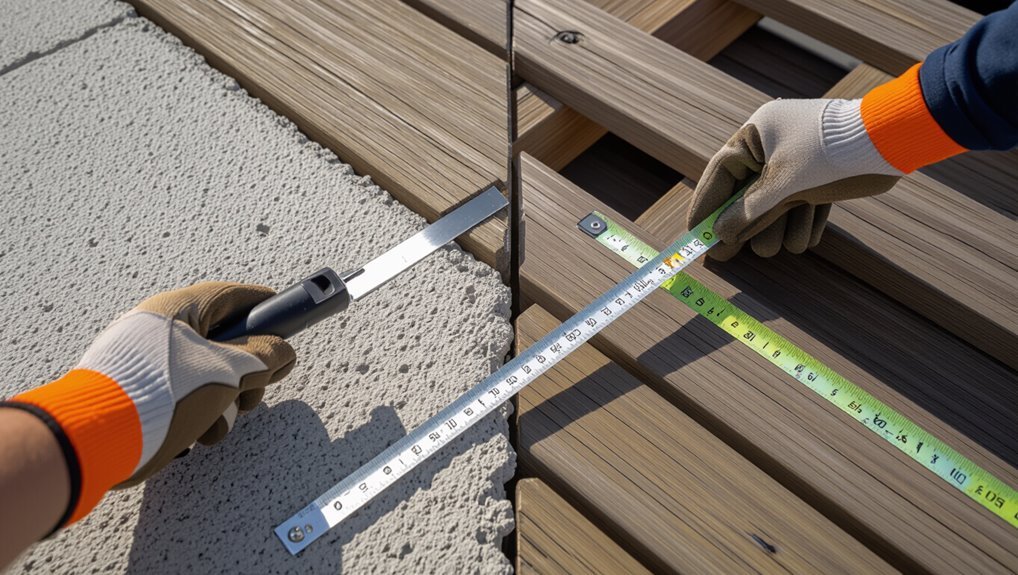
Measuring area and calculating tile quantity
Now that you’ve inspected and repaired the surface, measure the area to determine how many tiles you’ll need.
Use a tape measure to get length and width, multiply for square footage, and account for patterns and cuts. Round up for waste and future repairs.
Follow these steps:
- Measure length
- Measure width
- Calculate area
- Add 10% waste
Surface requirements: drainage, slope, weight limits, building codes
Because deck tiles sit on top of your deck or patio, you need to confirm proper drainage, slope, weight capacity, and code compliance so the installation performs safely and lasts.
Check surface drains and a slight slope (¼” per foot) for runoff. Verify the substrate supports added load, and review local building codes or HOA rules.
Obtain permits if required before installing.
Cleaning, repairs, and moisture barriers
1 essential step before laying deck tiles is cleaning and repairing the surface so moisture can’t undermine the installation.
Remove debris, mold, and loose paint; pressure-wash if needed and let dry.
Patch cracks, replace rotted boards, and tighten fasteners.
Install a breathable vapor barrier or membrane where recommended, ensuring proper overlap and perimeter drainage so tiles sit on a stable, dry substrate.
Step-by-Step Installation Process
Start by dry-laying your tiles to mock up the pattern and plan cuts.
Then establish a straight starter edge and reference line so you can snap, screw, or glue the tiles together as you go.
Finish by cutting tiles to fit around edges and securing the assembly appropriately for your substrate—concrete, wood, or pavers.
Step 1 Dry layout and planning (mock-up pattern)
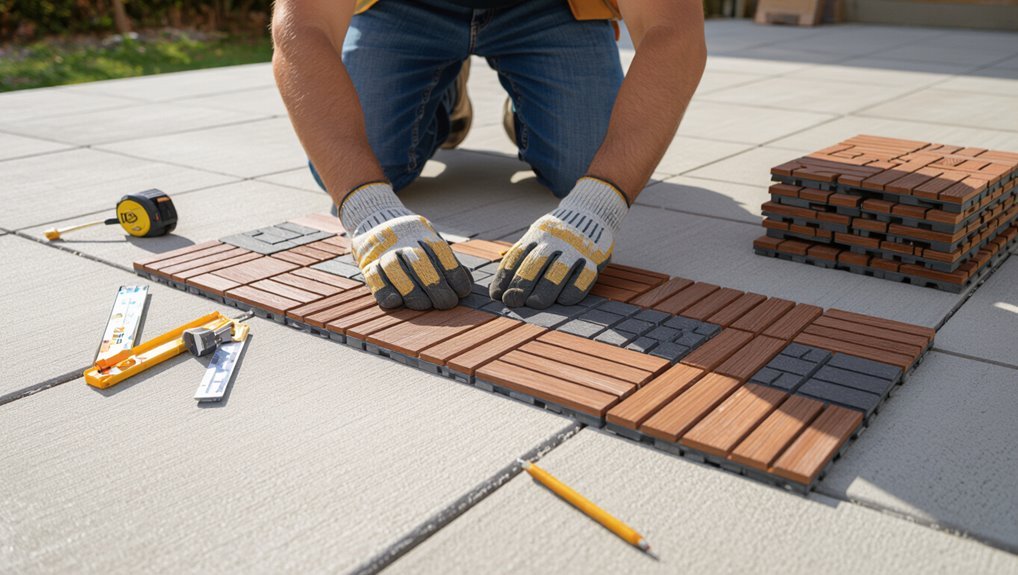
Before you fasten a single tile, lay out a dry mock-up so you can see how the pattern, cuts, and joints will look across the whole deck.
Walk the layout, adjust tile orientation, and note awkward gaps.
Mark full and partial tiles, plan changes, and identify necessary cuts. This prevents surprises and lets you estimate materials and tools before committing.
Step 2 Creating a starter edge and reference line
With your mock-up settled and problem areas marked, you’ll create a straight starter edge and reference line to keep every tile aligned.
Snap a chalk line from a fixed corner or perimeter board, verify it’s square using a 3-4-5 triangle, and secure a level guide board along the line.
This guarantees consistent spacing and a true first row for the entire installation.
Step 3 Interlocking tile connection methods (snap, screw, adhesive)
Once your starter edge is set, you’ll connect tiles using one of three common methods—snap, screw, or adhesive—each suited to different tile types, subfloors, and exposure conditions.
Snap systems click together quickly for floating installs.
Screws secure tiles to wood or composite decks for wind resistance.
Adhesive works on concrete or uneven surfaces.
Choose based on manufacturer guidance and local conditions.
Step 4 Cutting tiles to fit edges and obstacles (tools + techniques)
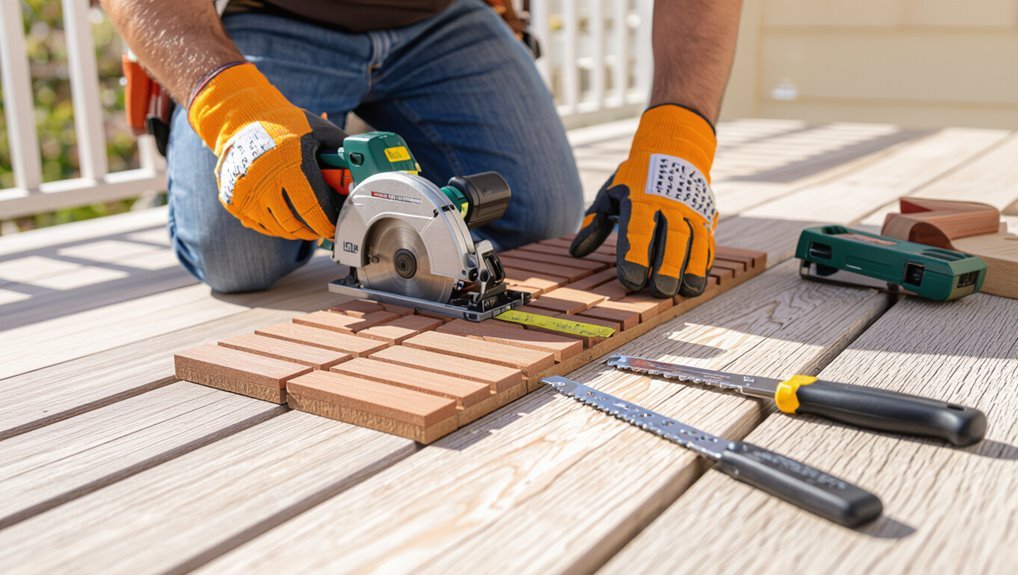
After you’ve connected the field tiles, you’ll need to cut pieces to fit along edges, around posts, and next to obstacles so the finish looks professional and lays flat.
Measure and mark cut lines, use a pencil or masking tape.
For straight cuts use a circular saw or jigsaw with a fine-tooth blade; for small notches use a handsaw or utility knife.
Wear eye protection.
Step 5 Securing tiles on different substrates (concrete, wood, pavers)
Because substrates behave differently, you’ll secure deck tiles differently on concrete, wood, and pavers to guarantee a stable, long-lasting surface.
Use these concise guidelines to anchor tiles properly:
- Concrete: adhesive or concrete-rated screws with plugs.
- Wood: screw through tile clips into joists; allow ventilation.
- Pavers: use spacers and heavy-duty adhesive or interlocking systems.
Check level and expansion gaps as you secure.
Step 6 Trimming, finishing edges, and installing transition pieces
Step 6 covers trimming tiles to fit, finishing exposed edges, and installing junction pieces so your deck looks polished and performs properly.
Measure carefully, mark cuts, and use a saw or tile cutter to trim.
Sand rough edges, apply edge trims or fascia, and caulk joints where needed.
Fit connecting pieces at doorways and steps for a safe, seamless finish.
Step 7 Final checks: level, gaps, drainage, and load test
Now you’ll perform a concise final inspection to verify the deck tile system is level, gaps are correct, drainage paths are clear, and the surface can bear expected loads—these checks catch installation issues before they become problems.
Use a spirit level across multiple points, measure gap widths, confirm water flows to drains, tighten loose tiles, and step-test load-bearing areas.
Record fixes and retest.
Installation Variations and Comparisons
You’ll choose between interlocking, glued, or screwed tiles based on durability, maintenance, and how permanent you want the installation to be.
For balconies and rooftops you’ll also need to check weight limits and local code requirements before picking a method.
If you’re renting or want something temporary, you’ll favor non-permanent systems that won’t damage the substrate.
Interlocking vs glued vs screwed installations
When deciding how to lay your deck tiles, you’ll weigh interlocking, glued, and screwed methods based on surface type, permanence, and ease of maintenance. Interlocking snaps down for fast, removable installs; glue bonds low-porosity surfaces; screws secure to wood subfloors. Choose by durability needed and future access.
| Method | Best surface | Pros |
|---|---|---|
| Interlocking | Flat, clean | Quick, removable |
| Glued | Concrete, tile | Low profile, stable |
| Screwed | Wood | Very secure, serviceable |
Installing on balconies and rooftops (weight and code considerations)
Because balconies and rooftops have strict load limits and often local code requirements, you should verify weight capacity and permitting before laying tile.
Check structural records or consult an engineer, factor in tile weight, underlayment, and foot traffic.
Use lightweight, ventilated tiles and nonpenetrating systems when codes or leases restrict anchors.
Keep documentation of approvals and product specs for inspections.
Temporary/rental-friendly installations vs permanent installations
Whether you’re renting or owning, choose an installation that matches how long you’ll keep the deck tiles and how much change you want to tolerate:
For temporary setups, use interlocking, no-glue tiles or removable trays so you can take them when you move and protect substrates.
For permanent installs, bond or screw tiles, seal edges, and plan airflow and drainage for long-term durability and code compliance.
Common Mistakes and How to Avoid Them
Don’t skip proper surface prep or ignore drainage, because water and uneven bases are the top causes of early failure.
Plan your layout carefully to avoid wasted tiles and crooked seams, and measure twice before cutting so edges look clean.
Also check load limits and local codes up front so your new deck is safe and compliant.
Mistake 1 Poor surface prep and drainage issues
If you skip proper surface preparation and ignore drainage, your deck tiles won’t last and can warp, buckle, or trap moisture.
Inspect and clean the substrate, remove loose material, and level low spots. Guarantee a slight slope or add drainage channels so water flows away.
Use breathable underlayment and spacers to promote airflow. Proper prep prevents rot, mold, and premature tile failure.
Mistake 2 Incorrect layout causing waste and misaligned seams
Once the substrate’s clean and draining properly, plan your tile layout before you drop the first piece—poor planning leads to wasted tiles and crooked seams that ruin the look.
Measure carefully, dry-fit tiles from focal points, stagger seams for stability, and keep consistent spacing with spacers.
Account for obstacles and adjust your grid to minimize narrow edge cuts and awkward joints.
Mistake 3 Improper cutting and edge finishing
3 common cutting and edge-finishing errors can turn a clean deck installation into a sloppy-looking mess, but you can avoid them with the right tools and techniques.
Measure twice, mark clearly, and use a quality saw with a fine blade to prevent splintering.
Finish exposed edges with trim pieces or bullnose tiles, sand rough cuts, and seal to match color and protect against moisture.
Mistake 4 Overlooking weight limits or local building codes
Because deck tiles add more load than you might expect, don’t ignore weight limits and local codes when planning your installation.
Check your deck’s load rating, especially on balconies or older structures. Consult local building codes and get permits if required.
Factor in furniture, planters, and foot traffic. When in doubt, hire a structural engineer to confirm safety before you proceed.
Maintenance, Repairs, and Longevity
Keep your deck tiles looking and performing their best with routine cleaning and seasonal checks to catch wear before it spreads.
If a tile gets damaged, you can swap individual pieces or replace whole sections quickly to avoid structural issues.
For wood and composite tiles, regular sealing or staining (and following manufacturer care) will noticeably extend their life.
Routine cleaning and seasonal care
When you clean and inspect your deck tiles regularly, you’ll prevent small issues from turning into costly repairs and keep the surface looking its best. A simple routine of sweeping, spot-washing, and seasonal deep cleans will extend the life of both wood and composite tiles.
Follow these steps:
- Sweep debris weekly to prevent staining.
- Spot-wash spills immediately with mild soap.
- Deep-clean seasonally with gentle pressure washing.
- Apply protective oil or sealant annually for wood.
Repairing damaged tiles and replacing sections
Routine cleaning will catch many problems early, but you’ll still run into cracked, warped, or loose tiles over time; knowing how to repair or replace sections keeps small damage from spreading and preserves the deck’s safety and appearance.
Inspect regularly, remove damaged tiles, clean the substrate, and fit matching replacements. Secure edges, check alignment, and replace fasteners or connectors. Test stability before use.
Extending life of wood and composite tiles (sealing, staining)
Although wood and composite tiles tolerate wear, treating them with sealers or stains substantially extends their life by repelling moisture, UV rays, and dirt.
You should clean tiles, let them dry, then apply product suited to material. Recoat per manufacturer guidelines, strip and reseal worn areas, and test a small patch first.
Regular maintenance prevents fading, mold, and premature replacement.
Tips, Best Practices, and Design Ideas
To get the most from your deck tiles, follow proven installation tips—secure edges, allow for drainage, and use proper underlayment so the job lasts.
Mix materials and try simple patterns or a framed border to make the space feel intentional.
Then plan accessory placement—group planters, layer lighting, and arrange furniture for flow and function.
Best practices for long-lasting installation
When you focus on proper site prep, material choice, and regular maintenance, your deck tiles will stay attractive and secure for years.
You should level the base, guarantee drainage, pick weather-resistant tiles, and seal or oil as recommended.
Inspect fasteners seasonally and replace damaged tiles promptly.
- Level and compact base
- Provide drainage gap
- Choose durable, sealed materials
- Schedule inspections
Design ideas: patterns, borders, mixed materials
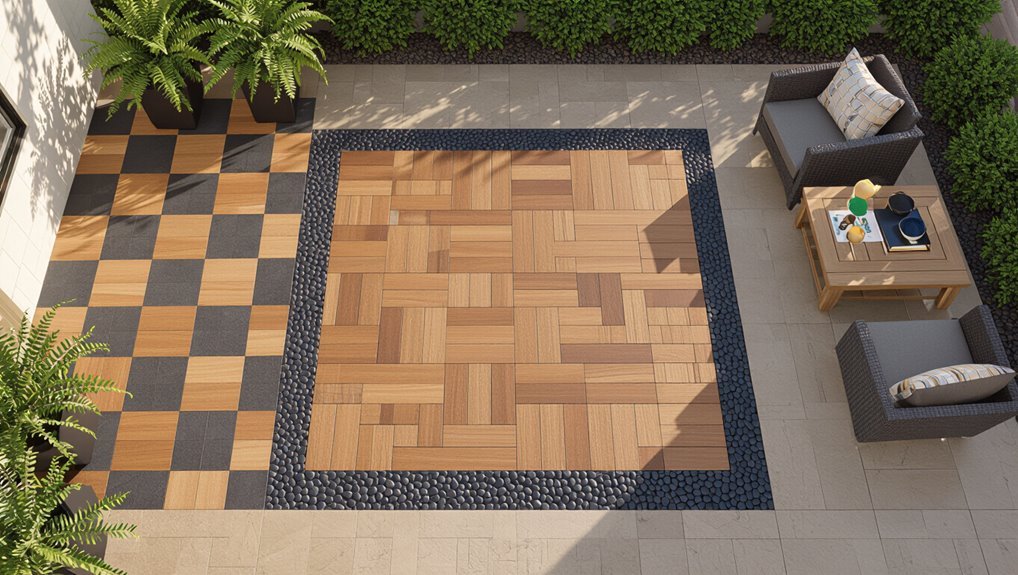
Once your base is sound and tiles are maintained, you can use patterns, borders, and mixed materials to give the space personality and function.
Lay herringbone or chevron for movement, alternating grain directions for texture. Frame seating or pathways with contrasting border tiles.
Combine wood-look, porcelain, and composite tiles for durability contrasts. Test color and scale in a small mockup before committing.
Accessorizing: planters, lighting, and furniture placement
If you want your deck to feel like an outdoor room, planters, lighting, and furniture should work together for flow and function.
Place furniture to create conversation zones and maintain traffic paths. Use varied planter heights for depth and choose durable, weatherproof pieces.
Layer lighting—string lights, path lights, and task lamps—for ambiance and safety. Anchor zones with rugs and select movable items for flexibility.
Cost-Benefit and When to Hire a Pro
You can handle small, flat decks with simple tile systems, but hire a contractor for complex layouts, structural work, or strict waterproofing needs.
Expect labor to add considerably to material costs—get timeline estimates upfront so you can compare total project price versus DIY time and risk.
When you contact pros, ask for itemized quotes, proof of insurance and references, and a clear start-to-finish schedule.
When DIY is appropriate vs when to hire a contractor
Wondering whether to tackle deck tiles yourself or call in a pro?
If you’re handy, have basic tools, and the deck is flat with simple cuts, DIY saves money and is satisfying.
Hire a contractor if structural repairs, complex patterns, drainage issues, or local permits are involved, or if you lack time.
Pros guarantee code compliance and faster, reliable results.
Estimated labor costs and project timelines
A basic DIY install can take a weekend for a single person laying interlocking tiles on a flat, prepped surface, but hiring a pro typically cuts labor time to a day or two while adding hourly or flat-rate costs—expect contractors to charge $40–$100+ per hour or $6–$12 per square foot in labor depending on region, experience, and job complexity.
| Task | DIY time | Pro time |
|---|---|---|
| 100 ft² | Weekend | 1 day |
| Prep | 2–4 hrs | 1–2 hrs |
| Complex cuts | 3–6 hrs | 2–3 hrs |
How to get reliable quotes and what to ask contractors
Because getting the right quote can save you time and money, approach contractors prepared: compare at least three bids, ask for written estimates that break down materials, labor, permits, and cleanup, and request project timelines and payment schedules so you can spot hidden costs or unrealistic deadlines.
Also verify licenses, insurance, references, warranties, and change-order policies; get a clear start date, communication plan, and final inspection commitment.
Frequently Asked Questions (FAQ)
You probably have practical questions like whether you can lay tiles over an existing wooden deck and if they’re safe for balconies without blocking drainage.
You’ll also want to know how long different materials last, whether you can install them yourself with basic tools, and which types hold up best in wet or high-traffic spots.
Below we’ll answer each question clearly so you can decide what’s right for your space.
Can I install deck tiles over an existing wooden deck?
Wondering whether you can lay deck tiles over your existing wooden deck? Yes—if the wood is structurally sound, dry, level, and free of rot.
Secure loose boards, replace damaged planks, and sand rough spots. Use a breathable underlayment or risers for airflow and to prevent trapping moisture.
Follow manufacturer specs for attachment and weight limits to guarantee a safe, long-lasting installation.
Are deck tiles safe on balcony surfaces and will they affect drainage?
If your wood deck passed the earlier checks for soundness and drainage, you can generally use deck tiles on balcony surfaces—but you must consider weight limits, water runoff, and the balcony’s waterproof membrane.
Check load capacity, choose lightweight tiles, and avoid permanent adhesive that traps water.
Use elevated or slatted tile bases to promote drainage and inspect the membrane regularly for damage or pooling.
How long do different types of deck tiles last?
Because material, climate, and installation all affect longevity, expected lifespans for deck tiles vary widely—typically from 3–5 years for inexpensive composite or rubber tiles up to 15–25 years for high-quality hardwoods and stone when properly maintained.
You can extend life by cleaning, sealing wood, avoiding standing water, and replacing damaged tiles promptly.
Inspect annually for wear, rot, or fading.
Can I install deck tiles myself without special tools?
Long-lasting tiles need proper care, but you don’t need a pro to get them in place. You can install most interlocking deck tiles yourself with basic tools: a tape measure, saw for trims, level, and a rubber mallet.
Prep the surface, plan layout, snap tiles together, and cut edge pieces. Follow manufacturer instructions for spacing and drainage to guarantee durability.
What is the best tile type for wet or high-traffic areas?
For wet or high-traffic areas you’ll want tiles that resist slipping, moisture, and wear—porcelain and textured composite or PVC tiles are top choices because they’re dense, low-porosity, and often come with slip-resistant surfaces.
Hardwood or untreated soft wood can look nice but won’t hold up as well unless it’s specially treated or covered with non-slip finishes.
Choose porcelain for durability, composite for comfort, and guarantee proper drainage and installation.