How to Clean a Marble Shower Floor Without Scratching or Staining It
You can safely clean your marble shower floor by using a pH-neutral stone cleaner or mild dish soap mixed with warm water, soft microfiber cloths or a nonabrasive pad, and light scrubbing with a soft-bristle brush to lift soap scum and grime. Rinse thoroughly, dry promptly to prevent mineral spots, and spot-test any product first. Avoid acidic or abrasive cleaners, excessive scrubbing, and steam. Keep going to learn specifics on stains, sealing, and maintenance.
Quick Answer How to Clean a Marble Shower Floor Without Scratching or Staining It
You can safely clean a marble shower floor with a pH-neutral cleaner, soft cloth or mop, and gentle rinsing to avoid scratches or stains.
Use DIY methods for light soap scum and routine maintenance, but call a pro if you have deep etching, stubborn stains, or extensive grout damage.
If you’re unsure about a cleaner or repair, it’s better to get expert help than risk irreversible harm.
One-sentence summary
When cleaning a marble shower floor, stick to pH-neutral cleaners, soft cloths or mops, and gentle blotting to lift dirt without scratching or etching the stone.
For a one-sentence summary: you clean marble shower floor by rinsing, applying a pH-neutral solution, gently agitating with a soft mop or sponge, rinsing thoroughly, and drying immediately to prevent mineral deposits and staining while preserving the finish.
When to use professional help vs. DIY
Although minor daily cleaning you can handle yourself, call a professional if the marble has deep stains, etching, persistent soap scum, loose tiles, or you’re unsure about the stone’s sealant.
These issues need specialized products, honing, or resealing to avoid permanent damage. If damage is visible or DIY fixes don’t work, hire a pro; otherwise, stick to gentle cleaners, soft cloths, and regular resealing.
Understanding Marble: What Makes It Vulnerable
Marble is a natural stone made mostly of calcite, so it’s softer and more porous than granite or ceramic.
Because of that porosity and relative softness, it scratches and etches easily and soaks up stains from acidic cleaners or runoff.
In a shower you’re usually fighting soap scum, hard-water minerals, body oils, and occasional mold, all of which can damage marble if you don’t clean and protect it properly.
What marble is (natural stone composition)
Stone formed deep underground, marble’s smooth, veined appearance comes from limestone that’s been altered by heat and pressure over millions of years.
You’re working with a crystalline metamorphic rock made mainly of calcite or dolomite crystals.
Its mineral makeup and layered structure give marble its color variations and unique patterns, so you’ll treat each slab as a distinct natural material when cleaning and caring for it.
Why marble scratches and stains easily (porosity, softness, etching)
Think of marble as a delicate, porous crystal that needs gentle care: it’s softer and more absorbent than many other countertop or flooring materials, so it scratches and stains when you use harsh cleaners, abrasive tools, or acidic substances.
Its porosity soaks liquids into tiny channels, softness allows surface damage from grit, and acid causes chemical etching that dulls and discolors the finish.
Common contaminants in showers (soap scum, hard water, mold, body oils)
Because marble soaks, scratches, and etches more easily than harder, less porous surfaces, the everyday grime in a shower can do disproportionate damage if you don’t manage it.
Soap scum leaves filmy residue, hard water deposits mineral spots and etches, mold stains and penetrates grout, and body oils darken and attract dirt.
Tackle each promptly with marble-safe methods.
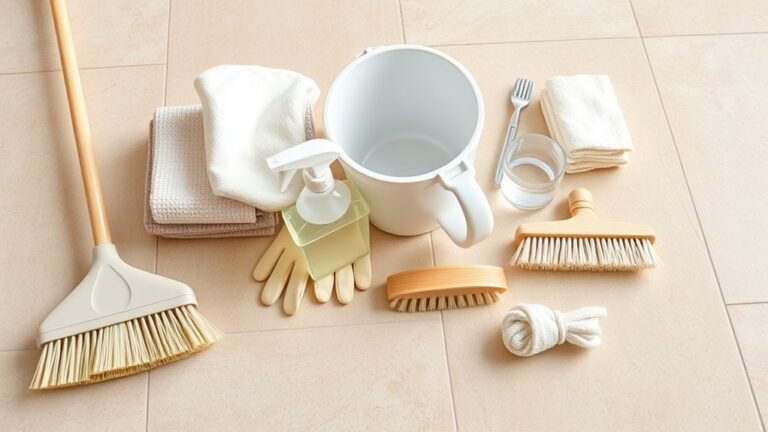
Safe vs. Unsafe Cleaning Products and Tools
When cleaning your marble shower floor, choose pH-neutral, stone-specific cleaners and soft tools to protect the surface.
Avoid acidic agents, bleach, vinegar, or abrasive powders and never use steel wool, stiff wire brushes, or harsh scrubbing pads.
Stick to microfiber cloths, non-abrasive pads, and soft-bristled brushes for safe, effective cleaning.
Safe cleaners for marble (pH-neutral, stone-specific)
Although marble looks durable, it’s actually sensitive to acids and abrasives, so you should stick with pH-neutral, stone-specific cleaners and soft tools to avoid etching or dulling the surface.
Choose labeled marble or natural stone cleaners, or mild dish soap diluted in warm water.
Test any product in an inconspicuous spot first, rinse thoroughly, and dry with a microfiber cloth to prevent water spots and residue.
Ingredients and chemicals to avoid (acidic cleaners, bleach, vinegar, abrasive powders)
If you want to keep your marble shower floor looking its best, steer clear of acidic and abrasive cleaners that can etch, dull, or discolor the stone.
Avoid vinegar, lemon, bathroom cleaners with citric acids, and grout cleaners high in acid.
Don’t use bleach, ammonia, or abrasive powders and scouring creams.
These chemicals permanently damage polish and stain marble.
Safe tools and materials (microfiber, soft-bristled brush, non-abrasive pads)
Now that you know which chemicals to avoid, choose tools that protect the marble’s surface: soft microfiber cloths trap dirt without scratching, a soft-bristled brush loosens grime in grout lines, and non-abrasive pads handle spot cleaning without dulling the finish.
Rinse tools frequently, use gentle pressure, replace worn pads, and dry the floor with a clean microfiber to prevent water spots and residue.
Tools to never use (steel wool, harsh scrubbing pads, stiff wire brushes)
When you’re cleaning marble, don’t reach for steel wool, harsh scrubbing pads, or stiff wire brushes — they’ll scratch and etch the surface, leaving permanent damage that dulls the finish and traps dirt.
Also avoid acidic cleaners, bleach, and ammonia; they can etch or discolor marble.
Use only soft tools and pH-neutral cleaners to protect the stone and maintain its shine.
Preparatory Steps Before Cleaning
Before you start cleaning, check your marble’s finish—polished or honed—and note any stains or damaged grout so you can choose the right approach.
Always perform a small spot test with your chosen cleaner in an inconspicuous area to confirm it won’t etch or discolor the stone.
Make sure the bathroom is well‑ventilated and wear gloves and eye protection for safety.
Assessing marble condition (polished vs honed, existing stains, grout status)
Although marble looks simple at a glance, you need to identify whether your floor is polished or honed, note any stains or etching, and check grout integrity before you start cleaning.
Feel the surface and observe sheen: polished is glossy, honed is matte.
Map stains, etch marks, and cracked or missing grout.
Document areas needing repair or special care.
Spot test procedure
Now that you’ve mapped the marble’s finish, stains, and grout issues, it’s time to run a spot test to make sure your chosen cleaner won’t harm the stone.
Pick a hidden corner, apply diluted cleaner, wait 10 minutes, blot dry.
Check for discoloration or etching. If safe, proceed. If not, stop and choose a gentler option.
- Choose corner
- Apply
- Wait
- Inspect
Ventilation and safety precautions
Because marble can react badly with strong cleaners and fumes can build up fast in a small bathroom, make sure you ventilate the area and protect yourself before you start cleaning.
Open windows, run the exhaust fan, and, if possible, use a portable fan to push air out.
Wear gloves, eye protection, and a mask rated for chemical vapors, and keep products sealed when not in use.
Step-by-Step Cleaning Method (Primary How-To)
Start by sweeping or rinsing away loose debris.
Then mix a pH-neutral cleaner using the proper ratio or a recommended alternative.
Use a soft-bristle brush or microfiber pad with gentle, circular motions and light pressure to scrub.
Then rinse thoroughly to remove all residue.
Finish by drying with a soft towel or squeegee to prevent water spots and streaks.
Step 1 Remove loose debris and rinse
Sweep or vacuum the floor to lift loose dirt, hair, and soap scum before you touch any cleaner.
Then, rinse thoroughly with warm water and use a soft microfiber mop or sponge to avoid scratching.
Gently work corners and grout lines until water runs clear.
You’ll feel relief knowing the surface’s ready for deeper cleaning.
- Calm
- Confident
- Relieved
- Prepared
Step 2 Mix a pH-neutral cleaning solution (ratios and alternatives)
Now that the floor’s rinsed and clear, mix a gentle, pH-neutral cleaner to protect the marble’s finish.
Combine one tablespoon of pH-neutral stone soap or a mild dish soap with one gallon of warm water.
For ready-made options, choose labeled marble or stone cleaners.
Test any solution in an inconspicuous spot, then use it immediately and discard leftovers—don’t store diluted mixes.
Step 3 Gentle scrubbing technique (motion, pressure, recommended tools)
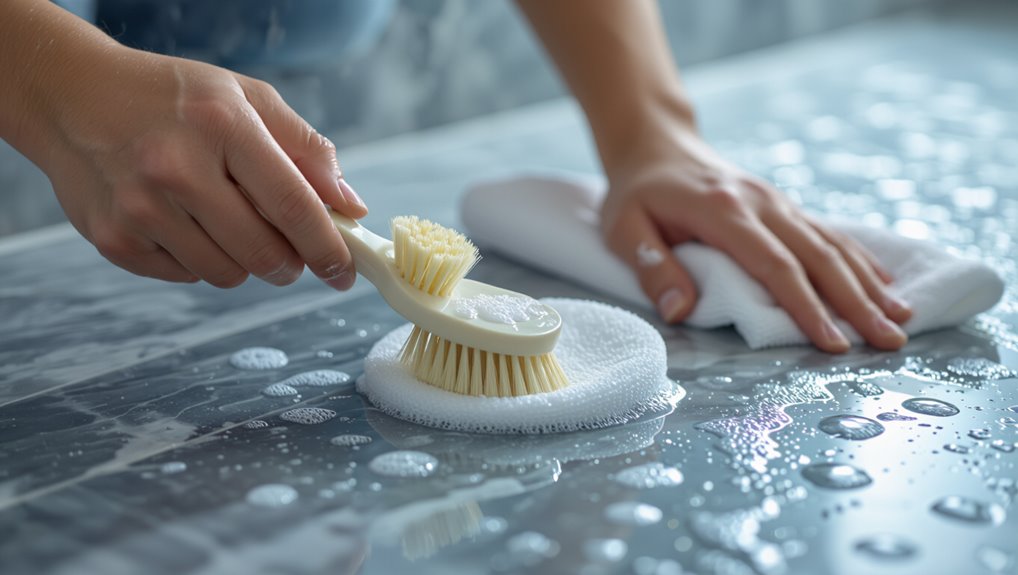
Move a soft-bristled brush or non-abrasive scrub pad in short, overlapping strokes while keeping light, even pressure so you lift dirt without scratching the marble.
Work smaller sections, angling the brush to follow grout lines. Don’t press hard or use circular scrubbing that creates friction.
Use microfiber cloths for edges and a soft sponge for stubborn spots, repeating gently until grime loosens.
Step 4 Rinse thoroughly and remove residue
After you’ve loosened grime, rinse the floor thoroughly with clean, lukewarm water to lift soap and cleaner residue without shocking the marble.
Use a gentle stream or a cup to flush corners and grout lines.
Wipe away milky film with a soft microfiber mop or cloth, rinsing the cloth frequently.
Repeat until water runs clear and no suds remain.
Step 5 Drying method to prevent water spots and streaks
Once the rinse runs clear, dry the marble promptly to prevent water spots and streaks from forming.
Use a soft, lint-free microfiber towel and blot rather than rub to lift moisture. Work in small sections, follow grout lines, and replace damp towels as needed.
Finish with a dry microfiber buffing pass to restore shine and guarantee no streaks remain.
Step 6 Final inspection and touch-ups
Now inspect the floor carefully, scanning for missed residue, dull spots, grout haze, or trapped water in seams; touch up any problem areas with a damp microfiber and a gentle circular motion, then dry and buff those spots immediately to blend the finish.
Check edges, corners, and drain areas. Repeat spot-cleaning as needed, then dry the entire floor and ventilate the shower to guarantee complete drying.
Removing Specific Problems Safely
Now you’ll learn targeted, marble-safe fixes for common issues like soap scum, mineral deposits, mold and mildew, and organic stains.
Use gentle chemical cleaners and soft scrubbing for scum and descaling solutions formulated for marble on hard-water buildup.
Choose non-acidic, oxygen-based treatments for mold, mildew, and hair or body-oil stains.
For deep or old stains, you’ll be guided on when a poultice is appropriate and how to apply it without harming the stone.
Soap scum removal (gentle chemical and mechanical approaches)
When soap scum builds up on your marble shower floor, you’ll want to tackle it with methods that remove residue without etching the stone.
Mix warm water with a few drops of pH-neutral dish soap, apply gently with a soft microfiber cloth, and rinse thoroughly.
For stubborn areas, use a non-abrasive nylon brush in light, circular motions, then dry to prevent streaks.
Hard water mineral deposits (safe descaling strategies)
If soap scum’s under control but you still see cloudy white rings or crusty spots, those are likely hard water mineral deposits and they’ll need a gentler, acid-free approach on marble.
Dampen the area, apply a poultice of baking soda and water, let it sit until dry, gently lift residue with a soft nylon brush, rinse, and dry.
Repeat if needed.
Mold and mildew removal without damaging marble
Because marble’s porous surface can trap moisture and organic residue, mold and mildew can take hold quickly—but you can remove them safely without etching the stone.
Ventilate and dry the area, then gently scrub affected grout and seams with a soft brush and a pH-neutral, enzyme-based cleaner diluted per instructions.
Rinse thoroughly, blot dry, and seal grout periodically to discourage recurrence.
Treating organic stains (hair dye, body oils)
Although organic stains like hair dye and body oils can seem stubborn, you can lift them from marble without etching the surface by using the right gentle methods.
Use mild dish soap, warm water, and a soft cloth; blot, don’t rub. If needed, apply diluted hydrogen peroxide briefly, rinse thoroughly, and dry.
Follow these steps:
- Test first
- Blot gently
- Rinse well
- Dry promptly
Treating deep or old stains (when to use poultices and how)
When gentle blotting and short hydrogen peroxide treatments don’t lift old, set-in stains, you’ll need a stronger, targeted approach: a poultice draws deep-seated contaminants out of marble without aggressive scrubbing.
Mix a poultice from absorbent powder (like kaolin or baking soda) and an appropriate solvent (water, hydrogen peroxide, or acetone for oil).
Apply, cover, wait 24–48 hours, then gently remove and rinse.
Stain-Removal Techniques: Products and DIY Poultices
When you’re tackling stains on marble, choose the right poultice — clay, baking soda, or diatomaceous earth each suit different stains and binders.
You’ll mix the powder with water or a mild solvent, spread a thick paste over the stain, cover it, let it draw out the stain, then gently remove and rinse per the step-by-step method.
For tougher spots, look for commercial stone stain removers labeled safe for marble and targeted to your stain type, avoiding acidic or abrasive formulas.
Types of poultices and appropriate binders (clay, baking soda, diatomaceous earth)
Poultices draw stains out of marble by combining an absorbent powder with a liquid binder to form a paste you spread over the mark; choosing the right powder—clay, baking soda, or diatomaceous earth—depends on the stain type and how aggressive you need the treatment to be.
Use clay for deep oil or organic stains, baking soda for gentle whitening and acidic residue, and diatomaceous earth for stronger, gritty absorption.
Step-by-step poultice application and removal
1. Mix your chosen powder and liquid into a thick paste, spread over the stain about 1/4–1/2 inch thick, and cover with plastic taped at the edges.
Let it sit 24–48 hours, then peel away the plastic and scrape gently with a plastic spatula.
Rinse with distilled water, dry, and repeat if residue or discoloration persists.
Commercial stone stain removers (what to look for)
Curious which ready-made stain remover will actually work on your marble shower floor? You’ll want pH-neutral, non-acidic formulas, enzyme or poultice-capable gels, and clear instructions for marble. Test in an inconspicuous spot first and follow contact time. Compare products:
| Feature | Good For | Avoid |
|---|---|---|
| pH-neutral | Marble | Acids/bleach |
| Poultice-ready | Deep stains | Harsh solvents |
| Clear label | Safe use | Vague claims |
Polishing, Honing, and Repairs
Once stains are gone, you’ll need to decide if the surface needs polishing to restore shine or honing to remove etch marks.
You can handle minor polishing yourself with the right pads, but significant wear or uneven surfaces usually require professional resurfacing.
Small chips and hairline cracks can be temporarily patched, whereas larger damage should be permanently repaired by a stone pro.
When polishing or honing is appropriate
If your marble shows dulling, light scratches, or etching from soaps and acids, polishing can restore shine quickly.
For deeper scratches, visible pits, or significant wear, honing is the better first step because it removes more material to level the surface.
You’ll choose polishing for surface blemishes and honing when you need to correct depth or texture before considering sealant or minor repairs.
DIY polishing vs professional resurfacing
When weighing DIY polishing against professional resurfacing, consider the scale of damage, your skill level, and the tools required—DIY polishing works well for light dulling and minor scratches if you’re comfortable handling pads and polishes.
However, deeper etching, large scratches, or uneven surfaces are best left to professionals who’ll hone, fill, and finish the marble correctly.
If you choose DIY, test first, use proper pads, and protect adjacent areas.
Repairing chips and cracks (temporary fixes vs permanent repairs)
Polishing or honing can restore surface sheen, but chips and cracks need different treatment—some fixes you can do yourself for a while, while others require a permanent repair to protect the stone and prevent moisture damage.
For minor chips, use a color-matched epoxy or marble repair kit and smooth it level.
For structural cracks or recurring moisture, call a professional for proper filling, bonding, and resealing.
Prevention and Best Practices for Long-Term Care
To keep your marble shower floor looking great, stick to a simple daily and weekly routine—wipe or squeegee after each use and mop weekly with a pH-neutral cleaner.
Reseal on the manufacturer’s recommended schedule and test the seal by placing a few drops of water to see if it beads; reapply a sealer if it soaks in.
Also use non-abrasive soaps, shower mats that don’t trap moisture, and the cleaners and sealers labeled safe for natural stone to minimize wear.
Daily and weekly maintenance routine
A simple daily and weekly routine will keep your marble shower floor looking fresh and prevent damage. You’ll avoid grime buildup and etching by staying consistent.
Do this:
- Squeegee after each use to banish water and soap.
- Wipe spills immediately with a soft microfiber.
- Weekly, mop with pH-neutral cleaner diluted per label.
- Air-dry and inspect for dull spots or residue.
Recommended sealing schedule and how to test seal integrity
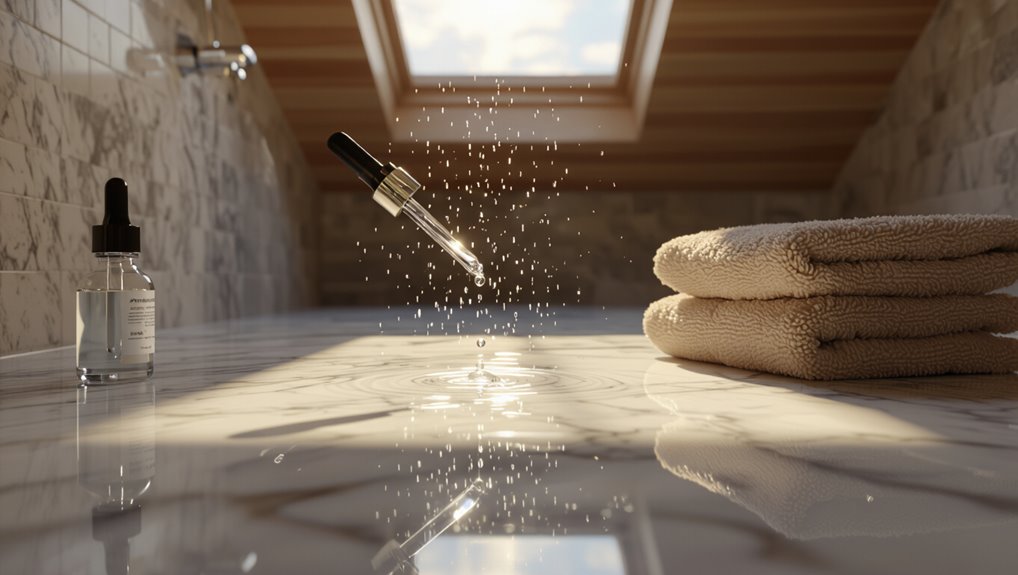
Keeping up with daily squeegees and weekly cleaning will only do so much—sealing protects the marble from stains and etching over time, so you should follow a regular schedule and check the seal regularly.
Reseal honed marble every 6–12 months, polished every 12–24 months. Test by dropping water beads: if it soaks in or darkens within a minute, strip and reseal that area promptly.
Shower design and usage tips to minimize damage (squeegeeing, mats, soap choices)
Small daily habits and smart design choices will go farther than harsh cleaners at protecting your marble shower.
Squeegee water after each use to prevent mineral spots, use a low-profile rubber mat to reduce grit abrasion, and keep drains clear to avoid standing water.
Choose non-alkaline, non-abrasive soaps and rinse thoroughly so residues don’t etch or stain the stone.
Product recommendations (safe soaps, cleaners, sealers)
To protect that daily care, pick products that won’t harm marble’s calcium-rich surface.
Use pH-neutral, non-abrasive soaps and cleaners labeled safe for natural stone. Avoid vinegar, bleach, and acidic bathroom sprays.
Reseal every 6–12 months with a breathable stone sealer. Test any new product in a hidden spot, follow manufacturer instructions, and wipe up spills promptly to prevent etching or staining.
Common Mistakes That Scratch or Stain Marble
Don’t use acidic or abrasive cleaners on marble, because they’ll etch or dull the surface.
Be careful with scrubbing and tools—too much force or the wrong brush will scratch the stone.
Also don’t skip sealant, let water pool, or confuse etch marks with stains when deciding how to treat a spot.
Using acidic or abrasive cleaners
If you reach for common household cleaners without checking the label, you can easily etch or dull marble’s surface—acidic ingredients like vinegar, citrus, or many bathroom cleaners dissolve calcium in the stone, while abrasive powders and scrubbing pads scratch the finish.
Instead, use pH-neutral, stone-safe cleaners and soft microfiber mops; rinse thoroughly and test any product in an inconspicuous spot first.
Over-scrubbing and wrong tool use
When you scrub too hard or grab the wrong tools, you can leave visible scratches, dull spots, or permanent stains on marble that won’t polish out.
Use soft microfiber or a non-abrasive sponge, gentle circular motions, and light pressure.
Skip steel wool, stiff brushes, or scouring pads.
Test any tool on an inconspicuous spot first to avoid irreversible damage.
Skipping sealant or allowing water pooling
Because marble is porous and delicate, skipping a proper sealant or letting water pool on the floor invites staining, etching, and mineral buildup that can quickly dull the stone.
You should seal regularly per manufacturer guidance and fix drainage or slope issues so water doesn’t sit.
Wipe damp areas after use, dry grout lines, and address leaks promptly to prevent lasting damage.
Misidentifying etch marks vs stains
After sealing and fixing drainage, you’ll still need to tell etch marks and stains apart so you don’t make the problem worse.
Etches are dull spots from acid; stains are discoloration from pigments soaking in.
You’ll test by applying a few drops of water and mild poultice—etch lightens with polishing, stains need poultice or professional treatment.
Don’t sand or use acidic cleaners.
When to Call a Professional
If your marble has deep etching, widespread staining, or crumbling grout, it’s time to call a pro.
A stone restoration specialist can assess damage, perform honing or polishing, and apply proper sealing to protect your floor.
Ask about experience with marble, before-and-after examples, warranties, and a clear estimate of work and costs.
Signs you need professional restoration
Not sure whether that stain or etch is beyond a DIY fix?
If you spot deep etching, widespread discoloration, pitting, cracks, or grout loss, call a pro.
Also seek help if previous repairs failed, polishing won’t restore shine, or untreated water damage and mold persist.
Professionals can assess structural issues and prevent further irreversible harm.
What to expect from professional stone care services
When you decide a pro is needed, expect a thorough inspection followed by a clear plan of action tailored to your marble’s condition.
They’ll safely clean, remove etches or stains when possible, repair chips or grout, and recommend sealing or maintenance frequency.
You’ll get a cost estimate, timeline, and realistic outcome—so you can weigh restoration versus replacement and schedule the work with confidence.
Questions to ask a stone restoration contractor
Wondering what to ask before hiring a stone restoration contractor?
Ask about licensing, insurance, and references.
Request photos of similar jobs and ask which methods and products they’ll use on marble.
Confirm guarantees, timelines, and pricing structure.
Ask how they’ll protect surrounding surfaces and handle unexpected damage.
Make sure they follow stone-specific care to avoid etching, scratches, or staining.
FAQ
You probably have a few quick questions about marble care, like whether vinegar or bleach are safe and how often to reseal the floor.
I’ll also cover etching recurrence, steam-cleaning, and the safest ways to remove rust or metal stains.
Read on for clear, practical answers you can use right away.
Can I use vinegar or bleach on marble?
Can you use vinegar or bleach on marble? No.
Acidic cleaners like vinegar etch and dull marble, while bleach can discolor and weaken the stone’s surface and grout.
Use a pH-neutral cleaner formulated for natural stone, or mild dish soap diluted in water.
Rinse thoroughly and dry to prevent water spots, and always test cleaners in an inconspicuous area first.
How often should I seal a marble shower floor?
How often should you seal a marble shower floor?
Seal new marble after installation, then every 6–12 months for light-use showers and every 3–6 months for heavy-use or constantly wet showers.
Test with a water drop: if it soaks in, reseal.
Use a penetrating stone sealer, follow label directions, and reapply sooner if grout or stone looks dull or absorbs moisture.
Will marble etching come back after cleaning?
Will etched marks come back after you clean them? If etching is shallow and you remove it with a poultice or polishing powder, it can reappear if acidic exposure continues.
You’ll prevent recurrence by neutral cleaners, prompt spill cleanup, and resealing as recommended.
Deep etches need professional honing; without corrective work, visible marks will persist despite regular cleaning and care.
Can I steam-clean my marble shower?
Curious whether steam-cleaning is safe for your marble shower? You should avoid high-heat steam: it can weaken sealers, open hairline cracks, or worsen etching.
If you insist on steam, use the lowest setting, keep the nozzle moving, and immediately dry the surface.
Better: stick to pH-neutral cleaners and gentle microfiber mops to protect finish and sealer longevity.
What’s the safest way to remove rust or metal stains?
Got a rusty spot on your marble shower? Use a poultice: mix white kaolin or baking soda with hydrogen peroxide to a paste, apply over stain, cover with plastic and tape, let sit 24–48 hours, then gently remove and rinse.
Repeat once if needed. Avoid acidic cleaners or steel wool—they etch marble.
Call a pro for deep, stubborn stains.