Can You Refinish Ceramic Tile to Restore Shine Without Replacement
Yes — you can refinish ceramic tile to restore shine without replacing it if the tiles are sound. Start by inspecting for loose tiles, deep cracks, or water damage; clean and degloss glossy surfaces, repair grout and chips, then apply the right primer and a durable topcoat like epoxy or urethane. Follow cure times and care guidelines to avoid adhesion problems. Keep going and you’ll find step-by-step prep, product choices, and troubleshooting tips.
How to Refinish Ceramic Tile: Quick Decision Guide
Decide quickly by checking the tile’s condition, location, and your desired finish: if tiles are intact and in low-traffic areas, reglazing or a DIY epoxy kit will save time and money; if grout is crumbling, tiles are loose, or the floor must bear heavy use, plan for replacement.
You’ll weigh tile design trends, follow ceramic maintenance tips, test a small area, and schedule proper curing.
Refinish or Replace: Which Is Right?
You’ll weigh upfront cost versus long-term value when choosing to refinish or replace.
Think about how long the job needs to last and whether refinishing will meet your durability expectations.
If you need decades of wear resistance, replacing might be the smarter investment.
Cost Versus Value
Although replacing tile can give you a brand-new look, refinishing often delivers comparable results for a fraction of the cost.
So you’ll want to weigh immediate expenses against long-term value.
Do a clear cost analysis: compare material, labor, and downtime.
Include a value assessment: resale appeal, aesthetic goals, and budget constraints to decide whether refinishing meets your priorities without unnecessary spending.
Longevity And Durability
When you’re weighing refinish versus replace, the key question is how long the outcome will last under real use and wear.
You’ll consider tile lifespan: refinishing can add years if surfaces aren’t deeply damaged, but replacement wins for structural cracks.
Choose maintenance strategies—sealing, gentle cleaning, prompt repairs—to maximize longevity, and match choice to expected traffic and long-term costs.
Inspect Tile Glaze, Body, and Grout for Repairability
Before you start refinishing, closely inspect the tile glaze, body, and grout to decide what you can realistically repair versus what needs replacement.
Before refinishing, thoroughly inspect glaze, tile body, and grout to determine repairable areas versus replacements needed.
You’ll perform a glaze inspection and grout assessment to identify cracks, delamination, staining, or structural damage before planning repairs.
- Check surface shine and crazing
- Tap for hollow sounds
- Probe grout firmness
- Look for chips or missing glaze
- Note moisture intrusion
Tile Problems You Can Fix Without Replacement
If the glaze and body are intact, you can fix many common tile issues without replacing whole tiles. You can remove stains, dullness, and surface scratches with proper cleaners, polishing pads, and sealers.
Regrouting, spot-filling chips, and replacing cracked grout lines restores appearance. Follow tile maintenance tips and basic ceramic restoration techniques to revive shine and extend tile life affordably.
Tile Damage That Requires Full Replacement
You’ve had success fixing stains and chips, but some problems go beyond surface repairs and call for full tile replacement.
You’ll need to assess Tile types and Replacement signs to decide. Severe cracks, delamination, water damage, structural movement and persistent mold often demand removal and new tile installation.
- Hairline-to-through cracks
- Glaze delamination
- Substrate water damage
- Floor movement gaps
- Recurrent mold behind tiles
Tools and Safety Gear for Tile Refinishing
Before you start refinishing, make certain you’ve got the right safety gear—gloves, a respirator, eye protection, and knee pads—to protect yourself from dust, chemicals, and sharp edges.
You’ll also need a few recommended tools like sandpaper or a deglosser, a good-quality primer and topcoat, foam rollers, and small brushes for grout lines.
Knowing which items are essential will keep the job safe and guarantee a professional-looking finish.
Essential Safety Gear
Safety gear isn’t optional when you’re refinishing tile — it’s what keeps you safe from dust, chemicals, and sharp edges.
You should use personal protective equipment and follow essential safety precautions: protect lungs, eyes, skin, and hearing, and prevent slips.
- N95 respirator
- Safety goggles
- Chemical-resistant gloves
- Knee pads and long sleeves
- Non-slip footwear
Recommended Refinishing Tools
1 good set of tools will make the job faster and give you a smoother, longer-lasting finish; you’ll need equipment for cleaning, sanding, priming, painting, and sealing, plus consumables and a few extras to handle tricky spots.
Grab refinishing kits, microfiber cloths, degreaser, sanding pads, a quality primer and epoxy paint, foam rollers, respirator, gloves, and masking tape for precise surface preparation.
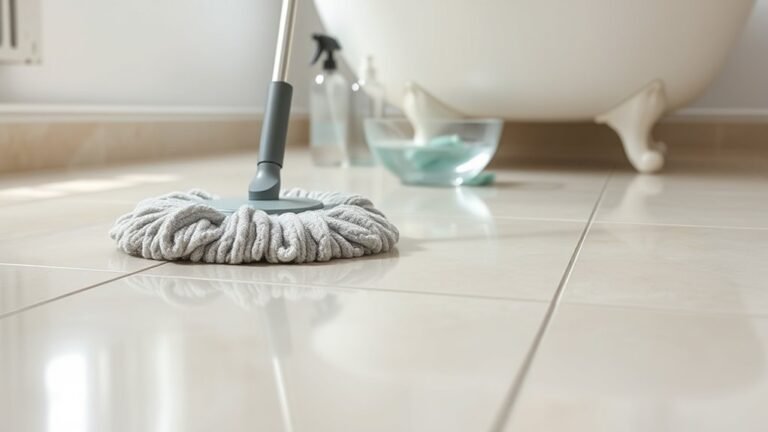
Cleaning to Restore Tile Shine (Before Refinishing)
Start by removing surface dirt and grime so the tile’s true condition is visible—you’ll work faster and get better adhesion for the refinish.
You’ll use gentle cleaners and microfiber cloths, following tile maintenance tips and simple shine enhancement techniques before any primer.
- Sweep and vacuum debris
- Use pH-neutral cleaner
- Wipe with microfiber
- Rinse thoroughly
- Dry completely
Remove Soap Scum, Mineral Deposits, and Grease
Start with gentle cleaners so you don’t damage the glaze while loosening soap scum and grease.
For tougher mineral deposits and stubborn stains, use targeted removers or a diluted acid cleaner applied carefully to the affected spots.
Rinse thoroughly and dry so residue doesn’t interfere with adhesion when you refinish.
Gentle Cleaning Solutions
While you don’t need harsh chemicals to tackle soap scum, mineral deposits, and grease, choosing the right gentle cleaners and techniques will make removal faster and protect your glaze and grout.
Use eco friendly solutions and natural cleaners, and follow safe methods so you won’t damage grout or finish.
- Vinegar dilutions
- Baking soda paste
- Mild dish soap
- Microfiber cloths
- Soft nylon brush
Targeted Stain Removal
Now that you’ve got gentle cleaners and tools ready, focus on removing the specific buildups that dull tile: soap scum, mineral deposits, and grease.
Use vinegar or a mild descaler for minerals, a baking soda paste for scum, and citrus-degreaser for grease.
Work small areas, scrub gently, rinse thoroughly, and dry.
This targeted cleaning improves shine and aids stain prevention long-term.
When and How to Degloss Tile First
If your ceramic tile has a glossy finish or an old coating, you’ll need to degloss it before refinishing so new paint or primer can adhere properly.
You’ll assess coating type, clean thoroughly, choose degloss methods, and follow surface preparation steps to guarantee adhesion.
- Test in an inconspicuous area
- Use chemical deglossers as directed
- Degrease and rinse completely
- Remove loose coating residues
- Allow full drying before priming
Sanding and Honing Ceramic Tile: Techniques
Start by evaluating the tile surface and deciding whether sanding or honing—or a combination—will give you the finish you want; sanding removes surface imperfections and old coatings, while honing subtly reduces gloss and smooths minor scratches. You’ll use sanding techniques with progressively finer grits and gentle pressure, then apply honing methods for uniform matte or satin results.
| Step | Tool | Grit |
|---|---|---|
| 1 | Orbital sander | 60 |
| 2 | Hand pad | 120 |
| 3 | Polishing pad | 400 |
Repair Chips, Cracks, and Surface Pits
Assess each chip, crack, and pit to determine its depth and whether it’s cosmetic or structural, since that decides whether you’ll fill, glue, or replace the tile.
You’ll do chip repair and crack filling for shallow damage, but replace or secure tiles with structural failure.
Follow these steps:
- Clean and dry the area
- Match filler color
- Apply epoxy or ceramic filler
- Sand smooth
- Seal repaired surface
Grout Repair and Color Restoration Techniques
Once tiles look sound, you’ll turn attention to the grout lines, which often show wear, staining, or hairline cracks even when tiles are fine.
Clean grout thoroughly, repair cracks with matching grout, then use grout colorants to refresh uniformity.
Clean grout thoroughly, fix cracks with matching grout, then apply colorants for a refreshed, uniform finish.
Finish by applying grout sealing to protect against stains and moisture.
Repaired, recolored grout instantly sharpens the whole surface.
Polishing vs. Honing vs. Buffing: Which to Use
Curious which finish will suit your tile best? You’ll choose based on wear, gloss desire, and maintenance.
Polishing techniques boost shine; honing methods dull and smooth; buffing refreshes without aggressive removal. Match surface porosity and traffic to the process, and test a small area first.
- Restore gloss quickly
- Reduce visible scratches
- Control slip resistance
- Preserve glaze integrity
- Minimize long-term upkeep
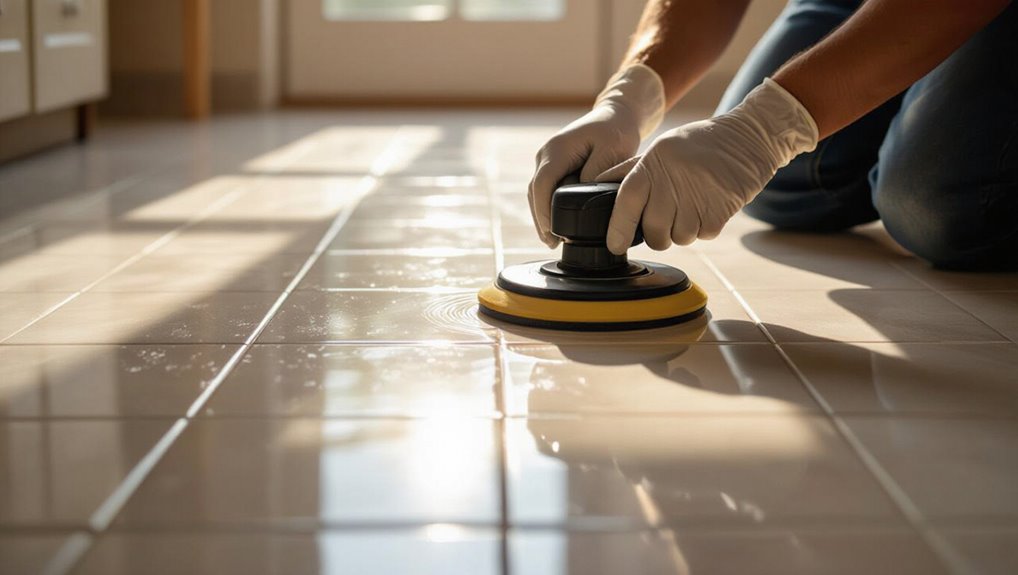
How to Apply Tile Polishing Compounds
Start by preparing the surface so the polishing compound can bond and work effectively: clean the tile thoroughly with a pH-neutral cleaner, rinse and dry, and remove any loose grout or residue from seams and edges.
Choose compound types for your tile, test a small area, then apply thin, even coats with a soft pad.
Use proper polishing techniques, buff to desired sheen, and wipe residue.
When to Use Epoxy or Urethane Tile Coatings
When choosing epoxy or urethane, consider how much prep the surface needs to bond properly and whether you can meet those prep steps.
Think about the durability and traffic the floor will see—epoxy is tougher, urethane resists UV better.
Also weigh application complexity and curing time so you pick a coating that fits your schedule and skill level.
Surface Preparation Needs
Surface preparation determines whether you should use an epoxy or a urethane tile coating, since each system demands different substrate conditions and bonding profiles.
You’ll evaluate adhesion, porosity, and prior finishes, and perform surface cleaning as part of routine tile maintenance before coating.
- Remove grease and soap scum
- Etch or sand glossy tile
- Repair cracked grout
- Dry thoroughly
- Test adhesion with a patch
Durability And Wear
Choose epoxy when you need maximum abrasion and chemical resistance—it’s tougher under heavy foot traffic, frequent cleaning, or exposure to solvents.
You’ll pick urethane for UV stability and some flexibility on less demanding floors.
Match choice to tile composition and existing surface integrity; harder, glazed tiles favor epoxy, while porous or slightly flexible substrates may perform better with urethane coatings for long-term wear.
Application And Curing
Plan your timing around temperature, humidity, and foot traffic—epoxy cures fastest and hardest but needs consistent, moderate temps and low humidity to set properly, while urethane tolerates wider temp swings and handles light moisture better during cure.
You’ll choose based on surface, traffic, and desired sheen; follow recommended application techniques and monitor curing time.
- Surface prep
- Mixing ratios
- Thin, even coats
- Ventilation
- Post-cure testing
Step‑By‑Step Tile Coating Guide
Start by clearing the area and gathering your tools so you can work steadily without interruptions.
Clean tiles thoroughly, repair grout, and sand gloss where needed.
Thoroughly clean tiles, repair grout, and sand glossy spots as needed for a smooth, lasting finish.
Apply primer in thin, even coats, letting each dry.
Roll or brush on the topcoat specified for tile surface treatments, follow manufacturer cure times, and include ceramic tile maintenance in your routine to preserve shine and durability.
Re‑Seal Glazed Tile Without Clouding the Finish
When you’re re‑sealing glazed tile, pick a sealer labeled for glazed surfaces and low‑sheen finishes to avoid clouding.
You’ll clean thoroughly and remove any residue or old sealer so the new coat bonds evenly.
Apply thin, even coats and follow the manufacturer’s cure times for a clear, durable result.
Choose the Right Sealer
Choosing the right sealer matters because the wrong product can leave a cloudy film on glazed tile and undo all your prep work.
Pick a sealer formulated for glazed ceramics and low-VOC or water-based chemistry to preserve shine, bond properly, and dry clear.
You should consider sealer types and application techniques to avoid haze.
- Test compatibility
- Choose water-based
- Follow cure times
- Use even strokes
- Avoid over-application
Prep Surface Properly
Before you apply any sealer, get the tile completely clean and dry so the product bonds evenly and won’t trap residues that cause clouding.
Do a thorough surface cleaning with a pH‑neutral cleaner, rinsing and drying each section.
Perform a careful tile inspection to identify chips, grout gaps, or old film; repair defects and remove residue before sealing to guarantee a clear, lasting finish.
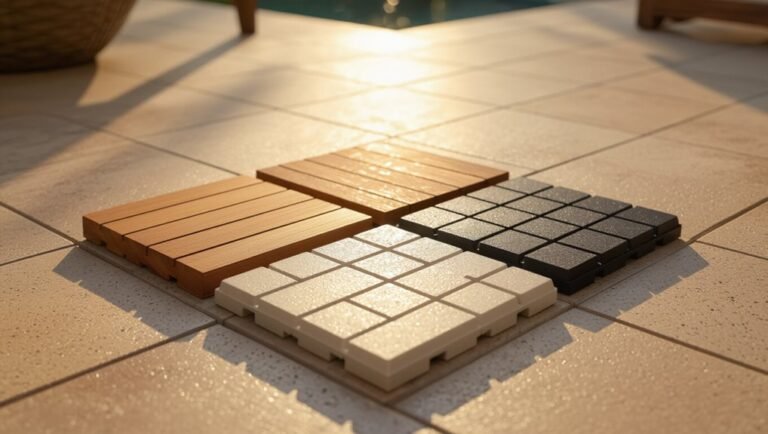
Match the Sheen: Gloss, Satin, and Matte Explained
Although sheen might seem like a small detail, it changes how your refinished tile looks and how it performs. Glossy finishes boost color and reflect light. Satin offers a soft, versatile mid-sheen, and matte hides imperfections while reducing glare.
Sheen may be subtle, but it transforms tile appearance and performance—gloss brightens, satin balances, matte conceals.
You’ll choose based on lighting, traffic, cleaning, slip resistance, and aesthetic goals.
- lighting impact
- traffic durability
- ease of cleaning
- slip resistance
- style consistency
Color‑Changing Coatings and Reglazing Options
Sheen affects how your refinished tile reads, but color changes and reglazing open up a whole new level of transformation — you can completely alter a room’s mood without replacing tile.
You can choose color enhancement coatings to shift hue and depth while maintaining or altering surface texture.
Reglazing hides stains, refreshes grout lines, and gives a durable, unified finish that fits your design.
DIY vs. Professional Refinishing: Cost and Outcomes
When weighing DIY vs. professional refinishing, think about what you can realistically handle and what you want the final result to be.
You’ll balance cost comparison with time, skill, and guaranteed finish; set clear outcome expectations before starting.
- DIY saves money upfront
- Pros deliver consistent durability
- Tools and prep add hidden costs
- Warranty and cleanup matter
- Finish quality varies by skill
How Long Refinished Tile Lasts and Care Tips
If you maintain the surface properly, refinished ceramic tile can look great and hold up for 5–15 years depending on the method and traffic.
Your refinished tile lifespan depends on prep, product quality, and foot traffic.
Follow maintenance best practices: gentle cleaners, soft mop, avoid abrasive pads, wipe spills promptly, and use rugs in high-traffic zones to extend coating life.
Common Mistakes That Ruin a Refinishing Job
Because refinishing relies on good preparation and the right materials, small shortcuts can quickly ruin the finish and waste your time and money.
You’ll avoid common preparation pitfalls and bad product selection by following basics, staying patient, and reading instructions carefully.
- Skipping deep cleaning
- Ignoring grout condition
- Using wrong primer
- Rushing cure times
- Applying too-thick coats
Troubleshooting Adhesion, Bubbling, and Uneven Sheen
Although proper prep prevents most problems, you may still run into adhesion failures, bubbling, or an uneven sheen—and catching them early makes fixes easier. Check for adhesion issues, address bubbling concerns by releasing trapped air, and sand or recoat to correct uneven sheen. Quick spot repairs save full recoats.
| Problem | Cause | Fix |
|---|---|---|
| Adhesion | Contamination | Clean, abrade |
| Bubbles | Trapped air | Puncture, recoat |
| Sheen | Inconsistent coats | Sand, rebuff |
Low‑VOC Tile Coatings and Eco‑Friendly Options
When you’re refinishing tile and want to cut down on fumes and environmental impact, low‑VOC coatings give you durable results without the harsh smell of traditional solvents.
You can choose eco friendly coatings that cure clear, resist yellowing, and suit kitchens or bathrooms while protecting grout.
- Water‑based polyurethane
- Acrylic latex sealers
- Plant‑derived resins
- Low VOC options with quick cure
- Reusable applicator recommendations
Time and Budget Estimates by Room
You’ll want clear time and budget expectations for each space before you start.
For a small bathroom, expect lower material costs and a day or two of work, while kitchens usually need more prep, specialized coatings, and a higher budget.
Living areas often take longer to cure and may require a weekend or more to complete and reopen.
Small Bathroom Estimates
Refinishing a small bathroom usually takes less time and costs less than larger spaces, but you’ll still want realistic time and budget estimates before you start.
You’ll factor room size, small bathroom layouts, existing grout, and tile color trends when planning. Typical projects finish in a day or two; expect moderate labor and materials costs.
- Prep and cleaning
- Grout repair
- Primer application
- Finish coats
- Sealing and cure time
Kitchen Cost Breakdown
Kitchens usually cost more and take longer to refinish than bathrooms because of larger surface area, cabinetry edges, and higher-use surfaces that need tougher prep.
You should budget more time and money based on kitchen layout complexity, appliance removal, and varied tile styles.
Expect 2–5 days for a modest kitchen and higher for islands or open plans; get an itemized quote for labor and materials.
Living Area Timeframe
Because living areas tend to be larger and more open, plan for more time and a slightly higher budget than for a single bathroom—typically 2–4 days for an average-sized room and 4–7 days for open-plan spaces or multiple connected rooms.
You’ll factor in prep, finish type, and living area trends influencing tile design choices.
- Prep and cleaning
- Minor repairs
- Sealant selection
- Drying times
- Labor vs. DIY
When Warranties and Product Guarantees Matter
When you choose a refinishing product or contractor, warranties and guarantees tell you what’s covered, for how long, and how claims are handled, so don’t skip the fine print.
You should confirm warranty implications for labor and materials, verify transferability, and document preexisting damage.
Compare expected product lifespan against warranty periods, and get written terms before work begins to avoid disputes.
Prepare Adjacent Surfaces and Protect Fixtures
Warranties and guarantees only cover the refinishing itself, not the damage that can happen to nearby surfaces or fixtures during the work, so you should protect everything before coatings go on.
Tape edges precisely and cover fixtures to prevent drips, then seal off adjoining rooms. Follow these steps:
- Mask baseboards and trim
- Tape edges around countertops
- Cover fixtures and plumbing
- Protect adjacent floors
- Seal door thresholds
Aftercare: First 72 Hours Post‑Refinishing
For the first 72 hours after refinishing, keep the area dry and restrict foot traffic so the coating can cure properly.
Don’t mop or use cleaners with harsh chemicals during this period — a dry dusting or gentle wipe with a barely damp microfiber cloth is fine if needed.
If you must cross the area, wear soft, clean shoes or use temporary walkways to avoid scuffs.
Avoid Moisture And Traffic
Although the new finish looks dry to the touch, keep off the tiles and keep them completely dry for the first 72 hours to let the coating fully cure.
You’ll focus on moisture control and traffic management to protect adhesion and shine.
- Block entryways and post signs
- Use absorbent rugs outside treated zones
- Avoid spills and mop water
- Keep pets off floors
- Limit heavy loads and foot traffic
Gentle Cleaning Only
Now that you’ve kept people and moisture off the floor, you can begin very gentle cleaning once the 72‑hour cure window closes.
Use soft microfiber mops, mild cleaners, and avoid harsh chemicals or heavy scrubbing.
If needed, test gentle abrasives on an inconspicuous spot.
Prefer natural solutions like diluted vinegar or castile soap for stubborn spots, then rinse and dry promptly to protect the new finish.
Quick Checklist: Refinish or Replace?
When you’re weighing whether to refinish or replace ceramic tile, start by checking the damage, budget, timeline, and long-term goals. Small chips, surface stains, or outdated grout often call for refinishing, while cracked tiles, widespread structural issues, or a desire for a new layout usually mean replacement is the better choice.
- Inspect cracks and loose tiles
- Estimate costs and downtime
- Consider refinishing techniques
- Assess grout condition
- Plan ongoing tile maintenance
Frequently Asked Questions
Can Refinished Tile Release Harmful Fumes Over Time?
Yes — if low‑VOC coatings aren’t used, you’ll risk fume safety issues; solvents can off‑gas and cause long term effects like respiratory irritation or headaches, so ventilate well and choose certified low‑emission products.
Will Refinishing Affect Under-Tile Heating Systems?
Yes — refinishing methods usually won’t harm under-tile heating systems if you use low-temperature, water-based coatings and avoid thick layers; you’ll maintain heating efficiency so long as installers follow manufacturer guidelines and let materials fully cure before use.
Can You Refinish Tile Outdoors in Freezing Temperatures?
Cold as ice, you shouldn’t refinish tile outdoors in freezing temperatures because outdoor refinishing needs stable warmth; temperature effects ruin adhesion and cure times, so wait for milder weather or use climate-controlled methods to get proper results.
Does Refinishing Change the Tile’s Slip Resistance?
Yes — refinishing methods can change slip resistance; you’ll alter surface texture and coatings, so tests or slip-resistant topcoats are needed to maintain or improve traction, especially on wet or high-traffic ceramic tile surfaces.
Can Pets Damage Refinished Tile Differently Than Original?
Yes — refinished tile can react differently: glossy new coating resists stains but may show pet claw impact more, while original wear hides scratches; you’ll judge tile surface durability by coating type, application quality, and pet habits.
Conclusion
You can often refinish ceramic tile instead of replacing it, saving time and money while avoiding a renovation headache. If the glaze’s mostly intact and chips or stains are limited, you’ll restore shine with cleaning, light sanding, and a proper sealant or coating. But if tiles are cracked through, delaminating, or under warranty limits, replace them. Follow prep and aftercare carefully — one small misstep can wreck the job, so proceed with care.