How to Deep Clean Bathroom Floor Tile and Remove Stubborn Grime Easily
You can restore grimy bathroom tile by clearing debris, sweeping, and vacuuming, then pre-treating stains with a baking soda paste or vinegar solution; scrub grout and corners with a stiff brush, let cleaners sit the recommended time, then mop and rinse thoroughly to remove residue. Use grout cleaner or mild acid for mineral buildup, wear gloves, and test products on a small spot first. Follow up with sealing and better ventilation, and keep going to learn detailed steps and tips.
Quick-Start: Deep Clean a Bathroom Tile Floor in 10 Steps
Ready to get your bathroom tile truly clean? You’ll follow ten clear steps: remove debris, sweep, vacuum, choose eco friendly options, mix cleaner, pre-treat stains, scrub grout and tile, rinse thoroughly, dry, and seal if needed.
You’ll prioritize regular tile maintenance to prevent buildup, work methodically from far corner toward exit, and tackle stubborn spots promptly for lasting results.
Decide: Surface Clean vs. Grout Restoration
How do you know whether to stick with a surface clean or schedule grout restoration? You’ll assess stain depth, mildew, and grout crumbling.
Try surface cleaning techniques first for light grime; choose grout restoration methods when discoloration or deterioration persists. Consider timeline, budget, and desired finish to decide.
- Inspect condition
- Test cleaning
- Evaluate cost
- Plan outcome
Tools for a Deep Tile Clean
You’ll want a compact but complete kit before you start: a stiff-bristled brush or grout brush, a mop and bucket, a scrub pad or hand-held scrubber, a floor-safe cleaning solution and a grout cleaner or oxygen bleach, plus protective gear like gloves and goggles. Use these tile cleaning tools and essential supplies efficiently.
| Tool | Purpose | Tip |
|---|---|---|
| Brush | Agitate grout | Scrub along lines |
| Mop | Rinse | Change water often |
| Gloves | Protect skin | Replace if torn |
Best Household Cleaners for Tile and Grout
When choosing cleaners for tile and grout, pick products that cut grease and lift grime without damaging sealant or the tile finish.
You’ll want safe, effective options: eco friendly options like vinegar-based mixes or baking soda paste, mild bleach solutions for stubborn mold, and tested commercial brands for tough jobs.
Choose based on grout type and ventilation.
- Vinegar/baking soda
- Oxygen bleach
- Mild bleach
- pH-neutral cleaner
Choose a Tile-Friendly Commercial Cleaner
If household mixes aren’t cutting it, look for a commercial cleaner designed for your tile type and grout. Choose products labeled safe for your surface, test a small patch, and consider eco friendly options and scent preferences before buying. Follow dilution and dwell-time instructions, wear gloves, and ventilate.
| Feature | Benefit | Tip |
|---|---|---|
| pH | Protects tile | Test first |
| Label | Surface match | Read directions |
| Scent | Comfort | Choose low-odor |
| Eco | Safer disposal | Look-certified |
DIY Cleaner Recipes: Baking Soda, Vinegar, Hydrogen Peroxide
Though DIY cleaners won’t replace a heavy-duty commercial product for every stain, baking soda, vinegar, and hydrogen peroxide each offer effective, inexpensive ways to tackle grime on tile and grout.
Use:
- Baking soda benefits: paste for scrubbing grout.
- Vinegar versatility: dilute for degreasing and odor neutralization tips.
- Hydrogen peroxide uses: spot disinfecting surfaces.
- Combine methods for eco friendly cleaners and stain removal techniques; follow cleaning frequency recommendations.
How to Test Cleaners Safely on Your Tile
Before using any cleaner, spot-test it in an inconspicuous area like behind a baseboard or under a rug.
Apply the solution, wait the recommended dwell time, then blot it up.
Inspect the spot for color change or surface damage before treating the whole floor.
Spot-Test Inconspicuous Area
When you’re about to try a new cleaner, test it on a hidden patch of tile and grout to make sure it won’t discolor, etch, or damage the finish.
Pick ideal test surfaces and note cleaner compatibility considerations. Try a small area, wait, inspect for changes, then proceed only if safe.
- Hidden corner
- Behind fixture
- Under mat
- Low-visibility grout
Wait Recommended Dwell Time
If you want to know whether a cleaner is safe for your tile and grout, follow the product’s recommended dwell time and watch the surface as it sits.
Most labels tell you how long to leave the solution before scrubbing or rinsing, and sticking to that window prevents overstaying and potential damage.
Use that period to judge cleaning efficiency and note any texture or finish changes before full use.
Inspect For Color Change
After watching the dwell time, you’ll want to check for color change to make sure the cleaner won’t damage your tile or grout.
Test a hidden spot, rinse, and compare. Watch for color fading or tile discoloration over 10–15 minutes. If you see change, stop and choose a gentler cleaner.
- Pick hidden area
- Apply small amount
- Rinse thoroughly
- Compare after 15 minutes
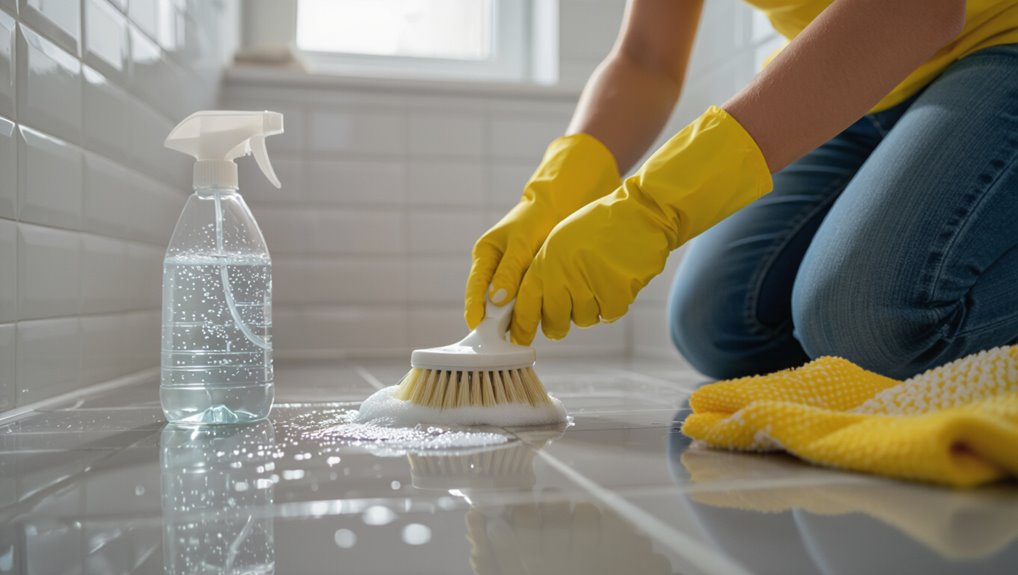
How to Remove Surface Dirt and Loose Grime Fast
Start by sweeping or vacuuming the floor to pick up hair, dust, and loose grit that can scratch tile.
Follow with a dry mop or microfiber cloth to catch finer particles and reach corners you missed.
Shake out or empty your mop head and vacuum canister outdoors to avoid reintroducing dirt.
Sweep And Vacuum
Grab a broom or vacuum and clear loose dirt, hair, and debris from the tile and grout before you apply any cleaners. You’ll prevent grit from scratching and make deep cleaning faster.
Follow tile maintenance tips and cleaning frequency guidelines to keep buildup minimal.
- Sweep corners and edges
- Vacuum with a brush attachment
- Empty vacuum canister
- Check grout lines
Dry Mop And Shake
Once you’ve swept and vacuumed, dry mopping quickly lifts the finer dust and hair that brooms miss, so your cleaners won’t get clogged with grit.
Use microfiber dry mop techniques, working in straight lines toward the drain.
Empty and shake dust outside after each pass to avoid redistribution.
Replace or wash the pad when it’s visibly loaded so wet cleaning starts on a clean surface.
Pre-Treat Grout Lines Before Scrubbing
Before you scrub, loosen the grime by applying a grout pre-treatment; it lets cleaners penetrate and reduces elbow grease.
Let it sit 5–10 minutes, then agitate with a brush for grout cleaning and stain prevention. Rinse well and repeat on stubborn areas.
- Apply product evenly
- Wait recommended time
- Scrub with stiff brush
- Rinse thoroughly
How to Use a Steam Cleaner on Bathroom Tile Safely
Turn on the steam cleaner and move methodically across the tile, keeping the nozzle a few inches above grout and tile to avoid saturating seams. You’ll prioritize steam cleaner safety: wear gloves, ventilate, and test a small area. Use low pressure for effective steam cleaning and wipe residue immediately.
| Step | Temp | Tip |
|---|---|---|
| Prep | Low | Ventilate |
| Test | Med | Spot-check |
| Finish | Low | Wipe dry |
Scrub Tile Effectively Without Scratching It
1 simple trick to scrub tile without scratching is to choose the right tool and move with controlled pressure—use a soft-bristle brush or nonabrasive pad, keep your strokes gentle and along the tile’s grain, and avoid metal scrubbers or coarse powders that can etch the surface.
- Test on an inconspicuous spot first.
- Match scrubbing techniques to tile finishes.
- Rinse frequently.
- Dry to prevent residue.
Remove Soap Scum From Tile and Corners
For stubborn soap scum, mix equal parts white vinegar and water for a quick, effective cleaner you can spray on tile.
Let it sit a few minutes, then scrub corners and grout lines with a stiff brush to loosen buildup.
Rinse well and repeat spots as needed until the tile looks clean.
Quick Vinegar Solution
A simple mixture of white vinegar and water cuts through soap scum on tile and in corners without harsh chemicals, so you can quickly restore shine and grout clarity.
You’ll enjoy vinegar benefits and eco friendly cleaning while reducing residues.
- Mix 1:1 vinegar and warm water.
- Spray affected areas.
- Let sit 5–10 minutes.
- Wipe with a microfiber cloth.
Scrub Corners With Brush
Once the vinegar loosens grime, grab a stiff-bristled brush to attack soap scum stuck in corners and along grout lines.
You’ll use targeted corner cleaning techniques: work small sections, scrub diagonally into the joint, and rinse frequently. Choose brush types with firm nylon bristles or angled heads for leverage.
Finish by wiping residue with a microfiber cloth to prevent streaks and buildup.
Tackle Hard Water Stains on Floor Tile
Hard water leaves chalky, stubborn mineral deposits on tile and grout, but you can remove them with the right cleaners and technique.
Hard water can leave chalky mineral stains on tile and grout, removable with proper cleaners and technique.
Use mild acid cleaners or vinegar solutions for stain removal, scrub gently, rinse thoroughly, and dry to prevent spots.
Follow maintenance tips and product recommendations, then adopt preventive measures like squeegeeing after use.
- Vinegar solution
- Commercial descaler
- Soft brush
- Squeegee
Remove Mildew and Light Mold From Grout
If mineral deposits are gone but you still spot dark specks along grout lines, you’ll want to tackle mildew and light mold next. Scrub with a vinegar-water mix, rinse, dry, and apply grout sealing to prevent return. For mildew prevention, guarantee ventilation and wipe tiles after use.
| Tool | Solution | Time |
|---|---|---|
| Brush | Vinegar mix | 5 min |
| Cloth | Water rinse | 2 min |
| Sealant | Grout sealing | 10 min |
Kill Stubborn Mold on Grout Without Bleach
Stubborn mold in grout can be removed without bleach by using targeted, non-toxic cleaners and a little elbow grease; start with a paste of baking soda and water or a hydrogen peroxide spray, let it sit for several minutes, then scrub with a stiff brush and rinse thoroughly.
- Use baking soda paste.
- Spray hydrogen peroxide.
- Scrub with stiff brush.
- Dry and ventilate to aid mold prevention and use eco friendly alternatives for regular maintenance.
Deal With Deep-Set Grout Stains
Before treating deep-set grout stains, test a small, inconspicuous area to make sure the cleaner won’t damage your grout or tile.
Once the spot test looks fine, apply a grout cleaner or a paste of baking soda and water to the stained lines.
Scrub firmly with a stiff brush, rinse, and repeat until the stain lifts.
Test A Small Area
Since deep-set grout stains can react differently to cleaning solutions, start by testing a small, inconspicuous patch first.
You’ll check grout color and tile finishes across surface types, confirm eco friendly options won’t harm tile maintenance, and challenge cleaning myths before broader use.
Note cleaning frequency impact and compare products to guide stain prevention and cleaning techniques.
- Test inconspicuous spot
- Observe reaction
- Compare products
- Note results
Apply Grout Cleaner
Apply a grout cleaner formulated for deep-set stains, working in small sections so you can agitate and rinse thoroughly before the solution dries.
Use targeted grout cleaning techniques: apply, let dwell per label, then rinse with clean water.
For sensitive areas, choose eco friendly options like oxygen bleach or vinegar solutions.
Repeat only where stains persist, then neutralize and blot dry.
Scrub With Brush
Scrub the grout with a stiff nylon brush, working small sections so you can tackle deep-set stains without spreading grime.
Use appropriate brush types and targeted cleaning techniques, and rinse often to check progress.
Stay patient and scrub firmly.
- Test cleaner
- Choose brush types
- Apply technique
- Rinse and repeat
Lift Oil and Grease Stains From Tile
Oil and grease can sink into tile grout and leave dark, stubborn spots, but you can lift most of it with the right approach and products.
Blot excess with paper towels, then apply an oil absorption powder (cornstarch or baking soda) to reduce grease penetration.
Let sit 15–30 minutes, scrub with a stiff brush and a degreasing cleaner, then rinse and repeat if needed.
Remove Rust Stains From Bathroom Tile
If you spot rust on your bathroom tile, first figure out what’s causing it—old metal fixtures, iron-rich water, or a dropped canister can all be culprits.
Use safe rust removers like a paste of baking soda and lemon or a commercial product rated for your tile type, and always test a small area first.
Once it’s clean, replace or protect the source of rust and dry the area regularly to prevent it from coming back.
Identify Rust Cause
Before you try any cleaners, figure out what’s causing the rust so it doesn’t keep returning. Inspect fixtures, fittings, and tools to pinpoint the source.
For effective rust removal and long-term rust prevention, address moisture and metal contact.
- Check leaky pipes
- Inspect metal drains
- Examine rusting hardware
- Note wet storage or tools
Use Safe Removers
When rust appears on your bathroom tile, choose removers that tackle iron stains without harming grout or finish; you’ll want a product labeled safe for ceramic or porcelain, a mild acid like oxalic acid or a commercially formulated rust remover, or a homemade paste of cream of tartar and hydrogen peroxide for small spots.
Use eco friendly alternatives and effective natural solutions, non toxic products and biodegradable cleaners, gentle cleaning methods, safe scrubbing techniques, child safe options, and sustainable cleaning practices.
Prevent Future Stains
Although rust can seem to return overnight, you can stop it before it starts by removing moisture sources, replacing corroding fixtures, and keeping metal items off tile surfaces.
Use stain prevention through humidity control, sealing grout, product selection, and routine maintenance.
Adopt cleaning habits and daily upkeep with moisture management and ventilation tips.
- Use floor mats
- Fix leaks promptly
- Seal grout yearly
- Choose rust-resistant fixtures
Remove Calcium and Lime Buildup From Grout
A simple vinegar soak can dissolve the hard calcium and lime deposits that make grout look dull and feel rough.
You’ll tackle calcium buildup and lime removal with acidic cleaners and natural remedies, focus on grout stains, and use effective scrubbing to lift residue.
Follow prevention tips, adjust cleaning frequency, adopt maintenance habits, and consider grout whitening only when residue’s fully removed.
Brighten Grout With Baking Soda and Peroxide
If grout still looks dingy after removing mineral buildup, try a paste of baking soda and hydrogen peroxide to brighten it fast; you’ll mix them into a spreadable consistency, apply to grout lines, let it fizz for 5–10 minutes, then scrub and rinse to reveal cleaner joints.
- Use baking soda effectiveness for stain lift.
- Apply paste evenly.
- Scrub with a grout brush.
- Rinse thoroughly and dry.
Grout Cleaner vs. Grout Stain Remover: When to Use Each
Decide whether you need a grout cleaner or a grout stain remover by thinking about purpose: cleaners lift dirt and mildew, while stain removers target deep-set discoloration or dye.
Use a cleaner for regular maintenance and light spotting, and reserve stain removers for stubborn, long-standing stains or when you want a color refresh.
Always check product safety for your tile and test durability on a small area so you don’t damage grout or finishes.
Cleaner Purpose Differences
When you’re tackling dingy grout, know that a grout cleaner and a grout stain remover aren’t interchangeable: cleaners lift everyday dirt and mildew, while stain removers target deep-set discoloration like rust, dye, or oil that hasn’t responded to routine cleaning.
- Compare cleaner types for material safety.
- Assess cleaner effectiveness on sample area.
- Use cleaners for maintenance grime.
- Reserve stain removers for persistent stains.
When To Apply
You’ll reach for a grout cleaner for routine upkeep—mildew, soap scum, and surface dirt that builds up from regular use—while a grout stain remover is for deep-set discoloration like rust, dye, or oil that hasn’t responded to repeated cleanings.
Use grout cleaner according to cleaning frequency (weekly or monthly as best practices); reserve stain remover for targeted, occasional treatments after cleaner fails.
Safety And Durability
Although both products aim to restore grout, they differ in how harsh they’re and how safe they’re for your tiles and health.
You should weigh safety precautions, durability considerations, maintenance tips, and long term protection when choosing. Use cleaners for routine grime; reserve stain removers for deep discoloration and test first.
- Test small area
- Wear gloves
- Reseal grout
- Schedule upkeep
Use a Grout Brush Like a Pro
Grab a sturdy grout brush and get ready to work the lines between tiles—proper scrubbing makes the biggest difference in how clean your floor looks.
Use small, firm strokes, angle the bristles into grout, and apply a grout-safe cleaner.
Follow grout brush techniques and professional tips: let cleaner dwell, concentrate on stained spots, rinse frequently, and dry grout to prevent residue and recurring grime.
Deep Clean Large Bathroom Floors Efficiently
Start by planning cleaning zones so you can work methodically and avoid re-soiling areas you’ve already cleaned.
Use efficient tools — a microfiber mop, a scrubber with interchangeable heads, and a long-handled grout brush — to cut time and effort.
Tackle one zone at a time, rinsing tools as you go to keep each section consistently clean.
Plan Cleaning Zones
Divide the floor into manageable zones before you mop or scrub so you won’t miss spots and you can pace yourself.
Use a simple cleaning schedule and clear zone organization to tackle one area at a time.
Prioritize high-traffic sections and note progress.
- Entry/doorway
- Shower/tub surrounds
- Vanity area
- Corners and grout lines
Use Efficient Tools
One or two well-chosen tools will cut your cleaning time in half and make deep-cleaning large bathroom floors much less backbreaking.
Choose a quality mop, scrub brush, or floor steamer to boost efficiency. You’ll pair them with efficient cleaning techniques and follow ideal cleaning schedules to prevent buildup.
Use ergonomic handles and quick-dry pads to reduce effort and repeat visits.
Protect Polished and Glazed Tile Finishes
Polished and glazed tiles look great but they scratch and dull if you treat them roughly, so be deliberate about protection: use soft microfiber mops and nonabrasive cleaners, avoid acidic or bleach-based products, and place felt pads under heavy furniture or mats at entryways to trap grit before it’s tracked across the floor.
Focus on glaze protection and regular tile maintenance.
- Sweep daily
- Mop gently
- Use pH-neutral cleaner
- Replace pads regularly
Clean Unglazed or Porous Tile Without Damage
For unglazed or porous tile, pick mild, pH-neutral cleaners that won’t etch or darken the surface.
Test any product on a small, inconspicuous patch first to confirm it won’t cause staining or color change.
If the test spot looks good, proceed with gentle cleaning and avoid harsh scrubbing.
Choose Gentle Cleaners
Because unglazed and porous tiles absorb liquids and cleaners, you’ll want to pick products that clean without etching or darkening the surface.
Choose cleaners with gentle ingredients and balanced pH. Consider eco friendly options, safe alternatives for allergies, scent preferences, and surface compatibility.
Test effectiveness with proper dilution ratios and application methods.
- gentle ingredients
- pH balance
- dilution ratios
- surface compatibility
Test Small Areas First
Start by picking a small, inconspicuous patch of tile and grout—behind the toilet or inside a closet works well—and try your chosen cleaner there first.
You’ll confirm surface testing safety, spot residue effects, and assess tile durability across tile types.
Compare cleaning products for effectiveness comparison, note stain types and cleaning frequency, and follow safety precautions and protective measures to prevent damage.
Refresh Textured and Slip-Resistant Tile
Textured and slip-resistant tiles need a gentler, more targeted approach than smooth surfaces, since aggressive scrubbing can wear down the texture or coating.
Use a soft-bristled brush, a pH-neutral cleaner, and low-pressure rinsing to lift grime from crevices without damaging the anti-slip finish.
You should follow these cleaning techniques and maintenance tips for textured tiles and slip resistant surfaces:
- Sweep first
- Apply pH-neutral cleaner
- Brush gently along texture
- Rinse and air-dry
Clean Mosaic and Small-Format Tile Properly
Small mosaic and other small-format tiles trap dirt and grout in tiny joints, so you’ll need targeted tools and gentle technique to clean them effectively without loosening tiles or eroding grout.
Use soft-bristled brushes, microfibre cloths and mild pH-neutral cleaner. Spot-treat with a paste for stubborn grime, rinse thoroughly, and dry.
Regular mosaic cleaning techniques prevent buildup; small format maintenance keeps grout intact.
Remove Adhesive and Sticker Residue From Tile
When stickers, tape, or leftover adhesive mar your tile, you can remove them without damaging the surface by softening the residue first and working gently with the right tools; warm soapy water, a plastic scraper, and a few targeted solvents usually do the trick.
- Apply warm soapy water to soften residue.
- Use a plastic scraper gently.
- Try rubbing alcohol or citrus solvent.
- Rinse and dry, following adhesive removal tips and sticker residue solutions.
Safely Clean Tile Near Wood or Painted Trim
1. When you clean tile near wood or painted trim, use gentle tile cleaning methods and avoid soaking edges. Protect trim with painter’s tape and a damp microfiber, wiping cleaners away quickly.
Test cleaners on an inconspicuous spot first. For grout, scrub with a soft brush angled away from trim.
Follow grime prevention tips like wiping spills promptly to protect finishes and reduce future buildup.
Dry and Ventilate Your Bathroom After Cleaning
After mopping, open windows and doors to let fresh air flow through and speed drying.
Turn on the exhaust fan to pull moisture out and reduce lingering odors.
Make sure air can circulate across the floor so grout and seams dry completely.
Open Windows And Doors
Because lingering moisture invites mold and mildew, open your bathroom’s windows and doors right after cleaning to speed drying and clear out fumes.
You’ll get ventilation benefits and fresh air that dry grout, reduce odors, and lower humidity.
Follow these simple steps:
- Open windows wide.
- Prop the door open.
- Place a towel at the threshold.
- Use cross-ventilation.
Use Exhaust Fan
While you’re airing the room, turn on the exhaust fan to pull moisture and fumes out fast; it’s the most efficient way to speed drying, prevent mold, and keep grout from staying damp.
You’ll notice exhaust fan benefits immediately: reduced lingering smells, faster tile drying, and better humidity control.
Run it during and after cleaning until surfaces feel dry to the touch.
Check Whether Grout Needs Repair or Replacement
Wondering whether your grout needs attention? Inspect grout color changes, crumbling grout durability, and persistent stains after grout cleaning.
Decide if grout repair suffices or grout replacement is needed based on grout types and damage. Consider grout sealing to prevent future issues and plan regular grout maintenance.
- Look for cracks
- Test for loose sections
- Probe stained areas
- Note water intrusion
Regrout Sections Without a Full Tear-Out
If a few grout lines are cracked or stained, you can regrout just those sections without tearing out the whole floor.
Gather a grout saw or multi-tool, matching grout mix, a grout float, sponge, and sealant so you’re ready to work.
Use the saw to remove damaged grout, pack in new grout, then clean and seal the repairs for a seamless finish.
Spot Regrouting Techniques
Spot regrouting lets you fix damaged or stained grout without tearing out entire sections of tile, saving time and money.
You’ll target only bad joints, match grout color, and use precise regrouting techniques to blend repairs. After curing, apply grout sealing and follow simple grout maintenance to keep lines looking new.
- Clean
- Remove
- Regrout
- Seal
Tools And Materials
You’ll need a compact set of tools and quality materials to regrout without a full tear-out: a grout saw or oscillating tool with a grout-cleaning blade, a grout bag or grout float for application, a stiff nylon brush, sponge, mixing bucket, and matching grout plus a silicone grout sealer.
Optional but helpful items include a vacuum or dust mask, painter’s tape, and a small pointing trowel for tight joints.
Use eco-friendly products where possible, and follow proper cleaning techniques: measure materials, remove damaged grout, apply new grout neatly, wipe excess promptly, and seal once cured to protect against future grime.
Recolor Grout With Stain or Grout Paint
Recoloring grout with a stain or grout paint can instantly refresh your bathroom without regrouting, and you can choose a shade that hides stains or complements your tile.
You’ll pick a grout color, test adhesion, and apply evenly for clean lines; consider stain longevity when choosing product.
- Clean grout
- Test color
- Apply with brush
- Wipe excess
Seal Grout for Long-Lasting Protection
Now that your grout looks fresh, you’ll want to seal it to protect against stains and moisture.
Pick a sealer made for your grout type—penetrating sealers work for porous grout, while surface sealers add a glossy barrier.
Apply it evenly with a brush or applicator, wipe excess, and let it cure fully for long-lasting protection.
Choose The Right Sealer
1 clear choice in sealers can save you hours of maintenance: pick one formulated for your tile and grout type.
You’ll compare sealer types and learn basic application techniques so you choose durability over hype.
Look for water- or solvent-based, breathable, and mildew-resistant formulas.
Match finish to tile and consider recoat intervals to keep grout protected.
- Water-based
- Solvent-based
- Breathable
- Mildew-resistant
Apply Properly And Evenly
Apply the sealer in thin, even coats so it soaks into grout without puddling or streaking.
You should work in small sections, using a brush or applicator for proper application and even distribution.
Wipe excess promptly, let each coat dry per instructions, and apply a second coat if needed.
This guarantees consistent protection and reduces discoloration or uneven shine.
How Often to Deep Clean Tile to Prevent Buildup
Because bathroom traffic and humidity vary, you should time deep cleans to match how quickly grime and soap scum build up rather than following a rigid schedule.
You’ll assess visual buildup and odor, then adjust cleaning frequency. Use these maintenance tips to decide:
- High use: deep clean every 1–2 weeks
- Moderate use: every 3–4 weeks
- Low use: every 6–8 weeks
- Spot clean as needed
Set an Easy Weekly and Monthly Cleaning Routine
Now that you’ve matched deep-clean frequency to use, set simple weekly and monthly tasks to keep dirt from coming back.
Each week, sweep, spot-mop grout, and wipe baseboards.
Monthly, scrub grout lines and seal as needed.
Keep cleaning supplies visible and grouped for easy access, and maintain bathroom organization so clutter doesn’t hide grime.
Quick, consistent steps prevent big jobs later.
Prevent Mold and Mildew From Returning
If you want mold and mildew to stay away, control moisture, improve airflow, and keep surfaces clean so spores can’t take hold.
Use mold prevention and mildew control habits:
Use simple mold prevention habits: clean regularly, seal vulnerable surfaces, inspect often, and control humidity for lasting results.
- Follow cleaning schedules and surface treatments.
- Apply sealing techniques on grout and tiles.
- Do regular inspections for early spots.
- Use ventilation tips and humidity management to discourage regrowth.
Manage Humidity and Ventilation to Protect Grout
Controlling humidity and improving ventilation will do more to protect grout than spot-cleaning alone, since damp conditions invite mold and accelerate grout breakdown.
You should use a vent fan during and after showers, open windows when possible, and run a dehumidifier for persistent dampness.
These humidity control and ventilation tips reduce moisture, speed grout drying, and help prevent recurring mildew without harsh chemicals.
Common Cleaning Mistakes That Damage Tile and Grout
Because tile and grout look sturdy, you might assume any cleaner will do—but the wrong products or techniques can quickly erode grout, dull glaze, and trap moisture.
You’ll avoid common cleaning myths and prevent grout damage by using proper tools and methods.
- Acidic cleaners that etch surfaces
- Abrasive scrubbing pads
- Overwetting grout long-term
- Skipping test spots before full application
Choose Safe Cleaners for Children and Pets
You’ve learned how harsh cleaners and rough scrubbing can harm tile and grout, and you’ll want to take the same care choosing products when kids and pets share the space.
Pick eco friendly options and sustainable choices with child safe ingredients, pet safe practices, and fragrance free products.
Prefer natural alternatives and non toxic solutions with gentle formulations to protect family health and surfaces.
Remove Deep-Set Stains Without Professional Help
1 simple approach can lift many deep-set stains without calling a pro: target the stain type, apply the right poultice or cleaner, and give it time to work.
You’ll match cleaning agents to stain types, protect tile finishes, and address grout issues gently.
Try these steps:
- Test cleaner on hidden tile.
- Apply poultice, cover.
- Scrub grout with brush.
- Rinse, dry, repeat.
When to Call a Pro for Tile and Grout Restoration
If a poultice and some elbow grease don’t bring your tile and grout back to acceptable condition, it’s time to contemplate a professional.
Call for a professional assessment when stains, pitting, or crumbling grout persist, mold recurs, or the sealant fails.
Pros can advise on grout sealing, repairs, and color restoration, and they’ll help prevent recurring damage you can’t fix with DIY methods.
Typical Cost for Professional Tile and Grout Cleaning
Expect to pay anywhere from about $0.50 to $5 per square foot for professional tile and grout cleaning, with small jobs sometimes quoted by the hour or flat rate.
Costs vary based on tile type, grout condition, size of the area, and whether sealing or stain removal is needed.
Get multiple quotes and ask for an itemized estimate so you can compare services and avoid surprises.
Typical Price Ranges
Prices for professional tile and grout cleaning usually range from about $0.50 to $5 per square foot, depending on factors like the size of the job, grout condition, and whether technicians need to apply stain-removing treatments or sealants.
You’ll use cost comparisons to plan cleaning budgets and decide if DIY or pros fit your needs.
- Small bathroom
- Average bathroom
- Large bathroom
- Per-room estimates
Factors Affecting Cost
Comparing small, average, and large bathroom estimates gives you a starting point, but several specific factors will determine the final bill for professional tile and grout cleaning. You’ll consider cost factors like square footage, grout condition, travel, and chemicals; ask about pricing strategies and guarantees to compare value.
| Factor | Impact |
|---|---|
| Size | High |
| Grime level | High |
| Material | Medium |
| Travel/time | Medium |
| Chemicals | Low |
Hire a Reliable Tile and Grout Cleaner: Checklist
Hiring the right tile and grout cleaner can save you time and protect your floors, so start with a clear checklist of must-haves: proper licensing and insurance, experience with your tile type, references or reviews, transparent pricing and scope, and guarantees for workmanship.
Hiring the right tile and grout cleaner saves time and safeguards floors—check licensing, experience, references, transparent pricing, and workmanship guarantees.
- Verify material compatibility and stain prevention methods.
- Ask about grout sealing and cleaning frequency.
- Confirm eco-friendly options and debunk cleaning myths.
- Ascertain professional services support long-term tile maintenance and bathroom hygiene.
Protect Newly Cleaned Tile During Everyday Use
After deep cleaning, you’ll want to keep dirt from coming back by placing mats at entryways and high-traffic spots.
Use gentle, non-abrasive floor protectors under furniture to avoid scratches and chips.
Finally, adopt a quick daily rinse or mop to stop grime from bonding to the grout.
Prevent Dirt With Mats
A simple mat at each entry point goes a long way toward keeping freshly cleaned tile looking new—place a bath mat outside the shower, a small rug by the sink, and a non-slip mat by the door to trap water, soap, and dirt before it reaches the floor.
- Choose entrance mat types for debris capture.
- Embrace bath mat benefits: absorbency, quick-dry.
- Wash mats weekly.
- Replace worn mats promptly.
Use Gentle Floor Protectors
While you’re enjoying that freshly cleaned shine, protect your tile with gentle floor protectors that prevent scratches, chips, and wear from daily use.
Fit pads to furniture legs, use nonabrasive materials, and check adhesives won’t react with grout.
Pair protectors with recommended gentle cleaners to maintain finish, and inspect periodically for wear so your floor protection stays effective without trapping grime.
Adopt Quick Daily Rinse
Protecting your tile with gentle floor pads helps, but you’ll also want a simple daily rinse to keep that just-cleaned look between deep cleans.
You can quickly remove soap scum and residue with a mop or squeegee. These daily maintenance tips boost longevity and show clear rinse routine benefits.
- Warm water swipe
- Mild cleaner spot
- Squeegee water off
- Quick dry with towel
Clean Grout Sealer and Reseal When Needed
Before you reseal grout, check whether the existing sealer’s still doing its job by sprinkling water on several grout lines—beads that absorb or darken the grout mean it’s time to clean and reseal.
Scrub with pH-neutral cleaner, rinse thoroughly, let dry, then follow grout maintenance tips and sealer application techniques: apply thin, even coats, wipe excess, and cure fully to protect grout and prevent stains.
Maintain Natural Stone Bathroom Floors Safely
If your bathroom has natural stone—like marble, travertine, or slate—it needs different care than ceramic tile.
So after resealing grout, you’ll want to switch to stone-safe practices.
Follow a simple maintenance schedule to balance cleaning frequency and stain prevention.
Follow a simple maintenance schedule to balance regular cleaning with stain prevention for lasting stone surfaces.
- Use stone care product recommendations only.
- Follow sealing tips for surface protection.
- Prioritize damage prevention.
- Respect surface compatibility; avoid cleaning myths.
Clean Grout on Heated Bathroom Floors
Heated bathroom floors need grout care that accounts for warmth and the heating system’s components, so you’ll use gentler methods and lower-moisture techniques than with unheated floors. Use mild cleaners, soft brushes, and minimal water; follow heated floor precautions to avoid damage. Try these quick options:
| Tool | Cleaner | Dry time |
|---|---|---|
| Soft brush | pH-neutral | Fast |
| Sponge | Dilute vinegar | Moderate |
| Steam mop (low) | Mild solution | Short |
Spot-Check Cleaned Areas for Missed Grime
Once you’ve treated grout on warm floors, take a close look for missed grime by inspecting cleaned sections at eye level and feeling along grout lines with a dry finger or cloth.
Now, quickly verify results against your cleaning checklist and address any missed spots immediately.
- Scan visually
- Run fingertip over grout
- Reapply cleaner sparingly
- Note location on checklist
Track Cleaning Results and Know When to Repeat Steps
Track your cleaning results right after spot-checking so you know what worked and what needs repeating. Note areas, methods, and timing to improve cleaning frequency and tracking progress. Use this quick log:
| Area | Result |
|---|---|
| Shower tile | Scrubbed, grout stain remained |
| Near toilet | Cleaned, shining |
| Entryway | Needs repeat treatment |
Repeat stubborn steps based on results.
Frequently Asked Questions
Can Steam Cleaning Spread Mold Spores Elsewhere in the House?
Yes — steam cleaning can spread mold spores if you disturb colonies without containment. You should use proper mold prevention: vent, wear a mask, capture runoff, and follow targeted steam cleaning to avoid dispersing spores throughout your home.
Will Grout Sealer Change My Tile’s Color or Shine Permanently?
About 90% of sealed grout shows no noticeable color shift; no, grout sealer usually won’t permanently change your tile’s color or shine. You’ll protect grout and enhance tile protection with proper grout maintenance and periodic resealing.
Are Enzyme Cleaners Safe for Septic Systems?
Yes — you can use enzyme cleaners; they’re effective at breaking organic grime (enzyme cleaner effectiveness) and are generally septic system compatible when biodegradable and phosphate-free, but you should follow manufacturer guidance and avoid overuse to protect bacterial balance.
Can I Use a Pressure Washer on Outdoor Bathroom Tile Floors?
Right off the bat, you can use a pressure washer on outdoor bathroom tile floors, but don’t go overboard — take it slow. Prioritize pressure washer safety, outdoor cleaning techniques, correct nozzles, and gentle angles to avoid damage.
What Precautions if Someone in Home Has Asthma or Chemical Sensitivities?
You should avoid harsh chemicals, choose natural cleaning products, and use ventilation tips like opening windows and running fans; wear masks, isolate the cleaning area, test cleaners on small spots, and rinse thoroughly to reduce irritants.
Conclusion
You’ve tackled the gritty bits and brought your bathroom floor back to a presentable state—no small feat. Keep up a gentle routine to prevent a return to “characterful” patinas, and reserve heavy treatments for when the tile truly needs revival. With the right tools, cleaners and a bit of elbow grease, grout and stone regain their quieter dignity. Check results, touch up trouble spots, and enjoy the subtly refreshed room you’ve earned.