
How to Clean Saltillo Tile Floors and Protect Natural Clay Finish
You’ll keep Saltillo’s warm clay finish looking great by sweeping daily, mopping weekly with a pH‑neutral cleaner and minimal water, and blotting spills immediately to avoid staining. Avoid acids, bleach, and harsh detergents that etch and darken the clay. Test cleaners first, remove efflorescence with dry brushing, and use a penetrating or surface sealer every 1–3 years depending on traffic. Quick stain fixes and proper resealing will protect the natural finish—keep going to learn practical steps and products.
What This Guide Covers
Before you start, know what this guide covers: routine cleaning, stain removal, sealing and resealing, and tips for preventing damage so you can keep Saltillo tile looking its best without wasting time or product.
You’ll get practical cleaning techniques, clear maintenance tips, step-by-step stain recovery, recommended sealers, and quick schedules.
Follow these concise actions to protect the clay finish and simplify upkeep.
What Is Saltillo Tile and Why It Needs Special Care
Saltillo tile is a handmade, unglazed clay tile from Mexico that’s prized for its warm, rustic look but also for its porous, soft surface that needs careful care.
You should respect Saltillo origins and tile aesthetics while using proper care techniques to protect surface durability.
Follow concise maintenance tips, debunk cleaning myths, and treat the floor gently to preserve color and prevent wear.
How to Tell If Saltillo Is Sealed or Unsealed
Look closely at the tile’s surface: sealed Saltillo usually looks smoother and may have a slight sheen, while unsealed tile appears more matte and porous.
You can also do a simple water drop test—place a few drops of water on the tile and watch: if the water beads, it’s likely sealed; if it soaks in, it’s unsealed.
Use these quick checks before choosing a cleaning method.
Visual Surface Indicators
Surface cues give you quick clues about whether your Saltillo is sealed or not: sealed tiles usually have a subtle sheen and more even color, while unsealed tiles look matte, absorb water quickly, and show darker wet spots or salt efflorescence.
Check for surface wear, color fading, texture changes, altered gloss levels, increased stain visibility, more cleaning frequency, and early moisture damage—signs you need protective treatments.
Water Drop Test
If the visual cues leave you unsure whether your floor’s sealed, try a simple water drop test to confirm.
Place a few drops on several tiles and watch for water absorption. If the water soaks in within minutes, the tiles are unsealed and at risk of moisture damage.
If beads remain, your sealant holds. Re-seal areas that show absorption.
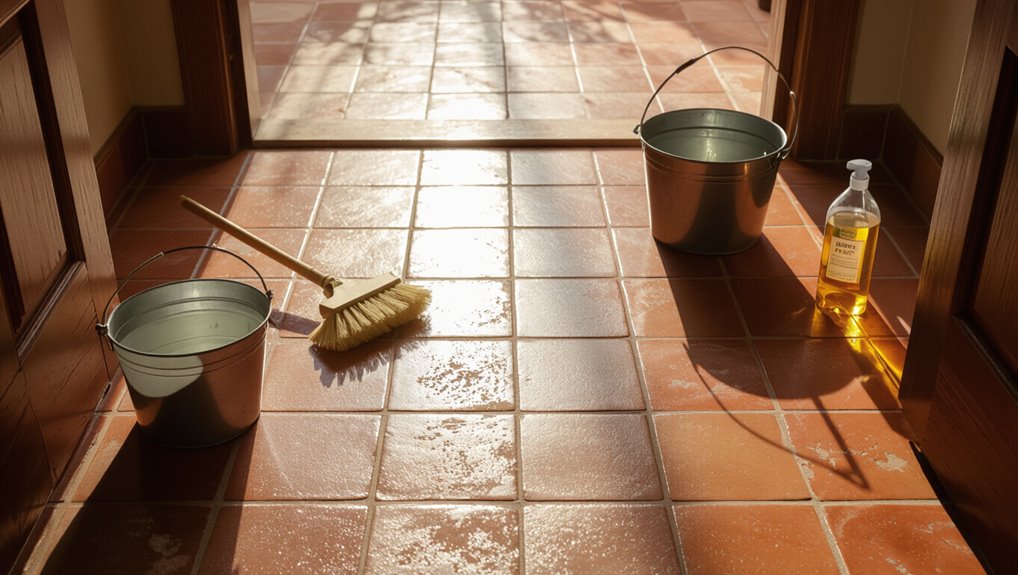
Quick Daily and Weekly Saltillo Maintenance
You should dry-sweep Saltillo floors every day to remove grit that can scratch the surface.
Once a week, mop gently with a pH-neutral cleaner and minimal water to avoid saturation.
These simple habits will keep your tiles looking good and reduce the need for heavy cleaning.
Daily Dry Sweeping
Start by sweeping your Saltillo floors every day to remove grit and dust that can scratch the surface; a quick pass with a soft-bristle broom or microfiber dust mop takes just a few minutes and prevents abrasive particles from embedding in the porous clay. Use proper sweeping techniques to reduce dust accumulation and protect finish.
| Task | Benefit |
|---|---|
| Daily sweep | Removes grit |
| Soft-bristle broom | Gentle on clay |
| Microfiber mop | Captures dust |
| Spot check | Prevents scratches |
Weekly Gentle Mopping
While daily sweeping keeps grit at bay, you should mop weekly using gentle solutions to protect the clay finish.
Mix a pH-neutral cleaner with warm water, wring the mop thoroughly, and work in small sections. Use circular mopping techniques and change water before it gets dirty.
Dry each area with a microfiber cloth to prevent stains and water spots.
Dry‑Sweeping and Dust‑Mopping Without Scratches
Begin by removing loose grit and debris with a soft-bristled broom or a microfiber dust mop to prevent tiny particles from scratching the tile surface.
Use gentle dry sweeping techniques and dust mopping tips:
- Sweep toward a single pile slowly.
- Use long, overlapping strokes.
- Change or wash mop pads often.
- Avoid stiff bristles or dragging dirt across tiles.
Cleaners to Avoid on Saltillo Tile
After you’ve removed grit and dust, be careful which cleaners you use—Saltillo is porous and reacts poorly to acids, harsh alkalis, and abrasive scrubs.
Don’t use acidic cleaners (vinegar, lemon), bleach, ammonia, or high‑pH detergents. Strong commercial cleaning products and harsh chemicals can etch, stain, or strip finishes.
Test any product first on an inconspicuous spot before broader use.
Safe, Gentle Cleaners for Saltillo Clay Finishes
Because Saltillo is porous and easily damaged, you’ll want to stick to pH‑neutral, non‑abrasive cleaners made for unglazed clay or natural stone; mild dish soap diluted in warm water, commercially formulated neutral floor cleaners, or specially labeled tile soaps are all safe options when used sparingly.
Use natural cleaners and gentle methods for clay preservation, pH balance, eco friendly options, and simple homemade recipes.
- Diluted mild dish soap
- Neutral tile cleaner
- Vinegar-free natural cleaner
- Commercial pH‑balanced solution
Wet‑Cleaning Saltillo: Step‑By‑Step
Before you wet-clean, sweep and vacuum thoroughly, then spot-treat any stains so grit won’t scratch the tiles.
Mix a neutral pH cleaner with warm water according to the label and wring the mop until it’s damp, not dripping.
Mop in small sections, rinsing the mop often and changing the water if it gets dirty.
Prepare The Floor
Start by clearing the room so you can move freely and see the whole floor—remove furniture, rugs, and breakables. Then sweep or vacuum thoroughly to lift loose grit that can scratch the tile.
Gather your cleaning tools and plan floor preparation before wet work.
- Dust mop edges
- Vacuum with soft-brush
- Inspect grout and tiles
- Tape off thresholds
Mop With Neutral Cleaner
Now that the floor’s clear and free of loose grit, it’s time to wet-clean.
Mix a pH-neutral cleaner per label, avoiding acids or alkalis that harm clay.
Use a well-wrung mop technique: damp, not dripping, and work small sections in a consistent pattern.
Rinse frequently, change solution when dirty, and air-dry to protect the finish and prevent residue buildup.
Treating Fresh Spills and Organic Stains
When you spill something on Saltillo tile, act quickly to prevent stains from setting into the porous surface: Blot liquids with a clean cloth, use spill absorption techniques like baking soda, then treat organic spots promptly with mild hydrogen peroxide solutions for organic stain removal.
Do:
- Blot excess immediately.
- Sprinkle absorber (baking soda).
- Apply mild peroxide.
- Rinse and dry thoroughly.
Removing Grease and Oil Stains
First, identify where the oil came from so you can choose the right cleaning approach.
Use a gentle, pH-neutral degreaser or a mild dish soap to lift the stain without harming the tile.
Rinse thoroughly and neutralize any residue so the surface won’t attract more oil.
Identify Oil Source
Because oil can come from many sources, you should identify what’s causing the stain before you start cleaning.
You’ll assess oil types and stain origins to choose proper cleaning methods and avoid harming protective coatings. Check source, age, texture, and spread to plan treatment.
- Kitchen oil
- Automotive grease
- Cosmetic/skin oils
- Spilled cooking fats
Use Gentle Degreasers
Now that you know what caused the oil stain, you can pick a degreaser that’ll remove it without harming the tile or sealant. Use gentle cleansers or natural solutions like mild dish soap diluted in warm water, applying sparingly with a soft brush. Test a hidden spot first, blot rather than scrub, and repeat short treatments until the stain lifts.
| Product | Use |
|---|---|
| Mild soap | Dilute, spot test |
| Enzyme cleaner | Apply briefly |
| Citrus degreaser | Use cautiously |
Rinse And Neutralize
Finish by rinsing thoroughly to remove any degreaser residue and neutralize lingering oils so the tile and sealer aren’t left slick or discolored.
You should use rinse techniques that lift soils, then apply neutralize solutions to break oil bonds. Blot excess moisture, avoid scrubbing sealed areas hard, and let tiles air dry fully before resealing or use.
- Warm water mop
- Spot blotting
- Mild neutralizer
- Air dry
Fixing Mineral Deposits and Efflorescence
When mineral salts rise through Saltillo tile and dry on the surface, they leave a chalky white residue called efflorescence that won’t come off with regular sweeping or mopping.
You’ll tackle mineral buildup by dry-brushing, then use a pH-neutral efflorescence removal product or diluted vinegar solution, rinsing thoroughly.
Address moisture sources to prevent recurrence and let tiles dry completely before sealing.
Removing Paint, Ink, and Stubborn Stains
If paint, ink, or other stubborn stains have dried into the porous surface, you’ll need a targeted approach that lifts the stain without damaging the tile or sealer.
Use gentle agitation and test cleaners first; balance paint removal techniques with safe solvents.
Consider ink stain solutions and stubborn stain remedies after a cleaning products comparison.
- Poultice with solvent
- Soft abrasion
- Solvent spot test
- Neutralize and rinse
Deep‑Cleaning Old, Darkened Saltillo
Before you start, inspect the tiles and grout for cracks, loose pieces, or areas with heavy efflorescence so you know what repairs or special care they’ll need.
Use gentle, tile-safe deep-cleaning methods and products to lift embedded dirt without etching the clay.
After cleaning, reapply an appropriate protective finish to restore color and guard against future darkening.
Assess Tile Condition
Start by closely inspecting several areas of your Saltillo floor—high-traffic zones, grout lines, and corners—so you can tell whether darkening comes from surface dirt, embedded grime, or old sealers.
Use tile assessment and condition evaluation to decide next steps.
- Scrape a small spot for residue.
- Check grout absorption.
- Note color variation.
- Photograph problem areas.
Safe Deep Cleaning
Now that you’ve assessed condition and noted where dirt and old sealers sit, you can move on to safe deep cleaning for old, darkened Saltillo.
Use mild pH-neutral cleaners, test small areas, and gently scrub with a soft-bristle brush.
Consider eco-friendly options and natural remedies like diluted vinegar or baking soda rinses, but always neutralize and rinse thoroughly to avoid etching.
Restore Protective Finish
Restore the protective finish by choosing the right sealer and applying it carefully so your Saltillo stays protected and looks revived.
You’ll use targeted restoration techniques, deep-clean first, then test products. For finish application, work in small sections, follow cure times, and buff for even sheen.
- Strip old finish
- Neutralize residues
- Apply sealer thinly
- Buff and cure
How to Test Cleaners and Do Patch Cleaning
Before you apply any cleaner to the whole floor, test it on a small, inconspicuous patch so you can see how the tile and grout react. You’ll confirm cleaner compatibility through patch testing, note color change, and check residue. Use this quick table to record results:
| Spot | Cleaner | Result |
|---|---|---|
| A | Mild | OK |
| B | Acidic | Stain |
| C | Alkaline | Residue |
Choosing a Sealer: Penetrating vs. Topical
Now you’ll compare penetrating sealers, which soak into the clay to protect from within, with topical sealers that form a surface film.
You’ll learn the basic benefits and limitations of each type. That comparison will help you pick the right sealer for your Saltillo floors and maintenance routine.
Penetrating Sealers Explained
When you’re choosing a sealer for Saltillo tile, understanding how penetrating sealers work will help you decide between them and topical finishes.
Penetrating sealers soak into the porous clay and chemically bond below the surface, offering invisible protection without changing the tile’s natural look.
- Sealer types: silane, siloxane, silicone, acrylic blends.
- Benefits: breathability, stain resistance, natural finish.
- Application methods: wipe, spray, low-pressure roller.
- Maintenance: reapply per porosity and wear.
Topical Sealers Overview
Topical sealers sit on the tile’s surface to create a visible protective layer, and you’ll choose them when you want enhanced sheen, easier cleaning, or a stronger barrier against spills and wear.
You’ll appreciate topical sealers benefits for aesthetics and maintenance; topical sealers application is straightforward — wipe, roll, or spray — letting you control finish and recoat schedule without altering tile porosity.
Pros And Cons Comparison
If you liked the look and easy upkeep that a topical sealer gives, you’ll also want to compare it to penetrating sealers before you pick one for your Saltillo floors.
- Topical: immediate surface protection, simple cleaning techniques, higher maintenance frequency.
- Penetrating: discreet finish, better humidity control, long term care.
- Stain prevention: both help; product recommendations vary.
- Restoration tips: topical may need stripping; penetrating needs reapplication.
How to Apply a Penetrating Sealer
1 simple, steady pass with a roller or low-pressure sprayer will get the penetrating sealer into the pores without puddling; you’ll then back-roll any excess so the surface stays even. Use penetrating sealers, follow recommended application techniques, work in sections, and allow full cure before light use.
| Step | Tip |
|---|---|
| Prep | Clean, dry |
| Tool | Roller/sprayer |
| Coverage | Thin coats |
| Time | Cure per label |
| Test | Small area first |
How to Apply a Surface Sealer or Finish
Start by choosing the right surface sealer—film-forming acrylics, urethanes, or polyurethanes. Then work in small, manageable sections so the finish goes on smoothly and evenly.
You’ll focus on sealer application technique and immediate surface protection. Use a quality applicator, maintain wet edges, and follow drying times.
- Clean
- Test
- Apply
- Buff
How Often to Reseal Saltillo Floors
Because sealers wear from foot traffic, cleaning, and sunlight exposure, you’ll need to reseal Saltillo floors on a schedule rather than waiting for obvious damage. Aim for resealing frequency of 1–3 years depending on use, climate, and finish. Follow a simple maintenance schedule to inspect sheen and water beading; reseal when protection weakens.
| Area | Interval |
|---|---|
| High traffic | 1 year |
| Moderate | 2 years |
| Low traffic | 3 years |
| Outdoors | 1 year |
Grout Care, Replacement, and Best Practices
While you’re keeping an eye on sealant wear and scheduling reseals, don’t forget the grout—it’s what holds the tiles together and keeps moisture from seeping under them.
You’ll want regular grout maintenance, spot repairs, and color-matched replacement to protect the clay finish.
- Clean gently with pH-neutral cleaner
- Repoint damaged joints
- Use grout color sealer if needed
- Test patch before full replacement
Preventive Measures: Mats, Pads, Humidity
1 simple habit can prevent a lot of wear: place doormats, furniture pads, and area rugs strategically and control indoor humidity to protect Saltillo tile.
Use floor mats at entrances, protective pads under legs to avoid scratches, and area rugs in high-traffic zones.
Employ humidity control and moisture barriers where needed to limit expansion, staining, and salt bloom for long-lasting natural clay finish.
Repairing Chips, Cracks, and Pitting
Start by evaluating the damage: inspect chips, cracks, and pitting to determine size, depth, and whether the tile needs patching or replacement.
Begin by assessing damage—inspect chips, cracks, and pitting to gauge size, depth, and repair versus replacement.
You’ll perform chip repair, crack filling, and pitting restoration, then surface smoothing, color matching, and texture enhancement to blend repairs.
- Clean and dry area.
- Apply filler for crack filling.
- Sculpt for texture enhancement.
- Sand and match color.
When to Call a Pro for Restoration
If the damage is extensive, uneven across multiple tiles, or beyond simple filling and sanding, call a professional—you’re more likely to get a durable, color-matched restoration and avoid costly mistakes.
You’ll want a professional assessment to confirm scope, timeline, and suitable restoration options.
Let an expert handle structural issues, severe staining, or matching aged clay so repairs blend and last.
DIY vs. Professional Restoration: Cost and Results
While tackling small chips or re-sealing tiles can save you money, weigh the upfront savings against time, skill, and finish quality.
DIY works well for minor, uniform issues, but you’ll likely get better color match, durability, and warranty coverage from a pro on extensive or uneven damage.
DIY suits small, consistent repairs — for uneven or widespread damage, pros deliver superior color match, durability, and warranty.
- DIY techniques: lower cost, variable Restoration results.
- Professional expertise: better Material selection.
- Cost comparison: estimate vs. guarantee.
- Long term benefits: durability, fewer callbacks.
Quick Troubleshooting: Common Problems and Fixes
Because Saltillo tiles are porous and often sealed differently across rooms, you’ll sometimes see issues like staining, efflorescence, loose grout, or uneven sheen; knowing quick, targeted fixes will let you stop small problems before they need full restoration. You should address Saltillo tile issues promptly, avoid common cleaning mistakes, test cleaners, spot-treat stains, regrout loose seams, and buff uneven sheen.
| Problem | Quick Fix | When to Call Pro |
|---|---|---|
| Stain | Poultice or mild acid | Persistent |
| Efflorescence | Dry brush | Returns |
| Loose grout | Regrout | Structural damage |
| Dull sheen | Reapply sealer | Wide failure |
Frequently Asked Questions
Can Saltillo Tile Be Installed Outdoors in Freeze‑Thaw Climates?
Yes — you can install Saltillo tile outdoors, but you’ll need proper outdoor installation methods, sealed tiles, and drainage to guarantee freeze thaw durability; otherwise moisture and repeated freezing will damage the natural clay over time.
Will Radiant Floor Heating Damage Saltillo Clay Tiles?
No, radiant floor heating won’t damage Saltillo clay tiles if you manage radiant effects and heating concerns; you’ll keep gradual temperature increases, stable humidity, appropriate mortar, and flexible grout so the tiles expand and contract without cracking or spalling.
Are Pets’ Nails Likely to Scratch Sealed Saltillo Floors?
Yes — pet nail concerns are valid; sealed Saltillo can still scratch if nails aren’t trimmed. You’ll prevent damage by keeping claws short, using mats, felt pads, regular resealing, and routine tile scratch prevention maintenance.
Can Color Variations Be Blended to Match New Saltillo Replacement Tiles?
Yes — you can, but it takes care and patience. You’ll use color matching techniques like stains, washes, and selective glazing; blend edges during tile installation tips, test repeatedly, and tweak until the changeover looks natural.
Is Saltillo Tile Safe for Kitchens Where Food Is Prepared Directly on the Floor?
You can, but it’s risky: unsealed Saltillo can harbor bacteria, so prioritize food safety by sealing thoroughly and maintaining tile maintenance routines—clean frequently with mild detergent and reseal as needed to protect the clay surface.
Conclusion
You’ve learned how to care for Saltillo so your floors stay beautiful and last. Keep up regular dry-sweeping, use pH-neutral cleaners on sealed tiles, and patch chips promptly—an ounce of prevention is worth a pound of cure. If restoration exceeds your skills, call a pro. With consistent, gentle maintenance you’ll protect the natural clay finish and enjoy warm, rustic floors for years—treat them well, and they’ll repay you in character.
