Do You Need Underlayment for Vinyl Flooring With an Attached Pad?
You usually don’t need extra underlayment for vinyl with an attached pad if your subfloor is flat, clean, and dry and you follow the manufacturer’s instructions. The factory pad gives cushioning, sound reduction, and minor moisture protection, so adding another layer can be unnecessary and raise floor height. Still, you’ll want underlayment for major unevenness, moisture issues, extra soundproofing, or warranty requirements. Keep gaps and seams right, and keep going to learn what to check next.
Do You Need Underlayment for Vinyl Flooring with an Attached Pad? Quick Answer
If your vinyl has an attached pad, you generally don’t need extra underlayment.
However, there are exceptions—like uneven subfloors, moisture-prone areas, or specific manufacturer requirements—where you should add or replace underlayment.
Check the product guidelines and your subfloor conditions before you install.
Direct answer in one sentence
Wondering whether you need extra underlayment for vinyl flooring that already has an attached pad?
In most cases, you don’t—do I need underlayment for vinyl flooring with attached pad is usually answered no because the factory pad provides cushioning, minor sound reduction, and moisture protection.
Just guarantee subfloor is flat, clean, and dry before installation to maintain warranty and performance.
When the short answer changes (exceptions)
Although most vinyl with an attached pad performs well on its own, there are clear exceptions where you’ll want—or need—additional underlayment.
If the subfloor is uneven, noisy, or lacks moisture protection, add underlayment.
Use acoustic or moisture-barrier layers for apartments, basements, or high-traffic rooms.
Follow manufacturer specs; warranties often require specific underlayment types to avoid voiding coverage and guarantee performance.
Basic Understanding What Is an Attached-Pad Vinyl Floor?
An attached-pad vinyl floor is vinyl plank or tile—like LVP or LVT—with a factory-bonded underlayer that often combines foam, cork, or felt.
You’ll find manufacturers heat- or adhesive-laminate the pad to the plank during production to add cushioning, sound reduction, and minor subfloor smoothing.
Knowing how the pad is made helps you decide if extra underlayment is still necessary for your installation.
Definition and common types (LVP, LVT, vinyl plank with attached pad)
Vinyl flooring comes in a few common types you’ll see in stores: luxury vinyl plank (LVP), luxury vinyl tile (LVT), and vinyl planks with an attached pad.
You’ll find LVP mimics wood, LVT imitates stone or tile, and attached-pad planks combine a vinyl wear layer with a bonded cushion for comfort and noise reduction.
Each type suits different styles and installation methods.
How attached pads are manufactured and what they provide
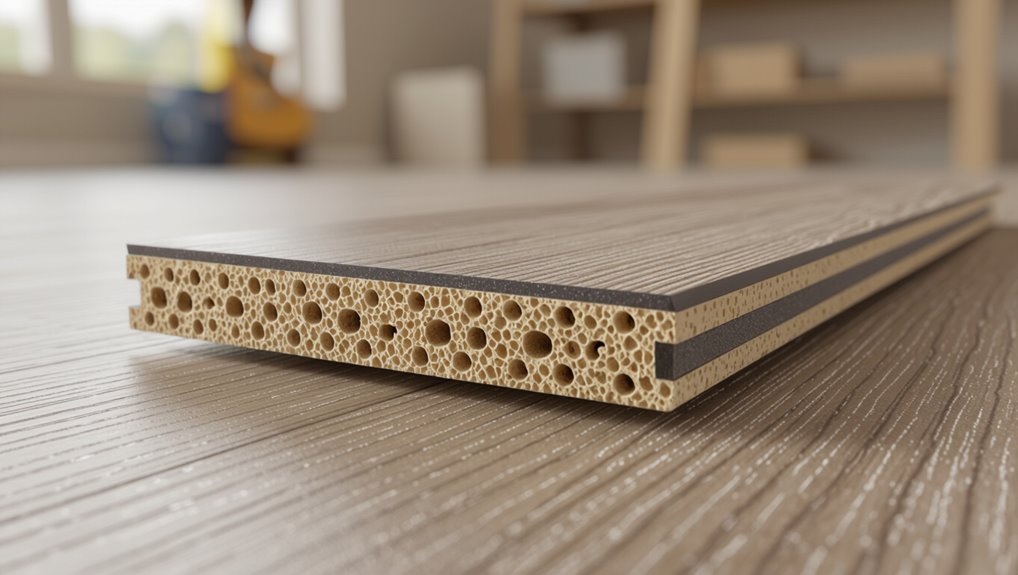
You’ll often find the padded backing factory-bonded to the plank during a lamination process that fuses a foam or felt layer to the rigid vinyl core.
Manufacturers apply heat and pressure or use adhesives to create a durable, one-piece floorboard.
The attached pad adds cushioning, sound reduction, minor subfloor leveling, and slight thermal insulation, but it won’t compensate for major unevenness or replace specialized underlayment.
How Underlayment Works and Why It Matters
You’ll want to know that underlayment serves several jobs: it blocks moisture, reduces sound, cushions foot traffic, and helps even out minor subfloor imperfections.
Attached-pad vinyl has some of those benefits built in, but a separate underlayment can offer better moisture protection or cushioning depending on the product.
Comparing the two will help you choose whether the factory pad is enough or if an additional layer makes sense for your space.
Functions of underlayment (moisture barrier, sound reduction, cushioning, leveling)
Although underlayment sits out of sight, it plays four essential roles that directly affect how your vinyl floor performs and feels:
- Moisture barrier and minor leveling — it blocks vapor and hides small subfloor imperfections.
- Sound reduction and cushioning — it cuts impact noise and softens footsteps for comfort.
- Protection and support — it prolongs vinyl life by distributing load and reducing stress.
How attached pads compare to separate underlayment
How do attached pads stack up against separate underlayment when it comes to performance and installation? You’ll find attached pads offer convenience and consistent cushioning, while separate underlayment gives you customization for moisture control, sound, and leveling. Choose based on subfloor needs and room use.
| Feature | Attached Pad | Separate Underlayment |
|---|---|---|
| Installation | Easier | Flexible |
| Performance | Standard | Customizable |
When You Should Skip Underlayment with Attached-Pad Vinyl
If your vinyl has an attached pad and the subfloor is flat, clean, and structurally sound, you can often skip additional underlayment.
Concrete, well-laid plywood, or existing smooth resilient floors usually don’t need extra padding.
Also, many floating and manufacturer-approved glued installations are designed to work without another underlayment layer.
Conditions where attached pad is sufficient
When your vinyl planks or tiles come with a factory-attached pad, you can usually skip adding a separate underlayment—provided the subfloor is flat, clean, dry, and structurally sound.
You can rely on the attached pad when moisture levels are controlled, traffic is typical residential, acoustics are acceptable, and the manufacturer’s warranty allows it.
Verify seams are tight and connections meet height requirements.
Subfloor types that usually don’t require extra underlayment
Now that you’ve confirmed an attached pad meets the basic conditions, the next step is checking your subfloor type—some are already suitable and won’t need extra underlayment.
Concrete that’s level, smooth, and moisture-tested, finished plywood or OSB in good condition, and existing clean, flat vinyl or tile often work without added underlayment.
Avoid uneven, spongy, or damp substrates.
Installation methods compatible without extra underlayment (floating vs. glued)
Because attached-pad vinyl already cushions and levels small imperfections, you can often skip extra underlayment for both floating and glue-down installations—provided the subfloor is flat and dry.
For floating installs, the pad supports click-lock seams and reduces noise; for glue-down, the pad bonds directly, saving steps.
Don’t skip underlayment if moisture, unevenness, or warranty rules require it.
When You Should Add Underlayment Even If Pad Is Attached
Even with attached-pad vinyl, you should add underlayment if your subfloor has moisture problems or needs a vapor barrier.
If the floor is uneven or squeaky, a leveling underlayment or cement board can make the finish stable and smooth.
Also consider extra underlayment for soundproofing, comfort, or to meet your flooring manufacturer’s warranty requirements.
Subfloor moisture issues and need for vapor barrier
If your subfloor has any chance of moisture—like a basement slab, a ground-level slab in a humid climate, or a floor above an unconditioned crawl space—you should plan for a vapor barrier even when your vinyl planks come with an attached pad.
Moisture can wick up, trap underneath, and cause adhesive failure, mold, or cupping.
Install a compatible vapor barrier per manufacturer specs and local code.
Uneven subfloors and leveling underlayment options
When your subfloor isn’t flat, an attached pad on vinyl planks won’t fix dips, humps, or seams that telegraph through the surface.
You should level with a cement-based patch or self-leveling compound for low spots, or sand/high-spot grind for peaks.
Use a thin underlayment over minor irregularities to smooth changes.
Always follow manufacturer tolerances and verify flatness before installation.
Soundproofing or enhanced comfort needs
Noise and comfort matter, so you’ll want extra underlayment when your vinyl’s attached pad can’t meet your needs for sound reduction or a softer feel underfoot.
If you live above another unit, have noisy kids, or want quieter footsteps and better impact absorption, choose a denser acoustic underlayment.
It improves sound transmission class (STC) and walking comfort without altering flooring height considerably.
Warranty or manufacturer requirements to add underlayment
You’ve already considered comfort and sound, but don’t stop there—manufacturer instructions and warranty terms can override comfort-based choices.
Always check the warranty and installation guide before skipping underlayment. If the maker mandates a specific underlayment or moisture barrier, follow it to keep your warranty valid.
Ignoring those requirements can void coverage, so prioritize compliance over convenience or perceived redundancy.
How to Choose the Right Underlayment for Attached-Pad Vinyl
When choosing underlayment for attached-pad vinyl, you’ll want to focus on thickness, R-value, compression resistance, and moisture protection to match your floor’s needs.
Consider compatible materials like foam, cork, rubber, or cement backer based on subfloor type and traffic.
Also check manufacturer labeling and warranty rules so you don’t void coverage by using the wrong underlayment.
Key features to look for (thickness, R-value, compression resistance, moisture protection)
Picking the right underlayment for attached-pad vinyl means focusing on four critical features: thickness, R-value, compression resistance, and moisture protection.
You want balance—enough thickness for comfort, R-value for insulation, firmness to avoid permanent indentations, and a reliable moisture barrier.
- Match thickness to subfloor and room use.
- Choose R-value for climate.
- Guarantee high compression resistance and vapor protection.
Compatible underlayment materials (foam, cork, rubber, cement backer)
Materials matter: foam, cork, rubber, and cement backer each bring different strengths for attached-pad vinyl, so you’ll want to match their properties to your subfloor and use. Choose foam for sound and cost, cork for warmth, rubber for durability and moisture resistance, and cement backer for leveling and wet areas.
| Material | Strength | Best Use |
|---|---|---|
| Foam | Sound, low cost | Living areas |
| Cork | Warmth, eco | Bedrooms |
| Rubber | Durable, moisture | Kitchens |
| Cement | Rigid, waterproof | Bathrooms |
Manufacturer warranty considerations and labeling
Because underlayment choices can affect more than comfort and performance, you should always check the vinyl manufacturer’s warranty and labeling before installing an attached-pad product.
Review allowed underlayment types, moisture barrier requirements, and installation methods. If you use an unapproved underlayment or alter instructions, you could void the warranty.
Keep records of product labels and installation steps to support any future claims.
Step-by-Step: Installing Underlayment with Attached-Pad Vinyl
Before you start, you’ll run a moisture test and check the subfloor for flatness so nothing surprises you mid-install.
Clean, repair, and level the floor, then lay any needed vapor barrier or underlayment with proper seams and overlaps.
Acclimate and install the attached‑pad vinyl with layout planning and expansion gaps, then finish with trims, passages, and thresholds.
Step 1 Pre-installation checks (moisture test, flatness)
When you’re getting ready to install underlayment for attached-pad vinyl, start by checking moisture levels and subfloor flatness—these two checks determine whether your floor will perform and how much prep you’ll need.
You’ll use a moisture meter and straightedge, record results, and decide if a vapor barrier or additional leveling is required.
- Measure moisture consistently.
- Check for deviations.
- Note tolerances.
Step 2 Preparing the subfloor (cleaning, repairs, leveling)
Step 2 covers getting the subfloor spotless, sound, and perfectly level so your attached-pad vinyl lays flat and stays secure;
you’ll sweep and vacuum, repair cracks or loose boards, and address any dips or high spots with appropriate patching or leveling compound.
Check for nails or debris, sand rough areas, fasten squeaky boards, and follow product cure times before proceeding to the next step.
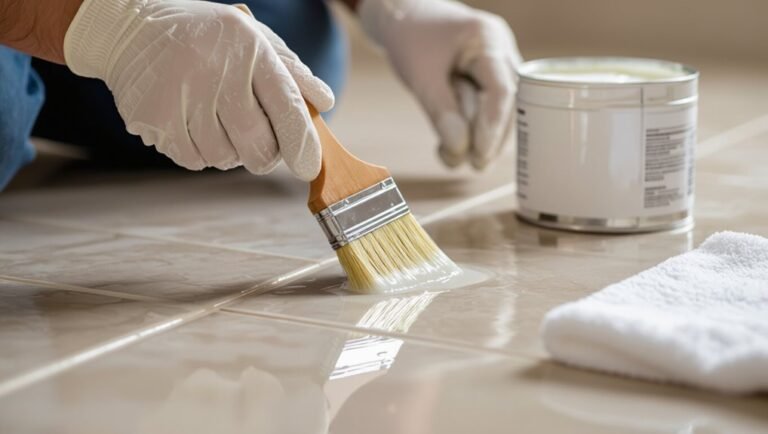
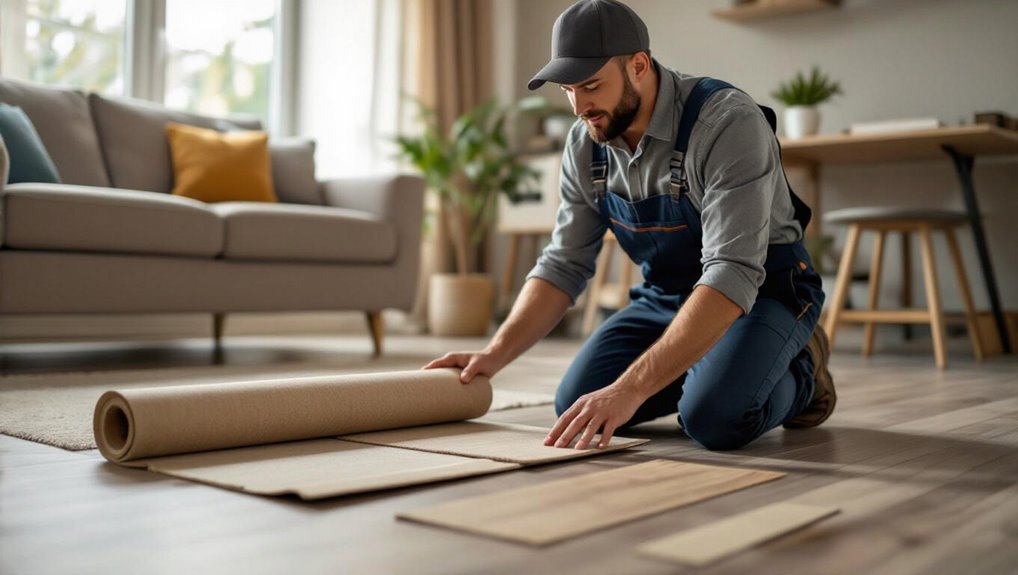
Step 3 Laying vapor barrier or underlayment (seams, overlaps)
Although attached-pad vinyl provides some cushioning, you’ll still want a proper vapor barrier or underlayment to protect the floor and improve performance; lay it out so seams are tight, overlaps follow manufacturer specs, and any seams in moisture-prone areas are taped and sealed.
Roll underlayment perpendicular to planks, butt seams snugly, overlap only where directed, trim excess, and secure edges to prevent shifting during installation.
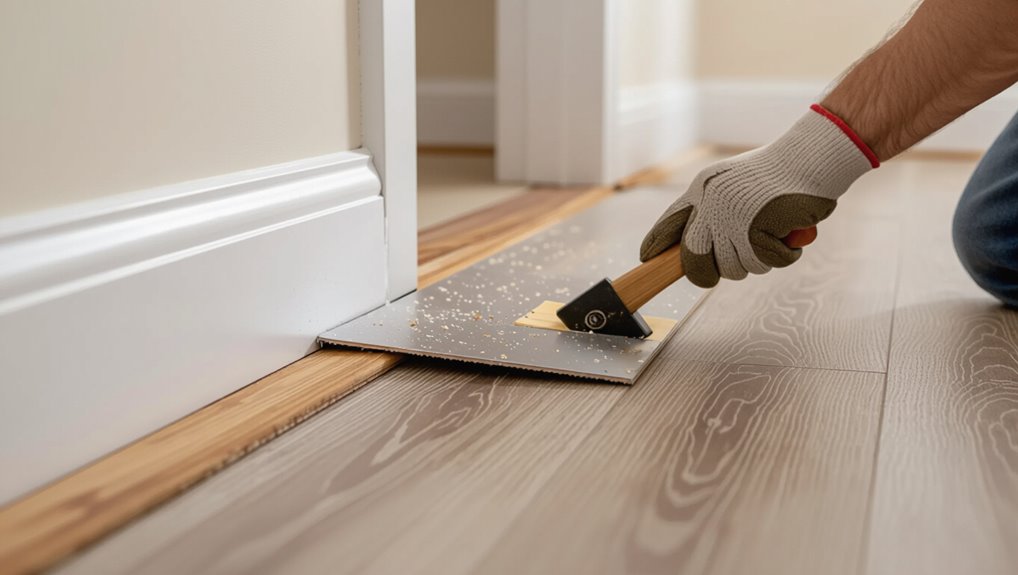
Step 4 Installing vinyl with attached pad (acclimation, layout, expansion gaps)
Before you start laying the planks, let the flooring acclimate in the room for the time the manufacturer specifies so materials stabilize; then plan your layout, staggering end joints and running planks parallel to the longest wall.
Leave recommended expansion gaps around perimeter and at fixed objects, using spacers. Trim starter boards as needed, check alignment frequently, and work row by row for a tight, even fit.
Step 5 Finishing touches (trim, transitions, thresholds)
Finishing touches bring the room together—install baseboards, connector strips, and thresholds so the floor looks polished and the expansion gaps stay hidden.
Measure and cut trim accurately, nail or adhesive-secure baseboards without pinching the flooring, and use junction strips where vinyl meets carpet, tile, or hardwood.
Seal thresholds against moisture and test door clearance before final fastening to avoid binding.
Common Mistakes and Problems to Avoid
Don’t install vinyl over wet or uneven subfloors—you’ll get peeling, mold, and short service life.
Make sure the underlayment you pick is compatible with your vinyl and follow the manufacturer’s instructions so you don’t void the warranty.
Also leave proper expansion gaps and handle junctions correctly to avoid buckling and seam failure.
Installing over wet or uneven subfloors
If you install vinyl over a wet or uneven subfloor, you’ll quickly run into buckling, adhesive failure, and premature wear.
Don’t ignore moisture testing and proper drying; elevated humidity ruins adhesives and promotes mold.
Level low spots with a cement-based patch and sand high areas.
Use a moisture barrier when required and wait for manufacturer-recommended conditions before laying vinyl to guarantee a lasting finish.
Using incompatible underlayment materials
When you pair vinyl with the wrong underlayment, you’ll invite problems like off-gassing, moisture trapping, and poor adhesion that shorten the floor’s life.
Don’t use foam, felt, or rubber products that react chemically with vinyl backing or block moisture vapor control.
Choose underlayment rated for vinyl, check permeability and compressibility, and test small areas if unsure to avoid cupping, delamination, or odors.
Ignoring manufacturer instructions and voiding warranty
Because manufacturers set specific installation and underlayment requirements, ignoring their instructions can quickly void your warranty and leave you covering costly repairs yourself.
If you skip specified underlayment, alter adhesive methods, or use unapproved products, the maker can deny claims.
Always read and follow installation guides, register your flooring if required, and keep receipts so you don’t lose warranty protection.
Overlooking expansion gaps and transitions
Although vinyl looks stable, it expands and contracts with temperature and humidity changes, so you need proper expansion gaps and shifts to avoid buckling, warping, or visible seams.
If you skip gaps or fail to install connectors between rooms, planks can lift or push against walls. Follow spacing specs, use reducers or T-molds at thresholds, and allow movement around fixed objects.
Best Practices and Tips for Longevity
To keep vinyl with an attached pad looking and performing its best, you’ll want regular cleaning, gentle cleaners, and felt pads on furniture to prevent wear.
Watch seasonal humidity and use a humidifier or dehumidifier as needed to avoid gaps or buckling.
If you notice persistent cupping, adhesive failure, or major damage, call a professional for assessment and repair.
Maintenance tips to protect vinyl with attached pad
If you want your vinyl with an attached pad to last, adopt a few simple maintenance habits now that prevent damage and preserve comfort.
Clean spills promptly, vacuum grit, and avoid harsh chemicals. Rotate furniture and use felt pads. Replace high-traffic tiles as needed.
- Sweep or vacuum daily to remove abrasive dirt.
- Wipe spills immediately with a damp cloth.
- Use protective pads under furniture.
Seasonal considerations and humidity control
Because vinyl responds to moisture and temperature swings, you should monitor seasonal humidity and indoor climate to prevent gaps, buckling, or cupping.
Use a hygrometer, and keep relative humidity between 35–55%. Run humidifiers in winter and dehumidifiers in summer as needed.
Allow flooring to acclimate before installation, seal seams where moisture could enter, and promptly address spills to reduce long-term damage.
When to call a professional
When should you call a professional for vinyl flooring issues?
Call one if you notice persistent buckling, gaps, or uneven seams after installation, chronic moisture or mold beneath the planks, or adhesive failures.
Also hire pros for subfloor repairs, complex room layouts, or when warranties require certified installers.
Prompt expert help prevents bigger damage and extends your floor’s lifespan.
Cost and Value Considerations
When you compare costs, adding underlayment raises upfront expenses but can be modest relative to total installation.
Over time, underlayment can improve performance and comfort and may protect your warranty, so you’ll want to weigh those benefits against the initial outlay.
Consider both short-term budget and long-term value when deciding whether to skip it.
Cost comparison: add underlayment vs. skip it
Curious whether adding underlayment is worth the extra dollars?
You’ll pay roughly $0.50–$2.00 per square foot for basic underlayment plus installation time, raising upfront cost modestly.
Skipping it saves those immediate expenses but limits cushioning and minor subfloor correction.
Compare material and labor costs to your budget and room needs to decide whether short-term savings outweigh potential small performance trade-offs.
Long-term value: performance, comfort, warranty implications
Although adding underlayment costs a bit up front, it can pay off over the long run by improving vinyl’s performance, comfort, and sometimes your warranty coverage. You’ll get better sound control, cushioning, and moisture protection that extend flooring life and may preserve warranties. Consider these trade-offs:
| Benefit | Short-term Cost | Long-term Value |
|---|---|---|
| Cushion | + | ++ |
| Noise | + | ++ |
| Warranty | 0 | + |
FAQ
You probably have specific questions about attached-pad vinyl—like whether you can lay it over concrete without underlayment or if adding underlayment will void the warranty.
You’ll also want to know the right underlayment thickness, when a vapor barrier is needed, and whether it works over radiant heat.
I’ll answer each of these so you can choose the best installation approach.
Can I install attached-pad vinyl over concrete without underlayment?
Wondering if you can lay attached-pad vinyl directly over concrete? Yes—you can in many cases, provided the slab is clean, dry, level and smooth.
Patch cracks, fill low spots, and test moisture with a meter. High moisture or unevenness means you should correct the slab first.
Follow manufacturer surface prep guidelines to guarantee proper adhesion and long-term performance.
Will adding underlayment void my vinyl flooring warranty?
How will adding underlayment affect your vinyl flooring warranty?
Check your manufacturer’s warranty and installation instructions first; some brands allow specific underlayments, others prohibit modifications.
If you use an approved product and follow guidelines, your warranty typically stays intact.
Using unapproved or incompatible underlayment, altering moisture barriers, or changing installation methods can void coverage, so document approvals before proceeding.
How thick should an underlayment be for attached-pad vinyl?
What thickness should you expect from an attached-pad vinyl underlayment? Typically, attached pads range from 1mm to 3mm. You’ll see thinner pads around 0.5mm on budget products and up to 4mm on cushioned luxury vinyl, but most common is 1–2mm. Choose based on comfort, subfloor smoothness, and manufacturer’s recommendations to avoid installation or warranty issues.
Is a vapor barrier always necessary under attached-pad vinyl?
Do you always need a vapor barrier under attached-pad vinyl? Not always.
You’ll need one if the subfloor is concrete, prone to moisture, or in basements and ground-level rooms.
On dry, well-sealed plywood or OSB, it’s usually unnecessary and can trap moisture if installed improperly.
Check manufacturer guidelines and test subfloor moisture before deciding.
Can I install attached-pad vinyl over radiant heat systems?
If your subfloor can handle moisture concerns and you’ve decided whether a vapor barrier is needed, you’ll also want to know how attached-pad vinyl performs over radiant heat.
You can install it if the manufacturer approves and surface temperature stays below their limit (usually ~85°F/29°C).
Guarantee even heat, allow acclimation, and follow installation guidelines to prevent warping, adhesive failure, or warranty voids.
Conclusion Bottom Line Recommendations
Use this quick checklist to decide if underlayment makes sense for your vinyl floor: check subfloor type, moisture levels, and the flooring manufacturer’s recommendation.
If conditions are borderline or you spot unevenness, cracks, or high humidity, get a professional assessment before you install.
When in doubt, a pro can save you time and money by confirming the best underlayment option or telling you it’s unnecessary.
Quick decision checklist for homeowners
Here’s a compact checklist to help you decide fast: consider your subfloor type, moisture levels, the vinyl product’s installation method, and whether sound reduction or added cushioning matters—then match those needs to the underlayment options and warranty requirements before you buy.
- Check subfloor and moisture; choose vapor barrier if needed.
- Verify manufacturer rules for attached pad.
- Prioritize sound and comfort vs. thickness limits.
When to seek professional assessment
Wondering whether to call in a pro? If subfloor damage, severe unevenness, moisture issues, or complex layouts worry you, get an assessment.
A pro can test moisture, recommend proper underlayment or repairs, and guarantee warranty compliance.
If you lack tools or experience, or the job affects structural elements or utilities, hire someone to avoid costly mistakes and secure a long-lasting install.