How to Grout Ceramic Tile Cleanly and Evenly Every Time
You can grout ceramic tile cleanly and evenly every time by picking the right grout (sanded for wide joints, unsanded for narrow, epoxy for wet areas), prepping tiles and joints thoroughly, and using a rubber float to pack grout at a 45° angle. Clean excess promptly with a damp sponge, shape joints evenly, rinse and buff to remove haze, then seal after curing. Follow consistent technique and proper cure times, and keep going to get detailed tips and troubleshooting.
Quick Answer Grout Ceramic Tile Cleanly and Evenly Every Time
You’ll mix a sanded or unsanded grout to a peanut-butter consistency, spread it with a rubber float at a 45° angle, and wipe excess with a damp sponge for clean, even joints.
You’ll need grout, a rubber float, a grout sponge, a bucket, gloves, and a grout sealer at a glance.
Follow those steps and tools for fast, professional-looking results.
One-sentence summary of the ideal method
When you want fast, consistent results, mix grout to a creamy, lump-free texture.
Spread it into joints with a rubber float at a 45° angle, work diagonally, and press firmly to fill voids.
Remove excess with the float, let set briefly, then wipe haze with a damp sponge.
Rinse, cure, and seal per instructions to finish.
Tools and materials you need at a glance
Gathering the right tools and materials cuts your work time and prevents common mistakes. You’ll need quality grout, a float, sponge, bucket, grout sealer, and protective gear.
Prepare surfaces and mix per instructions, then work small sections.
- Grout, float, sponge
- Bucket, mixing paddle, sealer
- Gloves, mask, rags
Understanding Grout Basics
Grout is the material that fills tile joints — typically sanded, unsanded, or epoxy — and each type behaves differently.
You’ll want the right technique because grout choice and installation affect both how long the job lasts and how it looks.
Use unsanded for narrow joints, sanded for wider floor joints, and epoxy where you need extra stain and water resistance.
What grout is and common types (sanded vs. unsanded vs. epoxy)
Think of grout as the invisible glue that locks tiles in place and seals the gaps between them. You choose based on joint width and exposure: sanded for wider joints, unsanded for narrow joints and delicate tile, epoxy for waterproof, stain-resistant needs.
| Type | Best for |
|---|---|
| Sanded | Wide joints |
| Unsanded | Narrow joints |
| Epoxy | Wet areas, durability |
Why grout technique matters for durability and appearance
Choosing the right grout type sets you up for success, but how you apply and finish it determines how long that success lasts.
You’ll force grout fully into joints, rake and tool consistently, and clean residue promptly to prevent staining. Proper technique minimizes shrinkage, cracking, and water intrusion, keeps lines straight, and preserves color and texture so your tile looks great and lasts longer.
When to choose each grout type by joint width and surface
While the right grout depends on joint width and the tile surface, you’ll usually pick sanded for wider joints and non-sanded or epoxy for narrow or delicate surfaces.
Choose sanded for joints 1/8″ and larger on floors and textured tiles.
Use non‑sanded for joints under 1/8″ on smooth ceramic or glazed surfaces.
Pick epoxy for wet areas or heavy stains.
Preparation The Key to a Clean, Even Result
Before you start grouting, inspect the tiles for cracks, loose pieces, or unevenness and clean away any old residue, adhesive, or contaminants that could prevent proper adhesion.
Protect adjacent surfaces and fixtures with tape and drop cloths so grout doesn’t stain or harden where you don’t want it.
Finally, measure your joints and calculate how much grout you’ll need to avoid running out mid-job or wasting material.
Inspecting and preparing tile surfaces
Start by thoroughly inspecting the tiled surface for loose, cracked, or uneven tiles and any gaps filled with old grout or debris; you want a stable, clean base so new grout can bond properly.
Check for lippage, levelness, and movement. Remove any loose tiles, tighten or re-bed them, and replace damaged tiles or spacers.
Mark areas needing repair before grouting.
Cleaning old residue and contaminants
A clean substrate makes grout stick and look its best, so you’ll need to remove any old grout haze, adhesives, grease, soap scum, or dirt that could block adhesion.
Scrape loose material, scrub with a pH-neutral cleaner or diluted vinegar for mineral deposits, and rinse thoroughly.
Use a grout haze remover for stubborn film, then let the surface dry completely before grouting.
Protecting adjacent surfaces and fixtures
Now that the surface is clean and dry, protect nearby countertops, fixtures, and trim to keep grout from staining or damaging them.
Use tape and covers, work methodically, and remove grout smears quickly.
- Mask edges with painter’s tape and plastic sheeting.
- Cover faucets and electrical outlets with tape or plastic.
- Keep a damp sponge and bucket nearby to wipe stray grout immediately.
Measuring joints and calculating grout quantity
Before you mix any grout, measure the tile joints so you know exactly how much you’ll need; accurate measurements save time and money and prevent running out mid-job. Measure area, joint width, and depth; use a calculator or online chart to convert to bags. Trust the math—running short ruins momentum.
| Tight | Steady | Relief |
|---|---|---|
| Pinch | Focus | Calm |
| Rush | Stress | Ease |
Step-by-Step Grouting Process
Now you’ll follow a clear, step-by-step grouting process starting with mixing the grout to the right consistency.
Apply and pack the grout into joints using the correct tools, angle, and pressure, then remove excess at the right time.
Finish with an initial clean and shape the grout lines for a smooth, even result.
Step 1 Mix grout to the right consistency
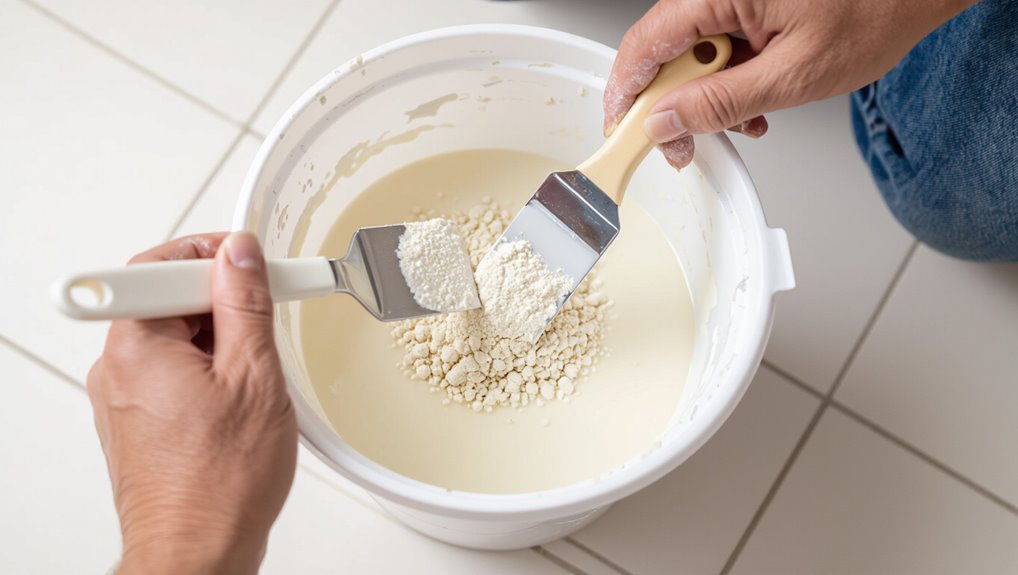
Start by mixing the grout to a peanut-butter–like consistency so it will hold in the joints without slumping out of the gaps.
Measure powder and water per manufacturer directions, add gradually, and stir with a margin trowel or mixing paddle until smooth and lump-free.
Let it slake briefly, then remix. Aim for spreadable, not runny, for clean filling and easier finishing.
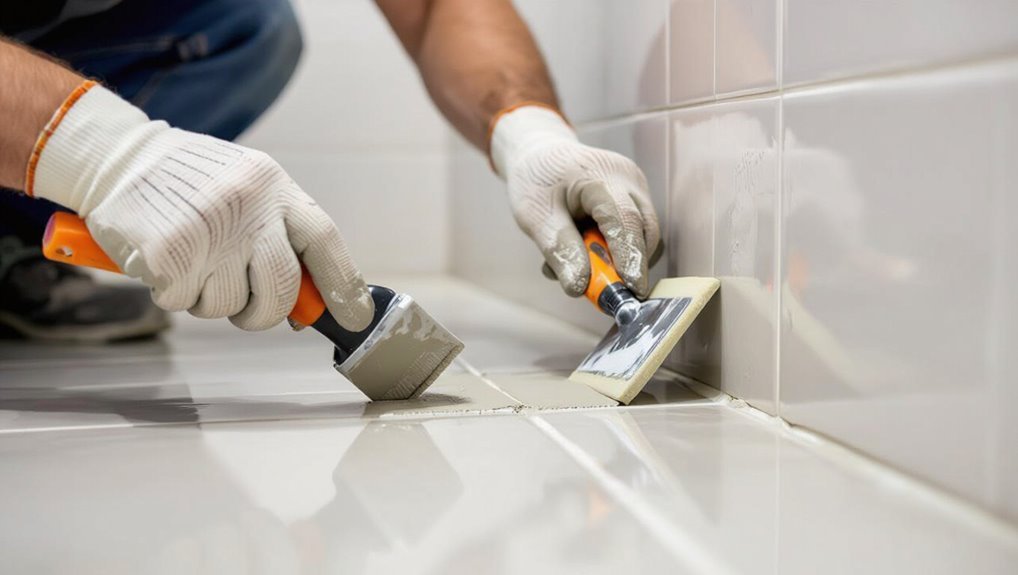
Step 2 Apply grout: tools, angle, and pressure
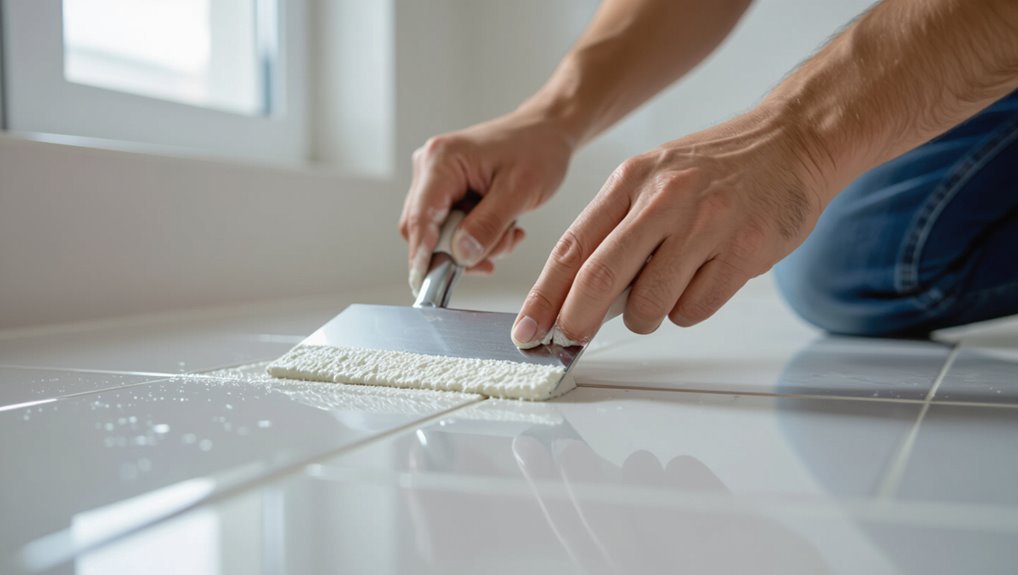
Grab a rubber grout float and hold it at a 45-degree angle to force grout into the joints, pressing firmly but evenly so the compound fully fills gaps without leaving voids; move diagonally across tiles to minimize gouging.
Use the float’s edge to scrape excess off, and switch to a sponge with light pressure to smooth edges. Keep tools clean to prevent dragging dried grout.
Step 3 Pack joints properly for even fill
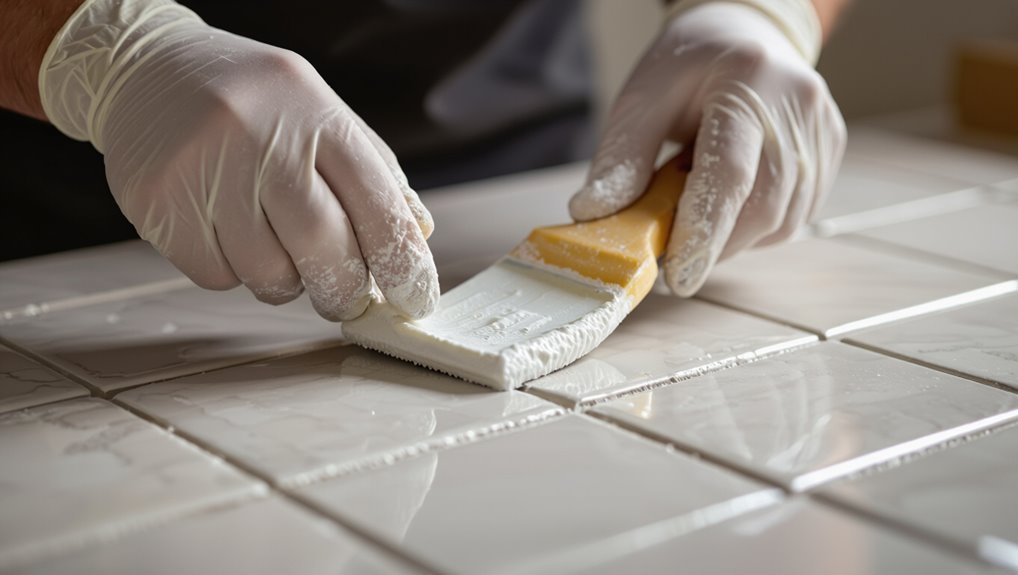
After you’ve forced grout into the joints and scraped off the excess, pack each joint firmly so the compound sits flush and won’t shrink away as it cures.
Use the corner of your float or a grout baton at a 45° angle, pressing deeply to eliminate voids.
Work systematically, refilling low spots immediately so joints stay uniformly dense and level.
Step 4 Remove excess grout timing and technique
1 minute after you’ve finished packing the joints, begin removing excess grout so it doesn’t harden on the tile surface.
Use a firm rubber float held at a 45° angle to scrape diagonally across tiles, pushing grout off. Work in small sections, wiping the float often.
Don’t delay—timing prevents stubborn residue—and keep motions smooth to avoid pulling grout from joints.
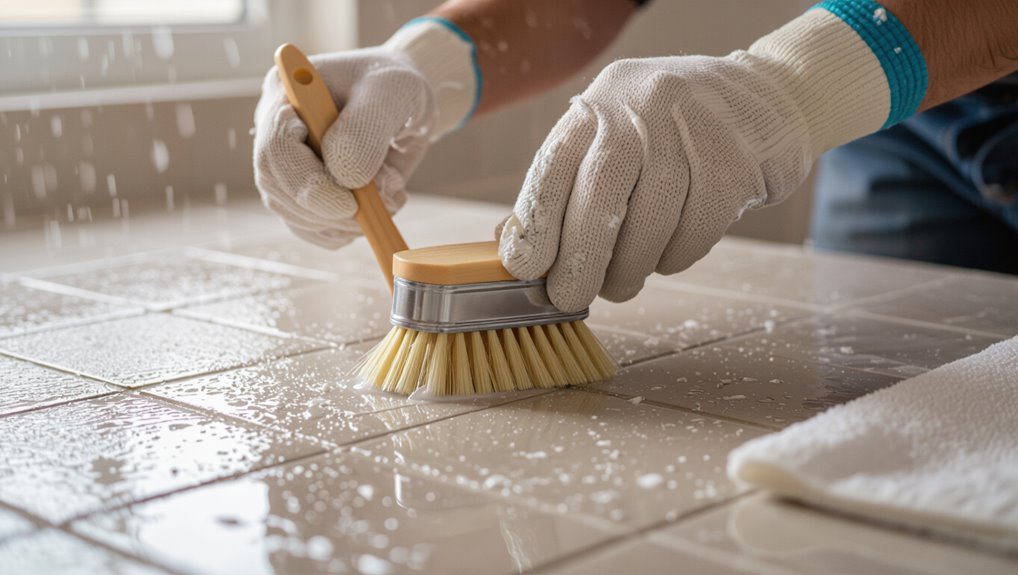
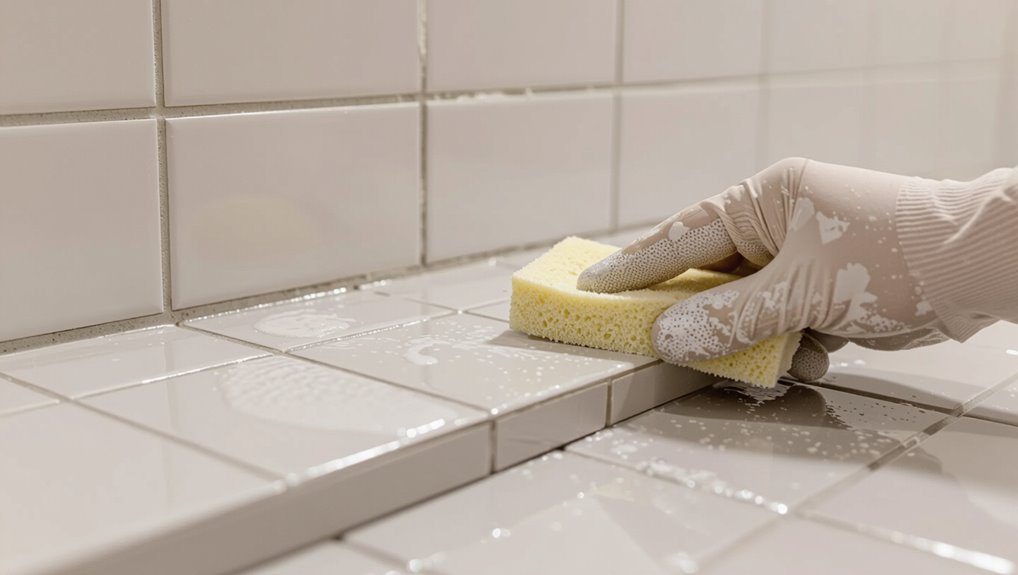
Step 5 Initial clean and shaping the grout line
Once you’ve cleared the bulk of the grout, it’s time to shape the joints and do the initial clean before the grout sets.
Use a damp sponge with light pressure to smooth and round edges, rinsing the sponge often. Keep water minimal to avoid weakening grout.
Follow grout lines with a fingertip or rubber grout float for consistent concavity, removing residue as you go.
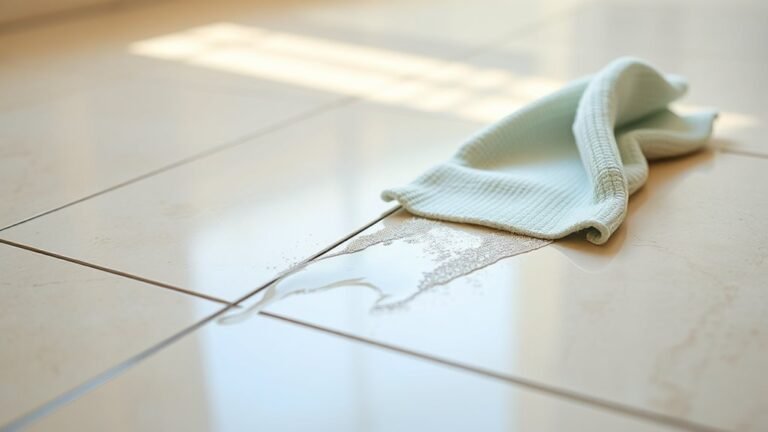
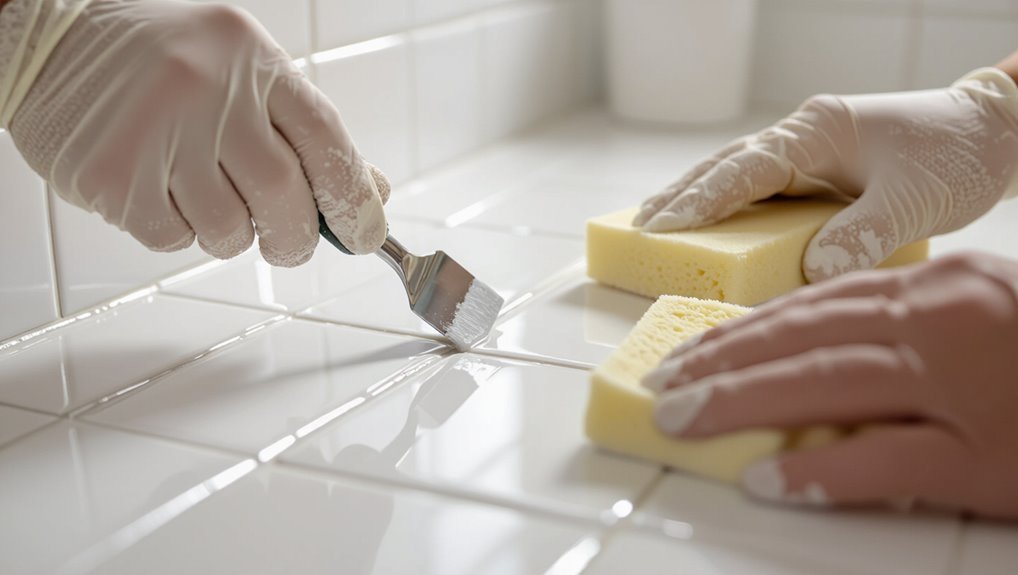
Step 6 Final wash-down and haze removal
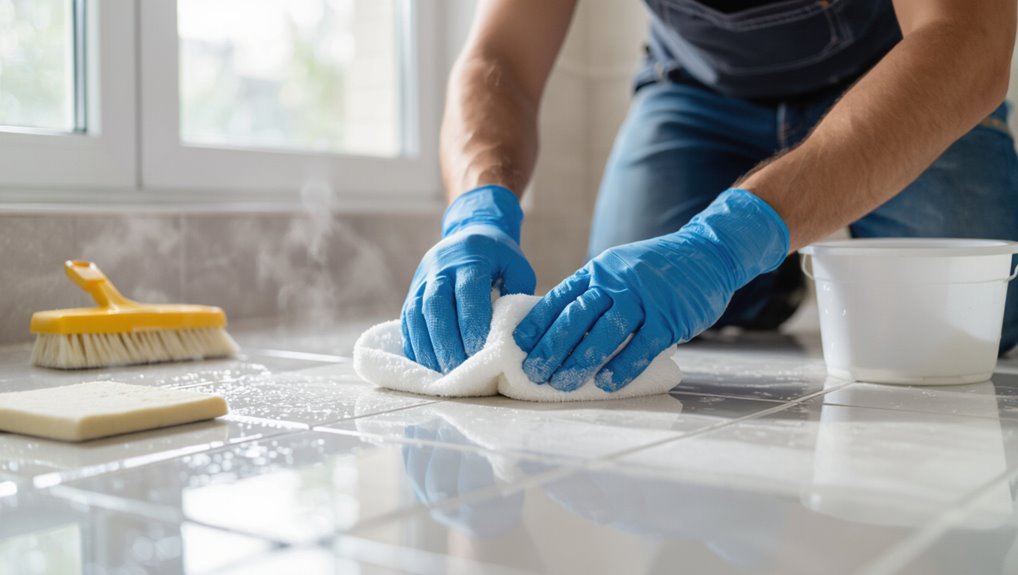
Now you’ll do the final wash-down to remove grout haze and any remaining residue before the grout fully cures.
Dampen a clean sponge, wring well, and wipe diagonally across tiles in sweeping passes. Rinse the sponge frequently and change water when cloudy.
After tiles look clean, buff with a soft cloth to lift remaining haze.
Inspect joints for evenness and touch up any smudges immediately.
Step 7 Curing time and post-grout care
Although the grout will seem set to the touch within a day, you should let it cure fully before heavy use—typically 72 hours for standard cement grout and up to 7 days for some epoxies or high-moisture areas.
During curing, keep the area dry, avoid traffic, and ventilate.
After curing, seal cement grouts as recommended, then clean gently and inspect joints periodically for cracks or staining.
Tools, Materials, and Product Recommendations
Before you start, gather an essential tools checklist—float, grout sponge, mixing bucket, grout saw, and a margin trowel—to keep the job smooth.
Pick the best grout type for your situation (sanded for wide joints, unsanded for narrow, epoxy for high-moisture or heavy-traffic areas).
Finish by choosing recommended sealers and pH-neutral cleaners to protect and maintain the grout.
Essential tools checklist
You’ll need a concise set of tools and materials to grout ceramic tile efficiently and get durable, professional-looking results. Gather these essentials, then confirm quantities and condition before starting.
- Grout float, margin trowel, grout sponge
- Mixing bucket, drill mixer, measuring cup
- Rubber gloves, knee pads, clean rags
Select quality grout and sealant; avoid expired products.
Best grout types for common scenarios
Pick the grout that matches your tile type, joint width, and room conditions so the job lasts and looks right. Use sanded for wide joints, unsanded for narrow or glazed tile, and epoxy for wet or high-traffic areas. Choose color to hide stains or match design.
| Scenario | Grout Type | Why |
|---|---|---|
| Wide joints | Sanded | Strength |
| Narrow/glazed | Unsanded | Prevent scratching |
| Wet/traffic | Epoxy | Waterproof durability |
Recommended sealers and cleaners
Now that you’ve matched grout type to joint width and room conditions, protect and maintain that investment with the right sealers and cleaners.
Choose a penetrating silicone or silane/siloxane sealer for porous grout and an impregnating sealer for epoxy-blended mixes.
Use pH-neutral cleaners for daily care, a bleach-free grout cleaner for stains, and avoid harsh acids that etch tile and degrade sealers.
Common Problems and How to Fix Them
You’ll run into a few common grout problems—uneven lines, shrinking or cracking, stubborn haze, and stains—but most have straightforward fixes.
I’ll show what causes each issue and the specific steps to correct or prevent it. Follow the tips and you’ll keep grout looking smooth, stable, and clean.
Problem: Uneven grout lines causes and corrections
When grout lines look uneven, it usually comes down to inconsistent tile spacing, lippage, or applying grout too soon or too thick; diagnosing which issue you’re facing lets you choose the right fix.
Use consistent spacers, correct lippage by re-setting high tiles or grinding edges, and wait for proper set time before grouting.
Remove excess grout promptly and tool joints evenly for uniform lines.
Problem: Grout shrinking or cracking prevention and repair
If grout starts shrinking or cracking, it’s usually because it dried too fast, was mixed wrong, or the substrate moved—problems you can prevent with the right prep and technique.
Work in moderate temperatures, mix to manufacturer consistency, and allow proper cure times. Use flexible grout or caulk at movement joints.
For hairline cracks, remove loose grout, clean, and regrout or fill with matching caulk.
Problem: Grout haze that won’t wipe off solutions
Why won’t that gritty, whitish haze come off no matter how hard you scrub?
It’s grout haze from dried thinset or excess grout.
Rewash with a haze remover or a 1:1 white vinegar and water mix, scrub gently with a nylon pad, then rinse thoroughly.
For stubborn spots, use a commercial haze cleaner per directions; avoid abrasive pads that scratch tile.
Problem: Staining and discoloration restoration steps
Because grout is porous and absorbs spills, stains and discoloration can set in quickly if you don’t act, but you can restore most grout with the right cleaners and techniques.
First, scrub with a baking soda paste and stiff brush. For stubborn stains, use oxygen bleach (not chlorine) or a commercial grout cleaner.
Rinse, dry, then seal to prevent recurrence.
Tips, Tricks, and Best Practices for Professional Results
You’ll learn a handful of time-saving techniques that don’t cut corners on quality, plus how to get uniform grout color and texture across the job.
I’ll cover tricks for neat work in corners, changes, and on vertical surfaces, and what to watch for when temperature or humidity could affect cure time.
Follow these tips and you’ll finish faster with professional, consistent results.
Time-saving techniques without sacrificing quality
When you plan ahead and use the right tools, grouting ceramic tile becomes faster without cutting corners; simple prep, the correct grout consistency, and efficient application techniques let you finish quicker while keeping seams strong and clean.
- Mix only what you’ll use in 20–30 minutes to avoid wasted time.
- Use a grout float at a 45° angle for rapid, complete filling.
- Wipe with minimal water and a microfiber for crisp joints.
Achieving consistent grout color and texture
Now that you’ve sped up the grouting process without cutting quality, focus on making the grout look uniform across the whole job.
Mix full batches with consistent water ratio, test a small area, and use the same grout line finishing tool.
Clean haze promptly, cure under stable conditions, and avoid patching different batches later.
Seal evenly after proper curing.
Working in corners, transitions, and vertical surfaces
Corners, changes, and vertical surfaces demand different techniques than flat floors, so plan your approach before you mix grout.
Use a rounded float angle for corners, press grout into seams, then tool with a small radius or finger wrapped in a damp sponge for neat joints.
For junctions and walls, work in small sections, remove excess promptly, and support tiles to prevent slumping.
Seasonal and environmental considerations (temperature/humidity)
Because grout cures through chemical reactions that are sensitive to temperature and moisture, you should plan work around the conditions you’ll actually be working in.
Work between 50–90°F (10–32°C) when possible, avoid high humidity or direct sun, and control ventilation.
Warm, dry air speeds set time; cold or damp slows it. Adjust water, additives, and curing time accordingly for consistent results.
Comparison: DIY vs. Hiring a Pro
You can weigh cost, time, and quality trade-offs when deciding whether to grout yourself or hire a pro. Use the table below to compare typical outcomes and know when to call a professional. If you’re short on time, tackling large or complex jobs, or want guaranteed results, get a pro.
| Factor | DIY | Hiring a Pro |
|---|---|---|
| Cost | Lower material cost, no labor | Higher overall cost, includes labor |
| Time | Slower if inexperienced | Faster, scheduled completion |
| Quality/Risk | Variable; mistakes likely | Consistent; warranty/guarantee |
Cost, time, and quality trade-offs
When weighing DIY against hiring a pro, focus on three trade-offs: money, time, and final quality.
- Money: DIY cuts labor costs but you’ll buy tools and risk mistakes that add expense.
- Time: DIY takes longer; schedule disruption and learning curve matter.
- Quality: Pros deliver consistent, durable results; DIY can match that only with practice and patience.
When to call a professional
Wondering if this grout job is one you should tackle or call in a pro?
If your space is small, joints uniform, and you’re comfortable with tools, DIY saves money and gives control.
Call a pro when tiles are rare, substrates damaged, waterproofing’s critical, or you need flawless, fast results.
Pros handle complex layouts, repairs, and warranty-backed finishes you might not.
Maintenance and Long-Term Care
After grouting, you’ll want to know when and how to seal the grout to block stains and moisture.
Keep a simple routine of gentle cleaning to preserve the color and finish without wearing the grout down.
If you see persistent cracks, crumbling, or widespread discoloration, it’s time to replace the grout rather than keep repairing it.
How and when to seal grout
If you want your grout to stay stain-resistant and last longer, seal it soon after it fully cures and re-seal it periodically based on use and exposure.
Choose a penetrating sealer for cement grout; apply evenly, let penetrate, then wipe excess. Test a small area first.
Re-seal high-traffic or wet areas every 6–12 months; less-used zones every 1–3 years.
Routine cleaning methods to preserve appearance
Keep a simple routine to preserve your grout’s appearance and prevent stains from setting: sweep or vacuum loose debris, wipe spills immediately, and mop weekly with a pH-neutral cleaner.
Spot-treat grout with a soft brush and diluted cleaner for stubborn dirt. Dry floors to avoid water marks.
Reapply sealer as recommended, and address discoloration early to avoid deep-set staining.
When grout replacement is necessary
Even with regular care, grout will eventually crack, crumble, or stain beyond cleaning, and you’ll need to replace it to protect the tile and restore appearance.
Replace grout when joints are missing, loose, or consistently damp despite sealing. Test with a screwdriver for softness and watch for mold returning after cleaning.
Regrouting prevents water damage, keeps surfaces sanitary, and restores uniform color and texture.
Mistakes to Avoid
Don’t rush the grout job or guess at mixing ratios—too-thin or too-thick mixes and wrong timing ruin strength and finish.
Make sure you pick the correct grout for the joint width and tool joints properly without over-sanding.
Finally, don’t skip sealing and routine maintenance, or you’ll shorten the life of the grout.
Incorrect mixing ratios
If you mix grout too thin or too thick, you’ll weaken its bond and make application harder.
Always follow the manufacturer’s water-to-powder ratio, measure precisely, and use a clean bucket. Mix to a smooth, peanut-butter consistency, let it slake briefly if recommended, then remix.
Incorrect ratios cause cracking, poor adhesion, color variation, and wasted material—so get the proportions right.
Waiting too long or cleaning too early
While you’re tempted to walk away once the grout’s in, waiting too long to clean the tile can let the grout skin over and become much harder to remove, leaving haze and permanent residue.
But cleaning too early pushes grout from joints and creates uneven lines. Work in manageable sections, wipe with a damp sponge on the manufacturer’s recommended schedule, and finish with a soft haze-free buff.
Using wrong grout type for joint size
Because grout performance depends on joint width, using the wrong type can lead to cracking, staining, or joints that never fully set.
You should match grout class (sanded for wide joints, unsanded for narrow) and polymer-modified options where movement or moisture’s expected.
Check manufacturer specs, buy appropriate grout, and don’t substitute to save money—incorrect choice forces repairs and wastes time.
Over-sanding or improper tooling
When you over-sand grout or use the wrong tooling, you can weaken the joint and leave it prone to crumbling, uneven texture, and poor adhesion.
Don’t sand past the desired profile or drag a too-aggressive tool; you’ll remove binder and create voids.
Use the correct float or rounded grout rake, work gently, and stop when the joint has a smooth, compact finish to guarantee durability.
Neglecting sealing and maintenance
If you skip sealing grout or neglect regular maintenance, stains, moisture damage, and mold can set in quickly and undo your work.
You should seal grout after curing and reseal periodically. Maintain it with gentle cleaners and prompt repairs.
- Seal immediately after cure.
- Clean monthly with pH-neutral products.
- Repoint or repair cracks fast to prevent water intrusion.
FAQ
You probably have a few practical questions after grouting, so let’s answer common concerns like when it’s safe to walk on new grout and whether you can change the color once it’s cured.
You’ll learn the pros and cons of epoxy versus cement grout for bathrooms, how to remove mold from grout lines, and whether you can grout over existing grout.
Keep reading for clear, actionable answers to each question.
How long should I wait before walking on newly grouted tile?
How soon can you walk on newly grouted tile?
You should wait at least 24 hours for light foot traffic; many manufacturers recommend 48–72 hours for full initial set.
Avoid heavy loads, furniture, or moisture during that time.
After 7 days grout reaches near-full strength, though full cure can take up to 28 days depending on type and conditions.
Check manufacturer instructions.
Can I change grout color after it’s cured?
Waiting a day or two for grout to set doesn’t lock you into its color forever—there are ways to change cured grout if the shade doesn’t suit your space.
You can use grout colorants or stains to darken or tint existing grout, or apply epoxy grout coatings for a uniform finish.
Clean grout thoroughly first, follow manufacturer instructions, and test a small area to guarantee adhesion and desired color.
Is epoxy grout better than cement grout for bathrooms?
Curious whether epoxy grout outperforms cement grout in a bathroom?
Epoxy grout is more water-, stain-, and chemical-resistant, so it stays cleaner and lasts longer in wet areas.
It’s harder to install and more expensive, but if you want low maintenance and durability—especially in showers—epoxy is worth it.
For DIY ease and cost savings, cement grout still works well.
How do I remove mold from grout lines?
Got mold in the grout lines? Scrub with a brush and a mixture of equal parts white vinegar and water, or use a commercial mildew cleaner.
Rinse thoroughly and dry the area. For stubborn stains, apply a paste of baking soda and water, scrub, then rinse.
Re-seal grout after it’s fully dry to prevent recurrence and maintain a cleaner, mold-resistant surface.
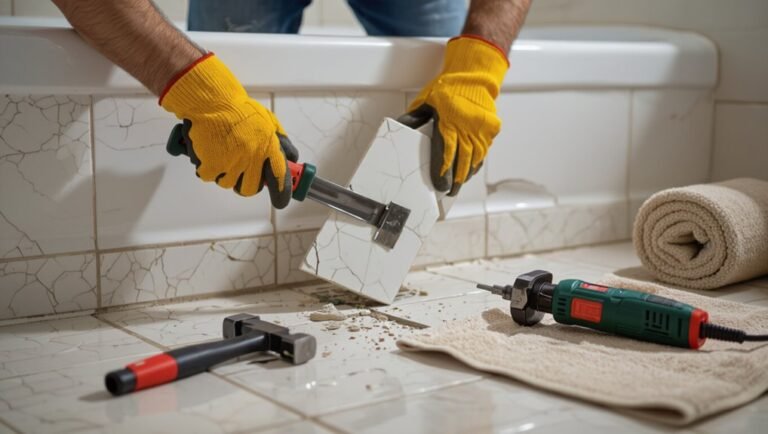
Can I grout over existing grout?
Can you grout over old grout? You can, but only when the existing grout is intact, clean, and well-bonded.
Remove loose, cracked, or molded grout first, then clean and let dry.
Use a grout release or sealant on porous tile edges to prevent staining.
Apply new grout thinly, tool it evenly, and cure per manufacturer instructions for a lasting finish.