
Can You Paint a Ceramic Tile Backsplash? Tips for a Finish That Lasts
You can paint a ceramic tile backsplash if the tiles are sound and well-adhered, giving you an affordable style refresh without full replacement. Clean thoroughly, sand or etch glossy glaze, apply a high-adhesion bonding primer, then 2–3 thin coats of durable enamel or acrylic, and finish with a clear polyurethane sealer. Expect less durability than new tile and plan for touch-ups and resealing every few years. Keep going to get prep, product, and technique tips that help your finish last.
Quick Answer Can You Paint a Ceramic Tile Backsplash?
Yes — you can paint a ceramic tile backsplash for a fresh, budget-friendly update.
It’s a good option if the tiles are structurally sound, well-adhered, and you’re okay with a painted finish; choose replacement when tiles are cracked, loose, or you want a long-term remodel.
We’ll cover the best prep, paint types, and when swapping tiles is the smarter move.
Short, direct conclusion
You can paint a ceramic tile backsplash, but it takes proper surface prep, the right primer and paint, and careful application to get durable, attractive results.
You can transform dated tiles without full replacement if you follow steps, use quality products, and allow proper cure time.
Expect maintenance like touch-ups and gentle cleaning to keep the finish looking fresh for years.
When painting is a viable option vs. when replacement is better
When the tiles are structurally sound and you’re happy with the layout, painting’s a great, budget-friendly way to update a backsplash; opt for replacement if tiles are cracked, loose, heavily stained, or if you want a completely different texture or long-term durability.
You should paint when grout is intact, surfaces cleanable, and you want a quick style change. Replace for water damage, mold, or resale value concerns.
Basic Understanding What Is Ceramic Tile and Why It Matters
To decide whether you can paint a ceramic tile backsplash, you need to understand what tile is made of and how its surface behaves.
Different finishes—glazed, unglazed, and porcelain—have distinct textures and porosities that affect how well paint will stick.
In particular, a smooth glazed surface repels paint more than a porous unglazed or matte porcelain tile, so preparation and primer choice become essential.
Ceramic tile composition and surface properties
Ceramic tile combines clay, minerals, and pigments fired at high temperatures to create a hard, durable surface, and knowing that makeup helps you pick the right paint and prep methods.
You’ll notice varying porosity, density, and surface smoothness, which affect adhesion and drying. Test adhesion, sand glossy areas, and use primers suited to the tile’s absorption to guarantee lasting results.
Common types of tile finishes (glazed, unglazed, porcelain)
Because tile finish affects how paint will adhere and wear, you’ll want to know whether your backsplash is glazed, unglazed, or porcelain before you start.
You’ll encounter four common types to identify and prep:
- Glazed: shiny, smooth surface.
- Unglazed: porous, matte surface.
- Porcelain: dense, low-porosity body.
- Semi-glazed/peelable finishes: partial coating, variable adherence.
How glaze affects paint adhesion
Now that you know the common finishes, think about how that shiny or matte surface will affect paint sticking and lasting.
Glazed tiles are slick and resist paint unless you sand, etch, or use a high-bond primer. Unglazed tiles absorb primer and bond better.
Porcelain’s low porosity needs thorough sanding and a bonding primer.
Prep determines whether paint will hold over time.
Overview Pros and Cons of Painting a Tile Backsplash
Painting your ceramic tile backsplash can save you money, be done quickly, and give you lots of design flexibility.
But it can also wear over time, need more upkeep, and possibly affect resale value if it’s not done well.
We’ll weigh those benefits and limitations so you can decide if it’s right for your space.
Benefits (cost, speed, design flexibility)
Practicality often wins when you’re weighing whether to update a ceramic tile backsplash: painting slashes cost, speeds up the project, and opens up far more design options than replacing tile.
You’ll enjoy quick results and customization without major disruption.
- Lower material and labor costs
- Faster completion—days, not weeks
- Wide color and finish choices
- Easy seasonal or style updates
Drawbacks and limitations (durability, maintenance, resale)
Although painting a ceramic tile backsplash can save you time and money, it carries trade-offs you should weigh first.
You’ll face limited durability, frequent touch-ups, and potential peeling in high-moisture zones.
Consider resale impact—buyers may prefer original tile.
Think about long-term maintenance before committing.
- Durability concerns
- Regular maintenance
- Moisture sensitivity
- Resale implications
Readiness Assessment Is Your Backsplash a Good Candidate?
Before you paint, check the tile for cracks, loose pieces, or crumbling grout that’ll need repair first.
Figure out whether the surface is glazed and slick or more porous, since that affects primer and paint choices.
Do a quick adhesion test with tape or a swatch of primer to make sure paint will stick.
Inspecting tile condition: cracks, loose tiles, grout issues
If your tiles are cracked, loose, or the grout is crumbling, you shouldn’t paint yet—these issues need fixing first because paint won’t hide structural problems and will peel away where adhesion is poor.
Check for hairline cracks, wobble each tile, and inspect grout for gaps or mold.
Replace or reattach loose tiles, repair cracks, and regrout before painting for a durable finish.
Identifying surface type: glazed vs. porous
Once you’ve fixed cracked or loose tiles and repaired grout, check what kind of tile surface you’re dealing with: glazed or porous.
Glazed tiles have a shiny, glass-like coat that resists water and paint adhesion; they usually need sanding and primer.
Porous tiles absorb moisture and grip coatings better, often requiring less prep but still cleaning.
Identifying type guides your prep choices.
Spot test for adhesion (simple tape or primer test)
Because paint adhesion can vary even on the same wall, you’ll want to run a quick spot test to see how your tile will hold up.
Do this simple tape or primer check so you know whether to sand, etch, or skip painting:
- Clean area.
- Apply tape, press firmly.
- Remove—check pull.
- Or brush primer, wait, scrape to test.
Materials and Tools You’ll Need
You’ll need the right paint and primer formulated for ceramic tile—usually an epoxy or bonding primer plus a durable enamel or acrylic topcoat.
Gather sandpaper, strong cleaners, brushes, rollers or a sprayer, and painter’s tape to prep and apply the finish.
Don’t forget safety gear (gloves, mask, eye protection) and a clean, well-ventilated workspace before you start.
Paint types and primers suitable for ceramic tile
When choosing paint and primer for ceramic tile, pick products designed for slick, nonporous surfaces so they’ll bond and resist peeling.
You’ll want a durable finish and proper adhesion.
- Bonding primer formulated for tile
- 100% acrylic latex enamel paint
- Epoxy or urethane topcoat for longevity
- Oil-based primer for glossy tiles
Tools: sandpaper, cleaning agents, brushes, rollers, sprayer, tape
Gather a few key tools before you start: sanding supplies, strong cleaners, good brushes and rollers, a sprayer if you have large areas, and painter’s tape for clean edges.
You’ll prep, clean, abrade, prime, and paint with these. Choose grit for tile, a degreaser, angled brush, foam roller, and a sprayer for efficiency.
- Sandpaper
- Cleaner
- Brushes/rollers
- Tape
Safety gear and workspace preparation
After you’ve prepped and collected sandpaper, cleaners, brushes, and tape, put on safety gear before you start work: a respirator or N95 mask for dust and fumes, safety glasses to protect your eyes, and chemical-resistant gloves for degreasers and primers.
Ventilate the area, open windows, and run fans. Lay drop cloths, remove nearby items, and secure tape lines to prevent splatter and dust spread.
Step-by-Step Guide How to Paint a Ceramic Tile Backsplash
Before you start, you’ll prep the area and protect counters and appliances so paint and dust don’t cause damage.
Then you’ll clean and degrease the tiles, fix grout or damaged tiles, and sand the surface to help paint stick.
Finally, you’ll choose and apply the right primer, following the recommended technique and drying times.
Step 1 Prepare the area and protect surroundings
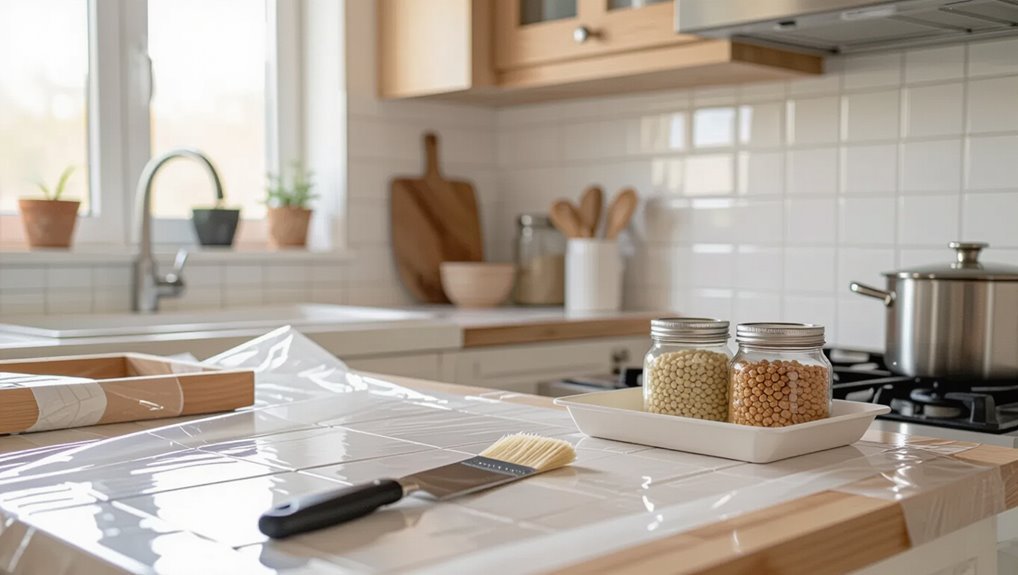
1. You’ll set up a clean, safe workspace before painting a ceramic tile backsplash. Follow these steps:
- Remove outlet covers and small fixtures.
- Lay drop cloths and seal edges with painter’s tape.
- Protect countertops, cabinets, and floors with plastic or cardboard.
- Guarantee good ventilation and keep a trash bin handy for debris.
Step 2 Clean and degrease tiles thoroughly
Now you’ll need to clean and degrease the tiles thoroughly so paint will stick; oily residue, soap scum, or food grease will prevent adhesion and cause peeling.
Follow these steps:
- Wipe loose dirt with a dry cloth.
- Apply a degreaser or trisodium phosphate solution.
- Scrub grout lines and tile faces with a nylon brush.
- Rinse thoroughly and let dry completely before priming.
Step 3 Repair grout and replace damaged tiles if needed
Check the grout and tiles closely and fix any cracks or loose pieces before you prime—damaged grout or a cracked tile will show through paint and shorten its lifespan.
Remove crumbling grout with a grout saw, vacuum debris, and regrout with matching color.
Replace any broken tiles, letting adhesive cure fully.
Smooth and wipe joints so paint adheres evenly and lasts longer.
Step 4 Sand and scuff the tile surface for adhesion
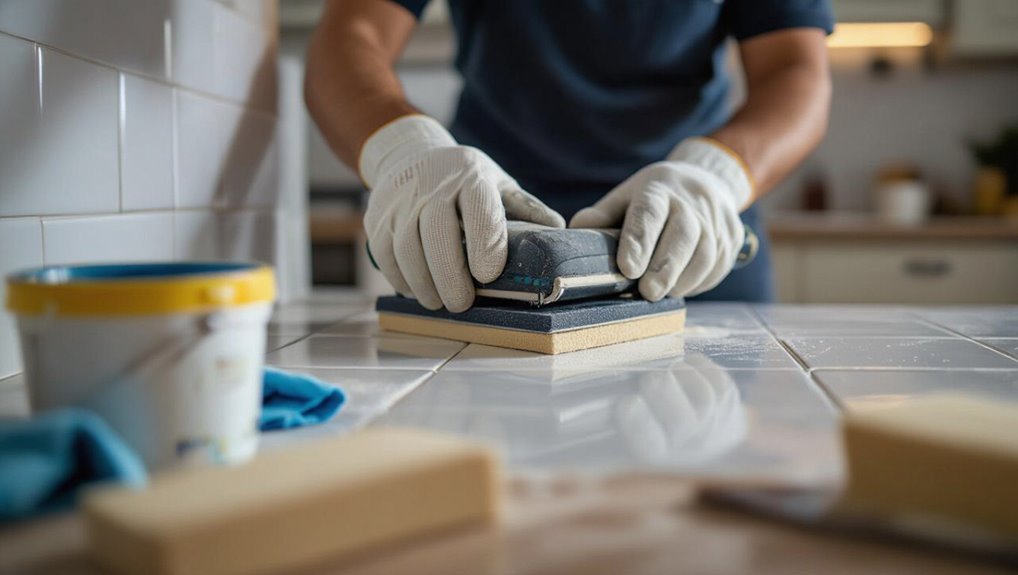
Scuff the tiles lightly so the primer and paint can grip the smooth glazed surface—without this step, coatings will bead and peel.
Use 220–320 grit sandpaper or a sanding sponge, working evenly to dull the glaze. Wipe away dust with a tack cloth or damp rag.
Focus on edges and grout lines, avoid gouging, and recheck for smooth, uniformly abraded areas before priming.
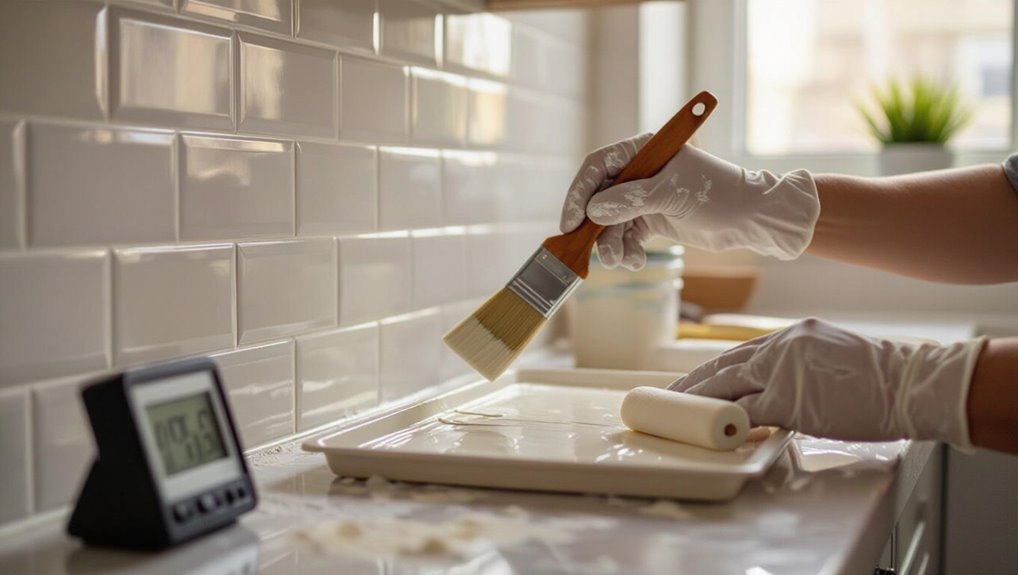
Step 5 Apply primer: type, technique, and drying times
With the surface evenly abraded and dust wiped away, you’re ready to prime; primer creates the bonding layer that keeps paint from peeling on glazed tile.
Choose a high-adhesion, stain-blocking bonding primer labeled for tile or glossy surfaces.
Apply thin, even coats with a foam roller and angled brush for grout lines.
Follow manufacturer drying times—usually 1–4 hours—before light sanding and painting.
Step 6 Apply paint: coats, tools, and recommended drying/curing times
Start by laying down thin, even coats of paint—too much at once will run or pool in grout lines—using a high-quality foam roller for flat areas and an angled synthetic brush for edges and grout.
Let each coat dry per manufacturer instructions (typically 1–2 hours between coats).
Apply 2–3 thin coats for full coverage, and allow recommended curing time before light use.
Step 7 Seal the painted surface: sealer types and application for longevity
Once your paint’s fully dry, seal the surface to protect it from moisture, stains, and everyday wear; choosing the right sealer and applying it correctly is what makes your backsplash last.
Use a durable clear polyurethane (water-based for low yellowing) or a satin/polycrylic for kitchens.
Apply two thin coats with a high-quality brush or foam roller, sanding lightly between coats for adhesion and smoothness.
Step 8 Reinstall hardware and final cleanup
Carefully reinstall your outlet covers, towel bars, and any removed hardware, making sure each piece lines up and screws are snug but not over-tightened so you don’t crack the new finish.
Wipe the backsplash with a soft, lint-free cloth to remove dust, then vacuum edges.
Inspect for missed spots, touch up if necessary, and allow final cure time before regular use to protect longevity.
Alternatives and Comparison
Before you commit to painting, consider how it stacks up against reglazing or full tile replacement regarding durability and finish.
You’ll also want to weigh peel-and-stick tiles and thin overlays as quicker, less permanent alternatives.
Compare upfront costs, time investment, and long-term maintenance to pick the best route for your backsplash.
Painting vs. reglazing vs. replacing tiles
Wondering which route makes the most sense—painting, reglazing, or replacing your tile backsplash? You’ll weigh cost, durability, time, and skill: painting is cheap and quick but less durable; reglazing gives a factory finish with moderate cost; replacing costs more and takes longer but transforms style and longevity.
| Option | Quick image |
|---|---|
| Painting | Roller, tape |
| Reglazing | Spray booth |
| Replacing | Stacked tiles |
Peel-and-stick tiles and tile overlay options
Looking for a middle ground between painting and full replacement? You can stick peel-and-stick tiles directly over clean, smooth ceramic for an instant style upgrade, or use thin tile overlays that bond to grout lines for a sturdier finish.
Both options hide worn surfaces, cut installation mess, and let you change looks without demolition. Prep and adhesive quality determine longevity.
Cost and time comparison for each approach
Peel-and-stick and tile overlays can save time and mess, but you’ll want to weigh their costs and schedules against painting, full replacement, or a professional reglaze. Choose painting for low cost and quick DIY; overlays cost more but install fast; replacement is pricey and slow; reglaze balances cost and durability.
| Approach | Cost/Time |
|---|---|
| Paint | Low / 1–2 days |
| Overlay | Mid / 1–2 days |
| Reglaze | Mid-High / 2–3 days |
| Replace | High / 3–7 days |
Common Mistakes and How to Avoid Them
Don’t skip proper cleaning and sanding, because paint won’t stick to grease or glossy surfaces.
Make sure you use the right primer and paint, apply enough coats, and allow proper curing time for durability.
Also inspect and fix grout or structural issues first so paint doesn’t fail later.
Skipping proper cleaning or sanding
Even if the paint and primer are top quality, skipping proper cleaning or sanding will undermine the whole job—grease, soap scum, and glossy surfaces prevent adhesion and cause peeling or bubbling.
You should degrease with a trisodium phosphate cleaner, rinse thoroughly, and sand glossy tiles lightly to scuff the surface.
Wipe away dust, let everything dry, and only then apply primer and paint.
Using wrong paint or primer
Cleaning and sanding set the stage, but choosing the wrong primer or paint will still ruin the finish.
Use a high-adhesion bonding primer designed for tile, then pick a durable, washable enamel or acrylic latex meant for kitchens.
Avoid interior wall paint or oil-only products that chip.
Always verify compatibility between primer and topcoat, and follow manufacturer instructions for best adhesion and longevity.
Applying too few coats or insufficient curing time
Skimping on coats or rushing the curing process is a quick way to undo all your prep work, since thin layers and premature use leave paint vulnerable to peeling, chipping, and staining.
Apply the recommended number of thin, even coats, allowing full dry times between layers.
Follow manufacturer cure times before exposing the backsplash to heat, moisture, or cleaning to guarantee long-lasting adhesion.
Ignoring grout and structural issues
Before you paint, check the grout and any structural issues—skipping them turns a fresh finish into a short-lived fix.
Repair loose, cracked, or missing grout and address loose tiles or substrate problems before priming.
Sealing grout prevents moisture wicking, which causes paint failure.
Skip repairs and you’ll waste time and materials; fix them first for a durable, professional-looking backsplash.
Tips and Best Practices for a Finish That Lasts
Choose a high-quality, heat- and moisture-resistant paint and a durable sealer made for kitchens so your backsplash can handle steam and splashes.
Apply and cure the finish when temperature and humidity are within the product’s recommended range, and let coatings fully harden before light use.
Keep the surface clean with gentle, nonabrasive cleaners, touch up chips promptly, and call a pro if tiles are loose or the damage goes beyond simple repairs.
Choosing the right paint and sealer for kitchens
When you want a durable, attractive finish for a ceramic tile backsplash, picking the right paint and sealer makes all the difference; the wrong products will peel, stain, or yellow fast.
Choose a high-quality bonding primer, then a 100% acrylic or enamel paint rated for kitchens.
Seal with a clear, water-based polyurethane or polycrylic designed for tiles to resist moisture, grease, and abrasion.
Optimal temperature and humidity for application and curing
If you want the paint and sealer to bond properly and cure without issues, aim to work and let the finish dry in a stable environment between about 50°F and 85°F (10°C–29°C) with relative humidity in the 40–60% range.
Avoid painting during rapid temperature swings or high humidity; condensation ruins adhesion.
Use fans or dehumidifiers to control conditions and pause if it’s too cold, hot, or damp.
Maintenance tips to preserve the painted surface
Once the paint and sealer have fully cured in stable conditions, regular care will keep your backsplash looking fresh and holding up to kitchen wear.
- Wipe spills promptly with a soft, damp cloth and mild detergent.
- Avoid abrasive pads or harsh chemicals that dull or scratch the finish.
- Reapply a clear sealer every 1–3 years depending on use.
- Use gentle, periodic inspections to catch chips and touch up quickly.
When to call a pro
Because a painted tile backsplash can look great but also hide problems, call a pro if you spot structural issues, widespread grout damage, persistent moisture, or if you want a commercial-grade finish.
A professional can assess substrate integrity, prep or replace tiles, and apply industrial sealers and coatings that last far longer than typical DIY products.
If you’re unsure, get an inspection to avoid costly repairs later.
Real-World Examples and Quick Project Scenarios
You can tackle a small refresh on a dated backsplash with minimal time and budget by spot-priming and repainting just the worn areas.
For high-traffic kitchens, you’ll want a more durable approach—proper sanding, a bonding primer, and a tough topcoat keep the finish holding up.
If you’re feeling creative, try patterns, stencils, or faux-tile techniques to transform the look without retiling.
Small refresh on an existing backsplash (budget-friendly)
If your tile is sound but looks tired, a small, budget-friendly refresh can revive the backsplash without a full overhaul.
You can clean grout, spot-prime chips, and repaint with a tile-specific primer and paint.
Swap outlet covers, add peel-and-stick trim, or reseal grout for instant lift.
These quick steps save money and extend the life of your existing backsplash.
High-traffic kitchen backsplash durable approach
When a kitchen gets daily heavy use, pick materials and methods that stand up to spills, scrubbing, and constant heat; durable options like porcelain tile, stainless steel panels, or high-build epoxy paint paired with proper prep will keep a backsplash looking professional for years.
For example, you can replace fragile tile with porcelain, install stainless behind the range, or roll epoxy over primed tile for a low-maintenance finish.
Creative finishes: patterns, stencils, and faux tile effects
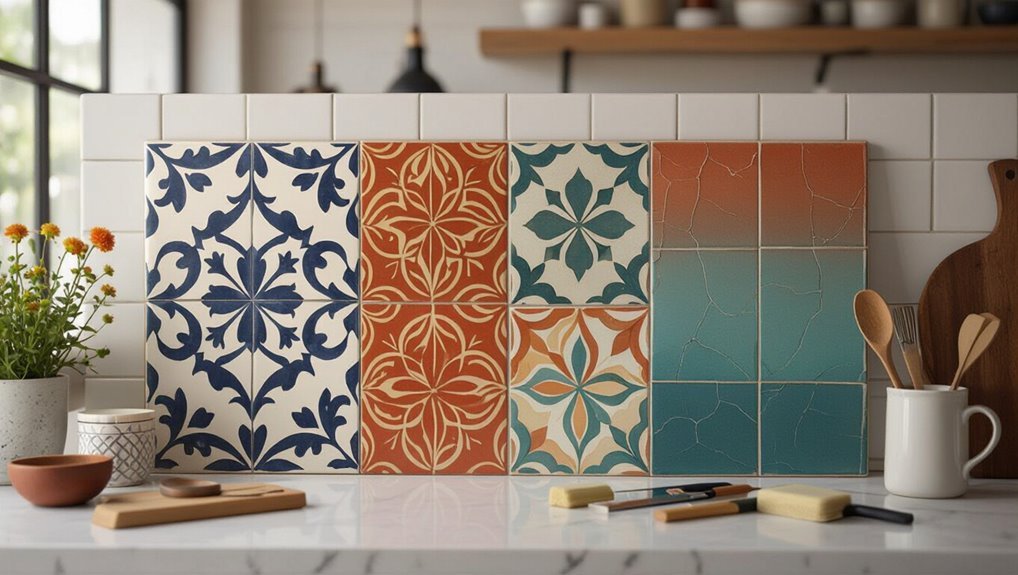
Although painting a ceramic tile backsplash sounds simple, creative finishes like stencils, geometric patterns, and faux tile effects let you transform dated tile into a custom focal point without a full remodel.
Try Moroccan stencil repeats, subway-tile trompe-l’œil with shadowing, or metallic glaze accents.
Test colors, use painter’s tape for crisp lines, seal with a durable topcoat, and expect a weekend project.
FAQ
You’ve probably got a few practical questions—like how long paint lasts on a backsplash, whether to repaint or redo grout, and which paint works on glossy tiles.
You’ll also want to know if painted tiles hold up to heat, steam, and splashes, and how to remove or repair peeling paint later.
Below are clear answers and fast solutions to those common concerns.
How long will painted tile last in a kitchen backsplash?
If you prep and seal the tile properly, painted kitchen backsplashes can look great and hold up for 5–10 years under normal use.
Longevity depends on surface prep, primer quality, paint type, and a durable topcoat. You’ll extend life by cleaning gently, avoiding abrasive scrubbing, and touching up chips promptly.
High-traffic areas may need repainting sooner than low-use spaces.
Can I paint over grout lines or should I redo grout first?
Should you paint over grout lines, or redo them first?
You should assess grout condition: if cracked, stained, or crumbling, regrout or repair before painting.
Clean and let grout fully dry, then seal if porous.
If grout is sound and well-adhered, you can paint it along with tiles using appropriate primer and paint.
Proper prep guarantees adhesion and durability.
What paint is best for glossy/glazed tiles?
Once you’ve cleaned and repaired grout and tile surfaces, pick a paint system formulated for glossy or glazed tiles so it will stick and resist moisture.
Use a high-bond primer designed for slick surfaces, then a 100% acrylic latex or epoxy-modified enamel topcoat for durability.
Choose a satin or semi-gloss finish for cleanability, and follow manufacturer cure times for best adhesion.
Will painted tiles withstand heat, steam, and splashes?
Because kitchens and baths expose tiles to heat, steam, and splashes, you’ll want a paint system that stands up to moisture and temperature changes; properly prepped glazed tiles coated with a high-bond primer and a durable topcoat (100% acrylic latex or epoxy-modified enamel) will resist steam and occasional splashes.
Though prolonged direct heat—like behind a range without a proper backsplash or heat shield—can degrade paint over time.
Avoid abrasive cleaners; wipe spills promptly.
How do I remove or fix peeling paint later?
If you spot peeling or flaking paint on your backsplash, don’t panic—most problems can be fixed without redoing the entire job.
Scrape loose paint, sand edges smooth, clean with degreaser, and rinse.
Prime bare spots with a bonding primer, then repaint with a high-quality tile or enamel paint.
Seal with a clear topcoat for added durability and cure fully before use.