How to Install VCT Tile Like a Flooring Professional
You can install VCT like a pro by prepping and leveling the subfloor, letting tiles acclimate, snapping straight chalk lines, and dry-fitting a balanced layout. Use the right primer and adhesive, trowel to manufacturer specs, set tiles tightly, and roll each row with a 100–150 lb roller to remove air pockets. Clean excess adhesive, inspect seams, and allow full cure before traffic. Follow maintenance and seam-sealing tips below to finish with professional results.
How to Install VCT Tile Like a Flooring Professional
You can install VCT yourself if you’re comfortable with careful measuring, surface prep, and basic cutting tools.
It means checking and repairing the subfloor, using the right adhesive and seam techniques, and following a consistent layout for tight, even rows.
With attention to detail and the proper steps, you’ll get a professional-looking result.
Quick Answer Can You Install VCT and What It Entails
Wondering if you can install VCT yourself and what’s involved? You can—if you follow proper prep, tools, and techniques for how to install vct tile.
Expect careful subfloor work, adhesive application, and seam alignment. Be realistic about time and skill; start small.
- Inspect and prep subfloor
- Use recommended adhesive and trowel
- Butt and align tiles tightly
- Roll and finish seams
Basic Understanding of VCT (Vinyl Composition Tile)
You’ll learn what VCT is, where it’s commonly used, and how it stacks up against other flooring options.
I’ll also cover the essential tools, materials, typical costs, and the safety and prep steps you’ll need before you start.
That background will help you plan the job and avoid common mistakes.
What VCT Is and Common Uses
Vinyl composition tile (VCT) is a durable, low-cost flooring made from a blend of vinyl and limestone fillers that you commonly see in schools, hospitals, retail stores, and commercial kitchens.
You’ll use VCT where heavy foot traffic, frequent cleaning, and budget constraints matter—corridors, cafeterias, back-of-house areas, and workspace floors.
It’s easy to replace and maintain.
Advantages and Limitations Compared to Other Flooring Types
Because VCT balances cost, durability, and ease of maintenance, it’s a strong choice for high‑traffic commercial spaces where budget and upkeep matter.
You’ll appreciate its resilience, reparability, and long service life versus sheet vinyl or carpet.
However, it scratches more easily than porcelain, lacks hardwood’s warmth, and can require periodic stripping and waxing, so weigh aesthetics and maintenance needs.
Tools, Materials, and Costs Overview
Getting the right tools and materials up front will save you time and prevent costly mistakes when installing VCT. You’ll need tile, adhesive, primer, seam sealer, cutter, trowel, roller, and straightedge. Budget for quality adhesive and replacement blades; expect moderate material costs.
| Item | Purpose |
|---|---|
| VCT tiles | Flooring surface |
| Adhesive | Bonding |
| Cutter | Cutting tiles |
| Roller | Securing tiles |
Safety and Preparation Requirements
Before you start laying VCT, make sure the work area and your procedures keep you and the floor safe: inspect the subfloor for moisture and levelness, ventilate the space, wear gloves and a dust mask when cutting or sanding, and keep tools and adhesives stored away from heat or open flames.
Clear debris, set up barriers, mark layout lines, test adhesive compatibility, and follow manufacturer curing times.
Planning Your VCT Installation
Before you start, check the subfloor for level, damage, and moisture and perform a proper moisture test.
Calculate how much VCT you’ll need, include a waste allowance for cuts, and sketch a layout to minimize seams.
Pick tile size, color, and pattern that fit the room’s scale and the visual effect you want.
Assessing Subfloor Condition and Moisture Testing
1 essential step in planning your VCT installation is a thorough assessment of the subfloor and moisture conditions; you’ll verify flatness, soundness, and dryness so the tile will bond and last.
Check for cracks, loose areas, contamination, and levelness.
Perform concrete moisture tests (calcium chloride or in-situ RH) and address excess moisture with mitigation or proper underlayment before proceeding.
Calculating Material Needs, Waste Allowance, and Layout Planning
Start by measuring the room’s length and width and calculating the total square footage so you know exactly how much VCT you’ll need.
Then add a waste allowance (typically 5–10% for straight layouts, 10–15% for diagonal or pattern installs) to cover cutting, mistakes, and future repairs.
Next, sketch the room, note obstacles, establish a starting point and chalk lines, and order tiles accordingly.
Choosing Tile Size, Color, and Pattern for Visual Effect

With your measurements, waste allowance, and layout sketch in hand, you’ll pick tile size, color, and pattern to create the room’s visual impact and make installation easier.
Choose larger tiles for small seams and faster installs, smaller tiles for detail. Use light tones to enlarge, dark to ground.
Align patterns with light sources and sightlines, and test samples in different lighting before committing.
Step-by-Step Professional Installation Process
You’ll start by prepping the room—removing old flooring, cleaning thoroughly, and repairing any damage—then level and patch the subfloor so it’s flat and sound.
Next you’ll acclimate and inspect the tiles, snap chalk lines, lay out the field, and dry-fit to confirm your plan.
Finally you’ll apply adhesive and set tiles using techniques for straight rows to guarantee a professional finish.
Step 1 Prepping the Room (Removal, Cleaning, Repairs)
Before you lay a single tile, clear the space, remove existing floor coverings, and fix any subfloor issues so your VCT will sit flat and bond properly.
Next, remove baseboards, trim nails and adhesive residue, sweep and vacuum thoroughly, and wipe with a manufacturer-approved cleaner.
Let the surface dry completely.
Inspect for debris or loose sections and address them before proceeding to layout and adhesive application.
Step 2 Leveling and Patch Repair of Subfloor
Step 2 focuses on getting your subfloor perfectly flat so the VCT bonds and wears evenly; you’ll patch cracks, fill low spots, and sand high areas to a smooth, level surface.
Inspect for loose sections, fasten or replace damaged plywood, and use a cementitious patch or self-leveling compound where needed.
Allow proper cure time, then recheck for flatness before proceeding.
Step 3 Acclimating and Inspecting Tiles
1. You’ll let VCT boxes sit unopened in the installation space 48–72 hours so tiles reach room temperature and humidity.
Open boxes one at a time, inspect for color, pattern, and edge damage, and separate any defective pieces.
Mix tiles from different cartons while checking shade variation.
Document issues and notify supplier before proceeding to avoid surprises.
Step 4 Chalk Lines, Laying Out the Field, and Dry Fits
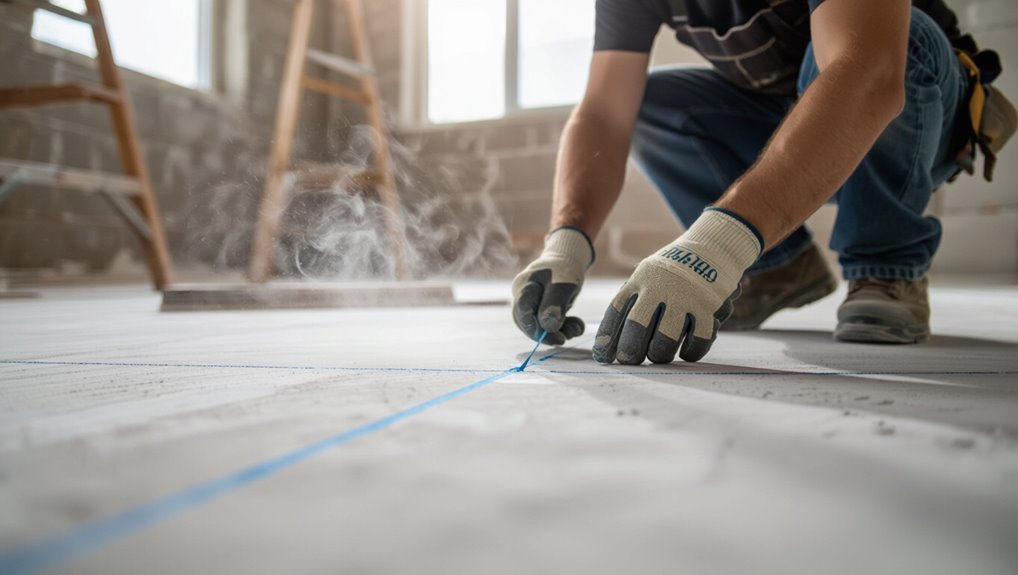
Begin by snapping a precise centerline down the room—this reference will guide every tile you lay—then establish perpendicular chalk lines for your field and perimeter.
Measure and mark tile offsets from those lines so edge tiles stay balanced.
Dry-fit rows across the center, checking pattern alignment and grout spacing.
Adjust layout to minimize tiny edge cuts and avoid awkward narrow strips at walls.
Step 5 Applying Adhesive and Setting Tiles (Techniques for Straight Rows)
Spread adhesive evenly using the recommended trowel notch size, then set tiles firmly along your chalk lines so each row stays straight and true.
Press each tile with a slight twist, maintain consistent spacing with spacers, and check alignment frequently.
Use a straightedge to confirm row straightness, adjust immediately, and roll the installed area to guarantee full adhesive contact and remove air pockets.
Step 6 Cutting Tiles for Edges, Doorways, and Fixtures
Now you’ll cut tiles to fit along walls, doorways, and around fixtures so the installation looks seamless and professional.
Measure gaps carefully, mark tiles, and transfer lines onto the backing. Use a straightedge and utility knife for straight cuts, and a jamb saw or coping tool for door jambs and tight curves.
Dry-fit each piece, trim incrementally, and test clearance before setting.
Step 7 Rolling, Seaming, and Allowing Adhesive Cure Time
Roll the floor with a 100–150 lb roller to firmly seat the tiles and eliminate air pockets, then cleanly seam any joints and let the adhesive cure undisturbed.
After rolling, inspect seams for gaps, pressing edges together and trimming excess adhesive.
Keep traffic off for the manufacturer’s recommended cure time, control temperature and humidity, and avoid walking or moving heavy items until adhesion fully develops.
Step 8 Applying Sealers or Finish Coats and Buffing (If Required)
With the adhesive cured and seams inspected, you can move on to protecting the VCT with a sealer or finish coat if the product or job specs call for it.
Choose compatible finish, apply thin even coats with recommended applicator, allow proper dry times, and sand between coats if directed.
When specified, buff to the manufacturer’s gloss using proper pads and speed settings for a durable, uniform surface.
Common Problems and How to Fix Them
You’ll likely run into a few common issues after laying VCT: loose tiles from adhesive failure, uneven seams or lippage, and surface damage like stains or scuffs.
Learn how to diagnose and repair lifting tiles, correct gapping and height differences, and decide when restoration will work versus when replacement is needed.
I’ll walk you through quick fixes and when to call a pro.
Adhesive Failure and Lifting Tiles Diagnosis and Repair
Adhesive failure and lifting tiles are among the most common problems you’ll see with VCT, and diagnosing them quickly lets you decide whether a simple re-bond or a full replacement is needed.
Check for moisture, adhesive breakdown, or substrate contamination. Peel a corner, test bond strength, and dry the area.
Clean, reapply recommended adhesive, roll tiles, and allow proper cure; replace irreparably warped tiles.
Uneven Seams, Lippage, and Gapping Correction Methods
When seams sit unevenly or tiles show lippage and gaps, they create trip hazards and make a finished floor look unprofessional, so you should address them promptly.
Remove affected tiles, clean substrate, and re-level using a flat screed or patching compound.
Shim, sand edges, or replace warped tiles.
Reinstall with proper trowel notch, press firmly, and roll to guarantee tight seams and even surface.
Stains, Scuffs, and Surface Damage Restoration vs. Replacement
1 common question you’ll face is whether a stained, scuffed, or otherwise damaged VCT tile can be restored or needs full replacement.
You’ll assess depth: surface scuffs and mild stains respond to cleaning, buffing, and recoating.
Deep gouges, delamination, or persistent discoloration require tile replacement.
Match replacement tiles, properly adhere, and finish with sealant to blend and protect.
Professional Tips, Best Practices, and Time-Saving Techniques
Before you start laying tile, plan a layout that minimizes waste and keeps borders balanced so cuts are predictable and materials last.
Use the right tools—sharp cutters, quality rollers, and controlled heat—and learn a few tool hacks to speed cutting and seam work.
Organize your sequence and crew for staged installs and follow simple maintenance steps to protect the VCT finish long-term.
Layout Tricks for Minimal Waste and Balanced Borders
Although the workspace may look straightforward, planning your layout carefully prevents costly mistakes and keeps borders balanced. Begin by snapping a central chalk line, work outward to mirror border widths, and dry-fit tiles to spot awkward cuts.
Prioritize full tiles in focal areas, stagger seams for visual flow, and calculate runs to minimize waste so you won’t trim unnecessary pieces or create thin edge strips.
Tool Hacks and Proper Use (Cutters, Rollers, Heat)
When you’re ready to cut, press, and set VCT, the right tools—and the right way to use them—save time and give a cleaner result; use a sharp straight-edge cutter, score once, snap confidently.
Roll in adhesive with a 100–200 lb roller, work outward to expel air, and apply heat sparingly to relax edges.
Keep blades fresh and rollers clean for consistent results.
Sequence and Team Workflow for Faster Installation
If you plan and assign tasks clearly, your crew will move through VCT installation much faster and with fewer mistakes.
Break work into prep, layout, adhesive, tile laying, rolling, and trims. Assign pairs: one measures and cuts, one lays and aligns.
Stagger tasks to avoid crowding, stock materials at zones, and run a quality-check sweep after each bay to catch errors early.
Maintenance Advice to Preserve VCT Finish Long-Term
To keep VCT looking its best for years, set a simple routine that combines daily cleaning, periodic restorative care, and preventative practices; you’ll save time and avoid costly recoats or replacements by staying consistent and using the right products and tools.
Maintain finish with these steps:
- Sweep daily; mop with neutral cleaner, not wax stripper.
- Use microfiber pads for buffing.
- Strip and recoat on schedule.
- Place mats at entrances.
When to Hire a Pro vs. DIY
Start by checking a simple complexity checklist so you can spot tricky substrates, large layouts, or pattern matching that usually mean you should hire a pro.
We’ll compare the upfront and long-term costs of DIY versus a contractor so you can see where time, skill, and warranty affect your budget.
With those factors clear, you’ll be able to decide whether to tackle the job yourself or call in help.
Complexity Checklist: When Professional Help Is Recommended
While simple VCT projects you can finish over a weekend are tempting, some jobs quickly exceed casual DIY limits and call for a pro.
Hire help if subfloor repairs, moisture mitigation, complex layouts, intricate cuts, large areas, commercial traffic, or strict warranties are involved.
Also consider a pro for tight timelines, matching patterns, or when you lack specialized tools or confidence to guarantee durable results.
Cost-Benefit Comparison of DIY vs. Contractor
If you’ve weighed the complexity checklist and still aren’t sure whether to tackle VCT yourself, compare the real costs and benefits side by side:
| Factor | DIY | Contractor |
|---|---|---|
| Cost | Lower materials, zero labor | Higher total, includes labor |
| Time | Slower, learning curve | Faster, experienced crew |
| Risk | Mistakes, warranty void | Professional guarantee, less risk |
| Long-term value | Depends on skill | Consistent finish, resale appeal |
Frequently Asked Questions (FAQ)
You’ll find answers here to common questions like curing time before heavy use, whether you can lay VCT over existing vinyl, and how to match replacement tiles years later.
You’ll also learn which adhesives and sealers work best for high-traffic areas and when underlayment’s needed for concrete or wood subfloors.
If you don’t see your question, leave a note and I’ll help.
How long does VCT installation take to fully cure before heavy use?
Wondering how long VCT needs before you can put heavy traffic on it? Typically, adhesive sets in 24–48 hours, but full cure takes 7–14 days depending on adhesive type, temperature, humidity, and ventilation.
Limit heavy loads and rolling traffic until then. For best results, follow the adhesive manufacturer’s cure timeline and avoid waxing or scrubbing until the surface fully stabilizes.
Can VCT be installed over existing vinyl flooring?
Although you can install VCT over some existing vinyl floors, success depends on the condition and type of the substrate; the old vinyl must be well-adhered, smooth, and free of damage, seams, or wax for the new tile and adhesive to bond properly.
Inspect, repair, and mechanically prepare the surface; use a manufacturer-approved primer or underlayment when required, and test adhesion before full installation.
How do I match replacement tiles years later?
Want to match VCT years later? Order extra boxes at installation and store sealed spares.
If you didn’t, bring an original tile to a supplier for a close match—note batch numbers and wear patina. Test a few candidates in hidden spots; sunlight and traffic affect color.
Trim and adjust grout lines for a seamless blend before permanently installing replacements.
What adhesives and sealers are best for high-traffic areas?
If you expect heavy foot traffic, choose high-strength acrylic or pressure-sensitive VCT adhesives and a durable sealer designed for commercial floors.
Use adhesive rated for dimensional stability and bond strength; follow open time and flashing instructions.
Select a commercial-grade finish—urethane or acrylic-based—to resist abrasion, chemicals, and frequent cleaning.
Recoat schedule depends on traffic; test adhesion and finish before full application.
Is underlayment required for VCT on concrete or wood subfloors?
Good adhesive and sealer choices matter a lot, but you’ll also need to contemplate the subfloor itself: VCT typically installs directly over properly prepared concrete or wood, so a separate cushioned underlayment isn’t usually required.
You should, however, repair cracks, level low spots, install a moisture barrier on damp concrete, and guarantee plywood is smooth, rigid, and properly fastened before adhering tiles.