How to Paint a Concrete Floor So It Actually Holds Up Over Time
You can make a painted concrete floor last by fixing cracks, removing oil and dirt, and controlling moisture before you coat. Test for dampness and profile the surface—acid etch for light prep or grind for a tougher bond. Use a masonry primer matched to the slab, pick a durable coating (epoxy for garages, polyurethane for UV exposure), apply even coats with proper dry times, and finish with a clear topcoat; keep going for pro tips and troubleshooting.
How to Paint a Concrete Floor So It Actually Holds Up Over Time
Yes—painted concrete can last for years if you focus on the right prep, quality products, and proper sealing.
Surface cleaning, etching or repairing cracks, using a masonry primer and epoxy or acrylic concrete paint, then finishing with a durable clear coat are what matter most.
The ideal durable finish is a well-prepped, properly primed epoxy or acrylic coating topped with a high-quality sealer.
can painted concrete last and what matters most
If you prep the surface correctly and pick the right products, painted concrete can last many years without peeling or wearing through; what matters most is concrete condition, surface prep, paint type, and topcoat.
You’ll ask how do you paint a concrete floor to guarantee longevity: repair cracks, remove contaminants, etch or grind for profile, use epoxy or acrylic concrete paint, then seal with a durable clear topcoat.
One-sentence summary of the ideal durable finish
When you want a concrete floor that genuinely lasts, aim for a mechanically profiled, repaired surface coated with a high-build epoxy or acrylic-concrete paint and finished with a UV-resistant, abrasion-proof clear topcoat.
You’ll prep thoroughly, fix cracks and moisture, apply primer if needed, roll or squeegee even coats, and let proper cure times elapse so the finish resists abrasion, chemicals, and peeling.
Basic understanding what painting concrete involves and why it fails
When you paint concrete, you’re really dealing with a porous surface that soaks up primers and coatings unevenly. This can lead to peeling, flaking, or blistering if conditions aren’t right.
The lifespan of the finish hinges on proper surface prep, controlling moisture, choosing the right paint or epoxy, and the amount of traffic the floor will see.
Sometimes a simple paint job is fine, but high-moisture or high-traffic areas often need resurfacing or a true epoxy system to avoid premature failure.
How concrete absorbs paint and common failure modes (peeling, flaking, blistering)
Because concrete is porous and alkaline, it soaks up moisture and loosely bonds with paint, which is why you’ll see common failures like peeling, flaking, and blistering if surfaces aren’t prepared or compatible coatings aren’t used.
Moisture migrating from beneath delaminates coatings, contaminants prevent adhesion, and trapped solvent or air causes blisters. You must recognize these failure modes to choose appropriate repair and coating strategies.
Key factors that determine longevity (surface prep, moisture, paint type, traffic)
Longevity depends on four things you can control: how well you prep the surface, whether moisture is present, the coating you pick, and the amount of traffic the floor will see.
You must remove contaminants and profile the concrete, test and mitigate moisture, choose a coating rated for concrete and your conditions, and match finish durability to expected foot, vehicle, and chemical exposure.
When painting is appropriate vs when resurfacing or epoxy is better
If your concrete has minor surface stains, is structurally sound, and sees only light foot traffic, painting can be a quick, economical option—but you’ll want to understand what that involves and why painted concrete often fails.
Paint suits clean, dry, well-prepped slabs.
Choose resurfacing or epoxy when cracks, moisture, heavy vehicle or chemical exposure exist, since coatings bond deeper and resist wear far better.
Materials, tools, and surface tests you need before starting
Before you begin, you’ll want to choose the right coating—epoxy, acrylic, or concrete paint—and weigh each one’s durability, cost, and prep requirements.
Gather essential tools and safety gear like grinders, scrapers, rollers, respirators, and eye protection.
Finally, run moisture and alkalinity checks (calcium chloride or plastic-sheet moisture tests and a pH strip test) so you know whether the floor needs additional drying or neutralizing.
Recommended coatings and their pros/cons
You’ll choose from several common concrete floor coatings—epoxy, polyurethane, acrylic, and penetrating sealers—based on your budget, traffic level, UV exposure, and desired appearance; each has trade-offs in durability, chemical resistance, slipperiness, and prep requirements, so gather the right materials, tools, and testing supplies before you start.
| Coating | Quick pro/con |
|---|---|
| Epoxy | Very durable / slippery when wet |
| Polyurethane | UV stable / pricier |
| Acrylic | Fast cure / less durable |
| Penetrating | Breathable / minimal protection |
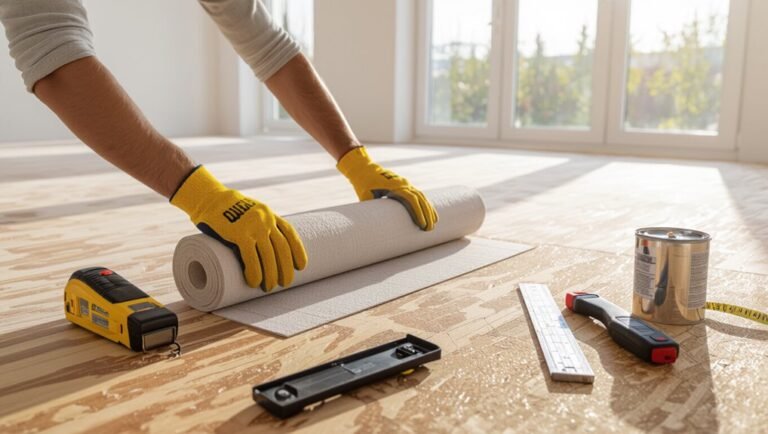
Essential tools and safety gear
Now that you’ve picked a coating, gather the right gear so the job goes safely and smoothly.
You’ll need basics: a grinder or sander, scraper, and shop vacuum for prep; quality rollers, brushes, and trays for application; and durable PPE—respirator, goggles, gloves—to protect yourself from dust and fumes.
Check tool condition and compatibility with your chosen coating.
- Grinder or sander
- Rollers, brushes, trays
- Respirator, goggles, gloves
How to test for moisture and alkalinity (calcium chloride, plastic sheet, pH test)

Concrete’s moisture and alkalinity can wreck a coating, so test both before you prep or paint; you’ll need a calcium chloride kit for accurate moisture readings, a clear plastic sheet for a quick vapor-check, and pH test strips or a pH meter to measure surface alkalinity.
Do a 24–72 hour plastic sheet test, run calcium chloride per instructions, and verify surface pH is 7–10 before priming.
Step-by-step process to paint a concrete floor that lasts
Before you paint, you’ll inspect the slab for damage, old coatings, and cracks so you can choose the right fixes.
Then you’ll clean, degrease, and either etch or grind the surface, repair spalls and joints, and confirm moisture won’t ruin the coating.
Following that sequence — inspection, cleaning, repairs, moisture control, and proper profiling — gives coatings the best chance to stick and last.
Step 1 Inspect and decide: damage, cracks, previous coatings
Start by walking the floor and taking a careful inventory of its condition so you can prioritize repairs and prep.
Note cracks, spalling, and soft spots, and check for old paint or sealers that might peel.
Decide whether to patch, grind, or strip based on severity and adhesion tests.
- Small hairline cracks
- Large structural cracks or spalling
- Existing coatings or sealers
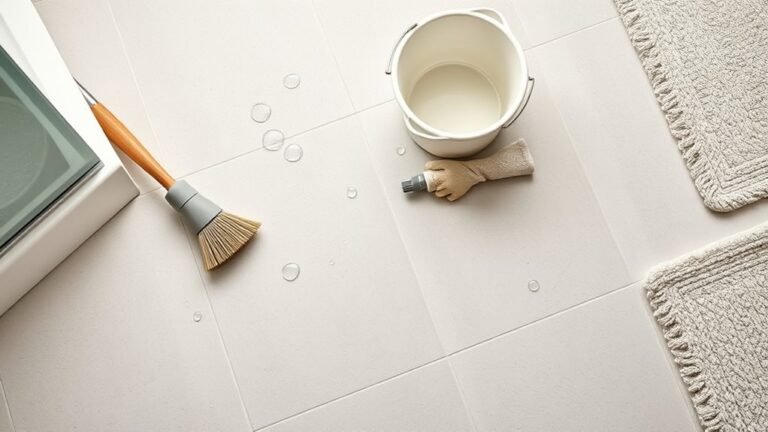
Step 2 Clean thoroughly: degreasing, pressure washing, etching

Clean the floor thoroughly so paint will bond and last; oil, grease, dirt, and old sealers will cause failure if you skip this.
Scrub greasy spots with a strong degreaser, rinse well, then pressure wash to remove residue and loose particles.
If concrete is smooth or sealed, etch with muriatic or phosphoric acid per instructions, neutralize, rinse, and let dry completely before proceeding.
Step 3 Repair and fill cracks, spalls, and joints (products and techniques)
With the surface free of oil and residue, you’ll now address cracks, spalls, and joint gaps so the paint lays and bonds evenly.
Chase out loose concrete, vacuum dust, then use epoxy or polyurethane patch for spalls. For hairline cracks, use concrete repair caulk; wider gaps need polymer-modified mortar.
Tool joints smooth, let cures per product instructions before priming and painting.
Step 4 Address moisture and vapor drive (vapor barriers, drying time)
Because concrete can wick moisture from the ground, you need to confirm and control vapor drive before painting so coatings won’t blister or peel.
Test moisture with a calcium chloride kit or relative humidity probe. If readings exceed manufacturer limits, install a vapor barrier, improve drainage, or allow extended drying.
Only proceed when moisture levels meet coating specs to guarantee adhesion and longevity.
Step 5 Profile the surface for adhesion (acid etch vs mechanical grinding)
Once moisture’s under control, you need to create a proper surface profile so the coating can bond—either by acid etching for light etch and stain removal or by mechanical grinding/blasting for deeper profile and old coating removal.
Choose acid etch for light contamination and gentle profiles; use grinders or shot blasters for heavy coatings, uneven surfaces, or to expose aggregate.
Clean thoroughly and vacuum.
Step 6 Prime correctly: choosing and applying primers
Start by choosing the right primer for your concrete and apply it correctly to guarantee long-lasting adhesion and durability.
Pick a primer matched to your paint system (epoxy, acrylic, or solvent-based) and to substrate porosity.
Clean and dampen the floor, roll or brush primer evenly, and follow manufacturer pot life and recoat windows.
Address pinholes and tack-free cure before proceeding.
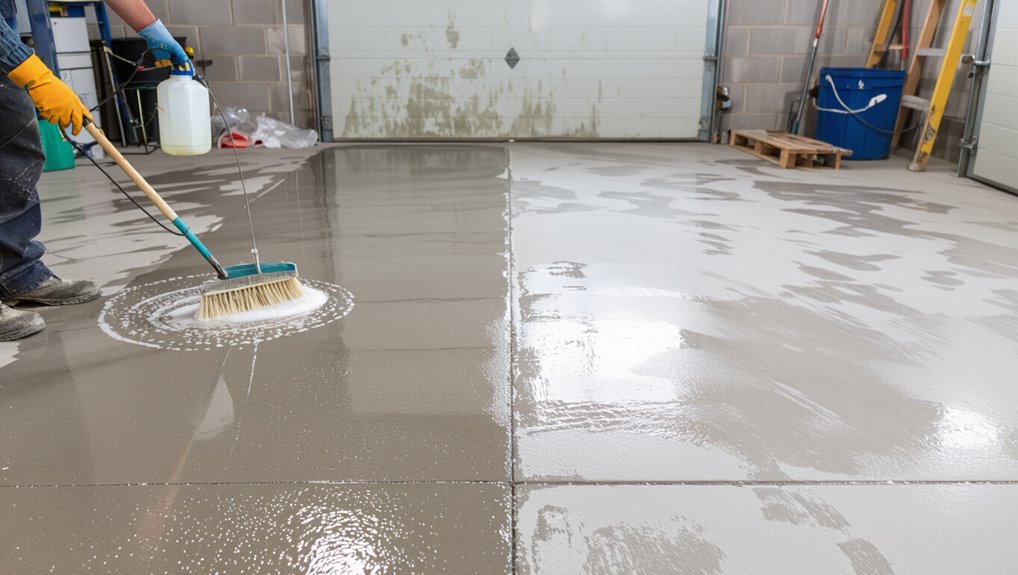
Step 7 Apply the paint/coating: mix, method (roller, sprayer), coats, dry times
Now you’ll lay down the actual coating—mix it per the manufacturer’s directions, choose the best application method (roller for DIY, sprayer for large or smooth jobs), and apply uniform coats with proper dry times between them so the finish bonds and lasts.
Work in thin, even layers, backrolling to remove lines, follow recommended recoat windows, and allow full cure before traffic.
Step 8 Optional: add texture or anti-slip aggregates for traction
1 simple addition can make a big difference: mixing or broadcasting an anti-slip aggregate into your finish boosts traction and safety without compromising the look.
You can sprinkle silica, polymer grit, or crushed walnut shell into wet topcoat, then back-roll or seal. Choose particle size for comfort and cleanability, and apply evenly.
- silica grit for durability
- polymer for easy cleanup
- walnut shell for softer feel
Step 9 Cure and wait time before traffic; recommended timelines by coating type
After you’ve added texture or aggregate and sealed the surface, you’ll need to let the coating cure fully before foot or vehicle traffic—each coating type has its own timeline and handling requirements.
Epoxy: light foot traffic 24–48 hours, full cure 7 days.
Polyurethane/topcoat: tack-free hours, full cure 3–7 days.
Acrylic: walkable in 2–4 hours, vehicle traffic 48–72 hours.
Check manufacturer specs.
Common mistakes that shorten the lifespan of painted concrete
Don’t skip moisture tests or ignore vapor issues, because trapped moisture will lift paint no matter how good the job looks at first.
Make sure you thoroughly clean and remove oil, grease, and other contaminants, use the right concrete paint and primer, and avoid painting on damp concrete or in unsuitable weather.
Also pay attention to joints, expected movement, and load conditions so cracks and wear don’t ruin the finish prematurely.
Skipping moisture tests or ignoring vapor issues
If you skip moisture tests or ignore vapor issues, your paint might look fine at first but will blister, peel, or fail prematurely as moisture pushes up through the slab.
You need to measure RH or use calcium chloride tests, check for hydrostatic pressure, and address high vapor with proper primers, vapor barriers, or specialized coatings.
Don’t guess—test and fix before painting.
Inadequate cleaning or failing to remove contaminants
Moisture problems are one cause of paint failure, but surface contamination will wreck your job just as fast: oil, grease, dirt, curing compounds, and old sealers keep paint from bonding to concrete.
You must degrease, scrub, rinse, and use appropriate cleaners or etching to expose clean, porous concrete.
Don’t skip testing for residue — paint won’t stick to contaminated surfaces.
Using wrong paint type or no primer
When you pick the wrong paint or skip a primer, the finish will peel, blister, or wear away long before its time.
Use a product made for concrete—epoxy or acrylic floor paint—and always apply a compatible primer.
Primer improves adhesion, seals porous surfaces, and evens out coverage. Skipping it risks frequent recoats and costly repairs; do it right once for lasting results.
Applying in unsuitable weather or on damp concrete
Skipping primer and picking the wrong paint sets you up for failure, but even the best products can’t bond properly to damp concrete or in bad weather.
You should test moisture with a meter or tape test, wait for dry conditions, and follow manufacturer temperature and humidity ranges.
Painting in rain, high humidity, or on cold surfaces causes peeling, blistering, and shortened lifespan—so delay if conditions aren’t right.
Overlooking joints, movement, and load conditions
Because concrete moves and bears weight, you need to plan for joints, expansion gaps, and the loads the floor will see; ignoring these factors is one of the fastest ways paint will fail.
Treat control and expansion joints properly, use flexible caulk or joint filler, and choose coatings rated for expected traffic and point loads.
Anticipate vehicle, pallet jack, and furniture stress to prevent cracking and delamination.
Best practices and pro tips to maximize durability
Pick a coating that fits the room—epoxy for garages, breathable sealers for patios, and commercial-grade systems for heavy use—to start with the right protection.
Keep a simple maintenance routine of regular cleaning, prompt spot repairs, and scheduled recoats to prolong the finish.
Factor seasonal and moisture conditions into prep and application, and call a pro for large, damaged, or moisture-sensitive jobs you’re not confident handling.
Choosing the right coating for the space (garage, patio, basement, commercial)
Match the coating to the room’s use and traffic to get lasting results: garages need oil- and chemical-resistant epoxy or polyaspartic coatings.
Patios benefit from UV-stable acrylics or concrete stains.
Basements do well with moisture-tolerant epoxy or breathable urethane systems.
Commercial spaces often require high-build, industrial-grade epoxies or polyurethane blends rated for heavy wear and frequent cleaning.
Pick slip-resistant additives, check cure times, and confirm substrate compatibility.
Maintenance routine to extend life (cleaning, recoat schedule)
If you want your painted concrete to last, set up a simple maintenance routine and stick to it.
Sweep weekly, mop with pH-neutral cleaner monthly, and blot spills immediately to prevent staining.
Inspect the surface quarterly for scratches, peeling, or wear.
Recoat high-traffic areas every 2–3 years and the whole floor every 4–6 years, using compatible products and proper surface prep.
Seasonal and environmental considerations
Along with regular cleaning and recoats, seasonal and environmental factors will make a big difference in how long your painted concrete holds up.
Monitor humidity and temperature before painting or recoating — avoid extremes.
Use breathable, moisture-tolerant coatings in damp areas. Protect floors from freeze–thaw cycles, deicing salts, and prolonged UV exposure with sealers or mats.
Ventilate during curing to prevent blisters.
When to call a professional vs DIY
Decide whether to tackle a concrete floor yourself or call a pro by weighing the scope of work, your experience, and the conditions of the slab.
DIY if surface is sound, cracks are minor, and you have proper tools and patience.
Call a pro for structural issues, moisture vapor drive, large repairs, or commercial-grade coatings.
Pros guarantee correct prep, warranty, and long-term durability.
Comparison: Paint vs epoxy vs concrete stain vs sealers
Now you’ll compare paint, epoxy, concrete stain, and sealers across key factors like durability, cost, appearance, and ease of application.
I’ll point out the best use cases for each so you can match the finish to your needs—budget-friendly touch-ups, heavy-duty garage floors, decorative color, or simple protection.
That way you can pick the right product for how the floor will be used and how much time or money you want to spend.
Durability, cost, appearance, and ease of application
When choosing a finish for your concrete floor, you’ll weigh durability, cost, appearance, and ease of application differently depending on the space and budget; paint is cheap and easy but wears faster, epoxy offers heavy-duty protection at higher cost and prep time, stains penetrate for a natural look with long-lasting color, and sealers preserve whatever finish you pick while adding varying levels of gloss and protection.
| Option | Trade-off |
|---|---|
| Paint | Low cost, low durability |
| Epoxy | High durability, higher cost |
| Stain | Natural look, moderate durability |
| Sealer | Protects finish, varies in gloss |
Best use cases for each option
Although each finish can work in many spaces, you’ll pick the best one by matching performance to the room’s traffic, moisture, and aesthetic needs.
Use paint for low-traffic, budget-conscious areas where looks matter.
Choose epoxy for garages and workshops that need chemical and impact resistance.
Pick stain to enhance texture and color in living spaces.
Apply sealers where protection without changing appearance is priority.
Cost, time, and ROI expectations
Expect to pay anywhere from a few hundred dollars for DIY paint and supplies to several thousand if you hire pros or choose epoxy, and labor will be the biggest variable.
Plan a weekend for a simple DIY job but allow several days for prep, cure times, and contractor scheduling.
Knowing these cost and time ranges helps you judge whether the upgrade will give the resale or usability return you want.
Typical material and labor cost ranges
1–3 days is a realistic range for most DIY concrete floor paint jobs, but costs and timelines vary with surface condition and the finish you choose. Expect materials of $50–$300; pro labor runs $2–$6/ft². Budget higher for repairs or coatings.
| Item | Typical Cost |
|---|---|
| Paint kit | $50–$150 |
| Primer | $20–$60 |
| Epoxy/coating | $100–$300 |
| Pro labor | $2–$6/ft² |
Project time estimates and scheduling tips
When you plan your concrete floor project, set a realistic schedule that ties each step to weather, curing times, and room use so you won’t be blindsided by delays.
Estimate prep (1–3 days), repair and etching (1–2 days), primer and paint application with proper dry/curing windows (3–7 days), and final curing before traffic (3–14 days).
Factor labor, contingencies, and ROI timelines.
FAQ
You’ll want answers to common questions like how long painted concrete lasts and whether you can paint over old paint or sealer.
Learn quick fixes for peeling paint, when epoxy makes sense versus regular floor paint, and how long to wait before driving on a painted garage floor.
I’ll walk you through clear, practical guidance for each.
How long will painted concrete last?
How long will painted concrete last depends mostly on how well you prep the surface and which products you choose.
With proper cleaning, etching, patching, a quality epoxy or acrylic primer and topcoat, and a durable sealer, expect 5–15 years in garages or basements.
High traffic or outdoor exposure shortens lifespan; regular maintenance and prompt repairs will extend it.
Can I paint over old paint or sealer?
Can you paint over old paint or sealer? Yes, but prep is key: clean thoroughly, remove grease and efflorescence, and sand or etch glossy surfaces so new coatings bond.
If the existing coating is flaking or chalking, strip it back to sound material. Test adhesion with a small patch first.
Use compatible products—water-based over water-based, epoxy over epoxy—for best results.
How do I fix peeling paint without redoing the whole floor?
If only small areas are peeling, you don’t have to redo the whole floor—spot repairs can save time and money.
Scrape loose paint, sand edges smooth, and clean with degreaser. Etch or scuff glossy spots for adhesion.
Prime bare concrete or patched areas, then apply matching floor paint in thin, even coats. Cure fully before light use.
Is epoxy always better than regular floor paint?
Wondering whether epoxy always outperforms regular floor paint? It depends on your needs: epoxy resists chemicals, abrasion, and stains better and bonds well to prepared concrete, so it’s ideal for garages or heavy-use areas.
Regular floor paint costs less, is easier to apply, and suits light-traffic rooms.
Match coating to traffic, budget, surface prep, and desired lifespan to choose wisely.
How long before I can drive on a painted garage floor?
After you pick between epoxy and regular floor paint, you’ll want to know when you can drive back on the garage floor.
Wait at least 24–48 hours for foot traffic with quick-curing epoxy; a full 72 hours before light vehicle use.
Traditional paints need 48–72 hours to set and 7 days to fully cure.
Always follow product instructions and avoid heavy loads until cure time completes.