Can You Install Tile Over Linoleum? What the Pros Recommend
Yes—you can install tile over linoleum if the sheet is solid, flat, well‑adhered and free of damage; pros say it’s a cost‑saving option when the substrate is stable. You’ll need to clean, degrease, scuff or sand the surface, address any soft spots, and use the right primer and thinset for nonporous floors to guarantee full coverage and bond. Follow manufacturer specs for joist spacing and curing, and keep going to learn the prep steps, costs, and pitfalls.
Quick Answer Can You Install Tile Over Linoleum?
Yes — you can often install tile over linoleum if the existing floor is solid, level, and well-adhered.
It’ll work when the linoleum is in good condition and you prepare the surface properly, but you shouldn’t cover loose, cushioned, or water-damaged sheet flooring.
If you’re unsure, a quick inspection or contractor consult will tell you whether to tile over it or remove it first.
Short direct answer for homeowners
If the linoleum is well-adhered, level, and in good condition, you can install tile over it—but you’ll need to properly prep the surface (clean, sand or prime, and often add a cement backer board or a suitable underlayment) to guarantee a long-lasting bond and avoid failures.
You’ll want a moisture-resistant underlayment, proper thinset, and firm substrate to prevent movement and tile failure.
When it’s a viable option and when it’s not
Those prep steps matter because whether you should tile over linoleum depends on the existing floor’s condition and your long-term goals.
If the linoleum is smooth, well-adhered, and level, you can tile over it after proper priming and using a suitable underlayment.
Don’t tile over bubbled, loose, cushioned, or water-damaged linoleum—remove it first to guarantee a durable tile installation.
Basic Understanding What Is Linoleum and How It Interacts with Tile?
You should know linoleum is a real, oil-based product distinct from vinyl and other sheet flooring, which matters when you plan tile over it.
Its adhesion, flexibility, wear, and any underlying damage affect whether tile will bond and stay put.
Also check what’s beneath the linoleum—plywood, concrete, or OSB—as that substrate often dictates the preparation and success of the installation.
Differences between linoleum, vinyl, and sheet flooring
Flooring materials like linoleum, vinyl, and sheet vinyl look similar at a glance, but they behave differently when you want to tile over them.
Linoleum is natural, dense, and can be more dimensionally stable. Vinyl is plastic, often thinner and more flexible.
Sheet vinyl is continuous, may hide seams, and can be trickier to bond to — know which you have before tiling.
How linoleum adhesion, flexibility, and condition affect tiling
After spotting whether your base is linoleum, vinyl, or sheet material, you’ll want to focus on linoleum’s adhesion, flexibility, and current condition because they directly determine if tile will bond and stay put.
Check for loose edges, bubbling, or delamination; brittle or highly flexible linoleum both hinder thinset bonding.
You’ll need a stable, well-adhered surface or removal before tiling.
Common substrates under linoleum (plywood, concrete, OSB)
Many linoleum installations sit over one of three common substrates—plywood, concrete, or OSB—and each affects how well tile will bond.
If you’re over concrete, you’ll likely get the best adhesion after proper cleaning and profiling.
Plywood needs a stable, rigid underlayment and moisture check.
OSB swells with moisture and often requires replacement or a new cement backer before tiling.
Pros and Cons of Installing Tile Over Linoleum
You can save time and money by tiling directly over sound linoleum, since it cuts demolition and cleanup.
However, you’ll face risks like poor bond, extra floor height, and potential long-term failure if the old sheet isn’t stable.
Decide based on condition and location—overlay works for well-adhered, level linoleum in low-moisture areas, while full removal’s safer for damaged or high-traffic spots.
Advantages (time, cost, less demolition)
Installing tile over existing linoleum can save you significant time, money, and hassle because you skip the demolition and subfloor repairs that strip-outs often require.
You’ll spend less on labor and disposal, finish the project faster, and avoid disrupting adjacent rooms.
For rentals or quick remodels, this approach cuts costs and downtime while still delivering a durable, attractive floor when done correctly.
Disadvantages and long-term risks (bond failure, height issues)
Although tiling over linoleum can be tempting, it introduces real risks you should weigh: poor adhesion leading to bond failure, uneven height that creates trip hazards and door clearance problems, and hidden moisture or damage that can ruin the new tile.
You’ll face increased repair complexity, possible grout cracking, and difficulty matching connections—so failures may be costly and disruptive over time.
Ideal scenarios for overlay vs. full removal
When your linoleum is well-bonded, level, and in good condition, overlaying with tile can save time and money; but if you’re facing moisture damage, uneven subflooring, or multiple height-sensitive changes, full removal is the safer long-term choice.
Choose overlay for sound, flat floors and temporary or rental updates.
Opt for removal when inspections reveal water, significant deflection, or permanent resale-focused renovations.
Assessment How to Determine If Your Linoleum Is Suitable for Tiling
Before you start, you’ll want to run a quick surface checklist—check adhesion, smoothness, and any signs of moisture.
Then inspect the structure: confirm the subfloor is flat, has minimal deflection, and joist spacing is appropriate.
Use tools and simple tests like a moisture meter, a pull test, and a tap test to verify the floor’s readiness.
Surface condition checklist (adhesion, smoothness, moisture)
Because your linoleum’s condition determines whether tile will last, you’ll want a quick, systematic checklist to assess adhesion, smoothness, and moisture before you start.
Peel test several spots to check adhesion; roughen glossy surfaces and remove loose edges.
Roll a level across for flatness and feel for bumps.
Use a moisture meter and tape test; any elevated moisture or delamination means repair or removal.
Structural checklist (subfloor flatness, deflection, joist spacing)
A straight 6-foot level and a good eye will tell you more than assumptions about the floor beneath your linoleum; check that the subfloor is flat, stiff, and properly supported so your tile won’t crack.
Walk the floor to detect bounce, note any sag between joists, and verify joist spacing meets tile manufacturer limits.
Reinforce or add blocking if you find excessive deflection.
Tools and tests to perform (moisture meter, pull test, tap test)
Once you’ve confirmed the subfloor is flat and stiff, you’ll want to run a few simple tests on the linoleum itself to make sure it can accept tile.
Use a moisture meter, perform a pull test, and tap for hollow spots; check adhesive residue and surface texture.
Recommended tools and checks:
- Moisture meter reading
- Adhesive pull test
- Tap test for hollows
- Surface profile check
- Texture/grit assessment
Step-by-Step Guide How to Prepare Linoleum for Tile Installation
Before you start tiling, you’ll want to get the room and yourself ready with proper ventilation, PPE, and by protecting door thresholds.
Next, clean and degrease the linoleum, repair or remove any damaged sections, and sand or scuff the surface to promote adhesion.
Finally, choose and apply the right primer or bonding membrane—know the common types and their pros and cons so the tile will stick reliably.
Step 1: Safety and site preparation (ventilation, PPE, door thresholds)
Start by securing good ventilation, donning proper PPE, and checking door thresholds so you’ll work safely and avoid surprises. Open windows, run fans, and seal off adjacent rooms.
Wear gloves, eye protection, a dust mask or respirator, and knee pads.
Measure thresholds and note changes—raise or adjust them now to guarantee tile height matches doors and prevents binding after installation.
Step 2: Clean and degrease the linoleum surface
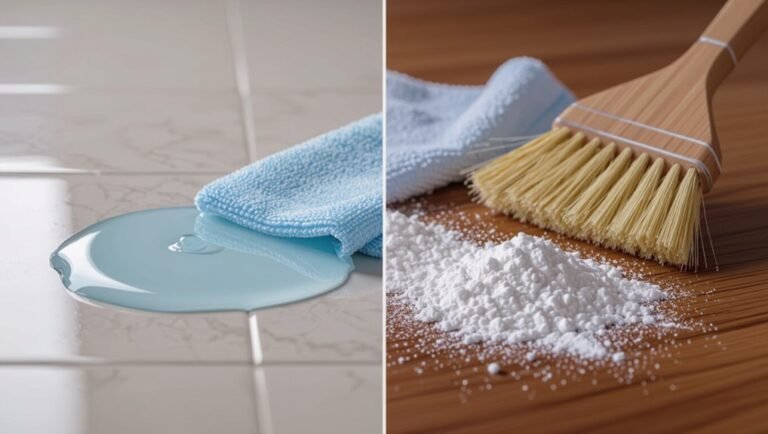
Prepare the linoleum by removing all dirt, grease, and residue so the tile adhesive can bond properly.
Sweep and vacuum, then mop with a degreasing cleaner or trisodium phosphate solution per label instructions.
Scrub stubborn spots with a stiff brush, rinse thoroughly, and let the surface dry completely.
Wipe with isopropyl alcohol for final decontamination before tiling.
Step 3: Repair or remove damaged sections when removal is necessary
If you find cracked, bubbled, or loose sections of linoleum that won’t bond or that sit above the subfloor level, repair or remove them now so your tile lays flat and stays put.
Cut out damaged areas, strip adhesive back to sound substrate, and replace with plywood or cement board patches as needed.
Confirm edges are flush and fasten securely before proceeding.
Step 4: Sanding or scuffing for better adhesion
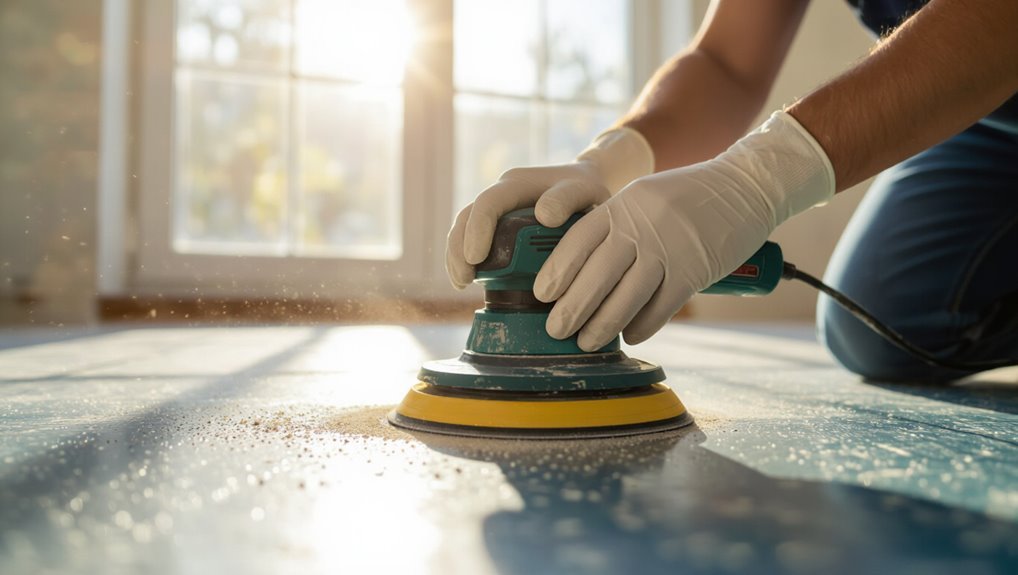
Roughen the linoleum surface so tile adhesive can grip—either sand it with a medium-grit (80–120) sanding block or use a coarse abrasive pad to scuff the entire area evenly.
Vacuum and wipe away dust with a damp cloth, then let dry.
Focus on consistent texture; avoid cutting through the linoleum.
Test a small area for adhesion before tiling the entire floor.
Step 5: Applying primer or bonding membrane (types and pros/cons)
Step 5 is where you seal the deal: applying a primer or bonding membrane that helps tile adhesive stick to slick linoleum.
Choose a latex primer for simple jobs—it’s quick and affordable but less robust.
Use an acrylic or epoxy bonding membrane for heavier traffic or moisture; they’re stronger and waterproof but costlier and need proper ventilation.
Follow manufacturer cure times.
Step 6: Installing a cement backer board or uncoupling membrane (when required)
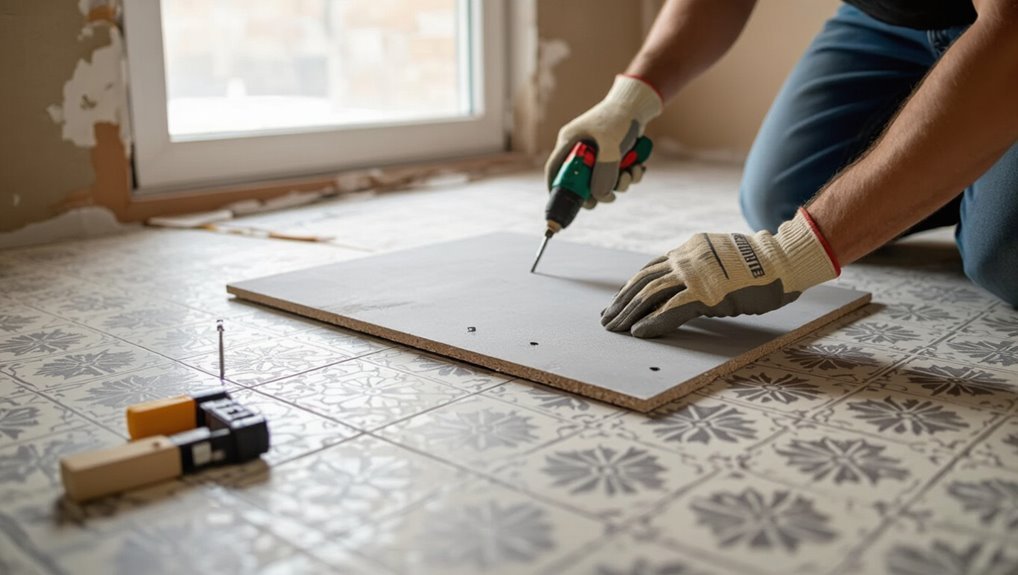
6 reasons to contemplate adding a cement backer board or uncoupling membrane: these layers give you a stable, moisture-resistant base and prevent cracks from transferring from the subfloor into your new tile.
You should choose backer board for rigidity on uneven linoleum, or an uncoupling membrane to allow movement.
Fasten, mortar-bed, and seal seams per manufacturer instructions before tiling.
Step 7: Setting tile mortar selection and trowel size
7 choices you make for mortar and trowel size will determine how well your tile bonds to the prepared linoleum: pick a thinset formulated for non-porous substrates (or a modified thinset if using cement backer board), match trowel notch depth to the tile size and backing method, and follow the mortar manufacturer’s pot-life and open time so you get full coverage and a solid bed without voids.
Choose a notch trowel that achieves 80–100% coverage, use polymer-modified thinset for larger tiles, and mix to manufacturer consistency for proper workability.
Step 8: Grouting, sealing, and finishing touches
Once your tiles are set and the mortar has fully cured, you’ll move on to grouting, sealing, and the finishing touches that lock in durability and appearance.
Mix grout per instructions, push into joints, and clean excess with a sponge.
After grout cures, apply a penetrating sealer suited for tile and grout.
Replace trim, reinstall baseboards, and allow proper cure time before heavy use.
Comparison Tile Over Linoleum vs. Removing Linoleum First
You’ll weigh cost, time, and labor when deciding whether to tile over linoleum or remove it first.
Consider how each option affects longevity and maintenance, and which rooms — bathroom, kitchen, basement, or living room — justify the extra work.
That comparison will help you choose the most durable, cost-effective approach for your space.
Cost comparison
Comparing costs for tiling over linoleum versus removing it first comes down to labor, materials, and long-term risks: keeping the old linoleum saves on demolition and disposal fees and can cut project time, but removing it lets you address subfloor issues and may prevent costly repairs or tile failures later.
| Option | Cost impact |
|---|---|
| Keep linoleum | Lower short-term cost |
| Remove linoleum | Higher upfront, lower risk |
Time and labor comparison
Cost and risk aren’t the only trade-offs to weigh—time and labor can swing your decision just as much.
If you tile over linoleum, you’ll save demolition time and disposal work, completing the job faster with fewer helpers.
Removing old linoleum adds hours of scraping, possible adhesive removal, and patching subfloor damage, requiring more labor, tools, and often a professional to guarantee a smooth, lasting base.
Longevity and maintenance comparison
If you leave tile over linoleum, expect more maintenance and a shorter trouble-free lifespan than if you remove the old flooring first.
You’ll likely deal with adhesive failures, grout cracking, and moisture traps that cause mildew.
Removing linoleum gives a stable substrate, longer-lasting adhesion, easier repairs, and simpler cleaning.
Upfront removal costs more time but reduces long-term maintenance and replacement frequency.
Best choice by room type (bathroom, kitchen, basement, living room)
Having removed or considered the trade-offs of keeping linoleum, pick your approach based on how each room gets used and what risks matter most.
In bathrooms and kitchens, remove linoleum for waterproofing and stable substrate.
In basements, keep only if dry and level; otherwise, remove for moisture barriers.
In living rooms, you can tile over sound, flat linoleum for speed, but removal gives better long-term performance.
Common Problems and Mistakes When Tiling Over Linoleum
When you tile over linoleum, you’ll run into a few common pitfalls: poor bond and hollow tiles from bad prep, mismatched heights at thresholds, moisture and mold risks, and problems if the subfloor is uneven or deflecting.
You’ll want to address adhesion with proper cleaning and primer or a decoupling membrane, plan for connections and underlayment to correct height, and test moisture levels to prevent mold.
Don’t ignore subfloor flatness and stiffness, since deflection will crack grout and tiles over time.
Bond failure and hollow tiles causes and solutions
One of the most common problems you’ll face tiling over linoleum is bond failure, which shows up as hollow-sounding or loose tiles that pop up under foot traffic.
It’s usually caused by poor surface prep, incompatible adhesives, or trapped moisture.
Remove loose tiles, clean and degrease the linoleum, use a recommended primer and thinset, and back-butter tiles to guarantee full coverage.
Height and threshold mismatch issues
Fixing loose tiles won’t help if your new floor ends up a trip hazard at doorways.
You’ll need to plan changes where tile over linoleum raises finished height. Measure thresholds, adjust subfloor or use reducers/ramps, and cut door jambs if necessary.
Match adjacent floor heights for safe passage and smooth sightlines. Don’t ignore clearance for doors and appliances.
Moisture and mold risks
Because linoleum can trap moisture beneath a new tile layer, you risk creating a hidden environment where mold can take hold if you don’t address ventilation and substrate conditions first.
Inspect for existing moisture, remove damp or water-damaged linoleum, and guarantee the subfloor is dry.
Use a moisture barrier or breathable adhesive where appropriate, and ventilate the room to prevent long-term mold growth.
Ignoring subfloor deflection or unevenness
If you skip checking for subfloor deflection or unevenness, your new tile can crack, grout can crumble, and fasteners may loosen as the floor flexes beneath traffic.
You should measure for bounce, shim or sister joists, and level high spots. Thinset and membrane won’t fix excessive movement.
Address structural issues first, then proceed with a rigid, properly supported substrate for durable tile.
Best Practices and Pro Tips from Pros
Before you start, know when you must always remove linoleum—when it’s loose, cushioned, or water-damaged—and when you can bond over a sound, well-primed surface.
Use proven materials (polymer-modified thinset, uncoupling membranes, and manufacturer-recommended primers) and stick to brands pros trust, and follow installer tips like proper trowel size, expansion joints, and staged curing for long-lasting results.
You can save money without cutting quality by prepping carefully, buying bulk or contractor packs, and choosing time-tested shortcuts like spot-bonding large sheets rather than full replacement.
When to always remove linoleum first
When your linoleum is loose, damaged, or bonded over problematic substrates like water-damaged plywood or multiple layers of old flooring, always remove it first to guarantee a stable, level base for tile.
Doing otherwise risks tile failure, uneven grout lines, and moisture traps that lead to cracks and mold.
Also pull linoleum if it has adhesive residue, noticeable deflection, or if you plan waterproofing or uncoupling membranes.
Recommended materials and brands (thinset, membranes, primers)
Choose proven materials that match the job: a polymer-modified thinset rated for your tile and subfloor, a reputable uncoupling or waterproofing membrane where movement or moisture is a risk, and a primer compatible with both the linoleum and the chosen thinset—these decisions determine long-term performance.
- Use polymer-modified thinset
- Select a trusted uncoupling membrane
- Choose a waterproofing membrane if needed
- Apply a compatible primer
- Pick brands with proven warranties
Installer tips for long-lasting results
Start by planning the job like a pro: map out tile layout, verify substrates, and gather all tools and materials so you won’t be improvising mid-install.
Prep surfaces thoroughly, remove loose linoleum, clean, degrease, and prime.
Use proper thinset and membrane, maintain consistent grout joints, check level frequently, stagger seams, and allow full cure time for adhesives and grout before foot traffic.
Cost-saving shortcuts that don’t compromise quality
If you plan carefully and focus on a few smart moves, you can cut costs without cutting corners: prioritize prepping the linoleum—clean, repair, and level—so you avoid pricey adhesives or backer board.
Buy quality tile and mortar in slightly bulk quantities, rent specialty tools, and schedule work in stages to reduce labor overlap.
DIY manageable tasks; hire pros for critical steps.
Estimated Costs and Timeline
You’ll want to compare typical price ranges for tiling over linoleum versus removing it and doing a full install so you know where your budget’ll land.
Expect a small room to take a day or two, while whole-house projects can stretch over weeks depending on prep and drying times.
Consider hiring a pro for large or uneven spaces and DIY for straightforward, small rooms where you’re comfortable with tile work.
Typical price ranges for overlay vs. removal + install
While overlaying tile directly over linoleum often cuts labor and disposal costs, removal plus install gives a cleaner substrate and can prevent long-term problems—so it helps to know typical price ranges and timelines before you decide. You’ll often see:
| Option | Low | High |
|---|---|---|
| Overlay | $3/sq ft | $7/sq ft |
| Remove+Install | $8/sq ft | $20/sq ft |
Choose based on budget and substrate condition.
Project timeline by scope (small room, whole house)
A small room can often go from demo to grout in as little as two to four days, while a whole-house project commonly stretches from several weeks to a few months depending on scope, crew size, and whether you’re overlaying or removing the linoleum first.
Expect additional time for subfloor repair, adhesive cure, and grout drying; factor in tile delivery and inspection delays.
When to hire a pro vs. DIY
Wondering whether to tackle the job yourself or hire a pro?
If you’ve got basic skills, a small room, and solid linoleum, DIY saves $200–$800 and takes a weekend.
Hire a pro for large areas, uneven subfloors, complex patterns, or if you need quick completion—expect $2–$6 per sq ft plus labor and a few days to a week for scheduling and installation.
Maintenance and Care After Installing Tile Over Linoleum
Once your tile over linoleum is set, you’ll want to keep grout sealed, clean spills quickly, and use nonabrasive cleaners to protect the finish.
Check periodically for soft spots, loose tiles, or grout cracks that might signal delayed adhesion issues.
If you notice spreading looseness, persistent movement, or water getting under tiles, call a professional to assess and repair.
Grout and tile maintenance tips
Proper care keeps your new tile over linoleum looking great and prevents grout from staining or crumbling prematurely.
Wipe spills immediately, mop with a pH-neutral cleaner, and avoid harsh acids or bleach.
Reseal grout yearly or as recommended, replace cracked grout promptly, and use soft-bristle brushes for scrubbing.
Place rugs in high-traffic areas and lift appliances when checking edges to spot issues early.
How to monitor for delayed adhesion issues
Even if the new tile feels solid at first, you should monitor for delayed adhesion issues over the first 6–12 months by checking for telltale signs like loose tiles, hollow sounds, hairline cracks, or grout separation.
Walk across rooms, tap tiles weekly, note any changes, and document locations and dates. Address minor movement early with targeted cleaning and regrouting to prevent wider failure.
When to call a professional for repairs
If you spot recurring issues—like hollow-sounding tiles, widening grout gaps, or tiles lifting in multiple areas—call a professional promptly, because these signs usually mean the bond beneath the tile has failed or the substrate needs repair.
You should also call if moisture stains, persistent movement, or cracking grout appear despite DIY fixes. A pro will assess, remove damaged sections, and restore a lasting installation.
FAQs
You probably have specific questions about tiling over linoleum—like whether it’s safe in bathrooms or how much it’ll raise your floor.
You’ll also want to know when the floor can be used, if radiant heating works under the new tile, and whether local codes allow the work.
I’ll answer each of these so you can plan confidently.
Can you tile over linoleum in a bathroom or wet area?
Wondering whether you can tile over linoleum in a bathroom or other wet area? You can, but only if the linoleum is fully bonded, clean, and undamaged.
Sealant and waterproofing underlayment are essential to prevent moisture from reaching the substrate. For safety, use a suitable thinset and uncoupling membrane, and follow local building codes—when in doubt, consult a pro.
Will tiling over linoleum raise my floor height too much?
Having linoleum in place can affect finished floor height, so it’s smart to check how much thickness your new tile assembly will add before you start.
Measure combined height of tile, thinset, and any underlayment. Compare to adjacent door clearances, passages, and thresholds.
You can reduce build-up with thinner tile, low-profile underlayment, or by planing door jambs to avoid trip hazards and alignment issues.
How long after tiling can I use the floor?
Within 24 to 72 hours you can usually walk on newly tiled floors, but you’ll want to wait longer before heavy use or grout sealing.
Light foot traffic is fine after a day; avoid moving appliances or heavy furniture for 48–72 hours.
Wait at least 7 days before aggressive cleaning or full use to let thinset and grout cure properly and reach strength.
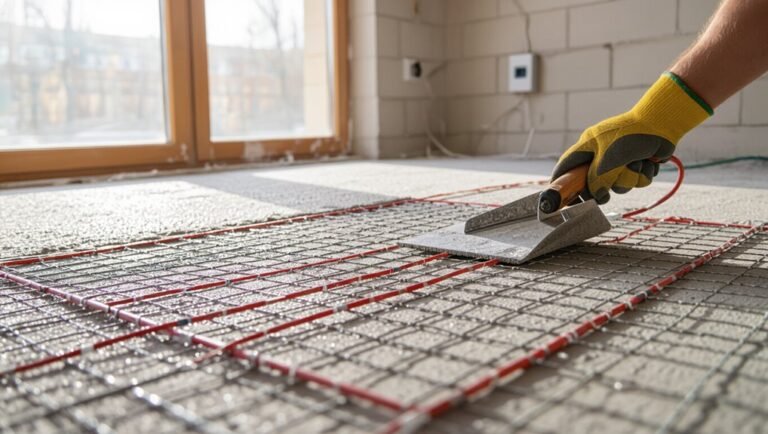
Can radiant floor heating be installed over linoleum with tile?
Once your tile and grout have cured enough for light use, you might also be thinking about adding radiant floor heating.
You can install electric or hydronic systems under tile over linoleum if the existing vinyl is stable, well-bonded, and thin. Remove loose sections, guarantee proper insulation and manufacturer compatibility, and test adhesion.
For best results, consult your heating and tile manufacturers before proceeding.
Do building codes allow tiling over existing linoleum?
Curious if building codes let you tile over existing linoleum? Generally, codes don’t prohibit it, but local rules and inspectors may require removal for risk, thickness, substrate condition, or moisture concerns.
You should check local building department, follow manufacturer instructions, and guarantee proper prep. When in doubt, get an inspection or permit to avoid failed inspections or warranty issues.