
How to Clean Floor Molding and Keep It Looking Freshly Painted
You can keep floor molding looking freshly painted by dusting weekly with a microfiber or vacuum brush, wiping scuffs with a gentle all-purpose cleaner or diluted dish soap, and using a Magic Eraser lightly for stubborn marks. Match cleaners to the molding material and finish, avoid soaking trim, and touch up chips with light sanding, primer on bare areas, and thin paint coats. Follow routine spot-cleaning and preventative guards, and if you want more tips, the next section covers techniques and products.
How to Clean Floor Molding and Keep It Looking Freshly Painted
You can usually keep trim looking freshly painted with a quick clean and touch-up instead of a full repaint.
Wipe away dust and scuffs with a mild cleaner, then spot-prime and touch up any chipped areas.
Repaint only when the finish is heavily worn, discolored, or the damage is widespread.
Short, actionable summary
Start by dusting and spot-cleaning baseboards regularly so they stay looking freshly painted without extra work; use a microfiber cloth or vacuum brush to remove dust, a gentle all-purpose cleaner or diluted dish soap for grime, and a magic eraser for scuffs.
Then dry and touch up paint where needed.
For quick how to clean floor molding: dust, spot-clean, remove scuffs, dry, and touch up.
When to clean vs. when to repaint
Although regular cleaning keeps most molding looking fresh, you’ll need to repaint when stains, chips, or yellowing don’t respond to spot treatments.
Clean scuffs, dust, and grime first; if discoloration persists, paint is warranted.
Repaint if multiple chips, water damage, or peeling finish appear.
Otherwise stick to targeted cleaning and touch-ups to save effort and preserve original trim detail.
Understanding Floor Molding: Materials and Finishes
Before you clean, know what your molding is made of—wood, MDF, PVC, or metal—since each material reacts differently to moisture and cleaners.
Also check the finish—latex, enamel, or oil-based paints and satin or gloss sheens—which determines how durable the surface is and how easily it can be wiped without damaging the coating.
Matching your cleaning method to the material and finish will protect the molding and keep the paint looking fresh.
Common molding materials (wood, MDF, PVC, metal)
When you’re choosing floor molding, the material matters as much as the profile: wood offers warmth and can be stained or painted, MDF is affordable and smooth for paint, PVC stands up to moisture and is low-maintenance, and metal delivers a modern, durable edge.
You’ll pick wood for character, MDF for budget-friendly painted trims, PVC for bathrooms, and metal for contemporary or industrial spaces.
Typical paint and finish types (latex, enamel, oil-based, satin, gloss)
There are a few common paint and finish types you’ll encounter for floor molding, and each affects appearance, durability, and maintenance differently.
Latex dries fast, resists yellowing, and cleans easily.
Oil-based and enamel give tougher, smoother surfaces but can yellow and need solvents for cleanup.
Satin hides imperfections; gloss shows detail and wipes clean quickly.
Choose based on look and toughness.
How material + finish affects cleaning methods
Although finish and material often get lumped together, they each change how you should clean floor molding: soft woods absorb water and cleaners, dense hardwoods resist them, painted surfaces tolerate milder, water-based cleaners, and oil-based or high-gloss finishes can handle stronger solvents and scrubbing.
Test cleaners on an inconspicuous spot, use minimal moisture on soft woods, and choose solvents matched to the finish.
Safety and Preparation
Before you start cleaning, gather a simple checklist of tools and supplies—soft cloths, mild cleaner, brush, bucket, and any finish-specific products.
Take basic safety precautions: work in a well-ventilated area and wear gloves and a mask if you’re using stronger cleaners.
Test a hidden spot first to check how the cleaner and your cloth affect the paint or finish.
Tools and supplies checklist
When you gather the right tools and supplies, cleaning floor molding goes faster and avoids damage.
You’ll need gentle cleaners, soft cloths, and small brushes to reach crevices. Have a bucket, sponge, and touch-up paint ready for scuffs. Keep a step-stool handy for higher molding.
- Mild detergent or all-purpose cleaner
- Microfiber cloths
- Soft-bristled brush/toothbrush
- Small bucket and sponge
Safety precautions (ventilation, gloves, mask)
Once you’ve gathered your cleaners and brushes, take a moment to set up safety measures to protect yourself and your home.
Open windows and run a fan to ventilate fumes. Wear nitrile gloves to protect skin and a disposable mask or respirator if using strong cleaners.
Keep pets and children away, and store chemicals upright and sealed when you’re done.
How to test a hidden spot (paint compatibility test)
How can you be sure a cleaner won’t strip or discolor your molding? Find an inconspicuous spot behind furniture or inside a closet.
Apply a drop of cleaner, wait the recommended time, then blot with a white cloth. Check for color transfer, softening, or gloss change.
If paint stays intact, proceed. If not, choose a milder cleaner or consult a professional.
Step-by-Step Cleaning Process
Start by removing dust and loose dirt so your cleaning solutions can work effectively.
Next, use mild soap and water for light grime, then tackle scuffs and stains with a magic eraser or mild solvent as needed.
Finish by removing sticky residue or grease and, for stubborn spots, consider sanding or a specialty cleaner.
Step 1 Remove dust and loose dirt
Grab a broom, vacuum, or microfiber duster and clear away loose dust and dirt from the floor molding before you get into wet cleaning.
Work top to bottom, using a soft brush attachment to reach crevices and corners. Wipe stubborn dust with a dry microfiber cloth.
Remove pet hair with a lint roller. Check for flaking paint and note areas needing touch-ups before proceeding.
Step 2 Gentle cleaning for light grime (soap and water)
1. Mix a few drops of mild dish soap with warm water in a bucket.
Dip a soft cloth or sponge, wring it until damp, and wipe molding from top to bottom. Rinse the cloth often to avoid spreading grime.
For grooves, use a soft-bristled toothbrush.
Dry promptly with a clean towel to prevent water spots and paint damage.
Step 3 Removing scuffs, marks, and stains (magic erasers, mild solvents)
If soap and water didn’t remove stubborn scuffs or stains, you’ll need slightly stronger tools: a magic eraser for surface marks and mild solvents for tougher spots.
Test solvents on an inconspicuous area first. Gently rub scuffs with the eraser, avoiding over-sanding paint.
For stained spots, apply solvent sparingly with a cloth, blotting until the stain lifts, then rinse and dry.
Step 4 Tackling sticky residue and grease
When sticky residues or grease cling to your molding, you’ll want a targeted, step-by-step approach that loosens the film without harming paint or finish.
Start by wiping with a microfibre cloth and warm, soapy water.
For remaining tackiness, apply a dab of white vinegar or diluted dish soap, rub gently, then rinse and dry.
Repeat sparingly until clean.
Step 5 Deep cleaning for stubborn stains (sanded spots, specialty cleaners)
Tackle deep stains by evaluating the damage first: identify whether the mark is a sanded spot, paint transfer, water stain, or something else so you can choose the right method.
For sanded spots, feather-sand edges and touch up with matching paint.
For paint transfer, gently scrape then use a solvent-tested rag.
Use specialty cleaners sparingly, testing hidden areas to avoid finish damage.
Step 6 Rinse, dry, and inspect for damage
After removing stubborn spots and any specialty cleaner residue, rinse the molding with clean water to lift remaining dirt and cleaning agents so the finish won’t cloud or attract dust.
Wipe dry with a lint-free cloth, working along grain and in corners.
Inspect for cracks, gouges, loose caulk, or swollen areas. Note damage for repair and verify surfaces are fully dry before proceeding.
Step 7 Touch-up painting for chips and wear
Although the cleaning’s done, you should touch up any chips, scuffs, or worn spots now so the molding looks consistent and is protected from moisture or further damage.
Lightly sand rough areas, wipe dust, apply matching primer if bare wood shows, then thinly brush on paint in even strokes.
Let it dry fully and inspect; repeat thin coats until seamless.
Cleaning Methods Matched to Material and Finish
You’ll match cleaning methods to each molding material and finish so you don’t damage surfaces. Use gentle, appropriate cleaners and follow specific cautions for wood, painted MDF, PVC/vinyl, and metal. Here’s a quick visual guide to remind you which approach fits which material:
| Material | Recommended Cleaner | Caution/Tip |
|---|---|---|
| Wood molding | Mild soap + water or wood cleaner | Avoid soaking; wipe dry |
| Painted MDF | Mild detergent, avoid abrasives | Test small area; don’t over-wet |
| PVC / Vinyl | Mild all-purpose cleaner | Avoid strong solvents |
| Metal / Aluminum | Mild detergent or metal cleaner | Rinse thoroughly to prevent residue |
| Finish note | Use soft cloths or brushes | Match cleaner to finish type |
Wood molding recommended cleaners and cautions
When cleaning wood molding, match your cleaner to the finish—sealed, stained, painted, or raw—so you don’t strip coatings or darken the wood; test any product in an inconspicuous spot first.
Use mild cleaners for most finished surfaces, and reserve stronger solvents or sanding for damaged, unsealed areas.
Use soft cloths, avoid abrasive pads, dilute detergents, and spot-treat stains gently to protect grain and finish.
Painted MDF do’s and don’ts
If your home has painted MDF molding, treat it differently than solid wood. MDF’s composite core and factory paint resist water poorly and can swell or peel if you scrub too hard or use harsh solvents.
Use a barely damp microfiber cloth, mild detergent, and blot spills quickly. Avoid soaking, abrasive pads, and strong solvents.
Touch up chips with compatible primer and paint.
PVC and vinyl best practices
Think of PVC and vinyl molding as low-maintenance options that still need the right care: wipe them with a soft cloth or sponge and mild detergent, rinse with clean water, and dry to prevent streaks or residue.
For scuffs, use a magic eraser gently. Avoid abrasive pads or harsh solvents. Test any new cleaner in an inconspicuous spot before treating visible areas.
Metal or aluminum safe cleaning agents
Because metals and aluminum finishes react differently to cleaners, you’ll want products that remove grime without stripping protective coatings or causing discoloration.
Use mild, pH-neutral cleaners or diluted dish soap with water. Avoid acidic, abrasive, or bleach-based solutions.
Test in an inconspicuous spot first. For stubborn spots, apply a metal-safe cleaner per label instructions, rinse thoroughly, and dry to prevent water spots or corrosion.
Tools, Cleaners, and DIY Solutions
You’ll want a mix of reliable commercial cleaners, degreasers, and touch-up paints for tough stains and finish repairs.
For everyday grime, you can use simple homemade solutions like diluted dish soap, vinegar-water, or a baking soda paste depending on the finish.
Keep small tools—soft brushes, microfiber cloths, and plastic putty knives—on hand for precise cleaning and paint touch-ups.
Recommended commercial products (cleaners, degreasers, touch-up paints)
1 simple rule will save you time: pick products made for the molding material you have.
Use a gentle pH-neutral cleaner for painted wood, a mild degreaser for kitchen grime, and a plastic-safe cleaner for vinyl.
Choose touch-up paints from the molding brand or matching trim enamel; satin or semi-gloss hides wear best.
Always test in an inconspicuous spot first.
Homemade cleaner recipes and when to use them
If you prefer DIY solutions or want to avoid harsh chemicals, homemade cleaners can handle most molding messes and often save money.
Use mild options for painted trim, stronger mixes for greasy spots, and spot-test first. Choose a recipe based on soil type and finish.
- Warm soapy water (dish soap + water)
- Vinegar solution for scuffs
- Baking soda paste for stains
- Rubbing alcohol for sticky residue
Tools for precision cleaning and touch-ups (brushes, microfiber, putty knives)
Precision tools make the difference between a quick clean and a finished look: grab soft-bristled brushes for grooves, microfiber cloths for streak-free wiping, and slim putty knives for lifting paint flecks or hardened gunk without gouging the molding.
Use angled artist brushes for touch-up paint, lint-free microfiber for final polish, and flexible plastic scrapers to protect surfaces while removing stubborn debris.
Common Problems and How to Fix Them
You’ll likely run into paint chips, water-swollen sections, mold or mildew stains, and failing caulk as you clean floor molding.
You’ll learn simple repair steps for flaking paint, how to identify and remediate swelling from moisture, ways to remove and prevent mold and discoloration, and when to replace or re-caulk visible seams.
Follow the fixes in the next sections to make your molding look and perform like new.
Paint chips and flaking repair steps
Start by evaluating the damage so you know whether chips and flaking are surface-level or require more work; small, isolated flakes usually just need sanding and touch-up, while widespread peeling often means the paint failed and you’ll have to strip and recoat.
For minor spots, sand smooth, clean dust, prime bare wood, then apply matching paint.
For larger areas, remove loose paint, sand, prime, and repaint.
Water damage and swelling identification and remediation
Beyond paint issues, water damage and swelling pose a different set of problems that need prompt attention because moisture can warp molding and invite mold growth.
Check for soft spots, bulging seams, bubbling paint, and gaps at joints.
Dry the area thoroughly, remove swollen sections, sand edges, apply wood filler or replacement trim, seal with primer and paint, and fix the moisture source.
Mold, mildew, and discoloration removal and prevention
When mold, mildew, or stubborn discoloration shows up on your floor molding, act quickly to prevent stains from setting and spores from spreading. Small areas often respond to a targeted clean, while larger or recurrent growth needs stronger treatment and moisture control.
Wear gloves, scrub with a diluted bleach or vinegar solution, rinse, dry thoroughly, fix leaks, improve ventilation, and repaint with mold-resistant primer and paint.
Visible seams and caulk failures re-caulking guide
If you spot visible seams or failing caulk along your floor molding, don’t ignore them—these gaps let moisture and dirt in and make the trim look shabby.
Remove old caulk with a utility knife, clean the gap, apply painter’s caulk smoothly, and tool the bead.
Paint over once cured. Re-caulk yearly where movement or humidity causes separation.
Mistakes to Avoid
Don’t use abrasive tools or harsh cleaners that can damage delicate finishes—check the molding’s finish first.
Don’t soak trim with water or use products that aren’t suited to the material, and don’t ignore signs of moisture or pests that need repair.
Catching these mistakes early will save you time and prevent bigger problems.
Using abrasive tools on delicate finishes
Although you might think a scrub pad or steel wool will speed things up, abrasive tools can quickly ruin delicate finishes on floor molding.
Don’t scrub hard or use metal pads; they scratch, dull, and remove paint.
Test a soft microfiber or fine nylon brush in an inconspicuous spot, work gently, and stop at the first sign of damage to preserve the finish.
Applying wrong cleaners for the finish
When you reach for a cleaner, match it to the molding’s finish—using the wrong product can strip paint, haze varnish, or eat through sealant in minutes.
Test any cleaner on an inconspicuous spot first. Use pH-neutral cleaners for painted or sealed surfaces, mild soap for coated wood, and solvent cleaners only for raw, unfinished trim.
Rinse residues and dry promptly to prevent damage.
Over-saturating molding with water
One quick mistake is drenching molding with water—do it and you risk swelling, warping, or peeling the finish.
You should use a barely damp cloth and wring it thoroughly before wiping. Quick, gentle passes lift dirt without soaking joints or seams.
Dry immediately with a soft towel. For stubborn grime, switch to a targeted cleaner rather than adding more moisture.
Ignoring underlying causes (moisture, pests)
If you skip checking for moisture or pests and just keep wiping, you’ll keep treating symptoms instead of the problem.
Inspect baseboards for soft spots, mold, or insect trails before cleaning. Fix leaks, improve ventilation, or call an exterminator as needed.
Otherwise stains, warping, and recurring damage will return, wasting time and ruining fresh paint.
Prevention and Long-Term Maintenance Strategies
To keep molding looking its best, set a simple routine—quick daily wipes and a weekly sweep—to prevent buildup before it becomes a problem.
Use protective measures like corner guards, chair rails, and weatherstripping to stop damage and moisture intrusion.
Follow a seasonal checklist for deeper inspections and cleaning, and learn to spot when scuffs call for repainting versus when rot or warping means replacement.
Routine cleaning schedule and quick daily tips
When you keep a simple routine, your floor molding stays cleaner and lasts longer with less effort; a short weekly deep-clean plus a few daily habits prevents grime buildup and costly repairs.
- Wipe scuffs daily with a damp microfiber cloth.
- Sweep or vacuum baseboards twice weekly.
- Spot-clean spills immediately with mild soap.
- Do a quick weekly scrub and touch-up any paint chips.
Protective measures (corner guards, chair rails, weatherstripping)
Because prevention beats repair, adding simple protective features—corner guards, chair rails, and weatherstripping—keeps your floor molding looking sharp and cuts down on maintenance.
Install soft, low-profile corner guards where traffic bumps occur, mount chair rails to stop chair scuffs, and seal gaps with discreet weatherstripping to block drafts and dirt.
These measures reduce chips, paint touch-ups, and cleaning frequency.
Seasonal maintenance checklist
Although you don’t need to tackle everything at once, a simple seasonal checklist will keep your floor molding in top shape year-round:
Inspect for chips, loose sections, and gaps; clean dust and scuffs; touch up paint or caulk small gaps; tighten fasteners; trim nearby vegetation; check for moisture or pest signs.
Schedule these tasks each season to prevent buildup and costly repairs.
When to repaint vs. when to replace
If your molding shows only surface wear—faded paint, minor scuffs, or small chips—you can usually refresh it with repainting or simple repairs; choose replacement when structural damage, rot, persistent gaps, or repeated repairs make continued patching impractical or more costly than new trim.
Inspect attachments, moisture damage, and insect signs. Repaint when solid; replace when stability, fit, or appearance won’t respond to touch-ups.
Cost and Time Estimates
Plan on about 15–30 minutes per room for basic cleaning and touch-ups, depending on molding length and how much detail you tackle.
DIY touch-ups usually run from free (use what you have) to $20–$50 per room for supplies, while professional repairs or repainting can range from $100 to $400 per room.
Use those figures to decide whether to handle it yourself or hire a pro.
Typical time requirements per room
Expect to spend about 15–30 minutes per small room, 30–60 minutes for medium rooms, and up to 90 minutes for large or high-traffic areas when cleaning floor molding—times vary with molding height, level of soiling, and whether you’re moving furniture.
Plan shorter sessions for routine dusting; allow more time for scrubbing, drying, and detail work.
Work systematically wall to wall for efficiency.
Cost range for DIY touch-ups vs. professional repairs
When you handle minor scuffs, chips, or paint touch-ups yourself, you’ll typically spend $5–$50 on supplies like sandpaper, caulk, touch-up paint, and basic filler, while hiring a professional for more extensive repairs or replacement usually runs $150–$600 or more depending on labor, travel, and materials. You’ll save money DIY but factor time and finish quality.
| Task | DIY cost | Pro cost |
|---|---|---|
| Touch-up | $5–$50 | $150–$250 |
| Repair | $20–$100 | $200–$400 |
| Replace | $30–$150 | $300–$600 |
FAQ
Got questions about cleaning and caring for your baseboards? You’ll find quick answers here on using bleach safely, removing ink or permanent marker, whether magic erasers harm paint, how often to repaint, and protecting molding in high-traffic spots.
Read on so you can pick the right method for your trim.
Can I use bleach to clean painted molding?
Curious if you can use bleach on painted molding? You can, but dilute it (about 1 part bleach to 10 parts water).
Test a hidden spot first, and rinse thoroughly after cleaning to avoid paint damage or discoloration.
Avoid prolonged soaking and strong scrubbing. Use gloves and guarantee good ventilation.
For delicate or older paint, choose a milder cleaner to prevent peeling or fading.
How do I remove permanent marker or ink from baseboards?
If you’ve tested cleaners on painted molding and rinsed well, you’re ready to tackle ink or permanent marker on baseboards.
Dab rubbing alcohol or a small amount of acetone on a cotton swab, working from edges inward. Blot—don’t rub—to lift ink.
Rinse with a damp cloth, then dry. Touch up paint if needed for stubborn stains or slight finish dulling.
Will magic erasers damage my painted molding?
Generally, yes—you can use a Magic Eraser on painted molding, but use it gently and sparingly since it’s an abrasive melamine foam that can dull or remove paint if you scrub hard.
Test a hidden spot first, wipe lightly with water, and avoid prolonged rubbing.
For glossy or fresh paint, choose a soft cloth and mild cleaner instead to preserve finish.
How often should I repaint baseboards?
How often should you repaint baseboards? Aim to repaint every 3–7 years depending on wear, sunlight exposure, and paint quality. Inspect annually for chips, stains, or discoloration; touch up small areas as needed. If trim looks dull, has many scuffs, or paint peels, repaint sooner. Use durable semi-gloss or satin for easier cleaning and longer-lasting results.
What’s the best way to protect molding in high-traffic areas?
Repainting every few years helps keep baseboards looking fresh, but in high-traffic spots you’ll also want to prevent knocks and scuffs before they happen.
Install corner guards or clear PVC protector strips, add chair rails where furniture rubs, and use scuff-resistant semi-gloss paint.
Place felt pads on furniture, train pets, and run rugs or runners to absorb impact and dirt, reducing touch-ups.
Visual Reference and Step Demonstrations
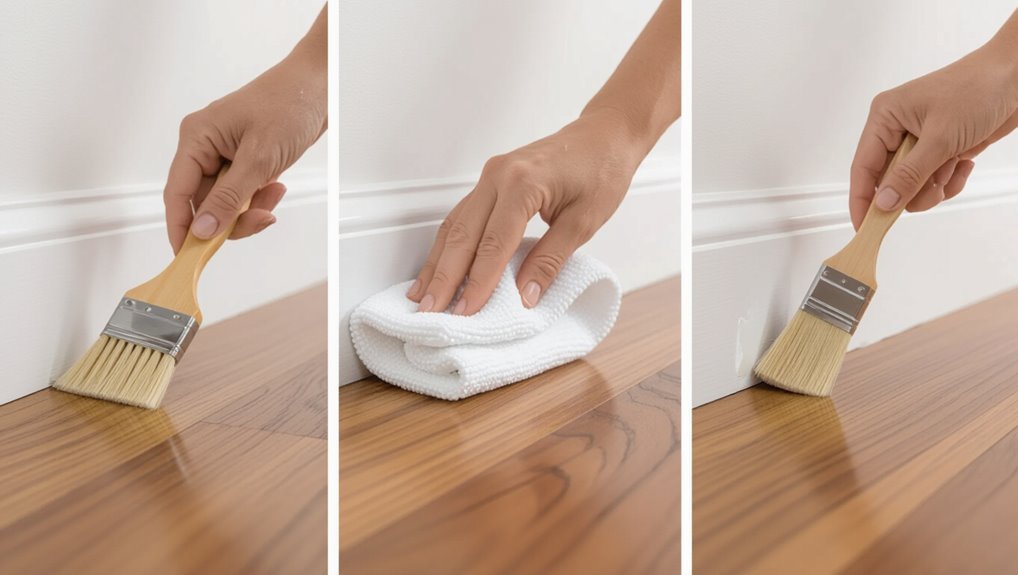
Anyone can follow the step-by-step photos and close-up shots here to match each cleaning technique with the right tool and motion; you’ll see before-and-after images, angle details for scrubbing, and where to apply stain removers or touch-up paint so you don’t guess as you work.
Use numbered steps with short captions, zoomed-in insets for tricky spots, and quick tips for drying, sanding, and final inspections.

