How to Install a Shower Pan and Tile Floor From Scratch
You can install a durable, watertight shower pan and tile floor from scratch if you plan carefully, have basic plumbing and tiling skills, and use proper materials. Start by evaluating and stiffening the subfloor, pick a preformed pan or mortar bed, install waterproofing and a clamped drain, then set tiles with thinset or a mud bed and grout/seal properly. Expect several days, common pitfalls, and tools listed below—keep going to learn the full step-by-step process.
Quick Answer Can You Install a Shower Pan and Tile Floor From Scratch?
You can install a shower pan and tile floor from scratch, but it takes moderate to advanced DIY skills, a weekend to several days, and a modest budget for materials and tools.
If you’re comfortable with plumbing, waterproofing, and precise tiling, you’ll save money by doing it yourself; if not, hire a pro to avoid leaks and costly mistakes.
Consider your timeline, confidence with the steps, and the project’s complexity before deciding.
Short summary of feasibility, time, cost, and skill level
Although it’s doable for a determined DIYer, installing a shower pan and tile floor from scratch requires moderate to advanced skills, careful planning, and several days of steady work.
You can learn how to install a shower pan and tile through tutorials, but expect 2–5 days, material costs of $200–$800 (varies by materials), and patience for waterproofing, leveling, and precise tiling.
When to hire a pro vs. DIY considerations
Given the time, cost, and skill involved, decide early whether to tackle the shower pan and tile yourself or bring in a pro.
If you’re comfortable with waterproofing, drainage slope, and precise tile work, DIY can save money.
Hire a pro if plumbing adjustments, complex drains, or warranty concerns exist, or if you lack time, tools, or confidence to avoid leaks and rework.
Basic Understanding What Is a Shower Pan and Why It Matters
You’ll want to know the main components of a shower assembly — the pan, drain, waterproof membrane, curb, and the tile surface — because each part affects water flow and longevity.
Choose the right pan type (preformed vs. mortar bed, and linear vs. center drain) to match your layout and skill level.
Also pick appropriate tile (porcelain, ceramic, or stone) and grout for wet areas to guarantee durability and slip resistance.
Components of a shower assembly (pan, drain, membrane, curb, tile)
Think of a shower assembly as a team where each part—pan, drain, waterproof membrane, curb, and tile—has a specific job to keep water contained and directed away from the structure.
You set the pan to collect water, install the drain to channel it, lay the membrane for protection, build the curb to stop overflow, and finish with tile for durability and slope.
Types of shower pans (preformed, mortar bed, linear vs. center drain)
While the shower pan might seem like just a base, it’s the essential waterproofing and support layer that determines durability, slope, and drainage performance.
You’ll choose between preformed pans—quick, consistent slopes and integrated drains—and mortar beds—customizable slope, heavier, tiled over.
Also decide drain style: center drains suit traditional layouts; linear drains offer accessible thresholds and single-direction slope, affecting tile placement and waterproofing approach.
Common tile floor types used in showers and wet areas
1 clear choice in shower tiling is the material: porcelain, ceramic, natural stone, and mosaic glass each bring different slip resistance, durability, and maintenance needs you’ll want to match to the pan type and usage.
Porcelain resists water and wear, ceramic’s affordable, stone’s beautiful but needs sealing, and small mosaics offer grip and slope flexibility.
Choose based on traffic and upkeep.
Tools, Materials, and Safety Gear Checklist
Before you start, make a checklist of the specific tools you’ll need—trowels, a level, a wet saw, and plumbing wrenches—and match materials to the pan type you’re installing (preformed, membrane, or mortar bed).
Gather the correct parts—drains, flange, waterproofing membrane or liner, and mortar or thinset—so nothing stalls the job.
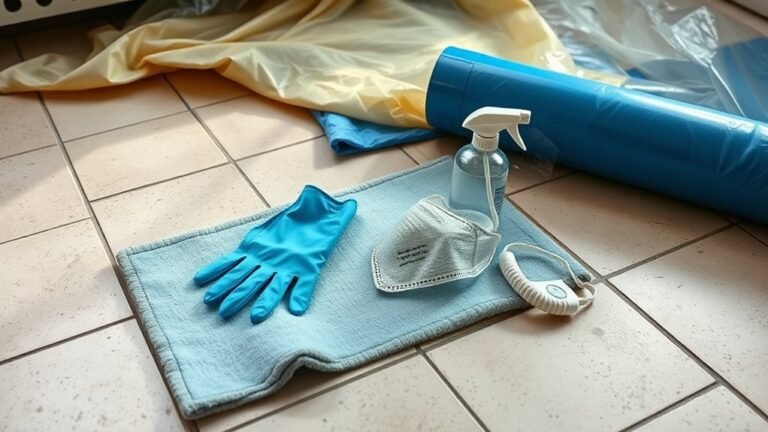
Don’t forget safety gear and site prep: gloves, eye protection, a respirator for dust, and a clear, well-ventilated workspace.
Tools required
Gathering the right tools, materials, and safety gear will make installing a shower pan and tile floor faster and reduce mistakes you’ll have to fix later.
You’ll need basic and specialty tools, plus PPE. Prioritize accuracy and durability.
- Measuring and cutting: tape measure, level, tile cutter
- Installation: trowels, drill, screwdrivers
- Safety: gloves, goggles, dust mask
Materials and parts needed by pan type
Now that you’ve got the tools and safety gear lined up, you’ll need different materials and parts depending on the type of shower pan you choose—preformed acrylic or fiberglass pans, tile-ready mortar/liner systems, or custom-built mortar beds.
- Preformed pans: pan, drain assembly, silicone sealant.
- Mortar/liner systems: liner, weep holes, deck mud, drain flange.
- Custom mortar bed: wire lath, bonding agent, waterproofing membrane.
Safety equipment and site preparation
1 essential step is making the work area safe and organized: put on eye protection, a dust mask, and sturdy gloves; set up knee pads and a respirator if you’ll be cutting or mixing cement; and lay down drop cloths or plastic sheeting to protect floors and collect debris.
You’ll also gather tools and confirm ventilation, lighting, and a clear waste container.
- PPE checklist
- Site prep tasks
- Tool staging
Site Assessment and Pre-Installation Planning
Before you start, measure the space and confirm the subfloor type so you know whether you’re working over plywood, concrete, or another surface.
Check the slope, joist condition, and load-bearing issues, and verify local permits, plumbing codes, and waterproofing rules that apply.
Plan your layout now—drain location, tile pattern, and curb placement affect every step that follows.
Measuring the space and identifying subfloor type
Start by taking clear measurements of the shower footprint and the surrounding bathroom area so you know exactly how much room you have to work with and what components will fit.
Then determine your subfloor type—plywood, OSB, concrete, or cement-board—by inspecting edges, penetrations, and openings.
Note thickness, damage, and fastener spacing to plan materials and attachments.
Checking slope, joist condition, and load-bearing concerns
When you inspect the shower area, check the floor slope with a level and straightedge to confirm it’s pitched 1/4″ per foot toward the drain; if it isn’t, note how much adjustment the underlayment or mud-bed will need.
Also examine joists for rot, deflection, or insect damage. Identify any unsupported spans and calculate if blocking or sistering joists is required to meet tile load demands.
Permit, plumbing codes, and waterproofing requirements
Having confirmed slope and joist integrity, you’ll need to handle permits, plumbing codes, and waterproofing requirements next to avoid costly rework or failed inspections.
Verify local permit needs, follow code for drain, trap, and venting, and choose tested waterproofing systems (membrane, liner, or cementitious).
Prioritize inspector-approved products and document compliance.
- Permit verification
- Code-compliant plumbing
- Approved waterproofing
Layout planning: drain location, tile pattern, and curb placement
Although it may seem minor, careful layout planning for the drain location, tile pattern, and curb placement will save you time and prevent costly mistakes during installation.
You should center or offset the drain for proper slope, plan tile joints to minimize cuts and visual disruptions, and position the curb to control water flow and meet code.
Double-check measurements and mock up lines.
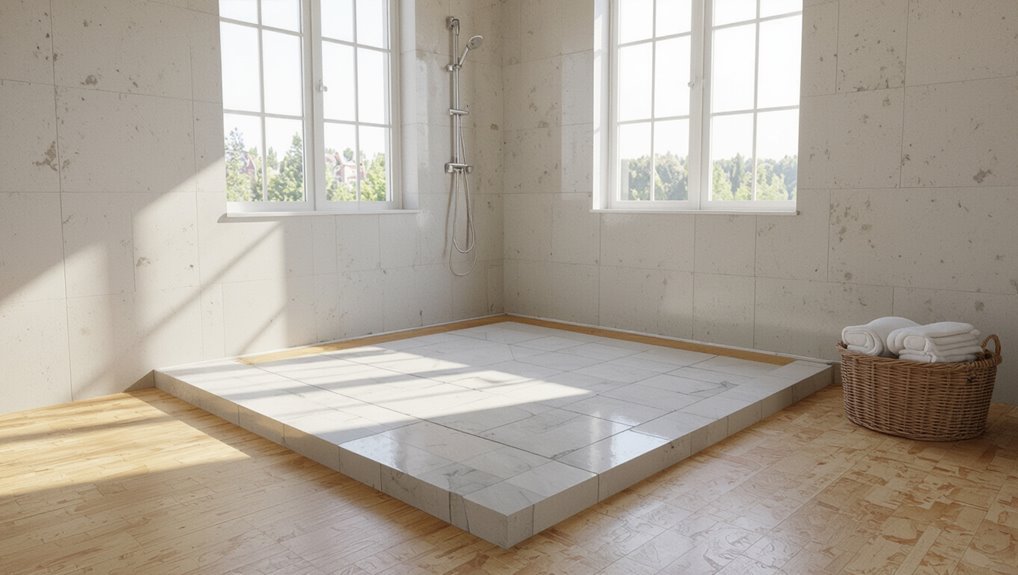
Step-by-Step Installation Preparing the Subfloor
First remove the old pan and flooring so you can inspect the joists and subfloor for rot or damage.
Repair or reinforce any weak framing, then install or level cement backer board to create a stable surface.
Finally, build the pre-slope to the drain per manufacturer guidelines so water will flow properly into the new pan.
Demo and removal of existing flooring and old pan
Start by clearing the bathroom of fixtures and loose items so you can work safely and see the full scope of the demo.
Turn off water, remove trim, and cut drywall as needed.
Pry up tile or vinyl with a bar, then unbolt and lift the old pan.
Bag debris, protect remaining surfaces, and vent dust while prepping for inspection and repairs.
Inspecting and repairing joists and subfloor
Before you lay any new underlayment, inspect the joists and subfloor for rot, sagging, or insect damage so you can address structural issues now rather than after the tile goes down.
Check for soft spots, nail pops, and water stains.
Sister or replace compromised joists, fasten or patch subfloor with exterior-grade plywood, and guarantee a stiff, level surface before proceeding.
Installing or leveling backer board or cement board
Once your joists and subfloor are sound and level, you’ll install cement board or a specialized tile backer so the tile has a stable, water-resistant base; measure and cut boards to fit, stagger joints, and leave 1/8″ gaps.
Fasten with corrosion-resistant screws and follow manufacturer spacing.
Tape seams with alkali-resistant mesh and thinset, then screw again and wipe residue before tiling.
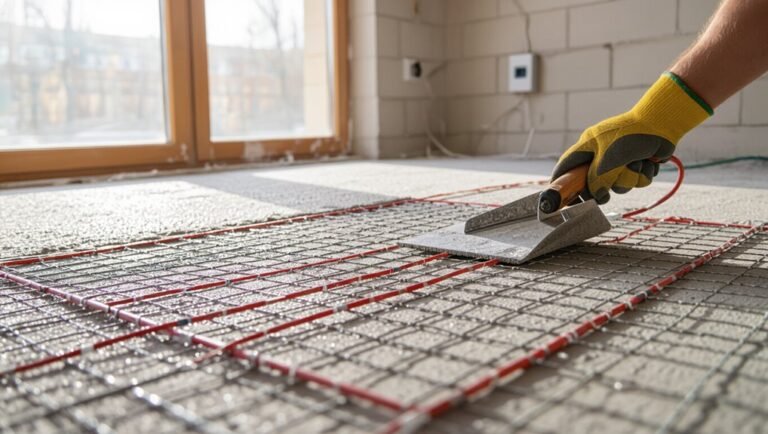
Creating the required slope to drain (pre-slope guidelines)
Because water won’t evacuate without a proper pitch, you’ll form a uniform pre-slope that directs all runoff toward the drain; aim for a slope of 1/4 inch per linear foot (about 2%) from the perimeter down to the drain and check it with a level and straightedge as you go.
Mix mortar to a workable consistency, trowel from edge to drain, compact, and recheck elevations before curing.
Step-by-Step Installation Installing the Shower Pan System
Now you’ll choose and install the shower pan system that fits your project—whether you use a preformed pan, build a mortar (mud) bed, or plan for a linear drain and custom pan.
You’ll also install and secure the drain assembly, dry-fit components, and check slope to guarantee proper drainage before you waterproof.
Follow the step-by-step procedures for your chosen method to get a reliable, watertight base.
Option A: Preformed shower pan installation (step-by-step)
If you’re using a preformed shower pan, the installation sequence is straightforward: prepare the subfloor, set the drain assembly, bed the pan on thin-set or mortar, level and secure it, then test the drain before tiling.
Drop the pan into place, tighten the drain flange, shim and fasten per manufacturer, seal seams with silicone, confirm slope and watertightness, then proceed to wall backer and tile.
Option B: Mortar bed (mud) pan installation (step-by-step)
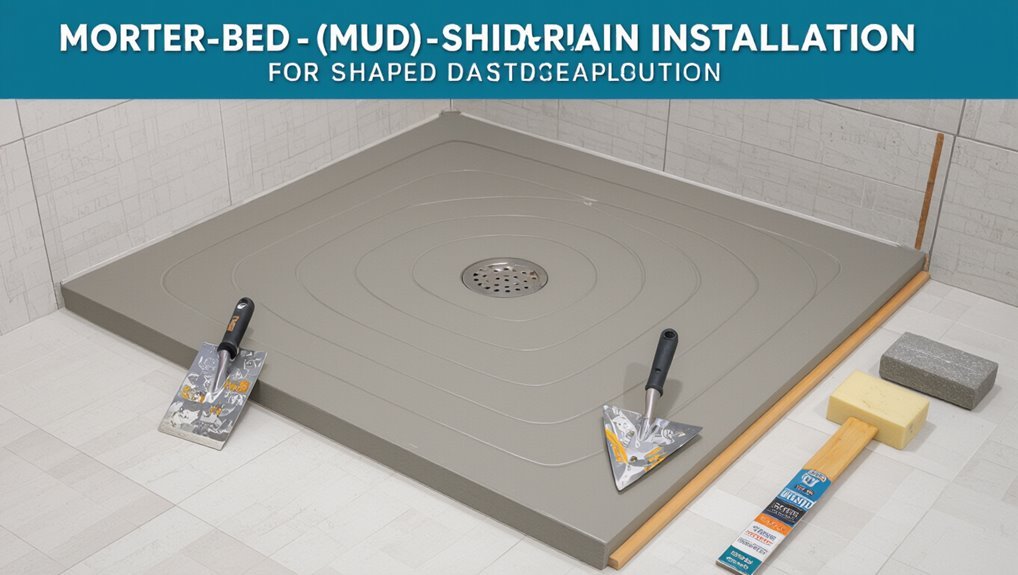
Preformed pans speed installation, but many pros prefer a mortar (mud) pan because it’s custom-shaped and durable; here’s how to build one step by step.
Lay the subfloor, install a bonded waterproof membrane, set a circular weep hole flange, screed a sand/cement mortar slope toward the drain, compact and cure, then waterproof the final surface and test slope and drainage before tiling.
Option C: Linear drain and custom pan considerations
When you choose a linear drain, you’ll plan the slope and waterproofing differently than with a central drain. The long, narrow outlet lets you run a single plane slope toward one wall or curb, simplifies tile layout, and requires careful flashing at the drain channel.
You’ll measure fall, build a custom pan to that plane, select compatible waterproof membranes, and accommodate tile junction and curb details.
Installing and securing the drain assembly
Start by dry-fitting the drain assembly to confirm alignment with the rough-in and the pan slope; you’ll check the flange, clamping ring, and weep holes (or channel for a linear drain) for proper orientation and clearance before bonding anything.
Apply appropriate sealant or plumber’s putty to the flange, tighten the clamping ring evenly, secure the tailpiece to the waste line, and fasten per manufacturer torque specs.
Testing for proper slope and dry fitting before waterproofing
After securing the drain assembly, you’ll verify the pan’s slope and dry-fit components to make sure water will flow properly toward the drain before applying any waterproofing.
Place the pan liner or mortar bed, set a temporary sheet of plywood or tiles, and use a straightedge and level to confirm 1/4″ per foot fall.
Adjust bed or shims until drainage is consistent and parts align.
Step-by-Step Installation Waterproofing and Membrane Installation
Now you’ll choose the waterproofing method that fits your project—sheet membrane or liquid-applied—and weigh their pros and cons for drains, seams, and movement.
If you use a sheet membrane, you’ll flash corners, seal seams, and bond carefully around the drain; if you use a liquid waterproofer, you’ll apply according to the manufacturer and allow proper curing time.
Make sure the floor membrane ties into the wall waterproofing and the curb so you create a continuous, watertight envelope.
Choosing a waterproofing method (sheet membrane vs. liquid-applied)
Choosing the right waterproofing method—sheet membrane or liquid-applied—means balancing skill level, shower design, and long-term reliability; you’ll want a system that fits your framing, slope, and how comfortable you are with seams and detailing. Pick sheet for predictable seams and quicker cure; choose liquid for complex shapes and seamless coverage.
| Method | Strength | Best for |
|---|---|---|
| Sheet | Predictable seams | Standard pans |
| Liquid | Seamless | Irregular shapes |
| Hybrid | Combined benefits | Challenging layouts |
Installing sheet membranes (flashing, seams, bond to drain)
When you install a sheet membrane, plan each flash and seam so the membrane laps toward the drain and creates continuous water paths away from the wall framing.
Cut panels to fit, overlap seams per manufacturer, and use compatible tape or adhesive.
Flash corners and jambs thoroughly.
Bond the membrane to the drain flange with sealant and clamping ring, testing for snug, watertight attachment before tile.
Applying liquid waterproofers and curing requirements
After you’ve sealed seams and secured the sheet membrane at the drain, apply liquid waterproofers to create a continuous, monolithic barrier over any irregularities and joints the sheet couldn’t fully cover.
Use a roller or brush for even coats, follow manufacturer thickness and flash times, allow proper cure (usually 24–72 hours), and keep the area dust- and water-free until testing or tiling.
Integrating waterproofing with walls and curb
Because the shower pan’s membrane only works if it ties into the surrounding surfaces, you’ll extend and seal the waterproofing up the wall studs and over the curb so water can’t find a seam to penetrate.
Use flashing and membrane tape at corners, bend membrane over the curb, overlap by at least 2 inches, and fasten or seal per manufacturer instructions for a continuous, tested barrier.
Step-by-Step Installation Tiling the Shower Floor
Now you’ll plan your layout and pick tiles that offer good slip resistance and the correct grout joint size for the slope.
Decide whether you’ll set tile in a mortar bed or use thinset over backer board, then cut tiles to fit the drain and perimeter.
Finish by grouting, sealing if needed, and allowing proper cure times before use.
Layout and tile selection for slip resistance and grout joint sizing
Start by planning your layout so tile placement maximizes slip resistance and keeps grout joints consistent; choose smaller-format or textured tiles for the floor and set grout lines wide enough for a secure bond but narrow enough to avoid trapping dirt.
Lay tiles to direct water toward the drain, stagger patterns to increase traction, and use grout widths that suit tile size and cleaning needs.
Setting tile on a mortar bed vs. thinset on backer board
When you get to the actual tiling, you’ll choose between a traditional mud (mortarpan) bed and a thinset installation over cement backer board—each method has trade-offs in slope-building, durability, and labor.
Mud lets you sculpt the slope and yields a solid, water-tolerant base but demands skill and cure time.
Thinset on backer board is faster, lighter, and easier for DIYers but needs a proper waterproofing layer.
Cutting tiles and working around the drain
Before you lay the field tiles, measure and mark each tile that will meet the drain so your cuts fit snugly and maintain the floor slope.
Use a carbide wet saw for straight cuts and a nipper or rotary tool for curves.
Dry-fit pieces, account for grout joints, and cut slightly oversized to trim for slope.
Clean edges before setting.
Grouting, sealing, and curing times
Once you’ve set and allowed your tiles to fully bond, grout fills the joints, seals out water, and finishes the floor’s look—so mix to manufacturer specs, work in small sections with a rubber float held at a 45° angle, and press grout firmly into each seam.
Wipe haze with a damp sponge, let grout cure per instructions, then apply a compatible sealer and wait recommended dry times before use.
Finishing Touches and Cleanup
Now you’ll finish by installing the curb, threshold, and any connections to adjoining floors so everything meets cleanly.
Fit the shower fixtures, check the drain flow for leaks or slow spots, then apply final sealing and caulking before running a waterproof inspection.
Finish with a thorough cleaning and follow simple maintenance tips to keep your new tile and grout looking great.
Installing curb, threshold, and transitions to adjoining floors
1 step you’ll take after the pan and tile are set is installing the curb, threshold, and connections to adjoining floors; these elements seal the shower, control water flow, and create a smooth, safe handoff to the rest of the room.
Fit a solid curb, bed it with thinset or mortar, trim threshold material to height, apply waterproof membrane overlap, and seal joints with silicone for a watertight connection.
Installing shower fixtures and testing drain flow
After the tile’s cured and the curb and thresholds are secure, you’ll install the valves, showerhead, trim, and any accessories.
Then check that the drain clears and seals properly. Fit escutcheons and tighten connections to manufacturer torque.
Open supply valves slowly, inspect for leaks, and run water to confirm smooth drainage.
Adjust trap weir or debris screens if flow stalls.
Final sealing, caulking, and waterproof inspections
Finish the job by sealing all joints, caulking connections, and running a thorough waterproof inspection to make sure your shower stays watertight.
Check seams, corners, and the tile-to-tub interface for gaps. Use mildew-resistant silicone, tool smooth bead lines, and let cure fully.
Perform a water test, inspect for leaks, and correct any failures before finishing trim and reassembling fixtures.
Cleaning and maintenance tips for new tile and grout
With the waterproofing confirmed and caulk cured, you’ll want to keep that new tile and grout looking fresh from day one.
Sweep or vacuum loose debris, mop with pH-neutral cleaner, and blot spills promptly.
Reseal grout annually or as recommended, avoid harsh acids, and use a soft brush for stains.
Inspect grout lines regularly and touch up cracks to prevent water intrusion.
Common Problems, How to Diagnose Them, and Fixes
You’ll likely run into a few predictable issues—leaks, poor slope with standing water, and tile or grout failures—and you should know how to spot each one.
Start by isolating leaks with a simple water test and visual inspection, check slope with a level to find standing-water spots, and tap tiles to locate hollow or loose pieces.
For each problem I’ll show quick diagnostic steps and reliable fixes you can use.
Leaks and how to locate the source
When a shower starts leaking, don’t assume the nearest damp spot is the source — water travels along the path of least resistance and can show up far from the actual failure.
Inspect joints, fixtures, and the pan seam; run dry tests and dye tests to trace flow. Use a moisture meter and remove trim to follow stains.
- Trace with dye
- Probe seals
- Measure moisture
Poor slope, standing water, and how to correct
If the shower floor doesn’t slope properly toward the drain, water pools instead of flowing away and you’ll get standing puddles that invite mold and damage.
Check slope with a level; aim for 1/4″ per foot to the drain.
Fix by removing tile, adjusting mortar bed or installing a tapered foam or linear-drain system, then re-bed and retile, ensuring consistent fall and proper waterproofing.
Tile cracking, loose tiles, and grout failures
Although tile looks solid, cracks, loose pieces, and failing grout often signal underlying movement, improper installation, or moisture issues that need prompt attention.
You’ll inspect substrate, waterproofing, and thinset adhesion; tap tiles to find hollow spots and probe grout for softness.
Fix by replacing damaged tiles, improving drainage or membrane, reapply proper mortar, and use flexible grout or caulk where movement occurs.
Best Practices, Tips, and Preventive Measures
To keep your shower lasting, focus on long-term waterproofing and proper ventilation so mold and rot never get a foothold.
Choose materials that balance durability with easy maintenance—think high-quality membranes, grout seals, and slip-resistant tiles.
Use time-saving techniques and pro shortcuts, like layout planning and the right tools, to cut labor without sacrificing quality.
Long-term waterproofing strategies and ventilation
Long-term waterproofing and proper ventilation will keep your shower and tile floor sound and mold-free for years, so prioritize durable membranes, sealed junctions, and consistent air circulation from day one.
Install continuous waterproof membrane, tape every seam, and slope drains correctly.
Add a reliable exhaust fan on a timer or humidity sensor, maintain grout seals, and inspect/repair caulking annually to prevent failures.
Material selection tips for durability and ease of maintenance
When you pick materials for a shower pan and tile floor, focus on durability, ease of cleaning, and compatibility with waterproofing systems so you won’t have recurring repairs.
Choose dense, low-porosity tiles like porcelain or natural stone sealed properly, rust-resistant drains and fixtures, and a sturdy pan material (pre-formed acrylic, fiberglass, or mortar with membrane).
Prioritize grout sealers and simple-access drains for maintenance.
Time-saving techniques and pro shortcuts
With your materials chosen for durability and easy upkeep, you can shave hours off installation by working smarter, not harder.
Plan steps, pre-cut tiles, and organize tools nearby. Use quality spacers and a proper mortar mixer to speed laying and reduce rework.
- Pre-measure and label
- Batch-cut tiles
- Use efficient mixing and trowel techniques
Tools, Materials, and Cost Comparison
You’ll compare the cost breakdown for a preformed pan versus a mortar pan so you know where your money goes.
I’ll outline typical time-to-complete estimates for DIY versus hiring a pro, so you can weigh labor against savings.
Together these details will help you choose the right approach for your budget and timeline.
Cost breakdown for preformed pan vs. mortar pan
Although both preformed and mortar shower pans will give you a watertight base, they differ sharply in upfront costs, required tools, and long-term labor investment; this section breaks down what you’ll spend on materials, what tools are essential versus optional, and where time or skill can increase or reduce overall cost.
| Item | Typical Cost |
|---|---|
| Preformed pan | $100–$400 |
| Mortar bed materials | $30–$80 |
| Tools (essential) | $50–$150 |
| Labor/skill premium | Variable — higher for mortar |
Time-to-complete estimates for DIY vs. professional install
Because the time you spend varies with method and experience, planning your schedule accurately matters: you can expect DIY projects to take longer but save money; pros work faster with warranty and precision. Balance scope, skill, and downtime when choosing.
| Task | DIY hours | Pro hours |
|---|---|---|
| Prepping | 6–10 | 2–4 |
| Installation | 12–24 | 4–8 |
FAQ Common Questions About Installing a Shower Pan and Tile Floor
You probably have a few specific questions before you start, like how long the whole job takes and whether you can fit a pan on a wood subfloor.
You’ll also want to know the pros and cons of preformed versus mortar pans, how to make the shower watertight, and when to call a pro.
Below are clear answers to each of those common questions.
How long does a full installation take from demo to finished tile?
How long will the whole job take from demo to finished tile?
Expect a typical DIY full replacement to take about one to two weeks.
Demo and prep (1–2 days), framing and plumbing adjustments (1–3 days), pan and waterproofing (1–2 days), tile setting and grout (3–5 days with cures), plus final touches and cleanup (1 day).
Timing varies with complexity.
Can I install a shower pan on a wood subfloor?
Yes—you can install a shower pan on a wood subfloor, but it needs the right support and prep.
You’ll guarantee joists are solid, add a plywood or cement backerboard base, and create proper slope to drain.
Use a waterproof membrane and secure connections to framing and drain.
Inspect for rot, reinforce or sister joists as needed before proceeding.
What’s the difference between a preformed pan and a mortar pan?
While both types make a watertight base for your shower, a preformed pan is a factory-made, single-piece unit (usually fiberglass, acrylic, or PVC) that installs quickly and drops into the framed recess.
In contrast, a mortar pan—also called a mud or bonded mortar shower base—is built on-site from a cementitious mix to create a custom-sloped floor that’s covered with a waterproof membrane and finished with tile.
You’ll choose based on budget, slope needs, durability, and whether you want a tiled floor versus a ready-made liner.
How do I ensure my shower is fully waterproof?
Want a truly watertight shower? Use a continuous waterproof membrane under the tile, seal seams and corners with proper tape or sealant, slope the pan toward the drain, and install a bonded or clamped drain assembly.
Flash the curb and wall junctures, use cement board or approved backer, and test with a flood test before tiling to confirm there are no leaks.
When should I call a professional plumber or contractor?
When should you call a professional?
Call a plumber or contractor if layout changes, structural repairs, complex drain/waste plumbing, or permit-required work are needed.
Hire pros for poor slope corrections, hidden leaks, or waterproofing failures.
Also call them if you lack tools, experience with tile watertight systems, or time.
Getting expert help prevents costly rework and code violations.