How to Install Floor Tile on a Wood Floor Without Mistakes
You can install tile over a wood floor without mistakes if you stiffen and repair the subfloor, control moisture, and use the right underlayment and adhesive. Start by checking joists, nailing down squeaks, and adding plywood or a decoupling membrane; test moisture and fix any rot. Layout carefully, dry-fit tiles, and use a polymer-modified thinset made for wood. Grout and seal properly, allow cures, and follow movement-joint rules—keep going and you’ll get detailed steps, tips, and timelines.
Quick Answer Can You Install Floor Tile on a Wood Floor Without Mistakes?
Yes—you can install tile over wood without mistakes if you follow the right prep and use appropriate materials.
It’s appropriate when the wood subfloor is structurally sound, stiff, and properly braced; it’s not a good idea over sagging, rotted, or flexing boards.
Before you start, check subfloor condition, reinforce or replace any problem areas, and use a recommended underlayment and thinset for wood substrates.
Direct answer summary
If you prepare the subfloor properly and use the right underlayment and adhesive, you can install tile over wood without costly mistakes.
You’ll follow clear steps on how to install floor tile on wood floor: verify structure, stiffen and level the deck, apply a suitable membrane, use polymer-modified thinset, and grout correctly.
Do each step carefully to prevent movement and cracking.
When it’s appropriate and when it’s not
Although you can install tile over a wood floor and get great results, it only makes sense when the structure is stiff, flat, and free of moisture or movement that would stress the tile.
You should proceed if joists are solid, subfloor is level, and there’s proper underlayment.
Don’t tile over sagging, rotted, or water-prone wood—repair or replace first to avoid failures.
Basic Understanding What You Need to Know Before Starting
Before you start, know that wood floors flex and move, which creates unique challenges for tile adhesion and grout cracking.
You’ll need to identify your subfloor type—plywood, OSB, or plank—and assess whether it’s stiff and secure enough or needs reinforcement or a cement backer board.
Also pick tile and adhesive systems rated for wood substrates, since not all tiles or mortars bond well to or tolerate movement on wood.
Why wood floors present unique challenges for tile
Because wood moves with changes in humidity and load, it creates a shifting, sometimes springy surface that can crack tile and grout if you don’t address it.
You’ll also face issues with fastener looseness, uneven deflection, and vibration transmitting through thin-set. That movement stresses rigid tile, so you must plan for stabilization, proper underlayment, and controlled joints to prevent failure.
Types of wood subfloors and their suitability for tile
Wood subfloors vary a lot, and knowing which type you have is the first step to a successful tile job.
You’ll commonly find plywood, OSB, tongue-and-groove planks, and joist-mounted assemblies. Plywood and well-secured planks are usually most suitable after reinforcement; OSB can be problematic if thin or damaged.
Uneven, loose, or water-damaged wood must be repaired or replaced before tiling.
Tile types and adhesives compatible with wood subfloors
When you’re choosing tile and adhesives for a wood subfloor, pick materials that handle movement and flex without cracking the grout or tiles. Use porcelain or smaller-format ceramic, decoupling membranes, and flexible polymer-modified thinset. Follow manufacturer guidelines and allow movement joints.
| Tile Type | Adhesive | Notes |
|---|---|---|
| Porcelain | Polymer thinset | Durable, low water absorption |
| Ceramic | Modified thinset | Best in small formats |
| Natural stone | Epoxy or flexible thinset | Needs movement control |
Tools, Materials, and Preparations
Before you start tiling, gather the essential tools and materials—trowels, wet saw or tile cutter, backer board, thinset, grout—and calculate quantities based on room area and tile size.
Don’t forget safety gear and workspace prep like masks, knee pads, and dust control.
Finally, inspect the existing wood floor for level, movement, and moisture so you can reinforce, level, or replace sections as needed.
Essential tools list
You’ll need a compact set of reliable tools and materials to get tile down solidly on a wood subfloor: a notched trowel, tile spacers, a wet saw or tile cutter, a quality thinset mortar formulated for wood, a cement backer board or uncoupling membrane, a drill with mixing paddle, a level, and grout tools.
Keep everything accessible and sturdy.
- Prep and layout tools
- Cutting and mixing tools
- Setting and finishing tools
Required materials and quantities
Now that you’ve lined up the right tools, figure out the exact materials and quantities you’ll need so nothing runs short mid-job.
Measure the room, add 10% for cuts and waste, and choose tile, thinset, grout, and backerboard accordingly.
Calculate bags by coverage and thickness, then buy slightly extra for testing.
- Tiles (area +10%)
- Thinset (coverage)
- Grout (coverage)
Safety equipment and workspace prep
While you’re planning the layout, kit yourself and the workspace for safety: wear safety glasses, a dust mask or respirator, knee pads, gloves, and hearing protection, and keep a fire extinguisher and first-aid kit nearby.
Clear the area, protect nearby surfaces with drop cloths, and guarantee good lighting and ventilation.
- Secure power tools and test guards.
- Use non-slip footwear.
- Mark hazards and cord routes.
How to assess your existing wood floor (level, movement, moisture)
Before you begin tiling, inspect the wood subfloor for level, movement, and moisture so you can identify fixes that prevent tile failure.
Use a 6-foot level and straightedge to find dips or crowns; shim or plane as needed.
Walk the floor to detect bounce; reinforce joists or add blocking.
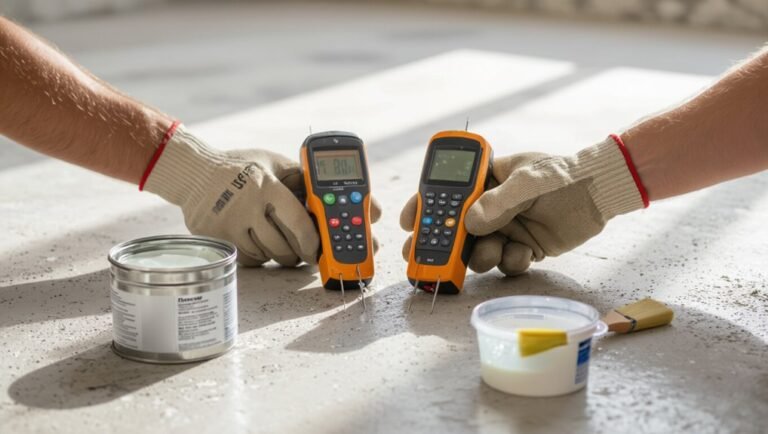
Test moisture with a meter and address high readings before installing underlayment.
Decision Checklist Should You Tile Over Your Wood Floor or Replace It?
Before you start, check the structure: is the subfloor solid, dry, and level enough to support tile, or will repairs or replacement be required?
Weigh cost, time, and how long you want the finished floor to last—tiling over wood can save time and money now but may shorten longevity if underlying issues remain.
Use those criteria to decide whether to tile over the existing floor or strip it down and replace it first.
Structural, moisture, and level criteria to decide
If your subfloor doesn’t meet basic structural, moisture, and flatness standards, you’ll need to replace or repair it rather than tile over it.
Check joist stiffness, deflection (L/360 or better), and secure, squeak-free decking. Measure moisture with a meter; plywood should read low single digits.
Confirm surface flatness within 1/4″ over 10′. If not, fix before tiling.
Cost, time, and longevity comparison
When weighing whether to tile over your existing wood floor or replace it first, consider costs, project time, and how long the finished job will last—because a cheaper or quicker route now can mean more repairs later. You’ll pay less and finish faster if you tile over sound subflooring, but full replacement often yields longer durability and fewer callbacks.
| Option | Typical outcome |
|---|---|
| Tile over | Lower cost, quicker |
| Replace first | Higher cost, longer life |
Step-by-Step Installation Process
Before you lay a single tile, you’ll inspect and repair the subfloor—nail any squeaks, sister joists if needed, and level as required.
Then you’ll test for moisture and movement and decide on mitigation like decoupling membranes.
Prep the surface with cleaning and the right underlayment or backerboard, and plan your layout with dry lays and cuts.
Finally, choose the correct adhesive or thinset formulated for wood subfloors and apply it according to the manufacturer’s instructions.
Step 1 Inspect and repair the subfloor (nailing, sistering, leveling)
Start by thoroughly inspecting the wood subfloor for loose nails, squeaks, rot, or uneven areas that could compromise your tile installation.
Drive or replace popped nails, add screws every 6–8 inches along joists, sister weak joists with matching lumber, and plane or shim low spots to achieve a flat, rigid surface.
Clean debris before proceeding.
Step 2 Test and mitigate moisture and movement (moisture test, decoupling membranes)
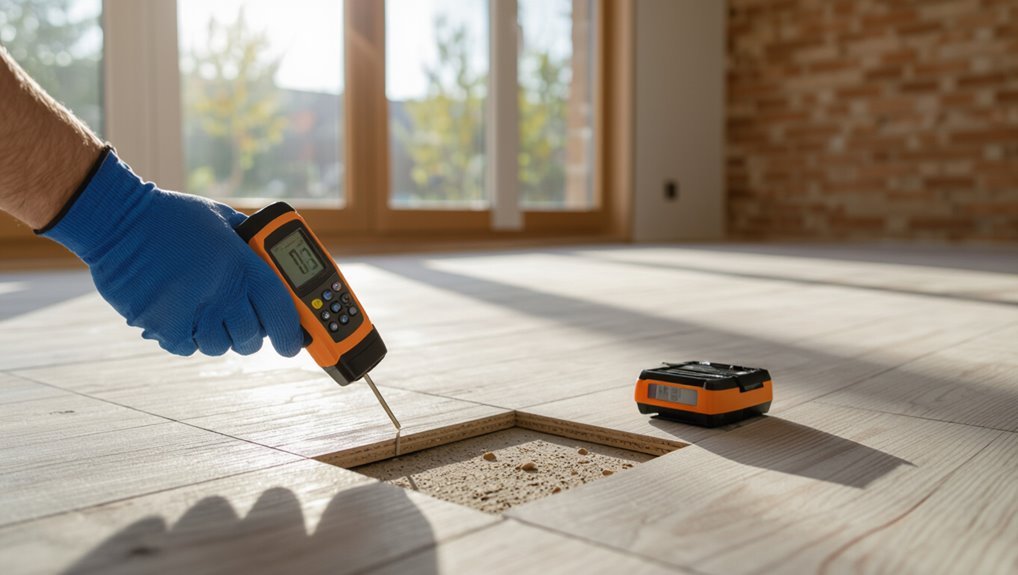
After you’ve fixed nails, joists, and uneven spots, check the wood for moisture and potential movement that can ruin tile.
Use a calcium chloride or hygrometer test, and interpret results per manufacturer specs.
If moisture or slight deflection exists, install a suitable decoupling membrane to isolate tile from movement.
Re-test as needed so adhesive and tile will last.
Step 3 Prepare the surface (cleaning, underlayment installation, backerboard options)
1 key task remains before laying tile: get the surface clean, flat, and firmly backed so your work lasts.
Remove debris, sand high spots, and repair squeaks or loose boards.
Install appropriate underlayment—plywood, cement backerboard, or a decoupling membrane—secured per manufacturer instructions.
Seal seams, fasten properly, and guarantee a rigid, level substrate before you start tiling.
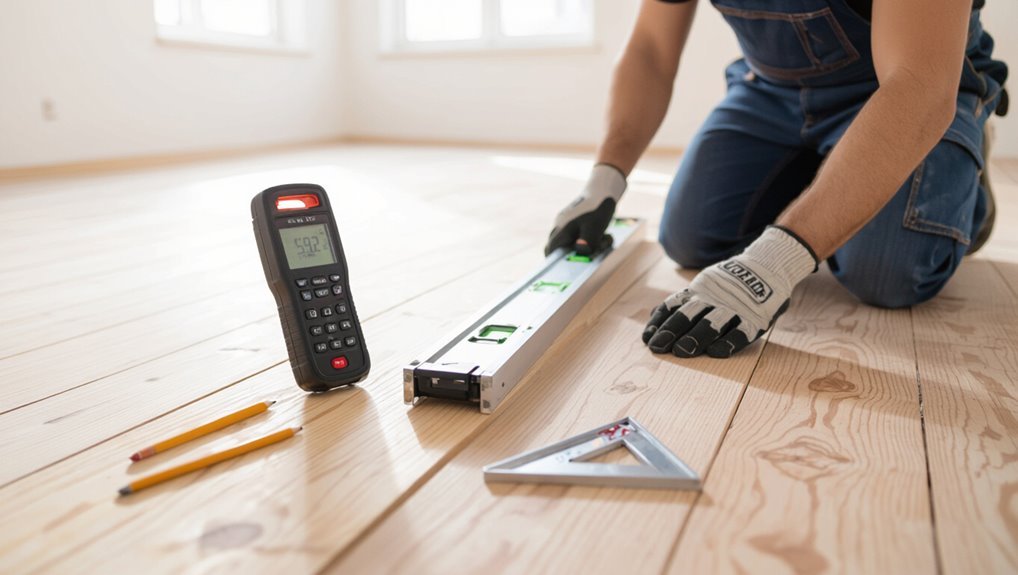
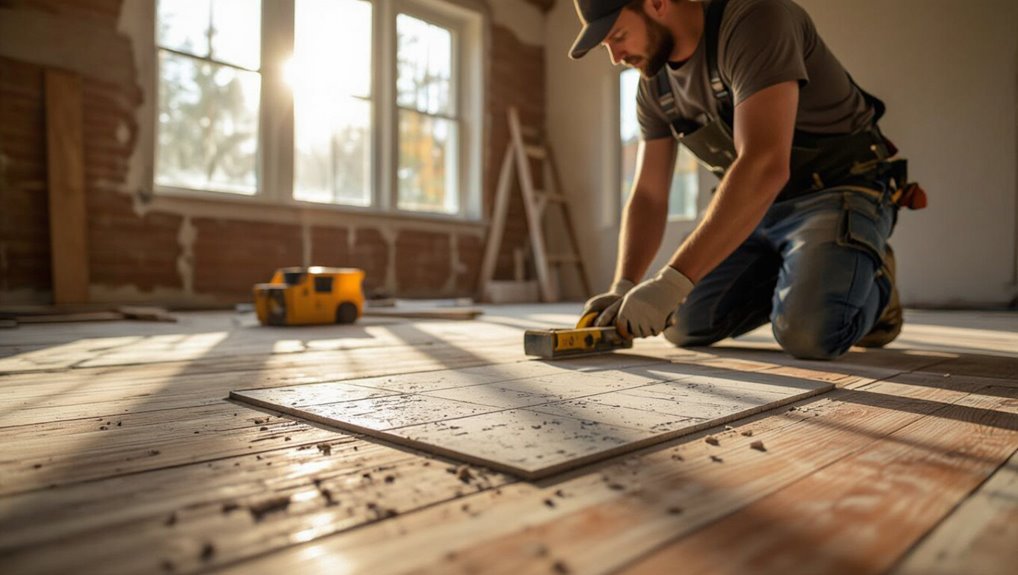
Step 4 Plan the layout and dry lay tiles (starting lines, focal points, cuts)
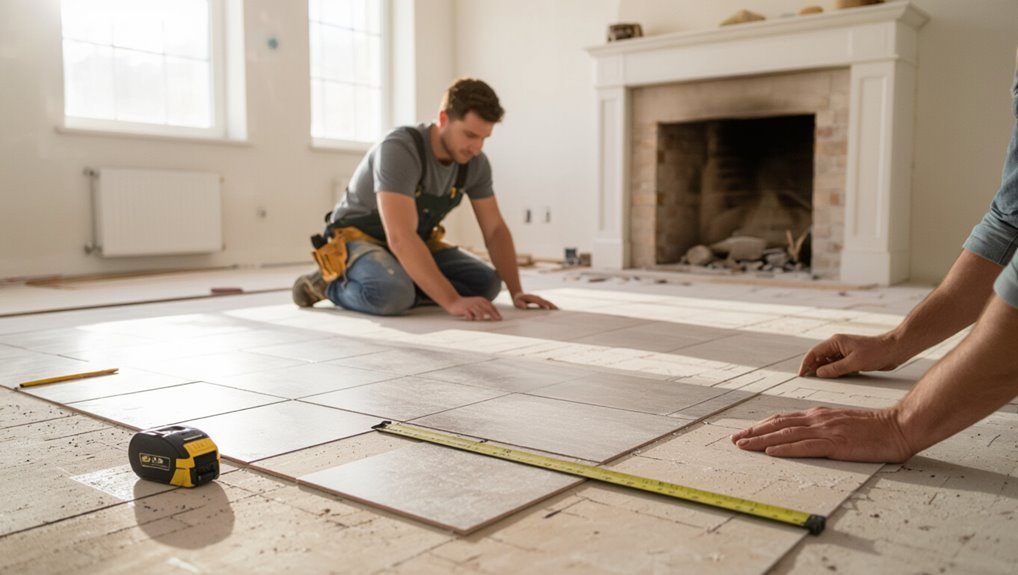
Before you spread adhesive, lay out a clear plan and dry-fit the tiles so you can see how cuts, grout lines, and focal points will fall.
Measure and snap reference lines from the room center, test tile placement toward walls, and adjust to minimize tiny edge cuts.
Mark tiles needing cuts, note focal tiles, and photograph the dry layout before you start.
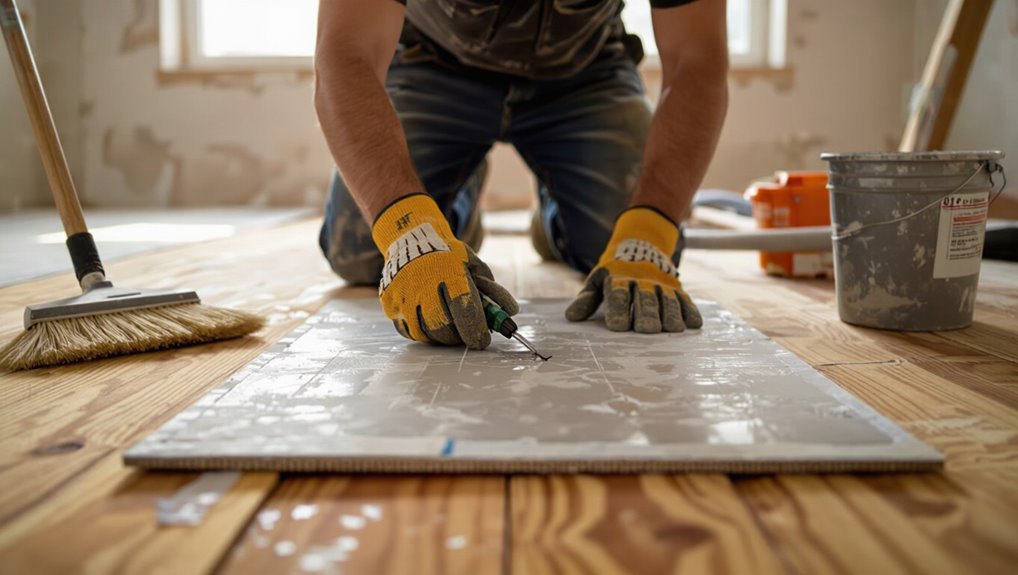
Step 5 Choose and apply the correct adhesive or thinset for wood subfloors
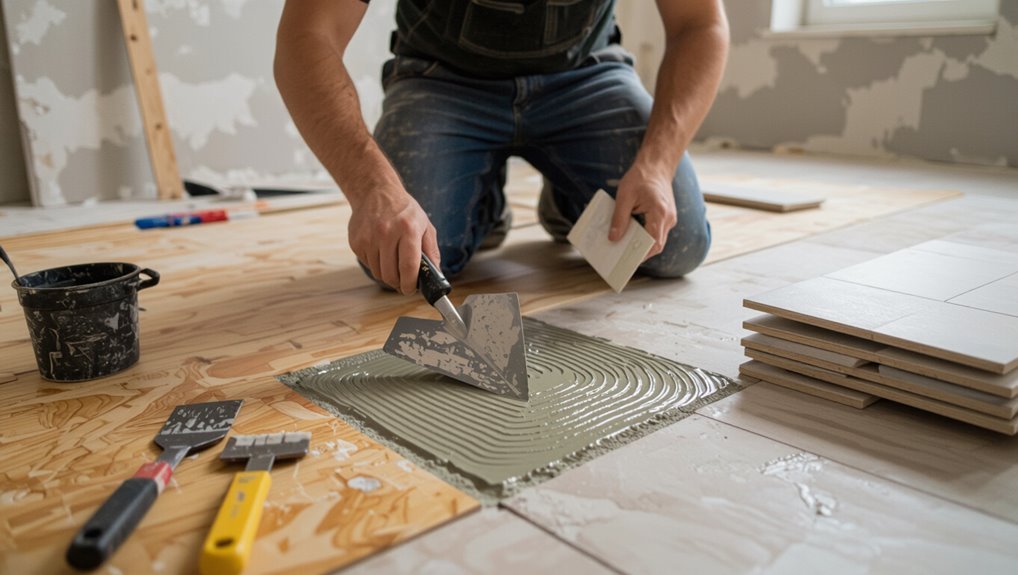
Once your dry layout looks right and you’ve marked the tiles that need cuts, it’s time to pick an adhesive designed for wood subfloors and prepare the surface.
Choose a flexible, polymer-modified thinset or an epoxy adhesive rated for plywood/OSB.
Clean, sand, and prime the subfloor per manufacturer instructions.
Mix to proper consistency, work in small areas, and apply with the recommended trowel notch.
Step 6 Setting tiles, spacing, and ensuring flatness (tapping, leveling systems)
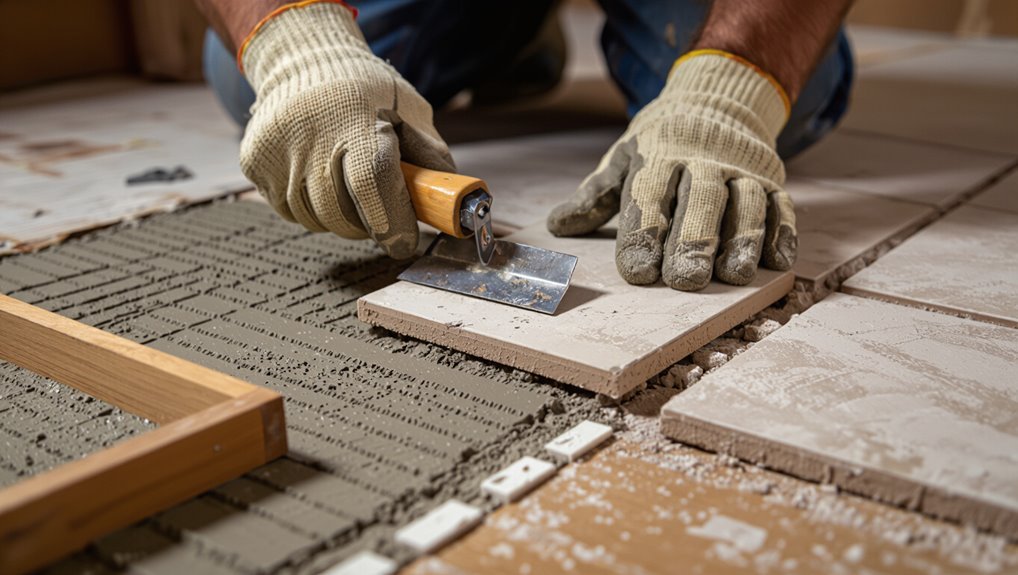
Start by spreading a workable bed of thinset and pressing the first tile into place, using consistent pressure so each tile seats evenly; use spacers to hold uniform grout joints and check alignments frequently with a straightedge or chalk line.
Tap tiles with a rubber mallet and wood block, use a leveling system to prevent lippage, and verify flatness with a long level, adjusting as needed.
Step 7 Grouting, sealing, and final cleaning
Mix the grout to the right consistency, then spread it diagonally across the tiles with a rubber float so the joints fill completely; scrape off excess grout and let it firm to a toothpaste-like skin before wiping with a damp sponge, taking care not to pull grout from the joints.
After curing, apply a suitable sealer to grout and porous tiles, then buff and clean residues for a uniform, protected finish.
Step 8 Finishing touches (transitions, baseboards, movement joints)
With grout cured and sealers dried, finish the job by installing edge pieces, baseboards, and movement joints that protect the floor and give it a polished look.
Fit connector strips at doorways, caulk gaps with flexible sealant, and nail or glue baseboards flush without compressing tile.
Space movement joints per layout, ensuring they’re filled with appropriate flexible compound to allow wood expansion.
Common Mistakes and How to Avoid Them
Don’t underestimate how subfloor movement, moisture, or poor fastening can wreck a tile job—address structural repairs and test for moisture first.
Use the correct adhesive and underlayment for wood, plan your layout to minimize awkward cuts, and fasten everything to the manufacturer’s specs.
Catching these issues early will save you from cracked tiles, lippage, and costly rework.
Mistake 1 Ignoring subfloor movement and its consequences
Because wood expands, contracts, and flexes as humidity and loads change, you can’t treat a wood subfloor like a rigid base for tile.
If you ignore movement, grout will crack and tiles will loosen. You must anticipate deflection and movement, install proper movement joints, and stabilize the substrate so tile and grout can tolerate slight shifts without failing or requiring early repair.
Mistake 2 Using wrong adhesive or underlayment
If you pick the wrong adhesive or skip a proper underlayment, the tile job will fail even if your subfloor’s stabilized.
Choose a flexible, polymer-modified thinset rated for wood substrates and use a decoupling membrane or cement backerboard to isolate movement.
Follow manufacturer trowel size and cure times, bond test if unsure, and avoid mastic or non-flexible mortars that will crack or delaminate.
Mistake 3 Poor layout planning leading to awkward cuts
When you skip careful layout planning, you’ll end up with tiny slivers of tile at walls or bizarre diagonal cuts that scream amateur.
So take time up front to map your field and sight lines. Measure room dimensions, establish a centered starting line, dry-lay tiles, and adjust for focal points.
Plan grout joint symmetry and cut larger, consistent edge tiles to keep the result balanced and professional.
Mistake 4 Insufficient fastening or failed structural repairs
Good layout won’t save a tile job if the subfloor isn’t solid; inadequate fastening or skipping needed structural repairs lets movement crack tiles and grout.
You must inspect joists, replace rotten framing, sister joists where needed, and secure subfloor panels with screws at proper spacing.
Use exterior-grade plywood or cement backerboard over a rigid, well-fastened base to prevent deflection and long-term failure.
Mistake 5 Skipping moisture testing and vapor barriers
Because moisture can lurk beneath or within a wood subfloor, you need to test for it and install proper vapor protection before laying tile. Failing to do so lets trapped damp cause adhesive breakdown, mold, and tile failure.
Test with a moisture meter or calcium chloride kit, address high readings, and install a certified vapor barrier or uncoupling membrane to protect adhesive and tile longevity.
Prevention, Best Practices, and Pro Tips
To minimize tile failure on wood, you’ll focus on the right underlayment, solid substrate prep, and proper adhesive and movement joints.
I’ll explain which underlayments work best and how to install them, when it’s worth hiring a pro, and simple maintenance steps to keep your tile lasting longer.
Follow these best practices and pro tips to reduce problems and protect your investment.
How to minimize tile failure risk on wood
When you prepare the subfloor correctly and follow proven installation methods, you dramatically cut the risk of tile failure on wood.
You’ll clean, level, and stiffen the floor, control moisture, use proper adhesives, and allow movement joints.
Test for deflection, follow manufacturer specs, and avoid narrow spacing that traps stress.
Inspect and address weak spots before tiling.
Best underlayment choices and installation tips
Having shored up the subfloor and addressed weak spots, you now pick an underlayment that balances stiffness, moisture control, and bondability for tile over wood.
Choose cement backer board or uncoupling membranes (Ditra) for movement control; use thin-set rated for the chosen layer.
Fasten per manufacturer, stagger joints, leave recommended expansion gaps, and prep surfaces clean and flat before tiling.
Professional thresholds: when to hire a pro
If your tile job will span doorways, involve complex cuts, or bridge multiple floor types, you should consider hiring a pro—these are the moments where experience prevents costly mistakes.
You’ll save time, guarantee structural integrity, and get neat shifts.
- Structural issues or uneven subfloors
- Intricate patterning or custom cuts
- Warranty or code compliance requirements
Maintenance tips for tiled floors over wood
1 simple routine will keep your tiled floor over wood looking great and lasting longer: inspect, clean, and protect regularly.
Check grout and movement joints monthly, tighten loose tiles, and replace cracked grout promptly.
Clean spills fast with pH-neutral cleaner, avoid harsh chemicals, and use soft tools.
Protect with felt pads, mats at entries, and re-seal grout yearly to prevent moisture and wear.
Comparison Methods for Tiling Over Wood vs. Replacing Subfloor
When you’re deciding whether to tile over wood or replace the subfloor, weigh options like using a decoupling membrane, installing cement backerboard, or full subfloor replacement.
A membrane can isolate movement, backerboard adds rigidity, and removing the subfloor lets you fix rot and create the most stable base.
Consider cost, time, and long-term performance to choose the best method for your situation.
Tiling over existing wood with decoupling membrane
Tiling over existing wood with a decoupling membrane gives you a reliable way to install tile without tearing up the subfloor.
It’s worth comparing to the alternative of replacing the subfloor outright. You’ll adhere to membrane manufacturer instructions, guarantee the wood is sound and flat, fasten the membrane per guidelines, use flexible thinset, and grout as directed.
This minimizes movement-related cracks without full tear-out.
Installing cement backerboard over wood
Installing cement backerboard over wood gives you a durable, tile-ready surface that’s often stronger and more impact-resistant than membranes alone, but it requires more work and careful fastening to avoid movement-related failures.
You’ll fasten staggered panels with corrosion-resistant screws, tape and thinset seams, and float joints.
Make certain joists are stiff, gaps are correct, and the surface is clean and flat before tiling.
Removing and replacing the subfloor pros and cons
If you’re weighing backerboard over an existing wood subfloor against a full replacement, know that ripping out and replacing the subfloor changes the equation: it removes hidden rot, evens joist heights, and lets you install a stiff, tile-ready platform from the joists up. You’ll trade higher cost and disruption for long-term stability and fewer failure risks.
| Option | Cost | Longevity |
|---|---|---|
| Backerboard | Low | Moderate |
| Replace subfloor | High | High |
| Hybrid | Medium | Good |
Estimated Costs and Timeline
You’ll want to budget for materials like tile, thinset, backer board or membrane, grout, and underlayment, with costs varying widely by product and style.
Expect a DIY install to take several weekends depending on skill, while a pro can usually finish a standard room in one to two days plus prep time.
Factors like room size, substrate repairs, tile complexity, and regional labor rates will affect both your total cost and schedule.
Material cost breakdown
A realistic material cost breakdown helps you budget and schedule the job—expect to pay for tile, underlayment or backerboard, thinset mortar, grout, spacers, trim, and fasteners. Estimate per-square-foot costs, buy 10% extra tile, and factor small tools. Compare retail and bulk pricing to save.
| Item | Est. Cost/Unit | Notes |
|---|---|---|
| Tile | $2–$8/ft² | style varies |
| Backerboard | $1–$3/ft² | or membrane |
| Thinset | $10–$25/bag | covers ~40–50 ft² |
| Grout | $15–$30 | sanded vs unsanded |
| Trim/Extras | $20–$100 | connections, spacers, screws |
Labor time estimates for DIY vs. professional install
Expect a full DIY tile installation on a typical 100 ft² room to take a weekend for a confident DIYer but plan for 2–3 days if you include subfloor prep, underlayment, and curing times.
Professionals typically finish in 1–2 days with crews, minimizing disruption.
You’ll save labor costs DIY but trade time and potential rework; pros cost more but deliver speed, warranty, and less stress.
Factors that affect budget and schedule
When budgeting and scheduling your tile-on-wood project, consider materials, subfloor prep, labor, and curing times—each can shift cost and duration considerably.
Calculate tile, mortar, backer board, waterproofing, and grout costs. Factor in repair or reinforcement of the wood subfloor and unexpected delays.
Decide if you’ll DIY or hire pros; labor rates and contractor availability will strongly affect both timeline and final price.
FAQ
You’ll want clear answers to common concerns before you start tiling over wood, like whether painted or sealed wood needs stripping and how much subfloor movement is acceptable.
Ask about the right underlayment to stop cracks from telegraphing through, and whether radiant heat works with a wood subfloor.
Also check how long you should wait before walking on freshly grouted tile.
Can I tile directly onto painted or sealed wood?
Can you tile directly over painted or sealed wood? You can, but only after proper prep.
Remove loose paint, sand glossy surfaces, and degrease.
Apply a bonding primer or thin-set with a latex-modified mortar rated for non-porous substrates.
Use a cement backer board or membrane for best longevity.
Confirm adhesion tests before full installation to prevent future failures.
How much movement is acceptable in a wood subfloor before tiling?
Because tile and grout crack when the floor moves too much, you need a stiff, well-supported subfloor before installing tile.
Aim for less than 1/360 to 1/480 deflection under live load (L/360–L/480).
Check for bounce by walking; reduce movement by reinforcing joists, adding blocking or a plywood layer.
Excessive springiness risks hairlines and failures.
What underlayment prevents cracks from telegraphing through tile?
If you want tile that stays crack-free, use a decoupling underlayment like Ditra or a similar membrane that isolates the tile from small substrate movements.
These membranes prevent cracks from telegraphing by creating a slip plane and distributing stresses.
Install per manufacturer instructions: proper thinset, full-bonding, and waterproofing where needed.
They’re the reliable choice over rigid backerboards alone.
Can radiant floor heating be used under tile on a wood subfloor?
You can install radiant floor heating under tile on a wood subfloor, but you’ll need to follow specific methods to avoid movement, heat damage, and telegraphed cracks.
Use thin electric mats or low-profile hydronic tubing over an appropriate uncoupling membrane and cement board where required.
Verify the subfloor is stiff, well-fastened, and within manufacturer temperature limits, and follow installer guidelines for adhesives and expansion joints.
How long before you can walk on newly grouted tile?
How soon can you walk on newly grouted tile?
You can usually walk on grout after 24 hours for light foot traffic, but avoid heavy loads or furniture for 72 hours.
Full cure takes up to 7 days—longer for epoxy or cool, humid conditions.
Keep grout damp per manufacturer instructions during initial cure to prevent cracking and guarantee strength.
Visual Reference Gallery and Quick Checklists
You’ll find before-and-after photos and close-up detail shots that show common problem areas and correct techniques.
Use the pre-installation checklist to confirm your subfloor, backer board, and layout are ready before you start.
After the tile’s down, follow the post-installation inspection checklist to catch grout gaps, movement, or finish issues.
Before-and-after photos and detail shots
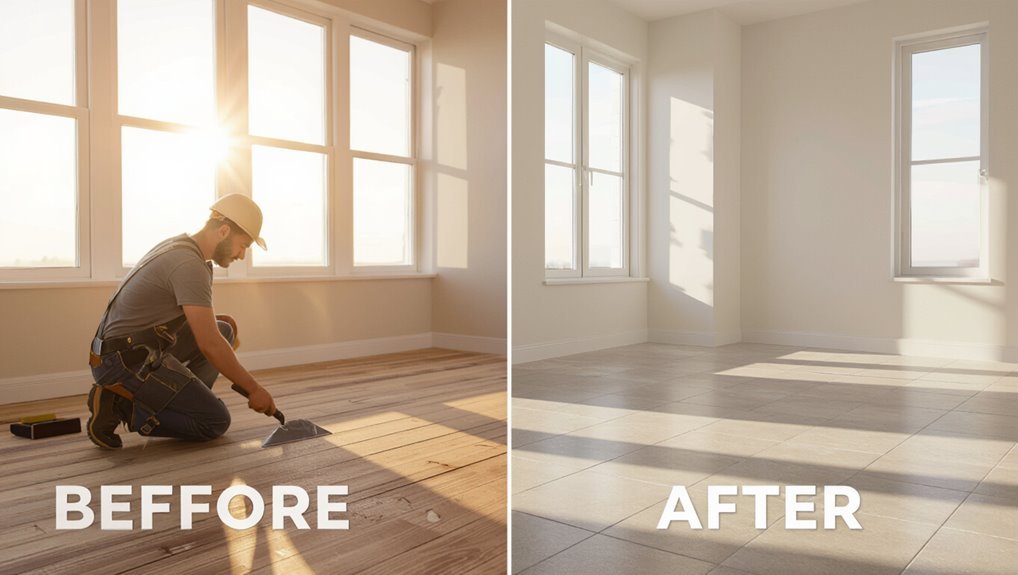
A gallery of before-and-after photos and close detail shots gives you a clear roadmap of what to expect and where to focus when tiling over wood.
Study the images to spot common problem areas like uneven substrate, improper underlayment seams, and thinset voids so you can avoid them on your own project.
Use detail shots to learn tile layout, edge treatment, grout joints, and junction solutions for a professional result.
Pre-installation checklist
After studying those before-and-after and detail photos, gather a visual reference gallery and quick checklists to guide the work ahead.
You’ll want clear photos of layout patterns, changeover details, and substrate repairs.
Use concise checklists for materials, tools, and sequencing so nothing’s missed.
- Materials and quantities
- Tools and safety gear
- Prep and sequencing steps
Post-installation inspection checklist
1 quick sweep through the finished floor and surrounding junctions will tell you a lot about how well the job held together and what needs attention.
Check grout joints, tile alignment, and movement. Photograph trouble spots for records.
- Inspect grout for voids, hairline cracks, and proper color match.
- Press tiles for hollow sounds or flex.
- Confirm trim, changes, and caulking are neat and continuous.