How to Seal Ceramic Tile the Right Way for Long-Lasting Protection
You’ll protect grout and extend your tile’s life by picking the right sealer, prepping and repairing surfaces, and applying thin, even coats per the manufacturer’s directions. Clean and fully dry tile and grout, fix cracks, then use a penetrating sealer for a natural finish or a surface sealer for added sheen. Work in small sections, wipe off excess, and reapply every 1–3 years. Keep ventilation and safety in mind, and continue for detailed steps and tips.
How to Seal Ceramic Tile the Right Way for Long-Lasting Protection
Sealing ceramic tile protects grout and porous surfaces from stains and moisture, keeping your floor or wall looking new longer.
The simplest reliable method is to clean thoroughly, let everything dry, then apply a high-quality penetrating sealer per the label.
You’ll be protecting your investment with minimal time and fuss.
Quick Answer What sealing does and the simplest recommended approach
Why bother with a sealer? You protect tile and grout from stains, moisture, and wear.
Sealing fills pores and eases cleaning, extending lifespan. For most ceramic, wipe-clean tiles, use a penetrating grout-and-tile sealer: clean, dry, apply evenly, wait, then buff.
Want specifics on how do you seal ceramic tile? Follow manufacturer directions and reapply every 1–3 years for best results.
##
Before you seal, make sure the tiles and grout are completely clean and dry so the sealer can bond properly; any dirt, wax, or moisture will prevent an even finish.
- Test sealer on a hidden tile.
- Apply thin, even coats with a microfiber pad.
- Wait full cure between coats per label.
- Wipe excess promptly to avoid hazing.
Understanding Ceramic Tile and Sealers
When you seal ceramic tile, you’re often treating two things: the tile surface (mostly for porous unglazed tile) and the grout lines that always need protection.
You’ll want to seal when tiles or grout are porous, exposed to moisture, or at risk of stains to boost durability and make maintenance easier.
Different surfaces—glazed, unglazed, matte, or textured—change which sealer you pick and whether you need to seal the tile at all.
What “sealing” means for ceramic tile vs. grout
Sealing isn’t the same for ceramic tile and grout, and knowing the difference helps you choose the right product and method.
Tile often needs a protective topical or penetrating sealer only if porous; glaze usually repels liquids without sealing.
Grout is porous and absorbs stains, so you use a penetrating sealer to block moisture and dirt.
Apply grout sealer separately and more frequently.
Why and when sealing is necessary (durability, stain resistance, moisture)
Although glazed ceramic often resists water and dirt on its own, you’ll need to seal unglazed tile and grout to preserve durability, prevent stains, and block moisture intrusion—especially in high-traffic, wet, or food-prep areas.
Sealing reduces wear, keeps spills from penetrating grout, and prevents mold and efflorescence. Seal before heavy use and reapply per product instructions to maintain protection.
Types of ceramic tile surfaces and how they affect sealing needs
Because tile varies in glaze, porosity, and finish, you’ll need to match your sealer to the specific surface rather than treating every ceramic the same.
Unglazed, matte, and quarry tiles absorb more and need penetrating sealers.
Glazed tiles often just need grout protection; look for film-forming sealers only if the finish is porous.
Textured surfaces may require extra coats and careful application.
##
If your tiles are new or have fresh grout, start by cleaning the surface thoroughly so the sealer can bond properly—wipe away dust, grease, and any grout haze with a pH-neutral cleaner and let everything dry completely before you begin. Then apply sealer evenly with a clean applicator, working in small sections and wiping excess promptly.
| Step | Tool | Tip |
|---|---|---|
| Prep | Cleaner | Dry fully |
| Apply | Applicator | Even coats |
| Finish | Cloth | Remove excess |
Types of Sealers and How to Choose One
You’ll need to weigh penetrating (impregnating) sealers versus surface (film-forming) sealers, since each has different protection, maintenance, and appearance trade-offs.
For kitchens and bathrooms, check for food-safe labels and low VOC options to protect health and finishes.
Match the sealer to your tile material and location—porous floor tiles often suit penetrators, glazed or decorative tiles may work better with surface sealers.
Penetrating (impregnating) sealers pros and cons
Penetrating (impregnating) sealers soak into ceramic and grout to block stains and moisture without leaving a surface film, so they’re ideal when you want a natural look and slip resistance.
You’ll get durable, invisible protection that won’t peel or alter sheen, but reapplication may be needed over years and they won’t hide existing discoloration or repair damaged grout.
Surface sealers (film-forming) pros and cons
When you want a glossy finish, stronger stain protection, or easier cleanup, surface (film-forming) sealers—such as acrylics, epoxies, and urethanes—create a protective coat that sits on top of tile and grout instead of soaking in.
You’ll get clearer color enhancement and easier wiping, but expect buildup, occasional peeling, and the need for strip-and-reapply maintenance on high-traffic or exterior surfaces.
Food-safe and VOC considerations for kitchens and bathrooms
Because kitchen and bathroom sealers can come into direct contact with food, utensils, or steam, you should choose products that are both food-safe and low in VOCs to protect your household and indoor air quality.
Look for EPA/NSF approvals, low-odor formulas, and clear labeling.
Test compatibility with finishes, ventilate during application, and allow full cure before food contact or heavy use.
How to match sealer type to tile material and location
Although the right sealer depends on both the tile material and where it’s installed, you can narrow choices quickly by matching sealer class to substrate and traffic:
use penetrating silane/siloxane for unglazed porcelain and natural stone in high-traffic or exterior areas;
topical acrylics or urethanes for glazed tiles and low-traffic interiors;
epoxy or urethane coatings for commercial floors;
choose food-safe, low-VOC options for kitchens.
##
It looks like you left the current subtopic blank—please tell me which subtopic you want covered (for example: “preparing tile for sealing,” “choosing the right sealer,” “applying sealer,” or “maintaining sealed tile”), and I’ll write the first paragraph right away.
- Tell me the subtopic.
- Specify tile location.
- Note any concerns (stains, grout).
- Mention timeline for project.
Tools and Materials You’ll Need
Before you start, gather the essentials: a tile sealer, a pH‑appropriate cleaner, applicators like brushes or rollers, and basic PPE (gloves, eye protection).
For smoother work and better results, consider optional tools such as a steam cleaner, microfiber pads, and a moisture meter.
Having the right materials on hand will speed the job and improve the seal’s effectiveness.
Required materials (sealer, cleaner, applicators, PPE)
When you’re ready to seal ceramic tile, gather the right sealer, a pH-neutral cleaner, appropriate applicators (brushes, rollers, or applicator pads), and basic PPE like gloves and eye protection.
Choose a sealer labeled for ceramic or grout, pick a streak-free applicator, and use a mild cleaner to remove residue.
Keep rags, a bucket, and ventilation—mask optional for strong solvents.
Optional tools for best results (steam cleaner, microfiber pads, moisture meter)
If you want cleaner tile and a longer-lasting seal, consider adding a steam cleaner, microfiber pads, and a moisture meter to your toolbox.
A steam cleaner loosens grime without harsh chemicals, microfiber pads apply sealer evenly and reduce streaks, and a moisture meter confirms tiles and grout are dry enough to accept sealant.
These tools speed work and improve durability.
##
You’ll want to test a small, inconspicuous area first to make sure the sealer bonds properly and won’t discolor the tile or grout.
Then evaluate surface readiness and choose a compatible sealer. Follow these quick checks:
Then evaluate surface readiness and pick a compatible sealer—use quick checks to ensure proper bonding and finish
- Cleanliness: no residue or soap film
- Dryness: grout and tile fully dry
- Compatibility: sealer matches tile type
- Ventilation: work in a well-ventilated space
Step-by-Step Sealing Process
Before you seal, inspect the tile and grout for damage or staining so you know what needs attention.
Clean thoroughly to remove dirt, grease, mildew, or efflorescence, then repair grout lines and fill cracks for a smooth surface.
Do a small test patch to confirm compatibility and appearance, and apply the penetrating sealer evenly following the product’s technique.
Step 1 Inspect and assess tile and grout condition
A quick, careful inspection lets you spot issues that will affect sealing success. You’ll check for cracked, loose, or chipped tiles, grout gaps, and previous sealers.
Note areas with staining, soft grout, or moisture migration. Map problem zones and decide if repairs or regrouting are needed before sealing.
Record measurements and photos to guide your next steps.
Step 2 Deep clean: removing dirt, grease, mildew, efflorescence
Start by stripping away surface grime so sealant can penetrate properly: sweep and vacuum loose debris, then mop with a degreasing cleaner designed for tile to remove oils and everyday dirt.
Scrub mildew with a diluted bleach or oxygen cleaner, rinse thoroughly, and dry.
For efflorescence, use a mild acid cleaner per instructions, rinse well, and make certain the substrate is completely dry before sealing.
Step 3 Repair: re-grouting, crack filling, and surface preparation
Tackle repairs now so your sealer bonds to a sound, even surface: remove loose or crumbling grout with a grout saw or oscillating tool, clear out joints and cracks, and inspect for hollow tiles or substrate damage; fill gaps with an appropriate epoxy or cementitious grout/filler.
Let it cure fully, then sand or scrape any high spots so the tiles and joints are flush and dust-free before sealing.
After curing, wipe surfaces, vacuum debris, and use a damp microfiber to remove residual dust; replace damaged tiles or secure hollow ones, and guarantee all repair materials match joint depth and texture for uniform sealer absorption.
Step 4 Test patch: compatibility and appearance check
Before you seal the whole floor, do a small test patch to confirm the sealer’s compatibility and the final appearance.
Choose an inconspicuous spot, apply according to label directions, and let it cure fully.
Inspect color change, sheen, and grout reaction.
If everything looks right and cleans easily, proceed; if not, try a different sealer or consult manufacturer guidance.
Step 5 Applying the sealer: technique for penetrating sealers
Lay down a clean, dry work area and plan your route so you move from one corner toward the exit; for penetrating sealers you’ll work in small sections, apply evenly with a low-nap roller or pump sprayer, let the product soak in for the manufacturer’s recommended dwell time, then wipe off any excess before it skins over to guarantee an even, invisible protection.
After wiping, buff lightly with a lint-free cloth and let cure per instructions; avoid reapplying too soon.
Step 6 Applying the sealer: technique for surface/film-forming sealers
If you used a penetrating sealer, you’ll notice the technique shifts for surface or film-forming sealers because these sit on top of the tile rather than soaking in.
Apply thin, even coats with a high-quality foam roller or microfiber applicator, avoiding pooling. Work in manageable sections, keep a wet edge, and lightly back-roll for uniform film.
Remove any bubbles or drips immediately.
Step 7 Drying and curing times and environmental considerations
Once you’ve applied the sealer, let it dry and cure under stable conditions so it can form a proper protective layer; temperature, humidity, and ventilation all affect how long that takes.
Keep the area dust-free, avoid traffic, and maintain manufacturer-recommended temperature (usually 50–85°F) and relative humidity (ideally 40–60%).
Faster curing in warm, dry, well-ventilated spaces; cold or humid slows it.
Step 8 Buffing, removing haze, and final inspection
While the sealer finishes curing, prepare to buff and inspect the floor so you can remove haze and guarantee an even finish; this last step turns a protected surface into a finished one.
Use a soft microfiber pad on low-speed buffer, work small sections, and wipe residues with a clean cloth.
Check grout lines, sheen uniformity, and tackiness.
Rebuff or spot-seal if needed.
##
Since you haven’t specified a subtopic yet, let’s pinpoint what you want to cover next so I can write the exact paragraph you need—do you mean sealing grout, sealing porous ceramic, choosing a sealer, prep and cleaning, or post-seal maintenance?
You should decide quickly; once chosen, you’ll get clear steps:
- Assess surface
- Pick sealer type
- Prep and apply
- Inspect and cure
##
If you chose sealing grout specifically, start by inspecting the joints for cracks, loose material, or heavy staining so you know what repairs are needed before applying any sealer.
Clean grout thoroughly with an appropriate cleaner, rinse and dry.
Clean grout thoroughly with a suitable cleaner, then rinse completely and allow to dry before sealing.
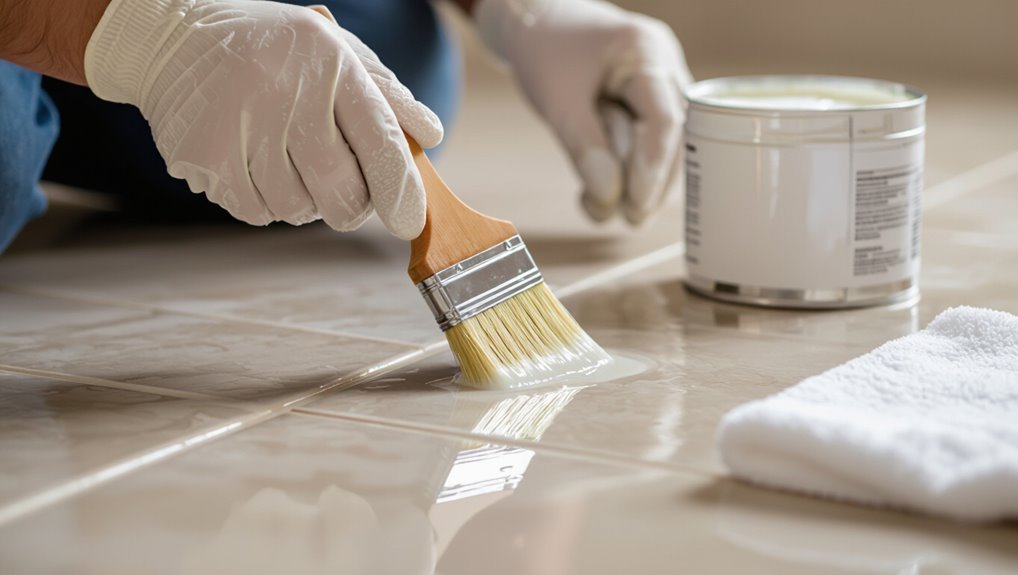
Apply a penetrating grout sealer with a brush or applicator, working in small sections.
Wipe excess and allow full cure per product instructions.
Maintenance and Reapplication Schedule
You can test whether tile or grout needs resealing by sprinkling water—if it beads, the sealer’s working; if it soaks in, it’s time to reseal.
For high-traffic kitchens and floors reseal every 1–2 years, bathrooms every 2–3 years, and outdoor tile may need annual attention depending on weather.
Keep the sealer effective by using pH-neutral cleaners, avoiding harsh scrubs, and wiping up spills promptly.
How to test if tile/grout needs resealing
Want to know whether your tile or grout needs resealing? Sprinkle a few drops of water onto grout and unglazed tile.
If water beads, the seal is working; if it darkens or soaks in within a minute, you need to reseal.
Check several spots, especially high-traffic and near water sources.
Also watch for stains that resist cleaning—those indicate lost protection.
Recommended reapplication intervals by area (kitchen, bathroom, floors, outdoor)
Different areas demand different reseal schedules because traffic, moisture, and exposure wear sealers at different rates; check and reapply accordingly.
In kitchens reseal every 1–2 years where spills and grease concentrate.
Bathrooms and showers need resealing yearly due to constant moisture.
High-traffic floors may require resealing every 6–12 months.
Outdoor tile exposed to sun and freeze cycles benefits from resealing annually or before harsh seasons.
Routine cleaning tips that preserve sealer performance
After figuring out when to reseal different areas, keep the sealer working longer with simple cleaning habits.
Wipe spills promptly, mop with pH-neutral cleaner, and avoid acidic or abrasive products that strip sealers.
Use soft brushes on grout, rinse thoroughly, and dry surfaces to prevent buildup.
Test cleaners in a hidden spot and reapply sealer when water no longer beads.
##
It’s time to move into grout sealing, where protecting the joints keeps your tile looking fresh and prevents stains and moisture damage.
You’ll want to:
- Clean grout thoroughly and let it dry.
- Choose a penetrating sealer suited for grout.
- Apply evenly with a brush or applicator.
- Wipe excess and cure per manufacturer instructions before regular use.
Common Problems and How to Fix Them
You’ll run into a few common issues when sealing ceramic tile, like haze, streaks, glossy blotches, peeling sealer, and yellowing.
I’ll show how to diagnose peeling or flaking, strip and reapply sealer, and fix stains that soaked in despite sealing.
You’ll also get quick prevention tips and corrective steps for sealer discoloration or stubborn marks.
Haze, streaks, or glossy blotches causes and remedies
When haze, streaks, or glossy blotches appear after sealing tile, they usually tell you something went wrong with your prep, product choice, or application technique; diagnosing which will guide the right fix.
Often residue, uneven applicator pressure, over-application, or incompatible sealer cause defects.
Clean with recommended cleaner, remove excess with solvent or buffing pad, allow proper drying, and reapply compatible thin coats following manufacturer instructions.
Peeling or flaking sealer diagnosis and recovery steps
Peeling or flaking sealer usually signals a bond failure between the coating and the tile or grout, so start by identifying whether poor surface prep, moisture, incompatible products, or old sealer caused the issue.
Scrape loose sealer, clean with appropriate cleaner, dry completely, test adhesion on a small area, and apply a compatible sealer per manufacturer instructions.
Recoat only after proper cure and adhesion confirmation.
Stains that penetrated despite sealing advanced cleaning options
Even with a quality sealer, some deep or porous tiles and grout can let stains migrate beneath the surface, and you’ll need stronger, targeted methods to pull those stains out.
Use poultices (clay or baking soda with hydrogen peroxide) for oil or dye, apply, cover, and let sit 24–48 hours.
For stubborn spots, try professional-grade stain removers or consult a restoration specialist.
Sealer discoloration or yellowing prevention and corrective actions
If a sealer pulled stains out of grout but now looks cloudy or has taken on a yellow cast, you’ll want to address that before reapplying or sealing other areas.
Test a small spot with acetone or isopropyl alcohol to remove degraded sealer; rinse thoroughly.
Prevent recurrence by using UV-stable, non-yellowing sealers, applying thin coats, and ensuring proper cure times and ventilation.
Best Practices and Pro Tips
Before you start, take basic safety steps—use gloves, eye protection, and guarantee the room is well-ventilated to limit fumes and dust.
For vertical, mosaic, or textured tiles, work in small sections, use angled brushes or foam applicators, and keep excess sealer from pooling in crevices.
To make the finish last, control temperature and humidity during curing and minimize foot traffic until the sealer fully cures.
Environmental and safety precautions
While sealing tile improves longevity and appearance, you’ll want to protect yourself and the environment by following a few simple precautions:
Wear gloves, eye protection, and a respirator when using solvent-based sealers; ventilate the area and keep children, pets, and food away; dispose of rags and excess sealer per local hazardous-waste rules; choose low-VOC products when possible and store materials in labeled, sealed containers.
Applying sealer in tricky situations (vertical walls, mosaic, textured tile)
When you’re sealing vertical walls, mosaics, or heavily textured tile, adjust your technique to control drips, guarantee even coverage, and protect crevices; work top-down with a thin, even coat.
Use a high-quality brush for grout and crevices, dab excess with a lint-free cloth, and apply multiple light passes rather than one heavy one.
Test a hidden spot first to confirm absorption and finish.
Maximizing longevity: ventilation, temperature, and traffic management
Although proper sealing does most of the work, you’ll extend the life of your tile by controlling ventilation, temperature, and foot traffic during cure and afterward.
Keep rooms well-ventilated to speed solvent evaporation, maintain stable 50–75°F temperatures, and avoid humidity spikes.
Block traffic until the sealer cures fully, use rugs or runners on high-traffic zones, and schedule heavy use after several days for best results.
Comparison: Popular Sealers and Use Cases
You’ll choose between penetrating sealers and film-forming sealers based on the tile type and where it’s installed.
Penetrating sealers soak into porous tile and grout to protect from within, while film-forming products leave a surface layer that repels spills and can change the sheen.
Consider traffic, maintenance willingness, and desired look when picking which to use.
Penetrating vs film-forming at a glance
Because they protect tile in very different ways, choosing between penetrating and film-forming sealers comes down to where and how you’re using them.
Penetrating sealers soak into porous tile and grout, preserving natural look and resisting stains; use them on unglazed or matte surfaces.
Film-forming sealers create a surface layer for high gloss and easy cleaning—best for low-traffic, decorative areas.
##
Now let’s look at recommended sealers for common scenarios so you can pick the right product. Below is a quick reference comparing options for high-traffic floors, showers, and outdoor tile.
| Scenario | Recommended sealer |
|---|---|
| High-traffic floor | Heavy-duty penetrating sealer (silane/siloxane blend) |
| Shower | Water-based acrylic or topical grout sealer |
| Outdoor | Solvent-based silane or siloxane for water and freeze protection |
Recommended products for common scenarios (high-traffic floor, shower, outdoor)
For high-traffic floors, showers, and outdoor tiles you’ll want different sealers tuned to each environment: a durable, penetrating epoxy or urethane for busy interior floors; a mildew-resistant, water-repellent silicone or topical sealer for wet shower walls and grout; and a UV-stable, breathable penetrating sealer for exterior stone or ceramic that faces freeze-thaw cycles.
Choose commercial-grade brands, match VOC limits, test a small area, and reapply per label.
##
It looks like the current subtopic is blank—please tell me which subtopic you want to cover (for example: preparing tile, choosing sealant, applying sealant, sealing grout, drying and curing, maintenance), and I’ll write the first paragraph right away.
You’ll need clear steps:
- Pick scope and surface.
- Gather tools and cleaner.
- Test sealant in a corner.
- Apply evenly, follow cure times.
Cost, Time, and When to Hire a Professional
For a 100 sq ft area you can expect DIY sealing to cost roughly $30–$80 in materials and take a few hours to a day depending on prep.
If you spot stubborn stains, cracked grout, or you’re short on time, it’s smart to hire a pro.
A professional service will assess damage, use commercial-grade sealers, and give a clear price and timeline before starting.
DIY cost and time estimates per 100 sq ft
Expect to spend roughly $30–$70 in materials and 1–3 hours of labor to seal 100 sq ft of ceramic tile if you do it yourself—costs vary with sealer type (penetrating vs. topical), condition of the grout, and whether you buy new applicators or use what you have.
You’ll need sealer, applicator pads or a brush, a grout cleaner, and disposable gloves. Plan for two coats and drying time.
Signs you should hire a pro
When grout is crumbling, large areas are stained, or tiles feel loose underfoot, you should consider hiring a pro — these problems add time, require specialized tools, and can hide water damage that a DIY job won’t fix.
Hire help if your project exceeds your skill, demands grout demolition, involves structural concerns, or if tight timelines and warranty needs make professional speed and insurance worthwhile.
What to expect from a professional sealing service
Curious what a pro will do and how much it will cost? You’ll get surface assessment, grout repair, proper cleaners, and high-quality sealant applied evenly.
Expect 1–4 hours for most rooms; larger jobs take longer. Costs usually range $100–$600 depending on size and prep.
Hire a pro if grout’s damaged, you lack time, or you want guaranteed, long-lasting protection.
Frequently Asked Questions
You probably have practical questions about sealing, like how long a sealer lasts on tile and grout and whether glazed tile needs sealing at all.
You’ll want to know if sealers are safe for kitchens and food prep areas, how long to wait after installing new grout, and whether you can change or completely remove old sealer.
Read on for clear, concise answers to those common concerns.
How long does sealer last on ceramic tile and grout?
How long a sealer lasts on ceramic tile and grout depends on the product, the surface, and how much wear it gets.
Typically, penetrating sealers protect grout 1–5 years; topical sealers on tile may last 1–3 years. High-traffic areas need reapplication sooner.
Check water beading and manufacturer guidelines, test small areas periodically, and reseal when protection fades to maintain performance.
Can I seal glazed ceramic tile, or is it unnecessary?
Do glazed ceramic tiles need sealing? Usually not—glaze creates a dense, nonporous surface that resists stains and moisture.
You can seal glazed tile if the glaze is worn, crazed, or the tile is unglazed ceramic disguised as glazed; sealer helps protect grout and any exposed body.
Test a small area first and choose a sealer compatible with glossy surfaces.
Is sealing tile safe for kitchens and food prep areas?
Concerned about chemicals near your countertops? You can safely seal tile in kitchens if you choose food-safe, low-VOC sealers and follow label directions.
Apply in a well-ventilated area, let the sealer cure fully, and wipe surfaces before food contact.
Avoid oil-based or non-food-safe products on prep surfaces; when in doubt, pick a sealer labeled safe for kitchen use.
How long after installation should I wait to seal new grout?
After grouting, wait until the grout has fully dried and cured before sealing—typically 24 to 72 hours for standard cement-based grout, but follow the manufacturer’s cure time for faster-setting or epoxy grouts.
The grout should feel hard and not release moisture when you press on it. If conditions are damp or cool, extend the wait; verify grout is clean and fully set for best sealer adhesion.
Can I change sealers later or remove old sealer completely?
Wondering if you can switch sealers or strip an old one off? Yes — you can change sealers, but compatibility matters. Test adhesion on a small area.
To remove old sealer completely, use a manufacturer-recommended stripper or a mild abrasive cleaner, then rinse thoroughly and dry.
Reapply the new sealer following product directions and allow proper curing for lasting protection.