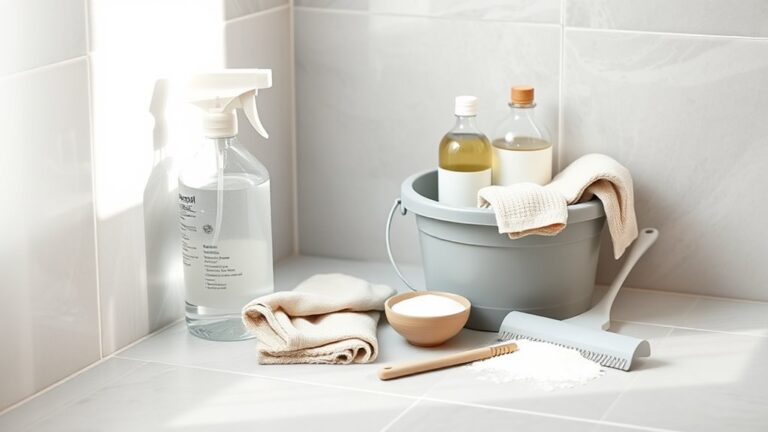
Can You Use Mr Clean on Vinyl Flooring Without Causing Dullness
You can use diluted Mr. Clean on most vinyl floors without causing dullness if you’re careful. Test a hidden spot first, follow the label’s dilution ratio, avoid abrasive scrubbing, and rinse thoroughly to remove residue that can dull finishes. Steer clear of high-solvent or high-pH cleaners and don’t let the solution sit on the floor. If you want step-by-step precautions, manufacturer tips, and troubleshooting for any film or loss of shine, keep going for more.
Quick Answer: Can You Use Mr. Clean on Vinyl Flooring?
Wondering if you can use Mr. Clean on vinyl flooring? You can, but you’ll want to dilute it and test a small area first to address safety concerns and preserve finish.
Proper dilution maintains product effectiveness without leaving residue or causing dullness. Avoid abrasive scrubbing and long contact times; rinse thoroughly.
If unsure, choose a manufacturer-recommended cleaner.
How This Guide Helps Homeowners
Because caring for vinyl floors can feel confusing, this guide gives you clear, practical steps so you can clean safely and effectively.
Caring for vinyl floors made simple: clear, practical steps to clean safely and keep them looking their best.
It offers homeowner insights and proven cleaning strategies so you’ll avoid dullness and damage. You’ll get concise advice, product guidance, and routine tips:
- When to dilute cleaners
- How to test a spot
- Best drying practices
Vinyl Types: Luxury Vinyl, Sheet, And Tile
While all vinyl floors share hardy, water-resistant qualities, they come in three distinct forms—luxury vinyl (planks), sheet vinyl, and vinyl tile—each with different construction and care needs.
You’ll treat planks like wood-look boards, sheet vinyl as continuous surface, and tiles as individual pieces.
Follow maintenance tips: use gentle cleaners, avoid abrasive tools, and test products on a hidden area first.
Vinyl Finishes: Wear Layers, Coatings, And Vulnerability
If you want your vinyl floor to stay attractive and last, pay attention to its wear layer and surface coatings—these thin protections determine how resistant the flooring is to scratches, stains, and chemical damage.
You’ll assess Vinyl durability, Finish longevity, Traffic impact, and Cleaning myths to pick care.
- Surface protection level guides Product comparisons and Care recommendations.
- Maintenance tips include stain prevention and gentle cleaners.
- Shine restoration avoids abrasives; follow Care recommendations.
How Manufacturers Describe Care And Why It Matters
When you check the manufacturer’s cleaning recommendations, you’ll see specific instructions about what to use and what to avoid.
They often list approved cleaning products and concentration limits that keep the finish intact. Ignoring those guidelines can void your warranty, so it’s important to follow them closely.
Manufacturer Cleaning Recommendations
Manufacturers spell out cleaning instructions to protect your warranty and keep vinyl performing as designed, so you should follow their guidance rather than improvise.
They explain preferred cleaning techniques, caution against harsh chemicals, and offer product comparisons to justify limits. Follow labels to avoid voiding coverage.
- Use pH-neutral cleaners and microfiber mops
- Avoid abrasive tools and high-alkaline solutions
- Rinse and dry thoroughly
Approved Cleaning Products
Because your vinyl’s lifespan and warranty hinge on proper care, makers list specific approved cleaners and explain why each type’s safe to use. You should follow labels, choose eco friendly options when possible, and consider mild alternative solutions for stubborn spots. Manufacturers warn against abrasives and strong solvents to prevent dullness.
| Type | Example | When to use |
|---|---|---|
| pH-neutral | Vinegar diluted | Regular cleaning |
| Mild detergent | Dish soap | Light grime |
| Specialty vinyl | Manufacturer brand | Deep cleaning |
Warranty Care Requirements
Good care instructions do more than keep your vinyl looking good — they shape what your warranty covers and for how long.
You should follow manufacturer maintenance requirements precisely to avoid denied claims; warranty implications hinge on approved products and methods.
- Use recommended cleaners only
- Keep records of cleaning and maintenance
- Avoid abrasive tools and harsh chemicals
What’s in Mr. Clean: Key Ingredients to Know
When you peel back the label on Mr. Clean, you’ll see surfactants, solvents, chelating agents, and fragrances listed. These components deliver key benefits like soil lift, grease breakdown, and residue control, supporting cleaning efficacy on many surfaces.
You’ll also find preservatives and pH stabilizers; knowing these ingredients helps you judge compatibility with vinyl and avoid unnecessary wear.
Why pH Matters for Vinyl: Safe pH Range And Tips
Although vinyl is durable, its finish can dulter over time if you use cleaners with the wrong pH.
So you should stick to milder, near-neutral products. You’ll protect pH balance and avoid cleaning myths by choosing pH 6–8 cleaners.
Quick tips:
- Test cleaner on a hidden spot first.
- Dilute concentrated solutions.
- Rinse residue to prevent long-term dulling.
How Surfactants And Solvents Affect Vinyl Finishes
You’ll notice surfactants in cleaners lift and suspend dirt and oils so they rinse away without scrubbing.
But some solvents can soften or strip the vinyl’s wear layer, so you should avoid products with strong solvents.
Also check that a cleaner’s chemistry is compatible with your floor’s protective finish to prevent dulling or damage.
Surfactant Cleaning Action
Surfactants lift and suspend dirt while solvents help dissolve greasy residues, but together they can also interact with vinyl finishes in ways you should know.
You’ll want to understand surfactant types and cleaning efficacy to choose a safe cleaner. Consider how they work:
- Anionic: strong soils, higher dulling risk
- Nonionic: gentler, balanced efficacy
- Amphoteric: mild, good for maintenance
Solvent Interaction Risks
When solvents in cleaners mix with surfactants, they can soften or strip vinyl finishes and leave the surface more susceptible to scratches and discoloration.
You should recognize solvent types—alcohols, glycols, ketones—and how dilution, dwell time, and agitation change interaction effects.
Test cleaners on an inconspicuous spot, rinse thoroughly, and avoid prolonged exposure to harsh solvent-surfactant mixtures to prevent finish damage.
Protective Finish Compatibility
Having covered how solvent-surfactant mixtures can soften or strip vinyl, it helps to look at how those same chemicals interact with the protective finish itself.
You should assess compatibility concerns before cleaning; surfactants or solvents can dull or swell finishes.
Consider:
- Mild, pH-neutral cleaners that preserve protective finishes
- Avoid high-solvent products that strip coatings
- Test in an inconspicuous spot first
Can Mr. Clean Strip Your Finish: What Actually Happens?
If you use Mr. Clean improperly, you can strip a protective layer and cause a dull finish over time.
You’ll notice matte patches where finish thinned, especially with high cleaning frequency or vigorous scrubbing. Mr. Clean’s detergents lift wax or topical coatings; they don’t dissolve vinyl itself.
Stop using strong solutions and switch to gentler cleaners to preserve the finish.
Safe Dilution: Mr. Clean Ratios for Vinyl Floors
You should follow the label’s recommended dilution—usually a few capfuls per gallon—to avoid over‑concentrating the cleaner.
Test the solution on a hidden spot first to check for finish dulling or residue.
Clean only as often as needed and rinse or buff any remaining film so buildup doesn’t attract dirt.
Proper Dilution Ratios
Because vinyl can be sensitive to harsh cleaners, you’ll want to follow safe dilution ratios when using Mr. Clean.
Use proper dilution techniques and adhere to recommended cleaning ratios:
- 1 tablespoon per gallon for light cleaning
- 2 tablespoons per gallon for moderate soil
- 1/4 cup per gallon for tough spots (brief use)
Always rinse with clean water and avoid soaking the floor.
Testing On Hidden Area
Before you clean the whole floor, test the diluted Mr. Clean solution on a hidden testing spot to check for color change or dulling.
Apply with a soft cloth, wait the recommended dwell time, then rinse and dry.
If the vinyl care area shows no damage or residue, you can proceed with that safe dilution across visible flooring, monitoring as you go.
Frequency And Residue
When you clean vinyl flooring with Mr. Clean, balance frequency and dilution to prevent residue buildup.
You’ll want safe ratios and sensible timing.
- Dilute per label: mild solution for routine mopping
- Limit deep cleans to avoid frequency concerns and dulling
- Rinse or mop with plain water to remove any leftover cleaner
How to Test Mr. Clean on a Small Area First
Start by choosing a discreet spot—like a closet corner or behind a cabinet—and apply a diluted Mr. Clean solution with a soft cloth.
Wait 24 hours, then inspect for dulling, discoloration, or residue.
Repeat with a slightly different dilution if needed.
These testing techniques help you confirm compatibility and protect your vinyl maintenance routine before treating visible floors.
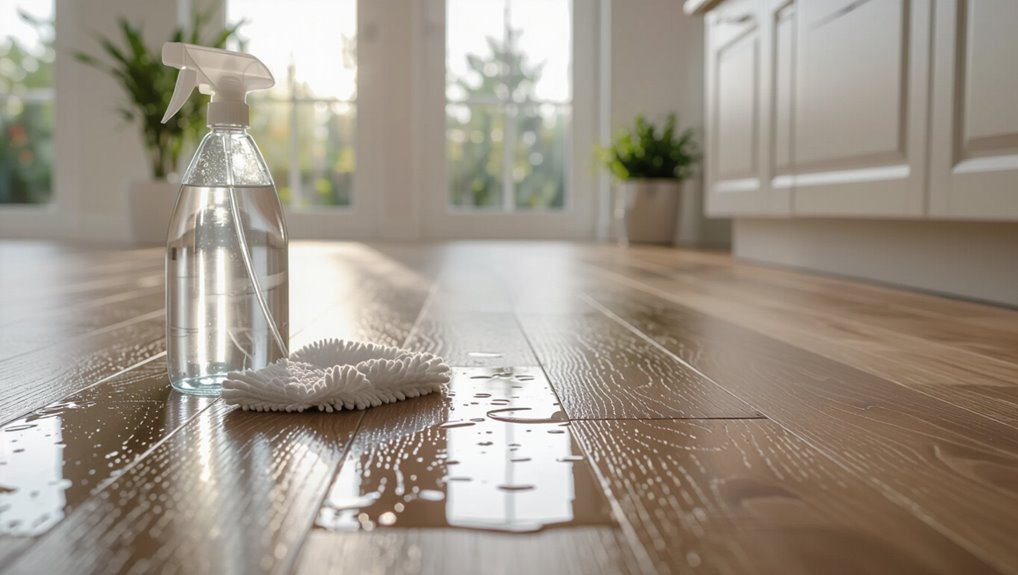
Mop Vinyl Safely With Diluted Mr. Clean
Once your patch test shows no adverse effects, you can mop the rest of the floor with a diluted Mr. Clean solution to protect finish and color.
Use proper dilution techniques and follow sensible cleaning frequency for routine care.
Try these steps:
- Mix mild solution in a bucket, not straight bottle
- Use a microfiber mop, wrung nearly dry
- Rinse with clean water afterward
How Often You Can Use Mr. Clean on Vinyl
Because overuse can dull vinyl’s finish, you should limit routine cleaning with diluted Mr. Clean to once weekly for high-traffic areas and every two to four weeks elsewhere.
Spot-clean spills immediately.
Follow vinyl maintenance tips by testing small areas and using a microfiber mop.
These cleaning frequency guidelines help preserve sheen without stripping protective layers, balancing cleanliness and long-term floor care.
Common Mistakes That Cause Dulling
Watch out for a few common missteps that can dull your vinyl: abrasive scrubbers, pouring undiluted cleaner, and skipping a proper rinse and dry.
Each of these damages the finish or leaves residue that attracts dirt.
We’ll cover how to avoid each one.
Abrasive Scrubbing Tools
When you scrub vinyl with abrasive tools like steel wool, scouring pads, or stiff-bristled brushes, you can quickly wear down the protective finish and create dull, scratched areas.
You should respect abrasive effects and scrubbing limitations to avoid damage. Choose gentler options and stop if sheen fades.
- visible scratches
- uneven dull patches
- trapped grit worsening wear
Using Undiluted Cleaner
After avoiding abrasive scrubbing, you still can damage vinyl by using cleaners straight from the bottle. Using undiluted cleaner raises undiluted risks like finish stripping and streaks. Dilute per label to balance cleaning effectiveness and safety.
| Risk | Cause | Fix |
|---|---|---|
| Dulling | Concentration | Dilute |
| Residue | No rinse | Wipe |
| Fading | Overuse | Limit use |
Skipping Rinse And Dry
If you skip rinsing and drying vinyl after cleaning, leftover cleaner and water can leave a dull, filmy haze that builds up over time.
You should rinse with clean water and dry promptly as part of proper cleaning techniques and maintenance tips.
Consider these consequences:
- Filmy residue that traps dirt
- Water spots that mute shine
- Faster wear from trapped grit
Does Mr. Clean Leave a Dull Film or Residue?
Wondering whether Mr. Clean leaves a dull film or residue effects on vinyl, you’ll notice build-up if overused or not diluted. Use sparingly and test first to avoid dull film.
| Use | Risk | Tip |
|---|---|---|
| Concentrated | High | Dilute |
| Frequent use | Moderate | Rotate cleaners |
| Proper rinse | Low | Wipe dry |
Rinse vs. Leave-On: When to Wipe the Floor After Cleaning
When should you rinse vinyl floors after using Mr. Clean? You should rinse promptly if residue worries you; otherwise a light wipe can suffice.
Use proper rinse techniques and follow effective drying methods to avoid streaks.
- Rinse with clean water and a microfiber mop
- Wring mop well to minimize water
- Finish with a dry cloth for quick drying methods
How Water Temperature Changes Cleaning Results
How hot should the water be? You’ll want warm, not scalding, water to boost cleaning efficiency without harming vinyl finish.
Warm water helps detergent dissolve and lift grime, improving results while protecting the wear layer. Cold water reduces effectiveness; very hot water can soften or warp planks.
Test a small area and follow manufacturer guidance for ideal water temperature.
Tools to Avoid on Vinyl: Abrasives, Steam Mops, Stiff Brushes
Because vinyl’s wear layer is thin and sensitive, you should avoid abrasive pads, steam mops, and stiff-bristled brushes that can scratch, dull, or delaminate the surface.
Avoid abrasive pads, steam mops, and stiff brushes—vinyl’s thin wear layer can scratch, dull, or delaminate easily.
Don’t use abrasive tools; pick gentle cleaning techniques instead.
Common offenders include:
- Steel wool or scouring pads
- High-heat steam cleaners
- Stiff deck or floor brushes
Best Mop Heads And Microfiber Techniques for Vinyl Shine
Choose a soft microfiber or sponge mop head to protect vinyl from scratches while picking up dirt.
Use a flat microfiber pad for everyday cleaning and a plush one for gentle buffing to restore shine.
Rinse or launder pads regularly so you’re not redistributing grime back onto the floor.
Best Mop Heads
When you want a streak-free, long-lasting shine on vinyl floors, the right mop head makes all the difference. You’ll choose based on mop head types and cleaning techniques that protect finish and lift dirt.
Consider options:
- Microfiber flat: gentle, absorbs well
- Sponge: good for heavy spills
- Steam mop pad: sanitizes without harsh chemicals
Match head to job and rinse often.
Microfiber Techniques
Start by dampening a high-quality microfiber pad with warm water and a few drops of a pH-neutral cleaner—too much solution can leave residue, while too little won’t lift grime.
You’ll use light pressure and change pads often to avoid grit.
Microfiber benefits include trapping dirt without harsh chemicals; follow quick-dry cleaning techniques and rinse pads regularly for consistent vinyl shine.
Safe Spot-Cleaning: Stain Removal With Mr. Clean
For quick, targeted stain removal on vinyl, you can use Mr. Clean diluted per label instructions for safe spot cleaning.
Blot, don’t scrub; test a hidden area first. Then treat the stain gently.
- Blot excess debris with a soft cloth
- Apply diluted solution sparingly, wait 30 seconds
- Rinse and dry to prevent residue
Removing Scuffs Without Dulling the Finish
Scuffs happen, but you don’t have to sand away your vinyl’s shine to remove them; use gentle, targeted methods that lift marks without dulling the finish.
For scuff removal techniques, try a soft eraser, microfiber cloth with warm soapy water, or a non-abrasive cleaner. Avoid harsh scrubbing.
Regular maintenance tips include immediate spot treatment and gentle routine cleaning to preserve sheen.
When Mr. Clean Is Not Appropriate: Sealed & Commercial Vinyl
Although Mr. Clean can work on many floors, you shouldn’t use it on some surfaces. You’ll avoid damage when dealing with sealed vinyl or settings using commercial products.
Although Mr. Clean suits many floors, avoid it on sealed vinyl, commercial finishes, or warranty-restricted surfaces.
Consider these situations:
- High-gloss sealed vinyl that needs pH-neutral care
- Heavy-traffic commercial products with specialized finishes
- Floors under warranty that forbid generic cleaners
Choose approved cleaners to protect appearance and warranties.
Reading Manufacturer Labels for Cleaner Compatibility
If your floor has a specific finish or warranty limits what you can use, you’ll need to check manufacturer labels before grabbing Mr.
Read those labels for cleaning compatibility details and any prohibited chemicals.
Follow manufacturer guidelines for dilution, application, and frequency to avoid voiding warranties or dulling finishes.
When in doubt, contact the maker for clarification before trying new products.
Mr. Clean vs. Vinyl-Specific Cleaners: A Comparison
When you compare Mr. Clean to vinyl-specific cleaners, you’ll notice trade-offs in formulation and finish protection.
Consider these points for choosing Mr. Clean alternatives and following Vinyl maintenance tips:
- Mr. Clean: multi-surface, stronger detergents, possible dulling with overuse
- Vinyl-specific: pH-balanced, protective finish, safer long-term
- Usage: dilute, test patch, follow manufacturer guidance
Top Commercial Alternatives for Vinyl Floors
Looking for safer commercial cleaners for your vinyl floors?
Choose pH-neutral, no-wax sprays from trusted brands and look for eco-friendly options labeled biodegradable and low-VOC.
You’ll want products that rinse clean to prevent residue buildup.
Follow manufacturer recommendations for cleaning frequency—usually light weekly mopping and deeper monthly care—to maintain shine without harsh chemicals or abrasive scrubbing.
Homemade Neutral Cleaner Recipes That Won’t Dull Vinyl
You can make simple neutral cleaners that protect vinyl by using gentle pH-balanced mixes like water with a small amount of mild dish soap or vinegar diluted under 1/4 cup per gallon.
Skipping oils and waxes keeps residue from attracting dirt or dulling the finish, so choose oil-free cleaning solutions and microfiber pads.
After cleaning, always rinse with plain water and dry promptly to prevent film and water spots.
Gentle pH-Balanced Mixes
Because vinyl reacts to harsh alkalines and abrasives, gentle pH-balanced cleaners give you effective cleaning without dulling the finish.
You’ll mix mild, neutral solutions that respect the floor’s pH balance and deliver gentle cleaning.
Try simple recipes like:
- Warm water with a few drops of pH-neutral dish soap
- Water plus a splash of distilled white vinegar (small amount)
- Commercial neutral cleaner diluted per label
Oil-Free Cleaning Solutions
The same pH-safe approach works best when you want oil-free options that won’t leave residue or dull vinyl’s finish. Use homemade recipes with vinegar solutions, baking soda, citrus cleaners, enzymatic cleaners, and soap alternatives. Choose eco friendly options and apply with microfiber techniques to avoid abrasion.
| Option | Mix | Use |
|---|---|---|
| Vinegar | 1:10 | Light soils |
| Baking soda | Paste | Spot clean |
| Citrus | Dilute | Deodorize |
| Enzyme | Follow label | Stains |
| No-soap | Mild surfactant | Regular care |
Rinse-and-Dry Techniques
1 simple rinse-and-dry routine will keep vinyl looking fresh without risking dullness: You’ll use gentle rinse techniques and careful drying methods to avoid residue.
Mop with a diluted neutral cleaner, then rinse with clean water. Dry promptly to prevent streaks and film.
- Microfiber mop for rinsing
- Squeegee to remove excess water
- Soft towel for final drying
When: And How: To Use a Polish or Restorer Safely
If your vinyl looks dull but isn’t damaged, you can safely use a polish or restorer—provided you pick the right product and follow the label.
Test a small hidden area first for polish application and finish preference. Clean thoroughly, let dry, apply sparingly with a microfiber or pad, follow cure times, and guarantee restorer safety by ventilating and avoiding mixing products.
How to Restore Shine After Dulling Has Occurred
First, you’ll want to remove any soap scum or product residue with a gentle cleanser so the surface can accept a new finish.
Next, apply a suitable vinyl floor polish or restorer in thin, even coats according to the product instructions.
Finish by buffing the floor for shine and set a simple maintenance routine to keep it glossy.
Remove Residue First
Because dullness often comes from a buildup of cleaner residue, wax, or grime rather than damage, you’ll want to strip that film before polishing or applying restorers.
For effective residue removal and surface preparation, do this:
- Mop with a pH-neutral cleaner, rinse thoroughly.
- Use a microfiber pad or soft brush to lift trapped film.
- Rinse and dry, then inspect for remaining haze before restoring.
Reapply Floor Polish
Reapply a quality vinyl floor polish to restore shine and protect the surface after you’ve removed residue and let the floor fully dry.
Apply thin, even coats with a microfiber applicator, following product instructions and drying times.
You’ll reapply polish only as needed—usually every few months—to maintain shine and extend wear without building up residue or risking uneven gloss.
Buff And Maintain
Buffing is the quickest way to bring back lost luster—start by lightly buffing the vinyl with a soft cloth or a microfiber pad to smooth out fine scratches and even the polish layer.
You’ll use basic buffing techniques and follow maintenance tips to preserve shine:
- Circular rubbing with gentle pressure
- Spot-treat scuffs first
- Finish with a clean microfiber pass
Preventive Maintenance to Avoid Long-Term Dullness
If you want to keep your vinyl looking fresh, adopt simple preventive habits like using doormats, felt pads on furniture, and area rugs in high-traffic zones.
You’ll extend shine by following preventive techniques: sweep daily, damp-mop weekly with a mild cleaner, and avoid harsh chemicals.
Set a clear maintenance schedule for inspections and spot-cleaning to prevent grit and spills from causing long-term dullness.
Wear Layers Explained: When to Call a Pro
When your vinyl starts showing wear, check the wear layer thickness—it’s the clear protective coating that actually takes the damage—and you’ll know whether a simple spot repair will do or if it’s time to call a pro.
When vinyl shows wear, inspect the clear wear layer—its thickness tells you if a spot fix will suffice or call a pro.
You’ll assess wear layer benefits and decide if DIY suffices or if professional services are needed.
- Thin wear layer: visible grit
- Moderate: repairable spots
- Thick: long-term protection
How Household Traffic Patterns Accelerate Finish Wear
You’ll notice finish wear shows up first along high-traffic paths like hallways and entryways.
Grit tracked in on shoes acts like sandpaper, accelerating abrasion along those routes.
Repeated concentrated heel impact at doorways and spots where you pause wears the finish even faster.
High-Traffic Wear Paths
Because people tend to follow the same routes through a home, the finish on vinyl flooring wears unevenly: entryways, kitchen aisles, and paths to bathrooms get the most abrasion and so show dulling, scuffs, and loss of texture first.
You can slow wear with targeted high traffic solutions and clear maintenance strategies:
- Place runners at key routes
- Rotate furniture and rugs
- Use nonabrasive cleaners regularly
Abrasion From Grit
Something as small as a grain of sand can act like sandpaper underfoot, grinding away the finish on vinyl every time someone walks through.
You’ll notice grit accumulation along entryways and between furniture legs; regular sweeping and targeted vacuuming cut abrasive particles.
Consistent flooring maintenance, like cleaned walkways and doormats, reduces micro-scratching and preserves sheen without relying solely on chemical treatments.
Concentrated Heel Impact
When people habitually cross the same narrow paths—by the kitchen sink, from the front door to the hallway, or between sofa and coffee table—your vinyl takes repeated, focused blows from heels and hard-soled shoes that wear the finish much faster than dispersed foot traffic.
You can reduce concentrated heel impact by:
- Using runners at high-traffic lanes
- Asking guests to remove shoes
- Choosing soft-soled footwear indoors
Do Entry Mats And Furniture Pads Reduce Cleaning Needs?
Although you’ll still need to mop and wipe occasionally, good entry mats and furniture pads cut down on how often you have to clean vinyl floors.
You’ll notice entry mat effectiveness at doorways trapping dirt and moisture, preventing grit from scratching surfaces.
Use furniture pad benefits under legs to stop scuffs and distribute weight, reducing concentrated wear and lowering cleaning frequency overall.
Seasonal Cleaning Routines That Protect Vinyl
As seasons change, adjust your cleaning routine to protect vinyl from weather-driven wear and stains: you’ll use seasonal cleaning to prevent grit damage and maintain vinyl protection.
Rotate tasks and products each season to match humidity and traffic patterns.
- Sweep daily; mop weekly with pH-neutral cleaner.
- Use door mats and shake them often.
- Inspect seals, address spills immediately.
Indoor-Air And Allergy Considerations for Cleaner Choice (Vinyl-Focused)
When you pick a cleaner for vinyl, consider its VOC emissions because strong fumes can worsen indoor air and trigger symptoms.
You’ll also want a product that removes allergen residue like dust and pet dander without leaving a film that traps particles.
Choosing low-VOC, residue-free options helps keep both the floor and your air healthier.
VOC VOC Emissions
If you’re choosing a cleaner for vinyl floors, consider VOC emissions because they directly affect indoor air quality and allergy symptoms.
You should weigh VOCs impact and emissions effects when selecting products to avoid headaches or irritation.
Consider:
- Choosing low-VOC or fragrance-free cleaners
- Ventilating during and after cleaning
- Testing a small area to verify no strong odors
Allergen Residue Removal
Allergen residue on vinyl — like dust mite droppings, pet dander, and pollen — can keep triggering symptoms even after visible dirt is gone.
So you’ll want cleaners that lift and trap these particles without leaving sticky films that re-collect allergens.
Identify allergen sources, choose low-VOC, non-residue formulas, and rinse thoroughly to remove residue types so airborne triggers drop and stay captured.
Real-World User Tests: Mr. Clean Experiences on Vinyl
Curious how Mr. Clean performs in real homes? You’ll read varied user experiences and tried cleaning alternatives. Many report quick shine; some note mild dulling after weeks.
Curious about Mr. Clean? Users praise quick shine, though some notice mild dulling over time—test a patch first.
- Quick mop with diluted solution, no immediate dulling.
- Vinegar or mild soap used as alternatives for touch-ups.
- Patch test avoided surprises; high-traffic areas showed the most change.
Mr. Clean: Safe Vinyl Cleaning Checklist
Those real-world reports show why you should follow a checklist when using Mr. Clean: test a hidden spot, dilute per label, use a microfiber mop, and rinse.
You’ll note Vinyl maintenance tips: avoid harsh scrubs and waxes.
Follow Cleaning frequency recommendations—weekly light cleans, monthly deeper rinses.
Wear gloves, work in small sections, and dry floors completely to prevent residue.
Troubleshooting Problems After Using Mr. Clean
If you notice residue or a filmy layer after using Mr. Clean, you’ll want to diagnose whether it’s leftover cleaner or hard-water deposits.
Check for causes of surface dulling like over-concentration, harsh scrubbing, or incompatible products.
I’ll show quick fixes to remove film and restore your vinyl’s shine.
Residue And Filming
When residue or a filmy haze appears after using Mr. Clean, you’ll want to act fast to prevent residue buildup and visible filming effects.
Try these steps:
- Rinse with warm water and a microfiber mop to lift film.
- Use a diluted vinegar solution to break down deposits gently.
- Dry thoroughly to avoid streaks and re-depositing cleaners.
Surface Dulling Causes
Rinsing away film can solve visible haze, but you may still notice your vinyl looking dull or washed-out after using Mr. Clean. Improper dilution, abrasive scrubbing, or residue buildup from cleaners affects surface maintenance and dulls finish. Adjust cleaning techniques and test small areas to identify causes.
| Cause | Action | Result |
|---|---|---|
| Overuse | Dilute | Less residue |
| Scrubbing | Gentle tools | Less abrasion |
| Wrong mix | Test first | Prevent dullness |
Restoring Vinyl Shine
After cleaning with Mr. Clean you might notice dull spots. Use these quick vinyl maintenance tips and shine restoration techniques to recover gloss.
- Buff with a soft microfiber in small, circular motions to lift residue.
- Rinse with clean water and mild detergent, then dry thoroughly to prevent film.
- Apply a manufacturer-approved restorative product sparingly, testing in an inconspicuous area first.
Final Recommendations: Keep Vinyl Shiny Without Risk
If you want to keep vinyl floors shiny without risking damage, stick to gentle, pH-neutral cleaners and dilute concentrated products per the label, avoid abrasive tools, and test any new cleaner in an inconspicuous spot first.
For shine maintenance and vinyl protection, mop with microfiber, dry promptly, spot-clean spills, use felt pads under furniture, and limit harsh chemicals to occasional, carefully tested use.
Frequently Asked Questions
Can Vinegar and Mr. Clean Be Mixed Safely for Vinyl Floors?
No — you shouldn’t mix vinegar and Mr. Clean; you’d create unpredictable cleaning solutions that can harm finishes. For safe vinyl care, use manufacturer‑recommended cleaners or diluted vinegar alone, not combined with commercial cleaners.
Will Mr. Clean Harm Adhesive Under Vinyl Tiles?
No, Mr. Clean usually won’t cause adhesive degradation if you dilute it properly; you’ll protect vinyl longevity by avoiding harsh solvents, testing a small area, and wiping up excess moisture promptly to prevent under-tile weakening.
Does Fragrance in Mr. Clean Affect Indoor Air Quality on Vinyl?
Yes — fragrance in Mr. Clean can affect indoor air quality on vinyl; you’ll notice odors that may trigger fragrance sensitivity and exacerbate indoor allergens for some people, so choose unscented formulas or ventilate well while cleaning.
Can Diluted Mr. Clean Remove Wax Buildup From Older Vinyl?
I tested a coin rubbed on old vinyl; it scraped but didn’t harm finish. You can use diluted Mr. Clean for wax removal techniques on older vinyl, but you’ll want gentle scrubbing, rinse, and follow vinyl floor care steps.
Are There Compatibility Issues With Mr. Clean and Radiant Floor Heating?
You can generally use diluted Mr. Clean with radiant floor heating; compatibility concerns are minimal, and it won’t harm heating efficiency when rinsed properly. Just avoid heavy residues and follow manufacturer recommendations for best results.
Conclusion
You can use Mr. Clean on vinyl, but you’ll want to dilute it and test a hidden spot first so you won’t accidentally dull the finish. Coincidentally, the same quick check you do to confirm color fastness also tells you whether the wear layer’s coating will stand up to regular cleaning. Keep to mild solutions, soft mops, and occasional polish, and you’ll protect shine—because the smallest precaution often prevents the most visible damage.