How to Install Pergo Outlast Flooring With Simple Tools and Tips
You can install Pergo Outlast yourself with simple tools by following seven clear steps: prepare and level a dry subfloor, acclimate planks 48 hours, plan layout and snap a guideline, cut a starter row, click subsequent rows with a tapping block and pull bar, finish trims and connections, then inspect and clean. Use underlayment on concrete, stagger joints, and leave expansion gaps. Follow care tips to keep seams tight, and scroll on to learn detailed tricks and troubleshooting.
Quick Start: 7-Step Install Overview

You’ll get through a Pergo Outlast installation faster if you break it into seven clear steps: prepare the subfloor, acclimate the planks, plan your layout, cut and fit the starter row, click in subsequent rows, finish connections and trims, and inspect and clean the floor.
You’ll face common installation challenges, but staying methodical reduces errors. Regular flooring maintenance keeps seams tight and appearance fresh.
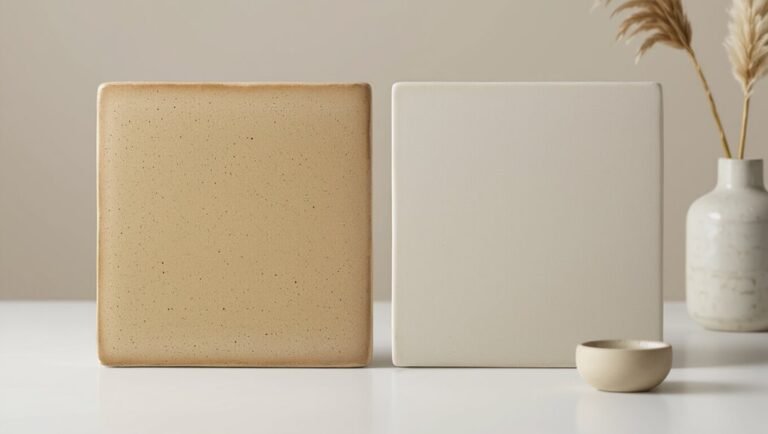
Why Choose Pergo Outlast for DIY Installs
You’ll appreciate Pergo Outlast’s durable wear layer that stands up to daily scratches and scuffs, keeping floors looking newer longer.
The easy click installation means you can fit planks quickly without glue or special tools.
And because it’s water-resistant, you won’t worry about spills or humidity during and after your DIY install.
Durable Wear Layer
Durable protection matters when you’re tackling a DIY install, and Pergo Outlast delivers a thick wear layer that resists scratches, stains, and everyday scuffs so your floors look new longer.
You’ll appreciate wear resistance and scratch protection that cuts routine maintenance, boosts surface longevity and finish durability, and maintains visual appeal.
Its impact resistance also reduces replacements and lowers environmental impact over time.
Easy Click Installation
1 simple snap-and-click motion makes Pergo Outlast a top pick for DIYers: its tongue-and-groove locking system clicks boards securely into place without glue or nails, so you’ll install faster and with fewer tools.
You’ll focus on subfloor preparation and layout planning, use proper installation techniques and plank alignment, apply cutting strategies, manage moisture, handle changeover solutions, and follow cleaning methods for lasting results.
Water-Resistant Performance
Along with its easy click system, Pergo Outlast brings strong water-resistant performance that makes it a smart pick for DIY installs in kitchens, bathrooms, and basements.
You’ll appreciate the water resistance benefits and improved moisture management that protect cores and subfloors.
Install confidently, knowing spills won’t ruin your work.
How to Read Pergo Outlast Product Labels and Specs
Before you buy or install Pergo Outlast, take a moment to read the label and spec sheet so you know exactly what you’re getting and how it should be handled. Check product features, warranty, and moisture limits. Follow installation guidelines, acclimation time, and max room size. Use the quick reference:
| Item | Detail |
|---|---|
| Features | Wear, water |
| Specs | Size, warranty |
Tools You Really Need for Pergo Outlast Installation
Before you start laying planks, make sure you’ve got the right measuring tools—tape measure, carpenter’s square, and a chalk line—to get accurate cuts and layout.
You’ll also need basic hand tools like a rubber mallet, pull bar, spacers, and a utility knife for trimming and tapping joints.
With those items on hand, installation goes faster and your seams finish cleaner.
Essential Measuring Tools
Accuracy matters when installing Pergo Outlast, so you’ll want the right measuring tools on hand. You’ll use precise measuring techniques and tape measure tips to avoid measurement errors and common mistakes.
Rely on precision tools, digital measuring and laser measuring for measuring accuracy and essential measurements. Pick measurement tools that fit your skill and space.
- Tape measure
- Laser measure
- Digital caliper
- Straightedge
Installation Hand Tools
Since precise cuts and secure fits make the difference between a pro-looking floor and a DIY disaster, you’ll want a compact set of reliable hand tools on hand for Pergo Outlast installation.
Prioritize tool selection for measuring accuracy, cutting techniques, and floor preparation.
Practice ergonomic practices, dust management, tool maintenance, and workspace organization to boost installation safety and keep your project timeline on track.
Optional Tools That Speed Up the Job
A few well-chosen optional tools can shave hours off your Pergo Outlast installation and make each step easier—think a pull bar, tapping block, and a good quality flooring nailer for tricky end pieces.
Use installation hacks and time-saving techniques to boost project efficiency, avoid common pitfalls, and follow expert insights while keeping budget-friendly options and workspace organization in mind.
Use smart installation hacks and time-savers to work faster, dodge mistakes, and finish like a pro.
- Faster cuts
- Cleaner seams
- Less strain
- Pride in finish
Materials and Supplies to Buy Before You Start
Before you begin, make a checklist of essential tools like a pull bar, tapping block, spacers, and a good saw so you won’t stop mid-job.
Pick up materials such as underlayment, trim pieces, and junction strips, plus extras like adhesive and replacement planks.
Having spares and the right supplies on hand will keep the installation smooth and efficient.
Essential Tools List
You’ll want a compact set of reliable tools and materials to keep your Pergo Outlast installation smooth and efficient.
Gather essential tool types and follow simple tool maintenance tips so everything performs when you need it. Feel confident—these picks reduce frustration and speed the job:
- Sturdy pull bar
- Tapping block
- Flooring saw
- Measuring kit and spacers
Materials And Extras
Now that your tool kit’s ready, gather the materials and extras that’ll keep the install running without hiccups.
Buy underlayment, moisture barrier, transition pieces, quarter-round, spacers, and replacement planks.
Pack installation accessories like tapping block, pull bar, and mallet.
If glue is recommended for edges or stairs, get flooring adhesives specified by Pergo.
Keep extra fasteners and a utility knife handy.
Which Subfloors Are Compatible With Pergo Outlast
When choosing a subfloor for Pergo Outlast, focus on a firm, flat surface—concrete, plywood, or existing vinyl or wood floors usually work well.
You’ll assess subfloor types, follow installation requirements, and mind moisture concerns to guarantee flooring compatibility.
Pick a stable base, address minor repairs, and use proper underlayment.
- Relief
- Confidence
- Comfort
- Satisfaction
How to Check Subfloor Flatness and Moisture Levels
Before you install Pergo Outlast, check that your subfloor is flat and dry—these are the two biggest factors that affect how the planks lock and how the floor performs long-term. Use subfloor inspection techniques, moisture testing methods, and a leveling tools overview. Follow surface preparation guidelines, subfloor repair tips, and humidity control solutions. Compare subfloor types; consider moisture barrier options.
| Check | Tool |
|---|---|
| Flatness | Straightedge |
| Moisture | Meter |
| Repair | Patch |
| Leveling | Grinder |
| Barrier | Membrane |
Preparing Concrete Subfloors for Pergo Outlast
Because concrete can hide moisture and irregularities that ruin a Pergo Outlast installation, you’ll want to inspect, clean, and remediate the slab carefully before you lay any planks.
Follow these subfloor preparation tips to guarantee concrete moisture control and a stable base:
- Test moisture and mark problem spots.
- Clean and degrease thoroughly.
- Patch cracks and level dips.
- Apply a moisture barrier.
Preparing Plywood and OSB Subfloors Correctly
Before you lay Pergo Outlast, you’ll want to run through a subfloor assessment checklist to confirm the plywood or OSB is structurally sound and securely fastened.
Check and address moisture issues, using a reliable meter and proper drying or vapor barriers as needed.
Finally, make sure the surface is flat and level—shim, sand, or use a leveling compound so the floor meets manufacturer tolerances.
Subfloor Assessment Checklist
1 key step in installing Pergo Outlast is a thorough subfloor assessment—this checklist helps you evaluate plywood and OSB surfaces for flatness, moisture, fastening, and damage so you can correct issues before laying flooring.
Use this inspection checklist to confirm subfloor types, moisture levels, flatness assessment, structural integrity, compatibility factors, installation readiness, surface preparation, damage assessment, and repair options.
- Check fasteners and squeaks — feel relief.
- Scan for delamination — don’t panic.
- Note high/low spots — act decisively.
- Verify clean, dry surface — breathe easy.
Moisture And Leveling
When you’re prepping plywood or OSB for Pergo Outlast, get moisture and level right first: high moisture or unevenness will ruin the install regardless of how well you fit the planks.
Check subfloor moisture with a meter, repair wet spots, and allow drying.
Use leveling techniques—sander for high spots, patch compound for low areas—and apply a vapor barrier for ongoing moisture control before laying flooring.
How to Acclimate Pergo Outlast Planks to the Room
Acclimate Pergo Outlast planks for at least 48 hours in the room where they’ll be installed so they can adjust to the temperature and humidity; this prevents gaps, buckling, and joint problems after installation.
Follow storage guidelines: keep boxes flat, maintain temperature control and humidity levels, check plank orientation during acclimation, and plan installation timing based on room conditions and moisture balance.
Underlayment: Do You Need It for Pergo Outlast?
You don’t always need underlayment with Pergo Outlast, but knowing when to use it matters for performance.
If you’re installing over concrete or a moisture-prone subfloor, include a moisture barrier to protect the planks.
Also consider underlayment for improved sound control and underfoot comfort if your subfloor is hollow or noisy.
Underlayment Necessity Explained
Although Pergo Outlast is designed with an integrated underlayment in some collections, you’ll still want to check the specific product line and subfloor condition before skipping extra underlayment.
You’ll weigh underlayment types and benefits: installation soundproofing, moisture protection, thermal insulation, floor cushioning, cost considerations, compatibility factors, installation challenges, maintenance tips.
- Relief
- Confidence
- Frustration
- Pride
Moisture Barrier Considerations
Because moisture can quietly ruin a floating floor, you’ll want to decide whether an extra vapor barrier is necessary for your Pergo Outlast installation based on the subfloor type, room use, and the specific Pergo collection you bought.
Check moisture retention risks, barrier types, and product selection.
Follow installation tips as preventive measures, consider climate impact and humidity levels, and guarantee proper floor protection.
Sound And Comfort Benefits
If you want quieter, more comfortable floors, add an underlayment beneath your Pergo Outlast—many installations benefit from the sound-dampening and cushioning it provides.
- Feel instant underfoot softness and comfort enhancement.
- Notice sound insulation and sound absorption reducing impact noise.
- Improve acoustic performance for rooms that need serenity.
- Gain thermal regulation and temperature control for cozier spaces.
How to Install Foam or Vapor-Barrier Underlayment
Before you lay your Pergo Outlast planks, roll out the foam or vapor-barrier underlayment so it sits flat and covers the entire subfloor; this layer cushions the floor, controls moisture, and helps reduce noise. Choose foam types after surface preparation; weigh underlayment benefits, moisture considerations, soundproofing options, product comparisons, cost analysis, installation tips, installation mistakes to avoid, and maintenance tips.
| Tip | Note |
|---|---|
| Seal seams | Use tape |
| Overlap edges | Avoid gaps |
Planning Your Layout for the Cleanest Seams
When you plan your layout, aim your first and last rows to be at least half a plank wide so seams fall in stable, visible places and you avoid thin slivers along walls.
Consider layout considerations and seam alignment to make joins crisp and steady.
Follow these emotional prompts:
- Pride in precision
- Relief from symmetry
- Confidence in planning
- Satisfaction at clean seams
How to Calculate How Much Flooring You Need
Start by measuring the room’s length and width in feet and multiply them to get the total square footage you’ll cover.
Use a flooring calculator to add closets, alcoves, and any irregular areas.
Then add 5–10% for material waste depending on cuts and pattern matching.
Add 5–10% extra for waste to cover cuts, pattern matching, and unexpected errors.
Round up to whole cartons and double-check measurements before ordering to avoid shortages or excess.
Where to Start: Best Starting Wall and Orientation Tips
Pick the longest, most visible wall and orient the planks so they run parallel to it—this gives the room a cleaner, more expansive look and minimizes short end cuts at doorways.
Use starting points that respect wall orientation and room layout; plan installation flow, first row, layout strategy, measurement tips, and seam alignment.
- Confident start
- Calm planning
- Smooth progress
- Proud finish
Stagger End Joints for Strength and Appearance
Because staggered end joints lock the planks together visually and structurally, you should offset each row’s seams by at least 6–8 inches (or follow the manufacturer’s minimum) to improve strength and appearance. Use staggering techniques for joint placement and flooring patterns to boost structural integrity, visual appeal, and installation aesthetics.
| Tip | Benefit |
|---|---|
| 6–8″ offset | Strength |
| Random lengths | Natural look |
| Avoid H-patterns | Stability |
| Vary start points | Seam concealment |
| Check alignment | Even finish |
Measuring and Marking the First Row Accurately
Start by measuring any wall irregularities so your first row sits straight and gaps are even.
Transfer those measurements along the length of the room and snap a straight guideline to follow.
Working from that line guarantees your first row sets the layout for the whole floor.
Measure Wall Irregularities
Before you cut the first row, check the wall for bows and irregularities so your planks fit tight and look straight.
Use measuring tools to map wall contours and surface variations. Note leveling issues, then apply adjustment techniques for installation accuracy and measurement precision to avoid installation challenges.
- Feel gaps
- Trace highs/lows
- Record offsets
- Mark cuts
Snap Straight Guideline
Lay out a straight chalk line as your reference so the first row stays perfectly aligned; measure a consistent gap from the wall for the expansion space, snap the line along that distance, and double-check at several points to account for any wall irregularities you recorded.
Then mark plank edges, use a square to keep lines perpendicular, and follow snap installation tips for maintaining alignment as you begin.
How to Click-Lock Pergo Outlast Planks Into Place
Fit each Pergo Outlast plank by angling the tongue into the groove of the previous board and then pressing down until you hear the click—this locks the pieces together and guarantees a snug seam.
Use pre installation tips and plank alignment techniques to keep rows straight and gaps even.
- Relief
- Pride
- Confidence
- Satisfaction
Techniques for Tapping and Securing Tight Seams
Tap each joint firmly but gently to draw the tongue fully into the groove, using a tapping block and hammer or a pull bar on end joints so the seams sit tight without damaging the plank edges.
You’ll use proper tapping techniques: stagger taps, check alignment, and avoid overstriking.
For securing seams, press seams flat, re-tap any gaps, and inspect visually as you progress.
How to Cut Planks Straight With a Utility Knife or Saw
Decide whether a utility knife or a saw fits the cut you need—knife for short snaps, saw for long or angled cuts.
Measure and mark each plank precisely, using a square or straightedge to keep lines true.
Cut steadily along the line to get clean edges and minimize splintering.
Choose Cutting Method
When you’re ready to cut Pergo Outlast planks, pick the method that matches the cut type and your comfort level: a utility knife scores and snaps cleanly for straight rip cuts, while a fine-tooth circular saw, miter saw, or jigsaw gives speed and accuracy for crosscuts and angled pieces.
- Trust cutting techniques that match your skill.
- Choose saw choices wisely for safety.
- Use a utility knife for neat snaps.
- Apply jigsaw tips and circular saw care for cutting accuracy.
Measure And Mark
Now that you’ve picked the right cutting method, you’ll want to measure and mark each plank carefully so your cuts are straight and fit the room.
Measure wall irregularities at several points, transfer those offsets to the plank, and mark straight guidelines with a pencil and ruler.
Double-check measurements before cutting to avoid waste and guarantee tight edges.
Make Clean Cuts
Cut planks cleanly by scoring and snapping with a utility knife for vinyl and laminate, or by cutting with a fine-tooth saw for tougher materials; align your guideline, clamp the plank if possible, and make steady, even passes to avoid jagged edges.
- Feel confident using proper saw types and blade selection.
- Respect safety tips and clean cutting surfaces.
- Use good cleaning techniques and workspace organization.
- Keep tool maintenance current for precise cutting angles.
Cutting Curves and Irregular Shapes Around Obstacles
If you’re fitting Pergo Outlast around pipes, door jambs, or other obstacles, plan and mark each curve before you make any cuts so the pieces fit snugly and look professional.
For curved cuts, trace templates from cardboard, transfer markings to planks, and use a jigsaw or coping saw for careful cuts.
Test-fit, sand edges, and adjust for precise obstacle navigation and clean seams.
How to Fit Planks Around Doorways and Thresholds
Doorways and thresholds are where precision matters most, so measure the opening and plank layout before you start installing to guarantee a clean change.
You’ll mark, cut, and dry-fit planks for tight doorway adjustments, then trim tongues if needed. For smooth threshold adjustments, use reducers or T-molding and test movement.
- Breathe — measure twice.
- Cut carefully.
- Dry-fit patiently.
- Secure confidently.
Installing Planks Near Cabinets and Toe Kicks
After handling doorways and thresholds, move on to cabinets and toe kicks where tight clearances demand the same careful measuring and dry-fitting.
You’ll verify cabinet clearance, plan toe kick installation, and check planks alignment.
Consider space considerations and installation angles, use precise cutting techniques, maintain expansion gaps, and test fit before gluing.
Finish trim hides gaps and completes the look.
How to Handle Narrow Last Rows and Scribing Walls
When the remaining row is too narrow for a full plank, plan your cuts carefully and scribe the planks to the wall so they fit the room’s contours.
Measure twice, transfer the profile to the plank, and cut with a fine-tooth saw for a snug, consistent gap.
You’ll handle narrow rows with patience and precise wall scribing.
- Relief
- Pride
- Calm
- Satisfaction
Making Clean Cuts Around Pipes and Vents
Cutting clean openings for pipes and vents takes a few careful steps: measure the pipe’s center and diameter, mark the plank precisely, and use the right tool—an awl for starter holes and a jigsaw or hole saw for round cuts—to get a neat fit without splintering the surface.
Use precision measuring, proper tool selection, safe cutting techniques, make pipe adjustments and vent modifications as needed, and follow safety precautions.
Transition Strips: When and How to Use Them
You’ll need junction strips whenever your Pergo Outlast meets different flooring types, uneven subfloors, or doorways to allow movement and create a neat finish.
Choose the right type—T-molding for same-height floors, reducer strips for drop-offs, and threshold/overlap pieces for doors or tile—to match the gap and profile.
Install by measuring and cutting the strip to length, securing its track or adhesive per the manufacturer’s instructions, then snapping or sliding the strip into place.
When To Use
Although junction strips might seem optional, you should install them wherever two different floor types meet, where heights differ, or at doorways to protect edges and create a clean, safe passage.
Plan installation timing with project planning: consider seasonal considerations, room preparation, surface assessment, environmental factors, installation readiness, material sourcing, timing flexibility, and project duration.
- You’ll feel relief
- You’ll gain confidence
- You’ll avoid damage
- You’ll add polish
Types Of Strips
When you reach a doorway or meet a different flooring material, pick the right transition strip to protect edges and guarantee a smooth shift in height.
Common types include T-molds for same-height floors, reducers for a higher floor meeting a lower one, and threshold or end-cap strips for doorways and exposed edges.
Choose among transition strip types based on gap, traffic, and aesthetics, noting installation strip benefits like edge protection and neat changes.
Installation Steps
1 simple rule guides change-strip installation: match the strip type to the height difference and traffic, then measure, cut, and secure so the edge stays protected and the change feels seamless.
- Consider subfloor types and moisture control — plan for installation challenges.
- Use DIY tips for clean cuts and flooring aesthetics.
- Weigh cost considerations and warranty information.
- Follow maintenance practices to guarantee flooring longevity.
Installing Reducers and T-Moldings Properly
Most changes are small details that make your Pergo Outlast installation look finished and perform correctly, so you’ll want to fit reducers and T-moldings with care.
For reducer installation and T molding placement, choose threshold strip types matching floor height.
Follow seam alignment tips, respect expansion gap importance, use proper tools for reducers, focus on aesthetic matching, aiding shifts, and apply finishing touches carefully.
How to Finish Door Jambs and Trim Without Gaps
After fitting reducers and T‑moldings, you’ll want door jambs and trim to look just as seamless; proper jamb finishing hides plank edges and keeps gaps from collecting dust.
- Measure and undercut jambs for clean, calm changes.
- Slide planks snugly under for reassuring continuity.
- Use thin shims and adhesive for confident stability.
- Apply paintable caulk for neat, lasting trim gap solutions and polished door jambs finishing.
How to Maintain the Expansion Gap Correctly
Because Pergo Outlast needs room to move, keep the expansion gap clear and consistent around the room so planks can expand and contract without buckling.
You should measure gaps per manufacturer specs, use spacers during installation, and avoid packing debris into the gap.
Proper sealing at thresholds preserves expansion gap importance while preventing swelling—critical for avoiding moisture damage and long-term floor performance.
How to Repair Minor Plank Damage During Installation
If you nick or scratch a Pergo Outlast plank during installation, don’t panic—you can often fix minor damage on the spot with a few simple tools.
Use touch-up markers, filler, and light sanding; reserve plank replacement techniques for deeper gouges.
Follow damage prevention tips moving tools and materials.
- Breathe
- Assess
- Repair
- Replace
Common Installation Mistakes and How to Avoid Them
When you rush, skip prep, or ignore manufacturer guidelines, problems like gaps, buckling, and uneven seams show up fast; taking a few careful steps up front prevents most issues.
You’ll avoid installation pitfalls by preventing common errors: fix improper acclimation, correct inadequate subflooring, double‑check incorrect measurements, stop poor cutting, allow sufficient expansion, address misalignment issues, reduce seam visibility, and prevent tool misuse.
Speed Tips: How to Install Faster Without Cutting Quality
You’ve already cut down mistakes by prepping properly, so now focus on working smarter to save time without sacrificing fit or finish.
Use speed techniques and efficiency hacks: prioritize workflow optimization, tool selections, planning layouts, and material management.
Try these installation shortcuts and time saving strategies to feel confident and relieved:
- Batch cuts
- Pre-mark boards
- Staging packs
- Quick-check seams
How to Work Solo Versus With a Helper Efficiently
If you’re working solo, plan your prep and layout so each board is staged and reachable to avoid back-and-forth trips.
With a helper, split tasks into a fast two-person workflow—one feeds and positions boards while the other locks and taps them in.
Keep communication clear and assign specific roles so you both stay efficient and avoid mistakes.
Solo Prep And Layout
Working solo on Pergo Outlast prep means planning each step so you don’t end up juggling too many pieces at once; set up a clear staging area, pre-cut your starter rows, and keep tools and spacers within arm’s reach so you can move steadily without back-and-forth trips.
Focus on floor preparation and layout planning to avoid delays.
- You’ll feel confident.
- You’ll save time.
- You’ll reduce mistakes.
- You’ll enjoy progress.
Efficient Two-Person Workflow
Divide tasks and communicate clearly so two people move faster and with less fumbling than a solo installer. You’ll use efficient teamwork, task delegation, role assignments, and synchronized efforts to speed installs. Apply workflow optimization, time management, and joint problem solving. Use communication strategies to avoid delays and keep momentum.
| Role | Task | Timing |
|---|---|---|
| Lead | Measurements | Start |
| Helper | Carry panels | Continuous |
| Both | Fit pieces | Finish |
Communication And Task Division
Now that you’ve seen how two people can streamline an install, let’s look at how to communicate and split tasks whether you’re solo or have a helper.
Use clear team roles and communication strategies: task delegation, progress tracking, feedback loops, conflict resolution, motivation techniques, and goal alignment to stay efficient and calm.
- Assign roles
- Share updates
- Give feedback
- Resolve issues
Temperature and Humidity Tips for Long-Term Stability
Because Pergo Outlast reacts to moisture and temperature changes, you’ll want to control indoor conditions during and after installation to prevent gaps, cupping, or buckling.
Use temperature control and humidity management to create ideal conditions—maintain a consistent environment and stable ambient temperature.
Plan seasonal adjustments and consider climate considerations for moisture regulation.
Monitor humidity fluctuations to guarantee long term performance.
How to Transition Pergo Outlast to Other Floor Types
Shifting from Pergo Outlast to another flooring type requires planning for height differences, movement allowances, and matching profiles so seams look intentional and perform well.
Transitioning from Pergo Outlast demands planning for height, movement, and matching profiles for seamless, durable joins.
You’ll manage Pergo changes, floor compatibility, design aesthetics, installation challenges, maintenance tips, flooring durability, flooring styles, aesthetic shifts, color matching, and trim options carefully.
- Feel confident.
- Stay practical.
- Embrace style.
- Avoid regrets.
Cleaning Up Adhesive, Dust, and Debris the Right Way
Start by clearing loose debris and dust with a stiff broom or a shop vacuum fitted with a soft-brush attachment so you don’t scratch the Pergo Outlast finish.
Use gentle adhesive removal techniques—plastic scrapers, adhesive remover wipes, and minimal solvent—to lift residue without damaging planks.
Implement dust management strategies: run HEPA vacuums, tack cloths, and damp mopping to leave a clean, safe surface.
How to Install Thresholds at Sliding Doors and Patios
1 key step when finishing a Pergo Outlast installation at sliding doors or patio entrances is fitting the threshold so it seals, shifts, and accommodates movement without stressing the planks.
You’ll guarantee proper threshold installation, make sliding door adjustments, manage patio changes, and check seam alignment for smooth operation and weather protection.
- Relief — secure but flexible
- Confidence — tight seam alignment
- Ease — smooth sliding door adjustments
- Pride — finished patio changes
Pergo-Approved: Glue vs. Floating Methods
While both glue-down and floating installations can produce a durable Pergo Outlast floor, your choice comes down to subfloor conditions, traffic demands, and whether you want a permanent bond or a removable surface.
You’ll weigh Pergo installation techniques: glue benefits include moisture resistance and secure aesthetics; floating advantages offer easier surface preparation, simpler tool selection, better subfloor compatibility, fewer installation challenges, and practical maintenance tips.
How to Inspect and Test Your Finished Floor for Issues
Now that you’ve chosen and completed either a glue-down or floating Pergo Outlast installation, you’ll want to inspect the finished floor to catch any issues before they worsen.
Perform a careful surface inspection and level assessment, note plank alignment and seam integrity, and run moisture detection.
Record installation feedback to protect long term durability, improve maintenance tips, and preserve visual appeal.
- Look closely for floor issues.
- Check gaps and alignment.
- Test for moisture.
- Note overall appearance.
Post-Install Care for Pergo Outlast
After installation, treat your Pergo Outlast floor proactively to keep it looking and performing its best: wipe up spills promptly, use felt pads under furniture, and follow a gentle cleaning schedule with manufacturer-approved products.
For post-install care, follow cleaning tips and a maintenance schedule, perform routine inspections, practice damage prevention and floor protection, handle stain removal, maintain daily care, make seasonal adjustments, and focus on surface care and product warranty.
Warranty Rules That Affect DIY Installations
Good post-install care helps protect your Pergo Outlast floor and also affects warranty coverage, so it’s important to understand which DIY actions can void or limit your warranty.
You’ll need product registration and follow installation guidelines; know warranty limitations, coverage exclusions, maintenance requirements, and warranty duration.
Learn repair procedures, service options, manufacturer support, and the claims process to protect your investment.
- Missed registration
- Improper install
- DIY repairs
- Neglected care
Troubleshooting Common Post-Installation Problems
After installation, you’ll want to check for common issues like gapping at seams, cupping or buckling, and problems with the click-lock joints.
If you spot gaps or raised edges, act quickly to identify moisture, acclimation, or installation errors.
Addressing these causes early will help you protect your warranty and keep the floor looking right.
Gapping And Seams
If your Pergo Outlast floor develops visible gaps or uneven seams, don’t panic — you can usually fix or minimize them with a few targeted checks:
- Check humidity levels; adjust to recommended range for gapping solutions.
- Inspect seam alignment; tap planks gently to reseat joints.
- Replace damaged threshold pieces causing stress.
- Add weight temporarily to tight seams, then recheck fit and gaps.
Cupping And Buckling
Gaps and misaligned seams can sometimes signal moisture or pressure issues that also cause cupping and buckling, so check those fixes first.
You’ll diagnose cupping causes by evaluating moisture control, humidity effects, surface preparation and leveling techniques. Correct installation errors, guarantee proper plank alignment, provide expansion gaps, and monitor temperature fluctuations.
For buckling solutions, relieve pressure and stabilize subfloor moisture before reinstalling.
Click Lock Issues
1 common post-installation headache is click lock issues, and you’ll usually spot them as noisy seams, loose joints, or planks that won’t stay latched.
Use click lock troubleshooting and plank alignment tips to fix gaps, misfeeds, or damaged tongues. Act quickly to prevent spread.
- Inspect joints
- Realign planks
- Replace damaged pieces
- Secure perimeter
When to Call a Pro: Signs Your Job Needs Expert Help
When your subfloor is uneven, damp, or damaged, don’t try to force Pergo Outlast into place—call a pro.
You should seek expert consultation if persistent flooring challenges, complex room layouts, or hidden moisture appear.
If installation complexity exceeds your skills or the project timeline is tight, hire a professional to avoid costly mistakes and guarantee warranty compliance, proper moisture mitigation, and long-term performance.
Budgeting: Cost Breakdown for a Typical Room Install
A typical 12×12 room will cost you between materials and labor, so plan your budget around three main line items: the Pergo Outlast planks, underlayment and trim, and installation labor (or rental tools if you DIY).
Balance quality and savings with cost effective alternatives and explore flooring financing options if needed.
- Shock: unexpected subfloor fixes
- Relief: shopping sales
- Pride: DIY savings
- Confidence: warranty choices
Time Estimates: How Long Each Installation Stage Takes
Expect a typical 12×12 Pergo Outlast install to take a full day if the subfloor’s in good shape—about 1–2 hours for prep, 3–5 hours for laying planks, and another 1–2 hours for trim and cleanup.
Use time management strategies and installation pacing techniques: set typical project timelines, assess time requirements, schedule breaks effectively, and apply efficiency boosting tips to minimize common delays encountered while optimizing work flow.
Quick Checklist to Finish and Sign Off Your Pergo Outlast Install
Wrap up your Pergo Outlast install with a focused checklist that guarantees every detail’s covered before you sign off.
You’ll feel confident finishing strong: use this installation checklist, perform a final inspection, and confirm warranties, connections, and cleanup.
- Check plank alignment and seams
- Verify trims, connections, and thresholds
- Clean and remove debris
- Document photos, receipts, warranty info
Frequently Asked Questions
Can Pergo Outlast Be Installed Over Radiant Heated Floors?
Yes, you can install Pergo Outlast over radiant heated floors; you’ll follow radiant heat compatibility and installation guidelines, ensuring floor surface temperature limits, proper acclimation, compatible underlayment, and manufacturer-recommended installation procedures to prevent damage.
Will Pets’ Claws Permanently Damage the Pergo Outlast Surface?
I’ve seen a golden retriever sprint across a kitchen like wind; no, pet claw impact won’t usually permanently damage Pergo Outlast—its flooring durability resists scratches, though deep gouges from neglect or large nails can still occur over time.
Are Chemical Cleaners Safe for Pergo Outlast Long-Term Maintenance?
Yes — you can use mild chemical cleaner types like pH-neutral solutions and diluted vinegar sparingly, but avoid harsh solvents; over time harsh cleaners cause long term effects like finish dulling and wear, so test first and rinse.
Can Seams Be Refinished if They Separate Years Later?
Yes — you can repair separated seams; you’ll use seam repair kits or adhesive, grind old filler, and reseal joints. Doing this properly preserves long term durability, and you’ll prevent moisture damage and further separation.
How Does Pergo Outlast Perform in High-Traffic Commercial Settings?
You’ll find Pergo Outlast holds up surprisingly well in high-traffic commercial settings — like a tuxedoed bouncer for floors. It resists wear, preserves design aesthetics, and benefits from proper installation techniques to maximize longevity and appearance.
Conclusion
You’ve got this: with Pergo Outlast, simple steps, smart spacing, and steady skills will save sweat and spend. Crack on confidently—clear the clutter, check the clicks, and cut cleanly; cultivate calm as you click planks into place. If complications creep in, call a pro to prevent pricey problems. Celebrate careful craftsmanship, complete the checklist, and enjoy a durable, delightful floor that’s practical, pretty, and proudly yours.