How to Clean a Lasko Floor Fan (Step-by-Step Deep Cleaning Guide)
You can deep clean a Lasko floor fan to restore airflow and cut dust in about 30–60 minutes by unplugging it, disassembling the grille and blades, washing non-electrical parts in warm soapy water, wiping blades with a damp cloth, and using compressed air and a soft brush on the motor housing while avoiding water. Lubricate moving parts, inspect for damage, then reassemble and test. Keep going to get step-by-step tips, troubleshooting, and maintenance schedules.
Quick Answer Can You Deep Clean a Lasko Floor Fan and How Long It Takes
Yes — you can deep clean a Lasko floor fan by unplugging it, removing the grill and blades, and scrubbing parts with mild soap before reassembling.
Expect about 30–60 minutes for a thorough cleaning, depending on how dirty it is.
Do a deep clean every 3–6 months, or more often if you use the fan a lot or notice performance issues.
One-sentence summary of the process
Quickly: you can deep-clean a Lasko floor fan by unplugging it, disassembling the grill and blades, wiping or washing parts, vacuuming the motor housing, and reassembling—expect about 30–60 minutes depending on how dusty it is.
For a clear one-sentence summary of how to clean a Lasko floor fan, follow that sequence, use mild cleaner for blades, and dry parts thoroughly before reassembly.
Estimated time and frequency for deep cleaning
You can deep-clean a Lasko floor fan, and it usually takes about 30–60 minutes for a single thorough session depending on how dirty the blades and grill are; plan 45 minutes if you’re doing a careful wash, vacuuming the motor housing, and letting parts dry.
Deep-clean every 3–6 months; wipe lightly monthly. Increase frequency if you have pets, allergies, or heavy use.
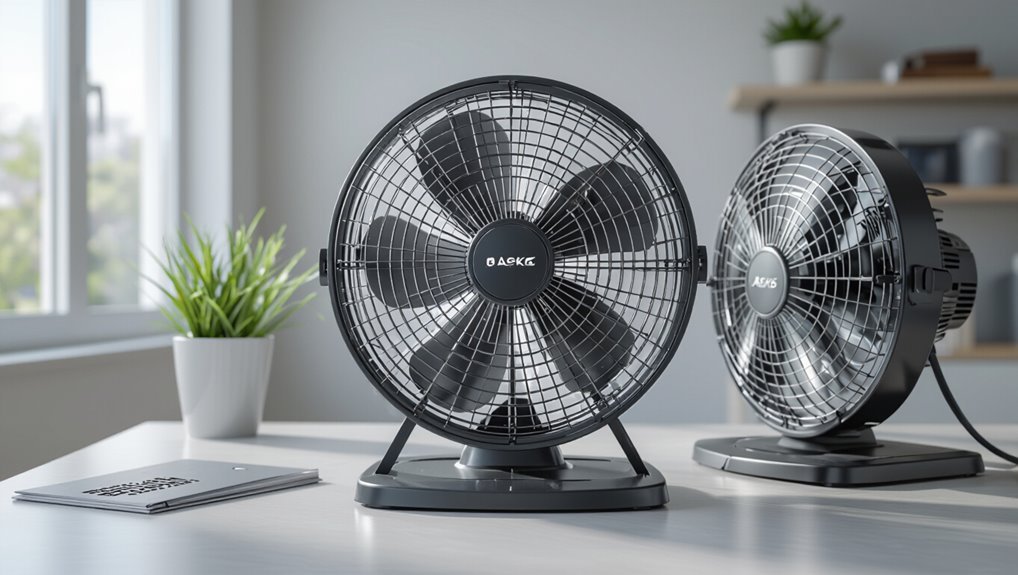
Basic Understanding What a Lasko Floor Fan Is and Why Deep Cleaning Matters
A Lasko floor fan has a motor, blades, guard, controls, and a base or stand that you should know before cleaning.
Dirt and dust can make it noisy, reduce airflow, and spread allergens, so deep cleaning actually restores performance and improves air quality.
Always unplug the fan, let the motor cool, and follow safety steps to avoid injury or electrical hazards.
Key components of a Lasko floor fan
Because a Lasko floor fan has several removable and serviceable parts, knowing each component helps you clean it thoroughly and safely.
Identify the grille, blades, motor housing, oscillation mechanism, base, tilt assembly, and controls.
You’ll remove the grille and blades for washing, wipe the motor housing without soaking, lubricate moving parts per manual, and reassemble securely to guarantee safe operation.
Common problems caused by dirt and dust (noise, airflow loss, allergens)
When dust and grime build up on your Lasko floor fan, it won’t just look filthy—it’ll run louder, push less air, and pump allergens into the room.
Dust on blades and motor creates imbalance and friction, causing noisy operation and reduced airflow. Accumulated particles circulate, worsening allergies and indoor air quality.
Regular deep cleaning restores performance, efficiency, and healthier air.
Safety considerations before cleaning
Before you unplug and unscrew anything, make sure you know what a Lasko floor fan is and why deep cleaning matters: it’s a compact, electrically powered oscillating fan with exposed blades, a guarded grille, and internal motor components that can be damaged or cause injury if handled carelessly.
Always unplug, wait for moving parts to stop, wear gloves and eye protection, avoid water near the motor, and follow the manual.
Tools and Supplies You’ll Need
Before you start, gather a few basic cleaning tools like soft brushes, microfiber cloths, and a can of compressed air to remove dust from the grill and blades.
You’ll also want mild detergent, white vinegar, and a small bottle of lubricating oil for the motor shaft and moving parts.
If you plan on more thorough maintenance, keep a set of screwdrivers and a multimeter handy for safe disassembly and quick electrical checks.
Cleaning tools (brushes, cloths, compressed air)
Gather a few basic tools—soft-bristle brush, microfiber cloths, and a can of compressed air—to make the cleaning quick and effective.
Use each tool precisely: remove loose dust, blow dust from motor vents, and wipe blades gently.
Prioritize soft contact to avoid scratches.
- Soft-bristle brush
- Microfiber cloths
- Compressed air can
Cleaning solutions and supplies (mild detergent, vinegar, lubricating oil)
You’ll need just a few gentle, common supplies to clean a Lasko floor fan safely: a mild dish detergent diluted in warm water for sticky grime, white vinegar for mineral buildup and deodorizing, and a light lubricating oil (like 3-in-1 or sewing-machine oil) for the motor shaft and oscillation points—use only a drop or two.
- Mild detergent solution
- White vinegar (diluted)
- Light lubricating oil
Optional tools for thorough maintenance (screwdrivers, multimeter)
If you want to go beyond basic cleaning, a few simple tools make maintenance easier and safer: a set of screwdrivers (flat and Phillips) for accessing the grill and motor housing, needle-nose pliers for pulling small clips or wires, and a small adjustable wrench for tight nuts.
- Multimeter — check wiring and continuity.
- Small brushes — clean crevices.
- Drop cloth — protect surfaces.
Step-by-Step Deep Cleaning Guide
Before you start, unplug the fan, clear a well-lit workspace, and take photos or notes so you can reassemble parts correctly.
First disassemble the front grill, blades, rear grill, and guard clips, then soak and scrub the grills while you wipe and degrease the blades to remove grime.
Finally, brush and use compressed air on the motor housing and internal parts—avoid getting water on electrical components.
Preparation: unplugging, workspace setup, and documenting assembly
Since safety comes first, unplug the fan and move it to a well-lit, flat workspace with a towel or drop cloth underneath to catch dust and parts.
Inspect the cord, controls, and fasteners. Take photos from multiple angles so reassembly’s easy.
Then:
- Clear space and gather tools.
- Lay parts order and photos nearby.
- Keep screws in labeled containers.
Step 1 Disassemble the fan safely (front grill, blades, rear grill, guard clips)
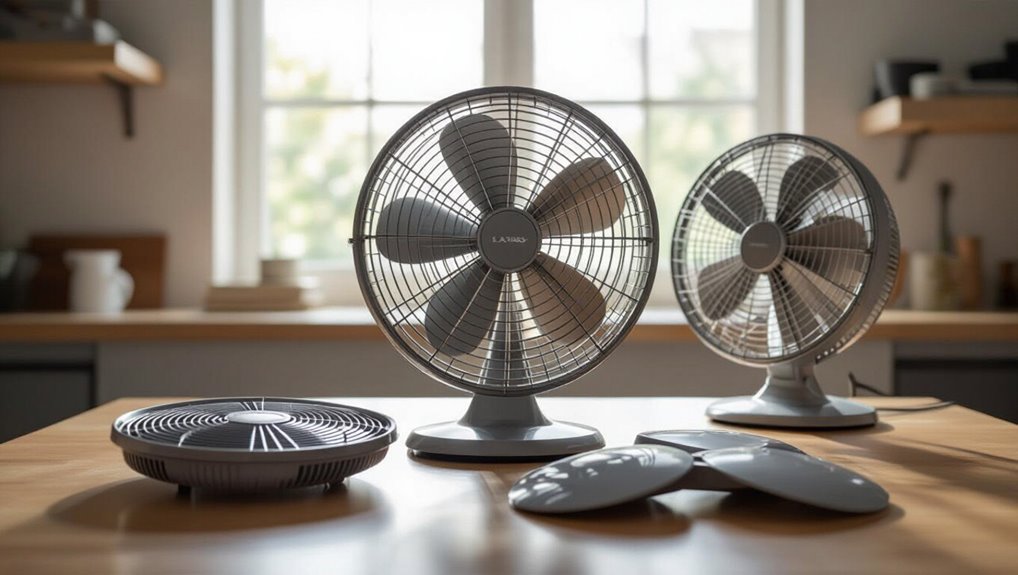
When you’re ready to take the fan apart, work methodically and keep the photos and labeled containers within reach: unplug the fan, tilt it forward, and remove guard clips or screws.
Lift off the front grill, slide off the blades (note their orientation), then unfasten the rear grill.
Store small parts in labeled containers and photos so reassembly is straightforward and safe.
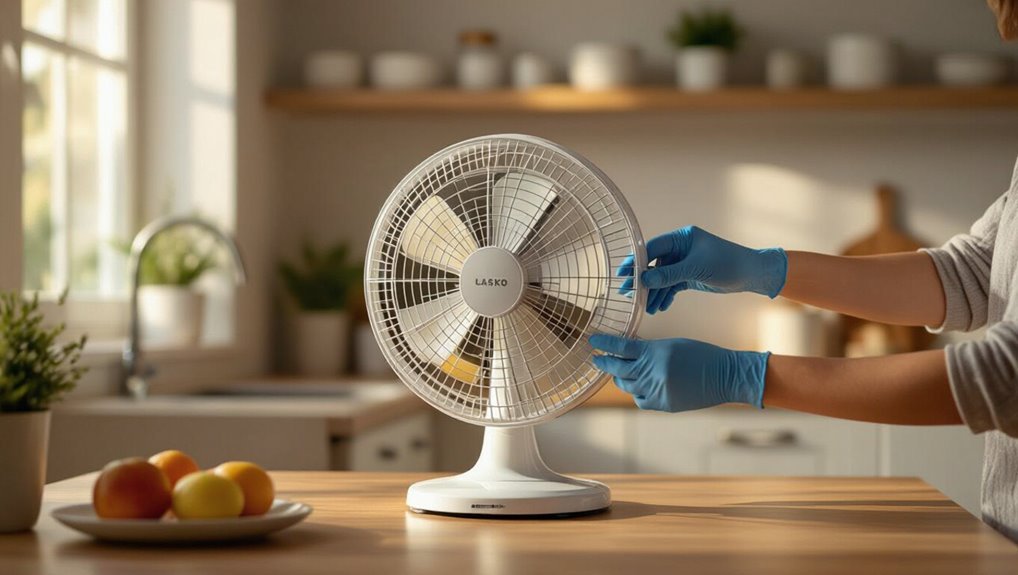
Step 2 Clean the grills and guards (soaking, scrubbing, drying)
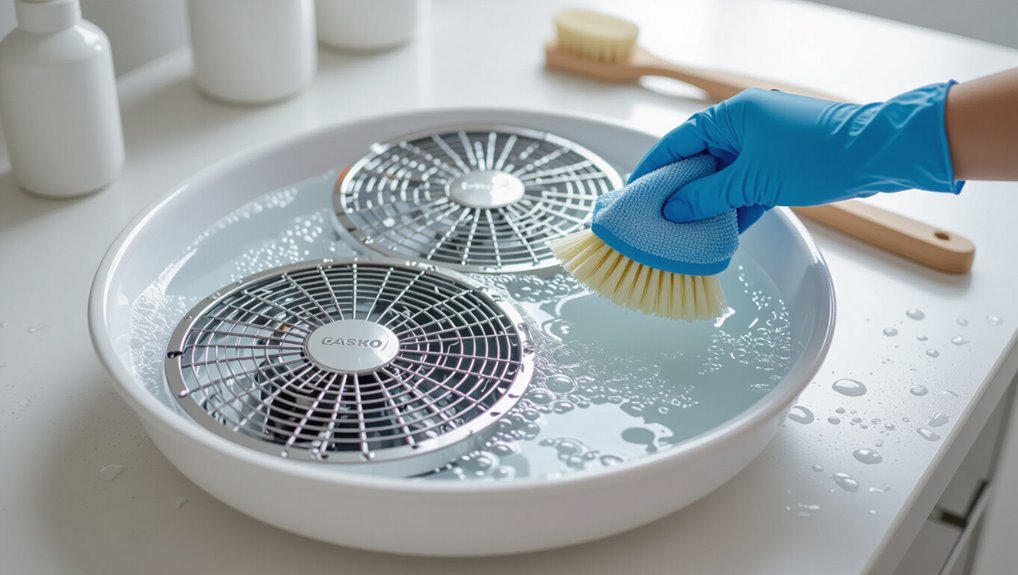
Soak the grills and guards in warm, soapy water to loosen dust and grime, then scrub them with a soft brush or sponge until the crevices are clean.
Rinse thoroughly to remove soap, tapping out excess water.
Dry completely with a lint-free cloth or air-dry on a towel to prevent rust.
Reinspect for trapped debris before reassembling the fan.
Step 3 Clean the blades (wipe-down, degreasing, stubborn grime removal)
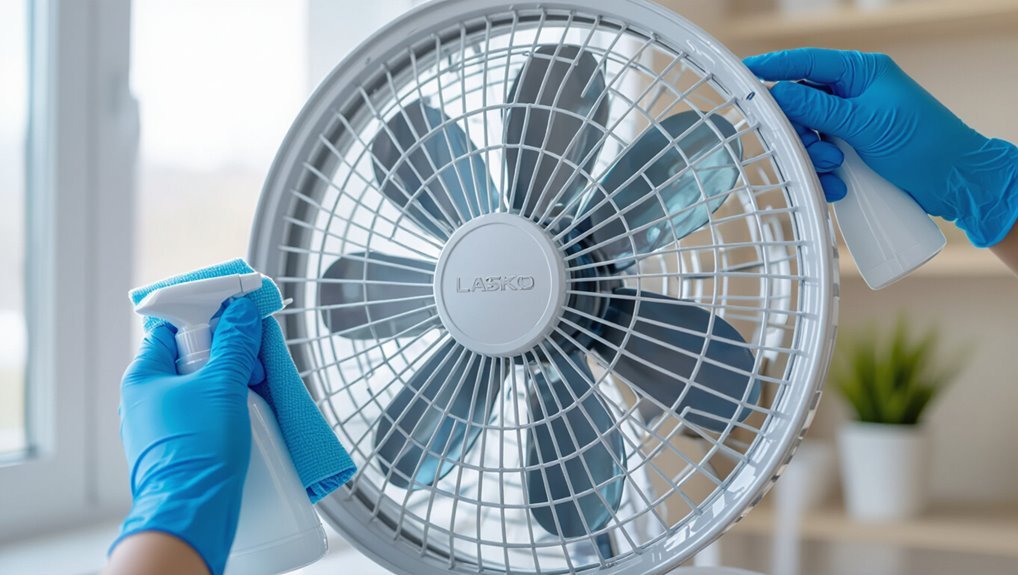
Start by wiping each blade with a damp microfiber cloth to remove loose dust.
Then apply a mild degreaser or dish soap solution to cut through oily buildup; let it sit a minute before scrubbing gently with a soft brush or non-abrasive pad.
Rinse with a damp cloth, tackle stubborn grime with a paste of baking soda and water, then dry thoroughly before reassembly.
Step 4 Clean the motor housing and internal parts (brushing, compressed air, avoid water)
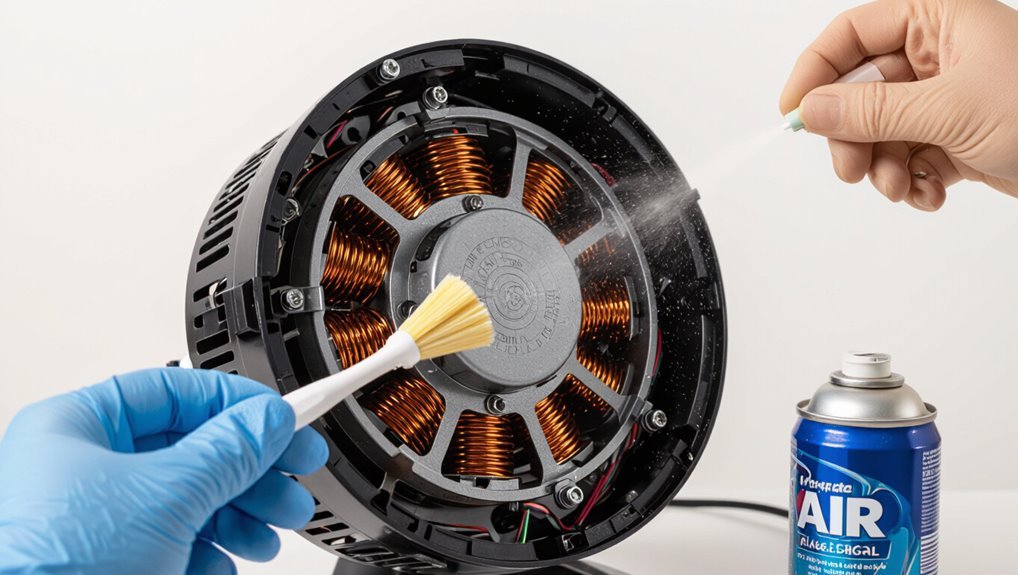
Carefully brush away dust and debris from the motor housing and exposed internals, using a soft-bristled brush or small paintbrush to loosen particles while avoiding contact with wiring and delicate components.
Follow up with short bursts of compressed air held a few inches away to dislodge trapped dust, and never use liquid cleaners or direct water on the motor.
Afterward, inspect for loose screws, frayed wires, or clogged vents and clear remaining dust with gentle air bursts, keeping tools nonconductive and hands dry.
Step 5 Lubricate moving parts and check bearings (what oil to use, how much)
Lubricate the fan’s moving parts and check the bearings to restore smooth operation and prevent wear—use a few drops of a light machine oil (3-in-1 or sewing machine oil) on pivot points, the motor shaft, and bearing surfaces, avoiding heavy greases that attract dust.
- Apply 2–3 drops per pivot or bearing.
- Spin blades to distribute oil.
- Wipe excess to prevent buildup.
Step 6 Reassemble the fan correctly and test operation
With the blades, grille, and controls cleaned and a few drops of light oil applied to the pivot points and bearings, it’s time to put the fan back together and confirm it runs right.
Align the blade hub, secure fasteners snugly, reattach the grille clips or screws, reconnect any electrical plugs, and tighten the guard evenly.
Plug in, power on, and verify smooth rotation.
Step 7 Final checks for wobble, noise, and airflow performance
Now run the fan at each speed and watch for any wobble, listen for unusual noises, and check that airflow feels even across the grille; this quick test tells you if your reassembly and cleaning fixed the issues or if you need further adjustments.
If you detect wobble, tighten mounting screws and realign the blade.
If noise persists, inspect bearings and motor mount; verify the guard is snug.
Troubleshooting Common Problems During Cleaning
If your fan’s still noisy after cleaning, check for loose screws, unbalanced blades, or hardened grease and we’ll cover simple fixes.
If it won’t start after reassembly, you’ll want to inspect electrical connections, try a reset, and test the power supply.
For persistent wobble, you’ll learn balancing techniques and how to inspect blades for damage or warping.
Fan still noisy after cleaning causes and fixes
Even after a thorough cleaning, your Lasko floor fan can stay noisy because worn parts, dried lubrication, or loose fittings weren’t fixed during the service.
Diagnosing which issue is causing the noise will help you choose the right repair. Check for loose screws, imbalanced blades, or bent guards.
Lubricate the motor shaft with light oil, tighten fittings, replace worn bearings or bushings, and test.
Fan won’t start after reassembly electrical checks and reset tips
When the fan won’t start after you’ve put it back together, focus on simple electrical checks and reset steps before assuming a major fault; these quick diagnostics often identify loose connections, a tripped thermal cutout, or a misplaced safety switch that’s preventing power.
Unplug, inspect the cord, plug into a known working outlet, check internal wiring and connectors, verify blade guard interlock aligns, and reset any thermal or circuit breakers.
Persistent wobble balancing techniques and blade inspection
Start by checking the blades and their mounting hardware—loosened screws, a bent blade, or accumulated debris are the usual culprits of a persistent wobble.
Tighten screws, straighten or replace warped blades, and clean blade edges.
Use a balancing kit or tape small weights to the blade hub to fine-tune balance.
Reassemble and test at low speed, repeating adjustments until wobble stops.
Mistakes to Avoid When Cleaning a Lasko Floor Fan
Don’t use harsh chemicals or soak the motor, since that can damage wiring and coatings.
Don’t over-lubricate or use the wrong lubricant, because that attracts dust and harms bearings.
And don’t skip safety steps or rush reassembly—missing screws or misaligned parts can create hazards or reduce performance.
Using harsh chemicals or soaking the motor
Although it might seem like a quick fix, you should never use harsh chemicals or soak the fan’s motor—doing so can strip protective coatings, corrode components, and create electrical hazards.
You should instead wipe and spot-clean, unplug first, and keep liquids away from the motor housing.
- Unplug before cleaning.
- Use mild detergent.
- Avoid direct sprays or submersion.
Over-lubricating or using improper lubricants
Be careful not to over-lubricate or use the wrong oil on your Lasko floor fan, since too much or improper lubricant can attract dust, gum up bearings, and shorten the motor’s life.
Use a lightweight, non-detergent electric motor oil sparingly at designated points. Wipe excess immediately, avoid household oils (WD-40, cooking oil), and follow the manual’s lubricant recommendations to keep performance smooth.
Improper reassembly and missing safety steps
When you put the fan back together, do it deliberately and follow the manual—improper reassembly or skipping safety steps can leave guards loose, blades unbalanced, or wiring exposed, creating noise, poor airflow, or shock and fire hazards.
Always disconnect power, tighten fasteners to spec, align blades and guards, replace worn screws or clamps, and test operation before regular use to guarantee safety and balance.
Preventive Maintenance and Best Practices
Keep a simple weekly and monthly checklist—quick dusting, wipe-down of blades and grill, and a cord inspection—to prevent buildup before it becomes a problem.
Schedule a seasonal deep clean and proper storage when you’re not using the fan, like disassembling the grill, oiling moving parts if recommended, and storing it in a dry place.
These small habits will extend your fan’s lifespan with minimal effort and fewer repairs.
Simple weekly and monthly cleaning checklist
1 simple checklist can keep your Lasko floor fan running efficiently and extend its lifespan:
weekly dusting of the grille and blades, a monthly deeper wipe-down with a damp cloth and mild detergent, and a quick inspection of the power cord and oscillation mechanism for wear or loose parts.
- Dust grille and blades weekly.
- Wipe housing and base monthly.
- Check cord, plug, and oscillation.
Seasonal deep-clean schedule and storage tips
For each change of season, schedule a thorough deep-clean and proper storage routine for your Lasko floor fan to prevent dust buildup, protect mechanical parts, and keep it running quietly.
Disassemble, vacuum, wipe blades and grill, lubricate pivot points if needed, and let parts dry fully.
Store in a cool, dry spot covered with a breathable cloth or bag to block dust without trapping moisture.
How to extend fan lifespan with minimal effort
A few simple habits will noticeably extend your Lasko floor fan’s lifespan with very little time or effort.
Wipe blades and grille weekly, vacuum vents monthly, and tighten loose screws.
Keep it on a stable surface, avoid moisture and direct sunlight, and unplug during storms.
Lubricate the motor shaft yearly if recommended.
Store in a dust-free cover when not in use.
Quick Comparison DIY Cleaning vs. Professional Service
While you can tackle basic Lasko floor fan cleaning yourself with a few tools and 30–60 minutes, hiring a professional gives you deeper cleaning, inspection, and peace of mind—so weigh cost, time, and the fan’s condition when deciding which route to take.
| Option | Benefit | Drawback |
|---|---|---|
| DIY | Immediate, low-cost | Limited depth |
| Pro | Thorough, inspected | Higher cost |
| Hybrid | Targeted parts | Scheduling needed |
Cost and Time Estimates
You can keep supply costs low—basic cleaners, a soft brush, and a replacement blade or grill clip if needed usually run $10–30.
A basic clean takes about 20–30 minutes, while a deep clean with motor access and part replacement can take 1–2 hours.
We’ll compare those estimates so you can decide whether to DIY or hire professional help.
Typical cost of supplies and optional replacement parts
Expect to spend around $10–$40 on basic cleaning supplies and another $15–$60 if you need replacement parts; this keeps most Lasko fan maintenance affordable and quick.
You’ll likely buy microfiber cloths, mild detergent, compressed air, and a soft brush.
Replacement parts like grills, blades, or motor mounts vary by model, so check your fan’s part number before ordering.
Time breakdown: basic clean vs. deep clean
One quick basic clean takes about 15–30 minutes and gets most dust and surface grime off the grill and blades, while a deep clean—including disassembly, degreasing, and inspecting or replacing parts—runs 60–120 minutes depending on your skill and the model.
Plan for 15–30 minutes cleanup and drying after either job. Expect longer if parts need repair or ordering.
Frequently Asked Questions
You probably have quick questions like how often to deep clean your Lasko, whether you can run water on the blades and grills, and if it’s safe to lubricate the motor yourself.
You might also wonder where to get replacement parts and whether cleaning will boost airflow and energy efficiency.
Below are clear, practical answers to each.
How often should I deep clean my Lasko floor fan?
How often should you deep clean your Lasko floor fan depends on how you use it and the environment it’s in; generally, plan a thorough deep clean every 3–6 months, and more often (monthly) if you run the fan constantly, have pets, or live in a dusty area.
Also wipe down grills and base every 2–4 weeks, check filters or removable parts monthly, and adjust frequency as needed.
Can I run water on the fan blades and grills?
If you clean your fan every few months or more often in dusty conditions, you’ll probably wonder whether it’s safe to run water over the blades and grills.
You can rinse non‑electrical parts with mild soap and water after unplugging and removing the grill.
Dry thoroughly before reassembly to prevent rust or electrical hazards.
Never wet the motor, wiring, or controls.
Is it safe to lubricate the motor myself?
Wondering whether you can safely lubricate the motor yourself? You can if the model has accessible oil ports and you follow the manual: unplug the fan, use recommended lightweight machine oil, apply a drop or two to bearings, and avoid overfilling.
If the motor’s sealed, damaged, or you’re unsure, don’t attempt it—consult a technician to prevent voiding warranties or causing harm.
Where can I get replacement parts for a Lasko fan?
Where can you find replacement parts for a Lasko fan? You can order parts directly from Lasko’s official website or contact their customer service for model-specific components.
Check authorized retailers like Amazon, Home Depot, or Lowe’s for compatible grills, blades, and switches.
For discontinued models, try eBay, appliance salvage shops, or fan repair specialists to locate hard-to-find parts.
Will cleaning improve airflow and energy efficiency?
Because dust and grime restrict blade movement and clog the grill, cleaning your Lasko floor fan will usually restore airflow and can reduce the motor’s workload.
You’ll notice stronger, more consistent breeze and your fan may use less electricity because the motor won’t struggle.
Regular cleaning prevents overheating and extends lifespan, so schedule simple maintenance every few weeks during heavy use.