How to Tile Like a Pro: A Beginner’s Guide to Ceramic Tile
You can tile like a pro by prepping thoroughly, choosing the right thinset and grout, and mastering layout and cutting basics. Measure, level, and repair the substrate first, then dry-fit tiles to set a centered baseline. Use a proper trowel, spacers, and a wet saw for clean cuts, grout carefully, and allow full cure times. Wear safety gear and inspect grout regularly. Keep going and you’ll pick up pro tips for complex patterns, waterproofing, and finishing.
How to Tile Like a Pro and Overview
You’ll get a quick answer on when to DIY and when to hire a pro, plus what parts of tiling this guide covers and the skill level you’ll need.
You’ll also see estimated time, cost ranges, and the basic tools required at a glance.
Use this overview to decide if you’re ready to tackle the job or should call in a pro.
One-paragraph quick answer: When to DIY vs hire a pro
If you’re comfortable with basic measuring, cutting, and grout cleanup and the job is limited to a single wall, floor, or small backsplash, DIY can save money and give you control;
hire a pro when the project involves complex patterns, uneven substrates, waterproofing a shower or wet area, or if tight timelines and warranty concerns matter.
You’ll learn how to ceramic tile basics, but call a pro for risky or large jobs.
What this guide covers and expected skill level
Deciding whether to DIY or hire a pro sets the stage for what this guide covers and the skills you’ll need: practical how-to steps for preparing surfaces, cutting and setting tile, grouting and sealing, and troubleshooting common problems.
You’ll also find tips on tools, materials, and safety. You’ll learn basics, where beginners can handle jobs, and when to call a pro.
- Step-by-step techniques
- Skill checkpoints
- Common pitfalls
Estimated time, cost range, and required tools at a glance
Because every project varies with size and complexity, expect time and cost to land within a range rather than a fixed number: you’ll spend 4–16 hours for a small room, $200–$1,200 depending on tiles, and basic to advanced tools. Stay patient; neat work pays off.
| Item | Feel |
|---|---|
| Time: 4–16 hrs | Anticipation |
| Cost: $200–$1,200 | Caution |
| Tools: trowel, spacers, cutter | Confidence |
| Skill: beginner–intermediate | Pride |
Basic Understanding Ceramic Tile Essentials
You’ll start by learning what ceramic tile actually is—its main types, common sizes, and the finishes you’ll see.
Then you’ll look at where each tile performs best, from floors and walls to backsplashes and wet areas.
Finally, you’ll get familiar with the key materials and terms every tiler uses so you can read plans and pick the right products.
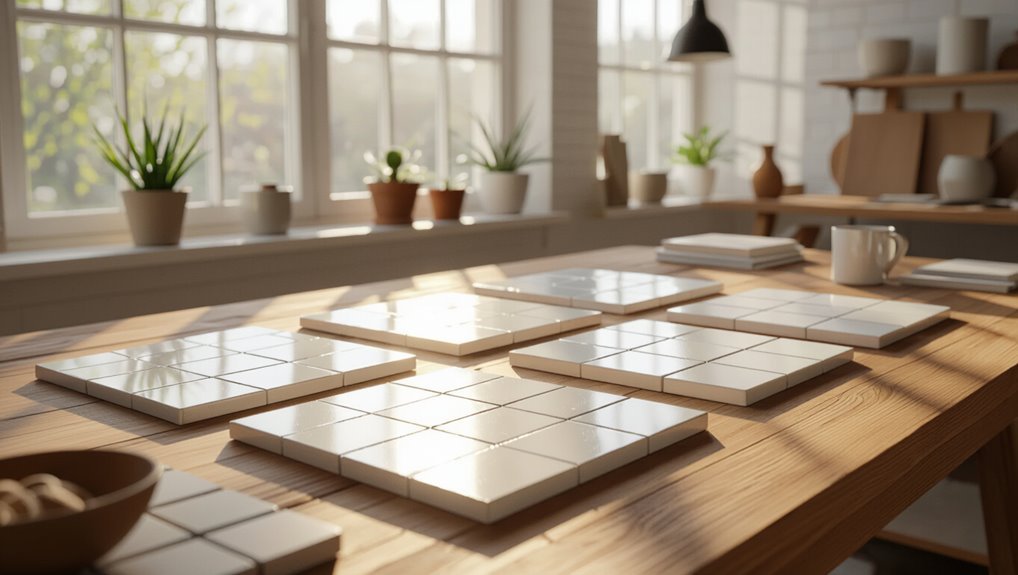
What is ceramic tile: types, sizes, and finishes
Ceramic tile is a durable, fired clay product available in many types, sizes, and finishes. Understanding these basics helps you choose the right tile for each room and task.
You’ll learn material differences, common dimensions, and finish effects so you can plan and buy confidently.
- Types: glazed, porcelain, quarry
- Sizes: mosaic to large-format
- Finishes: matte, gloss, textured
Where ceramic tile is best used (floors, walls, backsplashes, wet areas)
Think of tile as the go-to surface when you need durability, moisture resistance, and easy maintenance.
Use ceramic on floors for high-traffic rooms, on walls for clean, durable finishes, and as backsplashes to protect and style kitchens.
Choose glazed, slip-resistant options for showers and wet areas.
Match size and grout choice to function, not just appearance, for lasting results.
Key materials and terminology every tiler should know
Tiles and tools go hand in hand, so before you start a project get familiar with the essentials: tile types (glazed, unglazed, porcelain), sizes and edge profiles, common substrates, mortars and thinsets, grouts, sealers, spacers, and the basic tools like trowels, cutters, and wet saws.
- Choose tile and mortar by location.
- Match grout type to joint width and maintenance.
- Use proper substrate prep and waterproofing.
Planning Your Tile Project Preparation and Design
Before you pick a tile, measure the room, check the substrate and slope, and note any structural or waterproofing issues that affect wet areas.
Choose a layout—straight, staggered, herringbone, or mosaic—that complements the space and helps minimize cuts.
Then calculate materials with a waste allowance and verify permits or code requirements so you can order everything correctly.
Assessing the space: measurements, substrate condition, and slope
A careful assessment of your space sets the foundation for a successful tiling job: measure length, width, and any alcoves or niches, check the substrate for cracks, unevenness, or moisture, and verify floor or drain slopes so water will flow where you intend.
Note changes, elevation shifts, and subfloor type; document measurements, mark problem areas, and plan necessary repairs or leveling before ordering materials.
Choosing tile layout and pattern (straight, staggered, herringbone, mosaic)
Pick the layout that fits your space and style—straight for clean lines, staggered for forgiving joins, herringbone for visual movement, or mosaic for texture and detail.
Consider room size, focal points, and traffic flow. Lay out tiles dry to test alignment, adjust grout line widths for scale, and choose patterns that complement fixtures.
Keep cuts minimal and symmetry intentional.
Calculating materials, waste allowance, and ordering tips
Estimating tile quantities and waste is the practical step that turns your layout into a shopping list, so measure carefully and do the math before you order.
Calculate area, add 10–15% waste (corners, cuts, breakage), and round up to full boxes. Order extra for matching dye lots and future repairs.
| Item | Recommendation |
|---|---|
| Area | Measure in sq ft |
| Waste | 10–15% |
| Ordering | Round up boxes |
Permits, building codes, and waterproofing requirements for wet areas
Because wet areas pose safety and durability risks, you’ll need to check local building codes and pull any required permits before you start tiling; doing so guarantees your waterproofing meets standards and prevents costly rework or failed inspections.
Review code for membrane types, shower pan slopes, vapor barriers, and drain placement.
Hire licensed contractors when required, keep documentation, and schedule inspections timely to avoid delays.
Tools, Materials, and Safety
Now you’ll get into the practical stuff: the essential tools you’ll need (and budget-friendly alternatives), which adhesives and grout types work best for different surfaces, and the mortar or thinset choices for durable bonds.
I’ll also cover the safety gear—gloves, eye protection, masks—and simple best practices to keep you safe. Knowing the right materials and precautions up front will save time and prevent costly mistakes.
Essential tools list and alternatives
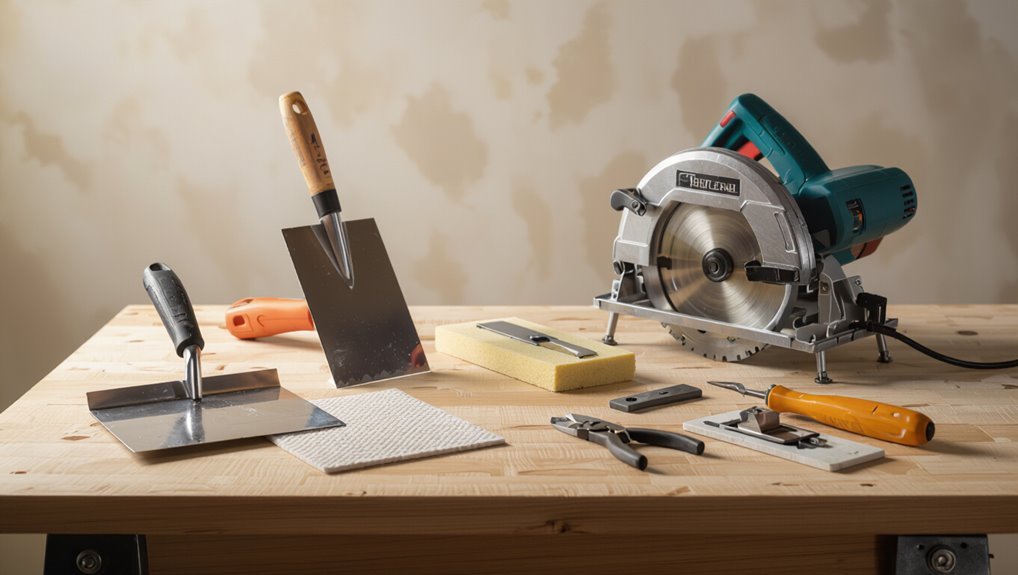
Before you lay a single tile, gather the right tools so your work stays accurate, efficient, and safe.
You’ll need basic gear and smart alternatives to keep costs down without sacrificing results. Prioritize measuring, cutting, leveling, and protection.
- Tile cutter or wet saw (or scoring and snapping tool)
- Notched trowel (or margin trowel for small spots)
- Tile spacers, level system, knee pads
Mortar, thinset, adhesives, grout types and when to use each
Choose the right mortar or adhesive and you’ll avoid failures and rework down the line. Use thinset (cement-based) for porcelain and floor tiles, mastic for dry walls and backsplashes, and epoxy grout for high-moisture or stain-prone areas. Match product to substrate and tile type; follow pot life and cure times.
| Product | Best use |
|---|---|
| Thinset | Floors, wet areas |
| Mastic | Walls, dry areas |
| Epoxy grout | Moisture, stains |
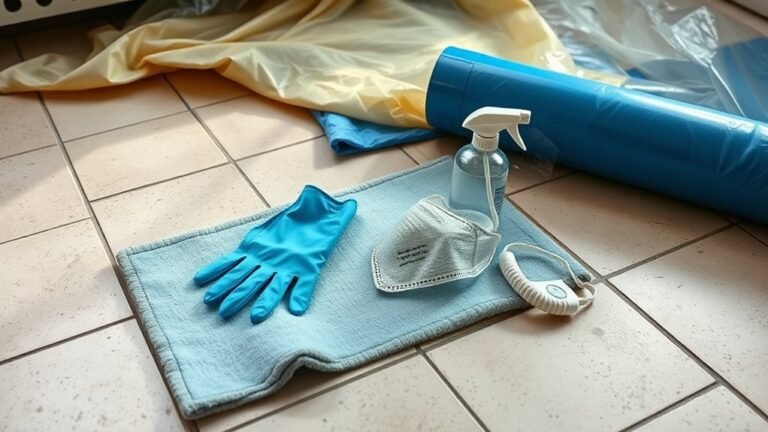
Safety equipment and best practices
1 essential rule for safe tiling is to respect both your tools and your body: wear eye protection, a dust mask or respirator, hearing protection, gloves, knee pads, and sturdy footwear.
Make sure your tools—wet saws, grinders, trowels, and mixers—are in good repair and used with their guards and correct blades or discs.
Plan lifts, secure workpieces, ventilate, clean spills, follow manufacturer instructions, and take breaks.
Step-by-Step Tiling Process
You’ll start by prepping the substrate—clean, level, and install backerboard where needed.
Then you’ll lay out and dry-fit tiles, snapping guide lines and reference points before mixing the thinset to the proper consistency.
Finally, you’ll set tiles with correct trowel notching and spacing, beat them in for alignment, and make cuts with the right tools for edges and openings.
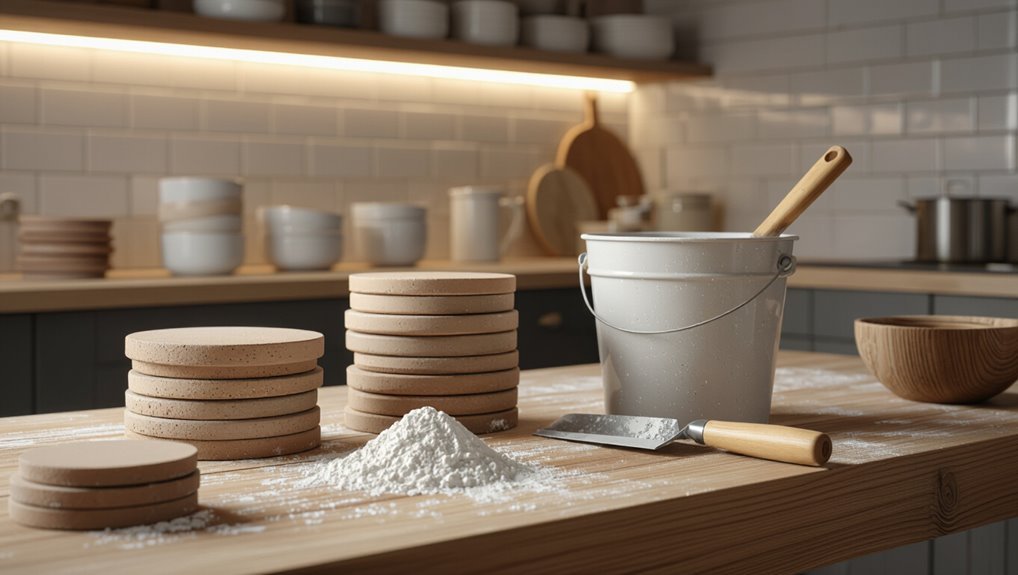
Step 1 Prepare the substrate: cleaning, leveling, and backerboard installation
Before you lay a single tile, get the substrate spotless, flat, and stable—clean away dust, grease, and loose material.
Fix dips and bumps with leveling compound, and install a properly fastened cement backerboard where needed so your tile has a firm, even base that won’t crack or flex.
Check for moisture, secure seams with tape and thinset, and follow manufacturer curing times before tiling.
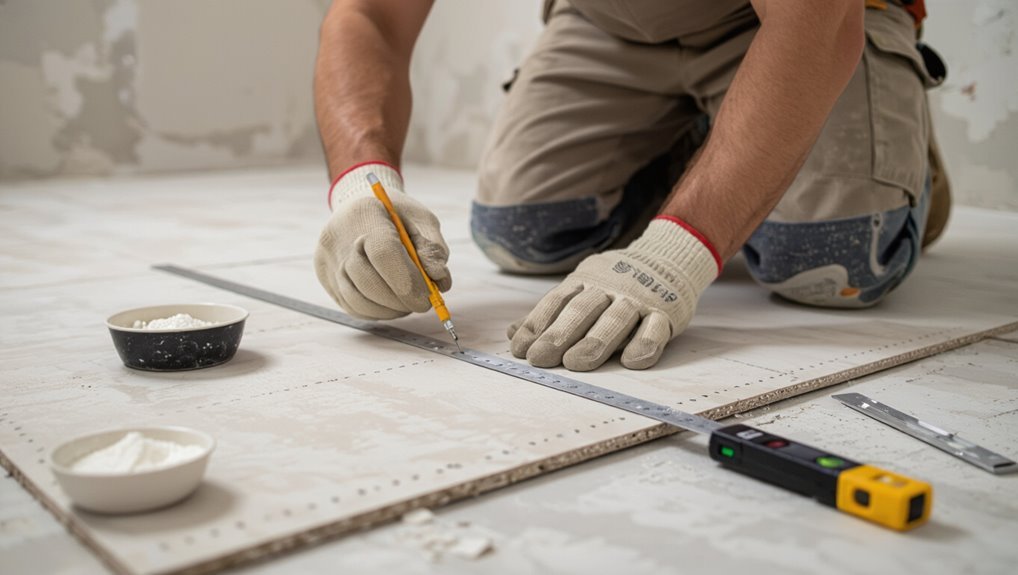
Step 2 Layout and dry-fitting tiles; snapping guide lines and reference points
Start by dry-fitting tiles across the room to establish your pattern and identify cuts. Then snap a set of straight reference lines from which you’ll work.
Work outward from a centered baseline or a dominant wall, spacing tiles with consistent spacers.
Mark key reference points, transfer cuts, and test connections at doorways and fixtures so your final layout is balanced and looks intentional.
Step 3 Mixing and applying thinset; trowel size and notch patterns
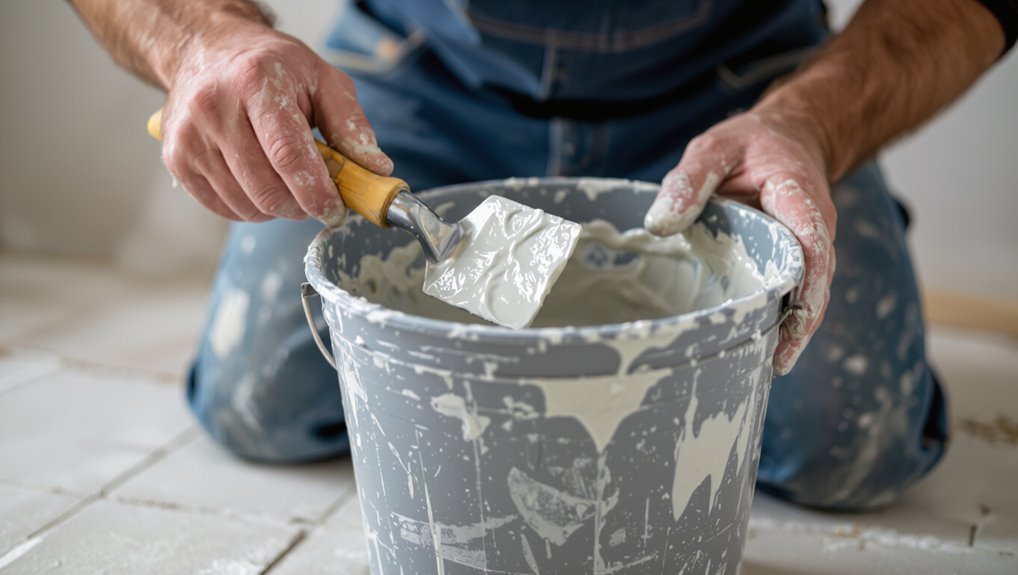
With your layout set and cuts confirmed, it’s time to mix and apply the thinset so tiles bond correctly and sit flat.
Mix to a peanut-butter consistency, slake per manufacturer instructions, and remix.
Use a trowel sized for tile size—typically 1/4″ for small, 1/2″ for larger tiles—and comb thinset with consistent notch pattern.
Work in manageable sections; remove ridges before laying tiles.
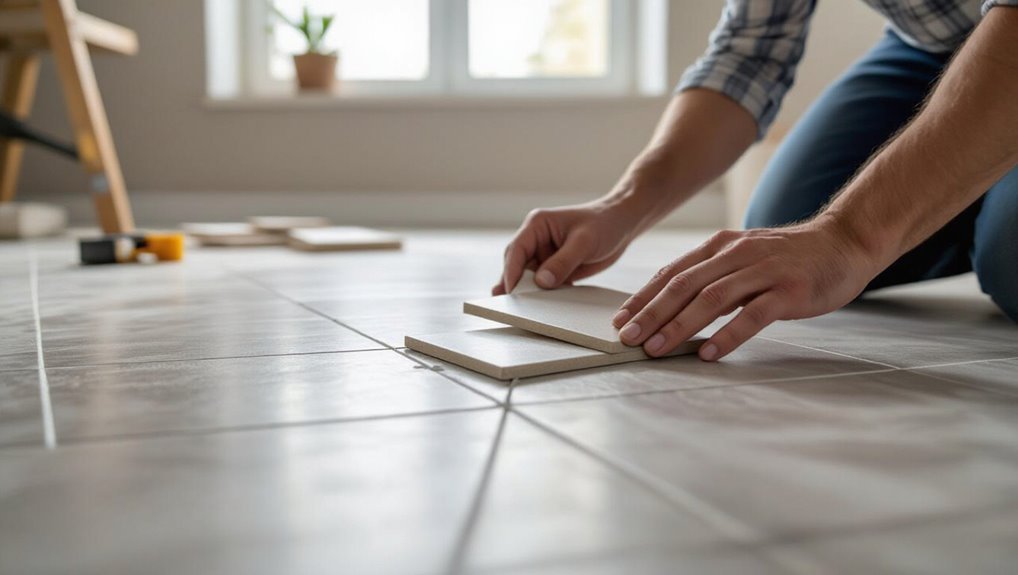
Step 4 Laying tiles: spacing, beating-in, and maintaining straight lines
Lay each tile deliberately, placing spacers for consistent grout lines. Then beat them in gently with a rubber mallet or tapping block to seat them into the thinset.
Check alignment using a straightedge or chalk line as you go, adjusting with small taps. Maintain level across the field, remove excess thinset from joints, and inspect spacing frequently to keep rows straight and even.
Step 5 Cutting tiles: snap cutters, wet saws, and specialty cuts
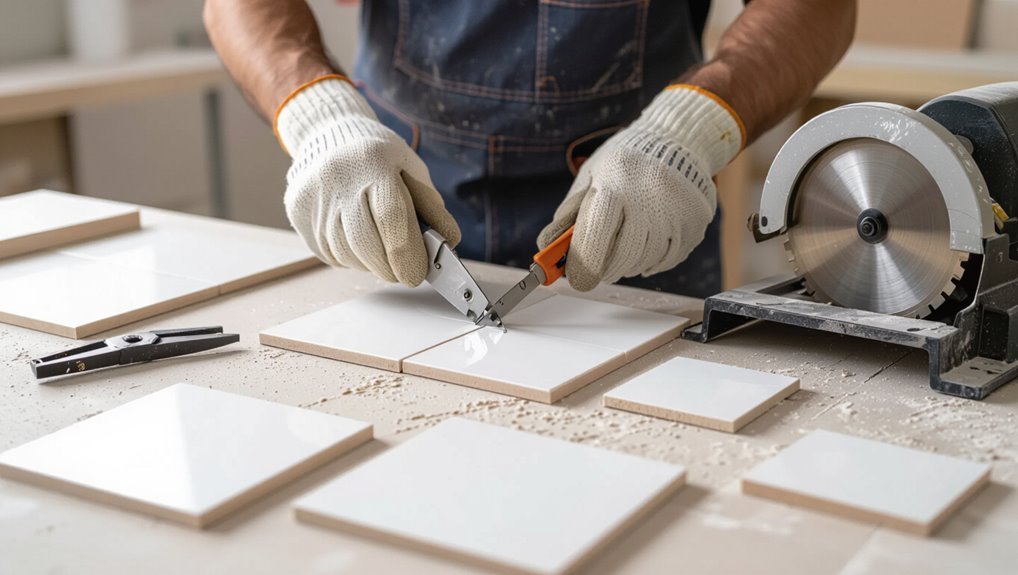
Cutting tiles accurately keeps your layout clean and professional, and you’ll choose the tool based on material, cut type, and how much dust you can tolerate.
Use a snap cutter for straight ceramic cuts, a wet saw for porcelain or intricate work, and nippers or a grinder for notches and curves.
Measure twice, score once, wear eye and ear protection, and work slowly.
Step 6 Allowing proper curing time before grouting
Let the thinset fully cure before you grout—rushing this step can trap moisture, weaken the bond, and cause grout to crack or discolor.
Check manufacturer cure times (usually 24–72 hours), keep tiles undisturbed, and protect the area from traffic, moisture, and temperature swings.
Verify firm attachment by gently testing joints; if any movement exists, wait longer before proceeding.
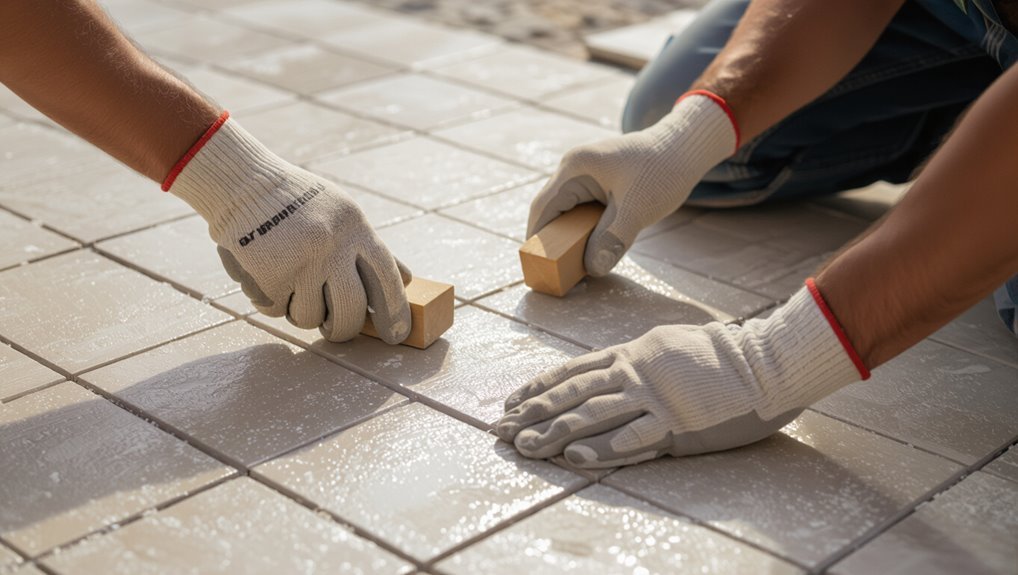
Step 7 Grouting: mixing, application, cleaning, and sealant use
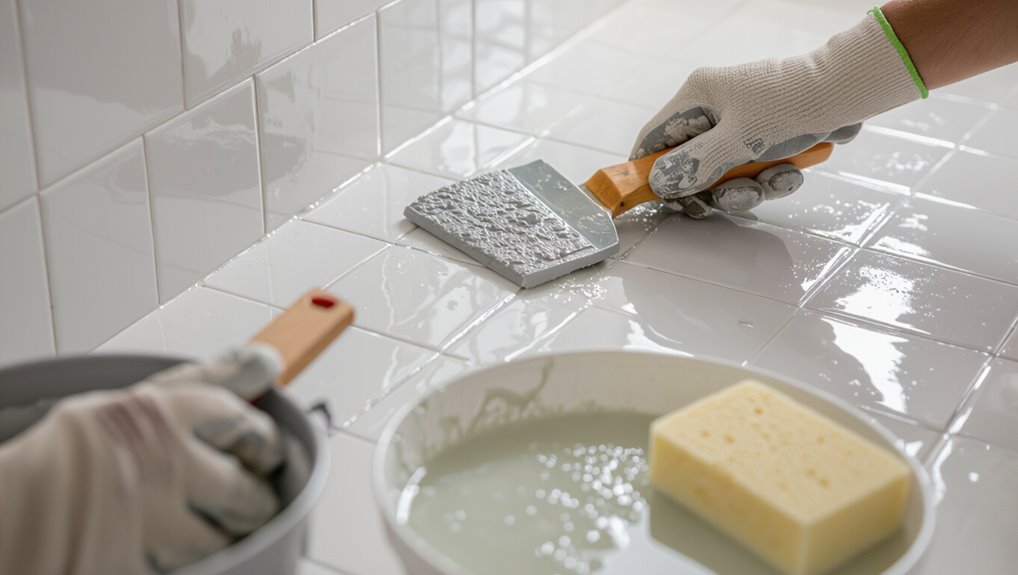
Mix the grout to a smooth, lump-free consistency following the manufacturer’s water ratio, then work it into the joints with a rubber float at a 45° angle, pressing firmly to fully fill gaps and eliminate voids.
After about 10–15 minutes, wipe excess with a damp sponge using diagonal strokes, reshape joints with a grout tool, let cure per instructions, then apply appropriate sealer.
Step 8 Finishing touches: trims, transitions, and cleanup
Once your grout has set and the seams are clean, finish trims, thresholds, and cleanup will give the installation a professional look and protect edges from damage.
Fit edge trim and connector strips snugly, caulk joints where waterproofing matters, and reinstall fixtures.
Remove haze with a damp sponge, vacuum joints, and polish tiles.
Dispose of waste responsibly and inspect for chips or gaps.
Common Problems and How to Fix Them
You’ll run into issues like uneven tiles and lippage, hollow-sounding tiles from poor adhesion, cracked tiles or grout, and water intrusion with mold in wet areas.
I’ll show you how to diagnose each problem and the correction or repair steps you’ll need. Knowing these fixes up front will save time and prevent bigger headaches down the road.
Uneven tiles and lippage causes and corrections
Uneven tiles and lippage happen when adjacent tile edges sit at different heights, creating trips, poor aesthetics, and grout cracking; they usually result from inconsistent substrate, uneven trowel pressure, inadequate back buttering, or not using leveling tools.
Fix by flattening substrate, apply consistent thinset with proper notched trowel, back-butter large tiles, use tile leveling clips/wedges, and check heights before grout.
Hollow-sounding tiles and adhesion failures diagnosis and repair
Lippage isn’t the only sign that something’s wrong under your tiles—hollow-sounding spots and adhesion failures point to poor bond and hidden voids that can let tiles crack or pop off later.
Tap to locate voids, mark loose tiles, remove and clean substrate, and reapply appropriate thinset or mortar with proper coverage and recommended trowel notch.
Test and grout after curing.
Cracked tiles or grout prevention and replacement steps
When tiles or grout start cracking, it’s usually because movement, improper installation, or hard impacts stressed the materials; you can prevent most issues by using the right substrate prep, movement joints, and flexible grout or caulk where needed.
To repair, remove damaged grout or tile, clean substrate, apply appropriate adhesive or backer, reset tile or fill with flexible grout/caulk, and seal.
Water intrusion and mold in wet areas detection and remediation
Cracked grout and failing tiles often let moisture reach the substrate, so you should watch for signs of water intrusion and mold in wet areas before small problems become structural ones.
Check discoloration, musty odors, soft spots, and peeling finishes.
Dry thoroughly, remove affected materials, treat mold with appropriate cleaner, repair waterproofing membranes, reglaze or retile, and maintain grout/sealant to prevent recurrence.
Professional Tips and Best Practices
Timing and environmental conditions matter, so you’ll plan work around temperature, humidity, and proper curing times.
You’ll also focus on consistent grout lines and color uniformity during installation, then follow a simple long-term cleaning and maintenance routine to keep the job looking sharp.
Know when a tricky layout or structural issue means you should call a pro instead of pushing your DIY limits.
Timing, environmental conditions, and curing considerations
Although you can rush some prep steps, you shouldn’t rush the actual setting and curing process—proper timing and environmental control guarantee tiles bond correctly and finishes last.
Monitor temperature and humidity; most adhesives need 50–77°F and moderate humidity. Follow manufacturer cure times before grouting or foot traffic.
Protect fresh work from drafts, direct sun, and moisture. Wait full cure before sealing or heavy use.
Achieving consistent grout lines and color uniformity
When you aim for professional-looking grout, consistency starts with how you space and handle each joint: use quality spacers, check alignment frequently, and run a single bead of grout across an area rather than dabbling in small patches so the color and texture remain uniform.
Work in consistent batches, mix to the same ratio, wipe excess promptly with even pressure, and inspect joints for voids.
Long-term maintenance and cleaning recommendations
Keeping a tiled surface looking professional starts with a simple, regular routine you can stick to; inspect grout and tiles monthly, clean spills promptly, and address stains or damage as soon as you spot them.
- Sweep and mop with pH-neutral cleaner to avoid dulling finishes.
- Reseal grout every 1–3 years, or sooner in high-traffic zones.
- Use soft brushes for grout and avoid acidic or abrasive cleaners that harm grout and glaze.
When to call a professional vs continue DIY
Wondering whether to keep tackling a tile job yourself or call in a pro?
If layout, substrate repair, waterproofing, or complex patterns overwhelm you, call a pro.
Stay DIY for simple wall backsplashes, straight-floor installs, or small repairs if you have proper tools and patience.
Factor time, warranty, and resale value—professionals pay off when mistakes are costly or irreversible.
Cost-saving Strategies and Material Choices
You can save big by choosing budget-friendly tiles and swapping expensive tools for smart substitutes without sacrificing quality.
Think about splurging selectively on high-impact upgrades like heated floors or large-format tiles that boost comfort and resale value.
Finally, weigh DIY savings against professional costs so you pick the option that gives you the best long-term value.
Budget-friendly tile and tool substitutions
While high-end porcelain and Italian marble look great, you can get a professional result on a budget by choosing durable, lower-cost alternatives like glazed ceramic or large-format porcelain that mimic pricier styles.
You’ll save by swapping specialty trims for stock pieces, using premixed thinset for small jobs, and renting tile cutters instead of buying.
- Stock trims over custom
- Premixed adhesives for convenience
- Rent a wet saw or cutter
High-impact upgrades worth the extra cost (heated floors, large-format tiles)
If you’ve saved by choosing stock trims and renting tools, it makes sense to spend a little more where it truly changes the room’s feel and function.
Invest in electric radiant floor heating for bathroom comfort and resale appeal, and choose large-format tiles to reduce grout lines and visually enlarge space.
Both elevate aesthetics and long-term value despite higher upfront costs.
Comparing DIY vs professional cost and value
Wondering whether to tackle tiling yourself or hire a pro? You’ll save labor costs DIY but risk mistakes and longer timelines; pros charge more yet deliver speed, warranty, and finish quality. Balance budget, skill, and project size.
| Option | When to choose |
|---|---|
| DIY | Small, simple projects; tight budget |
| Professional | Large, complex jobs; guaranteed results |
Mistakes to Avoid Top Beginner Errors
Don’t skip prep or skip a substrate inspection—you’ll pay for it later with loose or uneven tiles.
Choose the correct mortar and grout for your location and tile type so joints and bond hold up.
Plan your layout to minimize awkward cuts and don’t rush curing or grouting, since haste causes visible failures.
Skipping prep and substrate inspection
Although you’re keen to lay tile, skipping proper prep and a substrate inspection will cost you time and money down the road.
You must check for level, cracks, moisture, and firm adhesion before you trowel. Fix unevenness, replace damaged underlayment, and address water issues first.
Proper prep prevents lippage, cracking, and failures, saving effort and ensuring a lasting, professional-looking installation.
Wrong mortar or grout selection for the application
If you pick the wrong mortar or grout, your beautiful tile job can fail fast — so match products to substrate, tile type, and environment before you mix.
Use the right mortar (thinset, modified vs. unmodified) for porcelain, natural stone, or backerboard, and pick grout rated for joints, movement, and moisture.
Wrong choice causes delamination, staining, and cracking—don’t guess.
Poor layout planning leading to awkward cuts
Picking the right mortar and grout sets you up for durability, but a sloppy layout will ruin the look no matter how well you set the tile.
You should dry-run tile lines, center focal areas, and plan border cuts so tiny slivers don’t appear. Use chalk lines, measure from multiple walls, and shift layout to keep full tiles where they’ll be most visible.
Rushing curing and grouting steps
When you rush curing or grout too soon, the tile bond can weaken and grout can crack or discolor, undoing hours of careful work.
Let adhesive cure fully per manufacturer guidance before walking on tiles or grouting.
Apply grout only after proper set time, clean joints correctly, and avoid sealing prematurely.
Patience prevents rework, saves money, and guarantees a durable, professional finish.
Project Examples and Mini Case Studies
You’ll walk through three real projects to see what works and what can trip you up.
First, a small bathroom floor redo will highlight key steps and common pitfalls to avoid.
Then you’ll compare kitchen backsplash layout and pattern choices and finish with a shower surround waterproofing and tiling checklist you can follow.
Small bathroom floor redo step highlights and pitfalls
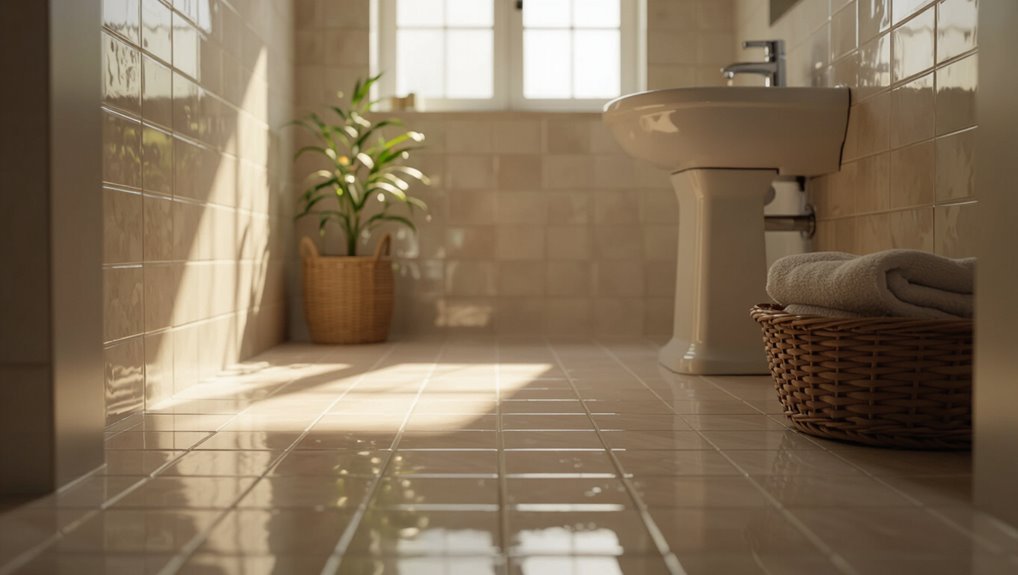
Although small bathrooms present tight maneuvering, you can get pro-level results by following a few focused steps and watching for common pitfalls.
Measure carefully, plan tile layout to minimize cuts, and use spacers for consistent grout lines.
Prep subfloor for flatness, waterproof around wet zones, and pick grout resistant to staining.
Work outward from a focal point and check level frequently.
Kitchen backsplash installation layout and pattern choices
If you want a backsplash that ties the kitchen together and stands up to splashes, plan your layout around both function and visual flow.
Align grout lines with countertops and cabinets, center focal tiles over the range, and choose patterns—subway, herringbone, stacked, or mosaic—that match scale and style.
Mock up with paper templates, then tile from the most visible corner outward.
Shower surround waterproofing and tiling checklist
Start with a tight checklist: prep the substrate, seal joints and corners, set a bonded waterproof membrane, slope the shower floor to the drain, and plan tile layout to minimize cuts at visible seams.
Then: use cement board or waterproof backer, tape and thinset seams, choose grout and sealant rated for wet areas, back-butter tiles, maintain consistent spacers, and test drainage before finishing.
FAQ Common Questions About Tiling
You probably have practical questions like how long a job takes, whether you can tile over existing tile, and which grout works best in showers.
You’ll also want to know how to cut tiles around outlets and fixtures and how to keep grout from discoloring.
I’ll answer each of these so you can plan time, tools, and maintenance with confidence.
How long does tile installation take from start to finish?
Wondering how long a tile job will take from demo to cleanup?
It depends on scope: a small backsplash or bathroom floor can take a day or two; a larger floor or complex pattern might take several days to a week.
Allow extra time for demolition, substrate prep, adhesive curing, grout drying, and final sealing.
Plan for inspections and unexpected repairs.
Can I install tile over existing tile?
If your project timeline looks tight after accounting for demo and curing, installing new tile over existing tile can save time and labor—when the conditions are right.
You can proceed if the old tile is sound, level, firmly adhered, and thoroughly cleaned.
Remove loose tiles, roughen glazed surfaces, and use a suitable thinset rated for bonding to tile.
Check height and threshold changes.
What grout should I use in a shower or high-moisture area?
Which grout should you pick for a shower or other high‑moisture area?
Use epoxy or high‑quality urethane grout — both resist water, stains, and mildew far better than cement grout.
Epoxy is waterproof and durable but pricier and trickier to apply; urethane offers easier handling with good moisture resistance.
Seal any cement grout regularly and keep joints properly sloped for drainage.
How do I cut tile to fit around outlets and fixtures?
Cutting tile to fit around outlets and fixtures takes a few simple tools and a bit of planning, and you can get clean, precise results without wasting material.
Mark hole locations on the tile, score with a carbide or diamond wheel, and use a nibbler, tile saw with a plunge cut, or drilling and cutting bits for curves.
File edges, test fit, and protect fixtures.
How do I maintain grout and prevent discoloration?
Once your tiles are trimmed and fixtures protected, keep grout looking fresh by sealing it and cleaning gently on a regular schedule.
Wipe spills promptly, avoid harsh acids, and use a pH-neutral cleaner. Reapply penetrating sealer yearly or as directed.
Scrub with a soft brush for stains, rinse thoroughly, and replace damaged grout to prevent mold and long-term discoloration.
Quick Reference Checklists
Before you start, use a pre-installation checklist to confirm materials, substrate prep, and measurements so nothing blindsides you.
During the job, follow a step-by-step installation checklist to keep tile layout, adhesive application, and grouting on track.
After you’re done, run a post-installation maintenance checklist to seal, clean, and schedule inspections for long-lasting results.
Pre-installation checklist
1 quick walk-through will save hours of rework: check your substrate is clean, dry, flat, and structurally sound; verify tile, adhesive, grout, and trim quantities and compatibility; confirm substrate waterproofing or vapor barriers are in place where required; and make sure you’ve got the right tools, spacers, and safety gear on hand.
- Measure and mark layout lines for balance and cuts.
- Inspect tiles for defects and batch consistency.
- Review manufacturer instructions and cure times.
Step-by-step installation checklist
Start with a clear, prioritized checklist that walks you through each installation stage—layout, adhesive, setting, grout, and cleanup—so you can tick tasks off as you go and avoid missed steps or unnecessary rework.
Keep entries short, time estimates realistic, and tools/materials listed. Use this quick reference during work to stay efficient and consistent.
- Mark layout lines and cuts
- Apply adhesive and back-butter tiles
- Grout, clean joints, final wipe
Post-installation maintenance checklist
Now that your tiles are set and grouted, keep them looking great with a short post-installation maintenance checklist you can follow weekly, monthly, and annually.
Review and act on these items to protect grout, prevent damage, and extend tile life.
- Weekly: sweep/vacuum, mop with pH-neutral cleaner, spot-check grout
- Monthly: inspect seals, reseal if needed, tighten loose trim
- Annually: deep clean grout, reapply sealer, check substrate for movement