How to Install Peel and Stick Vinyl Tile Without Bubbles or Gaps
You can install peel-and-stick vinyl tile without bubbles or gaps by prepping a clean, dry, level subfloor, acclimating tiles 48–72 hours, and planning a centered layout to avoid narrow slivers. Peel the backing slowly, align each tile to chalk lines, press firmly, then roll with a weighted floor roller to force out air and guarantee edge adhesion. Pierce tiny blisters or lift and re-seat larger ones, and keep traffic off until cured; follow these steps for more tips.
How to Install Peel and Stick Vinyl Tile Without Bubbles or Gaps
Yes—you can get a bubble- and gap-free peel-and-stick floor with the right prep and technique.
Start with a clean, smooth, dry subfloor, use proper acclimation and alignment, and press tiles firmly with a roller as you go.
Follow those steps and you’ll minimize bubbles and gaps for a professional-looking finish.
Quick Answer Can You Get a Bubble- and Gap-Free Peel-and-Stick Floor?
Wondering if you can get a peel-and-stick floor with no bubbles or gaps? Yes — with proper prep and technique you can.
Learn how do you install peel and stick vinyl tile correctly: clean and level the subfloor, acclimate tiles, peel gradually, press firmly with a roller, and trim edges precisely.
Small seam allowances and careful alignment prevent gaps and bubbles.
Summary of Key Steps (one-line overview)
Start with a clear plan: prep and level the subfloor, acclimate tiles, lay from a centered reference line, peel and set tiles gradually, press each tile firmly with a floor roller, and trim and finish edges for a tight, gap-free seam.
- Lay from center, keep alignment.
- Work outward, peel cautiously.
- Roll each tile, trim precisely.
Understanding Peel-and-Stick Vinyl Tile
Peel-and-stick vinyl tile is a thin, adhesive-backed flooring you press onto a clean, flat surface.
You’ll avoid bubbles and gaps by addressing common causes—poor adhesion, uneven or dirty subfloors, and installation mistakes like misaligning tiles or trapping air.
Choose this option when you want a quick, budget-friendly update and the subfloor is smooth; consider alternatives for high-traffic, moisture-prone, or long-term installations.
What Peel-and-Stick Vinyl Tile Is
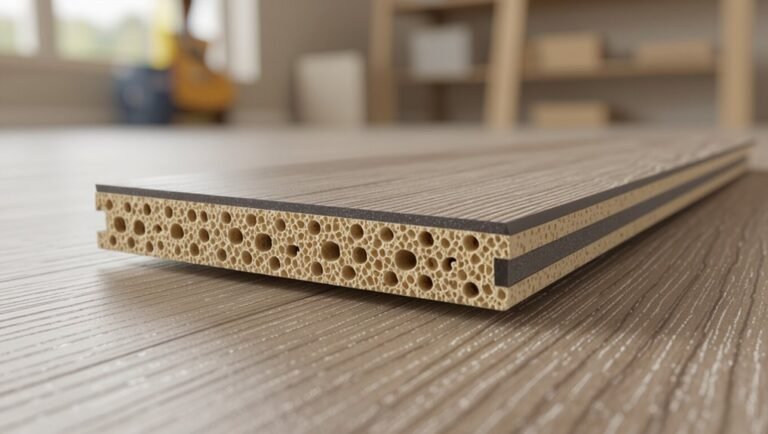
Vinyl tile with a pressure-sensitive backing is a modern flooring option that sticks directly to a clean, dry subfloor—no messy glue or trowel required.
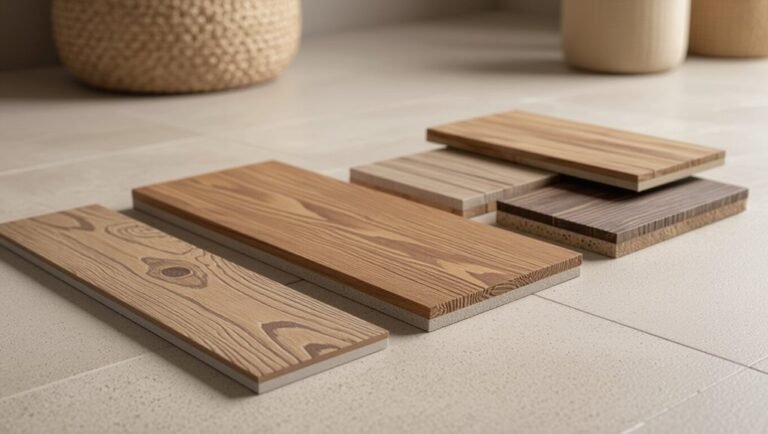
You’ll find tiles in various thicknesses, realistic patterns, and wear layers for durability. They’re cut-to-fit, lightweight, and often water-resistant, so you can replace or upgrade sections easily.
Installation is fast and minimally invasive.
Why Bubbles and Gaps Happen (adhesion, surface, installation errors)
You’ll still run into problems even with fast, clean installations: bubbles and gaps form when the tile can’t make uniform contact with the subfloor or when the adhesive itself fails.
Dirt, moisture, uneven or textured surfaces and temperature swings weaken bond strength. Poorly aligned cuts, trapped air, or reusing old adhesive create voids.
Proper prep and steady pressure prevent most issues.
When Peel-and-Stick Is the Right Choice vs Alternatives
If you’re after a quick, low-cost floor update that doesn’t require special tools or a professional installer, peel-and-stick tiles are worth considering; they stick directly to clean, flat substrates and let you finish a room in a weekend. You should choose them for rentals, DIY patches, or low-moisture rooms; opt for planks or glued vinyl for high traffic or wet areas.
| Situation | Recommendation |
|---|---|
| Rental | Peel-and-stick |
| Bathroom | Glued vinyl |
| High-traffic | Planks/glued |
| Budget | Peel-and-stick |
| Uneven subfloor | Repair first |
Tools and Materials You Need Before You Start
Before you peel and stick, gather the essential tools—a trowel or putty knife, a hand roller, a sharp utility knife, and accurate measuring tools.
You’ll also want to know when to use extra adhesive or a primer for tricky substrates and which adhesives work best.
For cleaner, more professional results consider optional items like a heat gun, seam roller, and floor scraper.
Essential Tools (trowel, roller, utility knife, measuring tools)
A few basic tools make peel-and-stick vinyl tile go down cleanly and last longer: a notched trowel or flat-edged spreader for smoothing adhesive, a heavy floor roller to press tiles firmly, a sharp utility knife for precise cuts, and accurate measuring tools like a tape measure and straightedge.
- Use a roller to eliminate air pockets.
- Cut neatly with a sharp knife.
- Measure twice, cut once for tight seams.
Recommended Materials and Adhesives (when to use extra adhesive or primer)
When your subfloor is smooth and the tiles are rated for your room, you’ll usually only need the manufacturer’s peel-and-stick adhesive.
However, you should also have contact cement, a roll-on or brush-on primer, and extra pressure-sensitive adhesive on hand for tricky spots.
Use primer on porous or patched areas, contact cement for edges or high-traffic seams, and extra adhesive where tiles lift or substrate is uneven.
Optional Tools for Professional Results (heat gun, seam roller, floor scraper)
If you want truly professional results, add a few optional tools to your kit: a heat gun to soften tiles for tight bends and seams, a seam roller to press edges and guarantee full contact, and a floor scraper to remove old adhesive or smooth stubborn bumps.
Use the heat gun sparingly to avoid warping, roll seams firmly, and scrape thoroughly for a flat, long-lasting finish.
Preparing the Subfloor for Perfect Adhesion
Before you lay any tiles, you’ll inspect the subfloor for cracks, old adhesive, high spots, and moisture issues so nothing will interfere with the glue.
Clean thoroughly to remove dirt, grease, and residue, then repair or level low or high areas and apply a floor leveler where needed.
Finally, test for moisture, address any dampness with a barrier or sealer, and let the tiles acclimate to the room’s temperature and humidity before installing.
Inspecting the Subfloor: What to Look For
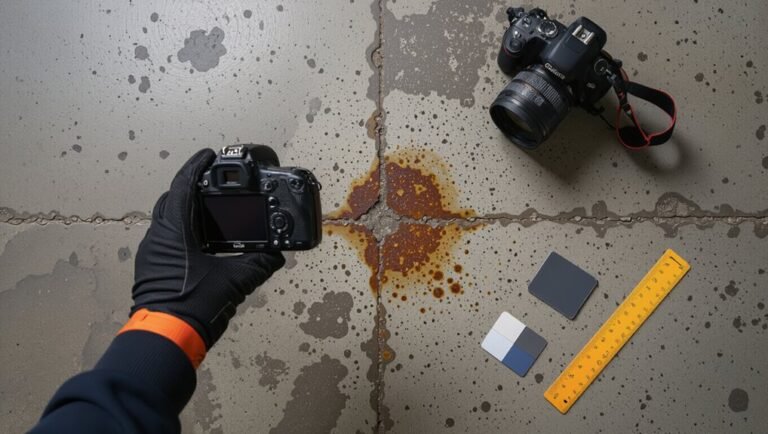
Although it can seem tedious, inspecting your subfloor thoroughly is the single most important step to guarantee peel-and-stick vinyl will bond properly; you’ll check for cleanliness, flatness, moisture, and damage so the tiles lay smooth and stick long-term.
Walk the area, feeling for soft spots, bumps, or loose boards. Use a straightedge for gaps or high spots and a moisture meter to confirm acceptable levels.
Cleaning: Removing dirt, grease, and old adhesives
Start by removing every trace of dirt, grease, and old adhesive so your peel-and-stick tiles can bond properly.
Sweep and vacuum thoroughly, then degrease with a mild detergent or trisodium phosphate solution.
Scrape stubborn adhesive with a plastic scraper, avoiding damage.
Rinse and dry completely.
Test surfaces with tape—if it lifts, repeat cleaning until the subfloor is clean, dry, and residue-free.
Repairing and Leveling: Filling cracks, sanding high spots, applying floor leveler
Now that the floor’s clean and dry, you’ll address cracks, low spots, and high areas so tiles lay flat and stick well.
Fill hairline and wider cracks with a polymer patch, sand any high spots smooth, and vacuum debris.
Mix and trowel a self-leveling compound into low areas per instructions, let it cure, then sand or feather edges for an even surface.
Moisture Testing and Solutions (moisture barrier, sealers)
Because moisture under vinyl prevents proper adhesion and can ruin a new floor, you’ll test the subfloor before laying any tiles.
Use a moisture meter or tape test, then address issues promptly. Options include:
- Apply a moisture barrier membrane per manufacturer instructions.
- Use a penetrating concrete sealer for light dampness.
- Install a full vapor barrier for chronic moisture problems.
Acclimating Tiles to Room Temperature and Humidity
After addressing moisture, let the tiles acclimate in the room where they’ll be installed so temperature and humidity won’t compromise the adhesive bond.
Leave boxes unopened for 48–72 hours on a flat surface, keeping HVAC set to normal living conditions.
Check tile edges for warping before laying.
If room is unusually humid or cold, extend acclimation or use a temporary dehumidifier or gentle heat.
Planning and Layout to Prevent Gaps and Misalignment
Measure the room and calculate how many tiles you’ll need before you open a box so you don’t run short or waste extras.
Decide whether to start at the center for a balanced look or along a wall to minimize cut pieces, and weigh the pros and cons for your space.
Dry-lay a few rows and snap chalk lines to lock in straight, gap-free placement before you peel and stick.
Measuring the Room and Calculating Tile Quantity
Before you cut or peel a single tile, take precise room measurements and map a layout so you’ll avoid narrow slivers at the edges and awkward seams.
Measure length and width in several spots, multiply to get square footage, add 10% waste for cuts and mistakes, then divide by tile area.
Round up to whole boxes and mark tile runs on your plan.
Choosing Starting Point: Center vs Wall (pros and cons)
You’ve got two solid options for where to start laying peel-and-stick tile—center of the room or along a wall—and each affects how your pattern reads and how many narrow edge cuts you’ll end up with.
Starting center gives balanced symmetry and hides imperfections but needs precise alignment.
Starting at a wall speeds install and keeps full tiles along sightlines but may force thin edge cuts opposite the wall.
Dry-Lay and Chalk Line Layout Technique
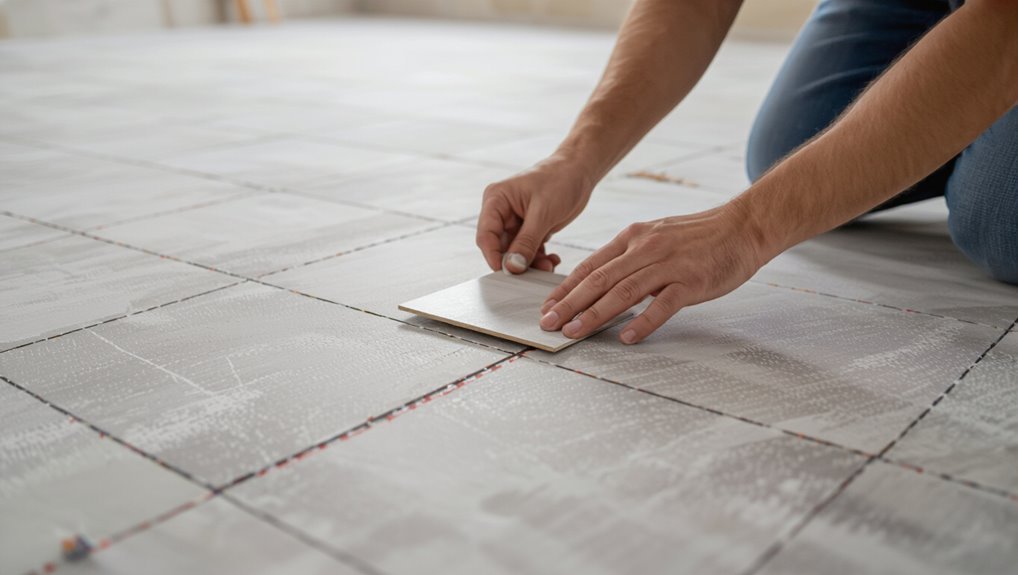
A quick dry-lay and chalk-line layout will save you from crooked rows and awkward gaps down the line, so take the time to mock up tiles and snap reference lines before sticking anything.
Lay full tiles along your primary lines, adjust spacings, and mark cuts. Use a chalk line for straight guides, recheck alignment, then peel and press tiles following those lines to guarantee even joints.
Step-by-Step Installation Process
Start by marking clear reference lines and choosing your starting position so each row stays square.
Peel the backing, set the first tiles with careful alignment, then press and roll each tile firmly to guarantee full contact.
Stagger seams for a tight pattern and trim tiles for edges and obstacles with straight and L-cuts as needed.
Step 1 Marking Reference Lines and Starting Position
Before you lay a single tile, snap two perpendicular chalk lines to mark the room’s center and a straight starting row so your pattern stays square and balanced.
Measure from walls to center, adjust for full tiles at edges, and trial-fit a few tiles dry to confirm symmetry.
Use a square and tape measure, and mark offset guidelines for staggered layouts.
Step 2 Peeling Backing and Positioning the First Tiles (alignment tips)
Peel back a corner of the backing, align the tile with your chalk lines, and press the exposed adhesive down so the tile sits exactly where you want it—don’t fully remove the entire backing until you’re certain of the placement.
Use the lines and adjacent tiles as guides, nudge edges for tight seams, and leave a small expansion gap at walls.
Check alignment before proceeding.
Step 3 Pressing and Rolling Tiles for Full Contact (pressure patterns, roller use)
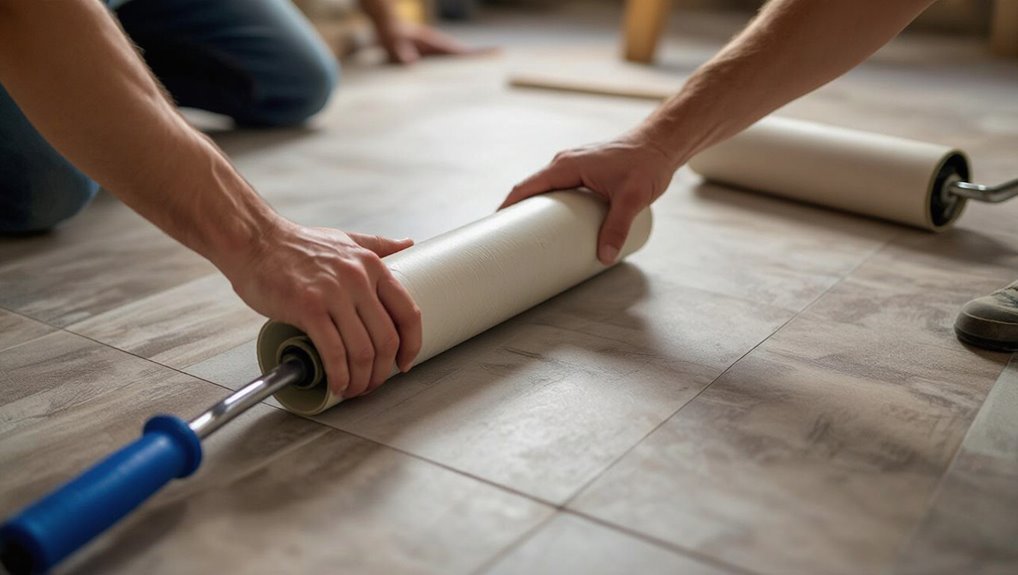
Press each tile firmly, then roll it to guarantee full contact with the subfloor and remove air pockets; use a hand or seam roller along edges and a 100–150 lb floor roller over the whole field in overlapping passes to press adhesive evenly.
Work outward from seams, apply steady even pressure, re-roll high-traffic areas, and check for lifts.
Clean debris before final rolling.
Step 4 Staggering and Seaming: Best Patterns to Minimize Gaps
When you lay the first rows, stagger the seams so tile joints don’t line up across the floor; this reduces visible gaps and improves stability by distributing movement across multiple seams.
Use a running bond (half-step) for rectangular or wood-look tiles, or a quarter/third offset for squares to hide pattern repeats.
Butt seams tightly, align edges, and check lines frequently to maintain consistent offsets.
Step 5 Cutting Tiles for Edges and Obstacles (straight cuts, L-cuts)
Measure and cut tiles carefully to fit edges and obstacles so your floor looks seamless and professional.
Mark cuts on the tile backing, score with a utility knife for straight cuts, and snap along the score.
For L-cuts, template around pipes or door jambs, transfer marks, and trim incrementally.
Test-fit pieces before peeling adhesive to guarantee tight seams and neat edges.
Step 6 Finishing Rows and Transition Strips
6. Finish rows by dry-fitting last tiles, trimming for tight fits, and removing backing slowly as you align edges.
Press tiles firmly with a roller, ensuring seams meet.
Install threshold strips at doorways or between floor types, following manufacturer holes and adhesive instructions.
Secure with screws or adhesive, then seal edges with matching caulk for a neat, durable finish.
Techniques to Avoid Bubbles During and After Installation
To prevent bubbles, you’ll use proper adhesion methods like slow-lay or partial peel with a quick tack before fully pressing the tile.
After laying, roll each tile in the advised direction and frequency to set the adhesive and push out air.
If bubbles appear, pierce small ones and press, re-lay larger ones or apply gentle heat when appropriate to soften the vinyl for smoothing.
Proper Adhesion Methods (slow lay, partial peel, tacking)
When you work with peel-and-stick vinyl, control is everything—start slow, peel back a little of the release paper, and lay the tile gradually so you can smooth out air pockets as you go.
Use partial peel to align edges, then tack the tile at one corner. Smooth toward the anchored edge, lift and re-seat if bubbles form, and press seams firmly for secure adhesion.
Using a Floor Roller Correctly (direction, frequency)
After you’ve tacked and smoothed a tile into place, use a floor roller to lock the adhesive and squeeze out trapped air. Start rolling from the center of the tile toward the edges so air is forced out rather than caught in the seam.
Roll each tile twice—once immediately, once after 15–30 minutes—to guarantee full contact. Use firm, even pressure and overlap passes for consistent adhesion.
Handling Trapped Air: How to Smooth Small and Large Bubbles (pierce and press vs re-lay)
Feel for bumps as you work and deal with them promptly: small air pockets can be pierced and pressed flat, while larger bubbles usually need the tile lifted and re-laid to release trapped air and reset the adhesive.
For small bubbles, use a pin and smooth toward the edge.
For large ones, peel back, clean debris, align precisely, and press firmly to eliminate voids.
Heat Techniques: When and How to Use Heat to Remove Bubbles Safely
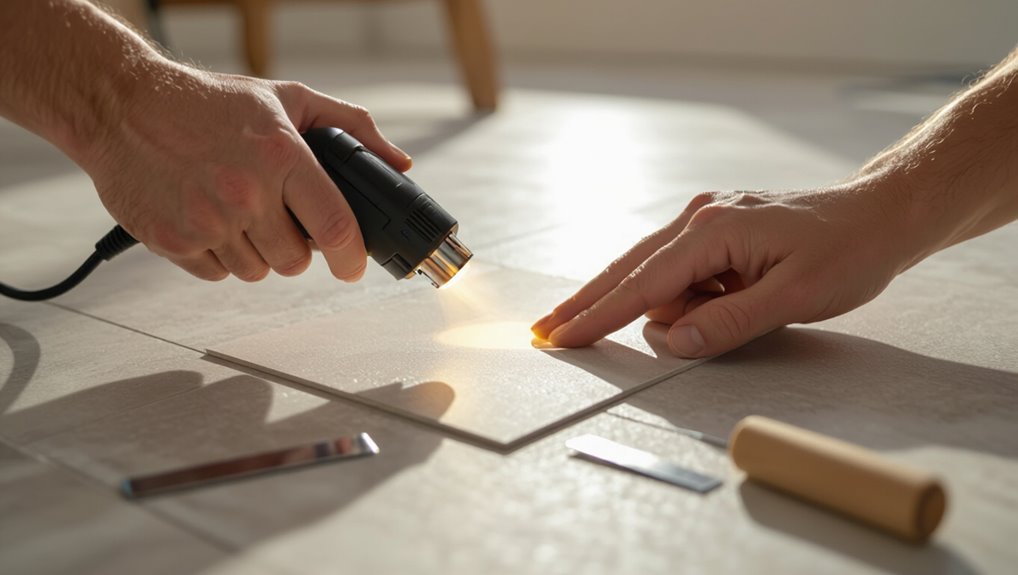
Use gentle heat to relax the adhesive and smooth stubborn bubbles without overheating the vinyl.
Aim a heat gun or hairdryer from 6–8 inches away, moving constantly. Once warm, press outward with a roller or cloth to expel air.
Don’t exceed moderate heat—test a scrap first.
For large bubbles, lift edge slightly, warm, reposition, then roll to reseal.
Preventing and Fixing Gaps
Gaps can come from planned expansion space, miscuts, or an uneven subfloor, so you should first identify the root cause before you fix anything.
For small gaps you can roll the tile, add a bit of adhesive or seam sealer, and press seams tight to hide and secure them.
If edges are lifted or gaps are large, you can often lift just the affected tiles and reglue or trim and replace them without ripping up the whole floor.
Sources of Gaps (expansion space, miscuts, uneven subfloor)
When you see gaps in peel-and-stick vinyl tile, they usually come from three things: not leaving proper expansion space at walls and fixtures, cutting tiles incorrectly, or an uneven subfloor that prevents tiles from seating tightly.
Check perimeter gaps to confirm expansion allowance, measure and recut misfits precisely, and inspect and level low spots or high seams before installing so tiles lay flat and abut properly.
Closing Small Gaps: Rolling, adhesive touch-ups, seam sealer
If small openings remain after laying your peel-and-stick tiles, you can usually close them without pulling everything up by rolling, adding adhesive, or sealing the seams.
Use a weighted floor roller to seat edges and squeeze out trapped air. Inject a little manufacturer-approved adhesive into gaps, press tiles together, then wipe excess.
Finish with a compatible seam sealer for a tight, moisture-resistant joint.
Repairing Large Gaps or Lifted Edges Without Ripping Up the Floor
While you’ll sometimes spot large gaps or lifted edges after installation, you don’t always have to tear out the whole floor to fix them.
Carefully lift affected tiles, clean old adhesive and subfloor, then apply fresh pressure-sensitive adhesive or a bead of vinyl adhesive.
Press tiles back, weight them overnight, and seal seams with matching caulk.
Trim warped edges if needed for a tight finish.
Common Mistakes and How to Avoid Them
Don’t skip the prep—an uneven or dirty subfloor will ruin your installation.
Work methodically: place tiles carefully and roll them right away so they bond, and don’t rely solely on the peel backing or the wrong adhesive.
Also check moisture and temperature first, because those conditions can undermine even perfect placement.
Mistake 1 Skipping Proper Subfloor Prep
Because the peel-and-stick tiles rely on a smooth, clean surface, skipping proper subfloor prep will cost you time and money in the long run.
You must clean, repair and level the subfloor: remove debris, old adhesive, and loose paint; fill cracks and holes; sand high spots; and guarantee dryness.
Proper prep prevents lifting, bubbling, and uneven seams later.
Mistake 2 Rushing Placement and Not Rolling Immediately
Once your subfloor’s prepped, slow down when you start laying tiles — rushing placement or skipping the immediate roll can ruin hours of work.
Peel-and-stick needs precise alignment and instant pressure to bond. Place each tile deliberately, check seams, then roll from center outward with a floor roller.
If you hesitate, tiles shift and trapped air causes bubbles and weak adhesion.
Mistake 3 Ignoring Moisture or Temperature Conditions
If you skip checking moisture and temperature, your peel-and-stick tiles might peel, buckle, or never fully adhere.
Test subfloor moisture with a meter or tape, and only install within the manufacturer’s temperature range.
Let floors acclimate, dry wet areas, and avoid installation after recent concrete pours.
Monitor humidity during and after installation to guarantee long-term adhesion and dimensional stability.
Mistake 4 Using Wrong Adhesive or Over-Relying on Peel Backing
While peel-and-stick tiles are designed with adhesive backing, relying on that layer alone—or using the wrong glue when extra hold is needed—can lead to tiles lifting, shifting, or failing at seams.
You should select manufacturer-recommended adhesives for edges, junctions, or high-traffic areas.
Clean surfaces, test adhesive compatibility, apply sparingly, and press tiles firmly.
Use seam tape or weight during cure for reliable bonds.
Best Practices and Pro Tips for a Professional Finish
Check alignment and adhesion as you work so you catch shifts or bubbles early.
Keep tiles clean, control humidity, and know when extra primer or adhesive will prevent future lifting.
If the layout or subfloor issues are complex, weigh the cost and time of hiring a pro against doing it yourself.
Routine Checks During Installation (alignment and adhesion checkpoints)
Because small misalignments compound quickly, you should pause regularly to verify both tile alignment and adhesion as you work.
Check seams for straight lines and consistent spacing with a straightedge or chalk line.
Press edges and corners firmly, using a roller or hand pressure.
Lift and re-seat any tile with wrinkles or weak contact immediately to avoid larger corrections later.
Long-Term Care to Prevent Future Lifting (cleaning, humidity control)
You’ve done the careful alignment and adhesion checks during installation; now focus on long-term care to keep tiles stuck and looking professional.
Wipe spills promptly with a damp microfiber, avoid abrasive cleaners or waxes, and use pH-neutral products.
Control indoor humidity with ventilation or a dehumidifier, maintain steady temperature, and replace damaged tiles quickly to prevent edges lifting or moisture infiltration.
When to Use Additional Adhesive or Primer
If your subfloor is uneven, porous, or in a high-traffic or moisture-prone area, plan to use a primer or extra adhesive to guarantee a lasting bond.
Test a small area first, follow manufacturer recommendations, and choose a primer compatible with vinyl.
Apply adhesive sparingly under edges and seams, press tiles firmly, and roll the floor to remove trapped air for a secure, even installation.
Hiring a Pro vs DIY: Cost and complexity considerations
After deciding whether to add primer or extra adhesive for a stable base, you’ll want to weigh whether to tackle the installation yourself or hire a professional. Assess your skill, time, and tools; pros guarantee speed and warranty but cost more. DIY cuts labor expense but risks mistakes that cause bubbles or gaps.
| Option | Consideration |
|---|---|
| Pro | Faster, guaranteed |
| DIY | Cheaper, needs skill |
Cost, Time, and Difficulty Estimates
You’ll usually finish a small room in a day or two depending on your skill level and prep work, while larger or irregular spaces take longer.
Expect a modest budget for tiles and basic tools but factor in extra for underlayment, adhesives, or a utility purchase if you don’t already have one.
If the subfloor is warped, rotted, or uneven beyond simple patching, you’ll save time and money in the long run by repairing or replacing it before you lay tile.
Typical Time per Room and Skill Level Required
Plan on most rooms taking between 2 and 6 hours from prep to finish, depending on size and obstacles.
Expect the project to be low- to moderate-skill—no specialized trades required but you’ll need basic measuring, cutting, and smoothing skills.
Small bathrooms lean toward the short end; kitchens and irregular rooms take longer.
Working solo is fine, but an extra pair of hands speeds layout and handling.
Budget Breakdown: Materials and Tool Costs
A typical DIY peel-and-stick floor job will cost you between $1 and $5 per square foot for materials, with tools adding a one-time outlay of $20–$150 depending on what you already own. You’ll budget adhesive tiles, underlayment, and basic tools; expect 2–6 hours per room and easy-to-moderate difficulty.
| Item | Typical Cost | Notes |
|---|---|---|
| Tiles | $1–$5/ft² | Varies by style |
| Underlayment | $0.50–$2/ft² | Optional |
| Tools | $20–$150 | One-time purchase |
When a Full Subfloor Repair or Replacement Is Worth It
If your subfloor shows rot, significant soft spots, widespread water damage, or structural movement, consider a full repair or replacement rather than patching.
Those issues will quickly undermine peel-and-stick tiles and can create safety hazards.
Full replacement costs $1,000–$5,000+ depending on area and materials, takes 1–5 days, and ranges from moderate DIY to professional-level work requiring permits and structural know-how.
Frequently Asked Questions
You’ll find answers to common concerns like how long to wait before walking on the floor, whether you can lay tiles over existing vinyl or tile, and how temperature changes affect expansion.
You’ll also learn how to fix bubbles that show up weeks later and which peel-and-stick options are suitable for bathrooms or basements.
If you still have questions after this section, I’ll point you to troubleshooting tips and product labels.
How long should I wait before using the floor after installation?
Once the tiles are fully set and the adhesive has cured, you can walk on the floor gently—usually within 24 hours for light foot traffic and 48–72 hours for heavy furniture or rolling loads.
Avoid dragging heavy items; use furniture pads and lift when possible.
Keep the room temperature stable and don’t expose the floor to water for at least 72 hours to guarantee a strong bond.
Can I install peel-and-stick vinyl over existing vinyl or tile?
Can you install peel-and-stick vinyl over existing vinyl or tile? Yes, if the surface is clean, dry, level, and firmly adhered.
Remove loose grout, fill gaps, and sand glossy finishes to promote adhesion.
Avoid cushioned vinyl, heavily textured tile, or surfaces with moisture issues.
Test a small piece first and follow manufacturer guidelines for best results and warranty compliance.
Will peel-and-stick tiles expand or buckle with temperature changes?
If you’ve confirmed your substrate is sound and smooth, you’ll also want to contemplate how temperature and humidity affect peel-and-stick tiles.
They can expand or contract slightly with extreme heat or moisture. Allow manufacturer-recommended expansion gaps at edges and around fixed objects.
Maintain stable indoor temps during and after installation, acclimate tiles per instructions, and avoid installing in unconditioned spaces to prevent buckling or separation.
How do I remove bubbles that appear weeks after installation?
Wondering what to do about bubbles that show up weeks after the job?
Gently lift the affected tile with a putty knife, warm the adhesive with a hair dryer to soften it, then press the tile back down, smoothing from center outward.
If adhesive lost tack, apply a thin bead of pressure-sensitive adhesive or double-sided tape beneath the tile, then roll to guarantee full contact.
Are there peel-and-stick tiles suitable for bathrooms or basements?
Those repair steps work for small problem spots, but you may still be thinking about overall suitability for moist spaces like bathrooms or basements.
Yes — choose waterproof or water-resistant vinyl tiles rated for wet areas, with a strong adhesive and sealed seams.
Guarantee subfloor is dry, use a moisture barrier if needed, and follow manufacturer guidelines to prevent lifting, mold, and damage.
Visual Guides and Checklists
Before you start, run through a pre-installation checklist so you’ve confirmed subfloor prep, room measurements, and materials.
Keep an installation quick-reference flowchart nearby to follow layout, cutting, and adhesion steps without losing your place.
If bubbles or gaps appear, a simple troubleshooting checklist will guide you through smoothing, re-pressing, or replacing tiles.
Pre-Installation Checklist
A clear pre-installation checklist helps you avoid costly mistakes and speeds up the job, so gather tools, measure the room, inspect the subfloor, and confirm tile quantity and layout before you start.
Use this quick list to verify readiness:
- Tools: roller, utility knife, straightedge, measuring tape.
- Subfloor: clean, dry, level, and repaired.
- Layout plan: starting line, pattern, and spare tiles accounted.
Installation Quick-Reference Flowchart
When you’re ready to lay tiles, follow a clear, simple flowchart so you won’t skip steps or waste time:
prep surface → measure and plan layout → dry-fit tiles → peel backing and align first row → press firmly and roll seams → trim edges → clean surface and inspect.
Keep tools, extra tiles, and adhesive handy so you can address issues immediately and maintain steady progress.
Troubleshooting Checklist for Bubbles and Gaps
If bubbles or gaps show up as you work, tackle them immediately with a quick checklist so small issues don’t become bigger problems:
- Press and roll: smooth bubbles toward edges with a rubber roller; lift only if adhesive failed.
- Re-seat edges: peel back a few inches, clean substrate, then firmly reapply.
- Fill gaps: use matching caulk or trim strips for narrow gaps; avoid stretching tiles.