
Best Adhesive for Vinyl Flooring: What to Use and Why
For vinyl flooring, pick the adhesive that matches your product and conditions: use pressure-sensitive adhesive for LVT/LVP for a secure, slightly flexible hold; choose a modified urethane for rigid SPC; and use full-spread acrylic for sheet vinyl. Test your subfloor for moisture first, and favor low‑VOC formulas in wet or high‑traffic areas. Apply per the manufacturer’s open time and trowel specs to avoid gapping or lift, and keep tools and ventilation ready if you want the full how‑to.
Quick Answer Best Adhesive for Vinyl Flooring
If you’re using sheet or glued-down vinyl, choose a pressure-sensitive or acrylic adhesive made for vinyl; for luxury vinyl plank (LVP) check manufacturer recommendations for urethane or craft adhesives.
You can skip adhesive with click-lock systems or peel-and-stick tiles unless you need extra stability in high-traffic or moisture-prone areas.
Use glue when the subfloor requires full bonding or the installer wants a permanent, seamless finish.
Short Recommendation by Vinyl Type
Match the adhesive to the vinyl type for best results: use pressure-sensitive (PSA) adhesives for luxury vinyl plank (LVP) and vinyl tile that click or float. Decide what adhesive to use for vinyl flooring based on type: solid LVT, SPC, or sheet. Quick guide:
| Vinyl Type | Recommended Adhesive | Notes |
|---|---|---|
| LVP/LVT | PSA | Removable, strong |
| SPC | Modified urethane | Rigid bonding |
| Sheet | Acrylic | Full-spread glue |
When to Use Adhesive vs. Click-Lock or Peel-and-Stick
When should you use adhesive instead of click-lock or peel-and-stick?
Use adhesive for high-traffic areas, large rooms, or rooms with heavy furniture where movement and gapping matter.
Choose glue when subfloors are uneven, when installing full-spread luxury vinyl, or for wet areas requiring watertight bonds.
Click-lock or peel-and-stick work for quick, small, or temporary installs, but adhesive gives long-term stability.
Understanding Vinyl Flooring and Why Adhesive Matters
You’re working with several kinds of vinyl—sheet, LVT/LVP, tile, and plank—each of which bonds differently and may need a specific adhesive.
Choosing the right glue affects how long the floor lasts, how it looks over time, and whether you keep the manufacturer’s warranty.
Pay attention to bond strength, flexibility, VOCs, water resistance, and cure time when picking an adhesive.
What Is Vinyl Flooring? Types (Sheet, LVT/LVP, Tile, Plank)
Vinyl flooring comes in several forms—sheet, luxury vinyl tile (LVT) or plank (LVP), and modular tiles or planks—and each type behaves differently during installation, which is why choosing the right adhesive matters.
You’ll pick based on flexibility, backing, and installation method.
Consider these types:
- Sheet vinyl
- LVT (tile)
- LVP (plank)
- Modular tiles/planks
Why Adhesive Choice Affects Durability, Appearance, and Warranty
Different vinyl constructions demand different adhesives, so picking the right one will directly shape how long your floor lasts, how it looks, and whether the manufacturer’s warranty stays valid.
You’ll protect seams, prevent delamination, and avoid staining or telegraphing if you match adhesive chemistry to vinyl.
Using the wrong glue can void coverage and shorten service life, so choose carefully.
Key Adhesive Properties to Consider (Bond Strength, Flexibility, VOCs, Water Resistance, Cure Time)
Think of adhesive selection as the bridge between your floor and its performance: you’ll want a glue that delivers strong, lasting bonds without sacrificing flexibility, low VOCs for indoor air quality, reliable water resistance, and a cure time that fits your schedule and traffic needs.
Choose adhesives with tested tensile and shear strength, elasticity to tolerate movement, certified low emissions, moisture resistance for wet areas, and predictable cure windows.
Primary Options: Types of Adhesives for Vinyl Flooring
You’ll run into several adhesive types for vinyl flooring, each with specific uses, strengths, and limits.
I’ll cover pressure-sensitive (removable) options, acrylic and solvent-based adhesives, polyurethane, and when epoxy or other specialty adhesives make sense.
That way you can match the right product to your vinyl type and installation conditions.
Pressure-Sensitive (Removable) Adhesives Uses and Limitations
While pressure-sensitive (removable) adhesives let you install vinyl quickly and replace planks later, they trade permanent bond strength for repositionability.
You’ll like them for rentals, temporary displays, or areas needing future access. They resist moderate traffic but can lift at edges and aren’t ideal for heavy moisture or high-heat zones.
Clean, smooth subfloors and proper seam sealing still matter for longevity.
Acrylic-Based Adhesives Pros and Cons
Because they combine strong bonding with flexibility, acrylic-based adhesives are a go-to for many vinyl installations and come in both water-based and solvent-based formulas.
You’ll like their quick grab, UV resistance, and low odor in water-based options. They tolerate temperature shifts and allow short open time for adjustments, but some formulations may cost more and need proper substrate prep for full adhesion.
Solvent-Based Adhesives Pros and Cons
If acrylics don’t fit your job — perhaps you need faster curing or stronger initial tack — solvent-based adhesives offer a different balance of strengths and trade-offs.
You’ll get excellent initial grab, good moisture tolerance, and long-term durability on many vinyl types, but you’ll deal with strong odors, VOCs, flammability, and stricter ventilation and disposal requirements.
Use them where quick bond matters.
Polyurethane Adhesives Pros and Cons
Polyurethane adhesives give you a high-strength, flexible bond that handles movement and temperature changes better than many other options.
You’ll get excellent moisture resistance and long-term durability, ideal for heavy traffic and varied subfloors.
They’re more expensive, need careful surface prep, and can be harder to trowel.
Use them when flexibility and longevity outweigh cost and installation complexity.
Epoxy and Specialty Adhesives When They’re Appropriate
When you need even greater chemical resistance, bond strength, or gap-filling ability than polyurethane can offer, epoxy and other specialty adhesives become the better choice.
You’ll pick them for heavy commercial areas, chemical-exposed spaces, or uneven substrates needing gap fill.
They cure hard, resist solvents, and deliver exceptional durability, but require precise mixing, ventilation, and professional application to avoid bond failures or installation defects.
Adhesives for Glue-Down vs. Full Spread Installations
Choosing the right adhesive depends on whether you’re doing a glue-down or full-spread installation, because each method demands different tack, open time, and transfer characteristics.
For glue-down planks, use pressure-sensitive adhesives with higher initial grab and faster set.
For full-spread, choose wet-set or acrylic emulsion adhesives offering complete transfer, longer open time, and moisture tolerance to guarantee uniform bond and dimensional stability.
Choosing the Right Adhesive by Vinyl Type and Location
When choosing an adhesive, you’ll match the product to the vinyl type—sheet vinyl often needs a different glue and surface prep than LVT or LVP.
Consider plank versus tile differences, moisture exposure in bathrooms or basements, and whether the space is commercial or residential before picking open-time, pressure-sensitive, or moisture-resistant adhesives.
I’ll walk you through the best choices and prep steps for each situation.
Sheet Vinyl Best Adhesive Choices and Surface Prep
Because sheet vinyl comes in different backing systems and is installed in varied spaces, you’ll need to match adhesive type to both vinyl construction and location to get a durable bond.
For cushion‑back or felt‑back, use pressure‑sensitive or acrylic adhesives; for solid‑back, use full‑spread vinyl or urethane adhesives.
Prep the subfloor: clean, dry, level, and prime porous surfaces per manufacturer instructions.
Luxury Vinyl Tile (LVT) and Luxury Vinyl Plank (LVP) Recommended Adhesives
Sheet vinyl adhesives set the groundwork, but LVT and LVP have their own bonding needs because they’re thicker, stiffer, and often used in different traffic and moisture conditions. You’ll choose pressure-sensitive for floating installs, acrylic for high-traffic, and moisture-tolerant urethane for basements. Match adhesive to subfloor, traffic, and warranty.
| Adhesive Type | Best Use |
|---|---|
| Pressure-sensitive | Click systems |
| Acrylic | Commercial areas |
| Urethane | Moisture-prone spaces |
| Epoxy | Heavy-duty installations |
Vinyl Tile vs. Vinyl Plank Specific Considerations
Although both vinyl tile and vinyl plank share vinyl’s durability, you’ll pick adhesives differently because tile is thicker and grout-like while plank mimics hardwood with longer edges and tighter seams.
For tile, use heavier-duty, trowel-applied adhesives that support weight and prevent hollow spots.
For plank, choose flexible, pressure-sensitive or peel-and-stick adhesives that allow slight movement and guarantee tight seam adhesion without gapping.
Adhesive Selection for High-Moisture Areas (Bathrooms, Basements)
When you’re installing vinyl in bathrooms or basements, pick an adhesive designed for constant or intermittent moisture exposure and for the specific vinyl type—waterproof, mold-resistant formulations for sheet vinyl; waterproof, solvent- or polymer-based adhesives for tile; and pressure-sensitive, moisture-tolerant adhesives for plank.
Test substrate moisture, follow manufacturer RH and pH limits, use appropriate primers, and verify edge sealing where water intrusion is likely to protect bond and prevent mold.
Adhesives for Commercial vs. Residential Installations
Because commercial spaces see heavier traffic and different maintenance routines than homes, you’ll need adhesives rated for higher shear strength, faster cure times, and greater chemical and heat resistance in those settings; in contrast, residential installations can often use more forgiving, cost-effective formulations that prioritize ease of installation and comfort underfoot.
Choose pressure-sensitive or urethane adhesives for commercial vinyl; for homes, acrylic or water-based adhesives usually suffice.
Step-by-Step Guide: How to Prepare and Apply Adhesive for Vinyl Flooring
Before you lay any vinyl, you’ll assess the subfloor and test for moisture to make sure conditions are right.
Then you’ll clean, level, and prime the surface, choose the right tools and mix the adhesive, and apply it using the proper trowel, observing open time and working in sections.
Finally, you’ll align the planks or sheet, roll them for full contact, and treat seams according to the manufacturer’s instructions.
Step 1 Assess Subfloor Condition and Moisture Testing
Condition matters: you’ll need to inspect the subfloor for level, cleanliness, and damage, then test for moisture so your adhesive bonds properly and your vinyl lasts.
You’ll measure flatness, check for soft spots, use a moisture meter, and document results before choosing adhesive or remediation.
- Measure flatness at multiple points
- Probe for soft or damaged areas
- Read moisture levels per manufacturer specs
- Record findings and decide next steps
Step 2 Surface Preparation: Cleaning, Leveling, Priming
Surface prep makes the difference between a vinyl floor that lasts and one that fails, so you’ll clean, level, and prime the subfloor methodically before any adhesive touches it.
Remove debris, vacuum, and degrease; repair cracks and low spots with appropriate patching compound; sand high areas.
Finally, apply a compatible primer per manufacturer instructions and allow proper drying time before proceeding.
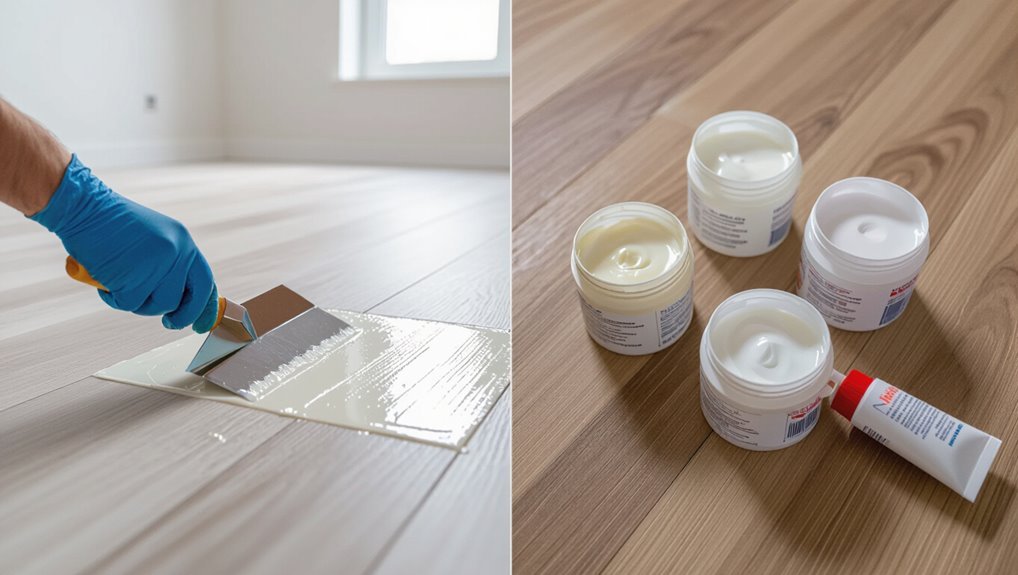
Step 3 Choosing Tools and Mixing Adhesive
With the subfloor clean, level, and primed, gather the right tools and get the adhesive ready so you’ll work efficiently and avoid mistakes.
Choose a notched trowel size recommended by the adhesive and vinyl, a margin trowel, mixing paddle, bucket, and gloves.
Follow manufacturer ratios, mix slowly to a lump-free consistency, and note pot life and storage instructions before you start.
Step 4 Application Techniques: Trowel Types, Open Time, Working in Sections
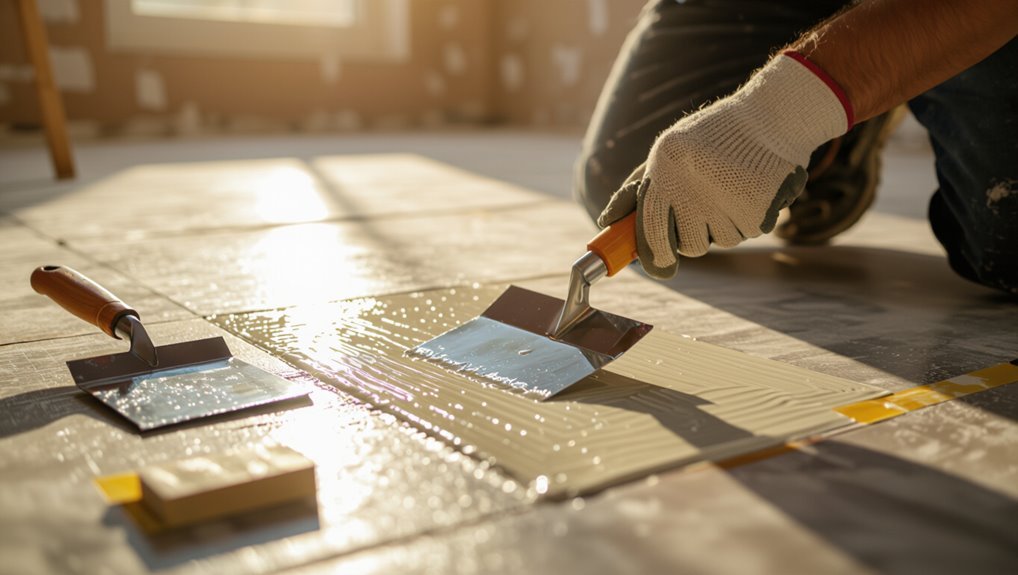
Once you’ve mixed the adhesive and gathered your tools, focus on proper trowel selection, respecting open time, and working in manageable sections so each sheet gets full contact and a strong bond.
Choose the trowel notch size per adhesive and flooring backing, spread evenly, and watch tack development. Work a few square feet at a time, align edges, and avoid skinning over before laying.
Step 5 Installing Vinyl: Alignment, Rolling, Seam Treatment
Now that your adhesive is spread and tack is developing, start laying the vinyl by aligning the sheet carefully to reference lines and room features so seams fall where they’ll be least visible.
Work from the center or a straight edge, smooth out wrinkles with a carpet roller, press seams firmly, and use a seam roller and seam sealer for tight, invisible joins before trimming excess with a sharp knife.
Step 6 Curing Time, Traffic Restrictions, and Post-Installation Care
After the adhesive has set, give the floor the time it needs to reach full strength before you walk on it or place furniture.
Wait manufacturer-recommended cure times—usually 24–72 hours—avoid heavy traffic and high heels, and keep temperature and humidity stable.
Clean gently with manufacturer-approved cleaners, protect seams with felt pads under furniture, and inspect periodically for lifting or gaps to address promptly.
Comparative Charts and Practical Recommendations
To make your choice easier, you’ll find a clear adhesive comparison chart showing strengths, cure time, VOC levels, and cost.
Use the quick picks to narrow options fast: Best Overall, Best Budget, Best for Wet Areas, and Best for Commercial.
From there you can match the adhesive to your project’s priorities—speed, indoor air quality, or heavy traffic durability.
Adhesive Comparison Chart: Strengths, Cure Time, VOCs, Cost
While you’re comparing adhesives, focus on four practical factors—bond strength, cure time, VOC emissions, and cost—because they determine long-term performance and installation trade-offs. Use the table to weigh priorities quickly and pick the right balance for your project.
| Strength | Cure | VOCs |
|---|---|---|
| High | 24–48h | Low |
Quick Picks: Best Overall, Best Budget, Best for Wet Areas, Best for Commercial
Picking the right vinyl flooring adhesive comes down to your priorities—durability, budget, moisture resistance, or heavy traffic—and we’ll highlight top choices for each so you can decide quickly.
- Best Overall: high-strength polyurethane for long-lasting bond and flexibility.
- Best Budget: water-based acrylic for affordability and easy cleanup.
- Best for Wet Areas: 100% silicone or marine-grade adhesive.
- Best for Commercial: heavy-duty epoxy or urethane with industrial tack.
Common Problems, Mistakes, and How to Avoid Them
Before you glue anything down, check the subfloor for bumps, soft spots, or debris—these signs need fixing or the vinyl won’t sit or bond properly.
Don’t grab the wrong adhesive or slap it on too thick or too thin; both mistakes cause lifting, bubbling, and poor appearance.
In basements especially, test and address moisture first because dampness wrecks most adhesives and leads to failure.
Poor Subfloor Prep Signs and Fixes
A shaky, uneven, or dusty subfloor will wreck even the best vinyl installation, so you need to recognize the signs early and fix them properly.
Check for bounce, high/low spots, loose boards, and visible dust or adhesive residue.
Secure squeaks, level dips with patch or self-leveler, sand bumps, and vacuum thoroughly.
Don’t skip moisture tests; address dampness before gluing.
Using the Wrong Adhesive Typical Failures and Prevention
Even with a spotless, level subfloor, using the wrong adhesive can undo all your prep work—causing lifting, edge curl, or staining that ruins the install.
You’ll also see seams separate, chemical reactions with vinyl, or adhesive bleed-through.
Prevent this by matching adhesive type to vinyl, checking manufacturer specs, testing a small area, and following recommended open time and temperature guidelines.
Over- or Under-Application How It Affects Bond and Appearance
If you apply too much adhesive, you’ll get squeeze-out, long dry times, and a messy finish; apply too little, and tiles won’t bond fully, causing hollow spots, edge lift, and seam separation.
Work in small sections, follow trowel notch size, and check transfer. Remove excess immediately and reapply thinly where coverage lacks.
Test a scrap tile before full installation.
Handling Moisture and Adhesive Failure in Basements
Because basements trap moisture and concrete can wick dampness up through the slab, you need to address humidity and vapor before laying vinyl—otherwise adhesive failure, mold, and lifting will follow.
Test concrete with a moisture meter or ASTM moisture test, install a vapor barrier or waterproof membrane, use moisture-tolerant adhesive, guarantee proper subfloor prep, and ventilate to prevent future failures.
Best Practices, Maintenance, and Longevity Tips
Keep your vinyl adhesive strong by using gentle, pH-neutral cleaners, avoiding excessive water, and wiping up spills promptly.
Check seams and edges regularly for lifting or discoloration so you can reapply adhesive or repair sections before damage spreads.
Also consider low-VOC products, proper disposal of old adhesive, and good ventilation to protect indoor air quality and your health.
Daily Use and Cleaning That Preserves Adhesive Bond
While regular foot traffic and routine cleaning won’t usually harm a properly installed vinyl floor, you should treat the adhesive seam areas with simple preventive habits to preserve bond strength and extend service life.
Wipe spills promptly, avoid soaking seams, use pH-neutral cleaners, lift heavy furniture instead of dragging, place protective pads under chairs, and maintain consistent indoor humidity and temperature to reduce adhesive stress.
Routine Inspections and When to Reapply or Repair
Inspect your vinyl floor on a regular schedule—every 3 to 6 months for high‑traffic areas and at least once a year elsewhere—to catch adhesive issues early.
Look for lifting edges, bubbles, or loose seams. If you find small areas, reapply recommended adhesive or seam sealer; for widespread failure, remove and replace affected planks.
Document repairs and monitor performance.
Environmental and Health Considerations (VOCs, Disposal)
Because adhesives and flooring materials can emit volatile organic compounds (VOCs) and create disposal challenges, you should choose products and practices that protect indoor air and the environment.
Select low‑ or zero‑VOC adhesives, follow manufacturer guidelines, ventilate during installation, and use proper PPE.
When removing vinyl, avoid landfill where possible: recycle, donate usable material, or use certified waste handlers to limit toxic leachate and air pollution.
Cost, Availability, and Brand Considerations
You’ll want to balance price and performance by understanding typical costs for pressure-sensitive, wet-set, and urethane adhesives.
Check technical data sheets and warranties to confirm coverage, cure times, VOCs, and recommended substrates before you buy.
Stick with well-known brands for DIY jobs and opt for professional-grade products when warranties or heavy-traffic durability are required.
Price Expectations by Adhesive Type
When budgeting for vinyl-flooring adhesive, expect prices to vary widely by type—water-based acrylics tend to be the cheapest, pressure-sensitive and urethane adhesives sit in the midrange, and specialty reactive urethanes or soundproofing formulas cost the most—so decide which performance features you need before comparing brands and availability.
Check local stock, compare coverage rates per tub or pail, and factor in labor and shipping for accurate totals.
How to Read Technical Data Sheets and Warranties
Wondering how to decode technical data sheets and warranty fine print so you can pick the right adhesive for cost and availability?
You’ll focus on coverage, cure times, temperature limits, and warranty scope.
Read specs for surface prep and compatible vinyl types. Compare warranty length and exclusions before buying.
- Coverage vs. price
- Open/cure times
- Temp/moisture limits
- Warranty exclusions
Popular Brands and When to Choose Professional-Grade Products
Now that you know how to read specs and warranties, let’s look at brands and when pro-grade adhesives make sense.
Choose reputable names—Roberts, Henry, Mapei—for reliable formulations and support.
Use pro-grade if high traffic, large areas, or demanding substrates require stronger bond, faster cure, or better moisture control.
Consider cost, local availability, and installer preference; pro products cost more but reduce risk and callbacks.
FAQs About Adhesive for Vinyl Flooring
You probably have specific questions about using and maintaining adhesive with vinyl flooring, like whether construction adhesive is okay or how long to wait before walking on it.
You’ll also want to know if adhesive stains show through thin vinyl, whether you can replace just a section of glued-down flooring, and how to remove old adhesive from the subfloor.
I’ll answer each of these clearly so you can pick the right product and handle installation or repairs confidently.
Can I Use Construction Adhesive for Vinyl Flooring?
Curious whether construction adhesive will hold your vinyl flooring? You can use construction adhesive for some rigid vinyl plank installations, but only if the product’s label lists vinyl or LVP/LVT and compatibility with subfloor type.
Flexible sheet vinyl and peel-and-stick planks usually need specialized vinyl adhesives.
Always check manufacturer recommendations, VOC limits, and cure instructions to verify bond strength and warranty compliance.
How Long Should I Wait Before Walking on Newly Glued Vinyl?
If your adhesive and vinyl are compatible, the next question is how long to wait before walking on the floor.
Generally, wait 24–48 hours for light foot traffic, longer if the manufacturer recommends longer cure times.
Keep the area ventilated and avoid heavy furniture for 72 hours to a week.
Check temperature and humidity—cooler or wetter conditions slow curing.
Will Adhesive Stains Come Through Thin Vinyl?
Wondering whether adhesive stains will show through thin vinyl? You might see transfer if the vinyl is very thin or translucent and the adhesive contains solvents or dark dyes.
Use low-solvent, clear adhesives and apply evenly to avoid bleed-through. Test a scrap first.
If staining appears, switch to a compatible water-based adhesive or choose thicker, opaque vinyl to hide any discoloration.
Can I Replace Only Part of a Glued-Down Vinyl Floor?
Thin or translucent vinyl can show adhesive problems, but you may still be able to replace just part of a glued-down floor without stripping the whole room.
You can cut out damaged planks, clean and prep the exposed substrate, and install matching replacement pieces with appropriate adhesive.
Match thickness and pattern, verify seams align, and feather edges to minimize visibility for a seamless repair.
How Do I Remove Old Adhesive from a Subfloor?
Start by identifying the adhesive type—pressure-sensitive, acrylic, epoxy, or water-based—since removal methods and solvents differ for each.
Test a small area with recommended solvent or warm water for water-based glue.
Scrape with a floor scraper or oscillating tool, then clean residue with solvent, mineral spirits, or adhesive remover.
Sand or grind stubborn spots, vacuum, and wipe before installing new flooring.
Visuals and Resources
You’ll find an installation diagram and adhesive application photos helpful for visualizing the steps and spread patterns.
Check manufacturer guides and technical datasheets for product-specific instructions and limitations.
Also consult moisture testing standards to confirm your subfloor meets requirements before you glue anything down.
Installation Diagram and Adhesive Application Photos
1 diagram and a few clear photos can make the installation process far easier to follow, so we’ve included a detailed layout showing plank orientation, seam staggering, and adhesive zones alongside step-by-step application images.
You’ll see proper trowel angles, spread rates, open time markers, and pressure-rolling technique. Use the visuals to match your floor plan, verify coverage, and avoid common mistakes during adhesive application.
Links to Manufacturer Guides, Technical Datasheets, and Moisture Testing Standards
Those installation visuals will help you apply adhesive correctly, but you’ll also need the manufacturer guides, technical datasheets, and moisture testing standards to confirm product compatibility and long-term performance.
Use them to verify adhesive type, coverage, open time, and substrate limits before you start.
- Manufacturer installation guide
- Technical datasheet (TDS)
- Safety data sheet (SDS)
- ASTM/ISO moisture testing standards