How Long Do Vinyl Floors Last? Expected Lifespan and Care Tips
You can expect vinyl floors to last anywhere from about 5 years for thin, budget options to 20–30+ years for high-quality luxury vinyl if you install and maintain them properly. Lifespan varies by type—sheet, LVP/LVT, or commercial grades—and by wear-layer thickness, traffic, moisture, and installation quality. Clean regularly, avoid harsh chemicals, use rugs and felt pads, and fix damage early to extend life. Keep going and you’ll get practical tips to maximize your floor’s longevity.
How Long Do Vinyl Floors Last? Quick Answer and Summary
You can expect vinyl floors to last about 5–10 years for thin sheet or budget LVT, 10–20 years for mid-range LVP/LVT, and 20–30+ years for high-quality, thick luxury vinyl with a strong wear layer.
Key factors that change lifespan are traffic, maintenance, sunlight exposure, and installation quality.
Below you’ll find a quick visual at-a-glance guide to compare lifespans by type.
Direct answer expected lifespan range by vinyl type
Vinyl flooring lasts anywhere from about 5 to 25 years depending on the type and installation quality: peel-and-stick and cheaper sheet vinyl often wear out in 5–10 years.
Mid-range luxury vinyl tile (LVT) or plank (LVP) typically lasts 10–20 years, and high-quality, well-maintained commercial-grade vinyl can reach 20–25 years or more.
For how long do vinyl floors last, expect variability by type.
One-sentence summary of key factors that change lifespan
Because installation quality, traffic levels, product type (peel-and-stick, sheet, LVT/LVP, or commercial-grade), wear-layer thickness, and maintenance all vary, expect vinyl-floor lifespan to range widely—from about 5 years for cheap, poorly installed options to 20–25+ years for high-quality, well-cared-for products.
You’ll extend service by choosing a thicker wear layer, installing correctly, limiting heavy traffic, and doing regular cleaning and prompt repairs.
Visual lifespan at-a-glance
How long will your vinyl floor last? Expect 5–30 years depending on type and care: budget sheet vinyl often lasts 5–10 years, luxury vinyl plank or tile 10–20 years, and commercial-grade or well-maintained LVP can reach 20–30 years.
Regular cleaning, proper underlayment, UV protection, and prompt repairs extend life.
Use this quick guide to set realistic expectations.
Understanding Vinyl Flooring Basics
You’ll first want to know that vinyl flooring is a synthetic surface made of layered PVC materials.
Types include luxury vinyl plank (LVP), vinyl sheet, and vinyl tile, each built differently with varying cores, backings, and printed surfaces.
Those construction differences — especially the wear layer and core — directly affect durability and how long your floor will last.
What is vinyl flooring? Types and construction
Vinyl flooring is a resilient, affordable sheet or plank product made from layers of synthetic materials bound to a backing, and it’s designed to mimic wood, stone, or tile while standing up to moisture and everyday wear.
You’ll find layered construction: a wear layer, printed design, vinyl core, and backing; material choices and thickness affect durability, maintenance, and installation options.
Comparison of luxury vinyl plank (LVP), vinyl sheet, and vinyl tile
1 clear choice between luxury vinyl plank (LVP), vinyl sheet, and vinyl tile depends on where you’ll install it, how it should look, and how much wear it must handle. You’ll pick LVP for realistic wood looks, sheet for seamless moisture resistance, and tile for modular repairs and patterns.
| Feature | Typical advantage |
|---|---|
| LVP | Realistic wood aesthetics |
| Sheet | Seamless, water-tight |
| Tile | Easy replaceability |
How construction affects durability (wear layer, core, backing)
Now that you’ve picked the vinyl style that fits the room, look at how construction determines how long it lasts.
Check the wear layer thickness for scratch and stain resistance; thicker is better.
Assess the core—rigid cores resist dents and moisture while flexible cores suit uneven subfloors.
Don’t ignore backing: it adds stability and sound reduction, affecting overall durability and comfort.
Typical Lifespan by Vinyl Type and Use Case
You’ll see different lifespans depending on the vinyl type and where you install it.
Vinyl sheet, LVP, and vinyl tile each have typical year ranges and suit different environments—from low-traffic bathrooms to busy commercial spaces.
Also note that commercial-grade vinyl usually outlasts residential-grade options under heavy use.
Vinyl sheet expected years and typical use environments
When installed and maintained properly, vinyl sheet flooring can last anywhere from 10 to 25 years depending on material quality and where you put it.
Commercial-grade, thicker sheets typically hold up toward the higher end in busy retail or office settings, while thinner residential sheets tend to wear out sooner in high-traffic kitchens or entryways.
You should choose heavier gauge for corridors, moisture-prone basements, and rental units to extend service life.
Luxury vinyl plank (LVP) expected years and typical use environments
Luxury vinyl plank (LVP) typically lasts 10 to 30 years depending on plank thickness, wear layer, and installation quality. Rigid core styles and commercial-grade wear layers push longevity toward the top end in busy households or light commercial spaces.
Thinner residential LVP will show wear sooner in entryways and high-traffic kitchens. You should choose thicker planks and 20–30 mil wear layers for pets, active families, or retail, and expect shorter life in poorly maintained or improperly installed installations.
Vinyl tile expected years and typical use environments
Planks aren’t the only vinyl option worth considering — vinyl tile (VCT and LVT styles) offers different durability and use patterns that affect how long it’ll last.
You’ll find LVT lasts 10–25 years in homes with moderate traffic; durable VCT can endure 20+ years in low-moisture, maintained spaces.
High-traffic or wet areas shorten lifespan unless you upgrade wear layer and care routinely.
Commercial-grade vs residential-grade vinyl lifespan
Because commercial and residential vinyl are engineered for different demands, their lifespans vary considerably: you’ll choose based on traffic and budget. Commercial vinyl often lasts 10–20+ years under heavy use; residential vinyl lasts 7–15 years in homes.
| Type | Typical Lifespan |
|---|---|
| Commercial | 10–20+ years |
| Residential | 7–15 years |
| Light-use residential | 5–10 years |
Key Factors That Determine Vinyl Floor Longevity
When you choose vinyl, the material and wear layer thickness are the first things that affect how long it lasts.
How well it’s installed and how solid the subfloor is will make a big difference, as will your home’s foot traffic, moisture and sunlight exposure, and temperature swings.
Finally, your upkeep—what cleaners you use and how regularly you maintain the floor—will determine whether it ages gracefully or wears out sooner.
Material and wear layer thickness
Although vinyl looks similar across styles, the core material and the thickness of its wear layer are what actually determine how long your floor will last.
You should choose rigid core or solid vinyl for durability, and prioritize a thicker wear layer (20 mil or more for high traffic).
Thicker, denser cores resist dents and moisture, extending lifespan and easing maintenance.
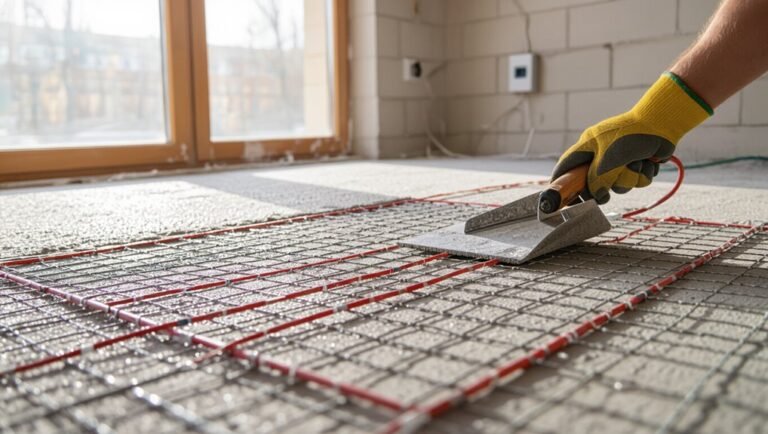
Installation quality and subfloor preparation
Material and wear layer matter, but even the toughest vinyl won’t perform if it’s poorly installed.
You should guarantee the subfloor is clean, dry, level, and free of bumps or moisture.
Use appropriate underlayment, follow manufacturer adhesive or click-lock guidelines, and allow acclimation time.
Proper installation prevents gaps, buckling, and premature wear, extending your floor’s lifespan and reducing future repairs.
Foot traffic and household activity levels
Because how you use a room directly affects wear, high foot traffic and active households will shorten vinyl’s effective lifespan faster than quiet spaces.
You’ll notice thinning in hallways, entryways, and kitchens where grit and repeated steps grind the wear layer.
Use rugs, felt pads, and regular sweeping to reduce abrasion, and rotate heavy furniture to prevent permanent indentation.
Exposure to moisture, sunlight, and temperature changes
If your vinyl gets exposed to water, direct sun, or big temperature swings, you’ll see faster deterioration—warping, fading, and adhesive breakdown are the usual culprits.
You should limit prolonged moisture, shield floors from intense sunlight with blinds or rugs, and maintain stable indoor temperatures to reduce expansion and contraction.
Promptly address leaks and avoid placing heat sources directly on the surface.
Maintenance routines and cleaning products used
While regular care won’t stop wear entirely, the routines you follow and the cleaners you choose have one of the biggest effects on how long vinyl floors last.
Sweep or vacuum daily to remove grit, mop with a manufacturer-recommended pH-neutral cleaner, avoid abrasive tools and waxes, and blot spills quickly.
Schedule deeper cleanings monthly and always test new products in an inconspicuous spot.
Pets, furniture, and impact damage
When pets, heavy furniture, and dropped items meet vinyl, the damage usually shows up as scratches, dents, or punctures.
So take preventative steps to protect your floor. Use felt pads, wide furniture glides, and rubber casters. Trim pet nails, place mats by doors, and avoid dragging heavy pieces.
For impact-prone areas, add rugs and consider thicker commercial-grade vinyl for extra resilience.
How to Accurately Estimate Remaining Life for Your Vinyl Floor
Start with a quick visual inspection checklist—look for surface scratches, thinning wear patterns, bubbling, and seams pulling apart.
Note specific signs that mean replacement is likely, such as extensive wear through the wear layer, permanent staining, or recurring warping.
If you spot structural issues, unclear causes, or widespread damage, call a flooring professional for a thorough assessment and an estimated remaining lifespan.
Visual inspection checklist
Because small problems often show up before big ones, a quick, systematic visual check can tell you a lot about how much life your vinyl floor has left.
Look closely and note issues, then compare across the room.
- Surface: scratches, dull spots, peeling edges.
- Seams: gaps, lifting, or visible adhesive.
- Joints: loose trim, uneven joints, water stains.
Signs of wear and when replacement is needed
A quick visual check tells you where to focus next: now look for concrete signs that wear has moved beyond minor repair and into replacement territory.
Check for deep gouges, persistent peeling or lifting, large areas of discoloration, exposed backing, or recurring seams separating.
If multiple zones show structural failure or water damage has warped the subfloor, plan replacement rather than spot fixes.
When to call a flooring professional for assessment
Wondering whether your vinyl floor still has life left or needs a professional’s verdict?
Call a flooring pro if you see widespread bubbling, persistent stains, deep gouges, seams separating, or unevenness indicating subfloor issues.
Also consult one for unclear discoloration, odor, or after major water damage.
A pro will assess wear, estimate remaining life, recommend repairs, or advise replacement and cost-effective options.
Installation and Preparation Steps That Improve Lifespan
To get the longest life from your vinyl, start by choosing a product rated for the room and traffic it’ll face.
Inspect and repair the subfloor, then let the flooring acclimate and follow proper installation techniques.
Finish by sealing edges and connections to block moisture and movement.
Step 1 Choosing the right vinyl product for environment
Because where you install vinyl determines how it performs, choosing the right product for the environment is the single most important step in extending its life.
Match vinyl type to traffic, moisture, and sunlight: use commercial-grade or thicker wear layers for busy areas, waterproof options for bathrooms/kitchens, and UV-resistant products for sunlit spaces.
Pick appropriate finish and warranty for longevity.
Step 2 Subfloor evaluation and necessary repairs
Before laying any vinyl, inspect the subfloor closely—unevenness, moisture, and loose boards will shorten your floor’s life and ruin the finish.
Remove debris, fix squeaks, replace damaged plywood, and level low spots with appropriate compound.
Test for moisture with a meter; address high readings before proceeding.
Proper repairs prevent warping, adhesive failure, and premature wear, extending your vinyl’s lifespan.
Step 3 Proper acclimation and installation techniques
Once you’ve repaired and dried the subfloor, let your vinyl acclimate in the installation room for at least 48 hours so it adjusts to temperature and humidity; this prevents gaps, buckling, and adhesive issues later on.
Measure and mark layout lines, stagger seams per manufacturer specs, use recommended underlayment, maintain proper expansion gaps, and follow adhesive or click-lock instructions precisely to guarantee a durable, long-lasting floor.
Step 4 Sealing edges and transitions to prevent moisture
If you want your vinyl to last, seal edges and junctions tightly to keep moisture out of seams, underlayment, and doorways.
Use appropriate caulk or seam sealer at perimeters, thresholds, and connections.
Install waterproof transition strips between rooms and around sinks.
Check seals periodically and reapply where gaps or wear appear.
Proper sealing prevents cupping, mold, and adhesive failure.
Maintenance and Care Tips to Maximize Lifespan
To keep your vinyl looking and lasting its best, stick to simple daily and weekly cleaning routines and know which cleaners to use or avoid.
Schedule periodic maintenance like deep cleans and any recommended resealing or protective coatings, and add practical protections such as mats, area rugs, and furniture pads.
These steps cut wear, prevent damage, and extend your floor’s lifespan.
Daily and weekly cleaning routines
Daily and weekly cleaning routines keep your vinyl looking fresh and prevent dirt from abrading the surface.
You should sweep or vacuum daily to remove grit, mop weekly with a damp microfiber mop, and address spills immediately to avoid staining.
Follow a simple schedule to spot-check high-traffic areas and rotate mats.
- Daily sweep/vacuum
- Weekly damp mop
- Immediate spill cleanup
Recommended cleaning products and products to avoid
Although vinyl’s durable surface handles ordinary cleaners, you should pick products formulated for vinyl or pH-neutral floor cleaners to avoid dulling or damaging the wear layer.
Use mild dish soap solutions, commercial vinyl cleaners, or manufacturer-recommended sprays.
Avoid abrasive scrubbers, ammonia, bleach, oil-based detergents, waxes, or silicone-based polishes.
Test new products in an inconspicuous spot first to guarantee compatibility.
Periodic maintenance (deep cleaning, resealing, protective coatings)
Because vinyl needs more than routine sweeping, you should schedule periodic deep cleaning and protective treatments to keep the wear layer intact and extend the floor’s life.
Every few months, mop with manufacturer-approved cleaners, remove stubborn grime with a soft scrub pad, and consider professional deep cleaning annually.
If recommended, apply compatible sealers or maintenance coatings sparingly to restore luster and added surface protection.
Protective measures: mats, furniture pads, area rugs
When you place mats at entrances, use felt furniture pads, and lay area rugs in high-traffic zones, you’ll cut down on abrasion, scratches, and embedded dirt that shorten vinyl’s life.
Choose non-staining, low-back rugs with breathable backing to prevent moisture trapping.
Replace worn mats, clean pads periodically, and shift rugs occasionally to avoid uneven wear and fading, extending vinyl’s appearance and longevity.
Common Mistakes That Shorten Vinyl Flooring Life
Don’t use harsh cleaners or abrasive tools, and don’t skip proper installation or subfloor prep—you’ll pay for shortcuts.
Letting moisture sit, hauling heavy furniture across the surface without protection, or ignoring small damage will compound problems fast.
Catching and correcting these mistakes early will keep your vinyl looking and performing its best.
Using harsh cleaners or abrasive tools
Ever wondered why your vinyl starts looking dull or scratched even though you clean it regularly?
You’re likely using harsh cleaners or abrasive tools that strip the wear layer and dull the finish. Avoid bleach, ammonia, scouring pads, and stiff brushes.
Use manufacturer-recommended pH-neutral cleaners, soft mops, and microfiber cloths.
Gentle care preserves appearance and extends vinyl’s lifespan.
Poor installation shortcuts and skipped subfloor prep
Cleaning with the right products won’t save your vinyl if it’s installed poorly, because shortcuts and skipped subfloor prep create problems that show up fast.
If you don’t level, clean, and secure the subfloor, seams will gap, adhesive will fail, and planks will buckle.
You’ll face premature wear, noisy floors, and costly repairs—so follow manufacturer guidelines and prep thoroughly before installation.
Allowing prolonged moisture or standing water
If you let moisture sit on vinyl for hours or days, it will damage the flooring faster than you expect. You should wipe spills immediately, dry seams and edges, and check under appliances for leaks.
Prolonged water causes warping, adhesive failure, mold, and discoloration. Use mats at entryways, maintain humidity, and fix plumbing issues promptly to protect vinyl and extend its lifespan.
Heavy furniture without proper protection
Just as standing water can undermine vinyl from below, heavy furniture can damage it from above when you don’t take precautions.
You should lift rather than drag pieces, use wide, stable coasters or felt pads under legs, and distribute weight with plywood or furniture cups for very heavy items.
Regularly check pads for wear and replace them to prevent indentations and scratches.
Ignoring minor damage that leads to larger problems
When you shrug off small scratches, chips, or loose seams, those tiny issues can quickly turn into bigger, costlier problems. Moisture, dirt, and traffic exploit any weakness and accelerate wear.
Don’t wait: repair chips, reseal seams, and clean debris promptly. Small fixes prevent delamination, staining, and warped planks.
Regular inspections save money and extend your vinyl’s lifespan.
Small Repairs and When Replacement Is Better
You can handle many small fixes yourself, like patching gouges or re-gluing loose seams, with the right tools and materials.
Call a pro if seams keep separating, patterns don’t match, or water damage has warped the layers.
If damage is widespread, the floor’s near the end of its warranty, or repair costs approach replacement, replacing the vinyl is usually the smarter, more economical choice.
DIY patching and seam repairs what you can fix
Small surface gouges, loose seams, and tiny tears are often things you can fix yourself without replacing the whole vinyl sheet or plank.
You can clean the area, use a vinyl repair kit or matching adhesive patch, press seams with a seam roller, and trim frayed edges.
Test patches in an inconspicuous spot, follow product instructions, and replace only if damage spreads or affects subfloor.
When professional repair is recommended
If damage goes beyond surface scratches—like wide tears, extensive bubbling, or seams lifting across a large area—call a pro to assess the problem and prevent hidden issues from worsening.
You should also hire a pro if moisture has reached the subfloor, pattern matching matters, or repairs require specialized welding or replacement planks.
Professionals diagnose rot, guarantee proper adhesion, and restore finish uniformity.
Signs that full replacement is more cost-effective than repair
When repair costs start to approach the price of new flooring, replacement often makes more sense—especially when damage is widespread or recurring.
Choose replacement if seams lift across rooms, multiple planks or sheets show wear, subflooring is compromised, or repairs keep failing.
You’ll save time and avoid repeated expenses by installing new vinyl with updated warranties and improved durability.
Cost, Warranty, and Value Considerations
You’ll want to weigh upfront cost against expected lifespan, since cheaper vinyl often wears out sooner while higher-grade options last longer.
Read warranty details carefully—coverage, exclusions, and labor terms tell you what the manufacturer expects the floor to endure.
Those warranty terms usually mirror durability: longer, more extensive warranties generally indicate a more resilient product.
Typical cost vs lifespan trade-offs
Although upfront price often grabs your attention, the best choice balances cost, expected lifespan, and warranty coverage to match how you’ll actually use the floor. You’ll weigh low-cost LVT for short-term rentals against premium commercial vinyl for heavy traffic. Prioritize longevity where you’ll keep the floor long, and choose affordable options for temporary needs.
| Type | Cost range | Expected lifespan |
|---|---|---|
| Budget | Low | 5–10 yrs |
| Mid | Moderate | 10–20 yrs |
| Premium | High | 20+ yrs |
Reading and understanding vinyl warranties
1 key step in evaluating vinyl flooring is understanding the warranty: it tells you what’s covered, for how long, and under which conditions.
Read exclusions, claim procedures, and whether labor or replacement is included. Check transferability and required maintenance to keep coverage.
Note wear, stain, moisture, and manufacturing defect definitions so you’ll know when a claim is valid and what remedies to expect.
How warranty terms reflect expected durability
When comparing vinyl options, look at warranty length and scope because they signal how manufacturers expect the product to perform over time.
You’ll use warranty details to gauge durability: longer, more extensive coverage usually means higher-quality wear layers and better installation tolerance.
Check exclusions, transferability, and pro-rated clauses so you can assess real value and predict maintenance or replacement costs accurately.
Real-World Scenarios and Lifespan Estimates
Think about how different rooms change what you can expect from vinyl: a low-traffic bedroom will usually last the longest with basic care, while a busy family kitchen sees more wear and needs tougher maintenance.
In bathrooms and laundry rooms you’ll want water-resistant or waterproof vinyl and strict moisture control to avoid problems.
For commercial retail or office use, plan for shorter lifespans and heavier-duty products and maintenance.
Scenario A Low-traffic bedroom (estimate + tips)
Although you won’t subject it to constant wear, a low-traffic bedroom still gives vinyl flooring an excellent chance to reach the higher end of its lifespan—typically 15 to 25 years depending on product quality and maintenance.
Simple habits like using felt pads, keeping pet nails trimmed, and avoiding harsh cleaners will pay off over time.
Rotate rugs, vacuum gently, clean spills promptly, and inspect seams yearly to prevent problems.
Scenario B High-traffic family kitchen (estimate + tips)
Moving from a calm bedroom to a busy family kitchen changes how long vinyl will last and what care it needs.
Expect 8–15 years for quality vinyl under heavy daily use.
Wipe spills immediately, use rugs at sinks and entryways, add felt pads to chair legs, sweep frequently, and deep-clean monthly with manufacturer-approved products to prevent wear and staining.
Scenario C Bathroom or laundry (moisture considerations)
Because bathrooms and laundry rooms expose vinyl to frequent moisture and temperature swings, you should expect a slightly shorter lifespan than in dry areas—typically 7–12 years for good-quality vinyl under regular wet use.
You can extend life by sealing seams, using waterproof underlayment, keeping humidity controlled, wiping spills promptly, and replacing damaged sections.
Regular inspections catch failures early.
Scenario D Commercial retail or office (expectations)
When used in moderate-traffic retail or office settings, good-quality commercial vinyl typically lasts 10–20 years depending on traffic, maintenance, and installation quality.
You’ll see shorter life where heavy loads, rolling carts, or poor subfloor prep occur. Regular cleaning, prompt repairs, and protective mats extend service life.
Expect faster wear in entryways and aisles; plan maintenance cycles and budget for earlier replacement if traffic spikes.
Frequently Asked Questions
You probably have a few quick questions about lifespan, refinishing, heat and water damage, and whether thicker vinyl lasts longer.
I’ll answer how long luxury vinyl plank typically lasts, when resurfacing is possible, and what heat, sun, or water damage means for replacement.
Read on for straightforward guidance so you can decide what’s best for your floors.
How long does luxury vinyl plank typically last?
Most luxury vinyl plank (LVP) floors last 10 to 25 years depending on wear, maintenance, and quality, so you can expect durable performance if you pick a well-made product and care for it properly.
Your LVP’s lifespan hinges on traffic, protective wear layer thickness, installation quality, and moisture exposure.
With routine cleaning, mats, and felt pads, you’ll typically reach the upper range.
Can vinyl flooring be refinished or resurfaced?
Can vinyl flooring be refinished or resurfaced? You can’t sand and refinish vinyl like hardwood, but you can refresh it.
For minor surface scuffs use gentle cleaners and repair kits for scratches or seam lifts.
Replace damaged planks or sheets for deeper wear.
Some professionals can apply specialty coatings, though compatibility and cost vary—get a pros’ assessment before proceeding.
Will vinyl flooring warp from heat or sunlight?
If repairs or coatings don’t fully solve surface damage, you’ll want to know how heat and sunlight affect vinyl next.
Vinyl resists moderate sunlight but prolonged UV exposure can fade colors and degrade wear layers.
Extreme heat—like radiant heaters or hot pans—can soften, warp, or cause adhesive failure.
Use blinds, UV film, and avoid direct heat sources to protect your floors.
How do I know if water damage requires replacement?
When water soaks into your vinyl, check for buckling, persistent swelling at seams, a sour or musty odor, or discoloration that won’t wipe away—those signs usually mean replacement is needed rather than a simple patch.
Also replace planks that crumble, delaminate, or feel spongy underfoot.
Minor cupping, surface stains, or isolated edge lifting can often be repaired if moisture source is fixed quickly.
Does thicker vinyl always mean longer life?
Curious whether thicker vinyl always lasts longer? Thicker wear layers often resist dents, scratches, and heavy traffic better, but overall longevity depends on material quality, installation, subfloor condition, and maintenance.
Thicker backing can improve comfort and stability, yet poor adhesive or inferior vinyl still fails sooner.
Choose reputable products, proper installation, and regular care for the best lifespan.