How to Remove a Ceramic Towel Bar From Tile Without Breaking It
You can remove a ceramic towel bar without cracking the tile by working slowly, using the right tools, and protecting the area. Start by inspecting the mounting type, remove decorative caps, and gently pry adhesive with a putty knife while supporting the tile. Unscrew anchors slowly, use penetrating oil or a carbide bit for stubborn anchors, and clean residue with a mild solvent and soft cloth. Follow careful repair and reinstallation steps below to avoid damage and learn safer alternatives.
How to Remove a Ceramic Towel Bar from Tile Without Breaking It
If you need a quick answer, you can usually remove a ceramic towel bar with the right tools and a gentle touch.
Follow the fast steps at a glance—protect the tile, loosen the mounting screws or anchors, and lift the bar straight off.
Call a professional if the anchors are stubborn, the tile risks cracking, or you’re unsure how the bar is attached.
Quick Answer Fast steps at a glance
Start by gathering a few basic tools—screwdriver, putty knife, utility blade, and a soft cloth—so you can work steadily and avoid sudden movements that might crack the tile.
For a quick answer on how to remove ceramic towel bar from tile, follow these steps:
- Pry adhesive edges gently with putty knife.
- Unscrew mounting hardware slowly.
- Clean residue with utility blade and cloth.
When to call a professional instead
Those quick steps will handle most towel bars, but call a pro when the mounting feels fused to the tile, the screws strip or won’t budge, or you spot hairline cracks around the fixture—signs that amateur force could shatter the ceramic.
A pro has specialized tools, experience with concealed anchors and adhesive, and can repair or replace damaged tile, reducing risk and long-term costs.
Understanding the Towel Bar and Tile Setup
Before you start, identify the mounting type—screwed anchors, adhesive pads, or concealed brackets—as each comes out differently.
Know that chips and cracks usually happen when force concentrates on the tile or anchors are stubborn, so you’ll want to work slowly and support the area.
Gather the right tools and materials (screwdrivers, putty knife, pry tool, adhesive remover, and safety gear) before you begin.
Common towel bar mounting types on tile (screwed-anchor, adhesive, concealed bracket)
When you remove a towel bar from tile, you’ll usually encounter one of three mounting systems: screwed anchors that go through the tile into the wall, adhesive pads or tapes stuck directly to the tile, and concealed brackets that hide fasteners behind a decorative cover.
You’ll identify each by its visible cover, screw heads, or adhesive seams, then choose removal tools and gentle technique.
- Screwed anchors
- Adhesive pads/tape
- Concealed brackets
Why tile chips and cracks happen during removal
Because the towel bar’s fasteners concentrate force at tiny points and the tile is brittle, pulling or prying against those anchors can crack glaze or chip edges.
You risk hairline fractures spreading inward, grout weakening, and ceramic pieces popping free when leverage or sudden movement overstresses the area.
Controlled, evenly distributed release prevents surprises and limits repair needs.
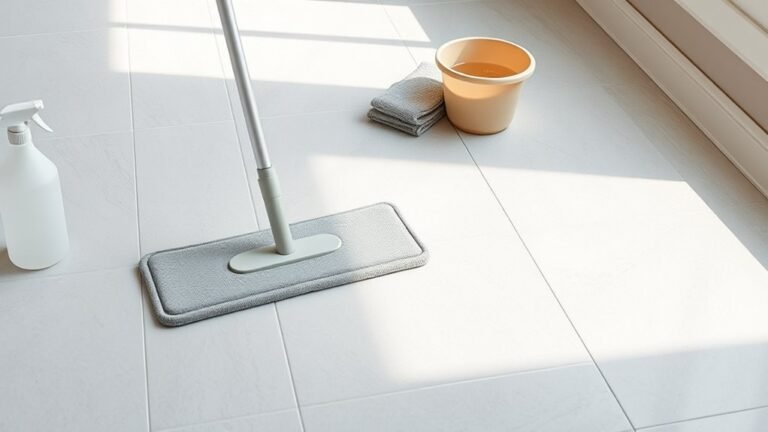
Tools and materials overview
Towel bars and the tiles they attach to come in a few common setups, so you’ll want the right tools and materials on hand before you start:
- Soft cloth, painter’s tape, and a thin putty knife to protect and pry gently.
- Phillips/flat screwdrivers, hex keys, and a drill with low-torque setting for hidden fasteners.
- Rubber mallet, suction cup, and safety glasses to tap and lift without chipping.
Safety and Preparation
Before you start, put on safety glasses and gloves so shards or dust don’t get in your eyes or on your hands.
Clear the area and lay down a drop cloth or cardboard to catch debris and protect the floor.
Tape around the towel bar and cover nearby tile with painter’s tape or a soft cloth to prevent scratches.
Safety gear and precautions
1. You’ll need proper safety gear and clear precautions before starting. Wear safety glasses, sturdy gloves, and a dust mask to protect from shards and grout dust.
Work slowly, avoid force, and keep kids/pets away. Have a first-aid kit and phone nearby in case of cuts.
- Safety glasses
- Cut-resistant gloves
- Dust mask
Preparing the work area and protecting surrounding tile
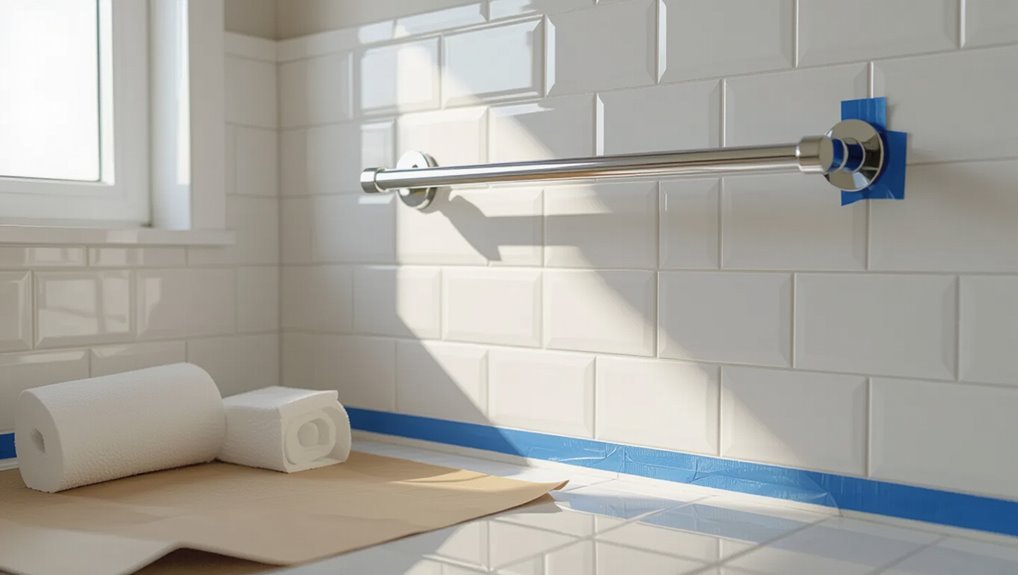
While you’ll be working close to finished surfaces, clear the area, remove any toiletries or fabrics, and lay down a drop cloth or cardboard to catch debris; then protect adjacent tile with painter’s tape and thin cardboard or foam padding so tools or falling screws won’t chip the grout or glaze.
You’ll also position a small magnetic tray for screws, set up lighting, and keep a soft towel nearby.
- Magnetic tray with screws
- Foam padding along edges
- Bright task lamp
Step-by-Step Removal Process
First, you’ll inspect how the bar is attached and remove any visible covers or decorative caps.
Then you’ll loosen the screws and test for movement, using penetrating oil, heat, or vice grips if a screw’s stuck.
Finally, you’ll deal with any concealed anchors or mounting plates and lift the bar clear of the tile.
Step 1 Inspect how the towel bar is attached
Begin by taking a close look at how the towel bar meets the wall so you know which fasteners you’ll be dealing with.
Check for visible screws, hidden set screws, or brackets behind end caps. Note tile grout lines and anchor types to avoid stress.
- Screws recessed into mounting plate
- Small hex or flat set screws
- Expansion anchors behind tile
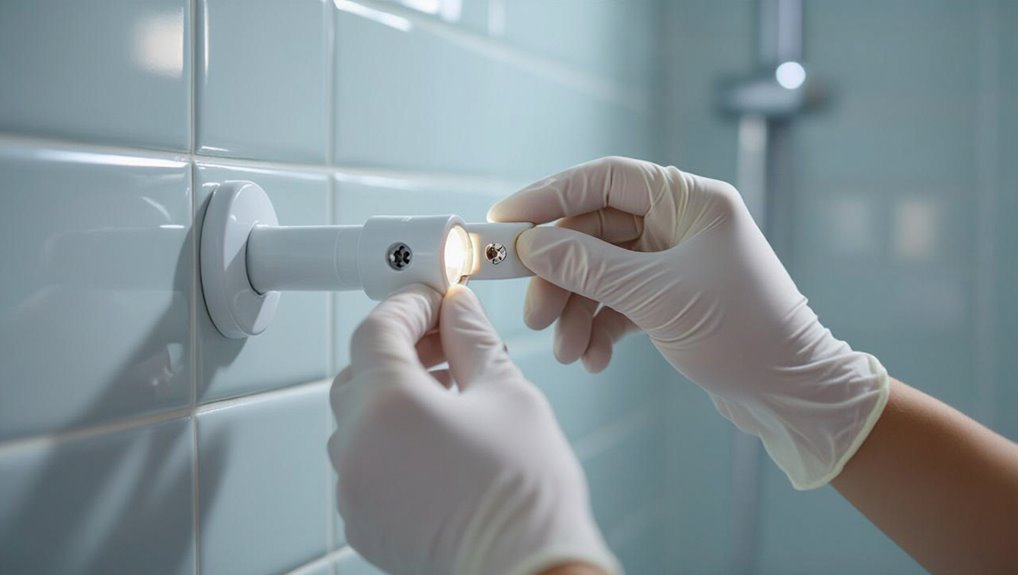
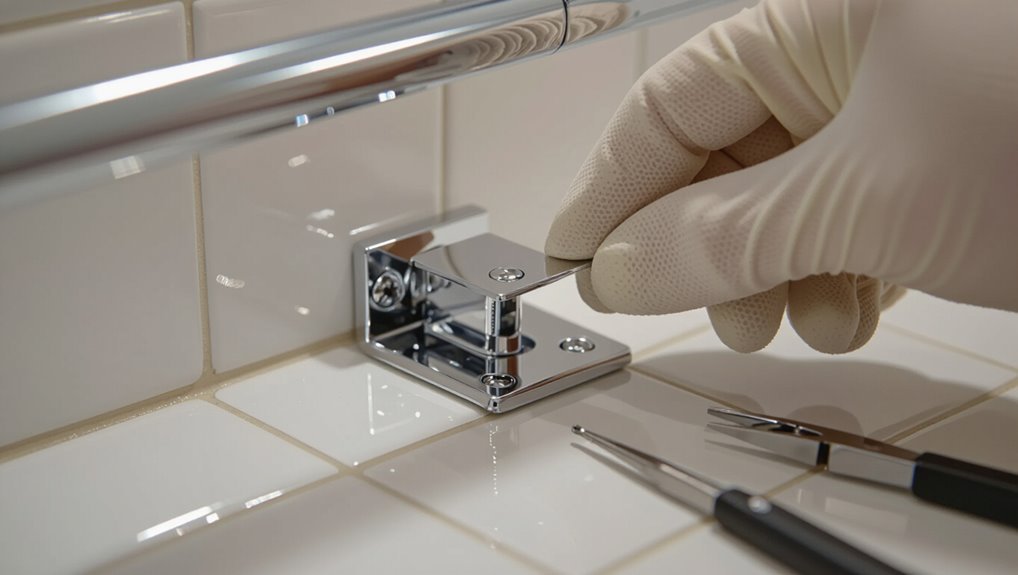
Step 2 Remove visible covers and decorative caps
Start by locating and gently removing any visible covers or decorative end caps that hide the mounting hardware.
Use a flat tool under a lip, pry slowly, and protect tile with a cloth. Keep caps and small parts together.
- Pry under a thin edge with a plastic putty knife.
- Cushion tile with a rag.
- Set caps in a labeled container.
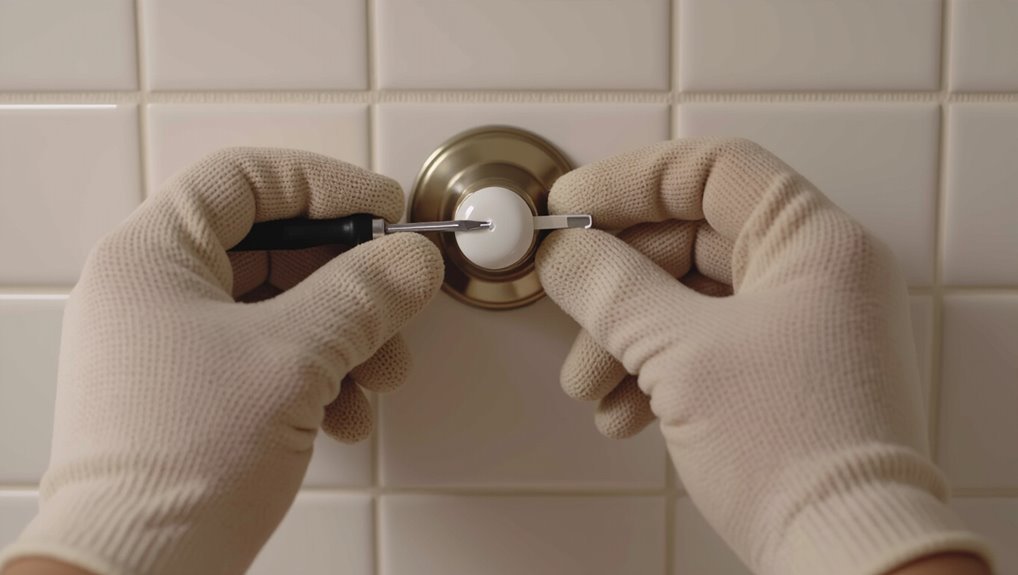
Step 3 Loosen screws and test for movement
Loosen the mounting screws a half-turn at a time with the correct screwdriver so you don’t strip them, then gently wiggle the bar to check for any remaining attachments; if it still feels stuck, back the screws out a bit more and recheck until the bar moves freely.
- Feel for looseness with a small push.
- Watch seams for gaps forming.
- Support the bar while testing.
Step 4 If screws are stuck: methods for stuck screws (penetrating oil, heat, vice grips)
If a screw won’t budge, try penetrating oil first—spray, let it soak for 10–15 minutes, then try turning again.
If that fails, apply controlled heat with a heat gun or hair dryer to expand the metal and break the corrosion bond.
As a last resort, use locking pliers or a screwdriver-grip clamp to gain extra torque while protecting the surrounding tile.
- Rusty screw with oil dripping.
- Heat blurring enamel near metal.
- Pliers clamped, tile shielded underneath.
Step 5 Handling concealed anchors or mounting plates
When you remove the visible screws, you’ll often find a concealed anchor or a separate mounting plate behind the cover—identify which type you’re dealing with before you proceed so you use the right removal method and avoid damaging the tile.
If it’s an anchor, pry gently and pull straight out; if it’s a plate, unscrew or lift it away.
- hollow plastic anchor
- metal expansion anchor
- decorative mounting plate
Step 6 Dealing with adhesive-mounted bars (softening adhesive, use of putty knife/oscillating tool)
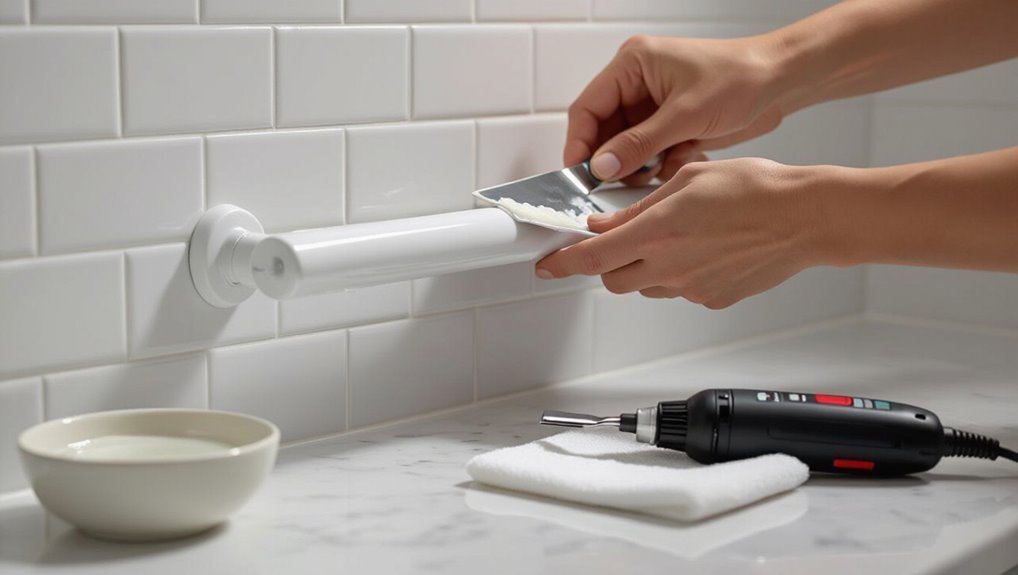
Once you’ve handled any concealed anchors or plates, turn your attention to bars held on with adhesive—these need a different approach.
Warm the adhesive with a hair dryer or heat gun, then pry gently. Work slowly to avoid tile damage.
- Apply heat evenly.
- Slide a thin putty knife under edge.
- Use an oscillating tool with a scraper blade.
Step 7 Removing stubborn anchors without damaging tile (small pilot drilling, rotary removal, gentle tapping)
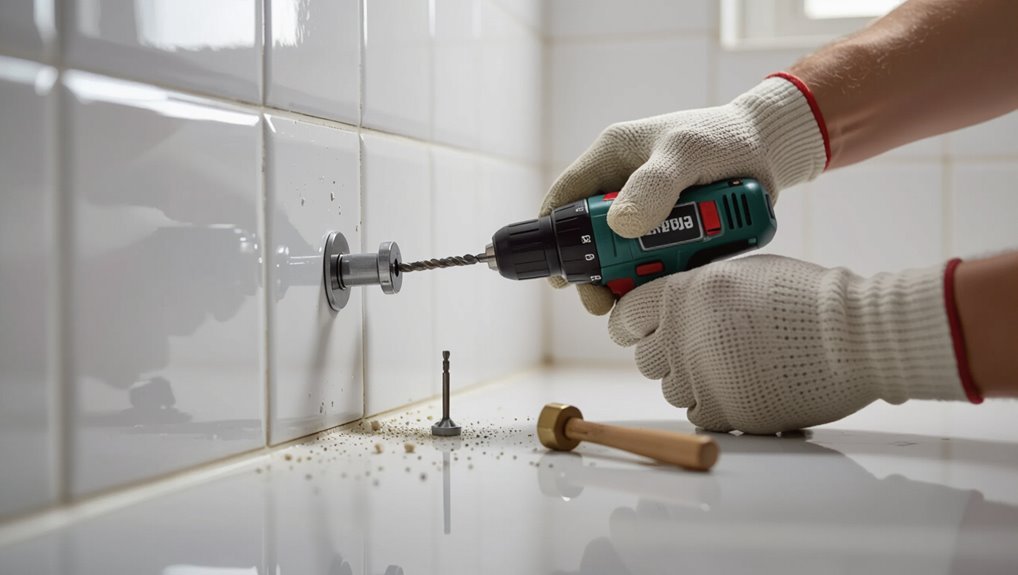
Start by evaluating the anchor type and how it’s seated in the tile so you can choose the least invasive removal method.
If it’s plastic or metal, try small pilot drilling with a carbide bit to collapse the anchor, or use a rotary tool to grind it flush. Gentle tapping with a punch can loosen edges before extraction.
- Pilot drill collapse
- Rotary grind flush
- Tap and pry
Step 8 Cleaning the tile surface and removing adhesive residue
Grab a soft scraper and a few cleaning supplies, because the next task is removing the old adhesive and restoring the tile’s surface.
Gently scrape softened adhesive, then apply a mild solvent (adhesive remover or rubbing alcohol) and wipe with a microfiber cloth.
Finish with a tile-safe cleaner and rinse.
- warm soapy water
- plastic scraper
- microfiber cloth and solvent
Repairing Minor Tile Damage and Hole Patching
Before you start patching, assess whether the damage is a chip, crack, or just a screw hole so you pick the right fix.
For small chips and scratches you can use epoxy or a touch-up kit, and you can fill screw holes and smooth grout lines with matching filler.
If the tile is badly cracked or the damage won’t hide, you’ll need to remove and replace the single tile safely.
Assessing damage: chip vs crack vs hole
When you remove a towel bar, inspect the tile closely to determine whether you’re dealing with a chip, a crack, or a hole—each needs a different fix.
Look for missing glaze or small missing fragments (chip), hairline or through lines that may spread (crack), or a recessed void exposing substrate and screw edges (hole).
Note size, depth, and whether grout’s affected.
Quick fixes for small chips and scratches (epoxy, touch-up kits)
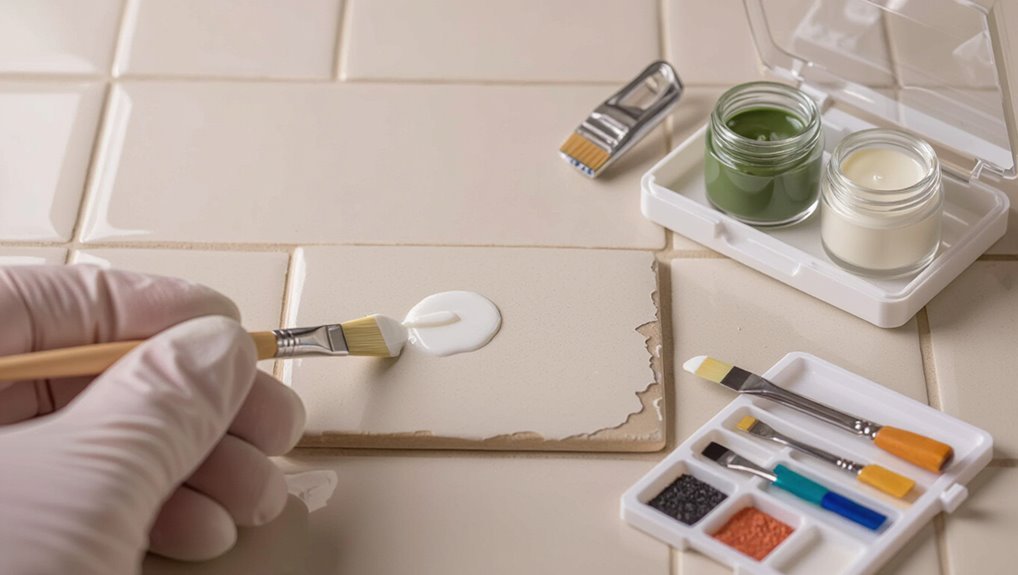
If you spot small chips or surface scratches after removing the towel bar, you can often restore the tile yourself with epoxy or a touch-up kit—both give a neat, lasting repair without replacing the tile.
Clean, sand lightly, then match color. Apply epoxy, shape, and cure.
- Tiny crescent chip filled and smoothed
- Hairline scratch blended with color resin
- Pinpoint glaze gloss restored
Filling screw holes and smoothing grout lines
Patch the holes and tidy the grout to make the wall look seamless again after removing a towel bar.
Use a small syringe or spatula to fill screw holes with matching epoxy or grout, smooth with a damp finger, and wipe excess.
After curing, sand lightly and seal.
Imagine:
- A tiny filled divot blending in.
- Smooth grout lines restored.
- No visible hardware scars.
When tile replacement is necessary and how to remove a single tile safely

Even after you smoothly fill screw holes and restore grout lines, some tiles will still show cracks, chips, or loose corners that won’t hide—those are the ones you’ll need to replace.
Score grout around the damaged tile, break the center with a chisel, pry out fragments, clean the substrate, apply thinset, and set a matching tile flush with surrounding grout for a seamless repair.
- Cracked face
- Loose bed
- Missing corner
Reinstalling or Upgrading: Options After Removal
Once the holes are patched, you can reinstall the same towel bar using proper tile anchors or toggle bolts to guarantee a secure mount.
If you want to avoid drilling into tile again, consider tile-safe alternatives like heavy-duty adhesive strips or a freestanding towel rack.
We’ll compare load capacity, ease of installation, and long-term reliability so you can pick what fits your bathroom.
Reinstalling the same towel bar (choosing proper anchors for tile)
If you’re planning to reinstall the same towel bar in tile, choose anchors that match the tile type and the load it’ll bear so the bar stays secure without cracking the tile.
Use ceramic-specific anchors, drill slowly with a carbide bit, and avoid oversized holes.
Picture the install:
- Small mushroom anchor seated flush.
- Nylon sleeve expanding gently.
- Metal toggle gripping behind tile.
Alternative mounting options that are tile-safe (adhesive strips, freestanding bars)
If you’d rather avoid drilling into tile again, several tile-safe options will give you a secure towel-hanging solution without risking cracks: heavy-duty adhesive strips and pads rated for wet rooms, silicone-based adhesive mounts, and freestanding towel bars or racks that sit on the floor or over a door.
- Adhesive strips for wet areas
- Silicone wall mounts
- Freestanding bar or over-door rack
| Option | Weight | Placement |
|---|---|---|
| Adhesive strip | 10 lb | Tile |
| Silicone mount | 15 lb | Smooth wall |
| Freestanding | 30 lb | Floor |
| Over-door | 20 lb | Door |
Common Mistakes and How to Avoid Them
Don’t over-tighten screws or pry too hard, or you’ll crack the tile.
Use the proper tools and drill bits made for tile to avoid chipping.
Check for hollow tile or weak grout first so you can reinforce anchors instead of making problems worse.
Over-tightening or aggressive prying that causes breakage
Avoid forcing things: over-tightening screws or prying too hard on tile-mounted towel bars can crack grout, chip glaze, or shatter tile.
You should loosen fasteners gently, support the fixture to distribute pressure, and stop if you feel resistance.
Visualize the damage to avoid it:
- Tiny hairline crack spreading under glaze.
- Flaked glaze revealing porous ceramic.
- A shattered fragment falling away.
Using wrong tools or drills for tile
One common mistake is reaching for a standard drill or the wrong bits and assuming they’ll work on tile; you’ll strip screws, glaze chips, or crack the tile if you use high-speed, hammer, or wood bits instead of a variable-speed drill with a carbide or diamond-tipped masonry bit and a slow, steady approach.
Use tape, low RPM, steady pressure, and proper bits to keep edges intact.
Ignoring underlying issues like hollow tile or weak grout
After picking the right drill and bits, check what’s behind the tile before you start removing anchors—hollow tile, loose backing, or crumbling grout can turn a simple towel bar job into a bigger repair.
If you ignore these issues, you’ll risk cracking tiles or creating gaps. Probe gently, patch weak grout, and add proper backing or anchors before removing the bar to avoid extra damage.
Best Practices and Preventive Tips
When you mount a towel bar, use anchors and placement that spread the load so you won’t stress the tile later.
Check and tighten the screws periodically, and replace worn anchors before they fail to avoid re-drilling.
With simple maintenance like cleaning around the mounts and avoiding overtightening, you’ll keep the bar secure and the tile intact.
How to mount towel bars to minimize future damage
If you want your towel bar to stay secure without harming tile, plan the mount carefully and use the right anchors and hardware for your tile type.
Measure, mark studs, and consider adhesive-backed mounting plates for thin tile. Use corrosion-resistant screws and soft washers to cushion tile edges.
- Mark stud center and level line.
- Drill pilot holes with a carbide bit.
- Use proper anchors and soft spacers.
Maintenance tips to keep mounts secure without re-drilling
1 simple habit will keep most towel-bar mounts from loosening: check and tighten the set screws and visible fasteners every few months, especially after heavy use.
You’ll also:
- Picture yourself wiping mounts and applying thread locker to loose screws.
- Imagine swapping worn anchors for low-profile metal ones.
- Visualize adding rubber pads behind mounts to reduce vibration and slippage.
FAQ
You probably have quick questions like whether you can remove a towel bar without taking out grout or if pulling anchors will permanently weaken the tile.
You’ll also want to know the safest drill bit to use, how to get adhesive off without harming the glaze, and how long the whole removal and repair should take.
Read on for concise answers and practical tips.
Can I remove a towel bar without removing grout?
Wondering whether you can remove a towel bar without taking out grout? Yes — often you can.
Work carefully around the mounting screws and anchors; grout doesn’t need removal if the fasteners sit in tile or wallboard behind it.
Use proper tools to avoid tile chips and protect grout edges with painter’s tape.
If grout cracked during removal, repair small gaps afterward.
Will removing anchors weaken the tile permanently?
Although removing anchors will leave holes, it doesn’t usually cause permanent weakening of the tile if you take care: drill or pull anchors out slowly, avoid levering against the tile edge, and patch holes promptly with a suitable filler or epoxy to restore strength and prevent moisture from getting behind the tile.
If you work carefully and seal repairs, the tile will retain its integrity and function.
What is the safest drill bit for tile if I must drill?
If you do need to drill into tile after removing anchors, pick a bit that minimizes cracking and chipping.
Use a carbide-tipped or diamond-tipped masonry bit designed for glazed tile; they cut cleanly and last longer.
Start slow, use a backing piece, and keep water nearby to cool and lubricate.
Avoid high speed and hammer action to prevent fractures.
How do I remove adhesive residue without damaging glaze?
How do you get stubborn adhesive off tile without dulling the glaze?
Use gentle solvents: rubbing alcohol, citrus-based adhesive remover, or mineral spirits applied sparingly with a soft cloth.
Test in an unseen spot first. Soften residue, then scrape with a plastic scraper or old credit card at a low angle.
Rinse with mild soap and water, dry, and avoid abrasive pads or harsh chemicals that etch glaze.
How long does it take to remove and repair a towel bar area?
Wondering how long the whole process will take? You can remove a ceramic towel bar in 30–60 minutes if mounts release cleanly.
Cleaning adhesive and minor glaze touch-ups add another 1–3 hours.
If you need to regrout or replace tiles, plan a full day plus drying time (24–48 hours) before reinstalling.
Total ranges from under an hour to two days.