
How to Fix Laminate Flooring: Common Problems and Easy Solutions
You can fix most laminate flooring issues yourself by diagnosing the cause and using simple tools. Start by stopping moisture, blotting spills, and inspecting for swelling, buckling, gaps, scratches, or loose boards. Use color-matched markers or fillers for scratches, reseat or tighten loose planks, and replace swollen boards. Keep humidity controlled and leave expansion gaps when reinstalling. Smaller jobs take under an hour, bigger ones require more time, and the sections below show step-by-step how to proceed.
How to Fix Laminate Flooring Quick Answer and Overview
Here’s the quick answer: you can usually repair scratched, loose, or slightly swollen laminate planks, but you’ll need to replace boards that are cracked, severely warped, or water-damaged beyond the locking joints.
Common problems—scratches, gaps, buckling, and moisture damage—have straightforward fixes like sanding and refinishing kits, replacing individual planks, tightening connections, or improving subfloor moisture control.
At a glance, you’ll want a pry bar, tapping block, rubber mallet, replacement planks, wood filler or repair kits, spacers, and a moisture meter.
Direct Quick Answer When you can repair vs when to replace
When deciding whether to repair or replace your laminate floor, consider the extent of damage, how long you want the fix to last, and the age of the flooring.
Minor scratches, single plank swelling, or loose boards you can replace or patch; widespread warping, water damage, or mismatched planks mean replacement.
For quick how to fix laminate flooring tips, repair when isolated, replace when systemic.
Summary of common laminate flooring problems and typical fixes
Common issues with laminate flooring fall into a few clear categories—scratches and surface wear, swollen or buckled planks from moisture, loose or popping boards, gaps between seams, and permanent stains or discoloration—and each has a straightforward set of fixes you can try before calling a pro.
You can usually sand/repair, replace damaged planks, secure or re-click joints, or clean/remove stains.
- Sand/patch scratches
- Replace swollen planks
- Re-seat loose boards
- Clean/stain treatment
Required tools and materials at a glance
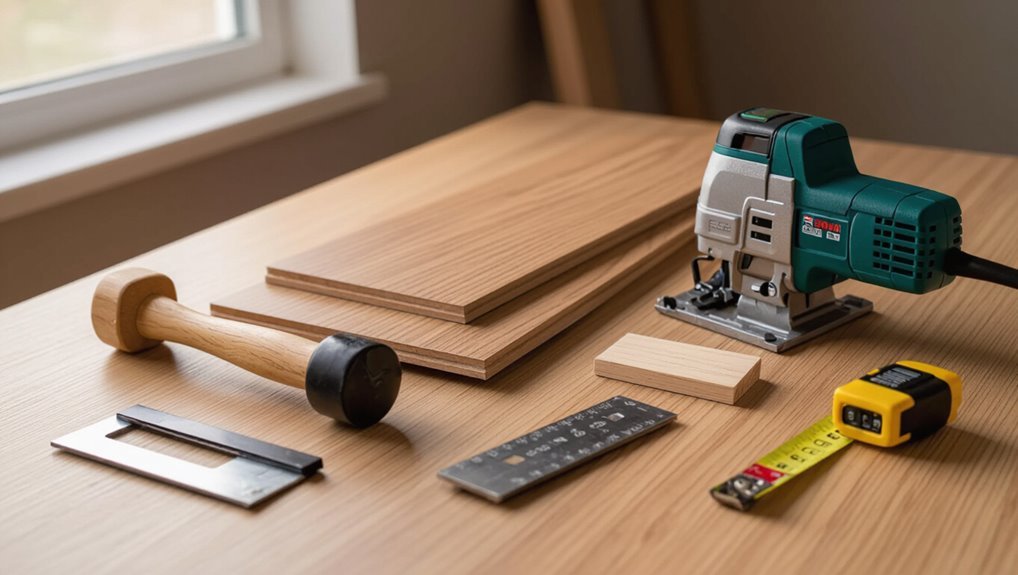
A compact set of tools and materials will let you handle almost every laminate-flooring repair yourself: pull bar, tapping block, rubber mallet, pry bar, circular saw or jigsaw, replacement planks, spacers, wood glue for trims, laminate floor cleaner, stain remover, sanding sponge or fine-grit sandpaper, and underlayment or moisture barrier if you need to replace sections.
- Basic hand tools
- Cutting and removal tools
- Replacement planks + underlayment
- Cleaning and finishing supplies
Understanding Laminate Flooring: Basics You Need to Know
You should know that laminate flooring is a layered product—usually a wear layer, printed design layer, core (HDF/MDF), and backing—and comes in styles like AC-rated planks, tile-look, and embossed options.
Installation methods vary (floating, glued, or click-lock systems), and each affects repairs and movement.
Most failures stem from moisture, heavy impact, wear, or poor installation, so identifying the cause guides the fix.
What is laminate flooring (construction and common types)
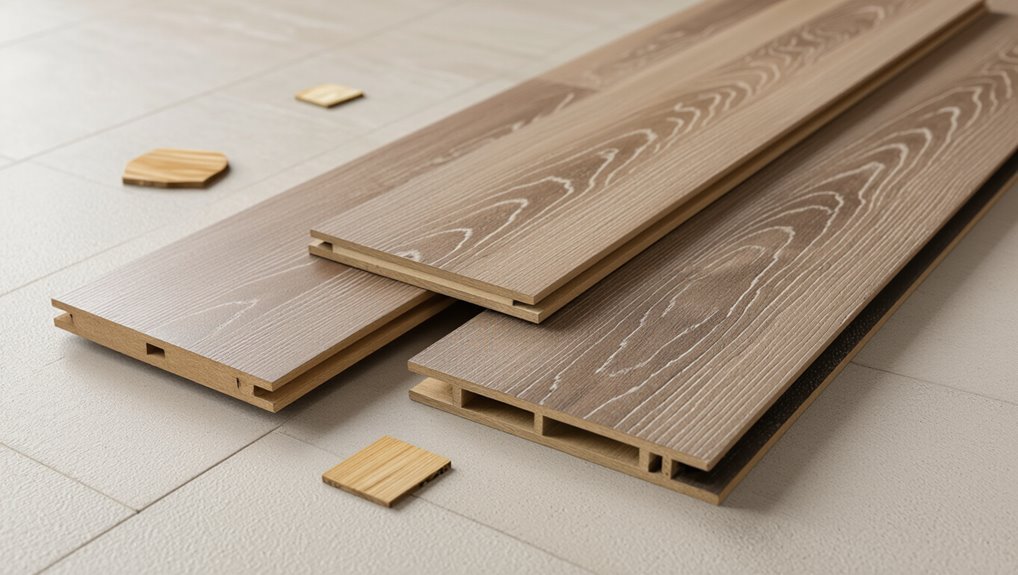
Although it looks like real wood or stone, laminate flooring is a multi-layered product made of a high-density fiberboard core, a decorative image layer, and a clear protective wear layer; some varieties add an inner moisture-resistant or sound-dampening layer.
You’ll find wood-look, stone-look, textured, and commercial-grade laminates. Choices differ by wear rating, thickness, and moisture resistance, so pick what’s suitable for traffic and room conditions.
How laminate is installed (floating vs glued vs click-lock)
Moving from what laminate is to how it’s put down helps you choose the right installation for your space.
You can install laminate floating—boards lock together over underlayment and float above the subfloor; glue-down adheres planks directly for stability in high-traffic or commercial areas; click-lock is a user-friendly floating method with simple snap-together joints.
Choose based on subfloor, movement, and longevity.
Why laminate fails typical causes (moisture, impact, wear, installation)
When laminate starts to fail, it’s usually due to a few predictable causes you can prevent or fix: moisture intrusion that swells or warps cores, heavy impacts that crack the wear layer, everyday abrasion that erodes the finish, and installation mistakes that leave gaps or restrict movement.
You should control humidity, clean spills fast, use pads under furniture, avoid dragging heavy items, and follow installation guidelines precisely.
Diagnosing the Problem: How to Identify What’s Wrong
Start by scanning each room for visible damage—gaps, buckling, swelling, scratches, chips, or loose boards.
Use a simple room-by-room checklist to note locations and severity, then prioritize areas that feel soft or uneven underfoot.
If you spot persistent gaps or moisture stains, you’ll want to test the subfloor and surrounding humidity with a moisture meter before repairing.
Signs of damage to inspect (gaps, buckling, swelling, scratches, chips, loose boards)
Although laminate is durable, you should still inspect it regularly for telltale signs of trouble: gaps between planks, buckling or ridges, swollen joints, surface scratches and chips, and any boards that feel loose or shift underfoot.
Note water stains, raised edges, or seams that separate. Measure gap width, press suspicious boards, and mark damaged areas so you can prioritize repairs and prevent worsening.
Step-by-step inspection checklist (room-by-room)
1 room at a time, work methodically so you don’t miss subtle problems: walk each room in a clockwise pattern, inspect along walls and thresholds, check under furniture and near sinks and appliances, and note any gaps, buckling, swelling, scratches, chips, loose boards, or water stains.
- Scan perimeter and changes.
- Lift rugs and check underneath.
- Press suspect boards for movement.
- Photograph and mark damaged spots for repair.
When to test subfloor and moisture levels (moisture meter usage)

You should test the subfloor and moisture whenever you see persistent gaps, cupping, buckling, discoloration, or any recurring problems after repairs.
These signs often point to underlying moisture issues that won’t be fixed by surface work alone.
Use a moisture meter (pin or pinless) across multiple spots, record readings, compare to laminate & adhesive limits, and address high areas before reinstalling.
How to Fix Common Laminate Flooring Problems (Main How-To)
Now that you’ve diagnosed the issue, you’ll learn how to fix common laminate problems step by step.
You’ll start with quick fixes for scratches and surface wear, then move to deeper repairs like gouges or chips and replacing a single click-lock or floating plank.
Finally, you’ll handle gaps, buckling, and cupping so your floor looks and performs like new.
Fixing small scratches and surface wear
Gather basic materials and prep the area so you can work cleanly and safely.
Start by cleaning the scratch and evaluating its depth, then choose a repair kit, marker, or filler that matches your floor.
Finish by sealing the repair and blending the finish so it’s protected and less noticeable.
Materials and prep
Tools and supplies make the job faster and neater, so collect a soft cloth, mild cleaner, laminate repair kit (color-matching putty or markers), fine-grit sandpaper or a non-abrasive pad, and clear laminate sealant or polyurethane.
Also gather painter’s tape, cotton swabs, a small putty knife, and disposable gloves.
Work in good light and ventilate the area before you start applying repair materials.
Step 1: Clean and evaluate
Start by giving the scratched area a thorough cleaning so you can see what you’re dealing with.
Use a soft cloth, mild detergent, and warm water; avoid abrasive cleaners. Let it dry completely.
Inspect under good light to determine scratch depth and whether the wear affects only the surface finish or the decorative layer.
Note size, direction, and any loose laminate for repair planning.
Step 2: Use repair kits, markers, or fillers
Once you’ve assessed the damage, pick a repair method that matches the scratch depth.
For hairline marks, use a color-matched marker or crayon, stroking along the grain.
For deeper gouges, apply a laminate filler or putty, press into the groove, then level with a plastic scraper.
Let dry per instructions, then lightly buff to blend surface texture without altering finish.
Step 3: Seal and blend finish
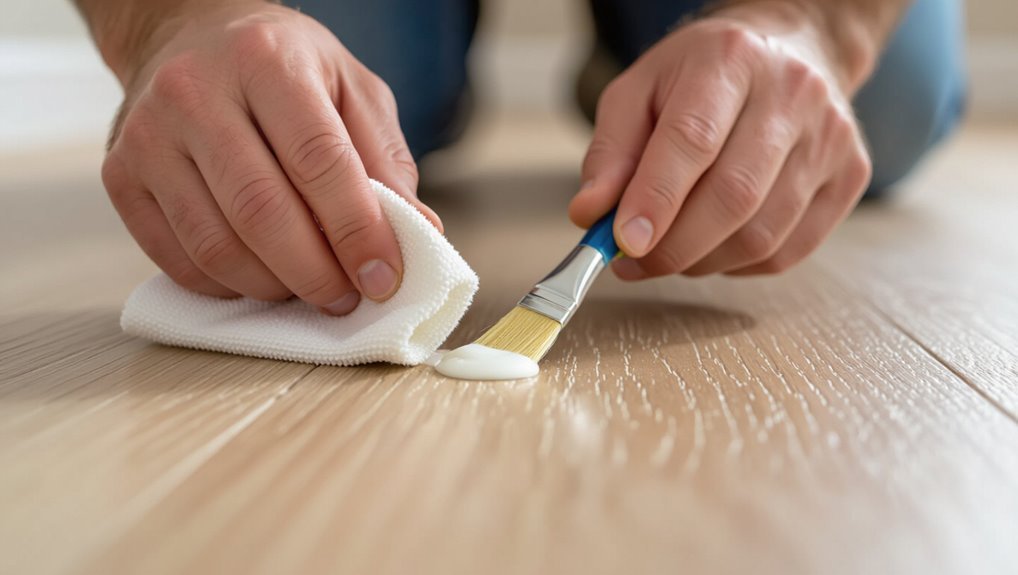
After the filler or marker has fully set, you’ll want to lock in the repair and match the surrounding sheen so the fix disappears.
Lightly sand any excess with fine-grit paper, clean residue, then apply a thin coat of clear laminate sealer or polyurethane recommended for your floor.
Feather edges into surrounding area, let dry, and buff gently to blend finish for a seamless look.
Repairing deep gouges or chips
If the damage is shallow and confined, you’ll usually save time by using epoxy or laminate putty. If the plank is split or the tongue-and-groove is damaged, you’ll need to replace it.
I’ll walk you through a clear, step-by-step repair using epoxy or colored putty so the patch blends with the floor. Before you start, inspect the gouge to confirm which option will give a durable, invisible result.
When to use filler vs replace plank
When deciding whether to fill a deep gouge or replace the whole plank, assess the size, location, and structural damage:
If the damage is shallow, small, and purely cosmetic, use filler.
If the core is delaminated, the locking edge is compromised, or the plank spans a high-traffic area causing recurring stress, replace it.
Also replace if matching finish or color can’t be achieved with repair.
Step-by-step repair with epoxy or laminate putty

Start by cleaning the damaged area thoroughly so the epoxy or laminate putty will bond properly; remove dirt, loose fibers, and any wax or polish with a mild cleaner and let it dry completely.
Mix epoxy or putty per instructions, apply with a putty knife, overfill slightly, smooth surface, let cure.
Sand lightly, match stain or marker, seal with clear coat for durability.
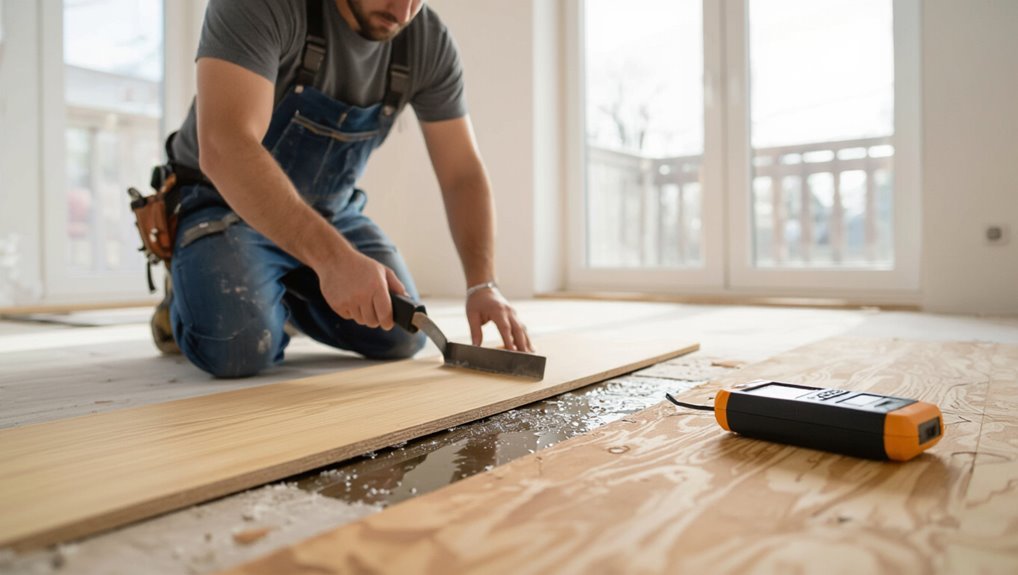
Replacing a single plank (click-lock or floating)
You’ll need a few basic tools and safety gear before you start, so lay them out and protect your hands and eyes.
First remove the baseboard or molding and measure carefully, then extract the damaged plank without harming the neighboring pieces.
Finally click in the replacement plank, check the fit, and reattach the trim.
Tools required and safety
Before you begin replacing a single click‑lock plank, gather the right tools and take simple safety steps so the job stays quick and safe.
You’ll need a pry bar, tapping block, pull bar, utility knife, measuring tape, pencil, replacement plank, rubber mallet and vacuum.
Wear safety glasses, kneepads and gloves, keep pets and kids away, and guarantee good lighting and ventilation.
Step 1: Remove molding and measure
Once the molding’s off, remove any threshold strips and measure the damaged plank’s length and width precisely so your replacement matches the cut pattern and orientation.
Note the plank’s tongue direction, bevel style, and grain direction. Record measurements twice, including distance from walls or seams.
Check adjacent planks for matching color and finish before ordering or cutting the replacement piece.
Step 2: Remove damaged plank without damaging neighbors
Start by loosening the damaged plank so you can lift it out without stressing the surrounding click-lock joints.
Score along seams with a utility knife, cut any tongue if needed, then lift the plank at the short end.
Use a flat pry bar and tapping block gently under edges to avoid chipping neighbors.
Remove debris and clean the gap before fitting the replacement.
Step 3: Install replacement plank and reattach trim
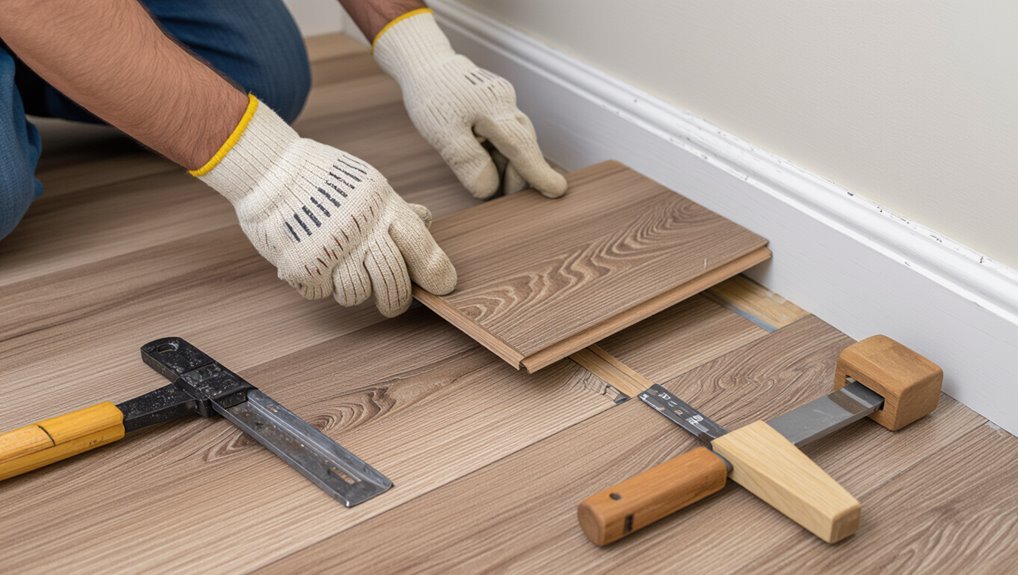
With the gap cleaned and debris removed, fit the replacement plank by angling its long edge into the adjacent row and lowering the short end so the click-lock engages.
You may need to gently tap the plank with a tapping block and mallet to seat it fully.
Trim and reinstall baseboards or quarter-round, cutting ends to fit.
Check alignment, remove spacers, and reinstall threshold strips.
Fixing gaps between planks
Gaps between laminate planks usually come from temperature or humidity changes and sometimes from improper installation, so you’ll first want to identify the cause.
You can use temporary fixes like color-matched fillers or trim, but for recurring or large gaps the long-term answer is often reinstallation.
Below are clear step-by-step methods to assess, fill, or repair gaps depending on their size and cause.
Causes of gaps (temperature, humidity, improper installation)
Because laminate planks expand and contract with temperature and humidity changes and installers sometimes leave inadequate expansion space or misalign seams, gaps can appear between boards.
You’ll notice gaps after seasonal humidity shifts, in rooms with poor climate control, or when installers rushed layout and locking.
Movement often concentrates near walls, doorways, or across long runs where panels weren’t acclimated properly.
Short-term fixes (fillers, trim) vs long-term solutions (reinstallation)
When you spot small separations between laminate planks, decide quickly whether a temporary patch or a full reinstall fits your situation: fillers and trim can mask minor gaps and prevent dirt buildup, but only reinstallation (or adjusting expansion space) will fix movement caused by wrong acclimation or chronic moisture.
Use caulk or wood filler for cosmetic fixes and baseboard trim to hide edges; plan reinstall if gaps recur.
Step-by-step gap repair methods
If you’ve tried quick fixes but gaps keep appearing, it’s time to move into step-by-step repairs that actually close the joints and stop dirt from collecting.
First, remove baseboards and measure gap sizes.
Use a tapping block and mallet to tighten floating planks.
For stubborn gaps, loosen nearby rows and reseat planks with adhesive or replacement pieces.
Reinstall trim and clean thoroughly.
Repairing buckled or cupped laminate
First figure out whether moisture or normal expansion caused the buckling by checking for leaks, measuring humidity, and noting if gaps around the room are tight or swollen.
If it’s moisture, dry the area thoroughly with dehumidifiers and fans before you try to flatten the boards; for expansion issues, loosen trim and give the floor room to settle.
If sections stay warped after drying and flattening attempts, you’ll need to remove and replace the affected planks.
Diagnosing moisture vs expansion issues
Because buckling and cupping can look similar, you’ll want to distinguish moisture damage from expansion problems before you start repairs.
Check for localized stains, warping near seams or walls, musty odor, or elevated humidity—these point to moisture.
If panels swell uniformly, especially after temperature swings and with blocked expansion gaps, expansion is likelier.
Use a moisture meter and inspect subfloor and gaps to confirm.
Steps to dry, flatten, and, if needed, replace affected area
When you’ve identified the cause, start by drying the area thoroughly—run dehumidifiers, increase ventilation, and use fans to pull moisture out of the planks and subfloor; monitor progress with a moisture meter until readings return to normal.
Then remove baseboards, gently flatten warped boards using weights and time, or replace irreparably damaged planks and restore underlayment before reinstalling trim.
Addressing water damage and swelling
If you spot water on your laminate, act fast to blot it up and stop the source to limit swelling.
Then dry the area thoroughly with fans, dehumidifiers, and by lifting baseboards if needed to pull moisture out of the seams.
Finally, be prepared to replace any swollen planks and inspect the subfloor for hidden damage before reinstalling.
Immediate actions to minimize damage
Although water often wreaks the fastest damage, you can limit swelling and staining by acting immediately: stop the source, blot pooled water with absorbent towels, and lift affected boards if possible to let trapped moisture escape.
Remove rugs, move furniture, and open windows to increase airflow. Note any cupping or discoloration for repair decisions, and avoid walking on soaked areas.
Drying techniques and moisture mitigation
Because quick, targeted drying prevents most long-term laminate damage, you’ll want to act methodically: remove standing water, lift edges or baseboards where possible, and use fans and dehumidifiers to circulate air.
Point fans at seams and run humidity control until readings stabilize.
Monitor moisture with a meter, keep traffic off the area, and avoid heat sources that can warp boards.
Replacing water-damaged planks and inspecting subfloor
Once the surface moisture’s been controlled, you’ll need to identify and remove any planks that have swollen, delaminated, or show dark staining.
Water-damaged boards won’t return to normal and will continue to compromise seams and underlayment.
Cut out damaged boards, check the underlayment and subfloor for rot or mold, replace compromised sections, let everything dry, then install replacement planks and reseal seams.
Fixing squeaks and loose boards
If your laminate is shifting or squeaking, you’ll want to identify whether movement comes from loose joints, insufficient expansion gaps, or subfloor issues.
Start by tightening seams and re-seating boards step by step. Then use construction adhesive or recommended fasteners where joints won’t be visible.
I’ll walk you through the correct tightening sequence and when to use glue versus screws so you can stop the noise and secure loose boards.
Causes of movement and squeaks
When your laminate floor moves or squeaks, it’s usually a sign that something’s wrong with how the planks interact or how the floor was installed.
Causes include improper expansion gaps, uneven subfloor, moisture-induced swelling or shrinkage, loose or damaged locking joints, and heavy traffic stressing seams.
Identifying the root cause helps you choose the right repair approach without guessing.
Step-by-step tightening, adhesive, and fastener solutions
Start by pinpointing the exact boards that move or squeak and then choose a targeted fix—tightening, adhesive, or fasteners—based on the problem:
Lift edge joints slightly, tighten loose planks with a pull bar, or inject construction adhesive into gaps beneath boards.
For persistent movement, drive trim-head screws through tongues into subfloor or replace damaged underlayment; test and trim excess adhesive for a flush finish.
Repairing damaged transitions, thresholds, and trim
When changes, thresholds, or trim get damaged you’ll want to replace or adjust them so the floor looks finished and functions safely.
Make sure replacement pieces match the laminate height and profile, and keep the manufacturer’s recommended expansion gaps at doorways and against walls.
If heights don’t align, shim or trim components rather than forcing boards together, which can cause buckling.
Replacing or adjusting transitions
Although changes often get overlooked, they’re essential for a clean, safe finish where two floors meet; damaged or loose thresholds can snag, let moisture in, and ruin your laminate edges.
Inspect trim, unscrew or pry out old pieces, clean the subfloor, then test-fit replacements. Secure new thresholds with screws or adhesive, trim to fit, and seal edges to prevent movement and moisture intrusion.
Matching heights and maintaining expansion gaps
If your new threshold sits higher or lower than the adjoining laminate, you’ll get a trip hazard or a visible gap—so you need to level the two floors and preserve the expansion space the manufacturer specifies.
Shim or trim the threshold to match height, use underlayment to raise low areas, and leave the recommended gap at edges.
Secure trim without compressing the gap.
Preventative Measures and Best Practices
To prevent repeat issues, you’ll want to start with proper installation techniques like correct underlayment, expansion gaps, and tight seams.
Keep moisture out with humidity control, prompt spill cleanup, and regular maintenance to extend the floor’s life.
Use area rugs, furniture pads, and manufacturer-recommended sealers or cleaners to protect your investment.
Proper installation tips to avoid future problems
When you install laminate correctly from the start, you’ll prevent gaps, buckling, and premature wear—so take time to acclimate the planks, prepare a flat subfloor, and follow the manufacturer’s spacing and underlayment recommendations.
- Check subfloor flatness and repair high/low spots.
- Let boards acclimate per instructions.
- Use recommended underlayment and expansion gaps.
- Stagger seams and lock joints securely to avoid shifts.
Moisture control and maintenance routines
Because laminate’s core can swell and delaminate if exposed to moisture, you should control humidity and clean up spills immediately to protect the floor.
Establish a regular maintenance routine that minimizes water and abrasive wear.
- Wipe spills within minutes.
- Use a damp, not wet, mop.
- Keep indoor humidity 30–50%.
- Sweep or vacuum daily to remove grit.
Recommended products and protective measures (rugs, pads, sealers)
If you want your laminate to last, choose protective products that stop damage before it starts: low‑pile rugs in high‑traffic zones, felt or rubber furniture pads under legs, and waterproof mats at entrances to trap grit and moisture.
Use breathable rug pads to prevent trapping humidity, apply manufacturer‑approved edge sealers for vulnerable seams, and replace worn protectors promptly to avoid scratches and staining.
Common Mistakes to Avoid When Repairing Laminate
When you repair laminate, don’t force planks or yank them out—use proper removal techniques to avoid cracking or damaging adjacent boards.
Check for moisture and subfloor problems first, since fixing visible damage won’t help if the underlying issue remains.
Also match repair materials and colors, and preserve expansion gaps and trim so the floor performs and looks right.
Forcing planks or improper removal techniques
Although it might seem faster to pry or force planks out, using heavy-handed removal techniques often damages the tongue-and-groove joints and nearby boards, making repairs harder and more expensive.
You should work methodically: release seams, lift panels gently, and slide sections apart.
Use proper tools like pull bars and tapping blocks, and replace any chips or fractured edges to guarantee a secure, long-lasting fit.
Ignoring moisture/subfloor issues
Because moisture under the floor can silently ruin your repair, you need to check the subfloor and surrounding areas before reinstalling planks.
Inspect for damp spots, mold, and soft or uneven sections. Measure moisture levels with a meter, fix leaks, and let the subfloor dry completely.
Address rot or insulation gaps before laying laminate, or the problem will recur.
Using the wrong repair materials or color mismatches
Checking moisture and subfloor issues is only part of the job; you also have to pick the right repair materials and colors to make the fix hold up and look professional.
Use manufacturer-approved laminate repair kits, matching planks, and color-matched filler. Test samples in low-visibility areas, avoid generic stains that soak differently, and replace damaged boards when matches aren’t available to preserve appearance and durability.
Neglecting expansion gaps and trim reinstallation
If you skip proper expansion gaps or rush the trim back into place, your repaired laminate can buckle, warp, or pop loose as temperatures and humidity change.
Leave recommended gaps at walls and around obstacles, then reinstall baseboards and edging strips without wedging the floor.
Secure trim to the wall, not the flooring, so planks can expand and contract freely and repairs last.
Comparison: DIY Repair vs Hiring a Professional
You can tackle small scratches, single-board replacements, and simple gaps yourself with basic tools and patience. Call a pro for large-area damage, persistent moisture, or suspected subfloor problems that need diagnosis and specialized equipment. Compare the scenarios below to decide which route fits your situation.
| DIY Repair | Hiring a Professional |
|---|---|
| Small scratches, single plank replacement | Large-area damage or many boards |
| Cosmetic fixes, loose boards, minor gaps | Moisture intrusion or mold concerns |
| Basic tools and time investment | Diagnostic tools and structural repair |
| Lower cost if simple | Safer long-term solution for complex issues |
When DIY is appropriate
When the damage is limited—small scratches, a single loose plank, or minor swelling—you can often tackle the repair yourself and save time and money;
but for widespread buckling, water damage across multiple boards, or issues with subflooring, bringing in a pro is the smarter choice.
Assess tools, skill, and time: if you can remove and replace one plank, refinish scratches, or fix trims safely, DIY.
When to call a pro (complex, large-area, moisture/subfloor problems)
Because serious laminate issues often signal underlying problems, call a pro for large-area damage, persistent moisture, structural subfloor issues, or widespread buckling that goes beyond a single plank.
You should hire a professional when repairs exceed your skill, require subfloor replacement, involve mold or water intrusion, or need specialized tools.
A pro diagnoses root causes, prevents recurrence, and guarantees a safe, durable repair.
Estimated Costs and Timeframes
You’ll usually pay anywhere from a few dollars for a single plank to several hundred dollars for larger repairs or replacement, depending on materials and labor.
Most simple fixes like replacing a plank or tightening gaps take an hour or two, while moisture damage or subfloor work can take a day or more.
I’ll outline typical cost ranges and time estimates for each common repair so you can plan.
Typical cost ranges for common repairs
Repair costs for laminate flooring vary widely based on the issue, but you can expect most common fixes to fall into predictable ranges that help you budget. You’ll typically pay for materials, labor, or replacement panels. Use the table to compare typical low–high costs and when DIY is feasible.
| Repair Type | Typical Cost | DIY? |
|---|---|---|
| Scratch repair | $10–$50 | Yes |
| Panel replace | $30–$150 | Sometimes |
| Water damage | $100–$600 | Rarely |
Typical time required per repair type
Estimate time per laminate repair so you can plan the job and any downtime.
Minor scratches or loose boards take 15–45 minutes each.
Replacing a single plank usually needs 30–90 minutes.
Filling gaps or cupping repairs take 1–3 hours.
Larger sections or moisture damage can require 4–8+ hours, including acclimation and adhesives.
Always add buffer time for prep and cleanup.
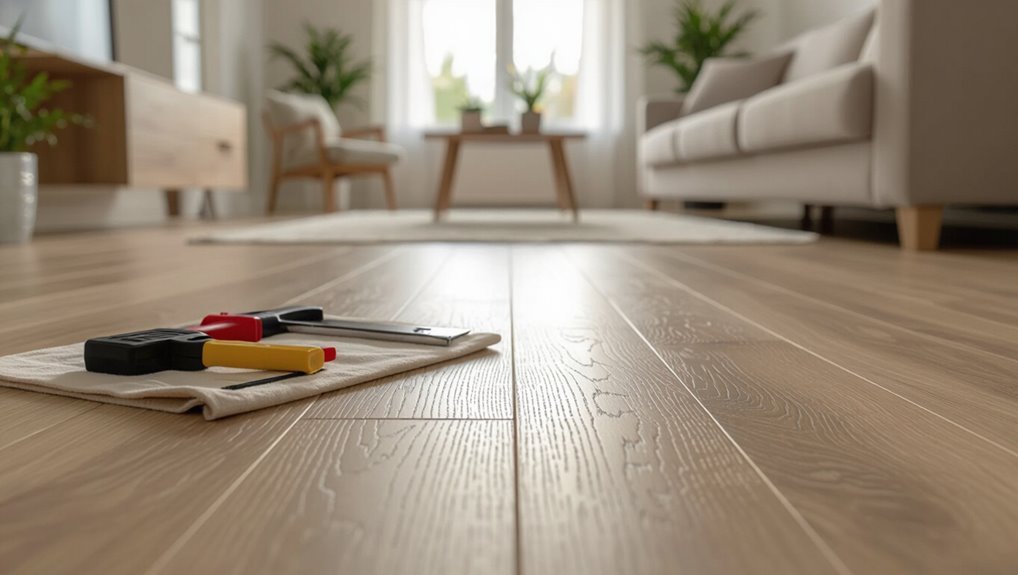
Tools, Materials, and Repair Kits Recommended
You’ll want a compact toolkit—pull bar, tapping block, rubber mallet, spacers, utility knife, and a circular saw or jigsaw for plank cuts.
Choose fillers and adhesives designed for laminate: color-matched putty or wax for scratches, two-part epoxy or solvent-based wood filler for deeper gouges, and a high-quality laminate adhesive for seam repairs.
For larger damage, keep a few matching replacement planks on hand and consider a repair kit that bundles fillers, adhesive, and trim pieces.
Essential tools list
Before you start, gather a compact kit of reliable tools and materials so every step goes smoothly and you don’t waste time hunting parts mid-job.
You’ll need sturdy basics to remove, repair, and refit boards safely and neatly.
- Pry bar, rubber mallet, and pull bar
- Tape measure, carpenter’s square, utility knife
- Drill, screwdriver set, replacement clips
- Vacuum, tack cloth, safety gloves
Best types of fillers, adhesives, and replacement planks
While you’re prepping to replace or repair damaged laminate, pick fillers, adhesives, and planks that match the floor’s material, finish, and locking system to guarantee a seamless, long-lasting result.
Choose color-matched wood filler, waterproof gap sealant, manufacturer-recommended click-lock adhesive, and full-length replacement planks for grain and bevel consistency.
- Color-matched wood filler
- Waterproof gap sealant
- Click-lock adhesive
- Full-length replacement planks
Step-by-Step Repair Checklist (Quick Reference)
If you find water on your laminate, act fast: stop the leak, blot moisture, and lift affected boards to dry and inspect.
For other common issues, follow a simple workflow—identify the problem, gather the right tools and parts, then remove and replace or refinish the damaged pieces.
Keep this quick checklist handy so you can move from diagnosis to repair without guessing.
Immediate action checklist for emergency water damage
When water floods your laminate floor, act fast: stop the source, unplug electronics, and get people and pets to safety.
Then follow this emergency checklist to limit damage and start drying immediately.
- Remove standing water with a wet vacuum or towels.
- Lift damp rugs and move furniture to dry areas.
- Open windows, run fans and dehumidifiers.
- Inspect seams and document damage for repairs.
General repair workflow checklist for common problems
Start by evaluating the issue and gathering the right tools so you can work efficiently: identify the problem (buckling, gaps, scratches, or water damage), clear the area, and have replacement planks, underlayment, tapping block, pry bar, adhesive, and cleaner on hand.
- Inspect and document damage.
- Isolate and dry affected area.
- Remove and replace damaged planks.
- Re-seam, seal, and finish.
FAQ
You’ll find answers here to common concerns like whether you can fix a damaged plank yourself or need a full replacement and how long repairs usually last.
I’ll explain how to stop swelling after a spill, whether a replacement board will stand out, and why you can’t refinish laminate the way you’d hardwood.
Read on for clear, practical guidance so you can choose the right fix.
Can I repair laminate flooring myself or should I replace it?
Wondering whether to fix that damaged plank or replace the whole floor? You can often repair scratches, chips, or a single swollen board yourself using replacement planks, filler, or laminate repair kits.
Replace the whole floor if damage is widespread, underlayment compromised, or planks no longer match.
Assess scope, budget, and your DIY skill before deciding; small fixes are usually worth doing.
How do I prevent laminate from swelling after a spill?
How quickly you act after a spill makes the biggest difference: blot liquids immediately with absorbent towels, then lift or fan to speed drying.
Remove baseboards if water reached edges to dry seams. Use a wet/dry vac for pooled water and dehumidify the room.
Keep traffic low until completely dry, and check for cupping or soft spots to address early.
Will replacement planks be visible if I replace one board?
If you acted quickly to dry a spill but still need to replace a single plank, you’ll want to know whether the new board will stand out.
Matching brand, color, and sheen minimizes visibility. Patterns and wear on surrounding planks affect blending.
Install carefully so joints align and gaps are tight. Over time, light exposure and foot traffic will help the repair blend more naturally.
How long does a laminate repair typically last?
Generally, a well-done laminate repair will last for years, but exact longevity depends on the damage, the repair method, and how you use the floor.
Minor surface fixes like scratch fillers or replacing a single plank can last a decade or more with gentle use. Severe core or water damage may return sooner.
Proper maintenance and prompt fixes extend lifespan.
Can I refinish laminate like hardwood?
Can you refinish laminate like hardwood? No — laminate has a printed surface and thin wear layer, so you can’t sand and re-stain it like solid wood.
If it’s scratched or faded, you can replace damaged planks, use repair kits, or apply specialized coatings designed for laminate.
For extensive wear, replacing the flooring is usually more effective and long-lasting than attempting refinishing.
Closing Tips and Next Steps
Decide whether a problem can be monitored or needs a full replacement by checking if damage is spreading, causing structural issues, or affecting safety.
If it’s minor and stable, keep an eye on it and perform small repairs; if it’s growing, schedule a replacement soon.
For tougher fixes, use reputable tutorials and manufacturer resources to guide advanced repairs or to find a professional.
When to monitor vs when to schedule a full replacement
If the gaps, warping, or wear are minor and not affecting safety or moisture resistance, monitor the floor for a few months while you control humidity and traffic.
But if damage worsens, joints separate, or water has penetrated the core, schedule a full replacement to prevent mold and structural issues.
Keep a photo log, note progression, and get a professional opinion if unsure or if damage spreads quickly.
Resources and tutorials for advanced repairs
When you’re ready to tackle advanced repairs, use a mix of manufacturer guides, video walkthroughs, and community forums so you get step‑by‑step instructions, product-specific tips, and real-world troubleshooting.
You’ll learn proper tools, safety steps, and restoration techniques to avoid costly mistakes.
- Manufacturer installation and repair manuals
- Step-by-step video tutorials
- Flooring forums and Reddit threads
- Local tradesperson workshops and classes