Which Direction Should You Lay Vinyl Plank Flooring?
You should generally lay vinyl planks parallel to the longest wall or toward the main light source to make the room feel larger and hide seams. Consider sightlines, traffic flow, and window placement, and align boards with cabinet runs in kitchens or lengthwise in hallways. Check joist and subfloor direction, stagger end joints, and allow expansion gaps. If your room connects to others, keep direction consistent for flow — keep going and you’ll find step-by-step tips and room-specific advice.
Quick Answer Which Direction to Lay Vinyl Plank Flooring
Run the planks parallel to the longest wall or the main light source for the cleanest, most natural look.
You may want to run them perpendicular to traffic in narrow rooms or change direction to match adjoining rooms or odd layouts.
If subfloor seams or structural runs dictate another orientation, follow those practical constraints.
One-sentence recommendation
Lay the planks lengthwise toward the main light source (usually windows) so seams are less noticeable and the room appears longer.
For most installs, follow that guideline when deciding which direction to lay vinyl plank flooring: run planks parallel to incoming natural light and the longest wall.
That orientation enhances flow, hides seams, and creates a cohesive, spacious look without complicating installation choices.
When to deviate from the recommendation
That guideline works for most rooms, but you’ll want to break it in specific situations.
If a room is narrow, lay planks lengthwise to visually widen it. Run planks parallel to long windows for fewer visible seams.
Match flooring direction between connected spaces when possible, but change direction at junctions or to align with stairs, focal walls, or complex layouts for better aesthetics and practicality.
Basic Understanding What Affects Flooring Direction
Think about how the plank direction will influence the visual flow and how wide or long the room appears.
You’ll want to take into account the room’s shape and light sources, plus how the subfloor orientation and structural members affect run direction.
Also check your plank type and locking system for any installation constraints before you start.
Visual flow and room perception
When you orient vinyl planks thoughtfully, they guide the eye and change how big or cohesive a room feels.
So choosing direction is as much about perception as it’s about structure. You’ll use plank direction to lead movement, emphasize focal points, and unify separate areas.
Aligning runs with sightlines can stretch spaces or tighten zones, so pick direction to reinforce your desired visual flow.
Room shape and light sources
Room shape and window placement play a big role in which direction your vinyl planks should run because they determine sightlines and how light highlights seams and texture.
You should run planks parallel to the longest visual axis to elongate the space and reduce visible joints.
Angle flooring toward primary light sources to minimize glare and hide seams, especially in narrow or irregular rooms.
Subfloor orientation and structural considerations
Because your subfloor’s orientation and framing dictate where seams, joists, and load paths lie, you’ll want to lay vinyl planks perpendicular to the joists whenever possible to secure proper support and minimize sagging or bounce.
Check subfloor runs, seams, and connections; stagger end joints over joists or blocking.
Verify underlayment compatibility and address uneven areas before installing to maintain stability and longevity.
Plank type and locking system constraints
Although plank profile and locking mechanism don’t always dictate direction, they can limit your installation options and affect how the floor performs.
If you use tongue-and-groove or click-lock, you’ll need panels oriented to allow proper engagement and floating movement.
Some bevels, micro-bevels, or rigid cores require stagger patterns or expansion gaps in specific directions, so follow manufacturer guidance to avoid buckling or gaps.
Primary Guidance Best Practices for Direction by Room Type
When deciding plank direction, you’ll tailor your approach to each space: run boards toward the main view in living rooms and open-plan areas, lengthwise in hallways, and across small rooms or bathrooms to make them feel bigger.
In kitchens, aim to align planks with the longest run of cabinetry or the primary traffic flow, and in basements favor the same direction as the longest wall while considering moisture and subfloor constraints.
These simple rules will help you choose a practical, visually pleasing layout for every room type.
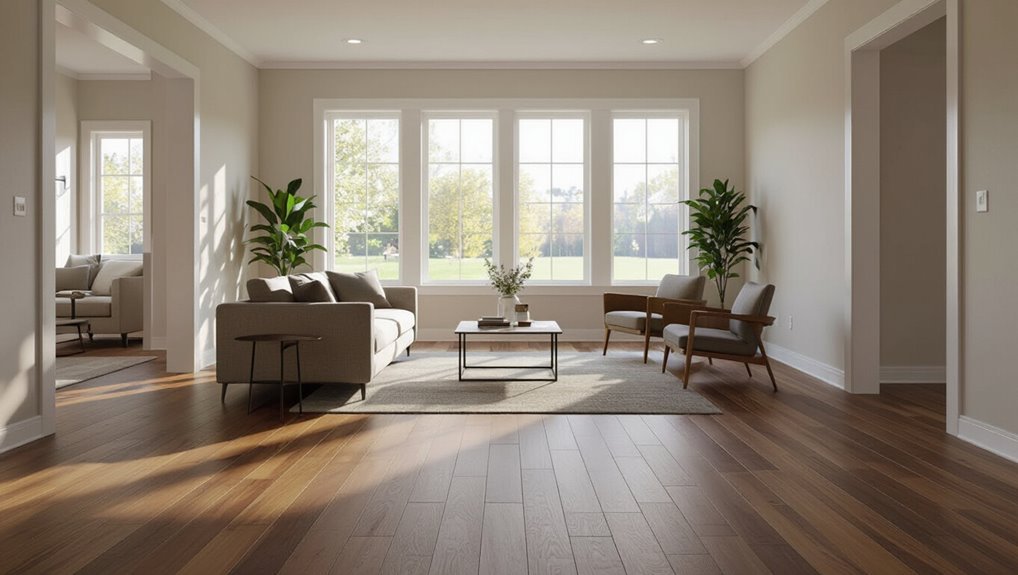
Living rooms and open-plan spaces
Living rooms and open-plan spaces demand a balance of durability and visual flow, so plan plank orientation and changes before you start.
You’ll typically run planks parallel to the longest wall or main light source to widen sightlines. In open plans, align planks between connected areas for continuity, use connectors at natural breaks, and orient to highlight focal points without disrupting traffic patterns.
Hallways and narrow spaces
Think about running vinyl planks lengthwise down hallways to visually stretch the space and reduce the number of seams you walk over.
Lay planks parallel to traffic so seams fall along, not across, your path. Stagger end joints for stability and appearance.
Use full-width planks when possible to minimize trimming. Align seams with doorways for a cleaner passage into adjoining rooms.
Small rooms and bathrooms
Although space is tight, laying vinyl planks thoughtfully can make a small room or bathroom feel larger and look cleaner.
Run planks lengthwise from the entry toward the far wall to elongate sightlines. Choose narrower planks or a light, consistent color to reduce visual clutter.
Keep seams tight and stagger joints minimally to maintain a seamless, moisture-resistant surface that reads expansive.
Kitchens and areas with cabinetry
1 rule to follow in kitchens and cabineted areas: run vinyl planks parallel to the longest uninterrupted sightline—usually from the main entry through the room—so seams align with cabinet runs and traffic flows.
Also stagger end joints away from cabinet bases, keep plank widths proportionate to counters, and orient toward windows when practical to showcase grain.
This improves appearance and simplifies installation.
Basements and below-grade installations
Because basements are prone to moisture and irregular sightlines, run vinyl planks perpendicular to the main source of light or longest uninterrupted wall to minimize visible seams and accommodate subfloor variations.
Also stagger end joints, allow expansion gaps, and use a moisture barrier when needed.
Orient planks to lead the eye toward brighter areas and away from low ceilings to make the space feel larger.
How to Decide Step-by-Step (Decision Flow)
Start by measuring the room and sightlines so you know the scale and where the floor will be most visible.
Then note primary light sources and focal points, check subfloor seams and joist direction, and do a dry-lay to see how patterns read.
Finally pick the plank orientation and final materials, and plan connections where rooms meet.
Step 1 Measure room dimensions and sightlines
A quick, accurate measurement of the room and its sightlines sets the foundation for a successful vinyl plank installation, so grab a tape measure and a notepad.
Measure length and width, note door swings, and mark alcoves. Sketch walls, windows, and passages. Calculate plank runs and waste.
- Measure room dimensions
- Note sightline directions
- Mark obstacles/thresholds
- Estimate plank quantity
Step 2 Identify primary light source(s) and architectural focal points
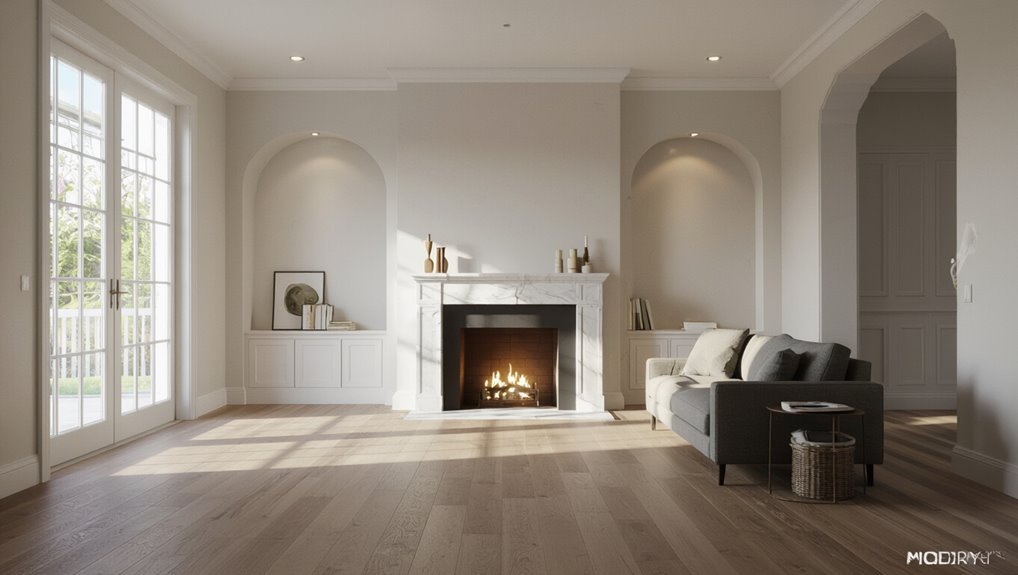
When you identify the room’s primary light sources and architectural focal points, you’ll make confident choices about plank direction, color variation, and patterning that enhance both flow and visual balance.
Note window and door placements, fireplace or stair orientation, and major sightlines from entrances.
Orient planks to highlight the room’s longest sightline or face natural light to minimize visible seams and showcase grain.
Step 3 Assess subfloor seams and joist direction
1. Inspect the subfloor for seams, gaps, and direction of joists.
You’ll want planks laid perpendicular to joists for better stability and to minimize deflection. Align seams away from high-traffic paths and avoid running planks parallel to long seam lines that might telegraph underneath.
Note uneven areas or changes that need leveling before installation. Record seam locations for planning.
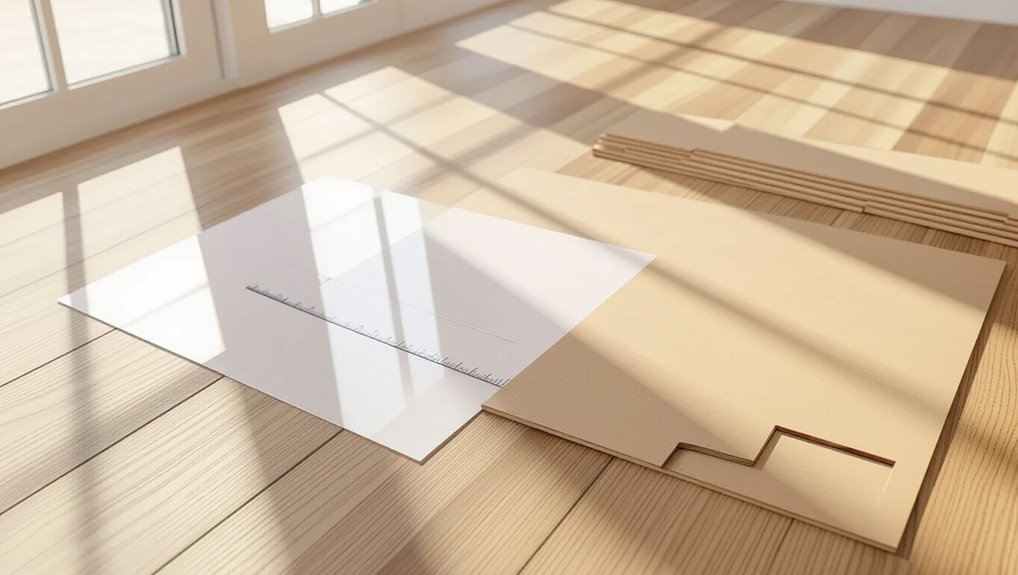
Step 4 Mock layout and visual test (dry-lay)
Now that you’ve mapped seams and joist direction, lay out several rows of vinyl planks without adhering them to get a real sense of spacing, pattern, and how end joints fall.
Walk the room, view from different angles, and note light reflections.
Adjust starting wall and plank alignment to minimize narrow edge cuts and awkward joint groupings before committing to installation.
Step 5 Final selection and transition planning
Step 5 focuses on locking in your final plank choices and planning changes so the finished floor looks intentional and performs well; decide plank direction, edge cuts, and starter row, then confirm shade and wear class.
Measure junction points, choose appropriate thresholds or reducers, and note height differences.
Create a concise installation map and list materials so installers follow a clear, consistent plan.
Comparison Direction Options and Effects
You’ll want to weigh how plank direction affects room flow, visual width, and how the boards sit over joists. Consider parallel, perpendicular, or diagonal layouts and whether you’re laying with, across, or at 45° to the joists to avoid cupping and for best stability. Here’s a quick comparison to help you choose:
| Layout Option | Joist Orientation | Typical Effect |
|---|---|---|
| Parallel to longest wall | With joists | Streamlined look, simpler installation |
| Perpendicular to longest wall | Across joists | Stronger support, may show seams more |
| Diagonal (45°) | 45-degree to joists | Visually dynamic, more waste but hides subfloor irregularities |
Parallel to longest wall vs perpendicular vs diagonal
When choosing plank orientation—parallel to the longest wall, perpendicular, or diagonal—you’ll affect how the room reads, how much cutting you’ll do, and how visible seams and changes become.
Parallel lengthens a room and minimizes cuts; perpendicular can emphasize width and may require more shifts; diagonal adds visual interest and hides irregular walls but increases waste and cutting complexity.
Choose by sightlines and practicality.
With joists vs across joists vs 45-degree installs
Along with choosing plank orientation relative to the room, you’ll also decide how planks run in relation to the floor joists—along (with), across, or at a 45-degree angle—and that choice affects structural support, squeak potential, and installation complexity.
Running with joists is fastest and reduces edge flex; across improves stiffness and appearance; 45-degree installs hide layout issues but increase cutting, waste, and labor.
Installation Considerations Linked to Direction
When you choose the plank direction, you’ll also pick the starting wall and plan your starter rows to keep patterns straight.
Pay attention to stagger and end-joint spacing so seams stay stable, and locate junction strips and thresholds where direction changes.
Leave proper expansion gaps along the runs, since movement behaves differently depending on plank orientation.
Starting wall selection and starter rows
Because the wall you pick sets the tone for the entire room, choose your starting wall with both appearance and practicality in mind.
Start along the longest straight wall or the room’s main sightline so seams read cleanly. Place tongue side toward the wall, leave required expansion gap, and use a full starter row where possible.
Check lighting and door swings before locking boards.
Stagger patterns and end-joint spacing
Decide on a stagger pattern before you lay your first row so boards lock together cleanly and the floor looks intentional.
Stagger end joints at least 6–12 inches between adjacent rows to prevent weak seams and create a natural look.
Varying plank lengths and avoiding H-shaped joints increases stability.
Measure and plan cuts to keep joints off high-traffic lines for durability.
Transition strips and thresholds
If you’re shifting between rooms or different floor heights, plan your changeover strips and thresholds to follow the direction of your planks so seams look intentional and wear distributes evenly.
Choose matching profiles—T-mold, reducer, or end cap—aligned with plank flow.
Secure strips to the subfloor, not the floating floor, and trim thresholds flush so connections stay snug, safe, and visually consistent.
Expansion gaps and direction-related movement
When you install vinyl plank flooring, leave proper expansion gaps along walls, around fixed objects, and at junctions so the floor can expand and contract with temperature and humidity changes without buckling.
You should also orient planks to minimize visible seams shifting; run them perpendicular to expected traffic or longest wall to distribute movement evenly.
Use manufacturer-recommended gap sizes and junction pieces.
Common Mistakes and How to Avoid Them
Don’t accidentally lay planks perpendicular to main sightlines or ignore how light and grain will affect the room’s look.
Check subfloor seams and joist direction before you start, and plan changes between rooms so seams don’t land in awkward spots.
A bit of upfront alignment and planning will prevent most visual and structural problems.
Laying planks perpendicular to sightlines accidentally
Although it might seem like a small detail, laying vinyl planks perpendicular to the main sightlines can make a room look off-balance and shrink visual flow.
Ignoring light reflection and grain direction
Because vinyl has visible grain and a reflective finish, you’ll notice seams, shade variation, and plank direction much more under strong light—so ignore these factors at your own risk.
Position planks to minimize glare and emphasize consistent grain flow. Test layouts in different lighting, rotate sample planks, and adjust direction until seams blend and reflections fall naturally.
You’ll avoid an uneven, busy-looking floor.
Overlooking subfloor seams or joist direction
Once you’ve settled plank direction to control glare and grain, check what’s underfoot: seams in the subfloor and the orientation of joists will affect how vinyl lays and how the finished floor performs.
Run planks perpendicular to seams when possible, stagger seams over solid supports, repair uneven areas, and reinforce weak spots.
That prevents telegraphing, flexing, and premature wear.
Poor transition planning between rooms
If you skip planning changes between rooms, you’ll end up with gaps, uneven sightlines, or strips that lift where different floor types meet.
Plan connections before you lay planks: measure thresholds, choose compatible profiles, and align plank direction for visual flow.
Use proper transition strips and adhesive methods, allow expansion gaps, and test-fit pieces to avoid trip hazards and visible seams.
Tips, Tricks, and Best Practices
Think about running planks diagonally in small or oddly shaped rooms to make the space feel larger, and use patterns or grain direction to guide the eye where you want it to go.
Keep plank direction consistent across open areas and changes so the floor reads as one continuous surface.
If the layout or subfloor is tricky, consider hiring a pro—DIY works for simpler jobs, but pros save time and prevent costly mistakes.
When to use diagonal installations
Diagonal installations work best when you want to visually widen a narrow room, disguise awkward angles, or create a stronger flow between adjoining spaces—so choose them for long hallways, small square rooms, or rooms opening into multiple directions.
You’ll need extra cutting, careful layout planning, and consistent seam alignment. Use a full dry run, mark focal lines, and account for waste when ordering materials.
Using patterns and grain to enhance space
Once you’ve settled on a layout, use plank patterns and wood grain to amplify the room’s feel—running boards lengthwise will make a space look longer, while herringbone or chevron adds movement and visual interest in square or compact rooms.
Stagger plank joints for natural flow, align grain toward focal points, and contrast plank width or tone subtly to define zones without overpowering decor.
Matching direction across open spaces
When you’re working across an open-plan area, keep plank direction consistent between connected spaces to create visual flow and avoid a chopped-up look.
Where the rooms meet, plan a shift that either continues the grain or uses a subtle seam or threshold to signal the change without disrupting sightlines.
Measure sightlines, align long runs with primary views, and use connector pieces to maintain rhythm.
Hiring professionals vs DIY considerations
If you’re weighing DIY against hiring pros, start by listing your skills, time, and tolerance for mistakes—vinyl plank looks straightforward, but subfloor prep, changes, and moisture issues can trip you up and add cost if fixed later.
- Save money doing routine layout and underlayment yourself.
- Hire pros for complex subfloors or moisture mitigation.
- Get quotes and timelines before deciding.
- Factor warranty, cleanup, and peace of mind.
Case Scenarios Examples and Recommended Directions
You’ll face different layout choices depending on the room: long rectangular living rooms with windows on the short wall, open-plan kitchen-to-dining areas, narrow hallways, and small square bathrooms each call for specific plank orientations and shifts.
I’ll show recommended directions—like running planks toward the main light source in the living room, aligning with traffic flow in hallways, and using smaller cuts and perimeter shifts in bathrooms.
Use these examples to pick the most stable, visually pleasing layout for each space.
Long rectangular living room with windows on short wall
A long rectangular living room with windows on the short wall calls for installing vinyl planks so the flooring visually widens the space and directs sightlines toward the light.
Lay planks perpendicular to the long axis, running from the short window wall outward. That alignment broadens the room, enhances natural light flow, and creates a balanced, inviting feel without awkward seams or distracting patterns.
Open-plan kitchen-to-dining area
Open-plan kitchen-to-dining areas benefit from thoughtful plank direction to define zones and guide movement; run vinyl planks parallel to the primary sightline—usually from the kitchen toward the dining space—to create flow, make changes feel intentional, and minimize visible seams where traffic is highest.
You’ll align planks to emphasize continuity, mask minor shifts, and simplify installation around islands and cabinetry for a cohesive, functional space.
Narrow hallway connecting multiple rooms
If you’ve laid planks through an open kitchen-to-dining zone, think about how those choices carry into tight connecting hallways.
These corridors act as visual arteries between rooms and demand direction that guides the eye and foot traffic. Run planks lengthwise down the hall to elongate sightlines and simplify passages at doorways.
Match direction to adjoining main spaces when possible for a cohesive flow.
Small square bathroom with single door
When planning plank direction in a small, square bathroom with a single door, prioritize visual width and ease of installation so the space feels larger and changes at the doorway stay tidy.
Run planks perpendicular to the door so seams don’t funnel the eye inward. That layout minimizes visible shifts, simplifies cutting around fixtures, and creates a cleaner, more spacious appearance.
FAQ Frequently Asked Questions
You’ll find answers here to common questions about plank direction, joist alignment, and whether changing direction between rooms affects performance or warranty.
I’ll cover whether running planks parallel or perpendicular to joists matters, if diagonal layouts justify the extra cost, and how direction affects patterned or textured vinyl.
Use these FAQs to make confident layout choices that protect durability and any manufacturer guarantees.
Should vinyl planks run parallel or perpendicular to joists?
Curious whether vinyl planks should run parallel or perpendicular to the joists? You can install either way, but many pros run planks perpendicular to joists for greater subfloor support and to minimize visible seams over joist lines.
If your room is long and you want the space to feel wider, run planks parallel to the longest wall—just guarantee proper underlayment and alignment.
Does plank direction affect durability or warranty?
If you’ve chosen a direction based on support or appearance, you may wonder whether that choice affects durability or your warranty.
Direction rarely changes plank durability if installation follows manufacturer specs—subfloor prep, acclimation, and correct adhesive or floating method matter more.
Some warranties require specific installation patterns or fasteners; always check the product warranty and installation guide before you start.
Can I change direction between rooms?
Yes—you can change plank direction between rooms, but plan shifts carefully so seams look intentional and the flooring can move properly.
Use linking strips at doorways or thresholds, align seams with sightlines, and stagger end joints for stability.
Account for underlayment compatibility and expansion gaps.
Measure and cut precisely so links are neat and flooring performance isn’t compromised.
Is diagonal installation worth the extra cost?
Wondering whether diagonal installation is worth the extra cost?
Diagonal layouts give rooms a spacious, dynamic look and help disguise irregular subfloors or awkward angles.
Expect higher labor and waste costs because cuts and pattern planning take longer.
Choose diagonal only if the visual payoff matters to you or if room geometry benefits; otherwise, straight installation is more cost-effective.
How important is plank direction for patterned or textured vinyl?
Plank direction matters a lot with patterned or textured vinyl because grain, bevels, and repeat patterns change how light and movement read across the floor.
You should orient planks to highlight length, disguise seams, and keep patterns consistent across sightlines.
Test a layout with samples, view under your lighting, and choose the direction that minimizes visual breaks and emphasizes the room’s shape and traffic flow.
Visual Resources and Layout Templates
You’ll find sample plank layouts for common room shapes to help plan runs and minimize waste.
Use junction and threshold detail diagrams to visualize how planks meet doorways, stairs, and other flooring.
These visuals make layout decisions faster and reduce installation errors.
Sample plank layouts for common room shapes
1 simple template can save you hours of guessing: sample plank layouts show how boards run, where to stagger end joints, and which patterns suit rectangular, L-shaped, or open-concept rooms.
Use a running bond for long rectangles, offset seams more in high-traffic zones, and mirror layouts in connected spaces so seams align visually.
Sketch before you cut to minimize waste.
Transition and threshold detail diagrams
When shifting between rooms or flooring types, clear detail diagrams save time and prevent costly mistakes by showing exact profile choices, fixing methods, and clearance requirements; they’ll help you pick T-molds, reducers, stair nosing, or threshold strips and place them so seams look intentional and perform well.
Use scaled templates showing direction, trim depth, gap tolerances, and fastener locations so installers follow one reliable standard.