
How to Install Laminate Timber Flooring the Right Way
You can install laminate timber flooring right by acclimating unopened boards 48–72 hours, preparing a flat, dry subfloor, and choosing the correct underlay and vapor barrier. Snap or glue planks as recommended, keep consistent expansion gaps with spacers, stagger end joints, and cut accurately for doors and pipes. Use a tapping block, pull bar and safety gear, finish with trims and seals, and control humidity for longevity—keep going for detailed steps, tips and troubleshooting.
How to Install Laminate Timber Flooring the Right Way (Quick Answer)
Start by acclimatising your boards, preparing a flat subfloor, and locking the planks together for a snug, floating installation.
Expect a typical room to take 4–8 hours depending on your experience; this is a DIY-friendly job if you’re comfortable with basic tools.
Budget roughly $2–$8 per sq ft for materials plus $50–$200 for tools or $800–$2,500 if you hire a pro.
One-sentence summary of the correct approach
Measure, acclimate, and prepare the subfloor, then click and stagger the planks while maintaining consistent expansion gaps so the floor lays flat, looks even, and lasts.
To install correctly, you’ll learn how to install laminate timber flooring by checking levels, laying underlay, working from one side, locking joints tightly, trimming end pieces precisely, and finishing trims for a professional, durable result.
Estimated time, skill level, and cost range
A typical DIY laminate flooring job takes a weekend for a single room—about 4–10 hours depending on room size, prep needs, and your pace—while professionals can finish the same space in 2–4 hours.
You’ll need basic DIY skills; complex cuts or stairs raise difficulty and time.
- Time: 4–10 hrs DIY, 2–4 hrs pro
- Skill: Beginner–intermediate
- Cost: $2–$8/ft² materials, $1–$3/ft² install
Basic Understanding What Is Laminate Timber Flooring and Why Choose It
Laminate timber flooring is a multi-layered product with a photographic wood-look surface and tongue-and-groove boards you click together, usually sold in planks or tiles.
You’ll find it’s more scratch- and moisture-resistant and cheaper than solid or engineered timber, though it isn’t sandable like real wood.
It suits high-traffic areas and most living spaces—just avoid constantly wet rooms unless you pick a water-resistant grade.
What laminate timber flooring is (construction and common formats)
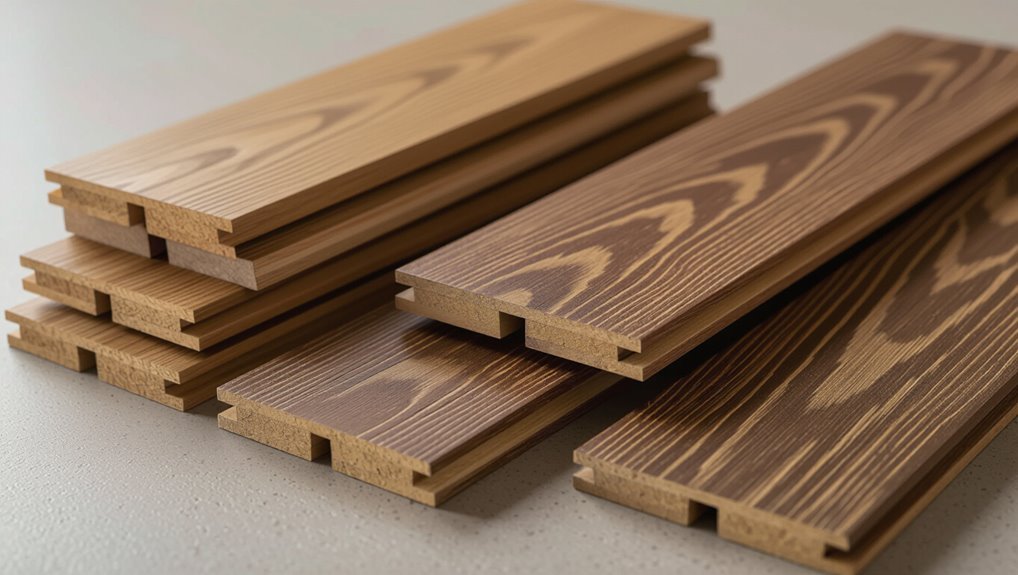
Think of laminate timber flooring as a layered engineered board that mimics real wood: a durable wear layer on top, a printed design film that gives the wood look, a high-density fibreboard (HDF) core for stability, and a backing layer to resist moisture.
You’ll find planks, tiles and wideboards in various lengths and thicknesses, often with click-lock edges for floating installations and easy replacement.
Benefits vs. solid timber and engineered timber
Now that you know how laminate boards are built and the usual formats, you can weigh how they compare to solid and engineered timber. You’ll find laminate is cheaper, easier to install, and more scratch‑resistant, though less authentic and repairable.
| Advantage | Trade‑off |
|---|---|
| Cost/ease | Less resale value |
| Durability | Limited refinishing |
Common uses and suitability by room
1 key question when choosing flooring is where you’ll install it, because different rooms demand different performance—moisture resistance for bathrooms, wear resistance for hallways, and comfort for bedrooms.
You’ll pick water-resistant or SPC-backed laminate for kitchens and bathrooms, high AC-rated planks for busy areas, and quieter, cushioned underlay for bedrooms.
Avoid damp basements unless specially rated.
Tools, Materials, and Preparations You Need
Before you start, gather the right tools and materials—a measuring tape, saw, tapping block, spacers, laminate boards, underlay, trims, and any adhesives you’ll need.
Inspect and prepare the site by checking the subfloor for level and moisture, performing a moisture test, and acclimatising the boards to the room.
Put on safety gear and clear a well-lit workspace so you can work accurately and safely.
Tools checklist (measuring, cutting, installation, finishing)
Because accurate cuts and a smooth installation hinge on having the right gear, gather a clear checklist of measuring, cutting, installation, and finishing tools before you start laying planks.
You’ll need precise measuring, safe cutting, and finishing tools.
- Measuring: tape, square, chalk line
- Cutting: circular saw, jigsaw, mitre box
- Installation/finishing: tapping block, pull bar, spacers, mallet
Materials checklist (boards, underlay, trims, adhesives, trims)
Now that you’ve gathered the right tools, make sure you’ve got the matching materials to put them to work: laminate boards in the pattern and grade you want, an underlay suited to your subfloor and moisture conditions, and the trims and moldings to finish edges and thresholds.
- Boards: extra packs for cuts and waste.
- Underlay: vapor barrier if needed.
- Trims/adhesives: scotia, changeover strips, recommended glue for trims.
Site preparation: subfloor inspection, moisture testing, and acclimatisation steps
A quick, thorough site prep saves you headaches later: inspect the subfloor for level, cleanliness, and structural soundness, test for moisture with a meter (and follow the laminate maker’s limits), and let your unopened boards acclimatize in the room for 48–72 hours so they settle to the ambient temperature and humidity before installation.
- Verify flatness and repair low/high spots.
- Measure moisture and document results.
- Stack unopened packs off the wall to acclimatize.
Safety gear and workspace setup
Before you cut or lay a single plank, gather the right safety gear and set up your workspace so you’re protected and efficient throughout the job.
Wear safety glasses, ear protection, dust mask, knee pads and sturdy shoes.
Clear and light the area, roll back carpet, remove obstacles, and ventilate.
Keep tools organized, corded devices secured, and a first-aid kit handy.
Step-by-Step Installation Guide
Now you’ll follow a clear, step-by-step installation guide that starts with planning your layout and calculating materials, including waste and plank orientation.
Next you’ll prepare and level the subfloor, add the correct underlay and vapor barrier, and then fit the first row with proper expansion gaps and spacers.
Finally you’ll work through subsequent rows using stagger patterns and a tapping block to lock planks securely.
Step 1 Plan layout and calculate materials (waste allowance, plank orientation)
Start by mapping the room and measuring its length and width so you can calculate how many planks you’ll need, including a sensible waste allowance for cuts and mistakes.
Decide plank orientation for appearance and run toward the longest light source.
Plan staggered end joints and check plank lengths.
- Calculate area + 7–10% waste
- Choose orientation
- Plan stagger pattern
Step 2 Prepare subfloor (leveling, repairs, moisture barrier)
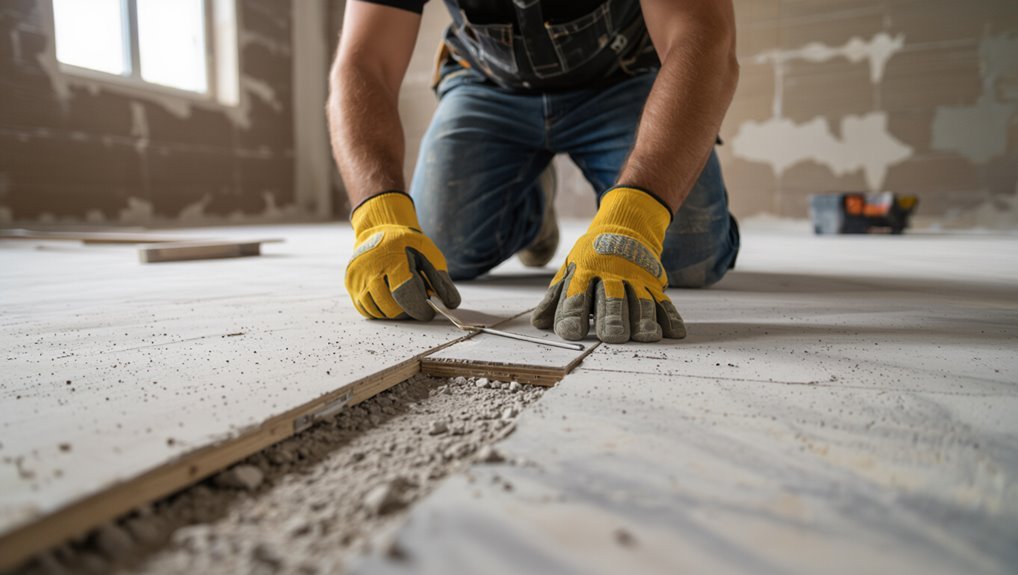
With your layout set and planks planned, get the subfloor ready so the new laminate will lie flat and last.
Check for level: patch dips, sand high spots, and use a self-leveler for uneven areas.
Repair: replace rotten sections and secure squeaky boards.
Control moisture: test with a meter and install an appropriate barrier where needed.
- Leveling
- Repairs
- Moisture control
Step 3 Install underlay and vapor barrier (types and placement)
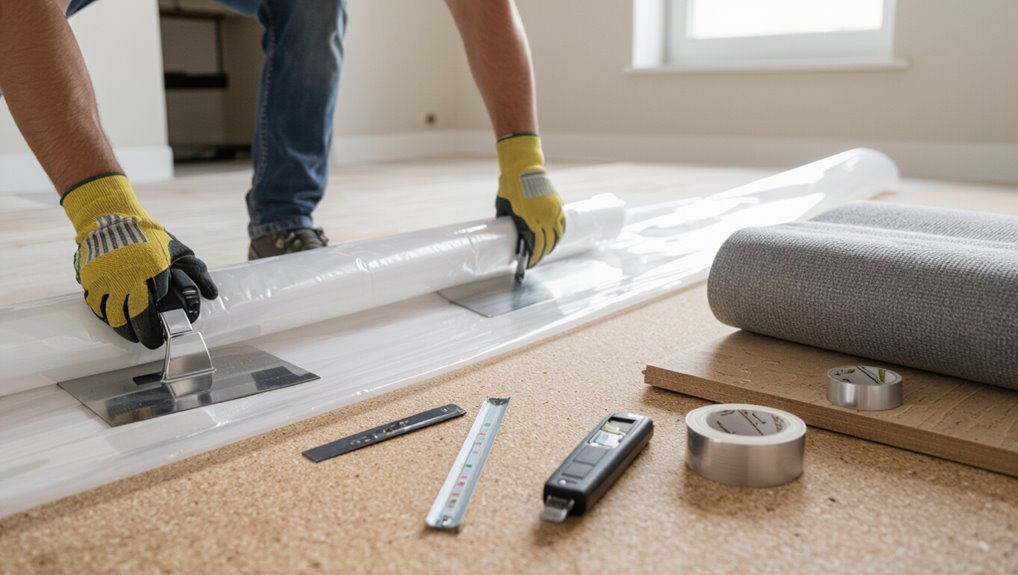
Before you lay any planks, roll out the underlay and vapor barrier so they cover the entire floor area without gaps, overlaps, or wrinkles that could compromise support or moisture protection.
Choose foam or cork underlay for sound and comfort; use polyethylene sheeting in moisture-prone areas.
Butt edges tightly, tape seams, trim at walls, and run vapor barrier up vertical surfaces where required.
Step 4 First row installation (expansion gap, spacers, splitting starter board)
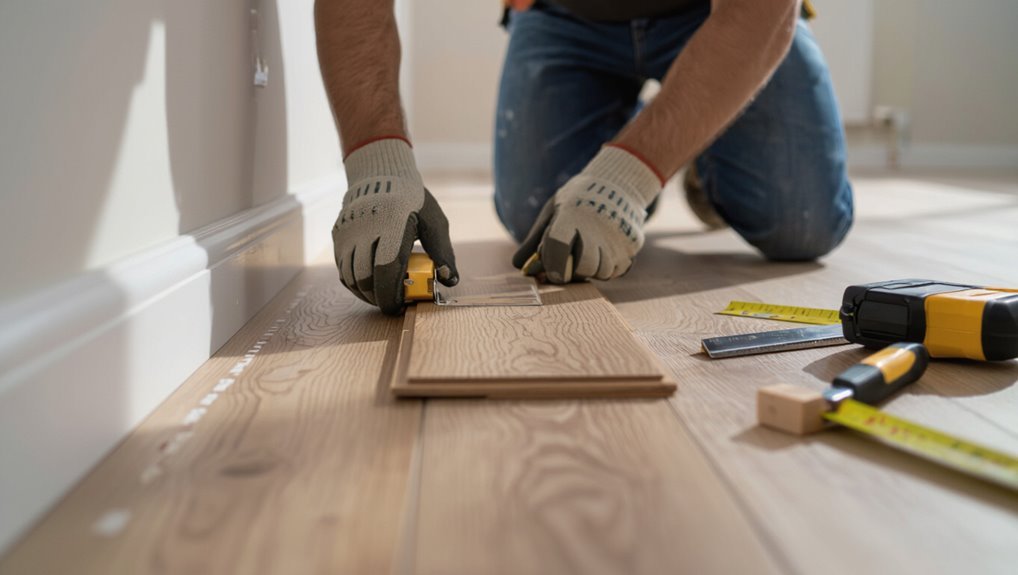
Once you’ve prepared the subfloor and rolled out the underlay, lay the first row of planks along the longest, straightest wall and leave a consistent expansion gap (usually 1/4″–3/8″) between the planks and the wall.
Use spacers to maintain the gap, align tongues facing into the room, and trim the starter board to fit.
Confirm ends are straight and securely seated.
Step 5 Subsequent rows (stagger patterns, tapping block technique)
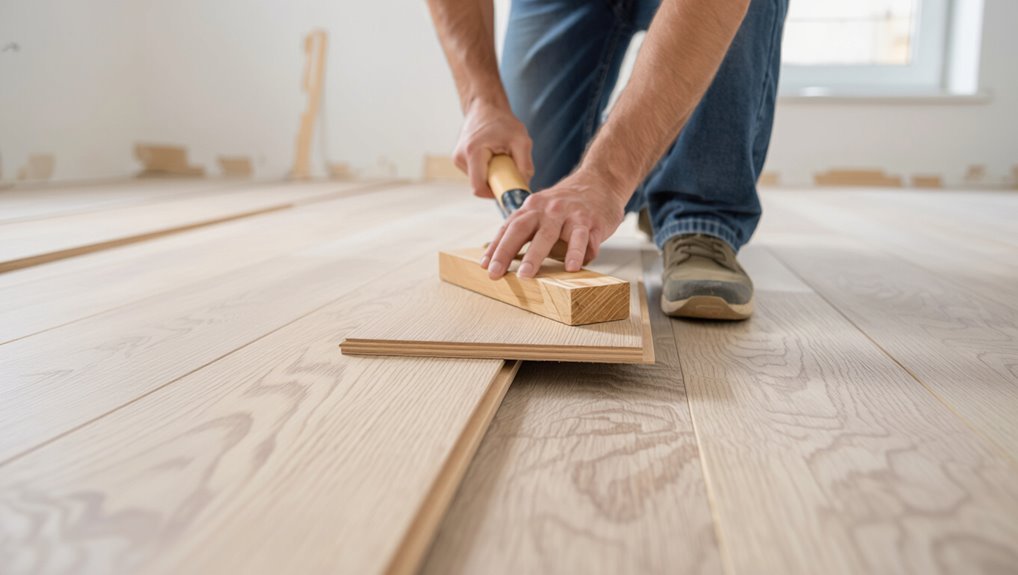
Because staggered seams make the floor stronger and look more natural, start the second row with a piece trimmed to at least 6–8 inches shorter (or longer) than the starter board and lock its long edge into the first row; then work across the room, tapping each plank into place with a tapping block and mallet to guarantee tight joints without damaging the profile.
Continue staggering seams, maintaining minimum offset, and checking alignment frequently.
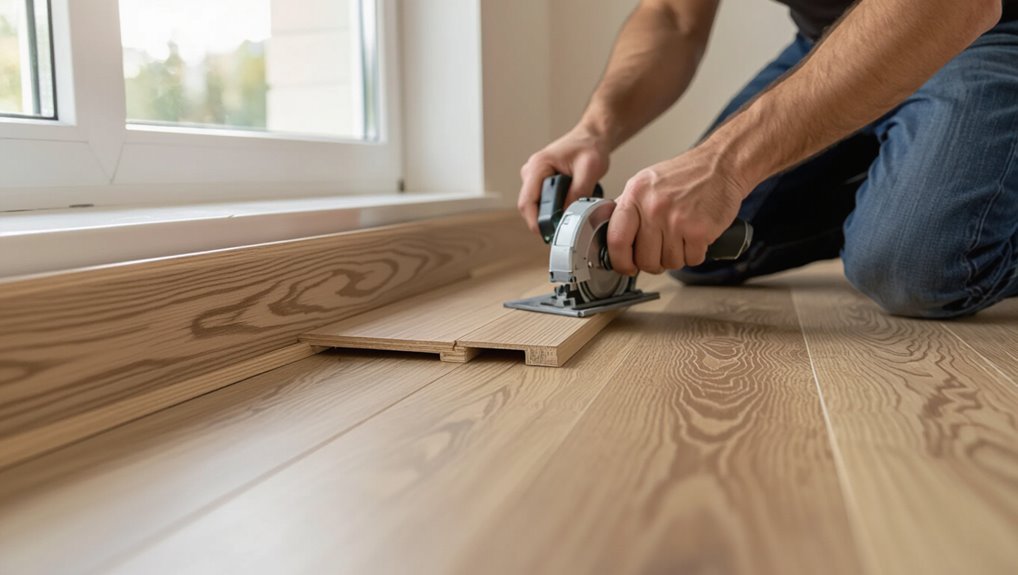
Step 6 Cutting for obstacles, doorways, and irregular walls (tools and templates)
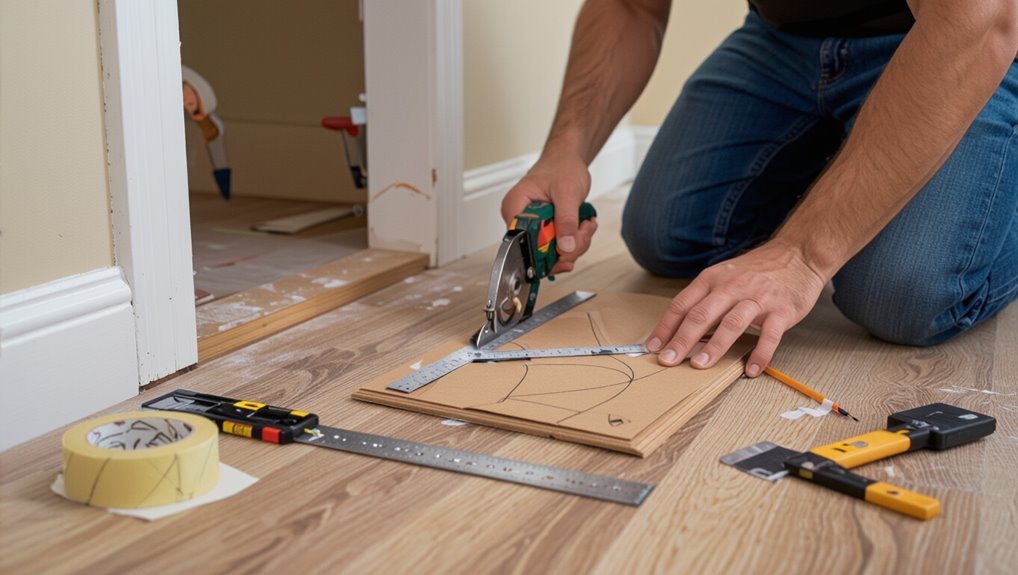
After you’ve locked in several staggered rows and checked alignment, you’ll face cuts for doorways, vents, pipes, and uneven walls.
Measure accurately, mark panels, and use a jigsaw for curves or pipe notches, a circular saw for straight rip cuts, and a coping template for irregular profiles.
Protect finished faces, clamp templates, and cut slightly oversized to test-fit before final trimming.
Step 7 Fitting final row and trimming for expansion gap
1 final strip often makes the biggest difference in a room’s appearance and performance, so measure carefully, trim panels to fit while keeping the required expansion gap, and install them by angling and snapping into place or using a pull bar for tight fits.
Check alignment, stagger joints correctly, and shave edges gradually until the row lays flat.
Recheck gaps around walls before finishing.
Step 8 Installing trims, transitions, and skirting boards
Now that the last row sits flat and your expansion gaps are set, you’ll finish the job by fitting trims, thresholds, and skirting boards that hide gaps and give the floor a polished look.
Measure and cut trims precisely, attach thresholds at doorways with adhesive or screws, and fix skirting boards to walls, leaving the expansion gap intact.
Caulk or use flexible sealant where needed.
Step 9 Clean-up, initial maintenance, and curing time
When you’ve finished installing trims and skirting, clean the floor thoroughly to remove dust, adhesive smears, and sawdust so the surface can settle and any sealants can cure properly.
Allow traffic only after recommended curing time (check adhesive/sealant labels).
Use a soft broom, vacuum with hard-floor attachment, and damp mop.
Avoid harsh cleaners, heavy furniture for 48–72 hours, and protect surfaces while curing.
Common Problems and How to Fix Them
You’ll run into issues like gapping, buckling or crowning, and each has a specific cause and fix you can apply.
If click-lock seams fail you can often reseat or replace affected planks, while squeaks and movement usually respond to targeted tightening or underlayment adjustments.
For water damage or stains, act quickly to dry, replace damaged boards, and consider refinishing or using repair kits where appropriate.
Gapping, buckling, or crowning causes and remedies
Although a few issues like gapping, buckling, and crowning can look similar, each has distinct causes and straightforward fixes you can apply, from adjusting expansion gaps to addressing moisture and subfloor problems.
Gapping usually follows dry conditions or poor acclimation; close gaps by restoring humidity and re-seating rows.
Buckling/crowning stem from trapped moisture or tight edges; relieve pressure, fix moisture sources, and refit affected planks.
Click-lock failures and re-seating planks
If a plank won’t lock or the seam keeps popping open, the problem usually lies with a damaged tongue or groove, debris in the joint, or improper alignment during installation; diagnosing the cause first lets you choose whether you can reseat the piece or need a replacement.
Clean the joint, inspect profiles, trim burrs, then realign and tap gently with a block. Replace if damaged beyond repair.
Squeaks and movement troubleshooting steps
1 common cause of squeaks and movement is loose subflooring or gaps between the laminate and underlayment; check for soft spots, nails or screws back into the subfloor, and verify underlayment lies flat.
Tighten fastenings, fill small gaps with wood glue or appropriate sealant, and use shims at junctions.
If planks rub, sand edges lightly or replace damaged pieces for a stable floor.
Water damage and stain remediation options
When water reaches your laminate, act quickly to limit damage: blot spills, remove affected planks if moisture soaks the seams, and dry the subfloor thoroughly before reinstalling or replacing boards.
For surface stains, use a gentle cleaner and soft cloth; avoid abrasives. Replace warped or delaminated planks.
Treat subfloor mold with appropriate cleaner, guarantee full drying, then reinstall with moisture barrier to prevent recurrence.
Best Practices, Tips, and Time-Saving Strategies
Start by planning your layout for both looks and stability, using proper plank direction and stagger ratios.
Make moisture checks and choose the right underlayment for concrete, timber, or tile, then use simple tool hacks for cleaner cuts and quicker fits.
Finish with routine maintenance tips to protect the surface and extend the floor’s life.
Layout strategies for visual appeal and stability (stagger ratios, direction)
Although it might seem purely aesthetic, planning your plank layout—direction, staggering pattern, and end-joint offsets—directly affects both the room’s look and the floor’s long-term stability.
Run planks parallel to the longest light source for flow, stagger end joints at least 300–400mm (12–16″) or follow a 1/3–2/3 ratio, and avoid continuous straight seams across the room to reduce movement and gaps.
Moisture control tips for different subfloors (concrete, timber, tile)
Because moisture is the biggest threat to laminate, you need to match your prep to the subfloor: seal and test concrete, acclimate and vet timber for rot and gaps, and use a decoupling or membrane layer over tile to block trapped moisture.
Use a reliable vapour barrier on concrete, repair or replace damaged timber, maintain a 48–72 hour acclimation, and confirm tile grout is intact before laying underlay.
Tool hacks and techniques for cleaner cuts and faster installs
A few well-chosen tool hacks will shave hours off your laminate install and leave edges so clean they look factory-cut.
Use a sharp carbide blade in a circular saw for straight cuts, score and snap planks for quick crosscuts, and clamp a sacrificial fence to prevent tear-out.
Invest in a pull bar, tapping block, and a jigsaw with fine blade for tricky cuts.
Maintenance tips to preserve finish and extend lifespan
When you stick to a few simple routines—regular sweeping, quick spot-cleaning, and using the right cleaners—you’ll protect the finish and keep laminate looking new for years.
You should also use pads under furniture, avoid excessive water, and control sunlight exposure. Maintain humidity between 35–65% and replace worn underlay promptly.
- Use soft broom or microfiber mop
- Wipe spills immediately
- Lift heavy items, don’t drag
Comparison: Floating vs. Glue-Down vs. Staple/ Nail-Down Laminate
You’ll weigh installation complexity, pros and cons, and ideal uses for floating, glue-down, and staple/nail-down laminate to pick the right method for your project.
Consider cost and expected longevity—floating is usually cheapest and easiest, glue-down offers a firmer bond for high-traffic or moisture-prone areas, and nail-down gives solid feel and long life on proper subfloors.
I’ll outline when each method makes the most sense so you can decide quickly and confidently.
Installation complexity, pros/cons, and recommended applications
Although all laminate types aim to mimic hardwood, they differ a lot in how you install them and where they work best; you’ll choose based on skill, subfloor, and room use. Floating is easiest, glue-down suits concrete, and nail/staple fits wood joists.
| Type | Best use |
|---|---|
| Floating | DIY, uneven subfloors |
| Glue-down | Basements, concrete floors |
| Nail/Staple | Renovations over wood joists |
Cost and longevity comparison
1 key thing to weigh is upfront cost versus lifespan: floating laminate usually costs the least to buy and install, glue-down sits midrange and can need more labor on concrete, and nail/staple installations are pricier because of materials and pro labor but can last longest when nailed to a stable wood subfloor.
| Type | Notes |
|---|---|
| Floating | Low cost, easier replacement |
| Glue-down | Better on concrete, moderate cost |
| Nail/Staple | Highest durability, higher cost |
When to Hire a Professional vs. DIY
Decide whether to tackle the job yourself by weighing room size, obstacles like stairs or built-ins, and the subfloor’s condition against any warranty requirements that might force professional installation.
If you hire a pro, expect a clear timeline, a workmanship warranty, and upfront cost estimates that include materials and cleanup.
Use those factors to choose the approach that saves you time and protects your investment.
Decision factors: room size, obstacles, subfloor condition, warranty requirements
If your room is large, has many doorways or built-ins, or the subfloor needs major repairs, you should seriously consider hiring a pro rather than doing it yourself; these factors affect time, cost, and whether you’ll keep your warranty intact.
- Room size/complexity: bigger or odd layouts take skill and time.
- Subfloor issues: repairs demand tools and expertise.
- Warranty rules: some warranties void DIY installs.
What to expect from a pro: timeline, warranty, and costs
When those factors push you toward professional help, know what to expect from a contractor: a clear timeline, defined costs, and warranty handling that can preserve — or extend — your protection.
You’ll get a schedule, itemized estimate, and written warranty terms.
Expect site prep, moisture testing, and cleanup included.
Ask about change-order fees, installation guarantees, and post-install inspections before signing.
Materials and Product Selection Guide
You’ll want to pick planks with the right thickness, AC rating, and wear layer for the room’s traffic and durability needs.
Match the underlay type to your subfloor and room use to control moisture, sound, and feel.
Don’t forget trims, connections, and skirting so the finished floor looks seamless and functions properly.
Choosing plank thickness, AC rating, and wear layer
Because your floor needs to balance comfort, durability, and budget, choosing the right plank thickness, AC rating, and wear layer is essential before you buy, install, or commit to a warranty.
Thicker planks (8–12mm) feel sturdier and reduce subfloor imperfections.
Pick AC3 for homes, AC4–AC5 for high traffic or commercial use.
Guarantee a clear, robust wear layer for scratch and stain resistance.
Underlay types and matching to subfloor/room use
1 key decision before laying laminate is picking the right underlay for your subfloor and room use, since it controls moisture protection, sound reduction, and floor feel.
Match materials: foam for level, dry rooms; combined vapor-barrier for concrete or basements; cork or high-density for soundproofing and durability in high-traffic areas.
Check thickness, R-value, and manufacturer compatibility with your laminate.
Matching trims, transitions, and skirting
Now that you’ve chosen an underlay that protects against moisture and controls sound, pick trims, thresholds, and skirting that both complement that performance and finish the look.
Match colours and profiles to plank thickness and expansion gaps. Use end caps at doorways, T-mouldings between rooms, and reducer strips at lower surfaces.
Choose durable, moisture-resistant materials and secure them without restricting floor movement.
Common Mistakes to Avoid
Don’t skip acclimatisation or moisture testing, because wet or mismatched boards will warp or buckle.
Make sure you plan your layout and leave proper expansion gaps, and avoid using the wrong underlay or adhesives.
Take cuts and end-joins slowly and accurately—rushing those steps is the fastest way to reveal flaws.
Skipping acclimatisation or moisture testing
If you skip acclimatising your laminate or testing the subfloor for moisture, you risk cupping, warping, and premature failure of the floor.
You should let the planks sit in the installation room for 48–72 hours and perform moisture tests before you start.
Ignore this and you’ll face buckling, adhesive failure on some products, and wasted time and money fixing avoidable moisture-related damage.
Ignoring expansion gaps or improper layout planning
Moisture issues aren’t the only way an otherwise solid installation can fail; failing to leave proper expansion gaps or planning a poor layout will cause visible problems once the floor settles.
You must allow perimeter and connection gaps per manufacturer instructions, stagger end joints for stability, and plan plank direction to minimize awkward cuts.
Without this, buckling, gaps, or uneven seams will appear quickly.
Using wrong underlay or adhesives
When you pick the wrong underlay or adhesive, the floor won’t perform as planned—you’ll get squeaks, poor sound insulation, trapped moisture, or joints that fail.
Choose underlay rated for moisture barrier, load support and acoustic needs. Use adhesives compatible with your laminate and subfloor—don’t improvise.
Test small areas, follow manufacturer specs, and replace inadequate materials immediately to avoid premature damage.
Rushing cuts and poor end-join techniques
Because precise cuts and clean end-join technique determine how seamless your floor looks and holds up, don’t rush the sawing, trimming, or joining steps.
If you hurry, panels won’t align, gaps will show, and joints can fail. Measure twice, cut once, deburr edges, and test-fit pieces.
Use the right tools and take time to clamp and tap joints squarely for a professional result.
Frequently Asked Questions
You probably have a few questions before you start, like whether you can install laminate over existing flooring and how much expansion gap you need.
You’ll want to know if laminate is waterproof and suitable for bathrooms, how long it lasts and how to repair damaged planks, and whether it affects resale value.
I’ll answer each of these clearly so you can make the right choices.
Can laminate flooring be installed over existing flooring?
Can you install laminate flooring over existing floors? Yes, you can if the current surface is flat, dry, clean, and securely fixed.
Remove loose tiles or trim high spots, fill gaps, and guarantee no soft or spongy areas. Use appropriate underlay for moisture and insulation.
Avoid layering over carpet, thick vinyl, or uneven subfloors that compromise locking joints and stability.
How much expansion gap is needed and why?
When installing laminate, leave a consistent expansion gap of about 1/4 to 1/2 inch (6–12 mm) around the room perimeter so the floor can expand and contract with temperature and humidity changes without buckling or popping loose.
Use spacers, maintain gaps at doorways and around fixed objects, and cover gaps with skirting or trim.
Check manufacturer specs for exact requirements.
Is laminate flooring waterproof and safe for bathrooms?
Curious whether laminate flooring can handle bathrooms? You’ll find most standard laminates aren’t fully waterproof; they resist spills but soak up prolonged moisture at joints and edges.
Use waterproof or water-resistant laminate with sealed seams, proper underlay, and good ventilation for wet areas.
Still, consider luxury vinyl or tile if you expect frequent standing water or high humidity.
How long does laminate flooring last and how to repair damaged planks?
Although laminate’s lifespan varies with quality and care, you can typically expect 10–25 years from residential planks and longer for commercial-grade products with heavy use.
To repair, replace individual planks by removing trim, disengaging adjacent boards, and swapping in matching pieces.
For scratches, use repair kits or color-matched filler.
Maintain with mats, felt pads and prompt spill cleanup to extend life.
Will laminate affect home resale value?
Will laminate help or hurt your home’s resale value? It depends.
Quality, style, and installation matter: high-grade, neutral-tone laminate fitted professionally can boost appeal and attract buyers, while cheap, mismatched, or poorly installed flooring may lower perceived value.
Highlight durability, maintenance, and recent replacement in listings.
Ultimately, choose attractive, durable laminate and document workmanship to protect and potentially increase resale value.