
How Thick Should a Concrete Floor Be? The Answer Depends on This
How thick your concrete floor should be depends on the loads, soil strength, and environment it faces. For light sheds you can use 3–4 in., garages typically need 4–6 in. (6–8 in. for heavy trucks), warehouses 4–8 in. depending on equipment, and heavy‑truck areas often need 8–12+ in. Reinforcement, subgrade quality, moisture, freeze‑thaw, and point loads all change the requirement, so plan for worst‑case conditions and consult specs — keep going and you’ll get the full sizing approach.
How Thick Should a Concrete Floor Be?
You’ll want different concrete thicknesses depending on the use—3–4 inches for interior slabs, 4–6 inches for garages and driveways, and 6–8 inches or more for heavy industrial loads.
Follow local codes and project-specific specs for reinforcement and subbase preparation.
In short: homeowners usually need 3–6 inches, while builders handling heavy traffic should plan for 6 inches plus and consult an engineer.
Direct thickness recommendations by use-case
Different jobs demand different slab thicknesses, so match the concrete depth to the use: a simple shed floor can be 3–4 inches, a residential garage usually needs 4–6 inches, and commercial or heavy-vehicle areas often require 6–12 inches or more with reinforcement. Decide based on load, subgrade and traffic if you’re wondering how thick should a concrete floor be.
| Use | Typical Thickness | Notes |
|---|---|---|
| Shed | 3–4 in | Light loads |
| Garage | 4–6 in | Passenger vehicles |
| Warehouse | 6–8 in | Forklifts |
| Heavy truck | 8–12+ in | Reinforced |
One-sentence summary for homeowners and builders
Now that you’ve seen typical thicknesses by use, summarize it in one clear rule: match slab depth to expected loads—3–4 inches for light shed floors, 4–6 inches for typical home garages, 6–8 inches for forklift traffic, and 8–12+ inches (with reinforcement) for heavy trucks—adjusting upward for weak subgrades or concentrated loads.
You should pick thickness based on load, soil, reinforcement, and drainage.
Basic Understanding What “Floor Thickness†Means
When you talk about “floor thickness,” you’re referring to the total depth of a slab—whether it’s a slab-on-grade, a suspended slab, or a thinner topping slab—measured from top surface to bottom.
Remember that reinforcement, any topping layer, and surface finish all add to that thickness.
The load the floor must carry, the supporting soil conditions, and the planned use determine how thick the slab needs to be.
Definitions: slab, slab-on-grade, suspended slab, topping slab
Think of “floor thickness” as the distance from the top surface of the concrete down to its bottom—what matters changes with the type of slab you’re dealing with.
A slab is any flat concrete panel.
Slab-on-grade rests directly on soil. A suspended slab spans between supports and leaves space below. A topping slab is a thin layer poured over an existing floor to level or strengthen it.
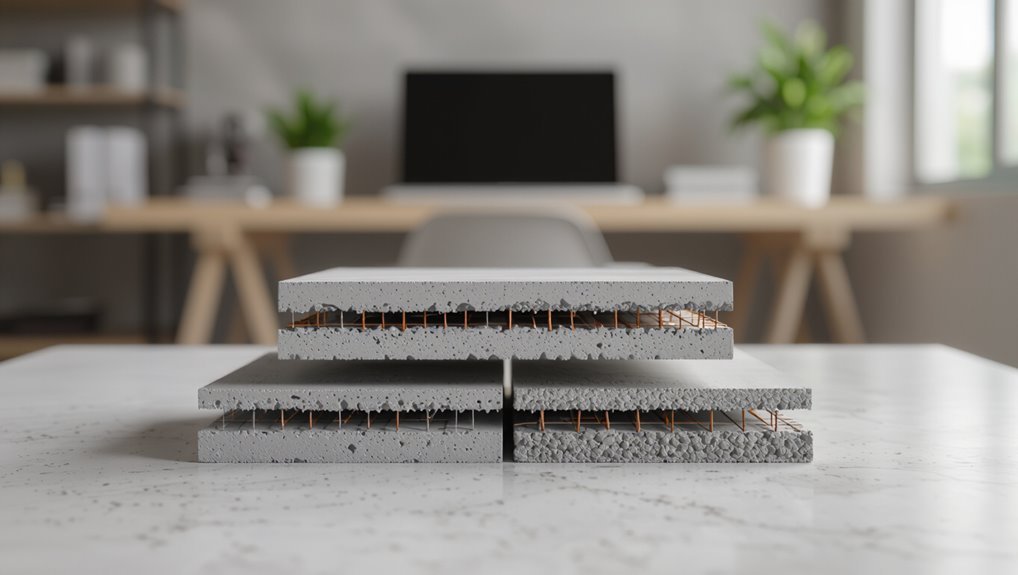
Components that add to thickness (reinforcement, topping, finish)
Several elements add to a concrete floor’s overall thickness, and you should account for each when planning or evaluating a slab.
Reinforcement like rebar or wire mesh sits within the slab and affects pour depth.
Topping slabs add a new layer for leveling or strength.
Finishes—polish, resin, or surface treatments—add millimeters to centimeters, which you’ll include in final measurements.
How load, soil, and use affect required thickness
Because floor thickness has to support what you put on it and sit on, you’ll choose different slab depths based on load, soil conditions, and planned use.
Heavier machinery needs thicker, reinforced slabs; light residential floors can be thinner.
Poor or compressible soil calls for thicker slabs, improved subgrade, or slab-on-grade with deeper footings.
Anticipate traffic patterns and moisture when deciding thickness.
Key Factors That Determine Concrete Floor Thickness
You’ll size your slab based on how you’ll use it and the loads it’ll carry—residential floors, garages, workshops, and industrial bays have very different live and point-load demands.
Consider whether loads are concentrated or distributed, what the subgrade can support, and which reinforcement (rebar, mesh, or fibers) and placement you’ll use.
Also account for slab edge conditions and supports like beams, footings, or grade beams since they change thickness and detailing requirements.
Intended use and live loads (residential, garage, workshop, industrial)
When deciding slab thickness, think about how you’ll use the space and the live loads it must carry.
For homes, typical 3.5–4-inch slabs handle foot traffic and furniture.
Garages need 4–6 inches for vehicle loads.
Workshops with machinery push toward 5–8 inches.
Industrial floors supporting heavy equipment or forklifts often require 8 inches or more, plus reinforcement and proper subgrade preparation.
Point loads vs. distributed loads
If a few concentrated points of pressure will sit on your slab—think machine feet, storage racks with narrow bases, or vehicle jacks—you’ll need a thicker slab or additional reinforcement than you’d for the same total weight spread evenly.
You should identify load concentrations, specify reinforcement (rebar, mesh, or thickened pads), and place isolation or bearing pads to prevent cracking and localized failure.
Subgrade and soil bearing capacity
The soil beneath your slab controls how thick that slab must be—soft, compressible soils need a thicker concrete section or improved subgrade to carry the same loads that dense, well-compacted soils will support.
Test bearing capacity with borings or plate tests, then compact, remove organic material, and add granular fill or geotextile where needed so the slab won’t settle or crack.
Reinforcement type and placement (rebar, mesh, fiber)
Because reinforcement controls how loads are distributed through a slab, you’ll choose not only the type—rebar, welded wire mesh, or synthetic fibers—but also how and where it’s placed to prevent cracking and control deflection.
Rebar suits heavy loads and spans, mesh reduces shrinkage cracks, and fibers improve surface toughness.
Position reinforcement near tension zones, maintain proper cover, and follow spacing and lap requirements for performance.
Slab edge conditions and support (beams, footings, grade beams)
When slab edges rest on beams, footings, or grade beams, they tell you how thick the concrete must be and where reinforcement should concentrate. You’ll usually increase thickness at supported edges to carry bending and shear into those supports.
You should detail support spacing, load paths, and bearing widths, and design edge cantilevers, drop panels, and continuity reinforcement so edges transfer forces without excessive deflection or cracking.
Environmental and durability considerations (freeze-thaw, chemicals, abrasion)
Edge detailing and reinforcement help your slab resist loads, but you also have to account for the environment the floor will face.
If freeze‑thaw cycles occur, increase thickness and air entrainment to prevent scaling.
For chemical exposure or heavy abrasion, choose denser mixes, greater cover, and hard finishes.
Proper drainage and jointing reduce deterioration, so plan thickness with durability demands in mind.
Local building codes and engineered specifications
If your project falls under local jurisdiction or involves structural loads that matter, you’ll need to follow building codes and engineered specs that set minimum slab thicknesses, reinforcement requirements, and tolerances.
Check local codes, zoning, and seismic or wind provisions.
Use engineered drawings for load-bearing floors, garages, and commercial slabs.
Don’t guess—permits, inspections, and professional calculations guarantee safety, longevity, and code compliance.
Recommended Thickness Guidelines by Application
You’ll want different concrete thicknesses depending on how the space will be used, so here’s a quick guide to typical applications and recommended depths.
| Application | Typical Thickness |
|---|---|
| Residential interiors (living areas, bedrooms) | 3–4 inches |
| Garages, driveways, light commercial | 4–6 inches |
For heavy commercial or industrial floors and exterior slabs (sidewalks, patios, heavy-driveways) you’ll need thicker sections and sometimes reinforcement or subbase improvements.
Residential interior floors (living areas, bedrooms)
For most homes, a typical interior concrete slab for living areas and bedrooms is 3 1/2 to 4 inches thick, which gives you enough strength for normal foot traffic and furniture while keeping costs and floor height changes reasonable.
You’ll want vapor barrier beneath, modest reinforcement (wire mesh or rebar), proper subbase compaction, and control joints to minimize cracking and guarantee long-lasting, level floors.
Garage floors and residential driveways
Moving from indoor living spaces to vehicle areas, garage floors and residential driveways need greater thickness to handle concentrated loads, occasional impacts, and vehicle fluids.
You should typically pour 4–6 inches of reinforced concrete for single-car garages and driveways; increase to 6–8 inches for heavy trucks, lifts, or frequent deliveries.
Include rebar or wire mesh, proper subbase, and adequate drainage.
Light commercial and retail floors
While lighter than heavy industrial slabs, light commercial and retail floors still need extra thickness and reinforcement to handle constant foot traffic, shelving, and occasional pallet loads.
You’ll typically use 4 to 6 inches of concrete with fiber or steel reinforcement, controlled joints, and a durable finish.
Consider higher-strength mixes and vapor barriers for moisture-sensitive retail spaces.
Heavy commercial and industrial floors (warehouses, forklifts)
Because heavy commercial and industrial floors must withstand constant pallet loads, heavy racking, and forklift traffic, you’ll typically need thicker slabs—usually 6 to 8 inches for general warehouse use and 8 to 12 inches (or more) where high axle loads, heavy equipment, or concentrated loads occur.
You should also specify reinforcement, control joints, proper subbase compaction, and concrete mix strength to prevent settlement, cracking, and edge damage.
Exterior slabs: sidewalks, patios, and driveways
When you’re planning sidewalks, patios, or driveways, slab thickness should match the load they’ll carry and the ground conditions beneath them.
For pedestrian walkways and patios, use 3–4 inches over well-compacted base; increase to 4–6 inches for driveways and light vehicle traffic.
Strength, reinforcement, proper subgrade compaction, and control joints prevent cracking and settling—adjust thickness for poor soils or heavier loads.
Special cases: radiant-heated floors, topping slabs, overlays
Those exterior guidelines give you a baseline, but special-floor situations call for different thickness rules to protect embedded systems and guarantee surface performance.
For radiant-heated floors, add 1–2 inches of concrete over tubing (typically 3–4 inches total).
Topping slabs need at least 1.5–2 inches over a sound base; overlays require proper bonding and 1/4–1/2 inch minimum for light use, thicker for heavy traffic.
How to Calculate and Specify Thickness Step-by-Step
Start by identifying your design loads and how the floor will be used so you know the performance requirements.
Next assess the subgrade (compaction, CBR, geotechnical data), pick reinforcement and a joint layout, and choose a thickness from relevant standards with appropriate safety factors.
Finally, specify edge support, slopes, and drainage to guarantee durability and proper water management.
Step 1: Determine design loads and use-case
Step 1 asks you to define the loads the slab will carry and how the space will be used, because those factors directly determine required thickness, reinforcement, and subbase preparation.
Identify live, dead, point, and distributed loads, frequent traffic, equipment weights, and storage patterns.
Use projected load cases to select slab type, thickness ranges, reinforcement (mesh/steel), and joint spacing for durability and service life.
Step 2: Assess soil and subgrade (compaction, CBR, geotechnical data)
After you’ve defined the loads the slab will carry, evaluate the soil and subgrade because they control bearing capacity, settlement risk, and how thick the slab must be.
Have compaction tests, CBR or R-value results, and geotechnical reports on hand. Use those to set allowable bearing pressure, decide on subbase thickness/material, and determine if stabilization or mitigation is required before specifying slab thickness.
Step 3: Choose reinforcement and joint strategy
Once you’ve established load requirements and subgrade capacity, pick a reinforcement and jointing plan that controls cracking and transfers loads efficiently. Your choices will directly affect the slab thickness and long‑term performance.
Decide between steel mesh, rebar, or fiber reinforcement, and select contraction, isolation, and construction joints.
Coordinate joint spacing, dowels, and edge reinforcement with anticipated loads and slab function for durability.
Step 4: Select thickness based on standards and safety factors
With reinforcement and jointing set, you’ll next determine slab thickness by applying relevant codes, load factors, and safety margins to the specific use and subgrade conditions.
Check local standards (ACI, Eurocode), factor in live and point loads, anticipated traffic, and soil-bearing capacity.
Increase thickness for heavy loads or poor subgrade, and document chosen safety factors and rationale for approval and future maintenance.
Step 5: Detail edge support, slopes, and drainage
Because edge conditions and surface gradient directly change how a slab carries loads and sheds water, you should specify edge support, slopes, and drainage together when finalizing thickness, not as an afterthought.
Detail edge beams, dowels, and bearing lengths to prevent edge failure.
Design slopes for positive runoff, locate drains, and guarantee subbase permeability and compaction match desired thickness and load conditions to avoid ponding.
Step 6: Confirm with structural/engineer review
After you’ve specified edge conditions, slopes, and drainage, have a licensed structural engineer review the slab thickness, reinforcement, and subbase assumptions before finalizing plans.
They’ll check load assumptions, code compliance, detailing, joints, and construction tolerances.
Address any adjustments they recommend, document their approvals, and incorporate stamped drawings.
This reduces risk, prevents costly rework, and guarantees the floor performs as planned.
Construction Process Influences on Effective Thickness
When you set thickness specs, remember the subbase and base prep—proper compaction and the right granular fill can make a thinner slab perform like a thicker one.
Your formwork, edge treatment, and how you place reinforcement (including cover requirements) directly affect load transfer and cracking.
And don’t underestimate how pouring, finishing, and curing control the concrete’s strength and durability, which define the effective thickness in service.
Subbase and base preparation (compaction, granular fill)
If you want your concrete slab to perform as designed, start with a well-prepared subbase and base: properly compacted granular fill creates a uniform, stable platform that controls settlement, reduces frost heave, and spreads loads so the effective slab thickness is actually realized.
Compact to specified density, use well-graded aggregates, install drainage layers, and verify with field tests so load transfer and durability meet design expectations.
Formwork and edge treatments
Because formwork and edge treatments set the slab’s boundaries and support its fresh weight, you should install them precisely and securely to guarantee the concrete achieves its aimed effective thickness.
Check form alignment, level, and rigidity; brace against bulging.
Use consistent edge details, chamfers or form liners where specified, and seal joints to prevent leakage so thickness and edge integrity remain reliable.
Pouring, finishing, and curing effects on final performance
Although the mix design and formwork set the nominal thickness, how you pour, finish, and cure the slab largely determines the concrete’s effective thickness and long-term performance.
You should place consistently, avoid cold joints, and consolidate to eliminate voids.
Finish without overworking the surface.
Cure promptly and adequately—moisture retention and temperature control boost strength, reduce cracking, and guarantee the slab performs to its designed thickness.
Placement of reinforcement and cover requirements
When you place reinforcement correctly and maintain the specified concrete cover, you secure the slab carries loads as aimed and resists corrosion and cracking over time.
You should space and support rebar or mesh to stay at design depth, use chairs or spacers, and confirm cover matches exposure and code.
Proper placement preserves structural capacity, aids crack control, and prolongs durability.
Common Mistakes That Compromise Floor Strength and Longevity
You can ruin a concrete floor by underestimating loads or choosing the thinnest possible slab.
Poor subgrade prep, wrong reinforcement placement, and skimping on curing, jointing, or mix design all shorten service life.
Also don’t ignore drainage and freeze–thaw protection if you want the slab to last.
Underestimating loads or using minimal thickness
If you skimp on thickness to save money or simply misjudge the loads your floor will carry, cracks, deflection, and premature failure become likely.
You should calculate live and dead loads, equipment point loads, and traffic patterns, then choose a thickness and reinforcement that match.
Don’t assume minimal thickness works; design for actual use to avoid costly repairs and downtime.
Poor subgrade preparation and insufficient compaction
Because the soil beneath your slab supports everything above it, neglecting proper subgrade preparation and compaction undermines the whole floor system.
You must remove organic matter, soften spots, and recompact to specified density. Poorly compacted or variable subgrade causes uneven settling, cracking, and reduced load capacity.
Use geotextile, gravel, and mechanical compaction to create a uniform, stable base before pouring concrete.
Incorrect reinforcement placement or lack of cover
When steel reinforcement sits too close to the surface or wanders from its planned layout, it can’t do its job of controlling cracking and carrying loads, and your slab’s durability suffers.
You must guarantee correct bar spacing, proper chairs or supports, and adequate concrete cover to prevent corrosion and exposure.
Improper placement reduces strength, shortens service life, and raises repair costs down the road.
Skimping on curing, jointing, or proper mix design
Neglecting proper curing, jointing, or mix design lets small problems become big failures—cracks widen, surface dusting appears, and strength falls short of what you expected.
You must cure correctly, place scheduled joints, and use a mix tailored to load and exposure.
Skimping saves little now but costs you repairs, reduced service life, and potential safety hazards.
Plan and follow specs.
Ignoring drainage and freeze-thaw protection
If you don’t plan for proper drainage and freeze–thaw protection, water will find its way into the slab and turn seasonal moisture cycles into a wrecking ball for your concrete.
You should slope surfaces, install drains and vapor barriers, and use air-entrained mixes or sealers.
Neglecting these lets freeze expansion, erosion, and salt damage shorten life and force costly repairs.
Best Practices and Practical Tips
Start by sticking to minimum safe thicknesses for your use—then upsize for heavy loads or poor soil.
Pick mixes and admixtures for durability, add reinforcement per application, and plan joints with proper spacing.
Finally, keep a simple maintenance routine to preserve the slab’s life.
Minimum safe thicknesses and when to upsize
When planning slab thickness, you’ll want to meet minimum safe dimensions for the planned use while knowing when to upsize for durability or load demands.
For residential garages and walkways, stick with common minimums (3–4 inches), but go thicker for heavy equipment, vehicle traffic, or poor soils.
Increase thickness, reinforcement, or use thicker sections at load points to prevent cracking and settlement.
Choosing mixes and admixtures for durability
Thicker slabs and proper reinforcement reduce cracking, but the concrete itself has to resist weather, chemicals, and freeze-thaw to last — and that starts with the mix and the right admixtures.
Use low water-cement ratio, well-graded aggregates, and supplementary cementitious materials like fly ash or slag for durability.
Add air entrainment for freeze-thaw, corrosion inhibitors for exposure, and plasticizers for workability.
Reinforcement recommendations by application
For most slab-on-grade and suspended concrete floors, you’ll choose reinforcement based on load, slab thickness, and exposure—light foot traffic and residential garages usually do well with welded wire fabric or light rebar mats, while industrial bays, heavy equipment pads, and vehicular aprons need heavier deformed bar grids or post-tensioning to control cracking and carry loads.
You’ll also consider:
- Safety and confidence
- Longevity and pride
- Cost versus peace of mind
- Peaceful, steady performance
Joint layout and spacing tips
Good joint layout starts with a clear plan that matches slab thickness, reinforcement, and expected loads so you can control cracking and simplify repairs.
Place contraction joints at intervals roughly 24–36 times slab thickness in inches, align joints with load paths and openings, use isolation joints at walls and columns, and space saw cuts early to reduce random cracking while easing future maintenance and patching.
Maintenance recommendations to preserve slab life
A regular maintenance routine will extend your concrete slab’s life and cut long-term repair costs, so inspect, clean, and address issues promptly.
Sweep and wash to remove grit, salt, and chemicals. Seal every few years to reduce water and stain penetration.
Fill cracks early, repair joints, and guarantee proper drainage. Use gentle deicers, avoid heavy impacts, and keep records of inspections and repairs.
Comparison: Thicker vs. Thinner Slabs Trade-offs
You’ll weigh cost against long-term performance when choosing slab thickness, since thicker slabs cost more upfront but usually last longer and handle heavier future loads. Consider how thermal and moisture behavior and repairability change with thickness—thinner slabs may be cheaper but can be more vulnerable to moisture and repair limits. The table below summarizes key trade-offs to help guide your choice.
| Aspect | Thicker Slab | Thinner Slab |
|---|---|---|
| Cost vs lifespan | Higher initial cost, longer service life | Lower initial cost, shorter expected life |
| Structural & load capacity | Better for heavy loads and future changes | Limited load capacity, more prone to cracking |
| Thermal/moisture & repairs | Better thermal mass, easier to retrofit | Less thermal mass, harder/cheaper to repair |
Cost implications
Thicker slabs cost more up front because they use more concrete, reinforcement, and labor, but they can cut long-term expenses by reducing repairs, downtime, and the need for future replacement.
Thinner slabs save money initially but may force you to pay more later for patching, reinforcement, or complete replacement if loads or conditions exceed their limits.
Factor in project budget, expected use, maintenance frequency, and resale value.
Structural performance and lifespan
Costs matter, but they don’t tell the whole story when it comes to how a slab performs over time.
You’ll find thicker slabs resist cracking, edge damage, and heavy loads better, extending service life and lowering repair frequency.
Thinner slabs save upfront money but need careful reinforcement and may require earlier replacement under sustained stress.
Balance load demands, maintenance capacity, and design standards.
Thermal and moisture behavior
While slab thickness doesn’t change the basic physics, it strongly affects how concrete stores and moves heat and moisture.
So you’ll want to weigh those trade-offs when designing a floor. Thicker slabs buffer temperature swings, slow moisture migration, and reduce vapor transmission risks, but can trap moisture longer.
Thinner slabs heat and dry faster, letting you control indoor conditions quicker but offering less thermal mass.
Repairability and future load changes
Because you may need to adapt a floor over its lifetime, slab thickness plays a big role in how easily you can repair it or upgrade its load capacity.
With thicker slabs you can rout, patch, or add overlays and anchors to accept heavier loads; thinner slabs limit upgrades and often require full replacement or expensive reinforcement.
Plan thickness for likely future uses.
Case Scenarios and Examples
Now let’s look at concrete-thickness examples so you can apply the trade-offs to real projects.
You’ll see a typical single-family home slab calculation, compare garage designs for passenger cars versus heavy trucks, and review a sample warehouse spec for forklift traffic.
These scenarios will help you pick a practical thickness for your needs.
Typical single-family home slab calculation example
Let’s work through a typical single-family home slab calculation so you can see how thickness, soil bearing, reinforcement, and load combine to determine a practical slab depth.
We’ll use a common 24-by-36-foot, lightly loaded garage and living-area slab on a moderately bearing site as our example.
Assume 3000 psi concrete, 4-inch aggregate base, soil bearing 2,000 psf.
You’d choose 4–6 inches thick with mesh or #3 rebar.
Garage designed for passenger cars vs. heavy trucks
When you’re designing a garage slab, the difference between passenger cars and heavy trucks changes the rules: passenger vehicles typically let you use a 4–6 inch slab with light reinforcement on good soil, while heavy trucks often require thicker concrete, heavier reinforcement, and a stronger base to prevent crushing and fatigue.
For cars, 4–6 inches with welded wire or light rebar works; trucks need 8–12 inches, denser base, and closer reinforcement spacing.
Warehouse slab for forklift traffic sample spec
Because forklift loads and traffic patterns vary widely, a sample warehouse slab spec gives you clear, implementable starting points for common scenarios.
For light pallet jacks, use 4–5 inches thick, 4,000 psi concrete, fiber reinforcement, and 6-inch compacted aggregate.
For heavy forklifts or racking, choose 6–8 inches, 5,000–6,000 psi, rebar or mesh, doweled joints, and proper subgrade compaction.
FAQs Concrete Floor Thickness (35 Common Questions)
You probably have specific questions like how thick a garage slab should be for cars, whether fiber mesh lets you pour thinner, or if 4 inches is enough for a basement floor.
You’ll also want to know when an engineered slab design is required and how freezing soil changes the needed thickness.
Let’s walk through concise answers to these common concerns.
How thick should a garage slab be for cars?
How thick should a garage slab be for cars?
For typical passenger vehicles, pour a 4-inch slab over compacted base; that handles sedans and light SUVs.
If you park heavier trucks, add thickness to 5–6 inches and use thicker reinforcement or heavier aggregate base.
Always compact the subgrade, provide proper reinforcement, and consider local load and frost conditions before finalizing thickness.
Can I pour a thinner slab if I use fiber mesh?
If you’re thinking about reducing slab thickness because you plan to add fiber mesh, don’t count on it letting you drop below recommended minimums for load-bearing floors.
Fiber mesh improves crack control and durability but doesn’t replace structural thickness or reinforcement like rebar or wire mesh where required.
Follow engineer specs and local codes; use fibers as a supplement, not a substitute, for strength.
Is 4 inches of concrete enough for a basement floor?
Wondering whether 4 inches of concrete will work for your basement floor?
For light residential use—storage, a finished living area without heavy equipment—4 inches on a well-prepared subbase with vapor barrier and reinforcement is usually acceptable.
If you expect vehicles, heavy machinery, or poor soil conditions, you’ll need thicker slab or structural upgrades.
Always follow local code and contractor guidance.
When do I need an engineered slab design?
Those basic guidelines for a 4-inch basement slab work for many homes, but you’ll need an engineered slab design when conditions or loads go beyond routine residential use.
Get engineering if you plan heavy equipment, vehicle traffic, large column loads, thin clearances, poor soil bearing, unusual hydrostatic pressure, or specialized finishes.
An engineer sizes thickness, reinforcement, and subgrade prep to prevent cracking and settlement.
How does soil freezing affect required thickness?
Because frozen soil can heave and lose bearing capacity, you’ll often need a thicker slab or deeper footings in cold climates to resist frost action.
You should extend foundations below frost depth or use insulation and vapor barriers to limit freeze-thaw cycles beneath the slab.
Increasing thickness and reinforcing controls cracking and settlement; consult local codes for frost-depth requirements and design accordingly.
Visual Aids and Quick Reference Charts
A simple chart or diagram can save you time and prevent costly mistakes when planning concrete slab thickness, so this section shows clear, easy-to-read visuals—thickness charts, load-versus-use diagrams, and cross-section sketches—that let you match slab specs to your project at a glance. Use the quick table below to compare common scenarios and recommended thicknesses.
| Use | Load | Thickness |
|---|---|---|
| Garage | Light vehicles | 4″–5″ |
| Workshop | Heavy tools | 5″–6″ |
| Industrial | Forklifts | 6″–8″ |