How to Lay a Concrete Floor Slab: Step-by-Step Guide for a Perfect Finish
You can lay a durable concrete floor slab yourself by planning the site, preparing and compacting a stable subbase, setting forms and a vapor barrier, placing reinforcement, and pouring a properly mixed concrete with correct slump. Screed to level, bullfloat to embed aggregate, cut control joints, and finish with troweling or broom texturing. Cure the slab for at least seven days and seal for protection. Keep going to learn detailed steps, mix ratios, and tips.
Can You Lay a Concrete Floor Slab Yourself?
You can handle a basic concrete floor slab by prepping the site, setting forms and reinforcement, pouring and finishing the concrete, and expecting a durable, level surface when it’s done.
A small DIY slab typically takes a weekend to a few days, costs from a few hundred to a few thousand dollars depending on size and materials, and needs moderate physical effort and some tool know‑how.
If you’re inexperienced or the job’s large or structural, plan on hiring a pro.
Short summary of process and expected results
Laying a concrete floor slab yourself is a straightforward but physically demanding project that most DIYers can handle with basic tools, careful preparation, and patience.
You’ll learn how to lay a concrete floor slab: prepare subgrade, build forms, install reinforcement and vapor barrier, pour, screed, float, and finish.
Expect a durable, level slab suitable for most uses if you follow steps and cure properly.
Typical time, cost range, and skill level required
A typical DIY concrete slab takes a long weekend for a small area (one to two days of hands-on work plus curing time).
However, larger or more complex jobs can span several weekends.
Expect $3–$10 per sq ft for materials and DIY tools, higher if renting mixers or hiring helpers.
Moderate skill and careful planning suffice; consider pros for large slabs or precision finishes.
Basic Understanding What Is a Concrete Floor Slab and Why It Matters
A concrete floor slab is the finished surface you’ll walk on, but it comes in different types—on-grade, suspended, or floating—each suited to different sites and loads.
You’ll need to understand the key components like the subbase, vapor barrier, reinforcement, and concrete mix to get strength and durability. Knowing those elements helps you decide when a DIY approach is reasonable and when it’s smarter to hire a pro.
Types of slabs (on-grade, suspended, floating)
Concrete floor slabs come in three main types—on-grade, suspended, and floating—each suited to different soil, load, and site conditions.
You’ll choose on-grade for ground-level builds, suspended when you need clearance or basements below, and floating for minimal settlement impact or over imperfect subgrades.
Consider access, structural support, and moisture risks to select the right type for your project.
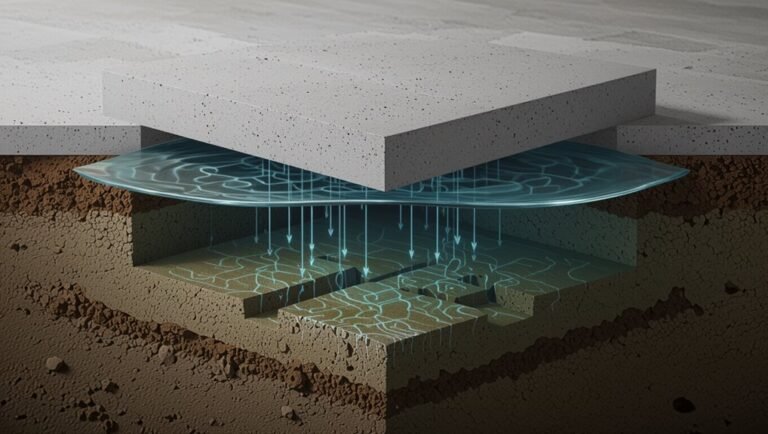
Key components: subbase, vapor barrier, reinforcement, concrete mix
Having picked the slab type that fits your site and loads, you’ll need to understand the key components that make a slab perform: the subbase, vapor barrier, reinforcement, and the concrete mix itself.
Prepare a compacted, well-draining subbase; install a continuous vapor barrier to control moisture; place rebar or mesh for tensile strength; choose a mix with proper slump, strength, and aggregate for durability.
When to choose a DIY approach vs hiring a pro
If your project is small, your site conditions straightforward, and you’ve got basic tools and experience, you can confidently DIY a slab;
but for large pours, poor soils, complex reinforcement, or when local code and warranty matter, hire a pro.
- You’re comfortable mixing, pouring, finishing
- Tight schedule or big area: pro
- Unstable ground: pro
- Budget vs risk: choose wisely
Planning and Preparation
Before you pour any concrete, you’ll assess the site—check soil type, drainage, and nearby structures—and confirm permits and local code requirements.
You’ll calculate dimensions, expected loads, and the correct slab thickness, then list the materials and tools needed.
Proper planning prevents costly mistakes and keeps the job on schedule.
Site assessment: soil type, drainage, existing structures
When you’re planning a concrete slab, start by evaluating the site’s soil type, drainage patterns, and any nearby structures so you’ll know what ground preparation and design adjustments are needed.
These factors determine bearing capacity, frost risk, water management, and how close you can safely pour to foundations or utilities.
Check:
- Soil classification and bearing capacity
- Surface and subsurface drainage routes
- Vegetation and root systems
- Proximity to existing foundations and utilities
Permits, codes, and local regulations
After evaluating soil, drainage, and nearby structures, check local permits, codes, and regulations to make sure your slab complies and you won’t face fines or costly rework.
Contact your building department for permit requirements, inspections, and approved plans.
Verify utility clearances, setback rules, and required reinforcement or vapor barriers.
Keep documentation on site for inspectors and to streamline final approval.
Dimensions, load requirements, and slab thickness calculations
Decide the slab’s dimensions and expected loads up front so you can size thickness, reinforcement, and joints correctly.
Measure area, note live and dead loads, and pick slab thickness: typically 4″ for light use, 6″+ for heavy loads.
Use engineering tables or a structural engineer for vehicles or machinery.
| Item | Typical value |
|---|---|
| Area | Measure layout |
| Live load | Occupancy/use |
| Thickness | 4″–6″+ |
Materials and tools checklist

Because getting the right materials and tools before you pour will save time and prevent costly delays, make a checklist that covers concrete, reinforcement, formwork, finishing tools, and safety gear.
Check concrete mix, rebar or mesh, timber for forms, and curing supplies.
Bring tools and PPE:
- Concrete mixer and wheelbarrow
- Trowels, floats, screed
- Rebar cutters/ties, vibrator
- Gloves, goggles, boots, masks
Step-by-Step Guide to Laying a Concrete Floor Slab
Now you’ll follow a clear sequence to build the slab: excavate and prepare the subgrade, compact and add granular fill, then set forms to the finished elevation.
Next you’ll install a vapor barrier and edge insulation before placing reinforcement like wire mesh, rebar, or fiber with proper supports.
Stick to each step in order and check levels and compaction as you go to guarantee a durable slab.
Step 1 Excavate and prepare the subgrade
Step 1 focuses on excavating and preparing the subgrade so your slab sits on a stable, well-drained base; you’ll remove unsuitable soil, compact the remaining material, and create the proper slope and depth to prevent settling and water problems.
Mark boundaries, strip topsoil, dig to design depth, check elevations, and slope toward drainage. Remove debris and organic matter before proceeding.
Step 2 Compact subbase and install granular fill
With the subgrade cleared and shaped, compacting the subbase and adding granular fill gives your slab a stable, well-draining platform.
Rake and level crushed stone or gravel in 2–4 inch lifts, compact each layer with a plate tamper, and check density with a hand probe.
Slope slightly for drainage, remove soft spots, and keep moisture consistent before placing vapor barrier or reinforcement.
Step 3 Set forms and establish finished floor elevation

Before you pour, set sturdy forms that define the slab perimeter and establish the finished floor elevation so your concrete pours to the right height and shape.
Use straight, level boards anchored with stakes; check corners and diagonals for squareness.
Set top of forms to planned grade, allow for slab thickness and finish depth, and verify elevations with a transit or level before proceeding.
Step 4 Install vapor barrier and edge insulation
Once your forms are set and checked for level and squareness, lay the vapor barrier and edge insulation to protect the slab from ground moisture and to control heat loss at the perimeter.
Smooth polyethylene sheeting overlaps at least 6 inches, taped and sealed at joints.
Install rigid foam along forms, securing it to prevent displacement. Trim flush with form tops before pouring.
Step 5 Place reinforcement (wire mesh, rebar, fiber) and supports

Place your reinforcement carefully—wire mesh, rebar, or fiber—so it sits where the slab will need strength, not just on the ground.
Use chairs, dobies, or rebar chairs to hold mesh/rebar at mid-depth, spacing supports per design.
Tie intersections, overlap per spec, and cut or bend bars at edges.
Keep fibers evenly distributed if used, avoiding clumping.
Step 6 Mix and pour concrete: batching, slump, and pouring techniques
Mix and pour the concrete methodically, keeping batching, slump, and placement techniques aligned with your mix design and site conditions.
Batch accurately by weight or calibrated volume, measure water to hit specified slump, and avoid overwatering.
Deliver concrete promptly, place continuously to prevent cold joints, and use chutes or pumps to minimize segregation.
Consolidate with appropriate vibration and monitor temperature during placement.
Step 7 Screeding, bullfloating, and initial leveling
After you’ve poured and consolidated the concrete, start screeding to establish the slab’s grade and remove excess material so the surface is roughly level to your forms or screed guides.
Use a straightedge in a sawing motion, working from high to low.
Follow with a bullfloat to embed aggregate, close surface voids, and knock down ridges, keeping the tool flat and moving steadily.
Step 8 Control joints, finishing trowel work, and surface texture

Cut control joints into the slab at the right spacing, then finish with trowel work and the chosen surface texture to control cracking and achieve the look and durability you want.
After screeding, score joints with a groover or saw at one-quarter slab depth. Float smooth, then trowel for density.
Apply broom, trowel, or non-slip finish while concrete’s plastic for desired traction and appearance.
Step 9 Curing methods and timeline
Once you’ve placed control joints and finished the surface, you’ll need to cure the slab to develop strength and resist shrinkage cracking.
Keep concrete moist for at least seven days (longer for weak mixes or hot, dry conditions). Use wet burlap, polyethylene sheets, or a curing compound.
Check regularly, maintain 50–90% relative humidity near the surface, and avoid early loads or traffic.
Step 10 Sealing, protection, and post-pour care
In the days and weeks after curing, you’ll seal and protect the slab to lock in strength, reduce moisture intrusion, and prevent surface damage from stains or abrasion.
Choose a breathable sealer, apply per manufacturer directions, and allow proper recoat times.
Use protective mats for heavy traffic, clean spills promptly, avoid deicing salts, and schedule periodic resealing every few years to maintain durability and appearance.
Concrete Mix and Materials Guide
Now you’ll decide the concrete strength, admixtures, and the right water–cement ratio for the load and finish you need.
Pick suitable aggregates and cement type, and consider reinforcement options like rebar or welded wire mesh and where to place them.
These choices determine durability, crack control, and long-term performance.
Choosing the right concrete strength and admixtures
Although it might seem like a detail you can skip, picking the right concrete strength and the proper admixtures determines how your slab will perform under load, resist cracking, and handle the environment it’s placed in.
Choose strength based on expected loads and exposure class.
Use admixtures—plasticizers for workability, air-entrainers for freeze-thaw, and retarders or accelerators to control set time—sparingly and per manufacturer guidance.
Aggregates, cement types, and water-cement ratio
Because aggregates, cement type, and the water-cement ratio control strength, durability, and workability, you should choose each component deliberately: select well-graded coarse and fine aggregates for stability and reduced paste demand, pick a cement type suited to your exposure (ordinary Portland for general use, sulfate-resistant or blended cements where needed), and target the lowest water-cement ratio that still lets you place and finish the mix—add plasticizers rather than extra water to improve workability.
| Component | Purpose | Tip |
|---|---|---|
| Aggregates | Reduce shrinkage, add bulk | Use well-graded mix |
| Cement | Binds, affects durability | Match type to exposure |
| W/C ratio | Controls strength | Minimize; use plasticizer |
Reinforcement options and placement best practices
Reinforcement gives a concrete slab tensile strength and crack control, so you’ll choose between welded wire mesh, rebar, fiber reinforcement, or a combination based on load, slab thickness, and crack tolerance.
Place mesh or rebar mid-depth on chairs or supports, maintain cover from soil, lap per specs, and use fibers to reduce plastic shrinkage.
Inspect placement before pouring.
Tools, Equipment, and When to Rent vs Buy
You’ll need a mix of hand tools (trowels, floats, levels) and power tools (vibrators, drills) for a proper pour, plus heavy gear like mixers, screeds, and concrete saws that you may prefer to rent for one-off jobs.
Think about cost, frequency of use, and transport when deciding to rent versus buy, and ask the rental shop about delivery, setup, and fuel.
Always gear up with PPE—gloves, eye protection, boots, and a simple jobsite safety checklist—to keep everyone safe.
Essential hand tools and power tools
Before you pour a slab, gather the essential hand and power tools that make the job safe, accurate, and efficient.
You’ll need basic, reliable gear to work fast and true. Consider:
- Tape measure, chalk line, and level
- Wheelbarrow and sturdy shovels
- Hand trowels and screed boards
- Corded drill or impact driver and grinder
Heavy equipment (mixers, screeds, saws) and rental tips
Hand tools get you started, but bigger slabs call for heavy gear that speeds work and improves results: mixers for batching concrete, power screeds for straightening, and saws for control joints and cutting cured concrete.
You’ll rent if one job; buy if you’ll use often. Consider transport, fuel, and operator skill.
- Rent mixers for single pours
- Buy screeds if frequent
- Use walk-behind saws
- Check rental rates and delivery
Safety gear and jobsite safety checklist
While heavy gear speeds work, safety gear keeps you and your crew protected on every pour.
You’ll need PPE, site controls, and a checklist before mixing or finishing. Rent expensive items you rarely use; buy essentials you’ll use often.
- Hard hats, goggles, respirators
- Gloves, knee pads, steel-toe boots
- Barriers, signs, fire extinguisher
- Pre-pour checklist and emergency plan
Common Problems, Causes, and How to Fix Them
As you finish the pour, you’ll want to watch for common problems like cracking, uneven settlement, surface scaling or spalling, and moisture or vapor drive.
You’ll learn how to identify the type and cause of each issue and which prevention or repair method—control joints, proper subgrade compaction, surface treatments, or vapor barriers—works best.
Addressing these early saves time and prevents bigger repairs down the road.
Cracking: types, prevention, and repair methods
Because concrete shrinks and moves as it cures and throughout its life, cracks are an inevitable concern you’ll want to anticipate and manage.
Identify hairline, control, and structural cracks. Prevent them with proper mix, adequate curing, correct joint placement, and reinforcement.
For repairs, clean and fill hairlines with epoxy or sealant, reopen and seal control joints, and consult a structural pro for widening or shifting structural cracks.
Uneven surface and settlement: diagnosis and remedies
Settling and uneven surfaces happen when the ground below a slab shifts or when the concrete wasn’t placed or finished correctly. You’ll usually notice dips, high spots, or a generally sloped floor that shouldn’t be there.
Diagnose by measuring elevations, checking drainage, and probing for voids. Fix small low spots with self-leveling compound, grind highs, and address subgrade issues or underpin and re-pour for severe settlement.
Scaling, spalling, and finish defects: causes and fixes
After you’ve checked elevations and fixed any subgrade problems, turn your attention to surface deterioration like scaling, spalling, and finish defects, which often show up even on otherwise level slabs.
Identify causes: poor curing, weak mix, freeze-thaw, or finishing too soon.
Fix by removing unsound concrete, patching with proper repair mortar, improving mix strength, adjusting timing, and sealing or applying durable toppings.
Moisture-related issues and vapor drive solutions
When moisture moves up from the ground or gets trapped beneath a slab, it can cause everything from efflorescence and adhesive failures to mold, flooring damage, and accelerated deterioration.
You’ll want to recognize the source—capillary rise, vapor drive, plumbing leaks, or high indoor humidity—and choose fixes that address both the water and its pressure.
Install vapor barriers, improve drainage, add capillary breaks, fix leaks, and ventilate.
Best Practices and Pro Tips for a Perfect Finish
To get a perfect finish you’ll control timing and the environment—temperature, wind, and rain affect setting and curing.
Plan joint layout and spacing up front, choose the right finishing technique for your desired texture (broom, trowel, or stamped), and work with concrete at the proper state.
Finally, follow simple long-term maintenance like sealing and regular cleaning to preserve appearance and durability.
Timing and environmental controls (temperature, wind, rain)
Although concrete can cure across a wide range of conditions, you’ll get the best, crack-free results by planning pours around temperature, wind, and rain and by using simple environmental controls.
Pour when temperatures are stable (40–80°F), avoid high winds that speed evaporation, and don’t pour in heavy rain.
Use windbreaks, sunshades, and curing blankets or misting to maintain even moisture and temperature.
Joint layout and spacing rules
As you control temperature and moisture during curing, plan your joints so the slab can move without cracking.
Place contraction, isolation, and construction joints strategically, following slab dimensions and load paths.
Space contraction joints at 24–36 times slab thickness (inches).
Consider dowels for load transfer.
Use a saw or tool-cut early joints to control cracking.
- spacing
- orientation
- depth
- timing
Finishing techniques for specific textures (broom, trowel, stamped)
Choose the right finishing method and you’ll get a durable, attractive slab that meets both function and style.
For broom finishes, drag a broom perpendicular to traffic for slip resistance.
For trowel finishes, wait until bleed water evaporates, then use a steel trowel for a smooth, dense surface.
For stamped concrete, press patterns before initial set and use release agent to prevent sticking.
Long-term maintenance recommendations
When you want your slab to stay strong and look great for years, commit to a simple maintenance routine: sweep and wash regularly, reseal every 2–3 years, repair cracks quickly, control drainage, avoid deicing salts, and use protective pads under heavy equipment.
Inspect annually for stains, spalling, or settlement. Follow manufacturer care for finishes and address issues promptly to prevent costly repairs.
Comparison DIY vs Hiring a Contractor
You can save money by doing the slab yourself, but run the numbers to find the true break-even once materials, tools and time are included.
A contractor usually delivers higher-quality finishes, warranties, and carries liability insurance that protects you if something goes wrong.
For complex jobs—poor soil, large pours, or structural slabs—you should hire a pro.
Cost comparison and break-even considerations
Comparing DIY versus hiring a contractor comes down to dollars, time, and risk: DIY cuts labor costs but adds tool purchases, longer timelines, and potential mistakes that can raise long-term expenses, while a contractor charges more upfront for expertise, efficiency, and warranty protection. Calculate materials, tool amortization, and labor to find break-even; track time saved.
| Item | Estimate |
|---|---|
| Materials | $ |
| Tools | $ |
| Labor | $ |
| Time | hrs |
| Break-even | date |
Quality, warranty, and liability differences
Although tackling the slab yourself can save money, hiring a pro usually delivers higher-quality finishes, formal warranties, and clearer liability coverage that protect you if problems arise.
You’ll weigh DIY risks versus contractor assurances, considering repair costs, workmanship guarantees, and insurance.
Consider these differences:
- Finish consistency and experience
- Written warranties and terms
- Liability and insurance coverage
- Cost versus risk trade-offs
When hiring a pro is strongly recommended
When a slab needs to carry heavy loads, span large areas, or meet strict code and finish requirements, hire a contractor—mistakes on these jobs can be costly and hard to fix.
You should also call a pro if site access is limited, drainage or vapor barriers are complex, or tight tolerances and inspections are required.
A contractor brings experience, equipment, and liability protection.
Cost Estimating and Material Quantities
You’ll start by calculating concrete volume and reinforcement needs so you order the right amounts and avoid costly overages.
Then break down typical labor and material costs to see where your budget goes.
Finally, I’ll show practical ways to save money without sacrificing durability or finish.
How to calculate concrete volume and reinforcement needs
Before you mix or order concrete, figure the exact volume and the reinforcement needed so costs stay predictable and the slab performs as expected. Measure length × width × thickness (m or ft) for volume; add 5–10% waste. Specify rebar size, spacing, and mesh area; calculate linear meters and weight to order.
| Item | Calculation/Note |
|---|---|
| Volume | L×W×T (+5–10%) |
| Rebar | spacing → linear m |
| Mesh | sheet coverage |
| Concrete mix | m³ or yd³ |
| Waste | order extra |
Typical labor and material cost breakdown
A clear cost breakdown keeps your slab project on budget and lets you compare bids accurately.
Itemize concrete (by cubic yard/meter), rebar or mesh, forms, vapor barrier, subbase material, and admixtures.
Include labor for excavation, forming, pouring, finishing, and curing.
Add equipment rental, disposal, permits, and contingency.
Get line-item quotes so you can spot discrepancies and plan cash flow.
Ways to save money without compromising quality
When you plan quantities carefully and shop smart, you can cut costs without cutting corners: get accurate takeoffs to avoid overordering concrete and reinforcement, choose locally available aggregates and standard rebar sizes to reduce waste and delivery fees, and schedule pours to minimize equipment idle time and labor overtime.
- Buy in bulk for volume discounts
- Reuse formwork where safe
- Compare supplier bids
- Optimize mix design for strength and cost
Case Examples and Scenario-Based Guidance
You’ll look at a small single-vehicle garage slab to highlight common steps and pitfalls like subgrade prep and drainage.
For larger workshops or sheds, you’ll focus on reinforcement choices and joint placement to control cracking and support heavier loads.
When soils are problematic, you’ll compare mitigation approaches such as stabilizing, using a granular fill, or designing a floating slab.
Small garage slab (single-vehicle) step highlights and pitfalls
Because a single-vehicle garage slab has limited space and fewer helpers, you’ll want to plan each step carefully to avoid common mistakes like poor subgrade preparation, inadequate reinforcement, and uneven finishing.
This section walks through real-case highlights and pitfalls so you can see how small decisions—drain slope, slab thickness, joint placement, and timing of finishing—make a big difference in durability and performance.
Inspect subgrade, compact, set 4–6″ thickness, use welded wire or rebar, slope 1/8–1/4″ per foot to drain, place control joints at 8–10 feet, avoid overworking surface, cure for seven days, and protect from rapid drying and vehicle loads.
Larger workshop or shed slab reinforcement and joint strategy
If your workshop or shed will host heavy machinery, frequent vehicle traffic, or a larger open plan, plan reinforcement and joints more deliberately to control cracking and support loads.
Increase slab thickness to 150–200mm, use welded wire mesh or dual-layer rebar on chairs, and design contraction and construction joints on logical bays.
Place joints at doorways and load paths, and consult engineer for heavy equipment.
Slab over problematic soils mitigation approaches
When your site sits on clay, peat, expansive silt, or loose fill, you’ll need specific mitigation strategies to keep the slab stable and crack-free.
The following case examples show practical options—from soil replacement and stiffened slabs to deep piers and floating slabs—and when each makes sense.
For shallow uniform swell, replace or undercut and compact; for variable loads, use stiffened slab or grade beams; for deep instability, install driven piles or piers; for compressible organic layers, float the slab with geotextile separation.
Frequently Asked Questions (FAQ)
You probably have a few practical questions about slab thickness, curing time, weather limits, moisture protection, and frost heave.
We’ll cover how thick a garage slab should be, when it’s safe to drive or build on new concrete, and whether you can pour in extreme temperatures.
You’ll also get clear guidance on vapor barriers and preventing slab heaving or frost damage.
How thick should a concrete slab be for a garage?
A typical single-car garage slab is 4 inches thick, but you’ll want 6 inches or more for heavier vehicles, workshops, or frequent forklift use.
Choose 4 inches for light passenger cars, 6 inches for trucks or occasional heavy loads, and consider 8 inches with steel reinforcement for constant heavy equipment.
Always compact base, use proper reinforcement, and follow local codes.
How long before you can drive or build on a new slab?
How long before you can drive or build on a new slab depends on the concrete strength and expected loads; typically you can walk on it after 24–48 hours, drive light vehicles at 7 days if mix reaches ~70% strength, and full construction or heavy traffic after 28 days when concrete nears design strength.
Always confirm strength with cylinder tests and follow engineer recommendations.
Can you pour concrete in cold or hot weather?
When temperatures stray far from the ideal range, you’ll need to adjust mix design, placement timing, and curing methods to keep concrete from freezing or drying too fast.
In cold weather, use accelerators, warm water, insulated forms, and extend curing with blankets.
In hot weather, use retarders, cool water, shading, and rapid finishing to prevent plastic shrinkage and guarantee proper strength development.
Do you need a vapor barrier under a slab?
Wondering whether you need a vapor barrier under your slab? You usually do—especially for indoor slabs or where moisture-sensitive flooring will be installed.
A polyethylene sheet limits ground moisture, helps prevent mold, dampness, and adhesive failure, and improves thermal performance.
Install it over compacted fill, overlap seams, and seal penetrations.
Local codes or project specifics might alter requirements; check before pouring.
How do you prevent slab heaving or frost damage?
If you’re pouring a slab in a cold climate, use frost-protection measures so the slab won’t heave or crack as the ground freezes and thaws.
Excavate below frost depth, add well-draining gravel, compact firmly, and install rigid insulation around or under the slab.
Provide proper drainage, seal joints, and consider heated forms or temporary heat during curing.
Monitor and cure per specs.