How to Install Vinyl Plank Flooring on Concrete: A Foolproof Guide
You can install vinyl plank flooring over concrete if the slab’s clean, dry, level, and crack-free; start by testing moisture, repairing damage, and grinding high spots. Pick the right vinyl type (LVP, SPC, or WPC) and thickness, acclimate planks 48–72 hours, lay a vapor barrier or underlayment if needed, then use click-lock or glue-down methods with proper expansion gaps and staggered joints. Follow finishing, maintenance, and warranty tips to guarantee longevity, and keep going to learn exact steps and pro tricks.
Can You Install Vinyl Plank Flooring on Concrete?
Yes — you can install vinyl plank flooring on concrete.
It’s appropriate when the slab is dry, level, and free of cracks or major imperfections that could telegraph through the planks.
If moisture, unevenness, or damage exists, you’ll need to address those issues first before laying the flooring.
Short direct answer
You can install vinyl plank flooring on concrete as long as the slab is clean, dry, level, and free of major cracks or moisture issues.
You’ll follow steps for how to install vinyl flooring planks on concrete: test moisture, repair and level, choose glue-down or floating planks, acclimate materials, and install underlayment if needed.
Prep determines long-term performance.
When it’s appropriate to install over concrete
If your slab meets the basic prep criteria—clean, dry, level, and sound—you can confidently install vinyl plank directly over concrete.
You should proceed when moisture is controlled, surface is flat, and no structural issues exist.
Consider these checks:
- Measure moisture with a reliable meter.
- Repair cracks and level high/low spots.
- Confirm concrete is fully cured and stable.
Basic Understanding What Is Vinyl Plank Flooring and Why Use It on Concrete?
Vinyl plank flooring comes in several types—LVP (flexible luxury vinyl), SPC (rigid stone plastic composite), and WPC (wood plastic composite)—and you’ll want to pick the one that fits your room’s needs.
Installing vinyl over concrete gives you water resistance, durability, and an affordable, low-maintenance surface.
Just be aware of limitations like subfloor moisture, levelness, and the need for proper moisture testing and underlayment.
Types of vinyl plank flooring (LVP vs. SPC vs. WPC)
Plank-style flooring comes in three common core types—LVP, SPC, and WPC—each offering different mixes of durability, comfort, and moisture resistance that matter when you’re installing over concrete. You’ll pick SPC for rock-solid stability, WPC for cushioned warmth, and LVP for cost-effective realism.
| Feel | Choice |
|---|---|
| Solid | SPC |
| Soft | WPC |
| Realistic | LVP |
| Practical | SPC |
| Cozy | WPC |
Benefits of installing vinyl over concrete
Having picked the core type that fits your needs, you’ll want to know why installing vinyl over concrete makes sense.
It’s durable, moisture-resistant, and handles temperature shifts well. You’ll get realistic wood or stone looks without high cost or maintenance.
Installation is often quicker than other floors, and vinyl’s comfort underfoot and sound dampening improve living spaces while keeping long-term practicality and value.
Limitations and conditions to consider
While vinyl plank works well in many rooms, you should be aware of situations where it’s not ideal: extreme moisture from below, uneven or damaged concrete, and subfloors that don’t meet manufacturer flatness or vapor-barrier requirements can all cause problems.
You’ll need moisture testing, repairs, self-leveling compound, or a proper membrane.
Also consider heavy static loads, prolonged direct sunlight, and incompatible adhesives.
Pre-Installation Assessment Check the Concrete Subfloor
Before you install, test the concrete for moisture with a calcium chloride or in-situ relative humidity test and follow the manufacturer’s limits.
Check that the slab meets flatness and levelness tolerances with a straightedge and level, measuring deviations and noting areas that need grinding or patching.
Inspect for cracks, contamination, and surface conditions that could prevent adhesion, and plan repairs or primers as needed.
Moisture testing methods (calcium chloride, relative humidity)
Because concrete can hide moisture that ruins vinyl plank floors, you need to test the slab before you install anything.
Use reliable methods to confirm dryness and avoid failures.
- Calcium chloride: measures moisture vapor emission rate; follow kit directions.
- Relative humidity (in-situ probes): assesses internal slab moisture over 72+ hours.
- Compare results to manufacturer limits and address high readings before installation.
Levelness and flatness tolerances and how to measure
1 key step in your pre-installation check is verifying the slab’s levelness and flatness, because vinyl plank needs a smooth, even surface to avoid gaps, telegraphing, and premature wear.
Measure flatness with a 10-foot straightedge; correct deviations over 3/16″ in 10′ (or per manufacturer’s spec).
Use a laser level or long spirit level to check level across the room and mark high/low spots.
Crack, contamination, and adhesion checks
When you inspect the concrete, focus on cracks, surface contamination, and how well adhesives will bond, since these issues directly affect vinyl plank performance.
Probe cracks for width/depth; hairline may be filler-ready, larger need repair.
Test for oils, sealers, or dust by solvent wipe; detect moisture with a meter.
Roughen smooth sections and guarantee substrate is clean, dry, and sound before installing.
Materials and Tools You’ll Need
Before you start laying planks, gather the flooring and underlay options you’ll need—choose a moisture barrier or the right underlayment type based on your concrete subfloor.
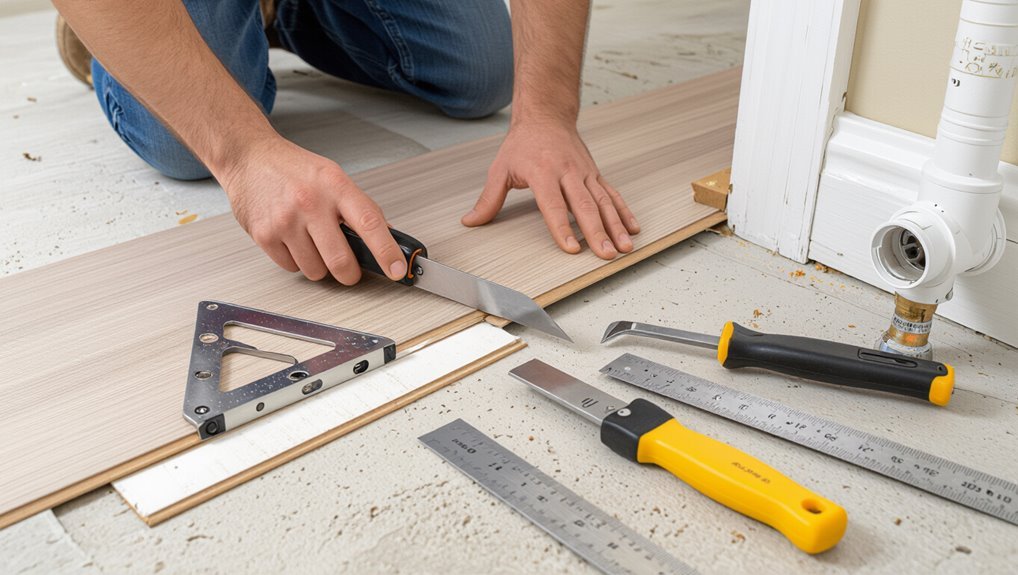
You’ll also want a basic toolkit: utility knife, tapping block, spacers, straightedge, and a saw or cutter for trim.
Don’t forget safety gear like gloves, knee pads, eye protection, and a mask for cutting dust.
Flooring materials and underlay options (moisture barrier, underlayment types)
Choosing the right vinyl plank and underlay sets the foundation for a long-lasting floor, so pick materials based on subfloor type, moisture conditions, and the level of sound and comfort you want.
You’ll choose a waterproof vinyl grade and an appropriate underlayment.
Consider:
- 6-mil polyethylene moisture barrier for damp concrete
- Foam or cork underlayment for sound and comfort
- Combination vapor-barrier underlay for added protection
Tools and safety equipment
Gather the right tools and safety gear so you can work efficiently and protect yourself from common hazards like dust, cuts, and back strain.
You’ll need accurate tools, protective equipment, and lifting aids.
- Pry bar, utility knife, tape measure, straightedge, mallet.
- N95 mask, safety glasses, knee pads, cut-resistant gloves, back brace.
- Trolley or panel lifter, spacers, level.
Step-by-Step Installation Guide
Start by preparing your concrete subfloor—clean it, fix cracks, and grind high spots so the surface’s flat and sound.
Then address moisture with sealers, vapor barriers, or a mitigation system.
Acclimate and inspect your planks, and install any required underlayment.
Finally, plan your layout carefully and measure expansion gaps before you begin laying the first row.
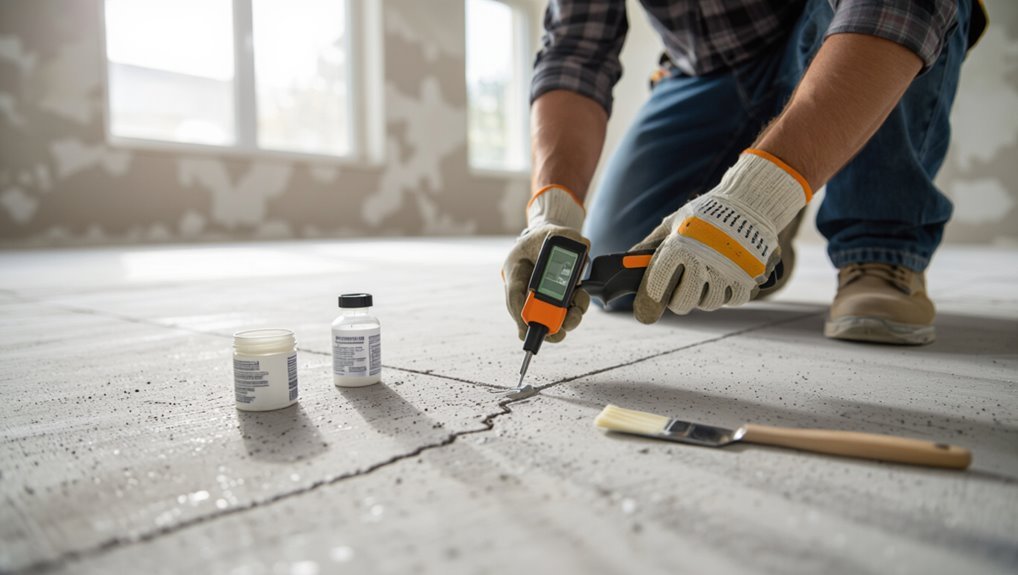
Step 1 Prepare the concrete (cleaning, repairing cracks, grinding)
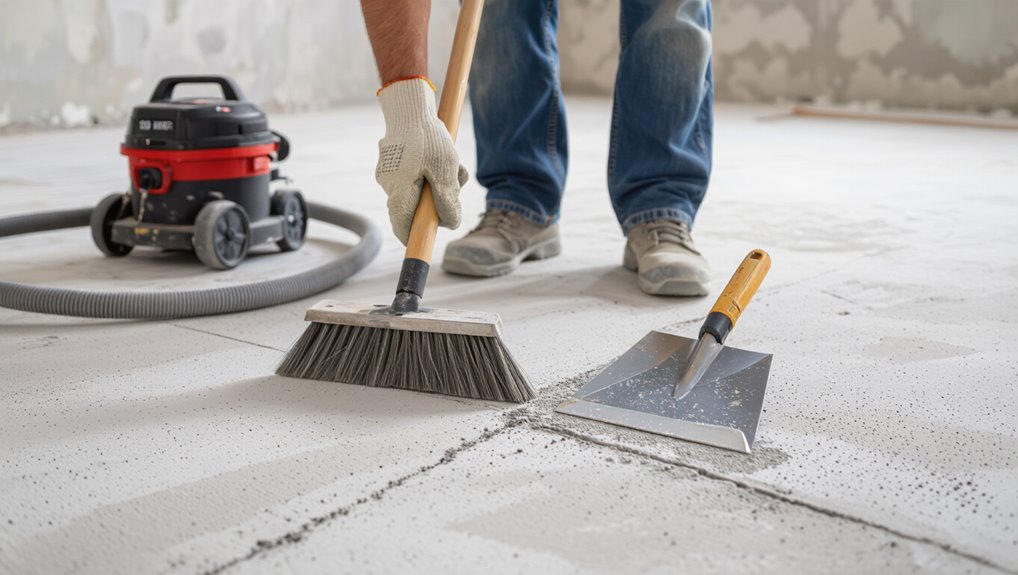
Before you lay a single plank, make sure the concrete subfloor is clean, level, and free of damage—this will prevent future issues like popping seams or uneven wear.
Sweep and vacuum, degrease stains, and remove adhesives.
Fill cracks and holes with a polymer-modified cement patch, level high spots by grinding, and verify flatness with a long straightedge before proceeding.
Step 2 Address moisture issues (sealers, vapor barriers, moisture mitigation systems)
Step 2 is all about keeping moisture out of your new floor—if concrete or crawl spaces can transmit damp, that moisture will ruin vinyl plank over time.
Test moisture with a reliable meter. Choose appropriate mitigation:
- Apply a topical concrete sealer per instructions.
- Install a polyethylene vapor barrier with taped seams.
- Use a commercial moisture mitigation system for high readings.
Step 3 Acclimate and inspect planks
1. Let planks acclimate in the room for 48–72 hours unopened, lying flat.
Check manufacturer instructions for required temperature and humidity.
Before installing, inspect each plank for defects, color variations, or damage; set aside any flawed pieces.
Mix planks from different boxes while laying to guarantee uniform appearance.
Keep the room stable to prevent warping during installation.
Step 4 Install underlayment or vapor barrier (if required)
Lay down the underlayment or vapor barrier now if your subfloor or manufacturer requires it—you’ll create a stable, moisture-resistant base that protects the planks and improves comfort.
Roll out material smooth and flat, overlap seams per instructions, and tape them. Trim at walls, maintain recommended seams, and guarantee seams run perpendicular to plank direction.
Keep barrier clean and wrinkle-free before installing planks.
Step 5 Layout planning and expansion gap calculations
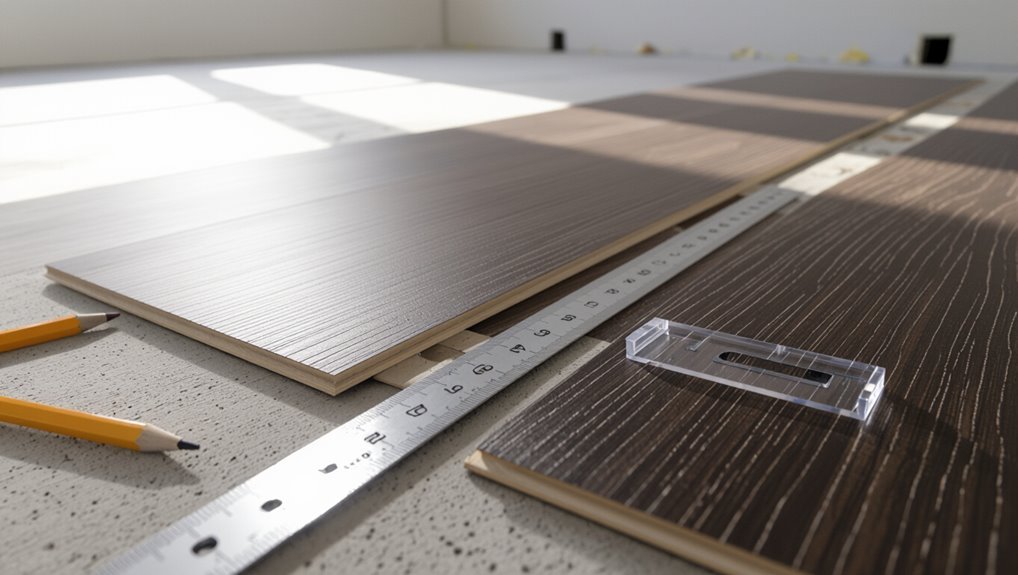
Before you start clicking planks together, plan your layout and calculate expansion gaps so the floor can naturally expand and contract without buckling.
Measure room length and width, determine plank orientation, and center the layout for balanced edge cuts.
Allow manufacturer-recommended gaps (typically 1/4″–1/2″) at walls, around pipes, and thresholds.
Mark spacing with chalk or spacers before installing.
Step 6 First row installation (starting straight, staggering seams)
Start the first row by placing the longest, straightest planks along your starting wall, tongue facing out, and use spacers to maintain the expansion gap; this guarantees a straight baseline and makes it easier to click subsequent rows together while you stagger end joints at least 6–8 inches (or per manufacturer recommendation) to create a stable, attractive pattern.
Trim the last plank for fit, test alignment, and lock each plank snugly.
Step 7 Continue installation (click-lock vs. glue-down specifics)
Now that your first row’s locked in, continue across the floor by following the specific method for your product:
For click-lock, angle and snap each plank, maintain expansion gaps, and tap seams with a block for tight joints.
For glue-down, spread adhesive in sections, set planks into wet adhesive, roll with a 100-pound roller, and clean squeeze-out as you go.
Step 8 Cutting and fitting around obstacles and doorways
When you reach doorways, vents, pipes, or irregular corners, measure each opening carefully and transfer those dimensions to the plank, allowing the manufacturer’s recommended expansion gap.
Cut the plank with a utility knife, jigsaw, or pull saw as needed, dry-fit the piece, and trim incrementally until it fits snugly without forcing.
Use sanding or chiseling for tight curves, notch around pipes, and test walk paths before proceeding.
Step 9 Finishing touches (trim, transitions, baseboards)
1 final step wraps up the job: you’ll install trims, connections, and baseboards to hide expansion gaps, protect edges, and give the floor a finished look.
Measure and cut threshold strips for doorways, nail or adhesive-mount baseboards leaving the gap intact, and use quarter-round or shoe molding where needed.
Caulk seams, touch up edges, and clean the perimeter for a neat, professional finish.
Step 10 Post-installation inspection and initial maintenance
Before you declare the job done, walk the entire floor and inspect seams, changes, and trim for gaps, adhesive squeeze-out, or misaligned planks so you can correct issues while they’re still easy to fix.
Clean with manufacturer-recommended products, avoid soaking the floor, reinstall furniture using protective pads, maintain temperature/humidity, and note any warranty-required inspection period to report defects promptly.
Comparison Glue-Down vs. Floating vs. Loose-Lay on Concrete
When choosing a method for concrete, you’ll weigh pros and cons like stability, moisture resistance, and ease of repair to match the room and traffic level. Below is a quick comparison to help you pick glue-down, floating, or loose-lay for high-traffic areas, living spaces, or rentals. Use this as a starting point for which method fits your concrete subfloor and usage needs.
| Method | Pros | Best Use Case |
|---|---|---|
| Glue-Down | Very stable, good for high traffic, moisture-tolerant with proper adhesive | Commercial spaces, busy kitchens |
| Floating | Easier install, tolerates minor subfloor movement, removable | Living rooms, low- to medium-traffic areas |
| Loose-Lay | Quick install, repairable, no adhesive | Rentals, temporary installs, low-traffic rooms |
Pros and cons for each method
Although each installation method can work well over concrete, you’ll want to weigh their trade-offs—glue-down gives the most permanent bond and low profile, floating is faster and easier to replace, and loose-lay offers the quickest install but depends on slab flatness and heavy traffic patterns.
- Glue-down: durable, low height, harder to remove.
- Floating: simple, forgiving subfloor, minor movement.
- Loose-lay: fastest, minimal adhesive, needs pristine slab.
Best use cases by room and traffic level
Think of each method as a tool: glue-down gives you the toughest, low-profile finish for high-traffic rooms.
Floating balances durability and ease for typical living spaces, and loose-lay works best for temporary areas or light-use rooms where a perfectly flat slab exists.
Use glue-down in entryways, kitchens, and commercial zones; choose floating for bedrooms and family rooms; pick loose-lay for rentals, basements, or short-term installations.
Common Problems and How to Fix Them
You’ll run into a few recurring issues—peaking, buckling, and gapping—and you’ll need to know what causes each and how to fix them.
For glue-down installations, you’ll want to diagnose adhesion failures and learn the proper repair steps.
You’ll also need to identify moisture-related failures and apply long-term solutions to prevent recurrence.
Peaking, buckling, and gapping causes and remedies
When planks start to peak, buckle, or pull apart, it’s usually a sign of moisture changes, improper acclimation, or installation errors—conditions you can often correct before they worsen.
- Remove affected planks, dry subfloor, check moisture, replace damaged boards.
- Re-acclimate new planks 48–72 hours, maintain stable indoor humidity.
- Guarantee proper expansion gaps and correct locking technique to prevent recurrence.
Adhesion failures in glue-down installations diagnostics and repair
Adhesion failures in glue-down vinyl plank installations usually show up as lifting, hollow spots, or full plank detachment. You can diagnose and repair them by systematically checking the adhesive, subfloor, and installation technique.
Verify correct adhesive type, open time, and trowel size. Inspect concrete for contaminants or dust.
Replace failed planks, scrape old adhesive, reapply recommended adhesive, and roll thoroughly to guarantee full contact.
Moisture-related failures and long-term solutions
Because moisture can quietly ruin a glue-down or click-lock vinyl floor, you need to spot and fix water-related problems early to avoid warped planks, adhesive breakdown, or mold growth.
Test concrete moisture, seal cracks, and install a vapor barrier or waterproof underlayment.
Address leaks, improve drainage and ventilation, and use moisture-tolerant adhesives or loose-lay products for lasting protection and fewer callbacks.
Best Practices and Pro Tips
To prevent future moisture issues, make sure you seal subfloors and use a proper vapor barrier where needed.
Pick plank thickness and a wear layer that match your traffic and durability needs, and factor in seasonal expansion for your climate.
If the job looks complex or your subfloor has serious problems, don’t hesitate to hire a pro rather than risk costly mistakes.
Preventing future moisture issues
If you want your vinyl plank floor to last, prioritize controlling moisture now so problems don’t show up later.
Seal concrete with a vapor barrier or primer, install a moisture barrier underlayment, and guarantee perimeter and expansion gaps for airflow.
Address plumbing leaks, grade exterior drainage away from the slab, and use dehumidifiers in basements.
Monitor humidity and act quickly on any damp odors.
Choosing plank thickness and wear layer for durability
When you pick vinyl plank thickness and wear layer, focus on matching product specs to traffic and environment so your floor actually holds up; thicker cores (5–8 mm) give better stability and sound dampening, while a heavier wear layer (12–20 mil for homes, 20+ mil for busy areas) resists scratches and wear.
Choose rigid or flex based on subfloor flatness, and prioritize warranty-backed products.
Seasonal and climate considerations
Climate and season affect how vinyl planks perform, so factor them in after you’ve picked thickness and wear layer.
Store and acclimate planks in the installation space for 48–72 hours to match temperature and humidity.
In cold months allow more expansion gap; in hot, humid seasons use a moisture barrier and guarantee subfloor dryness.
Check manufacturer limits for temperature and humidity ranges before installation.
When to hire a professional vs. DIY
Deciding whether to DIY or hire a pro comes down to your skill level, the job’s complexity, and how much time you can commit — and being honest about those factors will save you headaches and money.
If you’re comfortable with moisture tests, leveling, and precise cuts, DIY saves cash.
Hire a pro for large areas, uneven concrete, tight timelines, or if warranty and flawless results matter.
Cost, Time, and Lifespan Expectations
You’ll want to budget for materials, tools, and any labor so you don’t get surprised by costs.
Plan on a few hours for a small room and a day or two for larger spaces, depending on prep and skill.
Also check expected lifespans and warranties—thicker wear layers and solid guarantees usually mean better long-term value.
Typical cost breakdown (materials, tools, labor)
Expect to spend most of your budget on the planks themselves, with backing underlayment, connector pieces, and trim adding modest extras; tools and either DIY time or hired labor will round out the total cost. You’ll pay roughly: planks highest, underlayment/trim moderate, tools or labor variable.
| Item | Typical Cost | Emotion |
|---|---|---|
| Planks | $2–$5/ft² | Relief |
| Underlayment/trim | $0.50–$1/ft² | Confidence |
| Tools/labor | $100–$1,500 | Satisfaction |
Estimated timeline for typical room sizes
Knowing the cost breakdown helps you plan time and lifespan expectations for different room sizes.
You’ll prep concrete, acclimate planks, and install—time varies by room complexity.
Typical timelines:
- 100 sq ft (small): 4–6 hours including prep.
- 250 sq ft (medium): 1–1.5 days.
- 500+ sq ft (large): 2–3 days, more if subfloor repairs are needed.
Expected lifespan and warranty considerations
Although lifespan varies by product quality and installation, you can generally plan on vinyl plank flooring lasting 10–25 years with typical residential use.
To protect that investment, follow manufacturer care guidelines, install per instructions, and keep moisture in check.
Check warranty coverage for wear, water damage, and installation defects; register your product and keep receipts so claims go smoothly if issues arise.
Tools and Materials Checklist (Printable)
Before you start, check a concise pre-install checklist so you know the tools and materials you’ll need and any prep tasks to finish.
On the day of install, follow a focused day-of-install checklist to keep the work moving and avoid delays.
Print both lists and keep them handy so you can tick items off as you go.
Pre-install checklist
1 list of tools and materials will keep your vinyl plank installation smooth and fast—gather a utility knife, tape measure, T-square or straightedge, pull bar, tapping block, spacers, rubber mallet, and a quality underlayment if required.
Before starting, verify concrete is clean, dry, and level. Check plank acclimation time and read manufacturer instructions.
- Confirm surface prep
- Gather safety gear
- Verify plank quantities
Day-of-install checklist
Now that you’ve confirmed surface prep, safety gear, and plank quantities, it’s time to gather everything you’ll need for the actual installation.
Assemble tools, materials, and a printable checklist so you won’t run back to the store.
- Utility knife, tapping block, pull bar, spacers, measuring tape
- Underlayment, adhesive (if required), primer, threshold strips
- Broom, vacuum, knee pads, safety glasses, chalk line
FAQ
Got questions? You’ll get clear answers on whether you can lay new vinyl over old vinyl or adhesives, how long planks should acclimate on concrete, acceptable moisture levels, compatibility with radiant floor heating, and proper cleaning and maintenance.
Read on to troubleshoot these common concerns and follow safe, durable installation steps.
Can you install vinyl plank directly on old vinyl or adhesives?
Can you lay new vinyl plank over old vinyl or glue residues? You can in some cases, but only if the old vinyl is fully bonded, flat, and smooth.
Loose flooring or adhesive ridges must be removed. Clean, level, and repair the substrate; use a recommended underlayment or patching compound when needed.
Follow manufacturer guidelines to maintain warranty and prevent failures.
How long should vinyl planks acclimate to concrete?
How long should vinyl planks acclimate to concrete? You should let unopened boxes sit in the installation room for 48 to 72 hours.
Spread boxes flat, avoid direct sunlight or heat, and keep room temperature consistent (usually 65–85°F). This stabilizes plank dimensions to the concrete’s temperature, reducing gaps or buckling after installation.
Don’t skip acclimation.
What moisture levels are acceptable for installation?
After acclimating your vinyl planks, check concrete moisture before laying them down—excess moisture will ruin even well-acclimated flooring.
Use a reliable moisture test: calcium chloride or in-situ relative humidity (RH).
Manufacturers typically allow ≤3 lbs/1000 ft²/24 hrs (calcium chloride) or ≤75% RH, but always follow your plank’s specs.
If levels exceed limits, delay installation and remediate moisture.
Can radiant floor heating be used with vinyl plank on concrete?
Wondering whether you can run radiant heat under vinyl plank over concrete? Yes—you can, but choose vinyl planks rated for underfloor heating and follow manufacturer temperature limits (usually max surface 80–85°F/27–29°C).
Use a cementitious or self-leveling underlayment if required, guarantee even heat distribution, and allow proper acclimation.
Avoid sudden temperature changes and monitor surface temps to prevent plank damage.
How do I clean and maintain vinyl plank on concrete?
Want a floor that keeps looking new with minimal fuss? You’ll sweep or vacuum weekly, mop with a pH-neutral cleaner, and wipe spills immediately.
Use felt pads on furniture, avoid steam cleaners and abrasive scrubbers, and don’t drag heavy items.
Place mats at entrances to trap grit.
Periodically check seams and edges for damage and reseal if adhesive edges lift.