What to Clean Your Floors With (By Floor Type)
You should match cleaners to your floor: use a pH-neutral solution for hardwood and engineered wood, diluted vinegar or mild detergent for tile and grout, mild soap for vinyl, and ammonia-free cleaners for laminate; stone prefers plain water or a neutral cleaner. Avoid excess moisture, steam on wood or laminate, and harsh acids or abrasives that can etch, strip, or warp finishes. Follow proper drying and ventilation, and keep going to get full care steps and tips.
What to Clean Your Floors With (By Floor Type)
Now let’s look at quick, one-line cleaning picks for common floor types so you can grab the right product fast.
For each surface—hardwood, tile, laminate, vinyl, and stone—you’ll get a single recommended cleaner and a brief use tip.
Follow those notes to protect finishes and cut cleaning time.
One-line recommendations for common floor types
If you’re unsure which cleaner to grab, here’s a quick one-line pick for each common floor type so you can clean confidently and safely: Use a pH-neutral mop solution for hardwood; diluted vinegar for tile; mild soap for vinyl; ammonia-free cleaner for laminate; and plain water for sealed stone — that’s the short answer to what to clean a floor with.
| Floor Type | One-line Pick |
|---|---|
| Hardwood | pH-neutral mop solution |
| Tile | Diluted vinegar |
| Vinyl | Mild soap |
| Laminate | Ammonia-free cleaner |
| Stone | Plain water |
Basic Understanding Why Floor Type Matters for Cleaning
Different floor materials need different cleaners and techniques, so you’ll get better results if you match the product to the surface.
Using the wrong cleaner can cause lasting damage, leave slippery or sticky residue, or strip protective finishes.
Also mind safety—ventilate the area and follow label warnings to avoid fumes and accidents.
How floor material affects cleaning methods and products
Because each floor material responds differently to moisture, cleaners, and abrasion, choosing the right method matters: hardwood swells with excess water, tile grout traps dirt, vinyl can discolor with harsh chemicals, and stone needs pH-neutral solutions.
You’ll match tools and products to surfaces—microfiber mops for sealed wood, mild detergents for vinyl, grout brushes for tile, and gentle, neutral cleaners for natural stone—to protect finish and longevity.
Common risks of using the wrong cleaner (damage, residue, slipping)
When you grab the wrong cleaner, you can harm the floor in three major ways: chemical damage to finishes, sticky or filmy residue that attracts dirt, and slippery surfaces that raise fall risks.
You should choose products by material because each risk affects floors differently:
- Finish etching or discoloration from harsh agents.
- Residue buildup that dulls and soils faster.
- Increased slip hazard from soaps or waxes.
Safety and ventilation considerations
Mistakes with cleaners don’t just harm finishes or leave residue—they can also affect your health and home environment.
So you should consider ventilation and safe handling alongside product choice. Open windows, run fans, and avoid mixing chemicals.
Wear gloves and goggles for harsh cleaners, keep pets and children away, and follow label instructions.
Store products locked, upright, and away from heat or sunlight.
Detailed Recommendations by Floor Type
Now you’ll get specific recommendations for each common floor type so you can choose the safest, most effective cleaners.
I’ll cover hardwood and engineered wood, laminate, sheet and plank vinyl, plus ceramic and porcelain tile.
Follow the tips for the floor you have to avoid damage and keep finishes looking their best.
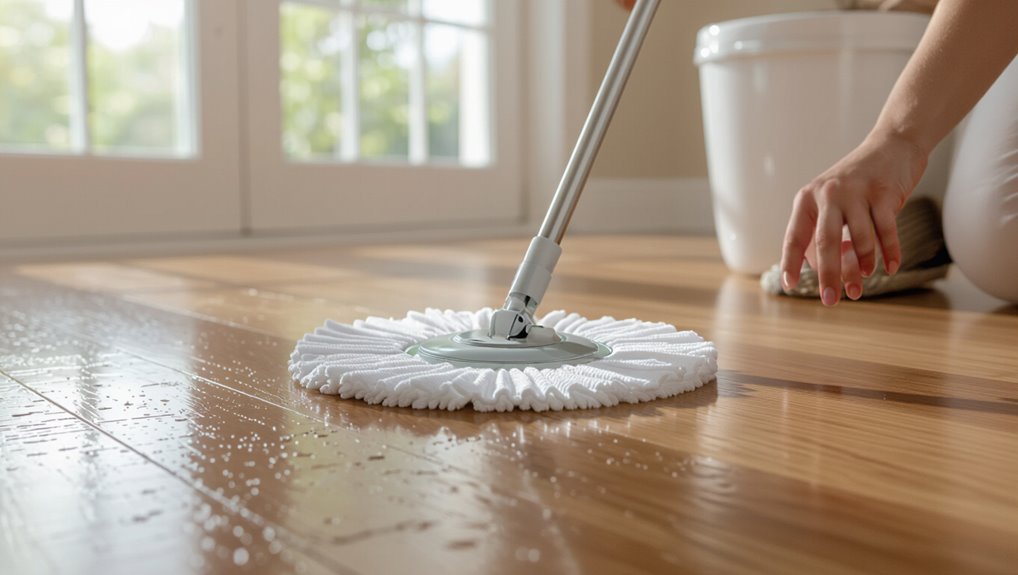
Hardwood Floors
For hardwood, you’ll want to use pH-neutral cleaners—either a simple homemade mix of water and a splash of vinegar or a reputable commercial wood cleaner—paired with a soft microfiber mop or a flat mop with a washable pad.
Clean drips and high-traffic spots as needed, and do a full gentle mop about once weekly, using a wrung-out damp mop and straight, overlapping strokes to avoid excess moisture.
Below I’ll show the proper mop motion and how wet the mop should be so you don’t damage the finish.
Best cleaners (homemade and commercial)
When you’re caring for hardwood, choose cleaners that protect the finish and wood fibers instead of stripping them; gentle, pH-neutral solutions and well-formulated commercial products do that best.
Use diluted castile soap or vinegar-free homemade sprays for light cleaning, and a reputable wood floor cleaner for deeper care.
Test any product in an inconspicuous spot, follow manufacturer directions, and avoid excess moisture.
Recommended tools and mop types
1 clear, well-chosen tool can make caring for hardwood floors faster and safer: pick mops and accessories that clean without scratching, trapping grit, or leaving excess water.
Use a microfiber flat mop with a washable pad, a soft-bristle broom or electrostatic dust mop for daily debris, and a damp mop for spot cleaning.
Avoid sponge mops and abrasive brushes.
Frequency and technique for mopping
Regularly tend to hardwood by dusting or dry-mopping daily and damp-mopping only as needed—typically every one to two weeks in low-traffic rooms and more often (once a week) in high-traffic areas.
When mopping, use a pH-neutral cleaner diluted per label, rinse the mop frequently, change dirty water, and dry the floor promptly with a clean cloth or fan to prevent lingering moisture and damage.
visual: proper mop motion and moisture level
To move from how often you mop to how you do it, pay attention to both the mop motion and how much moisture you use on hardwood.
Use long, even strokes along the grain, not circular scrubbing. Keep the mop just damp—wring until it’s barely dripping—to prevent warping and finish streaks.
Change water often and dry any wet spots immediately.
Engineered Wood
For engineered wood, pick a pH-neutral cleaner or a product the manufacturer recommends, and avoid steam mops, abrasive scrubbers, or oil-based cleaners that can damage the thin veneer.
Wipe up spills promptly and use a damp—not wet—mop to prevent warping or finish loss.
Protect high-traffic areas with rugs and felt pads to keep the surface looking new.
Suitable cleaners vs. cleaners to avoid
Wondering which products are safe for engineered wood? Use pH-neutral, water-based cleaners or manufacturer-recommended solutions diluted per instructions.
Microfiber mops work well with minimal liquid. Avoid ammonia, bleach, oil soaps, and vinegar concentrates — they can dull or penetrate the top layer.
Also skip steam cleaners and abrasive scrubs that lift or scratch the veneer. Test new products in an inconspicuous spot first.
Maintenance tips to protect finish
Now that you know which cleaners to use and which to avoid, protect your engineered wood finish with routine habits and spot treatments tailored to its thin veneer and topcoat.
Wipe spills immediately with a damp microfiber, use felt pads on furniture, avoid steam cleaners and harsh abrasives, maintain stable indoor humidity, and recoat with manufacturer‑approved products when wear appears to preserve appearance and durability.
Laminate Floors
For laminate floors, stick to manufacturer-approved cleaners or a simple homemade mix of water and a few drops of gentle dish soap or vinegar diluted with plenty of water.
Use a microfiber mop or a flat head with a damp — not wet — pad to avoid seeping water into seams.
Dry the surface quickly with a clean microfiber cloth or open windows to speed evaporation and prevent warping.
Approved cleaning solutions and homemade recipes
Because laminate reacts poorly to excess moisture and harsh chemicals, you’ll want gentle, low-residue cleaners that cut grime without warping or dulling the finish.
Use pH-neutral commercial laminate cleaners or mix 1 cup water with 1/4 cup white vinegar plus a few drops of mild dish soap for spot cleaning.
Avoid oil-based, wax, or abrasive products; always use minimal liquid.
Equipment and drying recommendations
While laminate won’t tolerate heavy soaking, you can keep it safe and dry by choosing the right tools and drying method: use a microfiber flat mop or slightly damp cloth, avoid steam mops, and pick a wringable bucket.
After cleaning, dry promptly with a clean microfiber towel or fan-assisted air flow. Address spills immediately to prevent swelling and edge separation.
Vinyl Floors (Sheet & Plank)
For vinyl sheet and plank floors, use pH-safe cleaners to protect the wear layer while tackling dirt and stains without harsh residue.
Test stain removers in an inconspicuous spot first and blot gently to avoid spreading or abrading the surface.
Don’t use solvents or overly wet methods that can cause discoloration or lift seams.
pH-safe cleaners and stain removal
When you clean vinyl sheet or plank floors, choose pH-neutral products to protect the wear layer and printed surface; harsh alkaline or acidic cleaners can dull, discolor, or break down the finish over time.
Use mild, water-based cleaners for routine soiling and a soft cloth or mop.
For stains, spot-test a diluted cleaner, blot gently, and rinse thoroughly to avoid residue.
Avoiding discoloration and seam damage
Besides picking pH-neutral cleaners, you’ll want to guard vinyl sheets and planks against fading, yellowing, and seam separation by managing moisture, heat, and abrasive contact.
Wipe spills quickly, avoid steam mops and hot water, use rugs in sunlit areas, and keep humidity steady.
Don’t drag heavy furniture—lift or use felt pads—and choose nonstaining mats to prevent discoloration at entryways.
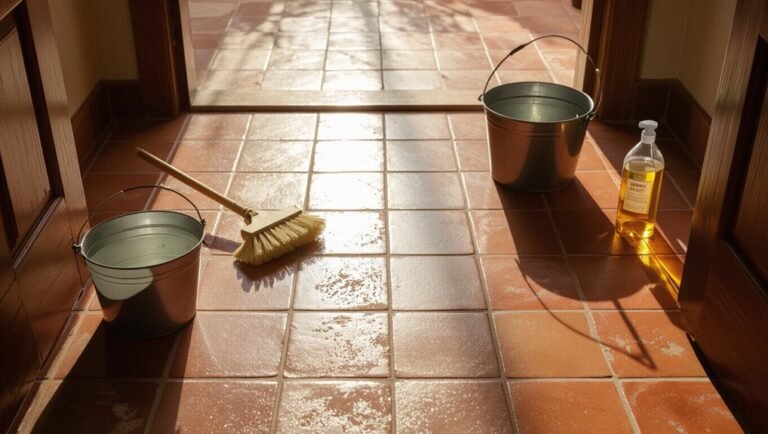
Tile Floors (Ceramic & Porcelain)
For ceramic and porcelain tile, you’ll want grout-safe cleaners that won’t etch or discolor the grout lines.
Use routine mopping with a mild pH-neutral solution and reserve stronger grout-cleaning methods—like a baking soda paste and stiff brush or a commercial grout cleaner—for periodic deep-cleaning.
I’ll walk you through safe product choices and a step-by-step grout-cleaning technique next.
Grout-safe cleaning products
Because grout is porous and can stain or erode if you use the wrong cleaner, pick products formulated to be gentle on grout while still cutting through dirt on ceramic and porcelain tile.
Look for pH-neutral cleaners, enzyme-based solutions, or mild oxygen bleaches labeled safe for grout.
Test in an inconspicuous spot, follow dilution instructions, and rinse thoroughly to protect grout integrity.
Deep-clean vs. routine cleaning methods
When you keep up with routine sweeping and mopping, tile stays presentable, but occasional deep-cleaning is essential to remove ground-in grime, soap scum, and discolored grout that regular maintenance won’t touch.
For deep-cleaning, use a pH-neutral or mild alkaline cleaner, a scrub brush, and hot water; rinse thoroughly.
For routine care, stick to gentle mops and quick spot-treats to prevent buildup.
grout cleaning technique

Grout acts like a sponge for dirt and mildew, so you’ll need focused tools and the right cleaners to restore its color without damaging ceramic or porcelain tiles.
Scrub with a nylon brush and a pH-neutral tile cleaner or diluted hydrogen peroxide for stains. Rinse thoroughly, dry, and seal grout once cured.
For stubborn mold, use a diluted bleach solution sparingly and ventilate well.
Natural Stone (Marble, Granite, Slate, Travertine)
For natural stone you’ll want a pH-neutral cleaner and routine resealing to protect porous surfaces like travertine and slate.
Treat stains with targeted methods—alkaline poultices for oil, enzyme or hydrogen peroxide for organic stains—rather than acidic products.
Never use vinegar, citrus, or other acid cleaners on marble or limestone, since they’ll etch the surface.
pH-neutral cleaners and sealant guidance
Because natural stone reacts differently to cleaners and sealants, you should stick to pH-neutral products and manufacturer-recommended sealers to avoid etching or staining.
Use mild, stone-specific cleaners diluted per instructions, wipe spills promptly, and test any product in an inconspicuous spot.
Reseal according to stone type and traffic—typically every 1–3 years—and hire pros for honed or porous surfaces when unsure.
Stain-specific treatments and avoiding acid cleaners
Now that you’ve covered pH-neutral cleaners and proper sealing, you’ll also need to treat stains differently depending on the stone—what works on granite can damage marble or travertine.
For marble and travertine, use poultices and avoid acid cleaners; for granite and slate, gentler alkaline cleaners or enzyme-based stain removers work.
Test a spot, blot stains, and reseal after treatment.
Concrete Floors (Sealed & Unsealed)
For concrete floors, you’ll choose cleaners based on whether the surface is sealed or unsealed: pH-neutral cleaners or mild detergents for sealed concrete, and gentle alkaline cleaners for unsealed finishes.
You’ll treat oil and heavy stains differently too, using absorbents and a degreaser or poultice before general cleaning.
Test any product in an inconspicuous spot and rinse thoroughly to avoid residue.
Cleaner selection by sealant status
When choosing a cleaner for concrete, identify whether the slab is sealed or unsealed first, since each needs different products and concentrations to avoid damage or staining.
For sealed concrete, use pH-neutral cleaners or mild detergents diluted per label to protect the finish.
For unsealed concrete, choose dilute alkaline cleaners or acetate-based cleaners sparingly, rinsing thoroughly to prevent residue and etching.
Handling oil and heavy stains
Tackle oil and heavy stains on concrete quickly, because the longer they sit the harder they’re to remove; you’ll use different methods depending on whether the slab’s sealed or unsealed.
For sealed concrete, blot, apply a degreaser, scrub with a nylon brush, then rinse.
For unsealed, absorb with cat litter, use a poultice or trisodium phosphate solution, scrub, and repeat until stained areas fade.
Cork Floors
Cork needs gentle, pH-neutral cleaners and careful moisture control to prevent swelling and warping.
Use a barely damp mop and dry spills immediately to protect the finish.
For minor scratches or dents, spot-repair with filler and a matching sealant to keep the surface intact.
Gentle cleaners and moisture control
1 key rule for caring for cork floors is to keep cleaners mild and moisture minimal: cork swells and stains if you use harsh detergents or let water sit, so choose pH-neutral, low-residue cleaners and clean up spills immediately to protect the finish and core.
Use a damp microfiber mop, wring thoroughly, avoid soaking, and air-dry quickly. Inspect seals regularly.
Repairing minor damage
Keeping cleaners mild and moisture low helps prevent most problems, but minor nicks, dents, and finish wear still happen with everyday use; you can repair many of these yourself on cork floors.
For small dents, press with a damp cloth and warm iron briefly.
Use matching wood filler for deeper gouges, sand lightly when dry, then recoat with compatible sealer to blend and protect.
Bamboo Floors
Bamboo floors need gentle care to keep their finish looking fresh, so you’ll want to use pH-neutral cleaners and a soft mop.
Wipe up spills quickly, avoid excess water, and use felt pads under furniture to prevent scratches.
For long-term protection, apply a recommended finish or touch-up kit when you notice wear.
Best practices for cleaning and protecting finish
Because bamboo floors take a lot of wear yet respond differently than hardwood, you should follow care steps that preserve their finish without causing swelling or scratches.
Sweep or vacuum daily, mop with a damp microfiber cloth and pH-neutral cleaner, and dry promptly.
Use felt pads, rugs in high-traffic areas, and avoid steam cleaners, harsh chemicals, or excess water to maintain the finish.
Carpeted Floors (Pile & Low-Profile)
For carpeted floors you’ll want a routine that matches pile height: vacuum high-pile carpets more often and use a low-profile setting or brush for short piles.
Keep spot cleaners on hand and choose shampooing for deep clean cycles or a steam cleaner if your carpet’s manufacturer approves.
For pet stains, treat fresh spots immediately with an enzymatic cleaner and follow up with odor neutralizers to prevent repeat marking.
Vacuuming frequency and tools
Whether your carpet has deep pile or a low-profile loop, regular vacuuming keeps fibers looking their best and extends the life of the flooring.
Vacuum high-traffic areas twice weekly and whole rooms once weekly. Use a vacuum with adjustable height and strong suction; use a brush roll for pile and a suction-only or gentle setting for low-profile loops.
Empty filters and replace belts as needed.
Spot cleaners and shampoo vs. steam cleaning
When a spill or stain appears, act quickly with a targeted spot cleaner for best results and reserve shampooing or steam cleaning for periodic deep refreshes; choose methods based on pile height and manufacturer recommendations.
For low-profile carpets, shampoo machines and low-moisture cleaners work well.
For thicker pile, use gentle shampoos or professional steam cleaning sparingly to avoid over-wetting and matting.
Pet stain and odor solutions
1 clear approach works best: tackle pet stains immediately with the right cleaner for your carpet type—use enzyme-based, odor-neutralizing formulas on pile carpets to break down urine proteins and low-moisture or specialized low-profile products on flat weaves to prevent over-wetting and backing damage.
Blot excess, apply cleaner per instructions, agitate gently, rinse sparingly, and dry thoroughly.
Repeat as needed and test first.
Step-by-Step Routine Cleaning Process (Universal Framework)
Start by preparing the floor: clear debris and sweep or vacuum thoroughly.
Pick the right cleaner, dilute it per instructions, and test a small, hidden spot before you proceed.
Then clean using the technique suited to your floor type, rinse if needed, and dry to avoid residue or damage.
Step 1 Prepare the floor (clear debris, sweep/vacuum)
Clear the floor of toys, shoes, and loose items so you can see the surface clearly, then sweep or vacuum to remove dust, crumbs, and grit that can scratch or dull finishes.
Check corners, edges, and under furniture; use attachments for baseboards and crevices.
Dispose of debris, empty the vacuum, and inspect for sticky spots before you move to wet cleaning.
Step 2 Choose the right cleaner and dilute properly
Choose a cleaner that matches your floor type and follow the manufacturer’s dilution instructions precisely: hardwood and laminate need pH-neutral or specially formulated cleaners, tile and vinyl tolerate stronger solutions, and stone often requires products labeled safe for natural stone.
Measure concentrate and water with the recommended ratio, mix in a clean bucket, and avoid overconcentration to prevent residue, damage, or slippery surfaces.
Step 3 Test in an inconspicuous area
Before you clean the whole floor, try the solution in an out-of-sight spot—like under a cabinet or behind a piece of furniture—to make sure it won’t discolor, etch, or leave a film.
Wait the recommended dwell time, then wipe and inspect under good light. If the finish looks unchanged and no residue remains, you’re safe to proceed; if not, stop and choose a gentler option.
Step 4 Clean using correct technique per floor type
If the patch test showed no damage, you can start cleaning the rest of the floor using methods that match your floor type—hardwood, laminate, tile, vinyl, or stone each need a different approach.
Work in small sections, follow grain or grout lines, use correct mop or cloth, avoid excess water on sensitive floors, and apply recommended cleaners sparingly to prevent buildup and streaks.
Step 5 Rinse and dry to prevent residue and damage
Because cleaners can leave a film or attract dirt, rinse and dry each section after cleaning to stop residue and water damage from forming.
After mopping, go over floors with clean water to remove detergent, then immediately dry with a microfiber mop, towel, or squeegee.
For wood, blot and air-dry briefly; for tile and vinyl, make certain grout and seams are moisture-free to prevent buildup.
Deep-Cleaning and Stain Removal Procedures
When tackling deep cleaning and stains, you’ll match methods to floor type—what removes coffee from sealed hardwood won’t work on tile grout or vinyl.
Know when steam cleaners help sanitize and lift grime versus when heat will warp or set stains, like on laminate or certain natural stones.
If stains penetrate finish, odors persist, or structural damage appears, call a professional for restoration rather than risking DIY fixes.
Removing common stains (coffee, oil, pet urine, rust) by floor type
Stains like coffee, oil, pet urine, and rust each demand a different response depending on whether your floor is hardwood, tile, laminate, vinyl, or concrete—you’ll get better results by matching the cleaner and technique to the surface.
Use these targeted steps:
- Hardwood: blot, mild detergent, dry; sand/seal for deep oil.
- Tile: scrub grout, oxygen bleach for urine.
- Concrete/vinyl/laminate: degreaser, poultice for rust.
When to use steam cleaners and when to avoid them
Curious whether a steam cleaner is right for your floors? Use one on sealed tile, sealed stone, and some finished vinyl to lift grime and sanitize without chemicals.
Avoid steam on hardwood, laminate, unsealed or waxed floors, and water-sensitive adhesives—steam can warp, delaminate, or strip finishes.
Test a hidden spot first and follow manufacturer guidance for temperature and dwell time.
Professional restoration triggers (when DIY isn’t enough)
If regular scrubbing, spot treatments, and rented machines aren’t getting your floors back to acceptable condition, it’s time to call a professional restoration service.
You should contact pros when stains penetrate finish, odors persist, grout or seams deteriorate, water damage warps planks, or mold appears.
They’ll assess, use commercial-grade cleaners, deep-extractors, and controlled drying to restore surfaces safely and prevent recurring damage.
Comparison Table Best Cleaners and Tools by Floor Type
Now let’s compare the best cleaners and tools by floor type so you know what to use and what to avoid.
You’ll see which products work on hardwood, tile, laminate, and vinyl, plus common ingredients or tools that can damage each surface.
Use the table to pick the right cleaner quickly and skip anything that could harm your floors.
What to use vs. what to avoid
Which cleaner works best for your floors depends on the material and the finish, so this comparison table shows what to use and what to avoid for each floor type. Use the table to choose safe products and tools, then follow manufacturer guidance to prevent damage.
| Floor | Use | Avoid |
|---|---|---|
| Hardwood | pH-neutral cleaner | Excess water |
| Tile | Mild detergent | Harsh acids |
| Laminate | Damp mop | Steam cleaners |
Common Mistakes That Damage Floors
Don’t soak floors or leave them to dry slowly, because over-wetting and poor drying can warp or stain materials.
Avoid acidic or abrasive cleaners and use the right mop or vacuum attachments to prevent surface damage.
And don’t skip regular maintenance—small, consistent care stops many common problems before they start.
Over-wetting and improper drying
If you soak your floors or leave them damp for long, you can cause swelling, warping, and mildew that shortens their life.
Don’t drench wood, laminate, or unsealed surfaces; use a barely damp mop and wring cloths thoroughly.
Dry promptly with fans or absorbent towels, check edges and seams, and ventilate the room to prevent trapped moisture and long-term damage.
Using acidic or abrasive cleaners
When you reach for a strong cleaner, remember that acidic or abrasive products can strip finishes, etch surfaces, and dull protective coatings.
Don’t use vinegar, bleach, or scouring powders on hardwood, laminate, stone, or vinyl unless product instructions allow it.
Test cleaners in an inconspicuous spot, follow manufacturer guidance, dilute as recommended, and choose pH-neutral, floor-safe solutions to preserve appearance and longevity.
Wrong mop type or vacuum attachments
After protecting finishes from harsh cleaners, you also need to pick the right tools: the wrong mop head or vacuum attachment can scratch, snag, or grind grit into your floors.
Use soft microfiber or sponge mops for delicate surfaces, and choose vacuum brushes labeled for hard floors.
Avoid beater bars and rough pads, test attachments, and replace worn parts to prevent instant and cumulative damage.
Skipping regular maintenance
Neglecting routine care lets small problems turn into big ones, and your floors suffer faster than you think.
If you skip sweeping, mopping, or periodic deep cleaning, grit, spills, and moisture build up, causing scratches, stains, and warping.
Stick to a simple maintenance schedule—daily debris removal, weekly damp mopping, and seasonal inspections—to extend lifespan and avoid costly repairs.
Prevention and Best Practices
Keep a simple daily and weekly checklist to sweep, spot-clean, and check high-traffic areas so small issues don’t become big ones.
Set a seasonal deep-clean schedule, use doormats and furniture pads, and control humidity to protect surfaces.
Store and label cleaners safely and keep them out of reach to prevent accidents.
Daily and weekly maintenance checklist
A simple daily and weekly routine will keep your floors looking great and prevent small issues from becoming big repairs.
You should sweep or vacuum high-traffic areas daily, spot-clean spills immediately, and mop weekly with a floor-appropriate cleaner.
Follow this checklist:
- Sweep/vacuum daily; address crumbs and grit.
- Spot-clean spills immediately to prevent staining.
- Mop weekly with the recommended solution.
Seasonal deep-clean schedule
After you’ve kept up with daily and weekly care, plan a seasonal deep-clean to catch buildup that regular maintenance misses.
Rotate tasks quarterly: mop and scrub grout, shampoo carpets, strip and refinish waxed floors, and deep-clean tile seals.
Inspect for wear, repair minor damage, and test cleaners on a hidden spot.
Schedule one thorough session each season to preserve finish and longevity.
Protective measures (doormats, furniture pads, humidity control)
When you set up simple defenses like doormats, furniture pads, and a humidity routine, you’ll cut down on scratches, stains, and warping before they start; place coarse mats at entrances, use felt or rubber pads under legs, move heavy pieces occasionally, and keep indoor humidity between 35–55%.
Wipe spills promptly and avoid dragging items to extend every floor’s lifespan.
Safe storage and labeling of cleaning products
If you store cleaning products properly and label them clearly, you’ll prevent accidental misuse, chemical reactions, and harm to kids or pets.
Keep chemicals in original containers with legible labels, noting dilution dates and hazards. Store them locked, upright, cool, and away from food.
Never mix products. Dispose of expired items safely and keep a list of contents and emergency contacts nearby.
Product Recommendations and Buying Tips
When you’re shopping for floor cleaners, learn to read labels and pH indicators so you pick products that match your surface.
Opt for eco-friendly or fragrance-free formulas when sensitivities or pets are a concern.
Also look for practical tool features—microfiber mops, HEPA vacuums, and sturdy scrubbers—that make maintenance easier.
How to read labels and pH indicators
Because cleaners can damage floors as easily as they clean them, you should learn to read labels and pH indicators before buying a product.
Check manufacturer recommendations and compatible surfaces. Look for explicit pH ranges and “neutral” or specific numbers; alkaline cleaners harm stone and finished wood, acids etch grout and marble.
Note dilution instructions, contact time, and safety warnings to avoid damage.
When to choose eco-friendly or fragrance-free options
After you’ve learned to read labels and pH indicators, consider how eco-friendly or fragrance-free choices affect both your floor’s longevity and indoor air quality.
Choose eco-friendly when you want biodegradable ingredients and reduced residue that can dull finishes.
Pick fragrance-free if household members have sensitivities or pets react to scents.
Prioritize proven cleaners with clear ingredient lists and minimal additives.
Recommended tool features (mop types, vacuums, scrubbers)
A good cleaning toolkit starts with the right tools: pick mops, vacuums, and scrubbers that match your floor type, cleaning frequency, and physical needs.
Choose microfiber flat mops for hardwood, sponge or string mops for textured tile, and spin mops for convenience.
For vacuums, pick adjustable-suction canisters or stick models with gentle brushes.
Look for washable pads and lightweight designs.
FAQ Common Questions About Cleaning Floors
You’ll get answers to common concerns like whether vinegar is safe for hardwood, how often to deep clean, and if steam cleaning works for laminate or vinyl.
You’ll also learn the safest ways to remove pet urine and practical tips to restore shine to dull floors.
Keep reading for straightforward, room-by-room guidance.
Can I use vinegar on my hardwood floors?
Curious if vinegar is safe for hardwood floors?
You can use diluted white vinegar sparingly for sealed hardwood: mix about 1/2 cup vinegar with a gallon of water, wring the mop well, and avoid puddles.
Don’t use on waxed, unfinished, or damaged floors; acidic solutions can dull or strip finishes over time.
Test a hidden spot first.
How often should I deep clean my floors?
How often you should deep clean depends on foot traffic, pets, and whether you have rugs or kids.
Generally, deep clean high-traffic areas every 1–3 months, moderate-traffic rooms every 3–6 months, and low-use spaces twice a year.
Adjust for spills, allergies, or visible buildup.
Stick to manufacturer guidelines for specific floor types and spot-clean between deep sessions to maintain condition.
Is steam cleaning safe for laminate or vinyl?
If you follow a regular deep-cleaning schedule, you might wonder whether a steam cleaner speeds the job up or risks damage to laminate or vinyl.
Don’t use high-heat steam on laminate—moisture can warp cores and loosen seams.
Low-steam, manufacturer-approved machines may be okay on some vinyl, but always check the flooring warranty and test a hidden area first.
What’s the safest way to remove pet urine stains?
Pet urine needs prompt attention to prevent stains and odors from setting into the finish or seeping into seams and subflooring.
Blot up liquid, then clean with a pH-neutral floor cleaner safe for your surface.
For lingering odor, use an enzyme cleaner designed for pet urine—test in an inconspicuous spot first.
Dry thoroughly and ventilate to prevent mildew and finish damage.
How do I restore shine to dull floors?
Want your floors to look like new again? Start by cleaning thoroughly with a manufacturer-approved cleaner to remove dirt and residue.
For hardwood, apply a restorative polish sparingly; avoid wax on polyurethane finishes.
For tile or vinyl, use a gloss-enhancing product and buff with a microfiber mop.
Test any product in an inconspicuous spot first and follow instructions for best, lasting results.
Summary Quick Reference Action Steps by Floor Type
Here’s a quick-action cheat sheet you can use for each floor type: read the short steps, gather the recommended tools, and follow the order—sweep or vacuum first, treat stains, then mop or finish—so you get clean floors without damaging surfaces.
- Hardwood: dry dust, spot-treat, damp microfiber mop.
- Tile/vinyl: sweep, degrease grout, wet mop.
- Carpet: vacuum, pretreat stains, deep clean as needed.