How to Install a Glass Tile Backsplash Like a Professional
You can install a professional-looking glass tile backsplash yourself by planning, prepping, and using the right tools. Start by cleaning and priming a smooth wall, measure and mark centerlines, and allow 10–15% extra tile for cuts. Mix a glass‑rated thin‑set, spread with a notched trowel, press tiles with spacers, then grout with non‑sanded grout for tight joints. Finish edges with trim and seal grout after curing. Keep going to learn specific tips and tricks.
How to Install a Glass Tile Backsplash Like a Professional Quick Answer
You can expect a professional-quality glass tile backsplash in one to two days for a typical kitchen, including prep, cutting, and grout. It should last decades with proper installation.
If you’re comfortable with precise cutting, surface prep, and working with spacer/layout lines, you can DIY and save money. Hire a pro if your layout is complex, walls are uneven, or you lack tools and time.
Use a quick checklist: assess skill level, estimate time and tool needs, compare costs, and decide whether guarantees or speed from a pro are worth it.
One-paragraph direct answer with outcome and time estimate
If you prep the wall, use the right thin-set and a notched trowel, and take care with spacing and grout, you’ll end up with a smooth, professional-looking glass tile backsplash in about a weekend (8–12 hours active work for a 10–15 sq ft area, plus drying time).
To answer how do you install glass tile backsplash: measure, cut, apply thin-set, press tiles, spacer, grout, seal.
When to hire a pro vs. DIY decision checklist
When should you call in a pro? If your wall is uneven, plumbing or electrical runs are involved, or you want complex patterns, hire a pro.
DIY if you’re comfortable cutting glass, mixing thinset, and grouting straight lines.
Consider time, tool costs, and patience. If mistakes will be costly or stressful, pay a pro for guaranteed results and warranty.
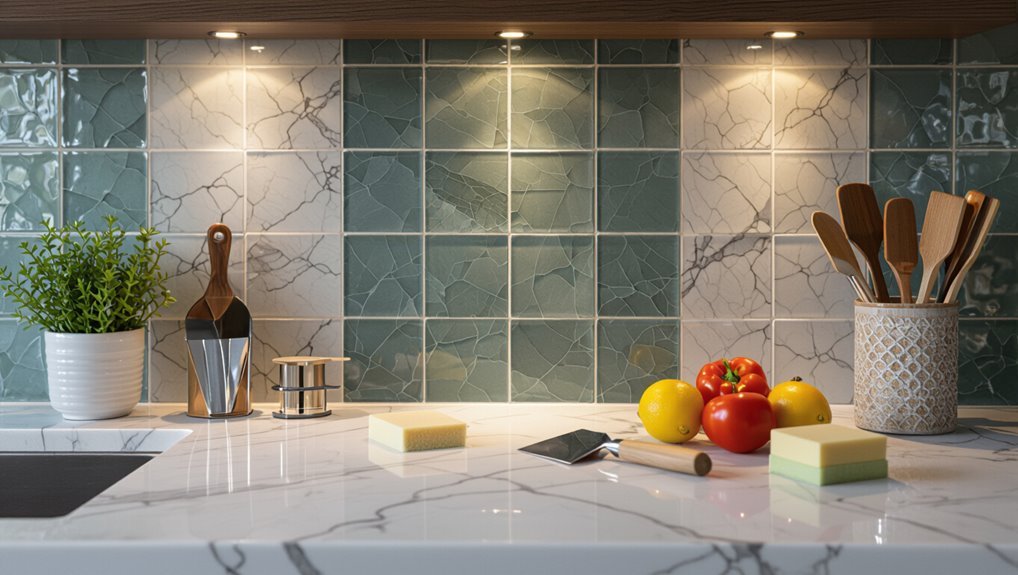
Basic Understanding What Is a Glass Tile Backsplash and Why Choose It
A glass tile backsplash is a stylish, low-profile option that comes in sheeted panels, mosaics, subway tiles, and even recycled-glass formats, so you can pick a look that fits your kitchen.
You’ll get benefits like light reflection and easy wipe-downs, though some glass can chip and grout needs regular care.
Think about where you’ll use it and the overall style—modern, coastal, or traditional—to choose the right type and finish.
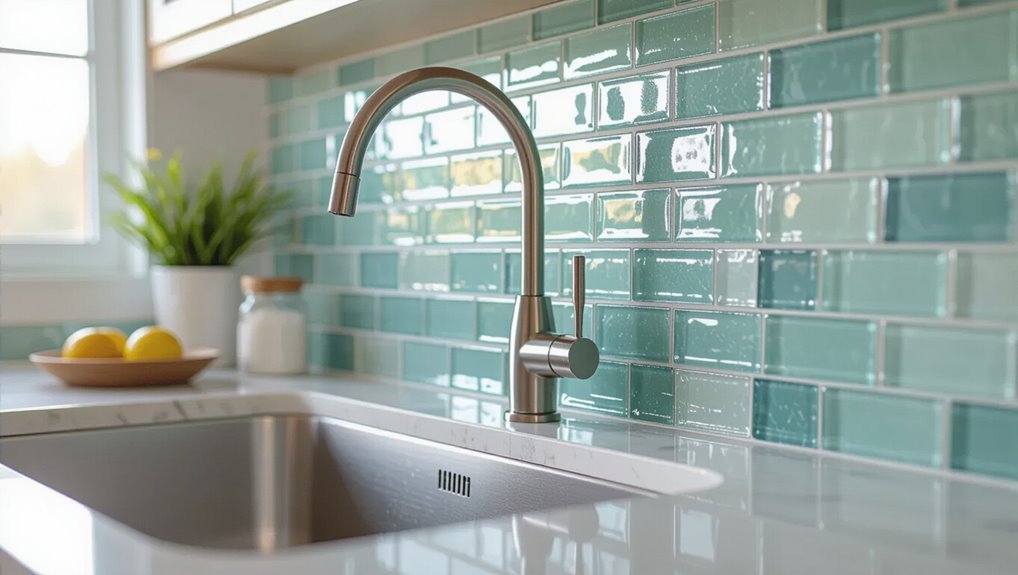
Types of glass tiles (sheeted, mosaic, subway, recycled glass)
Glass tile comes in several distinct forms—sheeted, mosaic, subway, and recycled—so you can pick the look and installation method that fits your style and skill level.
Sheeted panels speed installation and keep grout lines uniform. Mosaic sheets offer intricate patterns and curves. Subway tiles give a classic, linear look. Recycled glass brings color variations and eco-friendly appeal for customized designs.
Advantages and drawbacks (durability, light reflection, maintenance)
Now that you know the main tile types, you’ll want to weigh their advantages and drawbacks before committing.
Glass tiles resist stains and water, reflect light to brighten kitchens, and look modern. They scratch and chip more easily than porcelain, and grout lines need sealing to prevent discoloration.
Expect occasional polishing and gentle cleaners; heavy impacts and abrasive pads can damage the finish.
Common applications and style considerations
If you’re looking to update a kitchen or add a sleek accent to a bathroom, glass tile backsplashes offer versatile, light-catching options that suit modern and adaptable styles alike.
You’ll use them behind stoves, sinks, or as full-wall features. Pick colors, finishes, and grout to match cabinetry and lighting.
Consider scale, texture, and maintenance when planning placement and patterns.
Tools, Materials, and Cost Overview
Before you start, make a checklist of essential tools—tile nippers, notched trowel, level, wet saw or score-and-snap cutter, grout float, and safety gear—so you’re not interrupted mid-project.
Gather materials like glass tiles, appropriate adhesive, grout, sealer, and spacers, and confirm quantities based on your square footage.
Finally, set a budget by estimating material and tool costs and comparing that to local professional labor rates if you might hire help.
Essential tools list
Tackle your glass tile backsplash with the right tools and you’ll save time and avoid costly mistakes.
You’ll need quality gear to cut, set, and finish tiles cleanly; rent specialty tools if needed and protect surfaces.
- Wet saw or score-and-snap cutter
- Notched trowel and margin trowel
- Rubber float and grout sponge
- Laser level or long spirit level
Materials and supplies checklist (tiles, adhesive, grout, sealer, spacers)
Now that you’ve lined up the right tools, gather the materials and supplies that’ll actually go in the wall: glass tiles, a quality adhesive (thin-set mortar formulated for glass), grout, a penetrating sealer, and spacers.
Pick matching tiles and backing, plus these essentials:
- Glass tile sheets (with extra for cuts)
- Thin-set for glass
- Non-sanded grout
- Penetrating sealer and plastic spacers
Estimated costs and budget ranges (materials, tools, professional labor)
A typical DIY glass tile backsplash project can cost anywhere from $200 to $1,200 in materials and tools, depending on the tile quality and how many specialized tools you need; if you hire a pro, labor can add $300 to $1,000 or more. Plan budget tiers, buy only needed tools, and get multiple quotes.
| Item | Typical cost |
|---|---|
| Tiles | $50–$600 |
| Adhesive/grout | $20–$150 |
| Tools | $30–$200 |
| Labor | $300–$1,000+ |
Preparation and Planning
Start by measuring your wall and calculating how many tiles you’ll need, including a wastage allowance for cuts and breakage.
Inspect the surface—paint, drywall, plaster, or existing tile—to note repairs or substrate prep required.
Then plan your layout and seam placement, pick a compatible adhesive, grout, and sealer formulated for glass tiles, and mark centerlines and focal points before you begin.
Measuring the wall and calculating tile quantity (wastage allowance)
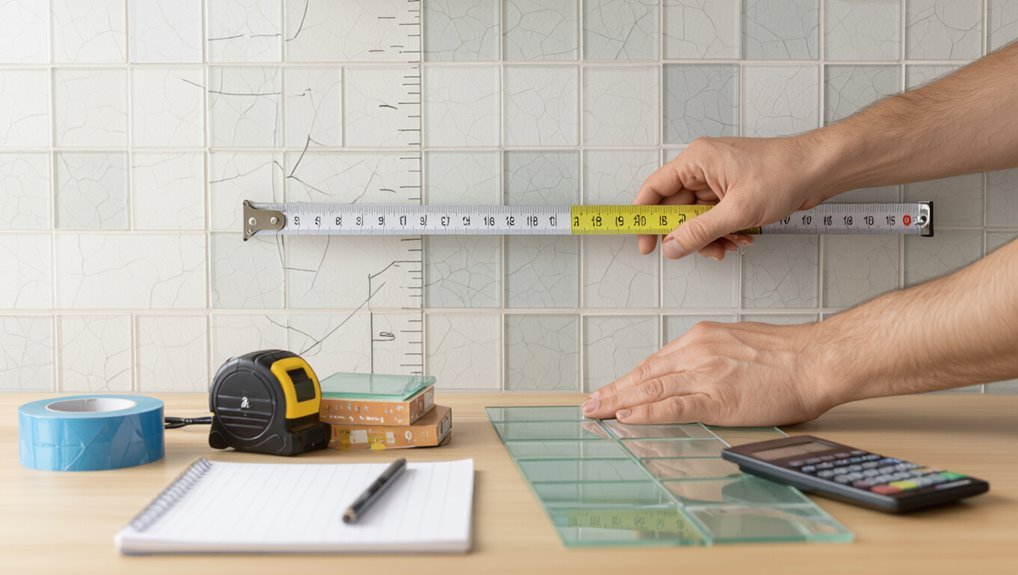
Before you buy tiles, measure the wall carefully so you know exactly how much material you’ll need and can account for cuts and breakage.
Measure height and length, subtract openings, then calculate square footage.
Add a 10–15% wastage allowance for cuts, mistakes, and matching.
Convert to tile units per manufacturer dimensions, round up, and buy extra for replacement pieces later.
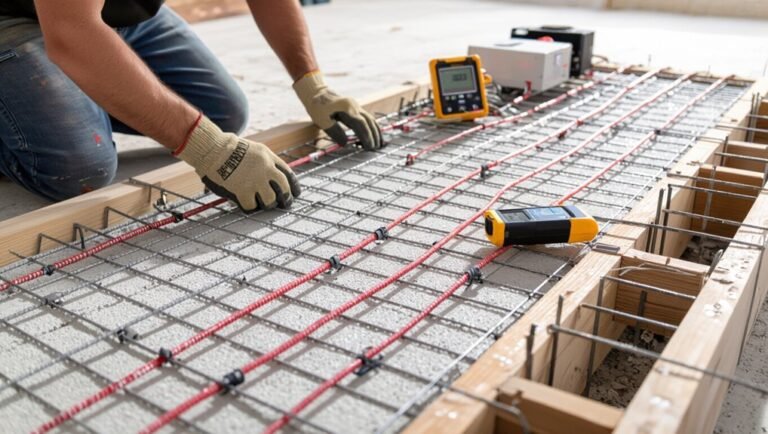
Surface assessment: substrates and repairs (paint, drywall, plaster, existing tile)
When you assess the wall, check what’s beneath the finish—paint, drywall, plaster, or existing tile—because the substrate determines the prep and adhesive you’ll need.
Scrape loose paint, sand glossy surfaces, repair drywall or plaster cracks, and level uneven areas.
If tiling over existing tile, verify it’s sound and scuffed for bond; otherwise remove it.
Prime porous or repaired spots before tiling.
Design layout and pattern planning (centerlines, focal points, seam placement)

Now that the surface is sound and prepped, plan your tile layout so the finished backsplash looks balanced and intentional.
Find centerlines, mark focal points like range or sink, and dry-fit tiles to see pattern flow.
Shift tiles to avoid tiny edge cuts.
Plan seams at natural breaks or grout lines, keeping symmetry and minimizing awkward slivers for a professional finish.
Selecting adhesive, grout, and sealers for glass tiles
Since glass tiles don’t absorb moisture like ceramic, you’ll need a modified thin-set or epoxy adhesive rated for glass to guarantee strong bonding and prevent discoloration.
Pick a white, non-staining mortar for translucent or light-colored tiles, and choose epoxy grout or a high-quality unsanded grout with a compatible sealer to avoid scratching the glass and to resist staining.
Select a penetrating sealer for joints, test first.
Step-by-Step Installation Process
Now you’ll move into the step-by-step installation process, starting by preparing the wall surface—clean, patch, and prime so tiles adhere properly.
Next you’ll mark level layout lines, cut and dry-fit glass tiles using the right tools, and mix thinset formulated for glass.
Finally, apply the thinset, place the tiles (or sheets) with consistent joint spacing, and handle sheets carefully to avoid chips.
Step 1 Prepare the wall surface (cleaning, patching, priming)
Start by clearing the work area and inspecting the wall for grease, loose paint, holes, or unevenness that could prevent the tile from adhering properly.
Clean with degreaser, sand glossy spots, and wipe dust.
Patch holes with appropriate filler, sand smooth, then apply a bonding primer suited for glass tile.
Let it dry fully before proceeding.
Step 2 Mark layout lines and establish a level starting point
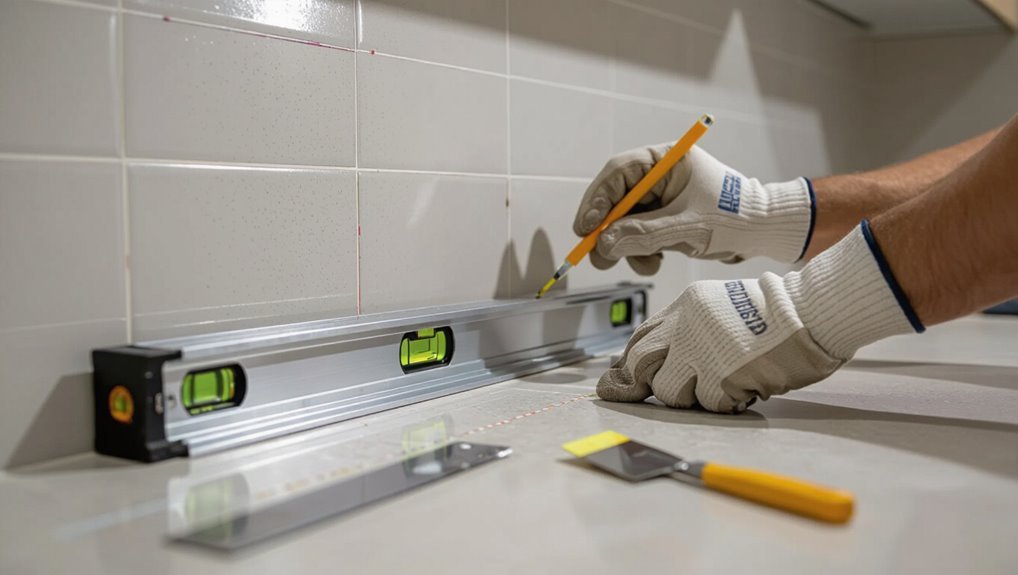
With the wall prepped and primer dry, you’re ready to lay out the tile grid and locate a true level starting point.
Snap a horizontal chalk line at the height of the bottom row, measure from existing countertops or cabinets for consistent reveal, and plumb a vertical reference at the center or a corner.
Mark cut lines and test fit edges before adhesive.
Step 3 Cut and dry-fit tiles (tools and techniques for glass)
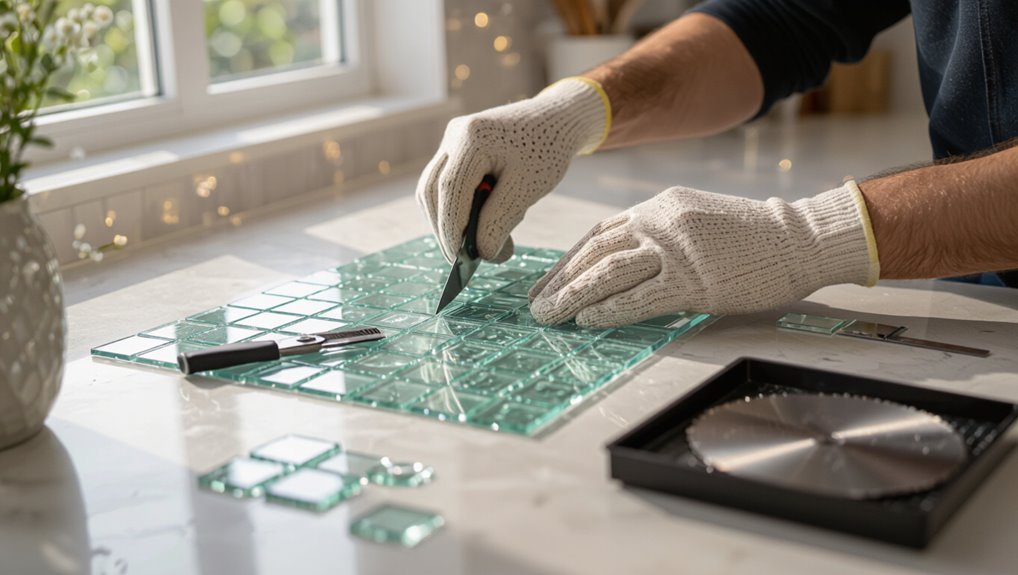
Set up your workspace and measure twice before cutting so each piece fits cleanly; glass tiles chip differently than ceramic, so you’ll want the right tools and test fits before applying adhesive.
Use a wet tile saw with a continuous-rim diamond blade, score small pieces with a glass cutter, and dry-fit full sheets and edge cuts.
Adjust spacers and trim until layout is perfect.
Step 4 Mix and apply thinset/mastic correctly for glass tiles
Mix the thinset to a creamy, lump-free consistency and spread it evenly—glass tiles demand a full, void-free bond to avoid lippage and show-through.
Use a white, polymer-modified thinset rated for glass.
Comb with the correct-notch trowel, work small areas, and backbutter large tiles or sheets.
Keep thinset no thicker than manufacturer recommends to prevent discoloration and guarantee full contact.
Step 5 Place tiles, maintain joint spacing, and handle sheets
Now that your thinset’s spread and notched correctly, start placing tiles from the centerline or a corner guideline and work outward so you keep layout balanced.
Press sheets firmly into mortar with a slight twisting motion, align seams, and use consistent spacers.
Check joints frequently with a straightedge.
Cut and fit edge pieces as needed, keeping grout lines uniform and clean as you go.
Step 6 Address transitions (outlets, cabinets, corners, edges)

When you reach changes—outlets, cabinets, corners, and exposed edges—plan each detail before the thinset cures so you can cut, reinforce, and seal cleanly for a professional finish.
Turn off power, remove cover plates, and mark openings. Trim sheets with a wet saw, back-Butt corners with right-angle cuts, install edge trim or Schluter profiles, and use waterproof caulk at cabinet joins.
Step 7 Allow proper cure time before grouting
After you’ve cut, reinforced, and sealed all outlets, corners, and edges, give the thinset full time to set before you touch the grout.
Wait the manufacturer’s recommended cure time—typically 24–72 hours—depending on thinset, temperature, and humidity.
Keep the area undisturbed, protect tiles from moisture or vibration, and check bonds by gently probing a few tiles before proceeding to grouting.
Step 8 Grouting technique for glass tile (non-sanded vs sanded, grout color selection)
Before you grout, choose the right grout type and color—glass tile needs non-sanded grout for joints under 1/8″ to avoid scratching, while sanded grout can be used only for wider joints but may abrade some tiles if you’re not careful.
Mix to manufacturer specs, apply with a rubber float at a 45° angle, pack joints fully, and wipe excess with a damp sponge before it skins.
Step 9 Cleaning haze and polishing glass tiles after grout
Tackle the grout haze now by letting the grout set just long enough to firm up. Then, using a damp sponge, gently wipe the tiles in a circular motion.
Rinse the sponge frequently and change the rinse water as it gets cloudy so you don’t smear haze back onto the glass.
After initial cleaning, buff with a microfiber cloth and a mild glass cleaner to remove residue and restore shine, avoiding abrasive pads.
Step 10 Sealing grout and final inspection
Seal the grout to lock out stains and moisture, then do a careful final inspection to catch any missed spots or imperfections.
Apply a penetrating sealer per manufacturer instructions, testing a small area first.
Once dry, inspect joints, edges, and tile alignment.
Remove any residue, touch up grout where needed, and confirm sealed surfaces are even.
You’re done—enjoy your finished backsplash.
Cutting and Special Techniques
When you need precise cuts on glass tile, choose a wet saw for straight cuts, scoring or nippers for small adjustments, and nippers for irregular shapes or tough spots.
Decide on edge finishes—metal trim, bullnose pieces, or epoxy-filled edges—before you cut so margins look clean.
For mesh-backed sheets, score and separate individual tiles carefully and swap out or repair any broken pieces before setting the sheet.
Cutting glass tile: wet saw, scoring, nippers when to use each
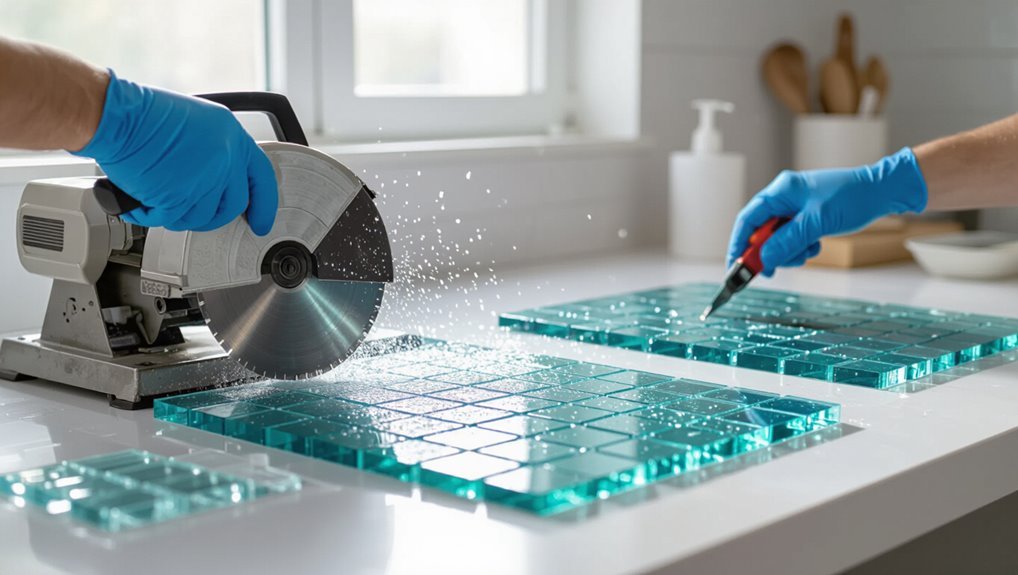
Because glass tiles can chip or shatter if you rush them, you’ll want to choose the right cutting method from the start: a wet saw for clean, straight cuts and complex shapes, a scoring wheel for simple straight cuts on thin tile, and tile nippers for small notches or irregular trims.
Use a wet saw with a diamond blade for mosaics and thick slabs; score only thin sheets, and nip sparingly.
Edge finishing options: trim, bullnose, epoxy-filled edges
Although glass tile edges can look unfinished straight out of the cut, you’ve got several clean, durable options—metal or PVC trim for crisp lines, bullnose tiles for a rounded factory edge, and epoxy-filled edges when you need an invisible, custom finish.
Choose trim when meeting countertops or outlets, use bullnose at exposed ends, and fill tiny chips or custom shapes with clear epoxy for smooth, sealed results.
Working with mesh-backed sheets and how to repair broken tiles in sheets
Handle mesh-backed sheets gently and plan cuts before you score: the fiberglass or paper mesh holds small glass tiles in a convenient grid, but it also hides weak spots and makes straight cuts trickier than single tiles.
Use a fine-tooth wet saw or nippers, support the sheet fully, and replace broken tiles by peeling mesh, removing fragments, setting a new tile with thinset, and reattaching mesh.
Common Problems and How to Fix Them
You’ll run into a few common issues—lippage and uneven tiles, adhesive failures that cause pop-offs, grout staining or haze, and cracked tiles—and you’ll want to spot their causes quickly.
I’ll explain how to correct uneven joints and lift low tiles, diagnose and re-bond or replace tiles that lose adhesion, and clean or regrout to fix discoloration and haze.
For cracked tiles, I’ll show safe removal and replacement techniques that protect surrounding glass.
Lippage and uneven tiles causes and correction
When tiles sit at different heights, creating small ridges along grout lines, it’s called lippage. It not only looks sloppy but can catch on hands and make cleaning harder.
You’ll cause this by uneven substrate, inconsistent thinset thickness, or poor tile leveling.
Correct by flattening substrate, using a notched trowel consistently, applying proper thinset, and using a tile leveling system.
Adhesive failures and tile pop-offs diagnosis and repair
Check for loose or missing tiles as soon as you spot shifting grout or hollow sounds under the tile—these are signs the adhesive failed.
Remove popped tiles, scrape old thinset, and inspect the substrate for moisture, movement, or contamination.
Replace damaged backerboard, let surfaces dry, and use a full-coverage polymer-modified thinset.
Butter backs of glass tiles for better contact and press firmly, using spacers.
Grout staining, haze, and discoloration remediation steps
If grout looks stained, hazy, or discolored after installation, don’t panic—most issues are fixable with the right cleaning and sealer strategy.
First, test a mild pH-neutral cleaner and soft brush; rinse thoroughly.
For haze, use a grout haze remover per directions.
For stains, try oxygen bleach or poultice.
Once clean and dry, apply a penetrating sealer to protect color and resist future staining.
Cracked tiles after installation removal and replacement technique
Spotting a cracked tile after installation is frustrating, but you can remove and replace it without tearing out surrounding pieces.
Score and lift grout edges with a grout saw, break the tile into sections with a chisel and hammer, and pry pieces out gently.
Clean the cavity, apply thinset, set a matching tile, level it, and grout once cured.
Best Practices, Tips, and Professional Tricks
You’ll save time with a few layout tricks and the right tools, so plan cuts and seams before you mix mortar.
Make sure you waterproof around sinks and stoves, choose grout and sealers rated for wet areas, and use gentle cleaners to preserve glass and finishes.
I’ll also show budget-friendly, eco-conscious material options and maintenance tips to keep your backsplash looking great for years.
Time-saving layout and installation tips
Although precise planning takes a little time up front, it saves hours during actual installation: measure twice, map your tile layout on paper, and mark reference lines on the wall so you never guess alignment mid-job.
Start at focal points, dry-fit sheets, and trim edge pieces before adhesive. Use spacers, work in small sections, clean grout haze promptly, and keep tools organized to maintain steady progress.
How to ensure waterproofing around sinks and stoves
Once your layout and cuts are set, make waterproofing around sinks and stoves a priority to prevent long-term damage from splashes and steam.
Seal substrate with a waterproof membrane, tape seams, and use thinset rated for wet areas.
Leave proper expansion gaps, install backerboard where needed, and finish joints with flexible, mold-resistant silicone.
Test for gaps before grouting.
Material longevity tips: cleaning, maintenance, and care products
Regularly caring for your glass tile backsplash keeps it looking new and prevents grout damage, mold, and dulling from kitchen residues.
Wipe spills promptly with a soft cloth and mild pH-neutral cleaner, avoid abrasive pads and acidic cleaners, and reseal grout annually.
Inspect caulking and grout lines, address stains with a gentle scrub brush, and dry surfaces to prevent water spotting and mildew.
Eco-friendly and budget-smart alternatives
When you want a green, budget-friendly backsplash without sacrificing style, there are smart alternatives and small tricks that save money and reduce waste.
Choose recycled glass or salvaged tile, thin-set offcuts, and low-VOC adhesives.
Use leftover grout tinted with natural pigments, plan layouts to minimize cuts, and buy remnant sheets.
You’ll cut costs and environmental impact while keeping a professional finish.
Comparison: Glass Tile vs. Other Backsplash Options
When you compare glass to ceramic, porcelain, and natural stone, you’ll see each material brings different looks and durability.
Consider how performance, cost, and maintenance trade off—for example, glass resists stains but can chip, while porcelain is tough and stone needs sealing.
Use those factors to pick the option that fits your budget and daily use.
Glass vs ceramic vs porcelain vs natural stone
Curious how glass tile stacks up against ceramic, porcelain, and natural stone for a backsplash? You’ll notice glass reflects light, offers vivid color, and feels modern. Choose ceramic for variety, porcelain for durability, and natural stone for texture. Match style to room.
| Material | Strength |
|---|---|
| Glass | Reflective |
| Ceramic | Versatile |
| Porcelain | Tough |
| Stone | Textured |
Performance, cost, and maintenance trade-offs
Although each backsplash material has its strengths, you’ll weigh performance, cost, and upkeep differently depending on your kitchen habits and budget.
Glass resists stains, reflects light, and cleans easily but chips more than porcelain, costs more than ceramic, and needs careful grout sealing.
Choose porcelain for durability, ceramic for economy, or stone for luxury—each demands different maintenance and replacement expectations.
Project Timeline and Checklist
You’ll want a clear timeline covering prep, tile installation, curing, grouting, and finishing so the job stays on track.
Before you start, check your surface, tools, and materials; afterward, inspect grout lines, sealant, and cleanup.
Use a simple checklist to mark each step and estimate how long each will take.
Typical project schedule (prep, install, cure, grout, finish)
When you follow a clear project timeline, each phase—prep, install, cure, grout, finish—flows smoothly and keeps surprises to a minimum.
Start with surface prep and measurements (half day), set tiles over one to two days, allow adhesive to cure 24–48 hours, grout the next day, then wipe and seal as needed, leaving final cure and cleanup another 24–48 hours.
Pre-installation and post-installation checklist
1 simple checklist will keep your glass tile backsplash project on track from start to finish: confirm measurements and materials, clear and protect the work area, gather tools and safety gear, and note timing for each step so you can meet drying and curing windows.
- Verify layout and tile count
- Inspect substrate and repair as needed
- Record adhesive and grout open/working times
- Clean and seal after curing, document warranty dates
FAQ
Got questions? You’ll want to know whether you can install glass tile over existing tile, which adhesive and grout work best, and how to cut tiles without cracking them.
Also ask about cure time before using the backsplash and whether glass tile’s suitable behind a range or in wet areas.
Can I install glass tile over existing tile?
If the existing tile is sound, unglazed or properly profiled, and firmly bonded to the substrate, you can usually install glass tile over it—saving demolition time and dust.
Check for loose, cracked, or water-damaged tiles and remove them.
Clean, degrease, and lightly sand glazed surfaces for better adhesion.
Use a flat, level field and make certain that connections and edges are properly prepared before tiling.
What adhesive and grout are best for glass tile?
Once you’ve confirmed the existing surface is sound and prepped, pick adhesives and grout formulated for glass tile to guarantee a lasting, stain-resistant finish.
Use a white, polymer-modified thin-set mortar or an epoxy-based adhesive for strong, non-staining bond.
For grout, choose a non-sanded, color-consistent epoxy or urethane grout to resist staining and cracking, and seal if required by the manufacturer.
How do I prevent glass tile from cracking during cutting?
When you cut glass tile, take steps to control vibration, heat, and stress so you don’t crack pieces mid-cut.
Use a wet saw with a continuous-flow water feed and a diamond blade rated for glass. Score slowly, support tiles firmly on a flat surface, clamp small pieces, and avoid sudden bends.
Cool blade and change blades when they glaze to reduce chipping.
How long before I can use the backsplash area after installation?
Controlling vibration and heat while cutting helps prevent cracks.
Similar care with setting and curing affects when you can start using the backsplash area. Wait at least 24–48 hours for thinset to firm up before light use.
Grout needs 24–72 hours to cure; avoid heavy scrubbing for a week.
Follow manufacturer instructions for adhesives and sealers for full strength.
Can glass tile backsplashes be used behind a range or in wet areas?
Curious whether glass tile holds up behind a range or in wet areas? Yes — glass tile is nonporous, heat-resistant, and easy to wipe, so it works well behind stoves, sinks, and showers when installed correctly.
Use a proper substrate, waterproof membrane for wet zones, heat-tolerant adhesives near cooktops, and grout sealed as recommended to guarantee long-lasting performance and easy maintenance.
Visual Resources and Further Learning
You’ll find step-by-step video tutorials and manufacturer guides helpful for visualizing tricky cuts, grout techniques, and recommended adhesives.
If the project looks larger than you expected or involves electrical/plumbing, consult a pro and ask for written estimates that break down labor, materials, and timelines.
Use those resources to compare methods and get accurate bids before you start.
Recommended video tutorials and manufacturer guides
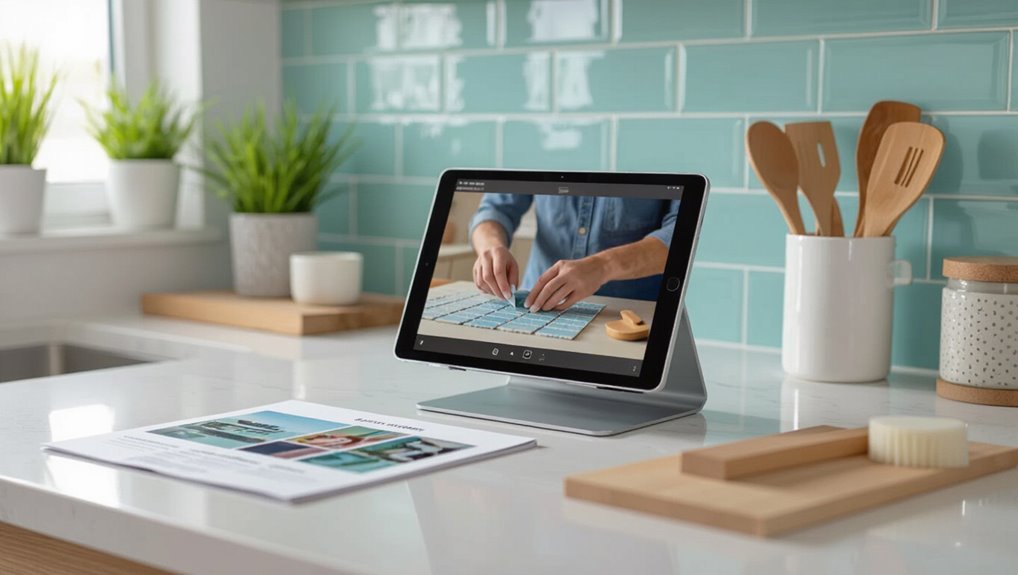
Want a quick way to see each step in action? Use trusted video tutorials and manufacturer guides to avoid mistakes and match products.
Look for clear, step-by-step demos and official installation PDFs.
- Manufacturer installation guide (PDF)
- Full project video walkthrough
- Tile-cutting and layout tutorial
- Grout and sealant technique demo
When to consult a professional and how to get accurate estimates
Those videos and manufacturer PDFs will get you far, but some jobs still call for a pro—especially if you’re dealing with irregular walls, plumbing/electrical behind the backsplash, or large-format glass tiles that need precise cuts and support.
Get bids from licensed tile contractors, compare written estimates with itemized labor, materials, permits, and timeline, check references and insurance, and ask for a warranty in writing.