How to Install Click and Lock Flooring: Beginner’s Complete Guide
You can install click-and-lock flooring yourself with basic tools and a bit of planning. Start by testing moisture, acclimating planks, and leveling the subfloor. Measure the room, lay an underlayment, then snap the first row with spacers for expansion. Angle and click each plank, use a tapping block and pull bar for tight seams, and rip the last row to fit. Finish with thresholds and baseboards for a clean look—keep going to learn tips for avoiding gaps, moisture, and lippage.
Quick Answer Can You Install Click and Lock Flooring Yourself?
You can often install click-and-lock flooring yourself in a weekend if you’re comfortable with basic tools like a saw, tapping block, spacers, and a pull bar.
The work is moderately easy for a single room but gets harder with irregular layouts, changes, or subfloor prep, which is when you should consider hiring a pro.
Call a contractor if you don’t have time, tools, or experience with moisture barriers, leveling, or complex trims.
Short summary of time, difficulty, and tools needed
Most DIYers can install click-and-lock flooring in a weekend: expect 1–2 days for a typical 300–500 sq ft room, depending on prep and breaks.
You’ll find basic how to install click and lock flooring straightforward if you’re handy.
Difficulty is moderate; you’ll need a saw, spacers, tapping block, rubber mallet, pull bar, measuring tools, and safety gear.
Plan extra time for acclimation.
When to hire a pro vs DIY
Though a handy DIYer can often install click-and-lock flooring successfully, you should hire a pro if the job includes complex cuts, uneven subfloors, large rooms with many changes, or tight deadlines.
If your space is straightforward, you’ve got time, and you enjoy projects, do it yourself.
Hire pros for warranties, precise connections, moisture issues, or if you lack tools or confidence.
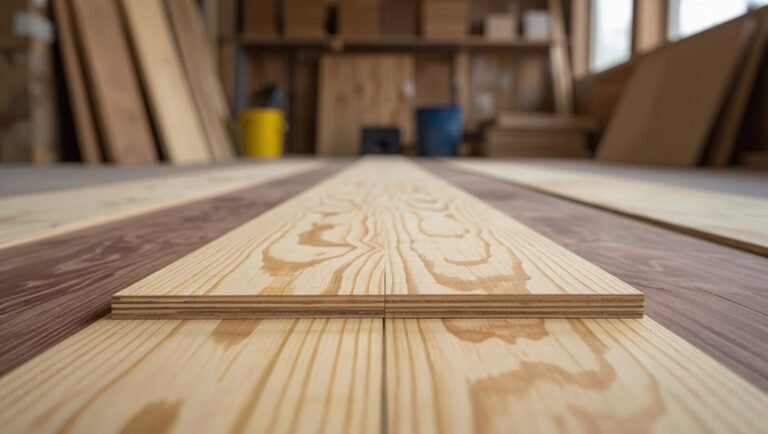
What Is Click and Lock Flooring?
Click-and-lock flooring is a floating floor system you snap together without glue, and it comes in common types like laminate, SPC (stone plastic composite), and engineered hardwood.
The boards use a tongue-and-groove profile that clicks into place to lock seams and keep the floor stable. You’ll get faster installation and easy repairs, though some types are less moisture-resistant or refinishable than others.
Definition and common types (laminate, SPC, engineered hardwood)
Think of click and lock flooring as a fast, tool-light system where individual planks snap together along engineered tongues and grooves to form a stable surface—you click one edge into place and lock the next.
You’ll find three common types:
- laminate (budget-friendly, printed wear layer),
- SPC (stone-plastic core, waterproof, very stable),
- and engineered hardwood (real wood veneer over plywood for authentic look).
How the click-lock system works
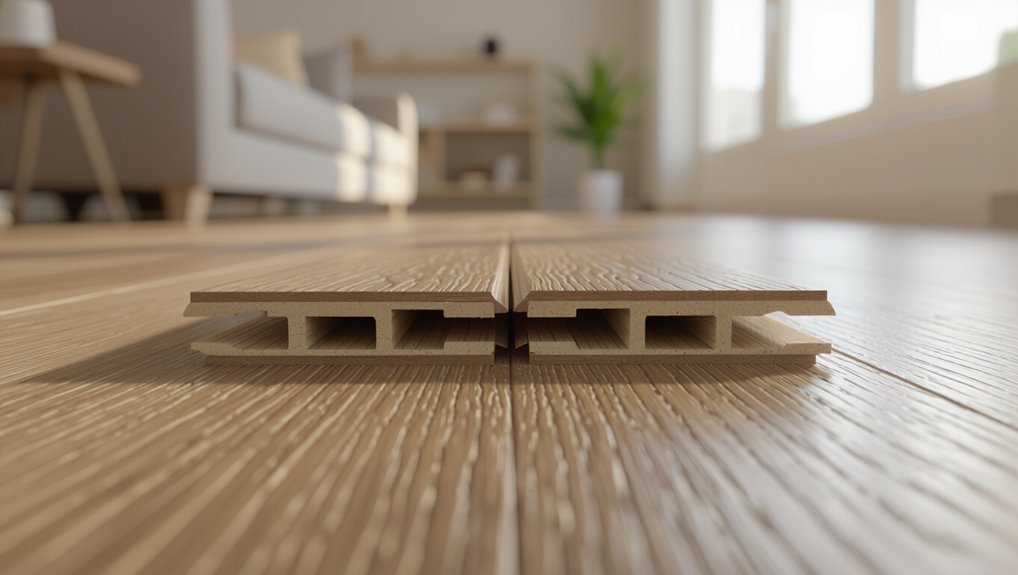
Anyone can install click-lock flooring because its planks are engineered to snap together without glue or nails: each board has a matching tongue-and-groove profile or a flexible lip that you angle in, then lower and lock, creating a tight seam that holds panels laterally while allowing the assembly to float over the subfloor.
You align edges, tap joints with a mallet and pull bar, and stagger end seams.
Advantages and limitations
While it’s a DIY-friendly option that snaps together quickly, click and lock flooring also brings trade-offs: you get fast installation, low mess, and easy replacement, but you’ll trade off sound insulation and sometimes durability compared with glued or nail-down systems.
It can be sensitive to subfloor imperfections and moisture; you’ll need acclimation and precise joins to avoid gaps, warping, or peaking.
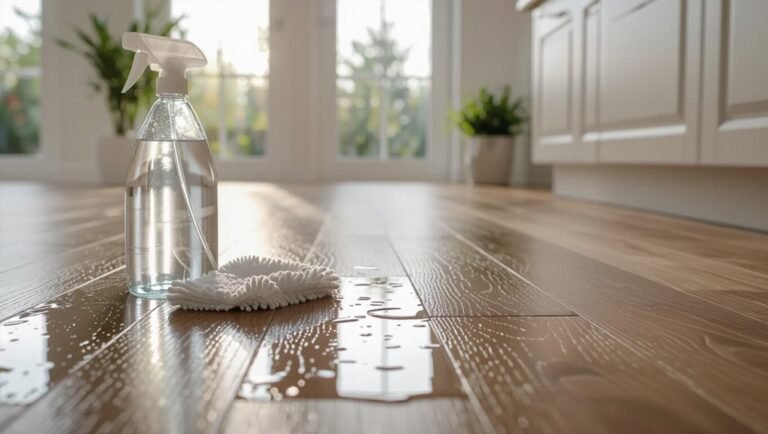
Tools, Materials, and Preparations
Before you start, gather essential tools (saw, tapping block, pull bar, spacers) and optional extras like a jigsaw or flooring nailer, plus materials such as underlayment, trim, and enough planks.
You’ll also want to test subfloor moisture, let the flooring acclimate per manufacturer instructions, and inspect/repair the subfloor so it’s flat and clean.
These steps save time and prevent problems once you begin clicking boards together.
Essential tools and optional tools
You’ll need a handful of essential tools to get your click-and-lock flooring installed quickly and cleanly, plus a few optional items that can make the job easier or more precise.
- Tape measure, pencil, and straightedge for accurate layout.
- Pull bar, tapping block, and mallet to secure joints.
- Saw (miter or jigsaw) for cuts.
- Knee pads, spacers, and a pry bar as optional aids.
Materials and accessories to buy (underlayment, spacers, trim)
Although the flooring planks lock together on their own, you’ll still need a few key materials and accessories to guarantee a stable, level installation: underlayment to cushion and dampen sound, spacers to maintain the expansion gap, and trim pieces to finish edges and connections.
Also get a moisture barrier if required, threshold strips for doorways, adhesive for trims, and replacement planks for mistakes.
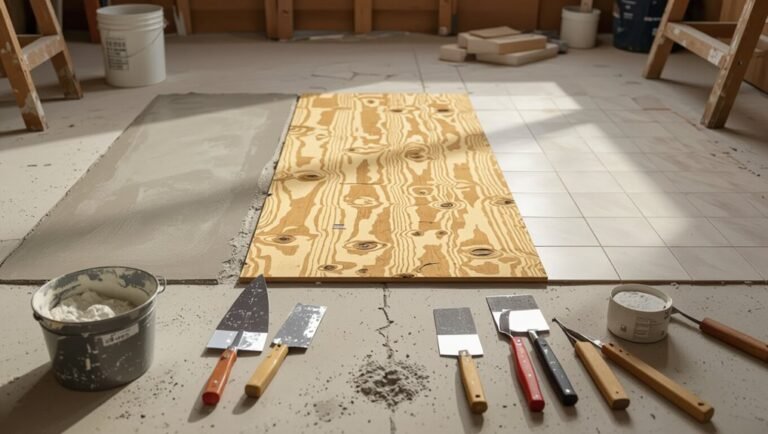
Site preparation: moisture testing, acclimation, subfloor inspection
Those underlayment, spacers, and trim choices matter, but you also need to prepare the room itself: check moisture levels, let the planks acclimate, and inspect the subfloor so the click-and-lock system performs correctly.
- Test concrete and wood for moisture with a meter.
- Leave cartons sealed to acclimate 48–72 hours.
- Repair, level, and clean the subfloor.
- Remove baseboards and guarantee expansion gaps.
Step-by-Step Installation Process
Now you’ll follow a clear, step-by-step installation process that starts with measuring the room and calculating how much material you need.
Prepare the subfloor and underlayment, plan your layout with staggered joints and expansion gaps, then install the first row using proper technique.
After that, lock in subsequent rows and cut panels to fit as you go.
Step 1 Measure the room and calculate materials
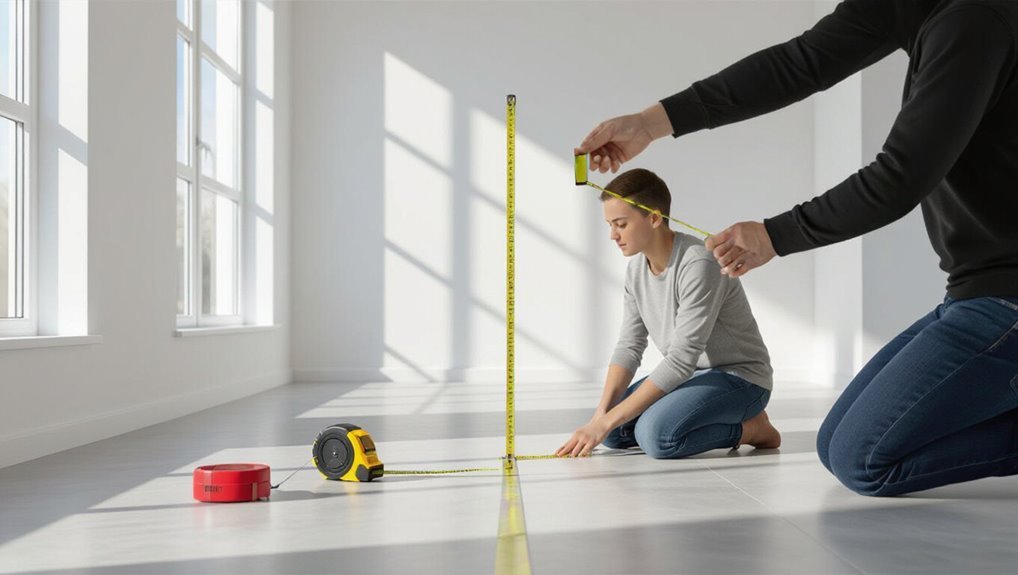
Before you cut or click anything together, measure the room precisely so you know how much flooring and underlayment you’ll need.
Measure length and width, then multiply for area. Add 10% waste for cuts and pattern matching. Note doorways and closets for extra pieces.
- Measure room dimensions.
- Calculate total area.
- Add 10% waste.
- List trim and thresholds.
Step 2 Prepare the subfloor and install underlayment
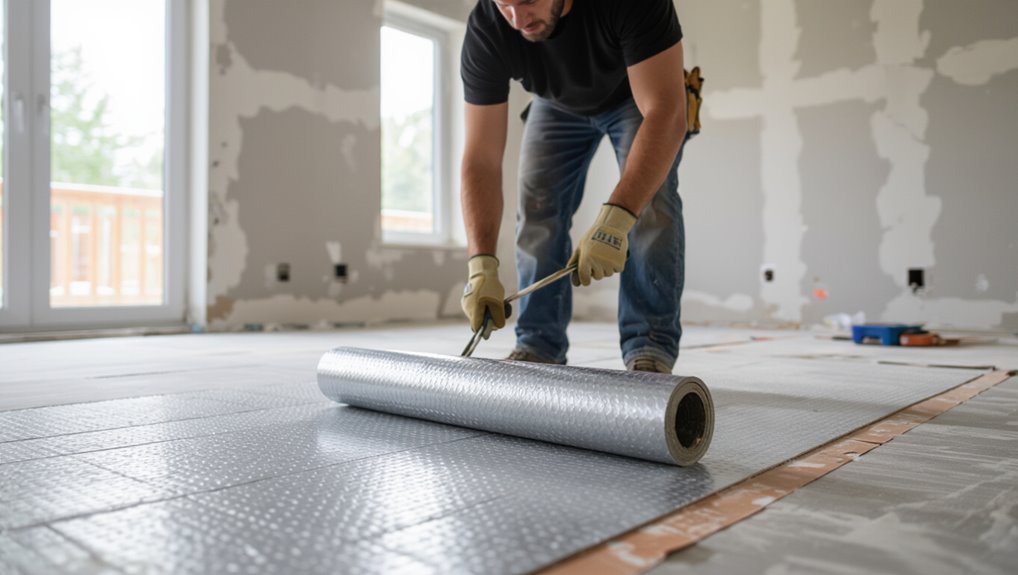
With your measurements and materials ready, get the subfloor in shape so the click-and-lock planks will sit flat and last.
Remove debris, nails, and trim high spots; repair dips with leveling compound and sand rough areas.
Verify the surface is clean, dry, and smooth.
Roll out recommended underlayment, overlap or tape seams per manufacturer instructions, and trim edges for a neat fit.
Step 3 Plan layout and stagger joints (starting wall, expansion gaps)
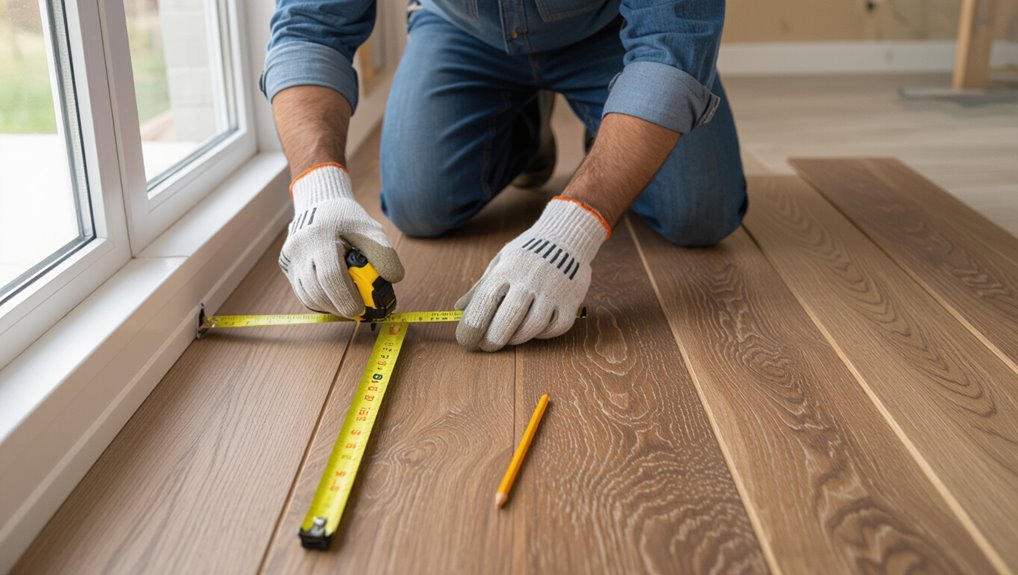
Although you’ve prepped the subfloor, take a few minutes to plan the plank layout so rows look balanced and weak seams are minimized; measure room width, calculate plank counts, and avoid creating short end pieces under 6 inches.
Stagger joints at least 6–8 inches between adjacent rows. Choose a starting wall with best sightline, and mark 1/4–3/8 inch expansion gaps around perimeter.
Step 4 Installing the first row (technique and tips)
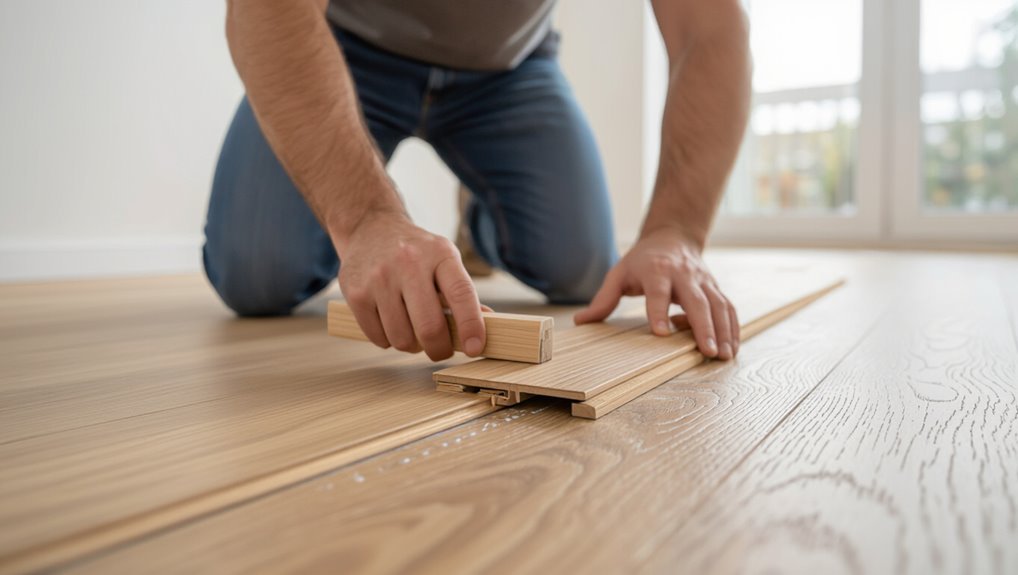
Start by laying the first plank with its tongue facing the wall, using spacers to maintain the 1/4–3/8 inch expansion gap; this gives you a straight reference line and makes subsequent rows easier to lock in.
Press each plank firmly into place, checking alignment and flatness.
Trim end pieces for staggered joints, and frequently confirm the gap and straightness as you progress.
Step 5 Locking subsequent rows and cutting panels to fit
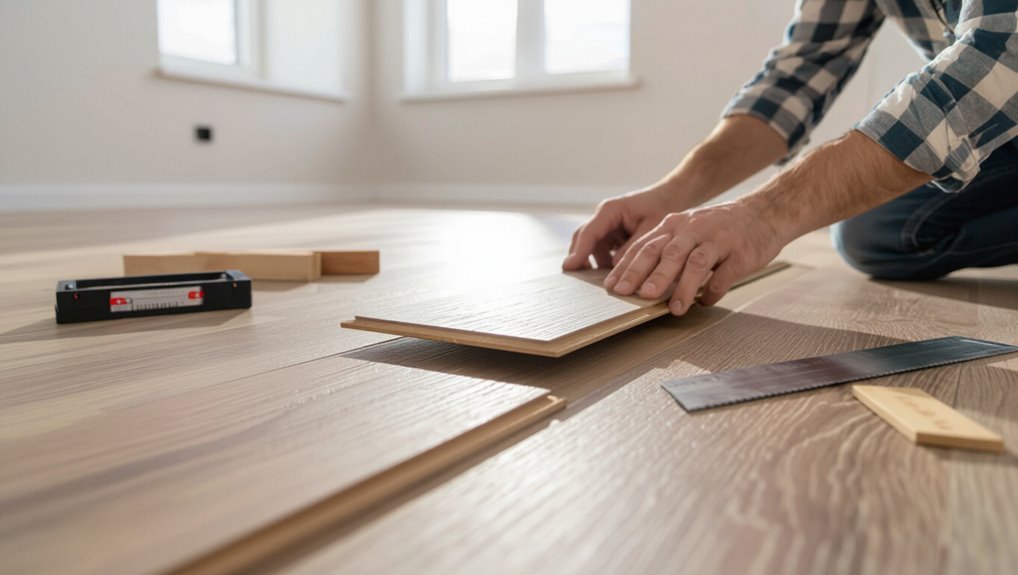
Now that your first row is set and straight, you’ll lock each new plank into the previous row by angling the tongue into the groove and snapping it down or forward until it clicks.
Stagger end joints, tap seams with a mallet and block, and measure and cut last planks so they leave the required expansion gap.
Use a saw appropriate for the material.
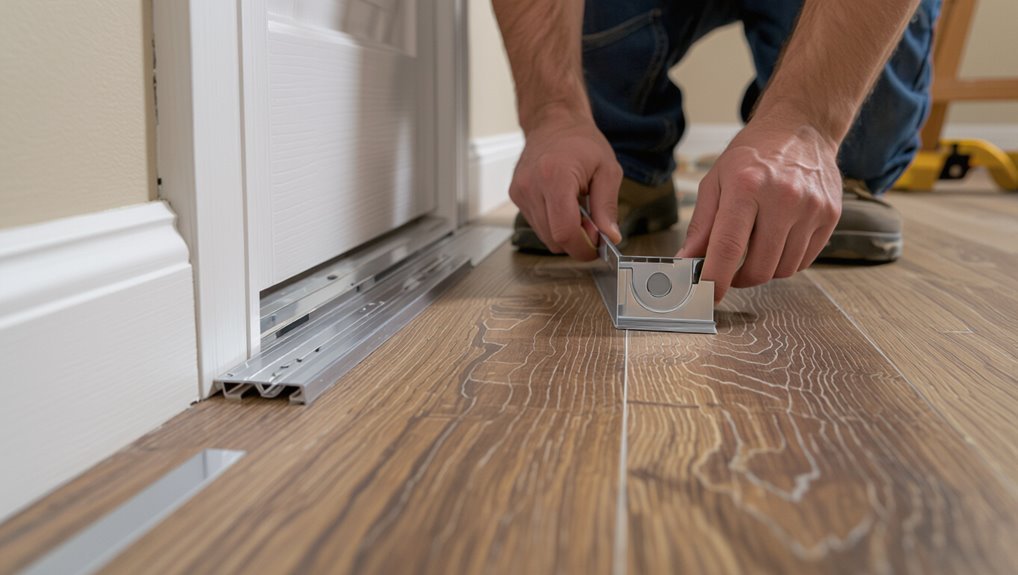
Step 6 Fitting around obstacles (doors, vents, pipes)
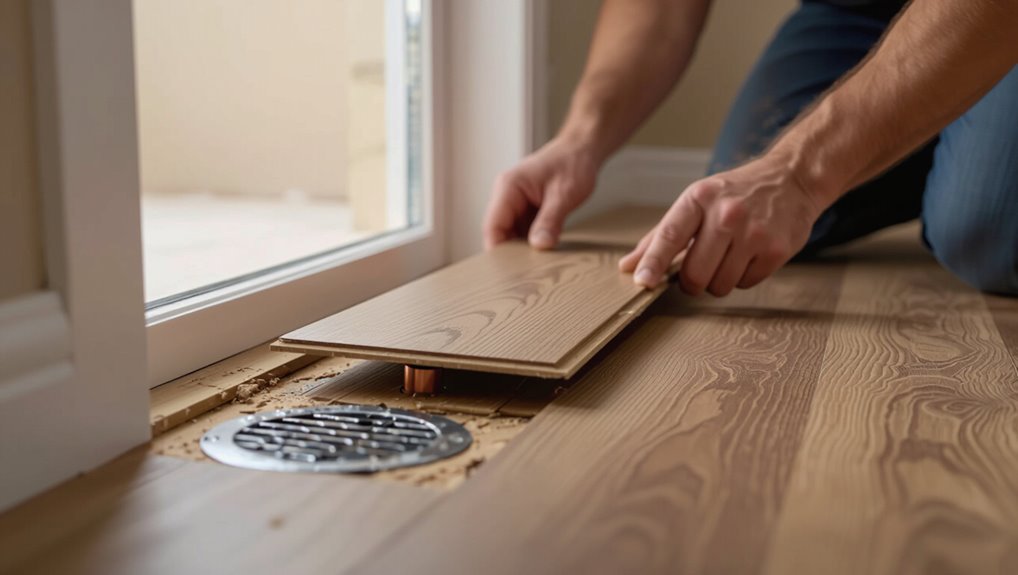
When you reach doors, vents, or pipes, plan each cut so the plank fits snugly while keeping the required expansion gap. Measure carefully, mark the panel, and cut with the right tool to maintain clean edges and proper alignment.
For vents, cut removable grilles or slide planks beneath them.
For pipes, drill or jigsaw precise holes, then trim a small relief notch to ease installation and preserve gaps.
Step 7 Installing last row and trimming
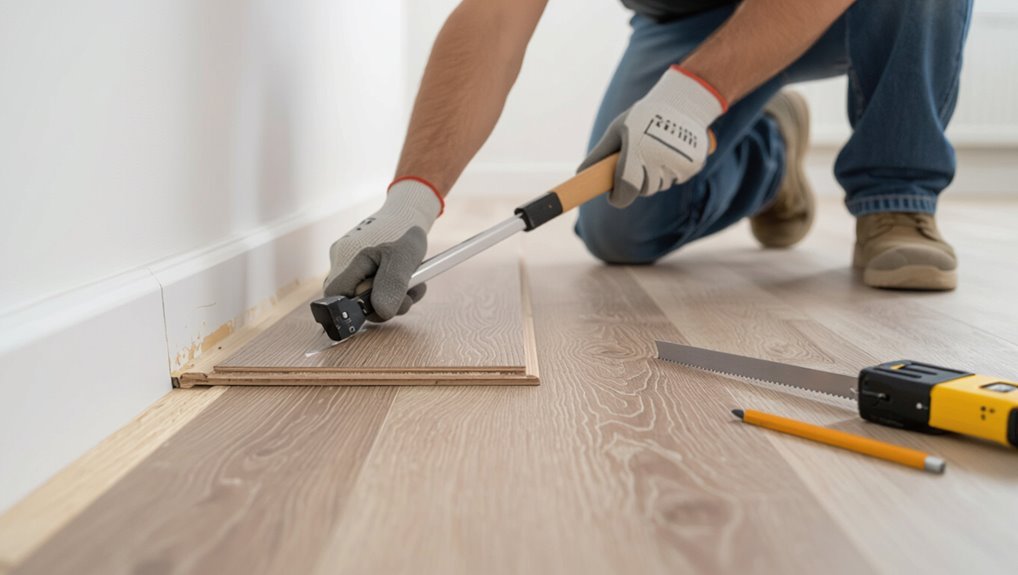
After fitting around doors, vents, and pipes, you’ll prepare the final row and trim to lock everything in place.
Measure the remaining gap, subtract the expansion allowance, and rip planks to width.
Lay them face down, angle-lock each into the previous row, and tap gently with a block.
Use a pull bar for tight joints and trim any uneven edges before cleanup.
Step 8 Installing transitions, baseboards, and finishing touches
Once you’ve locked the last row in place, finish the room by installing thresholds, baseboards, and final trim to seal gaps and hide edges.
Fit connector strips at doorways and height changes, nailing or screwing the metal track to the subfloor.
Nail baseboards to the wall, not the flooring, and caulk or trim as needed for a clean, flexible seal.
Common Problems During Installation and How to Fix Them
You’ll likely run into a few common issues—gaps or loose joints, lippage from uneven subfloors, swelling or cupping from moisture, and damage from cutting or locking mistakes—and you should know how to spot them quickly.
I’ll explain the typical causes for each and give straightforward fixes and prevention tips.
Follow these steps and you’ll correct problems without redoing large sections.
Gaps between planks and loose joints causes and fixes
If moisture levels, subfloor issues, or improper locking techniques aren’t addressed, you’ll start seeing gaps between planks and feel loose joints long before the installation should settle.
Check moisture, acclimate boards, guarantee a flat, clean subfloor, and use correct angle-and-click methods.
Replace damaged profiles, tighten floating sections by re-engaging seams, and add transitional trim where movement needs control to prevent recurrence.
Uneven floor or lippage detection and remedies
When planks don’t sit flush you’ll notice edges that stick up (lippage) or dips where seams meet. Those signs usually point to subfloor irregularities, inconsistent plank thickness, or installation errors.
Check with a straightedge and feeler gauge, replace warped or mismatched boards, plane high spots, fill low areas with leveling compound, and relock joints carefully.
Recheck alignment before finishing.
Swelling or cupping due to moisture prevention and corrective actions
Because wood and some laminate cores absorb moisture unevenly, swelling or cupping can appear quickly if you don’t control humidity and water exposure.
Prevent it by acclimating the flooring, sealing seams and subfloors where needed, and keeping the installation area dry.
If cupping occurs, remove moisture source, increase drying and ventilation, lower humidity, and lift affected planks to dry and re-install once flat.
Damage during cutting or locking repair and replacement tips
Though cutting and locking feel straightforward, mistakes can still nick edges, split tongues, or leave joints that won’t click, so be prepared to spot and fix damage quickly.
If a plank edge chips, trim cleanly and sand; for split tongues, cut out the plank and replace it; use adhesive sparingly for stubborn seams.
Keep spare boards and proper tools on hand.
Best Practices and Pro Tips for a Durable Installation
Stagger your planks and orient them to lead the eye along the longest room dimension for a stronger, more attractive floor.
Keep consistent expansion gaps and account for seasonal movement so boards can expand without buckling.
Clean the surface, protect it during move-in, and follow simple maintenance routines to keep the floor looking and performing its best.
Stagger patterns and plank orientation recommendations
When you lay click-and-lock planks, offset their end joints to create a stable, visually pleasing floor—aim for a minimum stagger of 6 to 8 inches between end joints on adjacent rows.
Run planks lengthwise along the longest wall or toward the main light source. Use varied plank lengths, avoid four-way seams, and plan a balanced layout so cuts at room ends stay consistent and subtle.
Managing expansion gaps and expected seasonal movement
Because click-and-lock floors float, you’ll need to leave an appropriate expansion gap around the room perimeter and at any fixed obstacles so the planks can move with seasonal humidity changes without buckling.
Use manufacturer-recommended gap width, install spacers during fitting, and cover gaps with trim or reducers.
Account for long runs and doorways; leave slightly larger gaps where sunlight or heat sources cause greater movement.
Cleaning, maintenance, and protecting new floor during move-in
Now that you’ve left the proper expansion gaps, keep the new floor protected and clean during move-in so those careful installation steps don’t get ruined.
- Lay rosin paper or moving blankets and tape seams without adhesive touching planks.
- Use felt pads on furniture legs before rolling in items.
- Vacuum daily; mop with manufacturer-approved cleaner.
- Avoid dragging heavy objects; use sliders or a dolly to distribute weight.
Cost, Time Estimates, and ROI
You’ll want a quick cost breakdown—materials, underlayment, and the basic tools can add up differently depending on quality.
Expect a few hours for a small room and a weekend for larger spaces, with faster times if you’ve got experience.
Also consider how the new floor could boost resale value and check manufacturer warranties before you buy.
Typical material and tool cost breakdown
When planning a click-and-lock flooring job, you’ll want a clear breakdown of material and tool costs so you can budget accurately and compare DIY vs. pro options; typical material costs range from economical vinyl planks at $1–$3 per sq. ft. to mid-range laminate or engineered wood at $2–$6, while tools and accessories (underlayment, connector strips, spacers, saw rental, adhesives) usually add $100–$300 for a small room and more for larger projects.
| Item | Typical Cost |
|---|---|
| Vinyl | $1–$3/ft² |
| Laminate/Engineered | $2–$6/ft² |
Time estimates by room size and skill level
Across most projects, install time varies by room size and your experience: a 100–200 sq. ft. bedroom takes a confident DIYer about 4–8 hours. A mid-sized living room (300–400 sq. ft.) usually runs 1–2 days, and larger open-plan areas can stretch over a weekend or more.
Pros work faster, often cutting those times by 30–50% thanks to better tools and technique. Expect prep, cuts, and adjustments to add time; complex layouts, trims, and acclimation needs extend schedules.
Partner help or rented specialty tools speeds progress and reduces fatigue.
Impact on home value and warranties to check
Although new click-and-lock flooring won’t always recoup every dollar you spend, it often boosts curb appeal and can increase resale value—especially if you pick a neutral, durable style that fits your market.
Check product and installation warranties, transferability, moisture and wear coverage, and manufacturer claim limits.
Keep receipts and photos to support future warranty or resale questions and maximize ROI.
Comparison: Click and Lock vs Glue-Down and Floating Alternatives
Now let’s compare click-and-lock to glue-down and floating systems so you can weigh performance, installation difficulty, and longevity.
You’ll see that click-and-lock is usually faster and DIY-friendly, glue-down offers superior stability in high-traffic or moisture-prone areas, and true floating installations can be simpler but may shift over time.
Use cases differ: pick click-and-lock for quick room updates, glue-down for commercial or wet spaces, and floating when you need an inexpensive, temporary solution.
Performance, installation difficulty, and longevity
When you’re choosing between click-and-lock, glue-down, or other floating floors, weigh how each performs, how hard it is to install, and how long it’ll last; you’ll pick based on traffic, DIY skill, and maintenance. Compare quickly:
| Aspect | Click-lock | Glue-down |
|---|---|---|
| Performance | Good | Excellent |
| Installation | Easier | Harder |
| Longevity | Moderate | Longer |
Best use cases for each system
Think about where the floor will live and how you’ll use it: click-and-lock panels suit bedrooms, living rooms, and low-traffic basements because they’re easy to install and can be swapped out, while glue-down systems work best in commercial spaces, kitchens, or high-traffic areas where you need maximum stability and longevity.
True floating alternatives (like loose-lay or perimeter-glued planks) fill the gap between the two, offering quicker installation than glue-down with better hold than simple floating installs.
You’ll choose click-and-lock for DIY, glue-down for permanence, and loose-lay when you want speed plus improved stability.
Tools and Materials Checklist (Printable)
Before you start, make a pre-install checklist so you’ve got the right tools, underlayment, and room measurements.
On install day, use a day-of-install checklist to confirm site prep, safety gear, and that your first row is square.
Print both lists and keep them handy to avoid delays.
Pre-install checklist
If you want the installation to go smoothly, gather all tools and materials listed below before you open the flooring boxes.
Check measurements, read the manufacturer’s instructions, and confirm acclimation time.
Verify subfloor is clean, dry, and level; stock extra planks for cuts and mistakes.
Prepare safety gear and spacers.
- Tape measure and chalk line
- Underlayment and vapor barrier
- Pull bar and tapping block
- Saw and utility knife
Day-of-install checklist
When you’re ready to roll up your sleeves, lay out every tool and material so you can work without interruption:
- Underlayment, planks, spacers, and connector strips.
- Tape measure, chalk line, tapping block, pull bar.
- Circular saw, jigsaw, utility knife, safety gear (gloves, goggles).
- Adhesive (if needed), cleaning supplies, trash bags, pencil.
This printable checklist keeps you organized and speeds installation.
Frequently Asked Questions
You’ve probably got questions like whether you can install click-and-lock over existing floors, how much expansion gap to leave, or if it’s suitable for bathrooms and basements.
You’ll also want to know how to repair a damaged plank and whether the floor will squeak over time.
Read on for clear, practical answers to each concern.
Can click and lock flooring be installed over existing flooring?
Wondering whether you can install click-and-lock flooring over what’s already down? Yes—you often can, provided the existing floor is flat, dry, and securely attached.
Remove loose or uneven sections, trim high spots, and clean thoroughly.
Avoid installing over carpet, cushioned vinyl, or surfaces with moisture issues.
Always check manufacturer guidelines and local building codes before proceeding.
How much expansion gap is required?
Most click-and-lock floors need a 1/4-inch to 1/2-inch expansion gap around walls and fixed objects to allow for seasonal movement; check your product’s instructions because some laminate or engineered planks call for up to 3/4 inch in long runs or wide rooms.
Use spacers during installation, maintain consistent gaps at thresholds and pipes, and cover gaps with baseboards or trim that don’t pin the floor.
Can you install click and lock flooring in bathrooms or basements?
Those expansion gaps matter more in moisture-prone areas like bathrooms and basements because water and humidity can make click-and-lock floors swell or warp.
You can install them if you choose water-resistant or waterproof options (vinyl, SPC, or sealed laminate), use proper underlayment, maintain drainage and ventilation, and seal connections.
Avoid direct water exposure and follow manufacturer moisture limits for subfloors.
How do you repair a damaged plank in a click-lock floor?
If a plank gets damaged, you can usually replace just that piece without ripping up the whole floor—provided you follow the right steps and use the correct tools.
Lift adjacent planks carefully, remove the damaged one, and prepare the replacement by trimming the tongue or angle as needed.
Fit and lock it in place, tap gently with a mallet and block, then inspect seams and clean debris.
Will click and lock flooring squeak over time?
Wondering whether click-and-lock flooring will start to squeak over time? It can, but proper installation, stable subfloor, and correct acclimation greatly reduce risk.
Squeaks usually come from movement, debris in joints, or loose connectors. If you hear noise later, locate the source, tighten or reassemble affected planks, add underlayment or adhesive where recommended, and make certain humidity stays within range.