
How to Install a Floor Drain: Everything You Need to Know
You can install a floor drain yourself if you’re comfortable with plumbing, concrete cutting, and local codes, but hire a pro for complex rerouting or sewer tie‑ins. Pick the right type and size, plan slope and trap placement, gather tools and materials, cut and excavate the slab, set the drain body, connect the trap and outlet, pressure‑test for leaks, then seal and finish. Follow code details and troubleshooting tips below to handle common problems and maintenance.
How to Install a Floor Drain Quick Answer and When to DIY
Yes—you can install a floor drain yourself if you’re comfortable cutting concrete, tying into existing plumbing, and following local codes.
Hire a professional when the job involves complex drainage connections, slope issues, or permits you don’t want to risk.
We’ll cover clear signs you should DIY and red flags that mean call a pro.
Direct answer can you install a floor drain yourself?
Wondering whether you can install a floor drain yourself? Yes — if you’re comfortable with basic plumbing, cutting concrete, and following code, you can learn how to install a floor drain with careful planning, proper tools, and patience.
Start small, follow manufacturer instructions, slope the drain correctly, and test for leaks.
Stop and consult a pro if complications or permit issues arise.
When to hire a professional vs DIY
If you’ve got solid plumbing skills, the right tools, and time to follow local codes, you can tackle a straightforward floor-drain install yourself; hire a pro when the job involves complex rerouting, structural concrete cutting, sewer-line connections, or permit requirements you’re not comfortable handling.
- DIY: simple retrofit, accessible drain, basic tools.
- Pro: sewer tie-ins, deep lines.
- DIY: clear instructions, permits allowed.
- Pro: structural or code risks.
Basic Understanding What a Floor Drain Is and Why It Matters
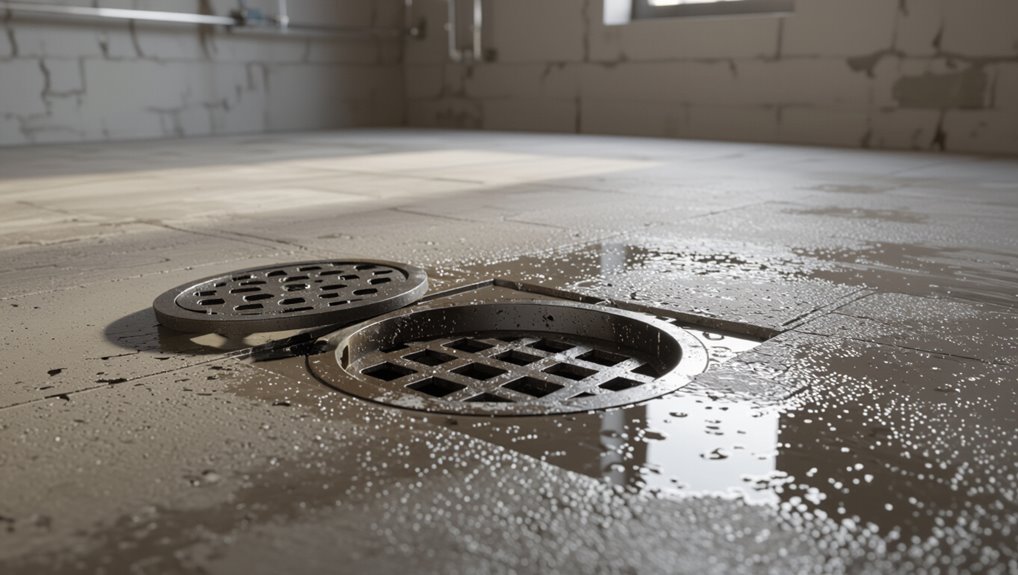
A floor drain is the low-point plumbing fixture that collects and routes water away, and you’ll most often see pop-up, grate, or trench styles in basements, laundry rooms, showers, and garages.
You’ll want to know the basic parts—a grate or cover, trap, and outlet—and how they work together to keep water moving and block sewer gases.
Understanding those types, locations, and drainage principles helps you pick the right drain and avoid backups or odors.
Definition and common types of floor drains
Floor drains let water escape from floors into your home’s plumbing, protecting spaces like basements, garages, and laundry rooms from standing water and damage.
You’ll choose types based on flow, odor control, and installation.
- P-trap drains — common, prevent sewer gas.
- Channel drains — linear, handle more surface runoff.
- Floor sink drains — for commercial setups.
- Trench drains — heavy-duty, large capacity.
Typical locations and use cases (basement, laundry, shower, garage)
When water spills, overflows, or condenses, you’ll want a nearby drain to carry it away so puddles don’t damage floors or invite mold.
You’ll typically install floor drains in basements to prevent seepage, in laundry rooms for washer leaks, in showers for curb-less designs, and in garages to handle vehicle runoff or wash water.
Choose location by likely water sources.
How a floor drain works components and drainage principles
Think of a floor drain as a simple plumbing appliance that keeps standing water from pooling and causing damage.
You’ll see four main parts: grate, clamping flange, trap, and outlet pipe. Water flows through the grate, fills the trap to block sewer gas, then drains into the outlet.
Proper slope, trap depth, and venting guarantee reliable flow and prevent backups.
Tools, Materials, and Permits You’ll Need
Before you start, make a checklist of the tools (wrenches, saw, level, plumber’s snake) and the materials and parts you’ll need—drain body, trap, piping, fittings, flange, and grate.
Check local plumbing codes and permit requirements and confirm the required slope for proper drainage.
Wear proper safety gear and prep the site to keep the work area clear and protected.
Required tools
Tools and materials set the stage for a smooth floor drain installation, so gather them before you cut into the floor.
You’ll need reliable tools for measuring, cutting, and sealing; quality prevents rework.
Typical required tools include:
- Tape measure, level, and marker
- Rotary saw or hole saw and jigsaw
- Pipe cutter and deburring tool
- Caulking gun and adjustable wrench
Materials and parts (drain body, trap, piping, fittings, flange, grate)
A proper floor drain installation depends on selecting the right materials and parts: the drain body, trap, piping, fittings, flange, and grate, each matched to your floor type and plumbing system.
You’ll choose durable materials (PVC, ABS, cast iron), the correct trap depth, and a grate style that fits traffic and cleaning needs.
- Drain body selection
- Trap type
- Piping & fittings
- Flange & grate
Plumbing codes, permits, and slope requirements
When you plan a floor drain install, check local plumbing codes and permit requirements so your work passes inspection and prevents costly rework.
You’ll verify trap seal depth, venting, approved materials, and required permits. Follow minimum slope rules to guarantee drainage.
- Confirm local permit process.
- Verify trap and vent specs.
- Use approved materials.
- Maintain required slope.
Safety equipment and site preparation
Before you cut into the floor, gather the safety gear, site-prep materials, and permits you’ll need so the job goes smoothly and meets code.
Wear goggles, gloves, ear protection, and a dust mask. Have shoring, drop cloths, a shop vacuum, and a first-aid kit.
Confirm permits, utility locates, and ventilation. Keep a fire extinguisher and phone nearby for emergencies.
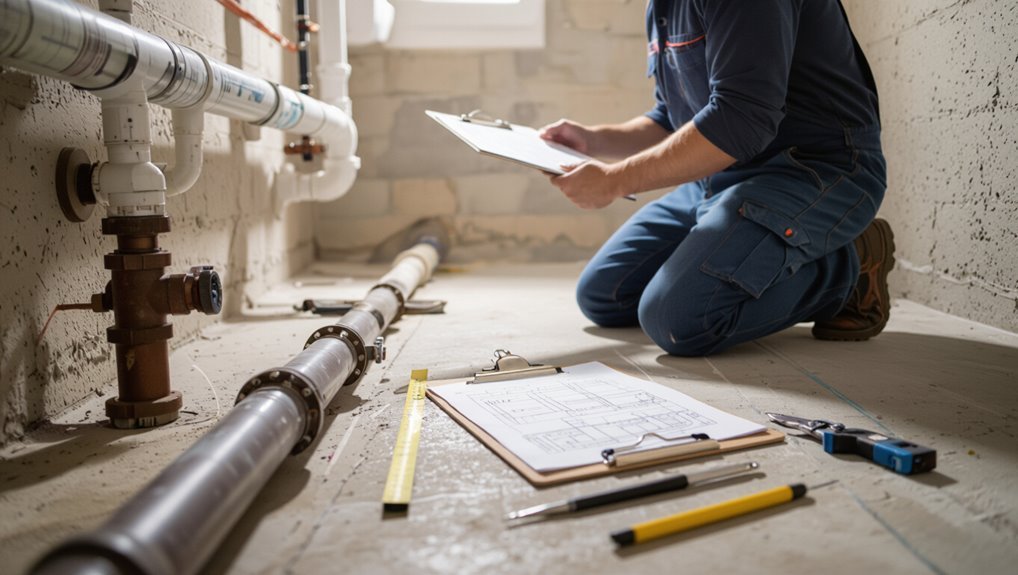
Pre-Installation Planning and Site Assessment
Before you cut into the floor, check existing plumbing and locate the main drain line so your new drain ties in correctly.
Measure and map the slope to identify the true low point, then pick a drain type and size that matches flow and floor construction.
Note common obstacles—concrete thickness, floor finish, and underfloor systems—so you can plan for coring, recesses, or rerouting.
Assessing existing plumbing and locating the main drain line
Because a reliable connection to the home’s existing plumbing is essential, you’ll first want to map out the current system and pinpoint the main drain line before cutting into the slab.
Inspect visible pipes, access the basement or crawlspace, and trace flows to stack or sewer.
Use a probe, plumber’s snake, or camera inspection, and verify connection points and vent locations to avoid surprises.
Measuring and mapping the slope and lowest point
When you’re ready to place the drain, measure the floor slope and identify the true lowest point so water will flow reliably toward the new fixture; use a long straightedge and level or a laser level along several lines across the floor, mark elevation changes, and record the steepest gradient and any high spots that will need grinding or bedding.
Then sketch a plan showing flow lines, low point coordinates, and slope percentages.
Choosing the right drain type and size for the application
Choose a drain type and size that matches the room’s use, expected flow rate, and flooring construction so the fixture handles peak discharge without backing up or damaging finishes. You’ll pick commercial vs. residential, grating style, and flow capacity. Match pipe size to calculated GPM and local code; oversized drains can waste space, undersized ones flood.
| Type | Emotion | Benefit |
|---|---|---|
| Trench | relief | fast removal |
| Floor | confidence | discreet finish |
| Spot | calm | targeted control |
Common obstacles: concrete, floor finish, and underfloor systems
Although the drain location might seem straightforward, concrete thickness, finished flooring, and hidden underfloor systems often complicate installation and demand careful planning.
You’ll check slab depth, reinforcement, and saw-cut access; confirm tile, vinyl, or epoxy clearances; and locate plumbing, electrical, or radiant-heating lines.
Plan core-drill size, adjust finished-floor height, and coordinate with trades to avoid costly rework and safety hazards.
Step-by-Step Installation Guide
Now you’ll work through the install in clear steps: mark the drain location and cut the floor (different approach for concrete vs. wood), then excavate and prep the subfloor or slab.
Next tie into or install the drain piping (PVC, ABS, or cast iron), set the drain body with the proper slope to the outlet, and add the trap and any required backwater valve or trap primer.
Follow each step in order and check fittings and slopes as you go.
Step 1 Marking location and cutting the floor (concrete vs wood)
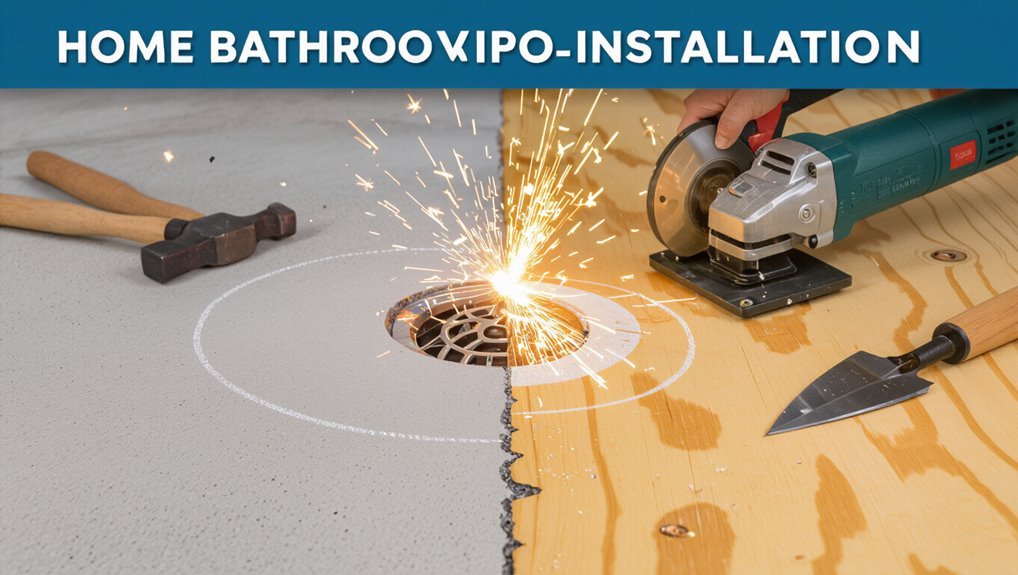
Step 1 is to precisely mark where the drain will sit and cut the floor to match—get this right and the rest of the job goes smoothly.
Measure from walls and fixtures, transfer centerlines, and trace the drain pattern.
For concrete, use a hammer drill and diamond blade or chisel; for wood, score then cut with a jigsaw or circular saw.
Clean edges and check alignment.
Step 2 Excavate and prepare the subfloor or slab
With the opening cut and edges cleaned, you’ll excavate down to the proper depth and prepare the subfloor or slab to accept the drain body and surrounding bedding.
Remove loose debris, compact soil or subbase, and guarantee a flat, level recess.
Add a gravel or sand bedding layer, tamp it firm, and verify depth and slope so the drain will sit squarely and securely.
Step 3 Install or tie into drain piping (PVC/ABS/cast iron)
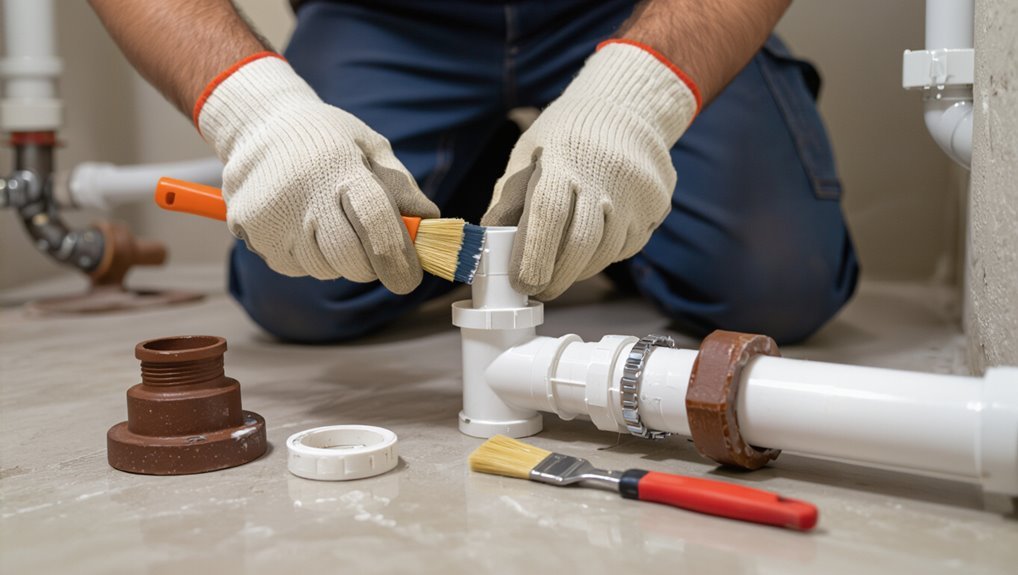
Begin by confirming the pipe material and layout you’ll tie into—PVC, ABS, and cast iron each need different fittings, adhesives, and cutting techniques.
Measure and mark connections, cut pipe squarely, deburr edges, and dry-fit components.
Use the correct primer, solvent cement, or mechanical couplings for cast iron.
Secure joints, slope runs toward the outlet, and pressure-test the system before backfilling or sealing.
Step 4 Set the drain body and ensure proper slope to outlet
Now that your drain piping is fitted and tested, set the drain body so it sits squarely over the outlet and lines up with the finished floor.
Adjust height so the grate will be flush or slightly recessed. Use shims or mortar to secure it.
Verify the channel slopes 1/8″ to 1/4″ per foot toward the outlet.
Re-check alignment before final bedding.
Step 5 Install trap, backwater valve, or trap primer if required
Install the trap, backwater valve, or trap primer as required so each device functions reliably with your drain assembly.
Fit the trap to maintain the correct water seal depth, tighten connections with proper gaskets, and slope trap piping to the outlet.
If local code or risk of sewer backup demands it, install a backwater valve.
Add a trap primer where standing water may evaporate.
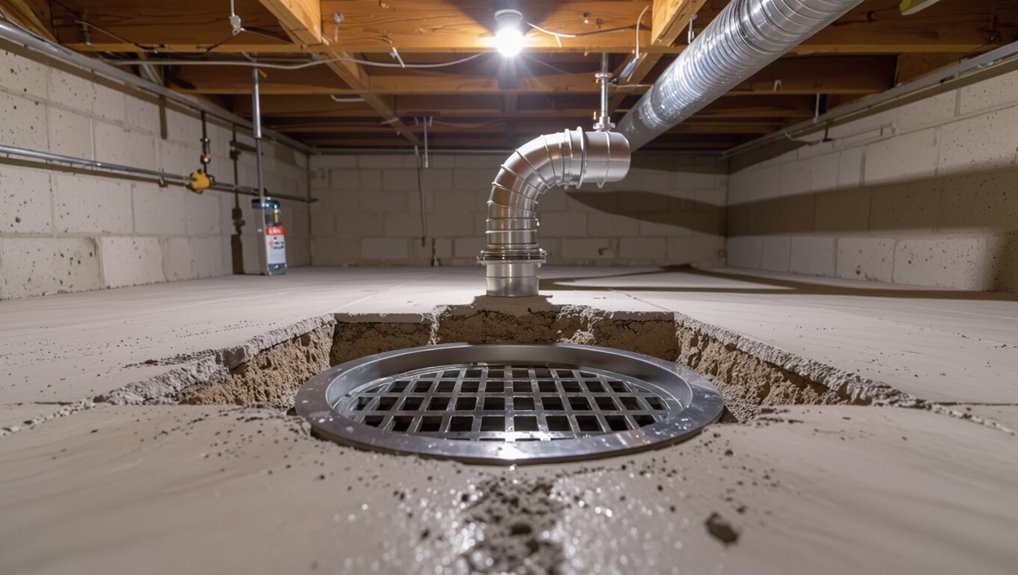
Step 6 Secure flange, pour or repair concrete, and finish floor surface
Once the trap and connections are set, secure the drain flange to the slab, patch or pour concrete around it, and finish the floor so the grate sits flush and watertight with the surface.
Anchor flange with stainless screws or epoxy, slope surrounding concrete toward the drain, smooth and cure the patch, and match final surface (tile, epoxy, or concrete) so changes are even and sealed.
Step 7 Install grate, test for leaks and proper drainage
Set the grate in place, secure it per the manufacturer’s instructions, and run a quick test to confirm there’s no leakage and that water flows freely to the trap.
- Pour water slowly to check flow.
- Inspect around the flange for seepage.
- Adjust grate alignment if pooling occurs.
- Clear debris from strainer and retest until drainage is smooth and leak-free.
Step 8 Final inspection and compliance checklist
Before you finish, do a thorough final inspection and walk through a compliance checklist to confirm the drain meets code and functions correctly.
Check slope, seal integrity, trap depth, venting, and grate securement.
Verify materials match plans and local codes, confirm leak-free operation during a full-water test, and document measurements.
Correct any issues, obtain necessary approvals, and retain inspection records for future reference.
Variations and Special Scenarios
If you’re working with an existing finished floor, you’ll need different cutting, flange, and waterproofing techniques than in new construction.
Consider the differences between slab-on-grade and raised floors, how to size and tie multiple drains into a main line, and whether basement waterproofing or a sump must be integrated.
Each scenario affects pipe routing, slope, and code requirements, so plan the layout before you start.
Installing a drain in an existing finished floor (retrofit)
Tackling a retrofit floor drain means you’ll be working around finished surfaces, so plan carefully to minimize cutting and patchwork.
Follow these steps:
- Locate joists, utilities, and the nearest waste line before cutting.
- Remove tiles neatly; keep pieces for patching or match replacements.
- Use a low-profile trap adapter and flexible couplings to limit excavation.
- Test slope and watertight seals before restoring finishes.
Floor drain in a slab-on-grade vs raised floor systems
Two common scenarios—slab-on-grade and raised-floor systems—require different approaches because you’ll be dealing with concrete mass versus accessible subfloor voids.
In slab-on-grade, core-drill, install a sealed clamping ring, and tie into drain beneath slab with proper slope and waterproofing.
In raised floors, cut framing, fit a recessed floor box, run pipe through joists, and support piping to prevent sag.
Connecting multiple drains and sizing the main line
Because multiple floor drains often tie into a single main line, you’ll plan the layout to balance flow, venting, and cleanout access while meeting code-required capacity; that means calculating combined fixture units, keeping branch runs short with proper slope, and locating accessible cleanouts where branches join the main so you can clear clogs without tearing up the floor.
| Branch length | Recommend slope |
|---|---|
| Short (<10') | 1/8″–1/4″ per ft |
| Long (≥10′) | 1/4″ per ft |
Basement waterproofing considerations and sump integration
When you’re installing a floor drain in a basement, plan waterproofing and sump integration together so water has a reliable path out without undermining the slab or membrane; this means locating the drain and sump pump discharge to avoid interrupting drain tiles or waterproof membranes.
Tie interior drains into the sump system only when local code allows, and provide backflow prevention and accessible cleanouts to keep groundwater and sewage separate.
Make sure membranes stay continuous, slope to the sump, protect pump power and test float switches, and use sealed penetrations.
Common Problems, Causes, and How to Fix Them
Watch for slow drainage, leaking joints or under-slab seepage, foul odors from dry traps, and recurring clogs—each has a specific set of causes and fixes.
You’ll diagnose slope issues by checking flow and tilt the drain or re-pitch the substrate to correct it. Inspect joints and access points for leaks and repair or replace seals or sleeves. Restore trap water or add a primer or vent to stop odors.
For clogs, start with cleaning and mechanical snaking, and schedule regular maintenance to prevent buildup.
Poor slope and slow drainage diagnosis and corrective actions
If your floor drain is draining slowly or standing water pools nearby, poor slope is often the culprit. You’ll need to diagnose where the pitch fails and how severe the blockage or sagging is before you fix it.
Check slope with a level and water test, clear partial blockages, and remove/replace sagging sections of pipe or bedding.
Regrade to 1/8–1/4 inch per foot.
Leaks at joints or under slab detection and repair options
Because leaks at floor-drain joints or beneath the slab often start small, you mightn’t notice them until you see staining, mold, or a sagging floor.
You’ll need to pinpoint the leak source quickly to limit damage. Check joints, clean and dry the area, use dye or pressure tests, and inspect accessible piping.
Repair options include resealing joints, replacing gaskets, or cutting into slab for pipe replacement by a pro.
Odors from dry traps causes and solutions (trap primers, vents)
While you’re checking joints and pipes for leaks, don’t overlook odors that come from a dry trap — they can be just as damaging to comfort and indoor air quality.
- Dry traps lose seal; add water regularly.
- Install a trap primer to auto-refill.
- Add venting to balance pressure and prevent siphon.
- Inspect for evaporative loss or leaks and repair promptly to stop sewer gas intrusion.
Clogging and maintenance issues prevention and remediation
When your floor drain starts to slow or back up, quick action prevents small clogs from becoming plumbing emergencies.
Check strainers, remove hair and debris, and flush with hot water. Use a plunger or plumber’s snake for deeper blockages. Avoid chemical drain cleaners; they can damage pipes.
Schedule regular inspections, clear nearby floor drains, and install a removable grate for easier maintenance.
Best Practices, Tips, and Maintenance Schedule
Follow manufacturer specs and local code during installation so your drain lasts and passes inspection.
Set a simple seasonal and routine maintenance checklist—clear strainers, test trap seals, and flush lines—to prevent clogs and odors.
Use corrosion-resistant parts and heavy-duty strainers or coatings to improve durability and reduce future repairs.
Installation best practices to ensure longevity and code compliance
Because proper installation prevents most future problems, you should focus on correct materials, slope, sealing, and access from the start to verify longevity and code compliance.
- Use code-approved drain bodies and traps.
- Maintain required slope (typically 1/8″–1/4″ per foot).
- Confirm watertight connections and proper membrane detailing.
- Provide accessible cleanouts and documented as-installed plans for inspections.
Seasonal and routine maintenance checklist
Although drains are out of sight, you should inspect and service them on a regular schedule to prevent clogs, odors, and water damage.
Follow this checklist each season and after heavy use:
- Clear grates, remove debris.
- Flush with hot water and mild detergent.
- Check trap seal and refill if dry.
- Run water and inspect for slow drainage or leaks; address promptly.
Materials and techniques to improve durability (corrosion-resistant parts, strainers)
Durability starts with the right materials: choose corrosion-resistant metals (304 or 316 stainless steel, brass, or plastic composites) for grates, strainers, and fittings to resist rust and chemical attack, and pick EPDM or silicone seals that hold up to temperature swings and cleaners.
Install removable strainers for easy cleaning, use marine-grade fasteners, apply compatible sealants, and torque fittings to spec to prevent leaks and galling.
Cost Estimate and Timeframe
You’ll want a clear cost comparison: a DIY install typically costs mostly for the drain, piping, and tools, while hiring a pro adds labor and permits.
For time, new-build installs can often be finished in a few hours to a day, whereas retrofits may take a day or more depending on cutting concrete and rerouting pipes.
I’ll outline typical price ranges and realistic timeframes so you can pick the right approach.
Typical DIY cost breakdown vs professional installation
On average, installing a basic floor drain yourself will cost between $50 and $250 in parts and supplies, while hiring a pro typically runs $300 to $1,200 or more depending on complexity. You’ll save labor costs DIY but risk mistakes; pros charge for expertise and permits. Compare quotes, factor materials, and decide based on skill and warranty.
| Option | Typical Cost | Notes |
|---|---|---|
| DIY | $50–$250 | Parts only |
| Pro | $300–$1,200+ | Includes labor |
| Hybrid | $100–$600 | Shared tasks |
Estimated time per installation type (new build vs retrofit)
A simple floor drain install in a new build usually takes a pro 2–4 hours from rough-in to final tie-in, since you’re working with open access and coordinated plumbing runs;
retrofits take longer—expect 4–8 hours for straightforward conversions and a full day or more if you need to cut concrete, relocate lines, or repair existing finishes.
Plan for inspections, curing, and cleanup when scheduling.
Tools and Products Comparison
Now you’ll compare common drain types and materials—PVC, cast iron, and stainless—to match durability, cost, and installation needs.
You’ll also get straightforward recommendations for reliable parts and the tools you’ll actually use on the job.
This will help you pick the best combination of materials and brands for your project.
Comparison of popular drain types and materials (PVC vs cast iron vs stainless)
Choosing the right drain material affects durability, cost, noise, and installation, so you’ll want to weigh PVC, cast iron, and stainless steel carefully. PVC is light, cheap, and easy to cut; cast iron is quiet and durable but heavy; stainless resists corrosion and looks good.
| Material | Pros | Cons |
|---|---|---|
| PVC | Affordable, light | Less durable |
| Cast iron | Quiet, long-lasting | Heavy, costly |
| Stainless | Corrosion-resistant | Expensive |
Recommended products and brands for parts and tools
Because the right tools and parts make installation faster and more reliable, you’ll want to pick brands known for quality and support.
Choose durable drains, reliable adhesives, and comfortable tools.
Recommendations:
- Oatey floor drains (PVC/cast iron)
- Sioux Chief fittings and adapters
- RectorSeal or Loctite sealants
- Milwaukee or DeWalt drills and hole saws for clean, efficient work
Mistakes to Avoid
Don’t skip the basics—common mistakes like improper slope, loose seals, or wrong fittings will cause leaks and backups.
After installation, you’ll want to test the drain with water and inspect joints, traps, and the surrounding floor for seepage or movement.
I’ll walk you through simple testing and inspection steps so you can catch problems before they become costly repairs.
Top installation mistakes homeowners make
When installing a floor drain, many homeowners skip vital steps or cut corners that create leaks, clogs, or costly repairs down the line; you’ll avoid trouble by knowing the common errors—incorrect slope, poor sealing, wrong trap choice, and improper connection to the drain line.
- Skipping proper slope, causing pooling.
- Using wrong sealant or gasket.
- Choosing incorrect trap depth/type.
- Forcing misaligned connections without adapters.
How to verify your work to avoid future failures (testing and inspection steps)
1 simple set of checks can catch most installation problems before they cause damage: run water through the drain, inspect all seals and joints, and test the trap and venting for proper flow and odor control.
After flushing several gallons, watch for leaks, slow drainage, gurgling or odors. Tighten fittings, reseal gaps, and re-test until flow is steady and no water remains in surrounding areas.
Frequently Asked Questions (FAQ)
You’ll find several common questions homeowners ask about floor drains, like whether they need traps or venting and if you can tie them into a laundry or sink line.
You’ll also want to know how deep the trap should sit below the slab, what to do if a drain smells, and how often to clean and inspect it.
I’ll answer each of these so you can pick the right installation and maintenance steps.
Do floor drains need traps or venting?
Wondering whether a floor drain needs a trap or vent? Yes—most codes require a trap to block sewer gas and a vent to prevent siphoning and guarantee proper flow.
You’ll install a P-trap sized per local code and connect to a vented system or use an approved air admittance valve where allowed.
Always check local plumbing codes before finalizing connections.
Can I tie a floor drain into a laundry or sink drain?
Since floor drains need proper traps and venting, you’ll also want to contemplate how they connect to other fixtures.
You can tie a floor drain into a laundry or sink drain only if local code allows, fittings maintain trap integrity, and flows won’t cause siphoning or backups.
Use appropriate wyes, maintain slope, and avoid shared sanitary tees; consult code or a plumber before tying in.
How deep should a floor drain trap be below the slab?
How deep should the trap for a floor drain sit below the slab? Typically the trap weir should be 4–6 inches below slab top to maintain proper trap seal and slope.
Local codes vary, so confirm minimum depths and required trap seal (usually 2 inches).
Verify you can access the cleanout and maintain 1/4 inch per foot slope to the building drain.
What to do if a floor drain smells even after use?
If your floor drain still smells after running water, don’t assume the trap is the only culprit — odors can come from dry traps, biofilm buildup, or a partial sewer gas leak.
Check and refill the trap, clean the drain cover and interior with a brush and enzyme cleaner, flush with hot water, inspect nearby vents and seals, and call a plumber if odor persists or you suspect a leak.
How often should floor drains be cleaned and inspected?
Want to keep your drains working and odor-free? You should clean visible debris and flush drains weekly in high-use areas (laundry, showers) and monthly elsewhere.
Inspect traps, grates, and seals every three months, and test water flow after heavy use or storms.
Schedule a professional inspection and deep clean yearly, or sooner if you notice slow drainage, odors, or backups.