
How to Replace Vinyl Flooring in Any Room (Full Walkthrough)
You can replace vinyl flooring yourself by removing the old layer, prepping the subfloor, and installing new sheet or plank vinyl with basic tools and careful moisture control. Start by clearing the room, pulling baseboards, and cutting old vinyl into sections for easy removal. Repair or level the subfloor, test for moisture, and acclimate new flooring. Choose click-lock or glue-down installation, follow adhesive and seam techniques, and finish with trim and thresholds—keep going to get full step-by-step guidance.
How to Replace Vinyl Flooring in Any Room Quick Answer and Overview
You can replace vinyl flooring yourself in most rooms by removing the old layer, prepping the subfloor, and installing new planks or sheets.
This guide is for DIYers and homeowners with basic tools who want a durable, attractive floor—expect professional-looking results if you follow the steps.
Typical projects take a day or two, cost from inexpensive to moderate depending on materials, and range from easy to moderately challenging.
One-sentence quick answer
Start by removing the old vinyl, prep the subfloor, and lay your new vinyl following the manufacturer’s instructions for adhesives and seams so the job’s clean, level, and durable.
You’ll measure, cut, and fit pieces, address changes, and allow adhesives or welds to cure.
With proper tools and attention to moisture, you’ll confidently learn how to replace vinyl flooring yourself, efficiently and safely.
Who this guide is for and expected results
If you’re handy with basic tools and willing to spend a weekend on prep and installation, this guide is for homeowners, renters with landlord approval, and DIYers who want a durable, attractive floor without hiring a pro.
You’ll get step-by-step instructions, surface prep tips, cutting and fitting techniques, adhesive and seaming guidance, and finishing steps so your new vinyl looks professional and lasts.
Time, cost, and difficulty at a glance
Expect to spend a weekend for a typical room (8×10 to 12×14 ft): plan on 1–2 days for removal and prep and another day for installing and trimming. You’ll pay $150–$900 for materials and $0–$1,500 for labor depending on quality and scope. Skill level: moderate; you’ll need basic tools and patience.
| Time | Cost |
|---|---|
| Weekend | $150–$2,400 |
| Difficulty | Moderate |
Understanding Vinyl Flooring Basics
You’ll first want to know the common vinyl types—sheet, plank, tile, and luxury vinyl—because each installs and wears differently.
Check what’s under the vinyl (plywood, concrete, or existing vinyl) since subfloor material and condition affect prep and whether you can lay new flooring over it.
If damage is localized and the substrate is sound, you can often repair; widespread wear, moisture, or subfloor problems mean a full replacement.
Types of vinyl flooring (sheet, plank, tile, luxury vinyl)
Vinyl comes in several distinct formats—sheet, plank, tile, and luxury vinyl—each suited to different rooms, budgets, and installation skills.
You’ll pick based on durability, water resistance, appearance, and how easy it’s to install or replace.
- Sheet: seamless, great for wet areas.
- Plank: realistic wood look.
- Tile: modular, grout-like appearance.
- Luxury vinyl: thicker, premium finishes.
Common subfloor types and implications for replacement
Subfloor type matters because it dictates how you’ll prepare the surface, what tools and materials you’ll need, and whether repairs or leveling are required before installing new vinyl.
Know common types and implications:
- Plywood — sturdy, may need patching or sanding.
- OSB — less moisture tolerant; seal edges.
- Concrete — check for moisture; use underlayment.
- Existing vinyl or tile — remove or level for adhesion.
When to repair versus fully replace vinyl
When should you repair rather than replace vinyl flooring?
You’ll repair when damage is limited: small tears, localized gouges, or loose seams. Patch kits, seam sealer, or adhesive fixes save time and money.
Fully replace when wear is widespread, backing is delaminated, odors persist, subfloor is compromised, or styles and thresholds demand a new installation for proper fit and longevity.
Tools, Materials, and Preparation
Before you start removing old flooring, gather the essential and optional tools that speed the job and improve the finish, plus a checklist of materials like adhesives, underlayment, and trim.
Wear proper safety gear, set up ventilation and dust control, and prep the site for work.
Finally, measure the room carefully and calculate how much flooring and supplies you’ll need to avoid shortages or excess.
Essential tools and optional tools for speed/finish
Because getting the right gear makes the job smoother, start by gathering a compact set of essential tools you’ll use on every vinyl install: a utility knife with fresh blades, a straightedge, measuring tape, chalk line, floor roller (or hand roller), pry bar, and a stiff broom or vacuum for prep.
- Heat gun for tight seams
- Flooring nailer for trims
- Knee pads for comfort
- Oscillating tool for cuts
Materials and supplies checklist (adhesives, underlayment, trim)
You’ve gathered the tools; now pick the right materials to match your vinyl type and subfloor.
Choose adhesive rated for vinyl (pressure-sensitive or wet-set), appropriate underlayment (foam, cork, or cement board), joining trim, and moisture barrier.
Measure accurately and buy 10% extra for cuts and waste. Verify compatibility with your vinyl manufacturer’s recommendations.
- Adhesive type
- Underlayment choice
- Trim and joins
- Moisture barrier
Safety gear and site prep (ventilation, dust control)
While you work, wear proper PPE and set up the room for good ventilation and dust control to keep air and surfaces safe.
Seal vents, open windows, and run fans to direct dust outside. Use a HEPA vacuum and disposable drop cloths. Remove furniture and cover vents.
- Respirator and eye protection
- HEPA vacuum and dust pan
- Plastic sheeting and tape
- Floor drop cloths
Measuring your room and calculating materials
Start by measuring the room accurately so you can buy the right amount of vinyl and avoid costly returns or shortages. Measure length and width, note alcoves, and add 10% waste for patterns. Calculate underlayment and trim lengths. Record dimensions and quantities in a simple table for ordering.
| Item | Quantity |
|---|---|
| Vinyl area | |
| Underlayment | |
| Trim | |
| Waste allowance |
Step-by-Step: Remove Old Vinyl Flooring
Start by clearing the room and removing baseboards and trim so you can work around the edges.
Then score and cut sheet vinyl or lift planks and tiles, pulling them up in manageable sections.
Finish by removing adhesive residue, tackling stubborn glue, and inspecting and repairing the subfloor for leveling or patching.
Step 1 Clear the room and remove trim/molding
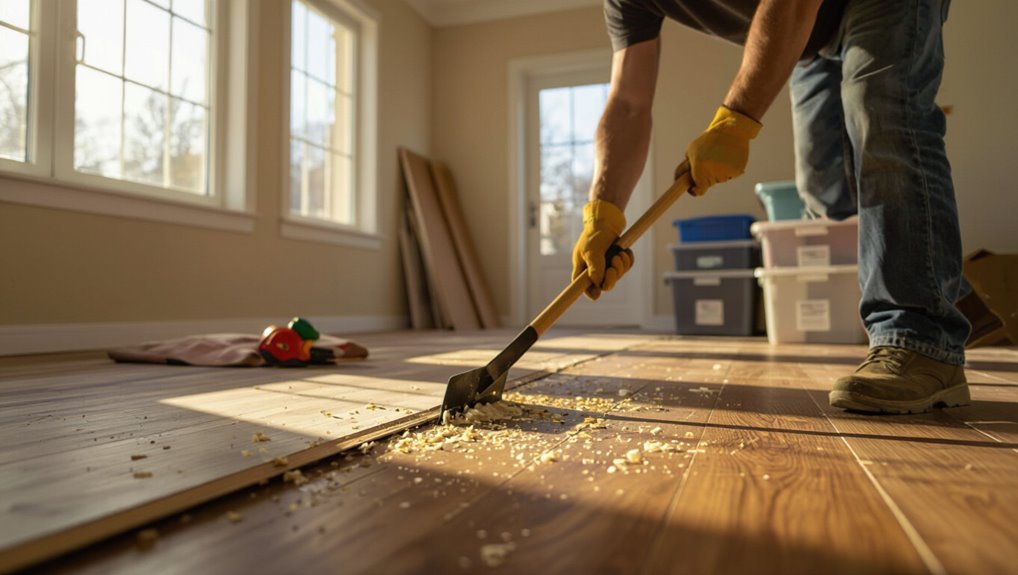
1. Clear furniture, rugs, and decor so you have full access to the floor. Open windows for ventilation and wear gloves and knee pads.
Use a pry bar and utility knife to gently remove baseboards and shoe molding—work slowly to avoid damaging walls. Label trim pieces and set nails aside for reuse.
Sweep and vacuum debris before proceeding to the next step.
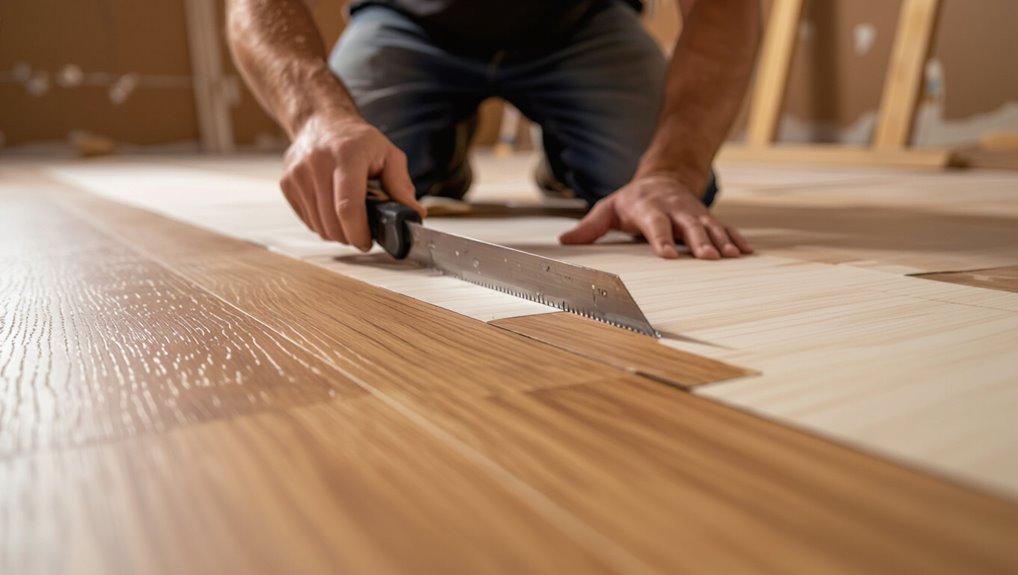
Step 2 Score and cut sheet vinyl or lift planks/tiles
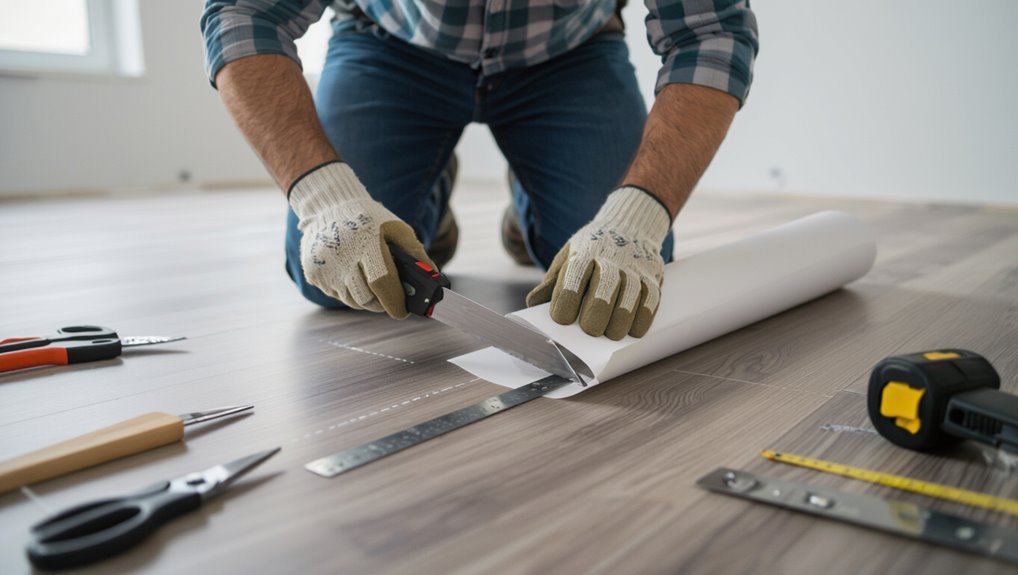
Score the vinyl and cut it into manageable sections so you can lift it without tearing the underlayment. Use a utility knife and straightedge, cutting every few feet into strips or squares.
For glued planks, loosen edges with a pry bar and lift gently with pliers. Work toward a doorway, keep scraps contained, and inspect the subfloor as you go for damage or fasteners.
Step 3 Remove adhesive residue and tackle stubborn glue
With the vinyl removed, you’ll now deal with the sticky layer left behind—adhesive can be thin and flaky or thick and stubborn depending on the product and how long it’s been down.
Scrape, apply solvent or heat as needed, then clean residue thoroughly so your new floor bonds properly.
- Test adhesive type
- Scrape loose bits
- Use appropriate solvent/heat
- Wipe and neutralize
Step 4 Inspect and repair the subfloor (leveling, patching)
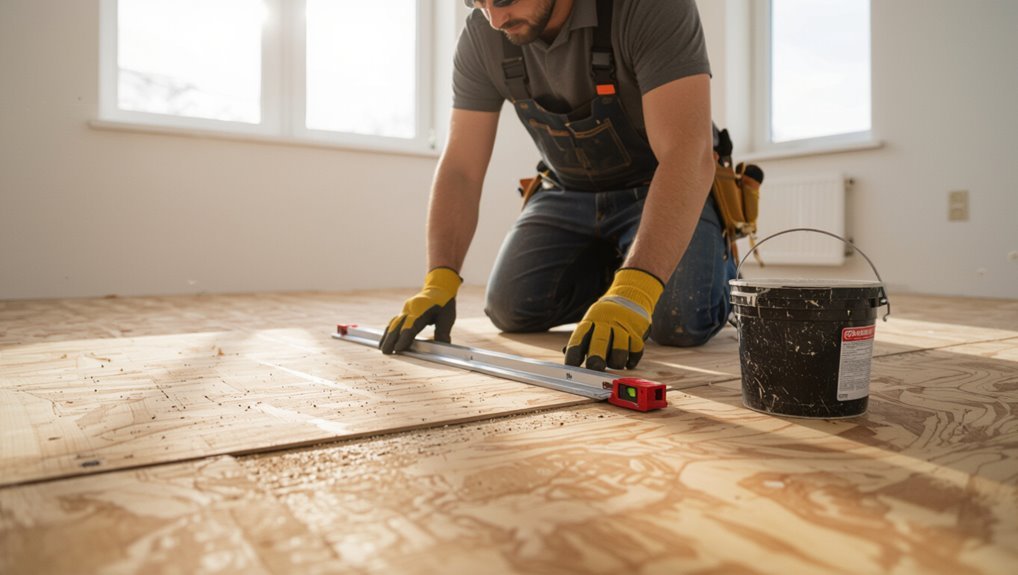
Inspect the subfloor carefully for soft spots, gaps, high spots, or water damage before you install anything new—these issues will affect how well your replacement vinyl lays and wears.
Remove debris, pry up damaged boards or cut out rotten sections. Level low areas with patching compound and sand high spots.
Use a moisture test; fix moisture sources before proceeding to prevent future failures.
Step-by-Step: Install New Vinyl Flooring
Before you lay any new vinyl, acclimate the material and plan your final layout so seams and plank patterns fall where you want them.
Prepare the subfloor by making it clean, dry, and flat, and add an underlayment or moisture barrier if the job requires one.
Then follow the proper techniques for sheet vinyl—cutting, seaming, and adhesive—and choose the right method for planks or tiles, whether click-lock or glue-down.
Step 1 Acclimate materials and final layout planning
Start by letting your new vinyl planks or sheets sit in the room where they’ll be installed for at least 48 hours so they can acclimate to the temperature and humidity; this prevents expansion or gaps later.
Then plan your final layout: measure, mock up seams, choose start wall, and mark changes.
- Measure room and calculate waste
- Dry-fit planks/sheets
- Choose visual focal start
- Mark change points
Step 2 Prepare subfloor: clean, dry, and flat
Get the subfloor clean, dry, and perfectly flat so your new vinyl will lay smoothly and last longer.
Remove debris, sweep and vacuum thoroughly. Repair dips, cracks, and loose boards. Confirm moisture is gone before proceeding.
- Sweep and vacuum
- Scrape adhesive and contaminants
- Patch and level low spots
- Secure squeaky or loose boards
Step 3 Install underlayment or moisture barrier if needed
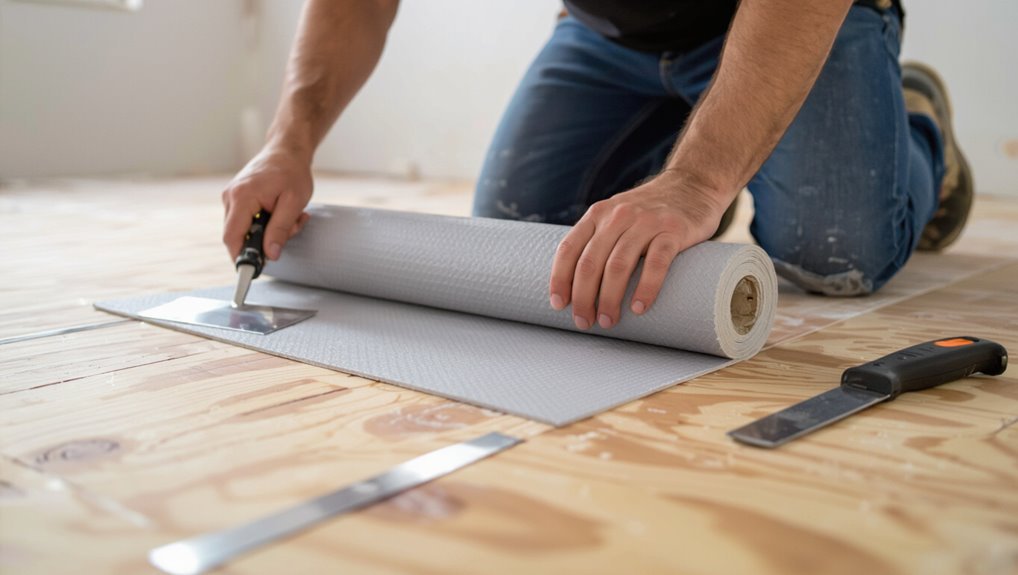
1. Decide if your subfloor needs underlayment or a moisture barrier based on material and manufacturer specs.
Lay a thin foam or cork underlayment for cushioning and sound control, or install a polyethylene vapor barrier where moisture’s a concern.
Overlap seams, tape edges, and trim to fit. Smooth wrinkles and secure per instructions so the vinyl will lie flat and last.
Step 4 Laying sheet vinyl: cutting, seaming, and adhesive techniques
Measure carefully and lay out your sheet vinyl so the pattern runs consistently and you’ve got enough material to cover seams and walls.
Trim with a straightedge and sharp utility knife, leaving a little extra at edges.
Overlap seams and use a seam roller after heat-welding or adhesive application.
Apply recommended flooring adhesive evenly, press sheet down, and allow proper curing time before trimming final edges.
Step 5 Installing vinyl planks/tiles: click-lock vs. glue-down methods
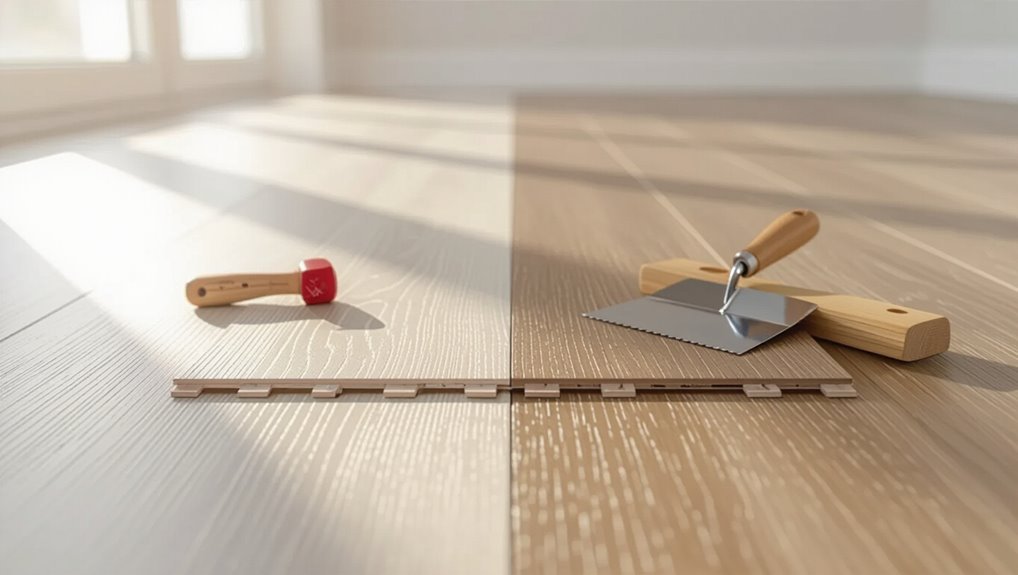
While both vinyl planks and tiles offer durable, attractive flooring, you’ll choose between click-lock (floating) systems and glue-down installations based on subfloor condition, room size, and traffic levels.
Click-lock is faster, tolerates minor subfloor imperfections, and floats over underlayment.
Glue-down bonds directly for a low-profile, stable finish ideal for high-traffic or moisture-prone areas, but demands a flat, clean substrate and adhesive application.
Step 6 Handling transitions, thresholds, and door clearances
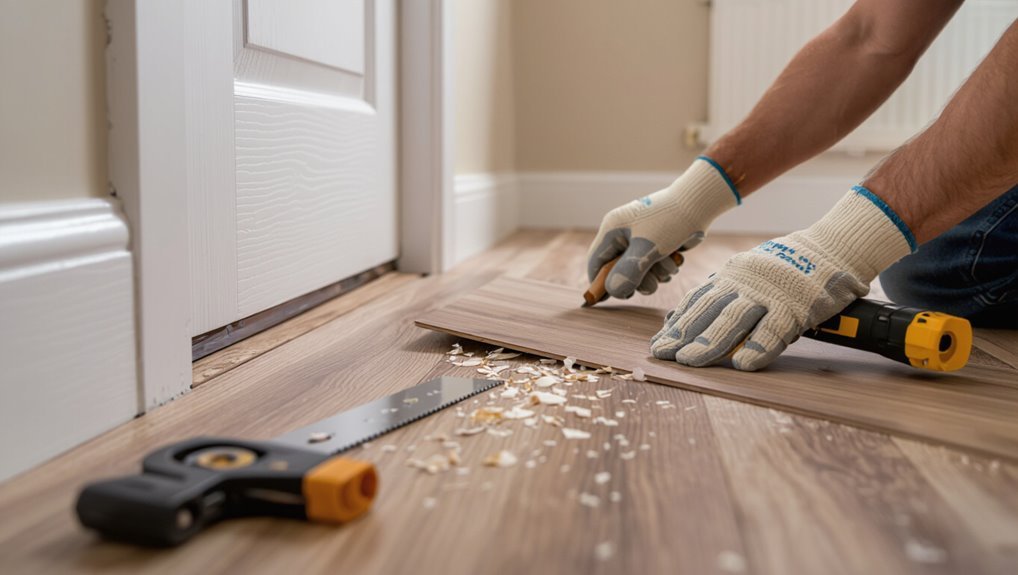
Because new vinyl often meets older flooring and doorways, you’ll need careful alterations, thresholds, and door clearances to get a professional finish and guarantee doors operate freely.
Measure height differences, trim under-door jambs if needed, and choose matching joining strips (T-mold, reducer, or end cap).
Secure thresholds with adhesive or screws, leave recommended expansion gaps, and test each door for smooth swing and clearance.
Step 7 Reinstall trim, baseboards, and finishing touches
Reattach trim and baseboards carefully so they cover the expansion gap without pinching the vinyl; you’ll want to nail or glue them back in place.
Caulk seams where necessary, and touch up paint or stain for a seamless finish.
Then check connections, reinstall thresholds, and clean the floor.
- Refasten baseboards
- Caulk gaps
- Reinstall thresholds
- Final clean and inspect
Room-Specific Considerations and Variations
Different rooms demand different approaches, so you’ll adjust waterproofing and sealing for bathrooms and wet areas, and plan for heavy traffic, grease, and appliance removal in kitchens.
In basements you’ll address moisture with the right underlayment, and on stairs or uneven spaces you’ll cut patterns carefully and choose secure attachment methods.
Consider these room-specific needs before you start so your replacement holds up and functions properly.
Bathrooms and wet areas: waterproofing and sealing
When installing vinyl in bathrooms and other wet areas, you’ll need to prioritize waterproofing and proper sealing to prevent moisture from penetrating the subfloor and adhesive.
Use a waterproof underlayment, seal seams with marine-grade caulk, slope wet areas toward drains, and protect thresholds and fixtures.
Follow manufacturer guidelines for adhesives and allow full cure time before exposure to standing water.
- Waterproof underlayment
- Seal seams/caulk
- Proper slope/drainage
- Protect thresholds
Kitchens: heavy traffic, grease, and appliances removal
Because kitchens see heavy foot traffic, spills, and frequent appliance movement, you’ll need a tougher approach than in most rooms: choose abrasion-resistant vinyl, plan for regular degreasing, and remove appliances before starting so edges and undersides get a clean, level surface.
- Use commercial-grade or wear-layered vinyl
- Clean grease thoroughly before installation
- Check and level subfloor under appliances
- Allow expansion gaps at cabinets and ranges
Basements: moisture issues and choice of underlayment
If your basement is prone to dampness or seasonal moisture, you’ll need to address vapor intrusion and choose an underlayment that blocks water and resists mold.
A moisture barrier plus a foam or cork underlayment designed for concrete will protect the vinyl and keep the floor stable.
Pick materials rated for basements, seal seams, and monitor humidity.
- Vapor barrier
- Foam/cork underlayment
- Seam sealing
- Dehumidification
Stairs and uneven spaces: cut patterns and attachment methods
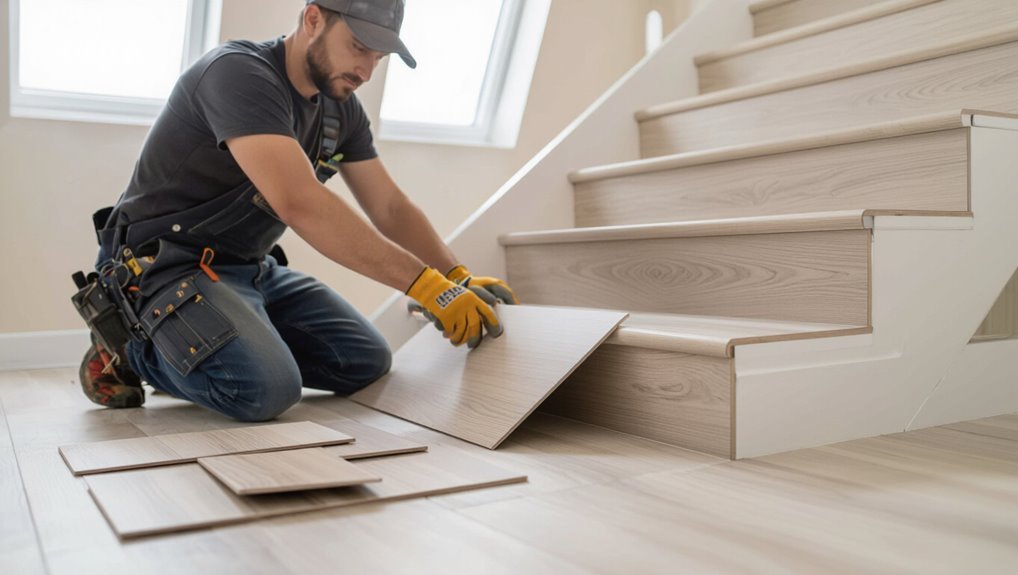
Though cutting vinyl for stairs and uneven spaces takes patience, you can get clean, secure results by planning each piece, using templates for tricky risers and treads, and choosing attachment methods that match the substrate.
Measure carefully, scribe pieces to fit contours, and cut slightly oversize for final trimming.
Use construction adhesive on solid wood, nails or screws with washers on thin underlayment, and edge nosing where needed.
Common Problems, Mistakes, and How to Fix Them
You’ll run into a few common problems—bubbles or wrinkles, separating seams, adhesive failures, and subfloor movement that causes squeaks—so it’s good to know the causes and fixes up front.
Address bubbles by reheating and rolling, repair seams with proper seam sealer or replacement, and re-bond failed adhesive with the right glue and technique.
For long-term squeaks or movement, fix loose subflooring or add underlayment to stabilize before reinstalling the vinyl.
Bubbles and wrinkles after installation causes and remedies
When vinyl shows bubbles or wrinkles after you’ve installed it, the surface won’t just look poor — it can trip people, wear faster, and trap dirt.
You’ll usually see this from poor adhesive, trapped air, temperature shifts, or inadequate subfloor prep.
Fix by re-rolling, applying adhesive, heat-smoothing, or replacing affected sections promptly.
- Re-roll with a heavy roller
- Inject adhesive
- Use heat and press
- Replace bad panels
Seams separating or visible gaps prevention and repair
If seams start to separate or you see visible gaps, water can get under the vinyl and the edges will wear or curl faster, so you should act quickly to stop further damage.
Clean and dry the area, press seams together, use seam sealer recommended by the manufacturer, and add edge trim or joining strips where gaps recur.
- Clean/dry
- Press seams
- Apply sealer
- Install trim
Adhesive failures and re-bonding techniques
Gaps and loose seams often signal that the adhesive underneath has failed. So after you press seams and seal edges, it’s time to check the bond itself.
You’ll clean, test, and re-glue problem areas with appropriate adhesive, then roll and weight seams until set.
- Clean residue and dry completely
- Test adhesion with a pry
- Apply recommended vinyl adhesive
- Roll, weight, cure per instructions
Subfloor movement, squeaks, and long-term issues
Because subfloors settle and materials expand, you’ll sometimes hear creaks or feel movement under vinyl—signs that long-term issues could be developing.
Address them early: stabilize joists, tighten fasteners, level dips, and inspect moisture barriers. If ignored, seams open and wear accelerates.
Plan repairs before installing new vinyl to guarantee a flat, dry, and secure base for lasting performance.
- Stabilize joists
- Tighten fasteners
- Level dips
- Check moisture barriers
Best Practices, Tips, and Time-Saving Strategies
To get professional-looking results without wasting material, plan your layout to hide seams and cut efficiently.
Use the right tools and techniques—straightedges, seam rollers, and proper adhesives—to speed the job and improve finish.
I’ll also cover simple maintenance to extend your floor’s life and a quick checklist to help you decide when to call in a pro.
Layout tricks to minimize visible seams and waste
When you plan the layout carefully, you can hide seams in low-traffic areas and cut down on waste by up to a third.
- Start at the room’s focal point so seams fall toward walls.
- Align plank patterns with longest sightlines.
- Stagger end joints at least 6–8 inches to disguise seams.
- Nest cuts from adjacent rows to use offcuts and reduce scrap.
Tools and techniques pros use for professional results
Tools and techniques make the difference between a DIY job and a pro finish, so gather the right saws, tapping blocks, spacers, and a quality straightedge before you begin.
Use a straight cut for tight joints, a block for tapping, spacers for expansion, and a pull bar for final rows.
Follow manufacturer adhesive and acclimation guidelines.
- Precise cuts
- Tight tapping
- Consistent spacing
- Final pull bar
Maintenance tips to extend vinyl life (cleaning, care)
You’ve set the floor up like a pro—now keep it looking that way with simple care routines that stop wear before it starts.
Clean spills quickly, use pH-neutral cleaners, and avoid abrasive tools. Place mats at entries and felt pads under furniture legs to prevent scratches.
- Sweep/dust daily
- Mop with mild cleaner weekly
- Wipe spills immediately
- Protect high-traffic zones
When to hire a pro vs. DIY decision checklist
Need help deciding whether to tackle vinyl flooring yourself or call in a pro? Assess skill, time, tools, and project scope.
Be honest about precision cuts, moisture issues, and changes.
- Skill: confident in measuring, cutting, and seaming?
- Time: do you have uninterrupted hours?
- Tools: specialty cutters, adhesives, roller?
- Risk: moisture, subfloor repairs, warranty concerns?
Cost Comparison and Budgeting Tips
Next, you’ll compare material and labor costs so you know where your money goes and which choices give the best value.
Use simple budgeting tips—like getting multiple quotes, buying remnants, and prioritizing durable wear layers—to cut costs without sacrificing quality.
Also weigh ROI and resale impact so your flooring choice makes sense for both daily use and future buyers.
Breakdown of material vs. labor costs
When planning a vinyl flooring job, you’ll want a clear split between material and labor costs so you can budget accurately and make smarter choices. Materials include planks, underlayment, adhesives; labor covers removal, prep, installation. Use this quick compare:
| Item | Typical Cost | Notes |
|---|---|---|
| Materials | $1–$5/ft² | Quality varies |
| Labor | $1–$4/ft² | Skill level matters |
Budgeting tips to save without sacrificing quality
Although you can cut costs in several places, focus on choices that keep durability and appearance intact so you don’t pay twice later.
Plan your scope, buy quality underlayment, and do prep work yourself when sensible. Prioritize long-term warranties and mid-range planks.
- Buy remnant or on-sale planks
- DIY demolition/prep
- Choose durable mid-range products
- Shop bulk and compare suppliers
ROI and resale value considerations
Saving on materials and labor is smart, but you should also weigh how those choices affect resale value and return on investment.
Choose durable, neutral-look vinyl or upgraded options in high-traffic areas to attract buyers.
Factor longevity, maintenance, and installation quality into cost decisions. A modest premium for better materials and pro installation often yields higher resale appeal and quicker sale.
FAQ Frequently Asked Questions
You probably have a few quick questions before starting, like how long replaced vinyl lasts and whether you can install it over existing vinyl.
You’ll also want to know if vinyl is waterproof, when you can move furniture back, and what warranties to expect.
Below are concise answers to these common FAQs.
How long does vinyl flooring last after replacement?
Wondering how long your new vinyl floor will last? With proper installation and routine care, you can expect 10–25 years from residential vinyl and up to 30 years for higher-grade plank or sheet products.
Durability depends on traffic, maintenance, and moisture exposure. Replace damaged sections promptly, use protective pads, and follow cleaning guidelines to maximize lifespan and keep the floor looking like new.
Can vinyl be installed over existing vinyl?
If you’re considering an update but don’t want the mess of tearing out old flooring, installing new vinyl over existing vinyl is often possible—and commonly done.
You’ll need to guarantee the current vinyl is flat, firmly adhered, and free of damage or mold.
Clean thoroughly, sand glossy surfaces, and use compatible adhesives or underlayment.
Check manufacturer guidelines and local code before proceeding.
Is vinyl flooring waterproof?
How waterproof vinyl flooring is depends on the type and installation—luxury vinyl plank (LVP) and luxury vinyl tile (LVT) are highly water-resistant and many are labeled waterproof, while sheet vinyl and vinyl composition tiles vary.
You should check product specs, seams, and edge treatments. Proper installation, sealed seams, and suitable underlayment prevent moisture intrusion; subfloor condition also matters.
How soon can I move furniture back onto new vinyl?
When can you move furniture back onto new vinyl?
Wait at least 24–48 hours for adhesive or seam sealer to cure on glue-down or heat-welded installs.
For floating click-lock vinyl, you can generally replace lightweight items immediately, but delay heavy furniture 24 hours to let planks settle.
Use felt pads, lift rather than slide heavy pieces, and avoid concentrated loads for the first week.
What warranties or guarantees should I expect?
After you’ve moved furniture back and given the floor time to settle, check the warranties that cover your vinyl—manufacturer warranties usually cover wear layer failure, peeling, and staining for a set number of years, while installation or contractor guarantees cover workmanship issues like improper adhesion or seams.
Register the product, keep receipts and photos, understand exclusions (moisture, improper maintenance), and get any contractor promise in writing.
Quick Troubleshooting Cheat Sheet and Final Checklist
Before you start, run through a quick pre-install checklist to confirm subfloor prep, measurements, and materials.
After the floor’s down, use a final inspection checklist to spot gaps, seams, and trim issues.
If problems pop up later, follow simple quick fixes for the most common post-install issues like bubbling, lifting edges, or mismatched seams.
Pre-install checklist before you start
Although you’ve picked the right vinyl and tools, take a few minutes to run a quick troubleshooting checklist so you don’t hit surprises mid-install; verify subfloor flatness, moisture levels, room temperature, and that you’ve got the correct underlayment, adhesive, trim pieces, and enough planks to cover the space plus waste.
- Confirm flat, clean subfloor and acceptable moisture readings.
- Ascertain room temp and acclimation time met.
- Verify underlayment, adhesive type, and trim compatibility.
- Count planks, include 5–10% waste, and stage tools for workflow.
Final inspection checklist after installation
One final walk-through will catch small issues before they become big headaches: check seams and changes for gaps or lifting, affirm planks sit flush with trims and thresholds, verify adhesive or locking mechanisms are secure, and scan the floor for scratches, height variations, or loose edges; note any spots that need immediate touch-up so you can fix them while tools and materials are still on hand.
- Confirm seams are tight
- Check changes and thresholds
- Inspect for surface damage
- Ascertain stability and adhesion
Quick fixes for the most common post-install problems
Now that you’ve finished the final walk-through and noted any trouble spots, here’s a compact cheat sheet to fix the common post-install problems quickly.
- Roll out minor bubbles with a seam roller; inject adhesive for stubborn ones.
- Trim lifted edges and press under molding; add adhesive.
- Replace damaged planks or patches; match grain and adhesive.
- Clean residue, re-caulk gaps, and verify connections are secure.