How to Clean a Floor Without a Mop: Quick and Effective Methods
You can clean floors fast without a mop by using microfiber cloths, disposable wipes, a steam cleaner, or a wet-dry vacuum, choosing the tool that fits the spill and floor type. Sweep or vacuum first, spot-treat stains with a gentle cleaner, then wipe with a damp microfiber pad for light soil or steam for grout and deep grime. Use minimal moisture on wood and laminate to avoid damage, and keep going below for step-by-step tips and solutions.
How to Clean a Floor Without a Mop Quick Answer and When to Use These Methods
Quick answer: use a microfiber cloth, sponge, or spray-and-wipe cleaner for the fastest mop-free results.
You’ll reach small spills and tight corners more easily with handheld tools. These methods are also gentler on delicate floors that shouldn’t see heavy water or abrasive scrubbing.
Direct answer fastest alternatives to mopping
You can skip the mop and still get a clean floor fast by using microfiber cloths, disposable floor wipes, a steam cleaner, or a wet-dry vacuum—each works best in different situations.
For quick results, grab microfiber for dusting, wipes for sticky spots, a steam cleaner for grime, or a wet-dry vacuum for puddles.
These are practical answers for how to clean a floor without a mop.
Best situations for mop-free cleaning (small spills, tight spaces, delicate floors)
If you need to clean without a mop, pick the method that fits the mess and the space: use paper towels or a microfiber cloth for small spills, a handheld vacuum or dustpan and brush in tight corners, and gentle, damp cloths or steamers on delicate floors.
These options prevent damage, save time, and let you target trouble spots without hauling out bulky equipment.
Understanding Floor Types and Why Method Choice Matters
Before you start cleaning, know what floor you’re working with—hardwood, laminate, tile, vinyl, stone, or sealed concrete each need different care.
Using the wrong method or product can dull finishes, warp boards, or etch stone, so match techniques to the surface.
I’ll also note which basic tools and supplies are safe for each type so you don’t damage anything.
Common floor surfaces (hardwood, laminate, tile, vinyl, stone, sealed concrete)
Floors come in many materials—hardwood, laminate, tile, vinyl, stone, and sealed concrete—and each reacts differently to water, cleaners, and scrubbing.
You’ll want to match your method to the surface to avoid damage and get the best results.
Hardwoods need minimal moisture; laminates resist light dampness; tile and vinyl tolerate wetter cleaning; stone and sealed concrete prefer pH-neutral solutions and gentle abrasion.
Risks of using the wrong cleaning method on each surface
Because each floor material reacts differently to water, cleaners, and abrasion, using the wrong method can warp, stain, or strip finishes fast.
You’ll peel veneers with excess water, swell laminate, dull stone with acids, and scratch vinyl or sealed concrete with harsh scrubbing.
Incorrect cleaners leave residues that attract dirt or damage seals, shortening lifespan and boosting repair costs.
Choose methods per surface.
Basic tools and supplies compatibility by floor type
When you match tools and cleaning products to the specific floor type, you’ll avoid common mishaps like swelling, dulling, or scratching and get better results with less effort. Know basics: soft broom for hardwood, microfiber for laminate, gentle cleaner for vinyl. Test products in a corner first.
| Floor | Tool | Cleaner |
|---|---|---|
| Hardwood | Soft broom | pH-neutral |
| Tile | Brush | Mild detergent |
Quick No-Mop Methods Overview
You don’t need a mop to keep floors clean—there are fast, effective alternatives that fit different messes and surfaces.
Use dry methods like a broom or vacuum for dust, tackle spills with cloths or spray cleaners, and try damp options such as a sponge or microfiber pad when you need more scrubbing power.
For quick fixes or creative tools, consider steam handers, a squeegee, scrub brushes, or even socks on your hands.
- Dry cleaning: broom, microfiber dust mop, vacuum
- Spot cleaning: cloths, paper towels, spray cleaners
- Damp no-mop options: sponge, microfiber pad, flat-mop alternative
- Gadgets & DIY: steam cleaners, hand steamers, scrub brushes, squeegee
Dry cleaning (broom, microfiber dust mop, vacuum)
Though mopping isn’t your only option, dry cleaning tools—broom, microfiber dust mop, and vacuum—let you clear dust, crumbs, and pet hair fast without water or elbow grease.
Use a broom for corners and quick sweeps, a microfiber dust mop for smooth floors and gentle pickup, and a vacuum for rugs or high-traffic areas.
Work toward edges, then sweep inward.
Spot cleaning (cloths, paper towels, spray cleaners)
Grab a cloth, some paper towels, and a spray cleaner, and you can handle most spills and sticky spots without bringing out a mop.
Blot fresh messes, spray grease or grime, then wipe in a circular motion.
Use disposable towels for oily stains, a damp cloth for water-soluble spills, and finish with a dry pass to prevent streaks and residue buildup.
Damp cleaning without a mop (sponge, microfiber pad, flat mop alternative)
One quick option is a damp sponge or microfiber pad used with a gentle cleaner—these let you tackle dirt and grime without hauling out a full mop.
Wring tools well to avoid puddles, work in small sections, and rinse or swap pads as they get dirty.
Use a flat microfiber pad on a handle for better reach and less bending.
Steam cleaning devices and hand steamers
Steam cleaners and hand steamers use high-temperature steam to loosen dirt, kill germs, and sanitize hard floors without chemicals, so you can clean quickly and with minimal elbow grease.
You’ll glide a steam mop or direct a handheld steamer over sealed surfaces, lift stubborn grime, and dry fast.
Always follow manufacturer guidelines for floor types and test a small area first.
DIY tools (socks on hands, scrub brushes, squeegee)
Try three simple DIY tools to clean floors fast without a mop:
Socks on your hands for gentle wiping, a stiff scrub brush for stuck-on grime, and a squeegee to push up water and streaks.
Use microfiber or damp socks to pick dust, scrub brushes for grout and scuffs, then squeegee toward a drain or towel to remove moisture and prevent streaks.
Step-by-Step No-Mop Cleaning Techniques (How-To)
You’ll get five practical no-mop techniques: a quick sweep and spot-clean for daily upkeep, a damp microfiber pad for light soil, a handheld steam cleaner for grout, tile, and sealed floors, a squeegee for big spills and fast drying, and vacuuming plus a damp cloth for pet hair and tracked-in dirt.
Follow each method step by step for best results, adjusting tools and pressure to your floor type.
Start with the one that matches your mess and work through the others as needed.
Method 1 Fast sweep and spot-clean (for daily maintenance)
Start by clearing loose debris and moving small items out of the way so you can work quickly.
Sweep or vacuum high-traffic areas, then treat any stains with the right spot-cleaning solution.
Finish with a microfiber pass to restore shine and pick up remaining dust.
Step 1: Clear debris and move small items
Before you sweep, clear the floor of toys, shoes, and small items so nothing blocks your path or gets swept into corners.
Scan each room quickly, gather loose papers, cords, and pet bowls, and stash clutter in a bin.
Move lightweight furniture like stools if needed. This makes sweeping faster, prevents damage, and guarantees you can reach debris for efficient spot-cleaning.
Step 2: Sweep or vacuum high-traffic areas
Grab a broom or vacuum and focus on the busiest paths—entryways, kitchen aisles, and living-room walkways—so dirt doesn’t spread.
Use short, overlapping strokes or slow passes to capture grit. Empty the vacuum or dustpan promptly to keep suction effective. Work toward a trash bin, not away.
Repeat daily in peak zones to prevent buildup and reduce the need for deeper cleaning.
Step 3: Spot-clean stains with appropriate solution
3 quick moves will handle most spots: identify the stain, choose the right cleaning solution, and treat only the affected area.
Examine the spill—grease, juice, pet accident—and pick a match: degreaser for oil, enzyme cleaner for organic messes, diluted vinegar for light grime.
Blot gently with a clean cloth, work outward, rinse and dry to prevent residue and spreading.
Step 4: Finish with a microfiber pass for shine
Finish by giving the floor a quick microfiber pass to lift remaining dust and restore shine: glide a slightly damp or dry microfiber cloth or pad across the surface in overlapping strokes, working with the grain for wood or in straight lines for tile, and flip or rinse the cloth as it picks up grime so you’re always using a clean section.
Then inspect and buff any dull spots for uniform sheen.
Method 2 Damp microfiber pad cleaning (for light soil)
For light soil, you’ll use a damp microfiber pad and a mild, floor-safe diluted cleaner you’ve prepared ahead of time.
Wring the pad so it’s damp, not wet, to avoid saturating the floor.
Work in small sections and dry any damp areas right away if the surface needs it.
Step 1: Prepare diluted cleaner safe for your floor
Start by mixing a mild, floor-safe cleaner with water according to the product label or your floor manufacturer’s recommendations so you don’t damage the finish.
Test the solution on a small, hidden spot to confirm no discoloration.
Pour into a spray bottle or shallow bucket.
Use room-temperature water, avoid harsh chemicals, and label the container.
Replace mixture daily for effectiveness.
Step 2: Wring pad to damp, not wet
Wring the microfiber pad until it’s just damp—too much water can leave streaks or seep into seams and damage some floors.
Squeeze firmly, fold, and repeat until excess stops dripping. A properly damp pad picks up dirt and holds cleaner without puddles.
Replace or re-dampen when it feels dry; avoid saturating the pad to protect finishes and prevent residue.
Step 3: Work in small sections and dry immediately if needed
Work in 3- to 4-foot sections so you can control moisture and catch dirt before it spreads; move the damp microfiber pad across the area with overlapping strokes.
Then check for streaks or damp spots and dry them immediately with a clean, dry microfiber cloth or pad.
Work systematically, finish each section before moving on, rinse or replace the pad as it soils, and keep traffic out until dry.
Method 3 Using a handheld steam cleaner (for grout, tile, sealed floors)
Before you start steaming, test the device on an inconspicuous spot to make sure it won’t damage the surface.
Use the manufacturer’s recommended attachments and make slow, overlapping passes to loosen grime in grout and on sealed tile.
After steaming, wipe up loosened residue with a microfiber cloth and let the floor dry completely.
Step 1: Test in an inconspicuous spot
Because steam can affect finishes and grout differently, always test the cleaner in an out-of-the-way spot first.
Choose a small hidden area, set the steam cleaner to the lowest safe setting, and apply for a few seconds.
Check for discoloration, sealant softening, or grout damage.
If the surface holds up, you can proceed; if not, stop and use a gentler method.
Step 2: Use recommended attachments and passes
When you’re ready to steam, attach the manufacturer-recommended nozzle and pad for your surface—typically a narrow brush for grout and a soft microfiber pad for sealed tile—and set the steam level to the lowest effective setting; this guarantees targeted cleaning without overexposure.
Work in short, overlapping passes, holding the nozzle just long enough to loosen grime, then lift and continue—don’t linger.
Step 3: Wipe residue and allow to dry
After you’ve steamed each section with the proper nozzle and pad, grab a clean microfiber cloth or disposable towel to wipe away loosened grime and moisture.
Work in straight strokes, rinsing or swapping cloths as they darken. Check grout lines and crevices with a small brush if needed.
Let the floor air-dry fully before walking or replacing rugs to prevent streaks.
Method 4 Squeegee technique (for large spills or quick drying)
For big spills or when you need the floor dry fast, you’ll want to use a squeegee to corral the liquid toward a drain or a small collection area.
Then pull the liquid with the squeegee in smooth strokes and blot the gathered fluid with an absorbent cloth.
You’ll finish quicker and leave less residue than trying to wipe the whole mess by hand.
Step 1: Gather spill toward drain or collection area
Because liquid spreads quickly, you’ll want to corral it before you start squeegeeing: work from the outer edges toward a single low point or drain so the pooled liquid concentrates.
Use a stiff-bristled broom, push broom, or a damp microfiber cloth to guide runoff. Clear obstacles, wear waterproof shoes, and leave a small collection area for the squeegee to deposit the fluid.
Step 2: Pull liquid with squeegee and absorb with cloth
Grab the squeegee and angle it slightly so the rubber edge makes full contact with the floor, then pull the liquid toward your designated collection point in smooth, overlapping strokes.
Once concentrated, press a microfiber cloth or absorbent towel against the pooled liquid, blotting and lifting moisture.
Replace saturated cloth sections as needed, repeating until the surface is dry and streak-free.
Method 5 Vacuum + damp cloth for pet hair and tracked-in dirt
Start by vacuuming on the hard-floor setting to lift pet hair and tracked-in grit without scratching.
Then wipe the area with a damp microfiber cloth to pick up fine dust and any remaining debris.
This two-step combo’s quick and effective for daily touch-ups.
Step 1: Vacuum with hard-floor setting
Set your vacuum to the hard-floor or bare-floor setting and run it methodically across the room to lift loose dirt, pet hair, and tracked-in debris before you use a damp cloth.
Move in overlapping strokes, reach corners and edges with attachments, and pause over high-traffic spots.
Empty the canister or change the bag when it’s full to maintain suction and prevent redistribution.
Step 2: Follow with a damp microfiber cloth wipe
Once the vacuum has removed loose dirt and hair, follow up with a slightly damp microfiber cloth to pick up the fine residue and any remaining pet dander.
Work in short, overlapping strokes, rinsing or swapping cloths as they clog. Pay attention to baseboards and corners.
Use distilled water for streak-free results, and dry any damp spots promptly to prevent residue or slipping.
Tools, Materials, and DIY Solutions (What to Buy and Make)
You’ll want a few key tools—a suitable vacuum (stick or canister), microfiber cloths, a handheld steamer, and a squeegee—to replace a mop for different jobs.
Pick cleaners that match your floor type: gentle pH-neutral or commercial products for sealed wood, dilute vinegar or detergent for tile and vinyl, and hydrogen peroxide for grout or stubborn stains.
I’ll explain when each option is safe and how to make simple homemade solutions next.
Essential tools list (vacuum types, microfiber cloths, handheld steamers, squeegees)
A few well-chosen tools will let you clean any floor without a mop: different vacuum types for various surfaces, microfiber cloths for streak-free wiping, handheld steamers to sanitize and loosen grime, and squeegees for smooth floors or excess water.
- Upright or canister vacuum for carpets and rugs
- Stick vacuum for quick pickups
- Microfiber pads and cloths
- Handheld steamer and rubber squeegee
Safe cleaning solutions by floor type (store-bought and homemade)
Now that you’ve picked the right tools, match them with cleaners suited to each floor type so you don’t damage surfaces or leave residue.
Use pH-neutral, nonabrasive cleaners for sealed hardwood and laminate; mild soap solutions for vinyl and tile; diluted rubbing alcohol or water for stone spot-cleaning; gentle enzyme sprays for grout and pet messes.
Test any homemade mix in a hidden area first.
When to use detergent, vinegar, hydrogen peroxide, or commercial cleaners
When deciding between detergent, vinegar, hydrogen peroxide, or a commercial cleaner, consider the surface, the soil type, and any finish or sealant so you pick something effective without causing harm. Choose detergent for greasy dirt, vinegar for mild grime on tile, hydrogen peroxide for stains and disinfecting, and commercial cleaners for sealed floors needing specific care.
| Cleaner | Best use |
|---|---|
| Detergent | Grease, general dirt |
| Vinegar | Mild grime on tile |
| H2O2 | Stains, disinfecting |
| Commercial | Sealed/finished floors needing specific care |
Comparison: Mop-Free Methods vs. Traditional Mopping
When you compare mop-free methods to traditional mopping, think about how each handles different soils and floor types—some scrubs and steamers beat mops on grout while mops can be gentler on delicate wood.
Also weigh time, water use, and drying time, since mop-free options often dry faster and use less water but can take longer to treat heavy grime.
Finally, consider cost, storage, and maintenance trade-offs: disposable pads and compact tools save space but recurring costs add up, while a mop needs more storage and care but lasts longer.
Effectiveness for different soils and floor types
A vacuum, microfiber pad, or scrub brush will perform very differently depending on the soil and floor type, so pick the method that matches the mess: dry debris and pet hair respond best to a vacuum or dry electrostatic cloth on hard floors.
Sticky spills and grease need a damp microfiber pad or targeted spot-scrubbing.
Textured or grout-heavy surfaces often require a brush to loosen trapped dirt.
Traditional mopping still beats mop-free methods for large wet messes on sealed tile or linoleum, but it can spread grime on uneven surfaces where a scrub-and-suction approach removes more dirt.
You’ll choose tools by matching soil, surface, and reachability for best results.
Time, water usage, and drying time comparison
Compare mop-free options and traditional mopping by looking at total time, how much water they use, and how long floors stay wet. You’ll find mop-free methods (vacuum, microfiber, spray-and-wipe) save time and cut water use, drying faster. Traditional mopping uses more water and longer drying. Choose based on spill size and floor type.
| Method | Time | Drying |
|---|---|---|
| Vacuum/sweep | Fast | Immediate |
| Spray-wipe | Moderate | Quick |
| Mop | Slow | Long |
Cost, storage, and maintenance trade-offs
Although mop-free methods often cost more upfront for gadgets like cordless vacuums or spray systems, they usually save you money over time through lower ongoing expenses, smaller storage needs, and simpler upkeep compared with traditional mop-and-bucket setups.
You’ll trade initial purchase price for durability, replaceable parts, and compact storage; traditional mops are cheap but demand more water, storage space, and frequent replacement.
Common Mistakes and How to Avoid Them
Don’t soak floors or you’ll risk warping and finish damage, and don’t grab abrasive tools or harsh cleaners that can scratch or strip surfaces.
You should test any new cleaner in an inconspicuous spot first and schedule regular deep cleans to remove buildup and residue.
Follow these simple precautions and you’ll avoid common pitfalls that undo your hard work.
Over-wetting floors and causing damage
When you pour or scrub with too much water, you risk warping wood, loosening grout, and encouraging mold in seams and under floor coverings.
Use minimal liquid: dampen a microfiber cloth or flat pad, wring thoroughly, and spot-clean.
Dry promptly with towels or a fan.
Test a hidden area first, and work in small sections to prevent pooling and long-term damage.
Using abrasive tools or wrong cleaners
If you scrub with steel wool, scouring pads, or harsh chemical cleaners, you’ll scratch finishes, strip protective coatings, and accelerate wear.
Instead, pick soft microfiber cloths, nonabrasive pads, and pH-neutral cleaners matched to your floor type. Test any product in an inconspicuous spot first.
Rinse residues thoroughly and follow manufacturer care instructions to preserve appearance and longevity without causing unnecessary damage.
Skipping regular deep cleaning buildup and residue
Because buildup sneaks into grout lines, baseboards, and textured surfaces over time, skipping regular deep cleaning leaves stubborn residue that simple surface wipes can’t remove.
Schedule monthly deep cleans, target grout and corners with a scrub brush and appropriate cleaner, and rinse residues thoroughly.
Spot-treat high-traffic zones more often so dirt doesn’t compact and require harsher methods later.
Not testing cleaners first
Although a new cleaner might promise sparkling results, you should always test it in an inconspicuous spot first to avoid discoloration, finish damage, or lingering residues.
Patch-testing reveals adverse reactions before they spread. Apply a small amount, wait the recommended time, then inspect.
If it alters color, gloss, or texture, don’t use it; choose a gentler product or dilute as directed.
Prevention and Best Practices to Keep Floors Clean Without a Mop
To keep floors tidy without a mop, adopt simple daily habits like using doormats, removing shoes, and spot-cleaning spills as they happen.
Set a weekly maintenance routine tailored to your floor type, store and care for your no-mop tools properly, and schedule seasonal deep cleans for grout and sealed surfaces.
Stick to these practices and you’ll prevent most dirt buildup and make cleaning quick and easy.
Daily habits (doormats, shoe removal, spot-cleaning routine)
When you make a few small habits part of your routine—placing sturdy doormats, asking guests to remove shoes, and dealing with spills as they happen—you’ll cut down on dirt, grit, and stains before they spread.
Wipe shoes or keep a shoe basket, shake mats weekly, spot-clean spills immediately with a microfiber cloth and mild cleaner, and sweep high-traffic areas daily to prevent buildup.
Weekly maintenance schedule by floor type
Create a simple weekly checklist tailored to your floor type so you can prevent grime buildup without ever lugging out a mop.
For hardwood, dust and spot-wipe with a damp microfiber cloth; avoid excess water.
For tile, sweep then scrub grout spots with a brush.
For vinyl and laminate, sweep and damp-wipe with mild cleaner.
Adjust frequency by traffic and pets.
Storage and care for no-mop tools
Your weekly checklist helps prevent buildup, but keeping no-mop tools ready and effective requires intentional storage and simple care.
Store microfiber cloths and dusters dry in breathable bins, hang brooms and squeegees to avoid warped bristles, and keep sprays and powders sealed.
Rinse pads after use, let them air-dry, replace worn items promptly, and label storage zones for quick access.
Seasonal deep-cleaning recommendations
Because seasonal deep cleaning goes beyond weekly touch-ups, you should schedule focused sessions each change of season to tackle hidden grime, renew protective finishes, and address wear that quick methods miss.
Then strip debris from corners, clean grout and baseboards, buff or recoat sealants, and inspect for damage.
Rotate deep tasks annually so you prevent buildup and extend floor life.
Troubleshooting Common Floor Problems Without a Mop
When you run into sticky residue or gum, simple solvents and a plastic scraper can save the day without a mop.
For pet stains and odors, you’ll want targeted cleaners, blotting, and quick drying to prevent lingering smells.
To restore shine and tackle dull floors or grout stains, use appropriate cleaners, gentle scrubbing, and spot treatments suited to your floor type.
Removing sticky residue and gum
If you’ve ever stepped on gum or found sticky residue on the floor, you can remove it without a mop using simple, household items and a little patience.
Freeze gum with ice in a plastic bag, scrape gently with a plastic scraper, then clean residue with vinegar or dish soap and warm water.
Wipe dry and inspect for remaining tackiness; repeat if needed.
Tackling pet stains and odors
After you’ve handled sticky spots, turn your attention to pet stains and odors, which need a different approach.
Blot fresh messes immediately with paper towels, then apply a vinegar-water mix to neutralize ammonia.
For dried stains, sprinkle baking soda, let sit, then vacuum or sweep.
Use an enzymatic cleaner for persistent odors, following label instructions and ventilating the area afterward.
Restoring shine to dull floors
Though dull floors can make a whole room look tired, you don’t need a mop or fancy products to bring back the shine.
Buff small sections with a microfiber cloth and a few drops of olive oil or a diluted vinegar solution, working in circular motions.
Finish by drying with a clean cloth and repeating where needed until surfaces reflect light evenly.
Dealing with grout stains without a mop
Shifting from buffing surface shine to targeted cleaning, you’ll often find grout holds the dirt that makes floors look grimy even when tiles gleam.
Scrub grout with a paste of baking soda and water, or vinegar for sealed tile; let sit, then agitate with a stiff brush.
Rinse with a damp cloth, repeat stubborn spots, and finish by drying to prevent re-soiling.
Frequently Asked Questions
You probably have a few quick questions about cleaning without a mop, like whether vinegar is safe on every surface or if steam cleaners disinfect better.
You’ll also want to know how often to deep clean, how to lift scuffs without a mop, and whether microfiber cloths can handle large rooms.
Below are clear, practical answers to each.
Can I safely use vinegar to clean all floors without a mop?
Wondering whether vinegar is a safe all-purpose cleaner for floors when you don’t have a mop?
Vinegar works well on sealed tile, vinyl, and linoleum diluted with water, but avoid it on natural stone (marble, granite), hardwood with unsealed or waxed finishes, and some laminates.
Test a hidden spot first, use gentle cloths, and don’t overuse to prevent dulling or damage.
Is a steam cleaner better than mopping for disinfecting?
How effective is a steam cleaner compared with mopping for killing germs and sanitizing floors?
Steam cleaners reach high temperatures that can inactivate many bacteria and viruses without chemicals, so they’re often more thorough than simple wet mopping.
You should still follow manufacturer guidance, avoid steam on sensitive surfaces, and pre-clean visible dirt, since steam works best on clean, heat-tolerant flooring.
How often should I deep clean if I don’t use a mop?
Generally, aim to deep clean high-traffic areas every 1–2 months and low-traffic rooms every 3–6 months if you’re not mopping regularly.
Adjust frequency for pets, allergies, or spills—those mean more frequent deep cleans.
Use vacuuming, spot-cleaning, steam or scrubbers to remove buildup.
Keep a simple schedule so dirt doesn’t accumulate and routine touch-ups stay easy and effective.
What’s the best way to remove scuff marks without a mop?
If you’ve been keeping up with regular vacuuming and spot-cleaning, scuff marks are usually the next thing to tackle because they stand out even on clean floors.
Use a soft cloth or tennis ball with a bit of baking soda paste or diluted dish soap, rub gently, then wipe with a damp cloth.
For stubborn marks, try a melamine sponge carefully.
Can microfiber cloths replace mops for large rooms?
Wondering whether microfiber cloths can handle big rooms, too? Yes—if you plan smart.
Use several large, high-quality microfiber pads, work in sections, and keep a couple of buckets: one with clean water and one for rinsing. Change or wring cloths frequently to avoid streaks.
For very large spaces, alternate with a lightweight flat mop or schedule shorter, regular cleanings to stay efficient.
Visual Guides and Quick Reference Resources
To make no-mop cleaning simple, you’ll want a compact toolkit checklist that lists essentials like a broom, dustpan, microfiber cloths, spray bottle, and spot cleaner.
You can also use a quick flowchart that points you to the best no-mop method for common messes—crumbs, spills, pet accidents, or tracked dirt.
Keep both the checklist and flowchart handy so you can grab the right tools and action in seconds.
Recommended cleaning tool kit checklist
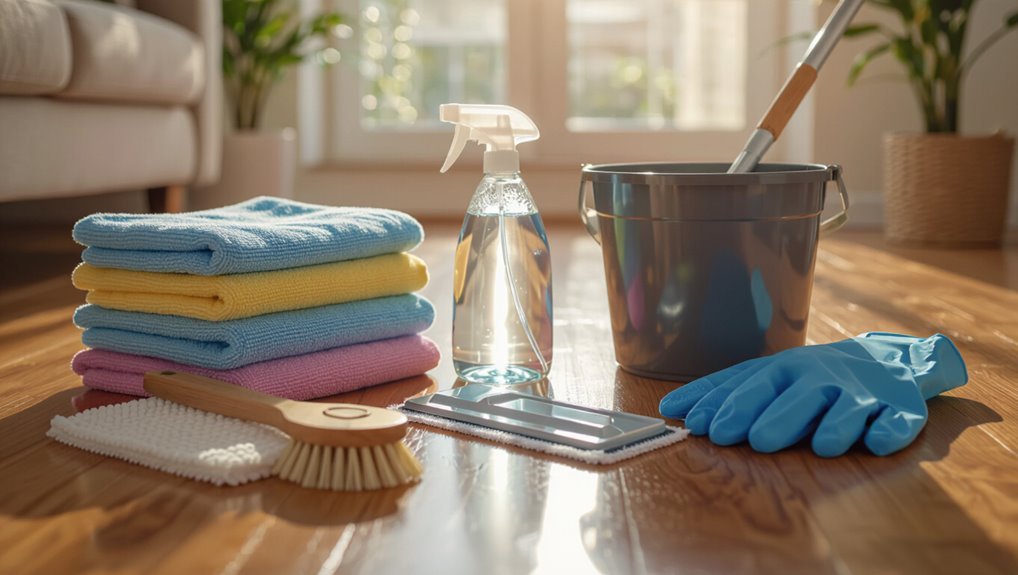
Start with a compact kit you can grab in one hand: a microfiber flat pad or cloth, a stiff-bristled brush, a handheld dustpan and broom, a spray bottle with your preferred cleaner (or diluted vinegar), a scrub sponge, disposable wipes or paper towels, and protective gloves—these basics cover dusting, spot-cleaning, scrubbing, and quick spills without a mop.
- Microfiber pad
- Stiff brush
- Spray bottle
- Dustpan and broom
Quick flowchart: Which no-mop method to use for common messes
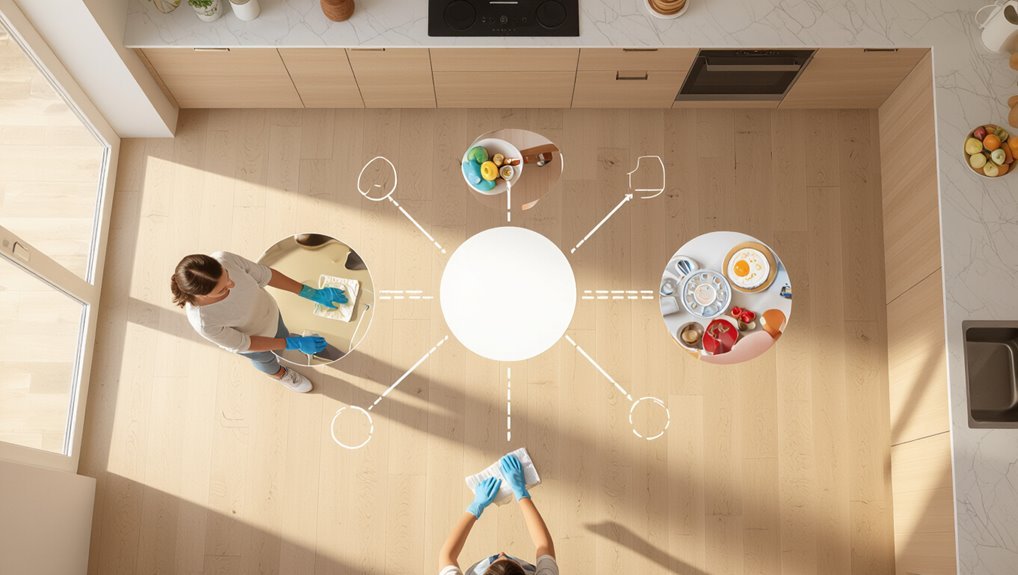
If you’re faced with a spill or stubborn grime and don’t want to break out a mop, this quick flowchart helps you pick the fastest no-mop method—sweeping for dry debris, spray-and-wipe for sticky spots, scrubbing for stuck-on gunk, and spot-extraction for larger wet messes—so you can grab the right tool from your kit and get the floor clean in minutes.
Follow these branches: sweep, blot, spray-wipe, scrub, or extract.