How to Install Click and Lock Vinyl Flooring Like a Pro
You can install click-and-lock vinyl yourself by planning the layout, prepping a clean, flat subfloor, and letting planks acclimate for at least 48 hours. Use underlayment if needed, snap rigid-core or LVP planks together row by row, trim edges for a neat fit, and keep a 1/4″–3/8″ expansion gap around walls. Work around vents and doorways, finish with trim or connections, and test seams for tightness — keep going and you’ll pick up pro tips and troubleshooting advice.
Quick Answer Can You Install Click and Lock Vinyl Flooring Yourself?
Yes—you can install click-and-lock vinyl yourself by measuring and prepping the subfloor, snapping planks together row by row, and trimming edges for a clean fit.
Expect a weekend project for an average room, moderate DIY skill, and basic tools like a tape measure, utility knife, straightedge, and spacers.
If you can follow instructions and handle simple cuts, you’ll likely save money and get professional-looking results.
Short step-by-step summary
You can install click-and-lock vinyl flooring yourself if you’re comfortable with basic DIY tasks and have the right tools; here’s a short, practical step-by-step summary to get you started.
Follow these core steps for how to install click and lock vinyl flooring:
- Prepare and level the subfloor.
- Lay underlayment and plan layout.
- Click panels together, staggering seams.
- Trim edges and install trim.
Time, skill level, and tools required
Most DIYers can install click-and-lock vinyl in a weekend for an average-sized room: plan on 1–2 days for prep and layout and another day for laying planks and finishing touches.
You can do it if you’re handy; basic carpentry skills help. Bring these tools and expectations:
- Tape measure, utility knife, straightedge
- Rubber mallet, tapping block, spacers
- Underlayment and adhesive (if needed)
- Patience, accurate cuts, two-person lifts for large areas
What Is Click and Lock Vinyl Flooring?
Click and lock vinyl flooring is a floating floor made of interlocking planks or tiles available as rigid-core types like SPC and WPC or as traditional luxury vinyl plank.
You click the edges together so pieces snap and lock without glue, creating a stable surface that sits over an underlayment.
Compared with glue-down or loose-lay, it’s faster and often DIY-friendly but can be less permanent or sound-dampening depending on the core and installation.
Definition and types (rigid core, SPC, WPC, luxury vinyl plank)
Think of click-and-lock vinyl as a user-friendly flooring system that snaps together without glue or nails.
You’ll choose among types that suit durability, budget, and feel:
- Rigid core: stiff, stable underfoot.
- SPC (stone plastic composite): extremely dense and durable.
- WPC (wood plastic composite): softer, warmer feel.
- Luxury vinyl plank: realistic looks, varied thicknesses and finishes.
How the click-lock system works
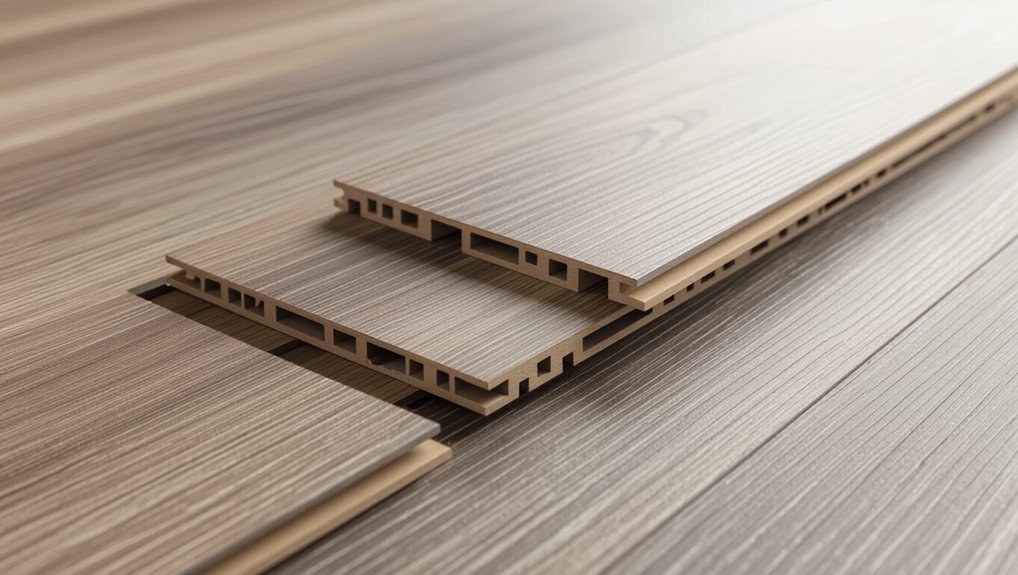
Having picked the type of vinyl that fits your needs, you’ll next want to understand how the click-and-lock system actually joins planks:
You angle one plank, insert its tongue into the groove of the laid plank, then lower and snap it down. The engineered profile locks horizontally and vertically, creating a tight seam without adhesive.
You can disassemble planks for repairs or replacement.
Pros and cons compared with glue-down and loose lay
While click-and-lock planks snap together for a floating floor that’s quick to install, they differ from glue-down and loose-lay systems in ways that affect performance, cost, and flexibility; you’ll find click-lock is easier to DIY and lets floors be lifted for repairs, glue-down offers greater stability and sound control but needs more prep and professional installation, and loose-lay gives fast install with minimal subfloor work yet can shift in high-traffic areas or with heavy furniture.
| Type | Stability | Best for |
|---|---|---|
| Click-lock | Moderate | DIY, rentals |
| Glue-down | High | Permanent installs |
| Loose-lay | Low-Moderate | Quick fixes, smooth subs |
When to Choose Click and Lock Vinyl Where It Works Best
Think about where you’ll use click-and-lock vinyl and what your subfloor is like, since it’s best for kitchens, living areas, and properly prepared concrete or plywood.
You’ll also want to take into account moisture and temperature—avoid areas with constant dampness unless you choose a waterproof product and control humidity.
Finally, match the plank’s wear rating to the room’s weight and traffic so it holds up where you need durability.
Suitable rooms and subfloors
Because click-and-lock vinyl resists moisture and wears well, it’s an excellent choice for busy rooms like kitchens, mudrooms, and family spaces.
It can also work in basements and bathrooms if the subfloor is dry and level.
Choose rooms and prep subfloors that are:
- flat and free of debris
- structurally sound with no movement
- clean, dry, and dust-free
- compatible with underlayment requirements
Moisture and temperature considerations
If your home gets humid or sees big temperature swings, plan for how that moisture and movement will affect click-and-lock vinyl so your floor stays stable and gap-free.
You’ll acclimate planks, allow expansion gaps, and use proper underlayment. Avoid basements prone to flooding.
- Acclimate planks 48–72 hours
- Maintain 35–65% humidity
- Leave recommended expansion gaps
- Use vapor-resistant underlayment
Weight, traffic, and durability factors
Durability matters: assess the weight and traffic your space will see before choosing click-and-lock vinyl so you pick a product built to last.
Choose higher wear layers for busy areas, consider heavy furniture support, and expect different lifespans by room. Match thickness and warranty to use.
- High traffic: 20–30 mil wear layer
- Light traffic: 6–12 mil
- Rolling loads: reinforced cores
- Warranty reflects durability
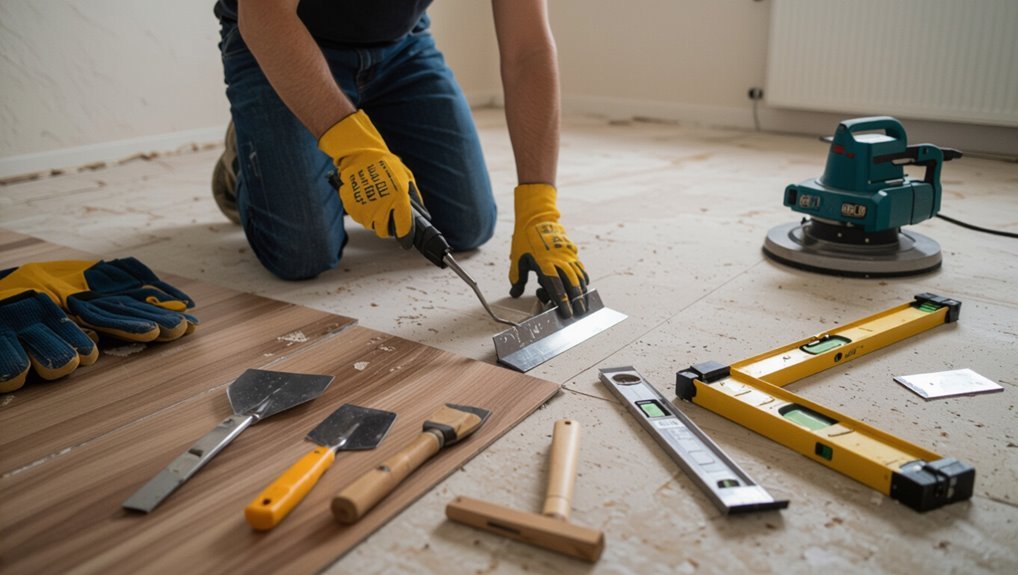
Tools, Materials, and Preparations
Before you start, gather the essential tools (tapping block, pull bar, spacer, utility knife) plus optional helpers like a jigsaw and floor roller.
Check you have underlayment, trims, and any adhesives for connections.
Inspect and repair the subfloor so it’s clean, dry, flat, and level within manufacturer specs.
Finally, acclimate the planks in the room and plan your layout to avoid narrow edge strips and awkward seams.
Essential tools and optional helpful tools
While you’re getting ready to lay your click-and-lock vinyl, gather a set of essential tools plus a few optional ones that speed the job and improve accuracy.
You’ll need basics and helpful extras to cut, fit, and protect your floor while keeping seams tight.
- Utility knife and spare blades
- Tapping block and mallet
- Tape measure and chalk line
- Pull bar and spacers
Materials checklist (underlayment, trim, adhesives for transitions)
You’ve got the tools ready; now make sure you have the right materials to finish the job properly.
You’ll need underlayment for cushioning and moisture control, connector pieces for doorways, trims for edges and stairs, and adhesives where junctions require bonding.
Check compatibility with your vinyl and room conditions before buying.
- Underlayment (vapor barrier if needed)
- Connector strips
- Quarter round or scotia
- Adhesive for thresholds
Preparing the subfloor: inspection and repair
Before installing click and lock vinyl, you’ll remove any old flooring and inspect the subfloor for low spots or damage.
Use a pry bar, scraper, and floor scraper to take out tile, carpet, or glue residue, then check level with a straightedge and level.
Patch holes and fill low areas with a self-leveling compound so the surface is flat and stable for the new planks.
Removing old flooring and floor-leveling tips
Start by stripping away old coverings—carpet, tile, or peel-and-stick vinyl—until you reach the bare subfloor so you can assess its condition.
Remove adhesive residue with a scraper and solvent, patch low spots with leveling compound, and sand high areas.
Confirm the surface is clean, dry, and flat within manufacturer tolerances.
Use primer on porous patches and let everything cure before installing click-lock planks.
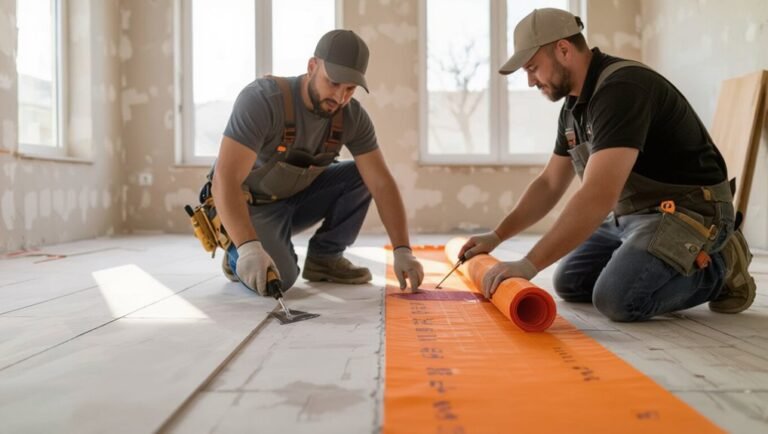
Acclimating the planks and planning layout
Although the room may feel ready, you should let the click-and-lock planks acclimate in the installation space for at least 48 hours so they match the room’s temperature and humidity; this prevents gaps, buckling, and uneven seams after you lock them down.
Then plan layout: measure, stagger seams, allow expansion, and mark junctions.
- Measure room and plan run direction
- Stagger end joints properly
- Reserve expansion gaps
- Mark junctions and thresholds
Step-by-Step Installation Guide
Now you’ll follow a clear sequence to get your planks down correctly: measure the room and calculate how many you need, lay any required underlayment and moisture barrier, and mark a straight start line while choosing plank orientation.
You’ll make safe, accurate cuts as you go, then install the first row carefully, keeping the proper expansion gap.
Stick to each step and you’ll avoid common mistakes and speed up the rest of the job.
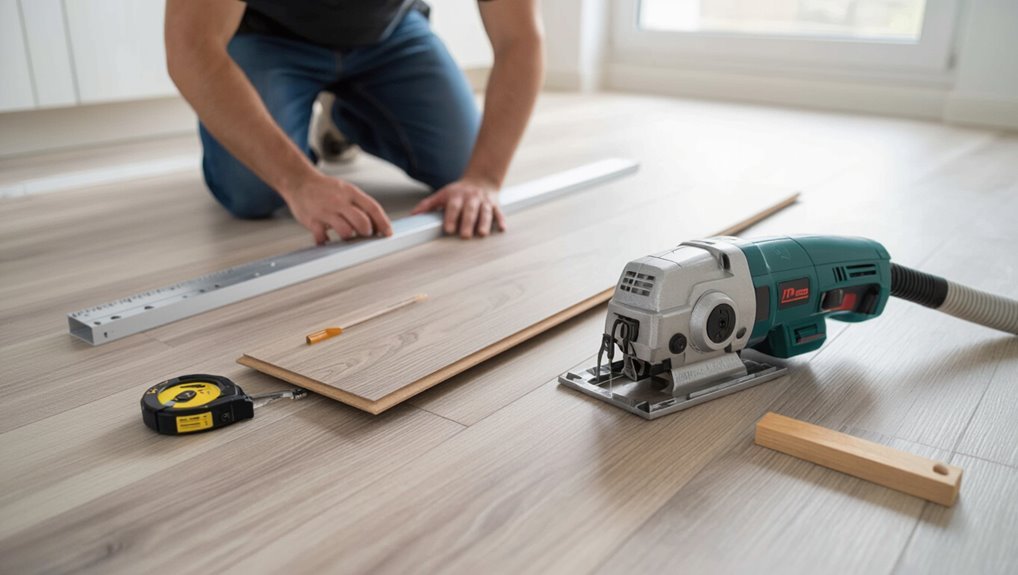
Step 1 Measure the room and calculate plank quantity
Before you lay a single plank, measure the room carefully and work out how many planks you’ll need so you don’t run short or end up with excessive waste.
Measure length and width, multiply for area, then add waste allowance (usually 5–10%). Check plank dimensions and layout. Consider stagger pattern and doorways.
- Measure twice
- Convert to plank count
- Add 5–10% waste
- Account for cuts
Step 2 Install underlayment and moisture barrier (if required)
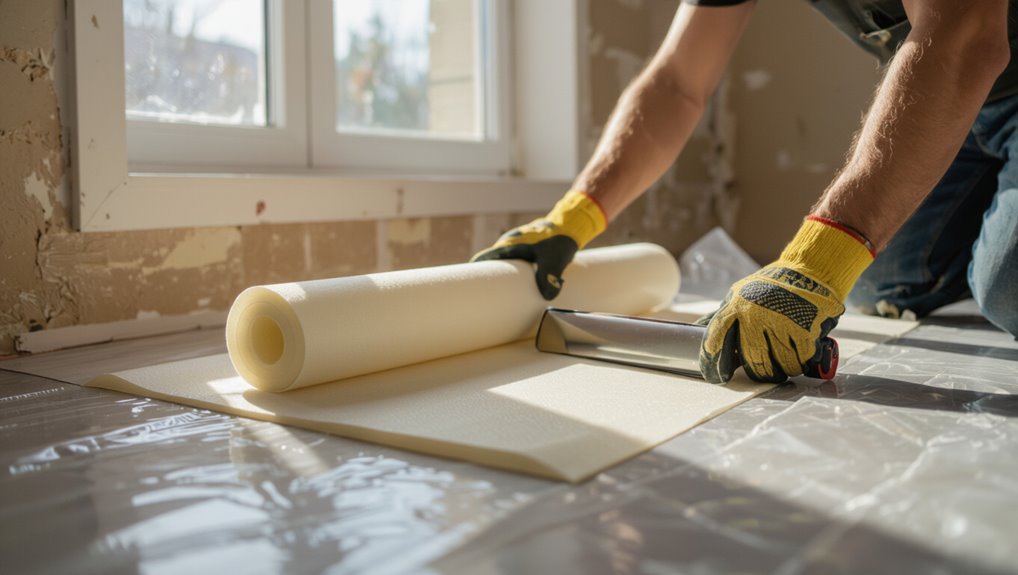
Since a proper underlayment and moisture barrier protect your new floor and improve comfort, lay them next according to the manufacturer’s instructions and the subfloor type.
Clean and dry the subfloor, roll out underlayment perpendicular to planks, tape seams.
If moisture is a concern, install the specified vapor barrier, overlap seams, and seal edges.
Trim excess for flush fit before planks.
Step 3 Mark start line and decide plank orientation
Pick a straight reference line and choose a plank orientation that balances aesthetics and installation ease. Measure the room, snap a chalk line, and plan staggered end joints so cuts fall in less visible areas.
Align the first row with the longest wall or light source. Keep a consistent tongue-facing-out direction for smooth locking.
- visual flow
- ease of installation
- edge stability
- minimized waste
Step 4 Cutting planks safely and accurately
Now you’ll learn the tools and techniques for making straight cuts, using a jigsaw, and trimming around door sills.
Use a straightedge and utility knife or a fine-toothed blade for clean, square cuts, and switch to a jigsaw with a fine-tooth blade for curves or notches.
Always wear eye protection, clamp planks securely, and measure twice before cutting.
Tools and techniques for straight cuts, jigsaws, and door sills
Measure and mark each plank carefully before cutting, and choose the right tool for the job—straight cuts call for a utility knife or mitre saw, jigsaws handle curves and notches, and coping or pull saws help fit door sills and trim.
Clamp planks, score several passes with a knife for clean breaks, use a fine-tooth blade in the jigsaw, and test-fit under door sills before final installation.
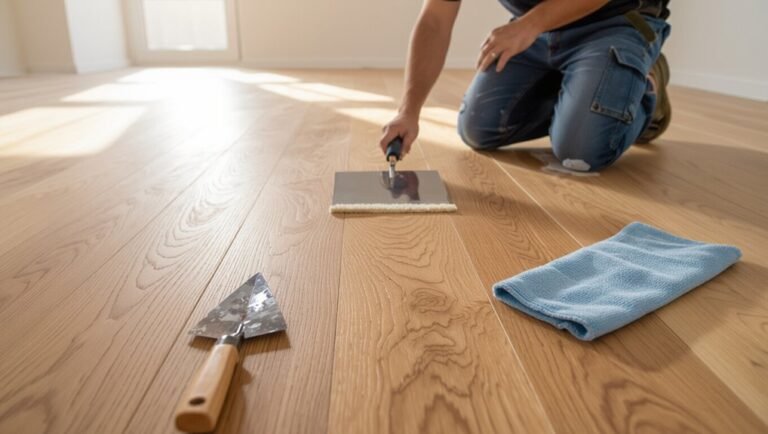
Step 5 Installing the first row and maintaining expansion gap
Begin by laying the first row with the tongue side facing the wall, keeping a consistent 1/4-inch (or manufacturer-specified) expansion gap between the planks and the wall. This gap lets the floor expand and prevents buckling.
Fit each plank snugly, use spacers, and check alignment. Adjust as needed before locking.
- Use spacers to maintain gap
- Trim end planks precisely
- Work left to right
- Verify straight reference line
Step 6 Locking subsequent rows and staggering seams
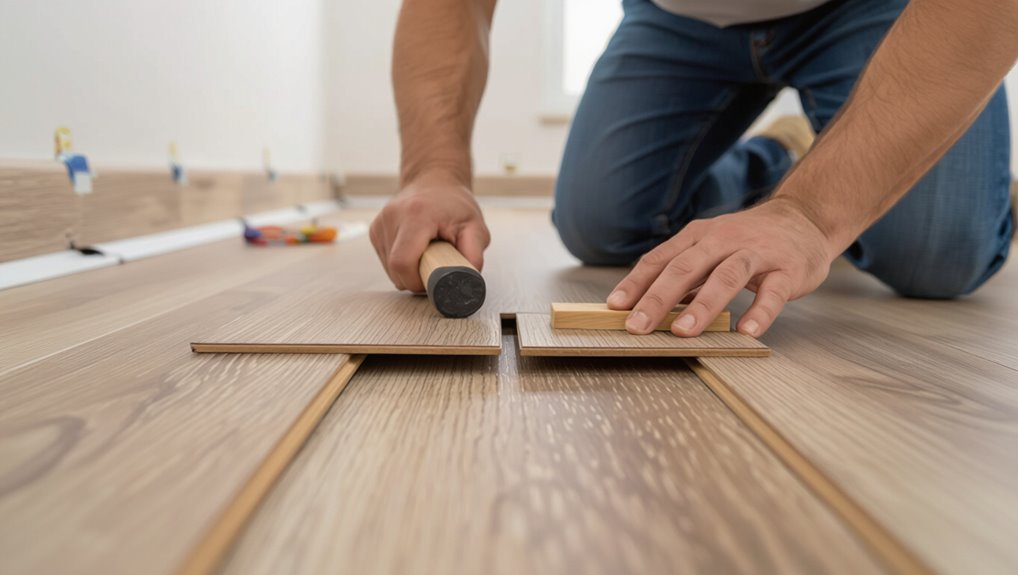
1. When you install each new row, angle the plank tongue into the previous row’s groove, then press down or tap with a mallet and block to lock.
Stagger end seams at least 6–12 inches for strength and appearance.
Check alignment constantly, trim starter pieces as needed, and avoid forcing joints; they should click together smoothly for a tight, uniform surface.
Step 7 Fitting around obstacles, doorways, and cabinets
When you reach vents, corners, or odd shapes, you’ll use a few simple cutting and measuring tricks to get neat fits.
Mark the plank carefully, transfer the outline, and cut with a jigsaw or utility knife as needed.
For doorways and cabinet toe kicks, leave appropriate expansion gaps and use trim or reducers to finish the edge.
Techniques for vents, corners, and irregular shapes
Although irregular cuts can seem intimidating at first, you can handle vents, corners, and odd shapes with accurate measuring, the right tools, and patient, deliberate cuts.
Trace templates from cardboard, transfer marks to planks, and cut with a jigsaw or coping saw. For vents, leave expansion gaps and use grille inserts.
Fit around door jambs by undercutting trim for a seamless, stable finish.
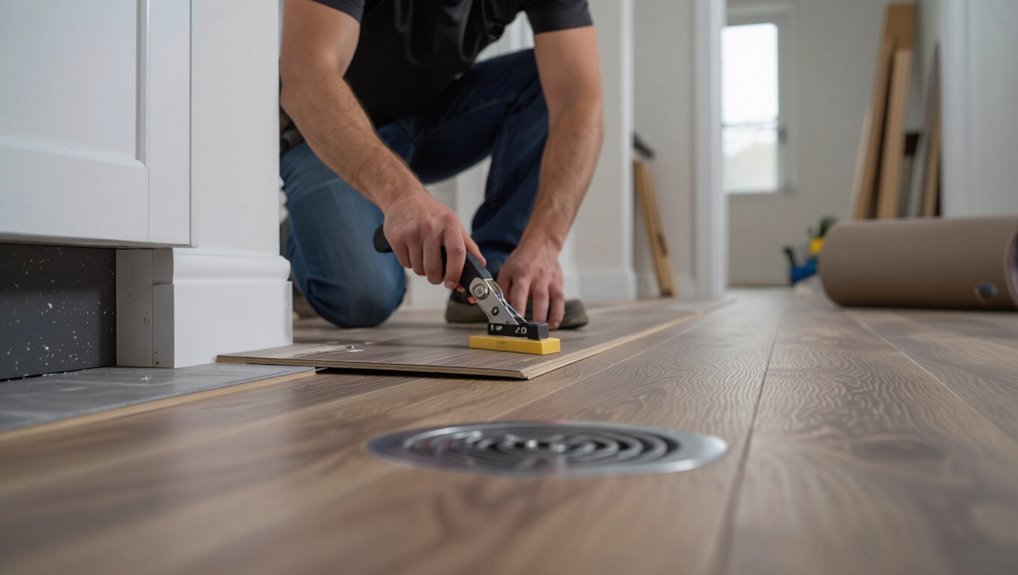
Step 8 Installing last row and finishing edges
Prepare to install the last row by measuring and trimming each plank to fit the remaining gap, keeping a consistent expansion gap along the wall.
Cut planks lengthwise, test-fit, then tap gently with a pull bar to lock. Finish seams and edges with sealing where needed.
- Measure twice, cut once
- Use spacers for gap
- Protect cut edge
- Check alignment
Step 9 Installing trim, transition strips, and thresholds

With the last row locked and edges trimmed, you’re ready to install the finishing pieces that give the floor a polished look and protect exposed edges.
Measure and cut baseboards, quarter-round, or T-molding to fit. Fasten trim to walls, not flooring, and use adhesive or screws for thresholds.
Snap or screw junction strips at doorways, ensuring smooth, secure connections and proper expansion gaps.
Step 10 Final inspection and cleanup
Once the trim and thresholds are in place, do a final inspection and cleanup to guarantee your floor looks great and performs as designed.
Check seams, connections, and expansion gaps, then clean thoroughly. Remove debris and protect edges during cure.
- Verify tight seams and aligned patterns
- Confirm connections sit flush
- Clean with recommended solution
- Install protective coverings for traffic
Common Problems During Installation and How to Fix Them
You’ll run into a few common issues during installation, but most have straightforward fixes.
Watch for gaps between planks, clicks that won’t lock, uneven lippage, and damaged edges or locking mechanisms so you can address each with the right remedy.
In the next section, you’ll get causes and step-by-step corrections for each problem.
Gaps between planks causes and remedies
Gaps between click-and-lock vinyl planks are usually caused by improper acclimation, uneven subfloors, or incorrect locking technique. Recognizing the source quickly helps you fix them before they worsen.
You should:
- Check acclimation time and temperature.
- Use a straightedge to find subfloor highs/lows.
- Re-seat joints with tapping block and pull bar.
- Replace damaged or warped planks to restore tight seams.
Clicks that won’t lock troubleshooting tips
If a click joint refuses to lock, don’t force it—inspect the tongue and groove for debris, damage, or misalignment before trying to snap it together.
Clean, sand, or realign as needed. If still stuck, replace the damaged plank. Check subfloor flatness and plank orientation.
- Clean debris
- File rough edges
- Replace damaged pieces
- Re-seat and realign before locking
Uneven floor or lippage prevention and correction
Uneven subfloors and slight height differences between planks can cause lippage—those visible ridges at seams—so check and address these issues before locking rows together.
You’ll want to level and correct as you go:
- Use a straightedge to spot high or low areas.
- Sand high spots; fill low spots with leveling compound.
- Don’t force planks; realign or trim edges.
- Check seam tightness frequently.
Damage to plank edges or locking mechanism repair options
One common snag you’ll run into is damaged plank edges or a compromised locking profile that keeps pieces from snapping together or holding once installed.
You’ll assess damage, then choose repair or replacement. Options include:
- Replace the damaged plank.
- Trim burrs and clean the profile.
- Use a vinyl-compatible adhesive sparingly.
- Shim or reroute adjacent boards to redistribute locking stress.
Best Practices, Tips, and Time-Saving Tricks
Use staggered plank patterns to boost both strength and the finished look, and plan your layout before you start cutting.
Work methodically in large rooms and doorways to save time—group tools, pre-cut junction pieces, and tackle full rows before stopping.
Protect the finished floor with rosin paper or cardboard and call a pro if you hit uneven subfloor issues, complex junctions, or time constraints.
Stagger patterns for strength and appearance
Because staggered seams distribute load and hide joints, you’ll get a stronger, more attractive floor by planning a consistent pattern before you install.
Stagger rows by at least 6–8 inches, vary end joints, and keep a repeating rhythm.
Consider board length and room lines to avoid small offcuts.
- stagger minimum 6–8″
- avoid aligned end joints
- repeat a simple rhythm
- plan for board lengths
Working efficiently in large rooms and doorways
After laying out a staggered pattern, tackle large rooms and doorways with a plan that keeps momentum and minimizes cuts.
Work outward from a center line, pre-measure doorways, and keep a full row ready to snap in. Use helpers for long runs and a trolley for planks.
- Center line guides alignment
- Pre-cut threshold pieces
- One-row staging
- Two-person lifts
Protecting finished floor during and after installation
One simple rule will save you time and headaches: protect the finished surface as soon as each section is complete.
Cover with breathable rosin paper or cardboard, avoid plastic that traps moisture, and tape only to baseboards.
Keep traffic low and wear soft-soled shoes.
- Use rosin paper for daily protection
- Pad under heavy tools
- Mark walkways
- Remove debris promptly
When to call a professional
If you’re tackling a large room, complex layout, or uneven subfloor, call a professional—getting expert help can save time, prevent costly mistakes, and guarantee your click-and-lock vinyl performs as designed.
You should also hire pros when you:
- Face extensive moisture or mold issues
- Need precise changes and thresholds
- Want warranty-backed installation
- Lack proper tools or time for a quality job
Cost, Warranty, and Maintenance Considerations
Before you start, know the typical cost breakdown—materials, underlayment, tools, and whether you’ll hire labor—so you can budget accurately.
Check manufacturer warranties closely and follow their installation requirements to keep coverage valid.
Finally, learn simple cleaning routines and long-term maintenance tips that preserve the planks and extend their lifespan.
Typical cost breakdown (materials, tools, labor)
Expect to spend most of your budget on materials and labor, with tools adding a modest but important extra cost; understanding that split will help you plan and compare estimates. You’ll budget per square foot for planks, allowance for underlayment, buy or rent tools, and factor installer rates if you don’t DIY.
| Item | Typical cost |
|---|---|
| Materials | $1–$5/ft² |
| Tools | $50–$300 |
| Labor | $1–$4/ft² |
Understanding manufacturer warranties and installation requirements
While warranties can protect your investment, they only do so when you follow the maker’s installation and maintenance rules exactly.
You should read the warranty before starting, meet subfloor, acclimation, and adhesive specifications, and keep proof of purchase. Failing to follow instructions can void coverage.
- Read full warranty terms
- Meet subfloor requirements
- Follow acclimation times
- Keep receipts and photos
Cleaning and long-term maintenance tips for vinyl planks
Because routine care both preserves appearance and protects warranties, you should adopt simple cleaning habits for click-and-lock vinyl planks and be mindful of long-term costs.
Clean regularly, avoid harsh chemicals, and address spills quickly to prevent damage. Consider professional deep cleaning periodically and track maintenance for warranty claims.
- Sweep/dry mop daily
- Damp-mop with mild cleaner
- Use felt pads under furniture
- Replace damaged planks
Frequently Asked Questions (FAQ)
You’re probably wondering whether click-and-lock vinyl can go over tile or concrete, how big the expansion gap should be, and if it’s safe for bathrooms and basements.
You might also ask how long installation takes for an average room and whether these floors can be refinished or sanded.
I’ll answer each of those common questions so you can decide what’s best for your space.
Can click and lock vinyl be installed over tile or concrete?
If your subfloor is flat, clean, and stable, you can usually install click-and-lock vinyl over existing tile or concrete without removing it.
You’ll need to repair loose tiles, fill deep grout lines, and guarantee the surface is dry.
Use a suitable underlayment if recommended, follow manufacturer guidelines, and check for moisture or unevenness that could void the warranty.
How much expansion gap is needed?
Once your click-and-lock planks sit on a flat, stable surface, you’ll need to leave space around the room’s edges so the floor can expand and contract.
Aim for a 1/4-inch gap for small rooms and up to 3/8 inch for larger areas or high temperature variance.
Use spacers during installation and cover gaps with baseboard or quarter round for a clean finish.
Can I use click vinyl in bathrooms and basements?
Wondering whether click vinyl works in bathrooms and basements? Yes—you can use click vinyl in both, but choose waterproof or water-resistant rigid core (SPC/WPC) and guarantee a moisture-resistant underlayment.
In bathrooms seal seams and junctions, and slope shower areas to drains.
In basements test subfloor moisture, use a vapor barrier if needed, and acclimate planks before installing for best results.
How long does installation take for an average room?
How long will it take to install click and lock vinyl in an average room?
You can usually finish a 12×12–15×15 ft room in a day if prepping’s minimal.
Expect 4–8 hours for layout, underlayment, cutting, and snapping planks.
Allow extra time for heavier trimming, door jambs, or irregular walls; add a day for acclimation if required.
Can I refinish or sand click vinyl floors?
Can you sand or refinish click vinyl floors? No — click vinyl has a thin wear layer and printed surface, so sanding or refinishing will damage the design and void warranties.
You can clean, buff lightly, or replace damaged planks. For deep scratches or wear, swap individual boards or consult the manufacturer for matching replacements and proper care recommendations to extend lifespan.