What Is the Tongue Side of Laminate Flooring and Why It Matters
The tongue side of laminate flooring is the protruding ridged edge you fit into the board’s recessed groove; you’ll want the tongue facing the wall so each new plank clicks into the groove of the installed row. That orientation makes alignment, locking, and a tight seam easier and reduces gaps, squeaks, and damage. Identifying the tongue is simple by inspection, and following this rule helps with floating or glued installs—keep going to learn practical tips and fixes.
Quick Answer Which Side Is the Tongue on Laminate Flooring and Why It Matters
The tongue is the protruding ridged edge of a plank that fits into the groove, the recessed slot on the mating board.
For installation, you’ll generally face the tongue toward the wall so the groove faces the direction you’ll click or tap boards together.
If you install them backwards the joints won’t lock properly, leaving gaps, weak seams, and a floor that can shift or squeak.
Direct definition of tongue and groove
Think of tongue-and-groove as a simple interlocking system: the tongue is a thin, projecting edge on one board that fits into a matching groove on the next board, creating a tight seam and stable surface.
When you ask what’s the tongue side of laminate flooring, it’s the protruding edge that inserts into the receiving groove, aligning boards and preventing gaps as you work.
One-sentence practical answer for installation orientation
Although it may seem minor, always install laminate with the tongue facing the wall so you can angle each new board’s tongue into the groove of the already-laid board and pull the seam tight toward you.
You’ll work left to right, inserting tongues into grooves at a slight angle, then pressing down or tapping to lock; this keeps seams aligned, simplifies fitting, and speeds installation.
Immediate consequences of wrong orientation
If you install boards tongue-first toward the room instead of toward the wall, you’ll immediately battle misaligned seams, difficulty angling new boards into place, and a higher risk of gaps or damaged locking edges.
You’ll waste time forcing boards, pry or reseat damaged tongues, and compromise floor stability.
Repairs cost more than correct initial orientation, so flip boards before laying to avoid these issues.
Basic Understanding What Are Tongue and Groove in Laminate Flooring
When you look at a laminate plank, you’ll notice the tongue is a thin ridge along one edge that fits into the groove on the opposite side.
You’ll also see different edge profiles—traditional tongue-and-groove, click-lock systems, and beveled edges—that change how planks join and how easy installation is.
Finally, the core material and laminate construction influence the tongue’s strength and how well the joint holds up over time.
Anatomy of a laminate plank

Think of a laminate plank like a puzzle piece: its edges are shaped to lock together, and the two most important profiles are the tongue and the groove.
You’ll also notice layers: a wear-resistant top, decorative print, core for stability, and backing for moisture balance.
Knowing these parts helps you handle, install, and maintain planks without damaging locking edges or compromising longevity.
Types of edge profiles (tongue-and-groove, click-lock, bevel)
Because the way plank edges fit together determines installation ease and floor performance, you’ll want to know the three common edge profiles: tongue-and-groove, click-lock, and beveled edges.
You’ll use tongue-and-groove for glued or nailed installs, click-lock for floating, tool-free assembly, and beveled edges to mimic real wood seams while hiding minor subfloor imperfections and easing cleanup between planks.
Materials and construction that affect the tongue
Although the tongue in tongue-and-groove systems looks simple, the materials and construction behind it determine strength, moisture resistance, and how well planks lock together during installation.
You should check whether manufacturers use HDF, MDF, or engineered wood cores, and if tongues are reinforced, laminated, or sealed.
These choices affect durability, swelling, and ease of fitting, so pick cores and treatments suited to your environment.
Why Tongue Orientation Matters Functional and Aesthetic Impacts
How you orient the tongue affects how tightly the planks lock together and how stable the floor feels underfoot.
You’ll also influence where expansion gaps are placed, how joints handle moisture, and whether seams stay visible or nearly vanish.
Pay attention to tongue direction to balance structural performance with a clean, continuous look.
Structural stability and locking mechanism
When you install laminate flooring, the direction the tongue faces directly affects how planks lock together and how stable the finished floor feels; tongues oriented toward the wall make tapping and locking easier during installation, while tongues facing out can complicate alignment and increase the chance of gaps.
You’ll get firmer seams when tongues seat properly, reducing movement and squeaks and improving load distribution across the surface.
Expansion gaps and movement allowance
Because laminate expands and contracts with temperature and humidity, you need to leave consistent expansion gaps at the edges. The tongue orientation affects how easy it’s to maintain those gaps and hide them with trim.
You’ll orient tongues toward walls where trim conceals gaps, allowing boards to move inward. Proper orientation prevents visible separations, keeps changes neat, and simplifies future adjustments.
Moisture resistance and joint integrity
While tongue orientation might seem like a small installation detail, it directly affects how well joints resist moisture and stay tight over time.
You’ll find tongues facing the primary moisture source reduce water intrusion into seams, preserving the locking mechanism.
Correct orientation limits swelling and gap formation, so you’ll maintain structural integrity longer and avoid edge lifting or joint failure in damp conditions.
Visual continuity and seam visibility
If you lay the tongue toward the room rather than away from it, you’ll often get tighter seams and a cleaner visual flow because light skims the boards and hides joints instead of highlighting them.
You’ll notice fewer shadow lines and a more continuous pattern, which makes rooms feel larger and more polished. Proper orientation minimizes distracting gaps and preserves the desired plank appearance.
How to Identify the Tongue Side Before Installation
Before you lay a single plank, you’ll want to confirm which edge is the tongue using simple visual cues and a quick tactile check.
Look for manufacturer markings or factory-cut edges that often indicate orientation, and use a straightedge or flashlight to verify the profile and fit.
These steps save time and prevent installation issues.
Visual cues and tactile checks
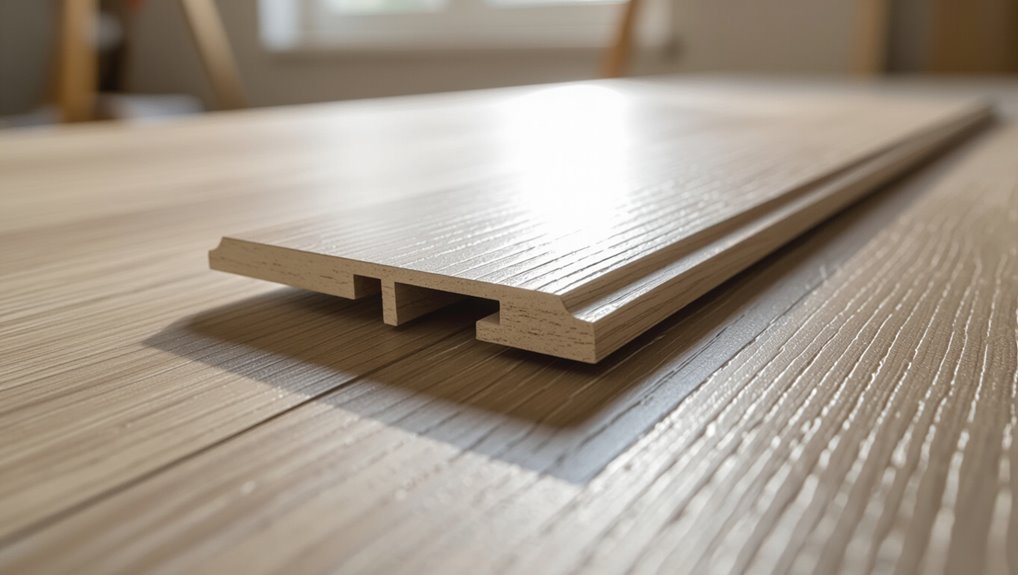
Start by looking closely at the plank’s edge: the tongue usually sticks out as a narrow strip of wood or MDF that tapers slightly and may have a rounded top, while the groove appears as a recessed channel.
Run your finger along edges to feel the protrusion, tilt the plank to catch light for shadowed relief, and compare ends to confirm which side locks into the next board.
Manufacturer markings and factory edges
Alongside visual and tactile checks, manufacturer markings and the factory-cut edges give clear clues about which side is the tongue.
Check printed arrows, “T” or “tongue” stamps, and edge labels; they usually point to the tongue direction.
Factory-cut edges are smoother and often chamfered toward the tongue.
Use these marks to orient boards consistently before you click them into place.
Tools to verify orientation (straightedge, flashlight)
Want a quick, reliable check before you click boards together? Use a straightedge to reveal slight lip differences: lay it along the edge; the tongue side sits flush while the groove shows a gap.
Shine a flashlight along the seam—light catches the groove’s recess. These simple tools confirm orientation fast, preventing miscuts and alignment problems during installation.
Step-by-Step Installation Guidance Focused on Tongue Direction
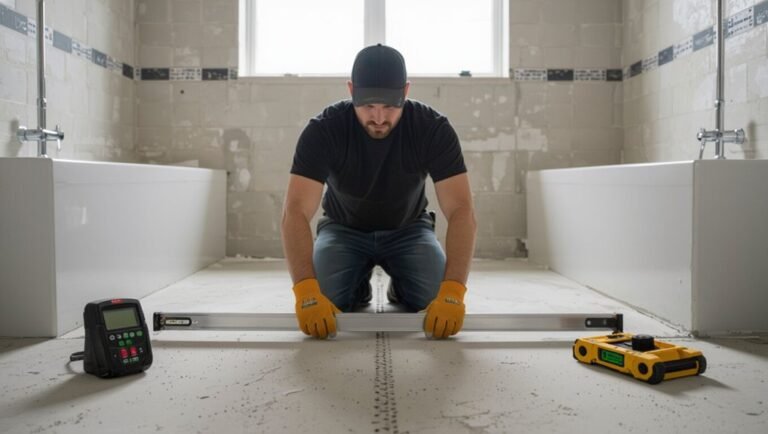
Before you start, make sure the subfloor is clean, level, and that your planks have acclimated to the room.
Choose your starting wall and orient the first row so the tongues face toward the direction you’ll be installing, then engage each tongue into its groove as you go.
Stagger joints, plan end cuts, and finish rows carefully while working around doorways and other obstacles.
Step 1: Preparing the subfloor and acclimating planks
A clean, level subfloor and properly acclimated planks are essential to a stable laminate installation, especially when you’re installing with the tongue facing the wall or the room’s primary direction.
Remove debris, repair low spots, and check moisture with a meter. Lay underlayment per manufacturer instructions.
Stack unopened boxes in the room for 48–72 hours so planks adjust to temperature and humidity before you begin.
Step 2: Selecting the starting wall and plank orientation
Choose the wall that draws the eye and runs parallel to the longest room dimension, and orient your planks so the tongues point toward that starting wall; this lets you work from the most visible edge and keeps cut rows against less conspicuous walls, while also simplifying alignment and locking as you progress.
Check doorways, light sources, and passages to guarantee plank direction enhances flow and minimizes awkward cuts.
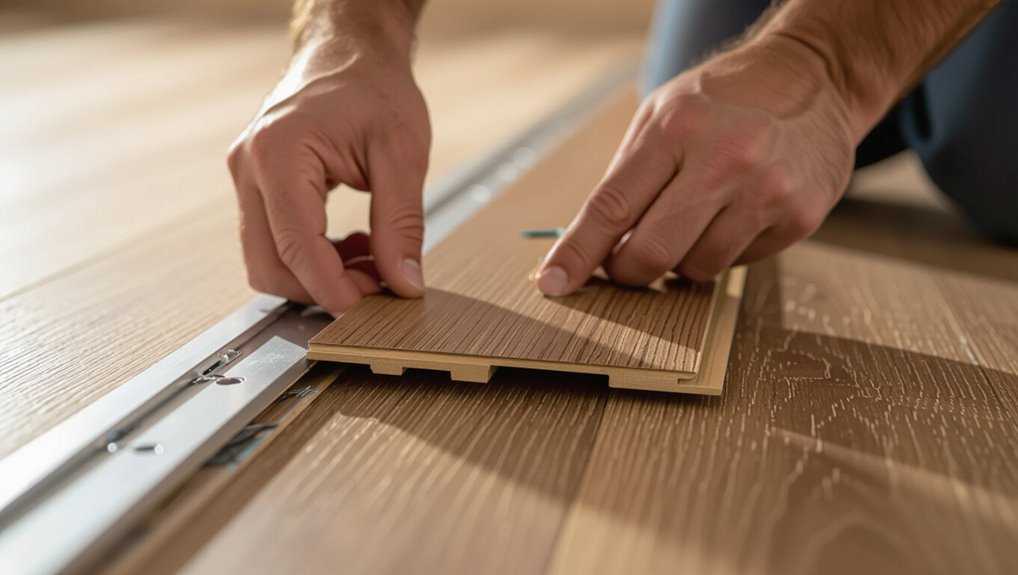
Step 3: Engaging the tongue into the groove technique
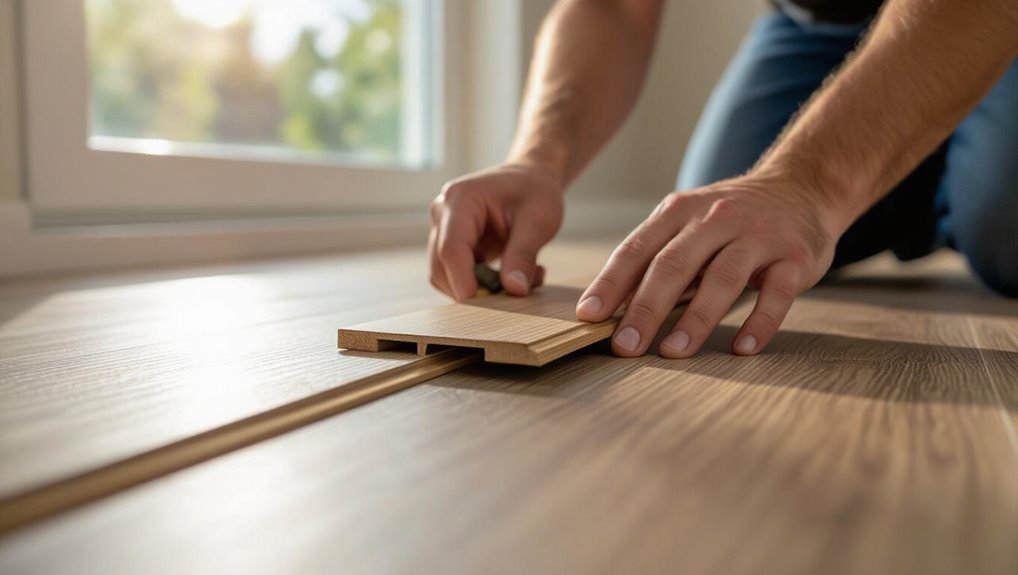
1. You’ll align the tongue of the new plank with the groove of the installed row, angling it slightly.
Insert the tongue into the groove and press down or tap gently with a tapping block until it clicks flush.
Keep seams tight, support the plank near the joint, and work along the row to maintain consistent engagement and a secure floating floor connection.
Step 4: Staggering joints and planning end cuts
Now that you’ve got the tongue engaged in the groove and the row sitting tight, plan your stagger and end cuts so the tongue direction stays consistent across the floor.
Measure each board, aim for offsets of at least 8–12 inches between end joints, and cut boards so tongues remain on the receiving side.
Keep scrap lengths functional for starting future rows.
Step 5: Finishing rows and dealing with obstacles
When you get to the final rows and tricky spots like doorways or vents, work from the tongue side so the last boards slide into place cleanly and you can maintain the same tongue-to-receive orientation.
Measure carefully, scribe cut lines to fit gaps, and leave the recommended expansion space.
Use a pull bar to seat tight seams, cope around pipes, and trim thresholds so tongues aren’t stressed.
Common Mistakes Related to Tongue Orientation and How to Avoid Them
Watch for signs you’ve installed planks the wrong way—gaps, uneven seams, or difficulty locking joints—and correct them by reversing rows or replacing affected boards.
Don’t force joints; that can chip tongues or locks, so loosen the row and re-seat planks gently.
Always orient for the recommended expansion direction and follow the manufacturer’s instructions exactly to prevent buckling and voiding warranties.
Installing planks facing the wrong way symptoms and fixes
If you accidentally install laminate planks with the tongues facing the wrong way, you’ll spot gaps, uneven seams, and a floor that refuses to lock properly.
These symptoms tell you exactly where the joints are compromised and what fixes you’ll need.
Pull affected rows, realign tongues to face the correct direction, refit clips or adhesives, and inspect edges for damage before reseating to guarantee secure, gap-free joins.
Forcing joints and causing damage
Because the tongue must sit precisely in the groove, forcing joints to close will often split edges, chip locking profiles, or deform tongues so they won’t engage later; you’ll hear cracking or see gaps as telltale signs.
Stop forcing—realign planks, check for debris, and use proper tapping blocks.
If a tongue’s damaged, replace the plank rather than risking unstable seams or future failures.
Ignoring expansion direction and resulting buckling
When you lay laminate without accounting for the board’s expansion direction, the floor has nowhere to go as humidity and temperature change.
As a result, planks push against each other and can buckle or form gaps. You should orient tongues and grooves to allow uniform expansion toward planned expansion gaps, maintain recommended spacing at walls, and avoid locking long runs tight to prevent cupping or floor failure.
Misinterpreting manufacturer directions
You’ve seen how improper expansion direction leads to buckling; now look at another frequent problem: misreading manufacturer instructions about tongue-and-groove orientation.
You might flip panels or install tongues toward walls because diagrams confuse you. Read instructions fully, follow arrowed flow, and verify tongue direction before snapping pieces.
When in doubt, contact support or check online videos to avoid costly rework.
Best Practices and Professional Tips
When you lay laminate, work toward the primary light source to show seams less and keep rows aligned.
Pay attention to changes and thresholds so the tongue faces the direction that locks neatly into trim and reduces gaps.
Consider adhesives or extra fasteners only where movement or moisture risk warrants it.
Inspect and test each joint as you go so you catch misalignments early and guarantee a tight, lasting fit.
Work direction recommendations (toward light vs. away from light)
Although layout preferences vary, you should generally work toward the room’s main light source so the seams run with the light and minimize visible joints; this makes the floor look more continuous and hides minor imperfections.
Also start along the longest straight wall, lay boards lengthwise from the entry, and plan plank direction to reduce cutting and align grain with light for a cleaner, professional result.
Handling transitions and thresholds with tongue orientation
After you orient planks toward the room’s light and along the longest straight wall, plan how the tongue faces at doorways and between rooms to guarantee clean joins and smooth movement.
Position tongues toward the room where you want easier removal and expansion access. At thresholds, align tongues to meet adjacent flooring profiles, easing snapping and minimizing visible gaps.
Check alignment before cutting.
When to use adhesives or additional fasteners
If you expect heavy traffic, uneven subfloors, or installations near moisture sources, plan to use adhesive or extra fasteners to reinforce the tongue-side connection.
Use a manufacturer-approved adhesive sparingly along the tongue for added shear strength.
Add fastening at junctions, perimeters, or longer spans to prevent movement.
Test compatibility with your flooring type and avoid overgluing, which can restrict necessary expansion.
Inspecting and testing joints during installation
When you’re installing tongue-side laminate, inspect and test each joint as you go to catch gaps, misalignments, or weak locks before they become bigger problems; use a straightedge, tapping block, and light shears or pull checks to confirm tight seating and consistent alignment across the row.
Check end joints for elevation, listen for clicks, and press seams—correct issues immediately to prevent squeaks, movement, or moisture entry.
Comparison Tongue Orientation Scenarios and When They Differ
When you compare click-lock and traditional tongue-and-groove systems, you’ll notice the tongue orientation affects assembly speed and seam tightness.
You’ll also weigh different tongue placement for floating floors versus glued-down installations because movement and adhesive access change the requirements.
Finally, new construction and renovation setups can force different tongue directions based on starting walls, subfloor prep, and connection needs.
Click-lock vs. traditional tongue-and-groove installation
Because the two systems lock together differently, you’ll notice distinct tongue orientation needs with click‑lock versus traditional tongue‑and‑groove installations. You align click‑lock tongues for snap‑in assembly, easing DIY installs; traditional tongue‑and‑groove needs precise tongue alignment and adhesive or nails. Choose based on access, repair needs, and installer skill.
| Feature | Impact |
|---|---|
| Alignment | Precision required |
| Repair | Ease varies |
| Skill | DIY vs pro |
| Fastening | Snap vs glue/nail |
Floating floor vs. glued-down installation considerations
After you’ve weighed click‑lock against traditional tongue‑and‑groove, you’ll next look at how the installation method—floating or glued‑down—affects which side of the plank should face outward and how tightly joints must fit.
For floating floors, you’ll orient tongues inward for expansion and looser fit; glued installations need tongues outward and tighter seams to guarantee adhesive contact and minimize gap movement.
New construction vs. renovation setups
If your project is new construction, you’ll usually have a flat, continuous subfloor and can orient tongues outward for glued installations or inward for floating ones without worrying about uneven changes.
In renovations, though, conditions like uneven thresholds, existing door clearances, or built-up underlayment can force you to change tongue orientation so planks ride over or snug into problematic edges.
You’ll assess junctions, trim, and expansion needs.
Troubleshooting Guide Problems After Installation and Remedies
After installation you’ll sometimes see gaps between planks, hear squeaks from loose joints, or find water seeping at seams.
You’ll want to identify whether the issue comes from improper acclimation, a misoriented row, or damaged locking profiles.
In many cases you can fix problems by tightening or replacing affected planks, reseating or re-laying the misoriented row, and sealing or drying joints to prevent further water intrusion.
Gaps appearing between planks
When gaps start appearing between laminate planks, you’ll want to act quickly to identify the cause—improper acclimation, unstable subfloor, or seasonal humidity changes are the usual suspects.
Check room humidity and acclimation history, inspect and level the subfloor, and tighten or re-lock affected seams using a tapping block.
If gaps persist, remove and reinstall boards with proper expansion spacing and acclimation.
Squeaks and loose joints
Gaps can signal movement that also causes squeaks and loose joints, so check both issues together to pinpoint where boards are shifting or rubbing.
Walk the floor to locate noises, press suspect seams, and tighten loose planks by reengaging tongues or adding discreet fasteners beneath joints.
Use felt pads or shim underlayment to stop friction; replace damaged locking strips if squeaks persist.
Water intrusion at joints
If water’s getting into the seams of your laminate, you’ll notice swelling, buckling, or dark stains along joints and underboards—signs you should address immediately to prevent lasting damage.
Stop water sources, dry the area with fans and dehumidifiers, remove affected planks, and inspect underlayment.
Replace swollen boards and seal joints with manufacturer-approved sealant.
Monitor humidity to avoid recurrence.
Re-laying or repairing a misoriented row
Spot the problem quickly — a misoriented row will stand out because tongue-and-groove edges don’t fasten flush, boards sit at odd angles, or the row won’t click into adjacent planks.
You’ll need to release that row by gently tapping out end joints, remove affected boards, reorient tongues correctly, and refit.
Use spacers, check alignment, and secure with manufacturer-recommended pressure to prevent recurrence.
FAQs
You probably have a few quick questions about tongue orientation and installation fixes—let’s answer them.
Here are the top FAQs you’ll want to check:
- Which way should the tongue face?
- Can I flip planks if installed wrong?
- Does tongue orientation affect underfloor heating?
You’ll also learn how to tell click-lock vs tongue-and-groove and get tips for irregular rooms and stairs.
Which way should the tongue face: toward or away from the wall?
When you install laminate flooring, orient the tongue toward the wall so the groove faces the room; that way you can angle or snap each new plank into the previous one without working under the exposed edge.
Doing this lets you work outward, keeps visible seams consistent, and simplifies trimming at walls.
Always maintain the manufacturer’s recommended expansion gap along the wall.
Can I flip planks if I installed them wrong?
Can you flip planks if you installed them wrong? You can, but only if you haven’t secured the whole floor and the joints permit disassembly.
Work from the last row back, release and relock planks correctly with the tongue facing the proper direction.
If glued or fully snapped in, flipping isn’t practical—partial replacement may be required.
Does tongue orientation affect underfloor heating?
How will the tongue orientation affect your underfloor heating performance? It usually won’t.
Heat moves through the board regardless of tongue direction, but proper installation matters: tight seams and correct expansion gaps prevent heat loss, warping, or buckling.
Make certain adhesive or floating method suits your heating type, follow manufacturer specs, and keep insulation and thermal conductivity in mind for efficient, safe operation.
How to tell if my laminate is click-lock or tongue-and-groove?
If you’re checking underfloor heating compatibility, you’ll also want to know whether your planks are click-lock or tongue-and-groove because each locks together differently and may affect installation choices.
Inspect edges: click-lock has angled or profiled edges that snap together without glue; tongue-and-groove shows a projecting tongue on one side and a matching groove on the other, usually requiring glue or nails.
Are there special considerations for irregular rooms or staircases?
When tackling irregular rooms or staircases, you’ll need to plan cuts, shifts, and underlayment more carefully than for a simple rectangle—measure multiple times, map out plank runs, and decide where seams and expansion gaps will be least visible.
Use junction mouldings at jogs, cut planks for risers and nosing, stagger joints away from focal points, and allow extra expansion near walls, fireplaces, and stair edges.