How to Install Engineered Flooring on Concrete Subfloors Correctly
You can install engineered flooring on concrete correctly by first testing and preparing the slab for moisture, cleanliness, and flatness, then choosing glue-down, floating, or a plywood underlayment based on those results and manufacturer specs. Acclimate boards 48–72 hours in stable temperature and humidity, use appropriate vapor barriers or moisture membranes, and follow adhesive or click-lock installation steps while maintaining expansion gaps and staggered joints. Continue for detailed step-by-step methods, product choices, and troubleshooting.
How to Install Engineered Flooring on Concrete Subfloors (Quick Answer & Overview)
Yes—you can install engineered flooring over concrete, but your choice of glue-down, floating, or nail-down methods depends on moisture levels, subfloor prep, and traffic.
You’ll usually glue down in basements or high-moisture areas, float in DIY-friendly rooms with stable conditions, and reserve nail-down for plywood over concrete or sleepers.
Expect most engineered floors to last 20–30 years with proper installation and maintenance, though higher-quality products can go longer.
Quick Answer Can you install engineered flooring on concrete?
Wondering whether you can install engineered flooring over a concrete subfloor? Yes — you can.
With proper moisture testing, a level surface, and the right underlayment or adhesive, you’ll successfully learn how to install engineered flooring on concrete.
Prep includes vapor barrier, patching cracks, and acclimating boards.
Choose a compatible installation method and follow manufacturer specs to guarantee durability and warranty compliance.
When to choose glue-down vs. floating vs. nail-down
Choosing the right installation method—glue-down, floating, or nail-down—depends on your concrete subfloor’s moisture level, flatness, and the room’s use.
Use glue-down for stable, low-moisture slabs and maximum contact.
Pick floating when moisture or minor unevenness prevents adhesives, or for quick installation.
Nail-down is rarely used on concrete unless a plywood underlayment is installed first.
Most common use cases and expected lifespan
Engineered flooring on concrete is most common in basements, ground-level slabs, and urban apartments where moisture resistance, dimensional stability, and a real wood surface matter.
You’ll also use it over radiant heating and renovated slabs. Expect 20–40 years with proper installation, moisture control, and maintenance.
High-traffic areas may wear faster; thicker wear layers and refinishing extend life.
Understanding Engineered Flooring and Concrete Subfloors
You’ll first want to know what engineered flooring is — layered wood panels designed for stability — and which types work best on concrete, like multi-ply construction, click-lock systems, and adhesive-ready planks.
Pay attention to concrete characteristics that affect installation: moisture levels, flatness, levelness, and porosity.
Also check building codes and the manufacturer’s installation requirements before you start.
What is engineered flooring?
Think of engineered flooring as a layered wood product that gives you the look of solid hardwood with greater stability for concrete subfloors.
You get a real wood veneer over plywood or HDF core, reducing movement from moisture and temperature. It’s thin, durable, and adaptable, making installation over concrete easier when you follow moisture and leveling guidelines.
- Real wood veneer
- Stable core layers
- Lower moisture sensitivity
Types of engineered flooring compatible with concrete (ply construction, click-lock, adhesive-ready)
Having picked a stable engineered plank for a concrete subfloor, you’ll next choose the construction and installation style that matches your site and skill level.
Opt for multi-ply cores for stability, click-lock systems for fast floating installs, or adhesive-ready boards for permanent bonding.
Choose plywood or HDF cores based on moisture tolerance, and match adhesive type to concrete and manufacturer recommendations.
Concrete subfloor characteristics that affect installation (moisture, flatness, levelness, porosity)
Because concrete varies widely in moisture, flatness, levelness and porosity, you need to assess each characteristic before installing engineered flooring so you can choose the right prep and installation method.
Test moisture with a reliable meter, check flatness and level against tolerance specs, and gauge porosity for adhesive compatibility.
Address high moisture, unevenness, or absorbency with appropriate mitigation before installation.
Building codes and manufacturer requirements to check
Before you start prep work, confirm applicable building codes and the flooring manufacturer’s installation requirements so you won’t void warranties or fail inspections.
Check local code for moisture barriers, vapor retarder class, expansion gaps, and fastening methods.
Follow manufacturer’s moisture testing, adhesive type, acclimation time, and approved substrates.
Document compliance and keep specs on-site for inspectors and future maintenance.
Pre-Installation Assessment and Preparation
Before you start installing, gather the right tools and materials and inspect the concrete for moisture (using calcium chloride or RH tests), pH, and surface contamination.
Check flatness and level with a straightedge or laser level and note cracks, spalls, or low spots that need repair.
If moisture or damage is present, choose appropriate mitigation—vapor barriers, moisture membranes, or epoxy treatments—before laying the flooring.
Tools and materials checklist
Checklist and care will make your installation go smoothly: gather the right tools, safety gear, and materials so you can assess and prep the concrete subfloor without delays.
You’ll need measuring, cutting, and fastening tools, plus adhesives and underlayment suited to concrete. Use PPE and proper transport aids to protect material and yourself.
- Tape measure, chalk line, utility knife
- Moisture barrier, adhesive, underlayment
- Safety glasses, knee pads, respirator
Inspecting the concrete: moisture tests (calcium chloride, relative humidity), pH, surface contamination
When you’re preparing to install engineered flooring over concrete, thoroughly testing and inspecting the slab is essential to prevent failures.
Moisture, high or low pH, and surface contaminants can all compromise adhesive bonds and the flooring itself.
Use calcium chloride or in-situ RH tests per standards, check pH (ideal 7–9), and test for oils, curing compounds, or laitance—clean or remediate before installation.
Measuring and checking subfloor flatness and level (straightedge, laser level)
You’ll want to confirm the concrete is flat and level because even small deviations can cause gaps, squeaks, and premature finish failure in engineered flooring.
Use a 6–10 ft straightedge to find high/low spots, noting deviations over manufacturer tolerance (typically 3/16″ in 10′).
Scan with a laser level for slopes and crown.
Record measurements and photos before proceeding with any corrective plan.
Repairing common concrete problems (cracks, spalls, low spots)
Start by cataloging and prioritizing defects—cracks, spalls, and low spots—and decide which fixes are needed to meet your flooring manufacturer’s tolerances.
Repair hairline cracks with epoxy injection, widen and fill structural cracks with appropriate cementitious repair, and level low spots with polymer-modified patch.
Follow cure times and grind smooth where required.
- Inspect and mark defects
- Choose matching repair material
- Verify flatness after repair
Moisture mitigation options (vapor barriers, moisture membranes, epoxy treatments)
Before you install engineered flooring over concrete, assess and address moisture so your new floor performs as promised: Choose between vapor barriers, moisture membranes, or epoxy moisture mitigation based on slab moisture tests. Install per manufacturer specs, seal joints, and allow cures.
| Option | Best for |
|---|---|
| Vapor barrier | Low to moderate moisture |
| Membrane | High moisture control |
| Epoxy treatment | Severe vapor drive |
Site Conditions and Acclimation
Before you lay any boards, make sure the room’s temperature and humidity are stable within the manufacturer’s recommended range so the floor won’t expand or contract after installation.
Allow the engineered flooring to acclimate on-site—usually 48–72 hours—stacked flat with spacers, checking moisture content before you start.
Coordinate sequencing with other trades so HVAC is running, concrete is fully cured and dry, and no wet work will occur after the floor goes down.
Ideal room conditions (temperature, humidity) before installation
Although engineered flooring’s stability depends on the product, you should hold the room at a steady 60–80°F (16–27°C) and 30–50% relative humidity for at least 72 hours before installation so the boards acclimate to the space.
Maintain those conditions during installation and afterward while adhesives cure.
Use HVAC, humidifiers, or dehumidifiers to stabilize environment; monitor with a thermometer and hygrometer.
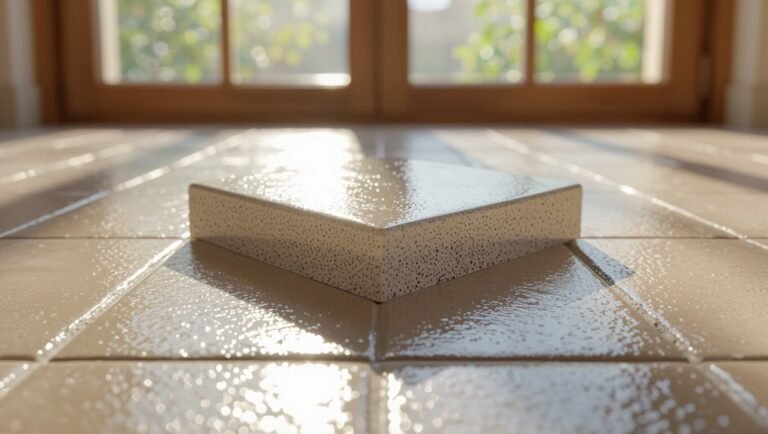
Acclimating engineered flooring: duration and process
If you want a lasting, stable floor, let the engineered boards acclimate to the jobsite for the right amount of time: typically 72 hours for most products, but up to 7 days for thicker or multi-ply planks or when moving from a very different climate.
Stack unopened boxes flat, separate rows for airflow, keep room conditions stable, and measure moisture content before installing.
Sequencing other trades and timing considerations
When you coordinate trades and schedule installation around site conditions and acclimation, you prevent delays and minimize moisture- and damage-related issues; plan flooring last after drywall, painting, and HVAC testing.
Allow final HVAC balance and stable interior humidity for at least 48–72 hours.
Sequence plumbers, electricians, and finish carpenters to avoid rework.
Confirm concrete moisture readings and keep traffic controlled until installation finishes.
Installation Methods Step-by-Step Procedures
Now you’ll follow clear step-by-step procedures for each installation method so you can pick the one that fits your subfloor and skill level.
I’ll walk you through glue-down, floating (click-lock), and mechanical fastening steps, highlighting tools, prep, and common pitfalls.
Follow each set of steps in order to get a secure, long-lasting install.
Method 1 Glue-Down Installation (Step-by-step)
Before you start gluing, make sure the concrete is clean, dry, and level so the adhesive bonds properly.
You’ll snap chalk lines for an accurate layout, choose the right trowel notch and spread adhesive evenly, then set and align each plank, roll the floor, and allow proper curing time.
Finish by cleaning excess adhesive and inspecting seams, changes, and trims for a professional result.
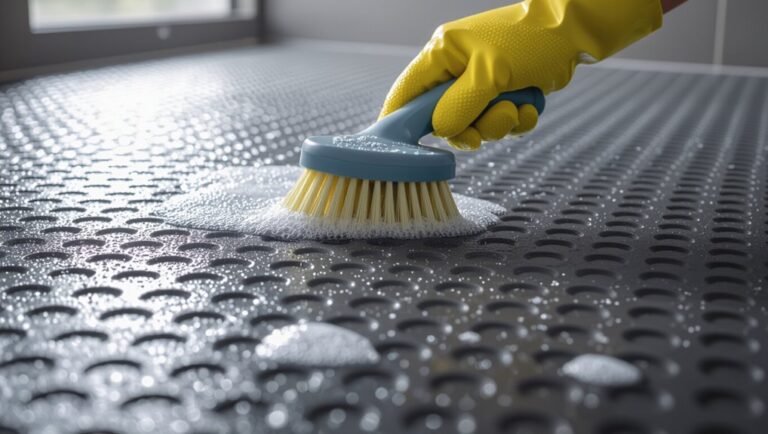
Prepare concrete surface for adhesive
Sweep and inspect the concrete, then make any repairs so the surface is clean, level, and solid for the adhesive to bond.
Remove dust, oils, paint, and laitance with a broom, vacuum, degreaser, or grinder.
Fill cracks and low spots with a compatible patching compound, allow full cure, then check moisture and pH levels.
Only proceed when the slab meets adhesive manufacturer specs.
Layout and chalk lines
With the slab clean, repaired, and within the adhesive maker’s moisture and pH limits, it’s time to lay out your floor pattern and snap chalk lines so the boards go down straight and balanced.
Measure room center, establish a starter line parallel to the longest wall, and snap primary and reference lines.
Account for expansion gaps, stagger end joints, and dry-fit rows to confirm alignment before adhesive.
Applying adhesive and trowel selection
Once you’ve confirmed the slab and layout are ready, spread the manufacturer’s recommended urethane or MS polymer adhesive using the specified trowel notch to get the correct coverage and bond.
Work in manageable sections, combing adhesive evenly, keeping ridges consistent, and avoiding pooling.
Check pot life and temperature limits, clean trowel frequently, and follow open time to guarantee peak adhesion before placing planks.
Laying planks, rolling, and curing time
Now that the adhesive’s been combed and is within its open time, start placing planks into the adhesive following your layout lines.
Press each plank firmly to seat it and align end joints properly.
Stagger seams, maintain expansion gaps at perimeter, and use a 100–150 lb roller to guarantee full contact.
Allow manufacturer-recommended curing time before traffic; keep area undisturbed.
Clean-up and post-installation checks
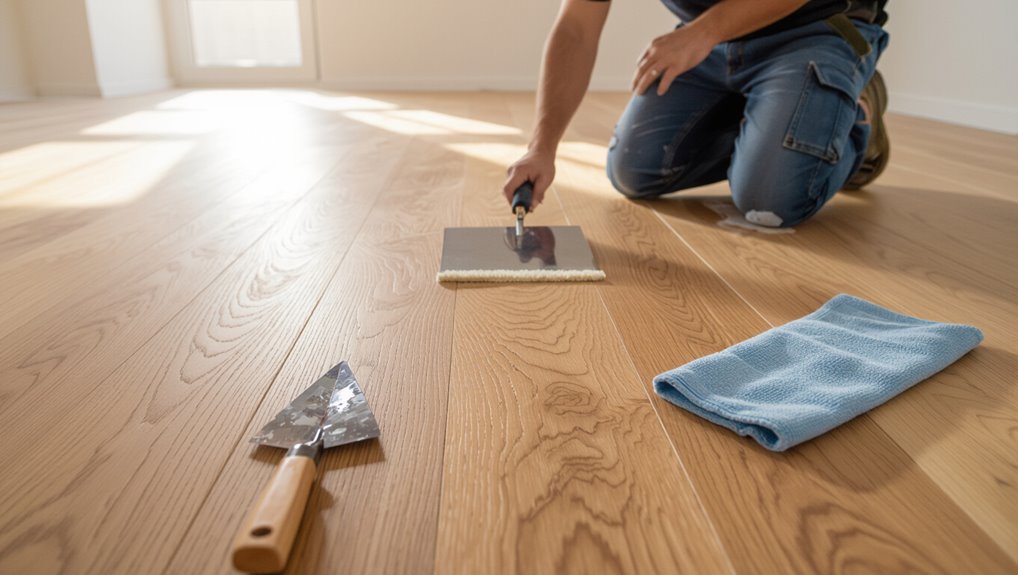
Sweep and vacuum the floor to remove any adhesive smears, dust, and debris before they set.
Then wipe plank surfaces with a damp (not wet) microfiber cloth to pick up residue without damaging the finish.
Inspect seams and edges for gaps or adhesive squeeze-out, trim excess, and tighten junctions.
Allow full cure time, then reinstall moldings, furniture with pads, and monitor for movement or squeaks.
Method 2 Floating (Click-Lock) Installation (Step-by-step)
For a floating click-lock floor you’ll start by laying a suitable underlayment and moisture barrier to protect the boards from concrete vapor.
Plan and maintain the required expansion gap around the room, treating the perimeter correctly as you assemble each row and use a tapping block to snug the joints.
Finish by fitting connection strips and thresholds at doorways and changes in elevation.
Installing underlayment and moisture barrier
Before you click the planks together, lay a proper underlayment and moisture barrier so the floating floor performs and lasts as designed.
Roll out a vapor barrier (6–8 mil polyethylene) taped at seams, then install the cushioning underlayment per manufacturer specs.
Butt seams tightly, trim edges to fit, and overlap barrier at doorways.
Verify the surface is clean and flat before snapping planks.
Expansion gap planning and perimeter treatment
1–3/8 inches (or whatever your manufacturer’s spec calls for) of clearance around the room is critical, so plan and mark that expansion gap before you lay the first row of planks.
Maintain that gap at doorways, columns, and pipes. Use spacers while you work.
Cover the perimeter with appropriate trim—quarter round or reducer—securing trim to the wall, not the flooring, so the floor can expand and contract.
Row-by-row assembly tips and tapping block technique
Now that you’ve marked and spaced the perimeter, start laying the first full row with the groove side facing the wall and use spacers to keep that expansion gap.
Work row by row, staggering end joints at least 6–8 inches. Angle and click each plank into the previous one, then use a tapping block and soft mallet to close seams without damaging edges.
Check alignment often.
Transition strips and thresholds
When you reach doorways, room changes, or alterations in floor height, install junction strips and thresholds to protect edges and allow the floating floor to expand and contract freely.
Choose compatible profiles, cut to fit, and leave recommended expansion gaps under the strip. Fasten only to the substrate, not the flooring.
Seal seams where moisture may intrude and check alignment before final fixing.
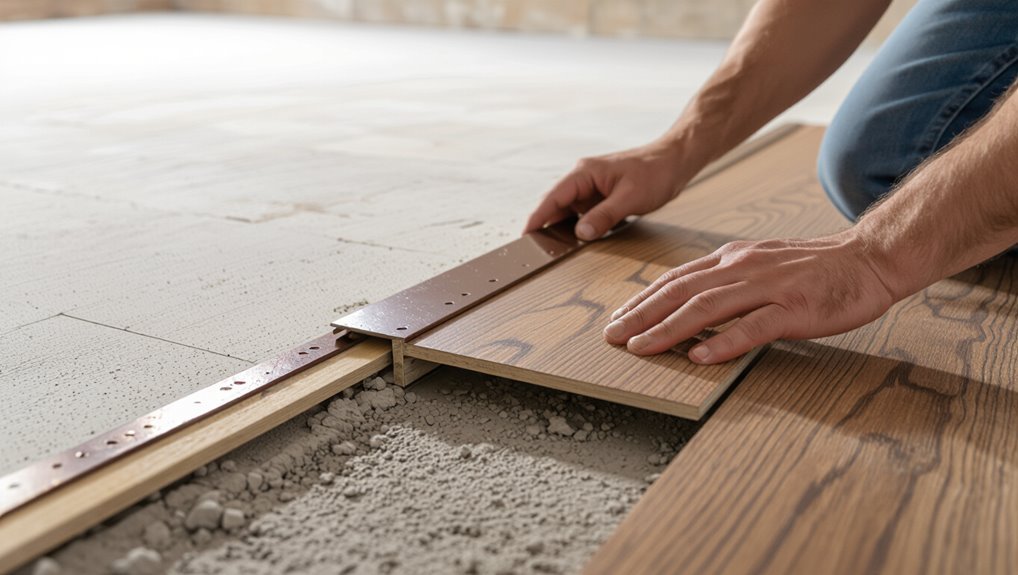
Method 3 Mechanical Fastening (when applicable) (Step-by-step)
When you use mechanical fastening, you’ll install a concrete-grade subfloor or sleeper system and secure the engineered planks with screws or screw-plus-adhesive into those sleepers.
This method gives you a stable, raised substrate that can simplify repairs and allow for better air and moisture control.
It trades the permanence of glue-down for easier replacement and potentially more noise than a floating floor, so weigh durability, sound, and installation complexity.
Using a concrete-grade subfloor or sleepers
If your concrete slab isn’t perfectly level or you want an air gap for moisture control, you can install a concrete-grade plywood subfloor or sleepers before mechanically fastening engineered flooring. This creates a stable, uniform surface that simplifies nailing or screwing the boards in place and helps isolate the wood from slab moisture.
Lay sleepers on sleepers tape or adhesive, plywood with staggered seams, check level, and secure.
Fastening methods (screws, adhesives to sleepers)
Start by choosing the fastening method that matches your sleeper layout and flooring type: screws into sleepers give the most secure, repairable attachment while construction adhesive alone can work on well-prepared, level sleepers for a floating-like bond.
Drill pilot holes through boards into sleepers, countersink screws, or apply continuous beads of adhesive. Stagger fasteners, allow cure time, and check flatness as you proceed.
Pros and cons compared to glue-down and floating
Now that you’ve prepared and fastened boards to sleepers, compare that mechanical method to glue-down and floating installations so you can pick what’s best for your job.
Mechanical fastening gives superior stability, easier repairs, and better air circulation beneath boards. It’s labor-intensive, raises floor height, and needs sleepers.
Glue-down offers low profile and solid feel but is messy; floating is quick and reversible but can sound hollow and shift.
Finishing Touches and Post-Installation Tasks
Now that the planks are down, you’ll trim edges, install baseboards or quarter round, and fit junction pieces, stair nosing, and door clearances for a finished look.
Follow adhesive curing times and first-week use guidelines to avoid damage while the floor stabilizes.
Finish with a final inspection checklist to confirm gaps, fasteners, junctions, and clean-up are all correct.
Trimming, baseboards, and quarter round installation
A few careful finishing touches—trim, baseboards, and quarter round—give your engineered floor a clean, professional look while hiding expansion gaps and minor edge imperfections.
Measure and miter cuts precisely, paint or stain pieces before installation if needed, and fasten baseboards to the wall, not the flooring.
Nail or adhesive quarter round to the baseboard, keeping the floor free to expand.
Transition pieces, stair nosing, and door clearances
Although the main installation’s done, you’ll want to add connector pieces, stair nosing, and check door clearances to guarantee safety, smooth movement between surfaces, and room for seasonal expansion.
Install junction strips at thresholds, secure stair nosing to match profile and nosing overhang, and trim doors for proper clearance.
Verify consistent expansion gaps and fasten junctions per manufacturer instructions for durability and code compliance.
First-week use guidelines and curing times for adhesives
Because adhesives and newly laid planks need time to settle, plan your room use for the first week to minimize traffic and weight on the floor.
Keep foot traffic light, avoid rolling casters or heavy furniture, and place felt pads under furniture legs.
Monitor manufacturer curing times—typically 24–72 hours for walking, 7 days for light furniture, and up to 21 days for full load.
Use humidity control.
Final inspection checklist
Now that the floor’s set and curing times have passed, you should perform a thorough final inspection to catch any issues before normal use resumes.
Check seams, changes, and expansion gaps for alignment and secure adhesion. Verify finish uniformity and remove debris. Confirm temperature and humidity are stable.
- Look for loose planks or shifts
- Inspect caulking and trim seals
- Test door clearances and changes
Common Problems, Causes, and How to Fix Them
You’ll sometimes see issues like buckling, cupping, or gapping, and each has a specific cause and remedy.
Pay close attention to moisture-related failures, adhesive delamination, and how uneven concrete or installation errors can show up after the job.
I’ll explain the root causes and quick fixes so you can troubleshoot and correct problems promptly.
Buckling, cupping, and gapping root causes and remedies
If engineered flooring starts to cup, gap, or buckle, it’s usually telling you there’s a moisture or installation issue that needs fixing.
Check subfloor flatness, adhesive or click-lock integrity, and proper acclimation.
Verify vapor barrier and perimeter expansion gaps.
Repair uneven concrete, reattach loose boards, replace distorted planks, and reinstall with correct fastening or adhesive.
Monitor humidity and maintain stable indoor conditions.
Moisture-related failures and emergency fixes
Because moisture under engineered flooring can wreck both appearance and structure, you should treat any signs of dampness as an urgent problem.
Stop traffic, dry the area with fans and dehumidifiers, lift affected planks to ventilate, and inspect for mold.
Identify and fix the water source—plumbing, slab vapor, or leaks.
Replace severely warped boards and install a proper vapor barrier before reinstalling.
Adhesive failures and delamination troubleshooting
When adhesive lets go or planks start to delaminate, you’ll see cupping, hollow spots, or boards that shift underfoot; these signs mean the bond between flooring and substrate has failed and needs prompt diagnosis.
Check for moisture, improper trowel paste, contaminated surfaces, or inadequate adhesive open time.
Remove affected boards, clean and prep the slab, reapply proper adhesive, and clamp or weight until cured.
Uneven surfaces after installation and corrective actions
Problems with adhesive and delamination often reveal themselves as uneven flooring, but other installation mistakes and substrate issues can produce peaks, valleys, or rocking boards even after the glue sets.
If you spot highs, sand or plane tongues; fill lows with a cementitious patch or self-leveler.
Replace or re-glue rocking boards, check moisture, and guarantee subfloor flatness before finishing to prevent recurrence.
Best Practices, Tips, and Maintenance
When you install engineered flooring on concrete, take preventive steps like proper moisture testing, using the right underlayment, and following acclimation guidelines to avoid future problems.
For long-term care, stick to manufacturer-approved cleaning, monitor and control humidity, and repair or replace damaged planks promptly.
Call a professional for persistent moisture issues, structural concerns, or complex repairs, but handle routine maintenance and minor fixes yourself.
Preventive steps during installation to avoid future issues
Although proper installation takes extra time up front, following proven preventive steps will save you from costly repairs and warranty woes down the road.
You should level and clean the concrete, test and mitigate moisture, and acclimate boards properly.
Take time to trowel adhesive evenly, maintain expansion gaps, and inspect each plank before fixing it.
- Level and clean concrete
- Test and mitigate moisture
- Acclimate and inspect boards
Long-term maintenance: cleaning, humidity control, repair of damaged planks
Keep your engineered flooring looking and performing its best by sticking to a simple maintenance routine: clean spills promptly, use the right cleaners, monitor indoor humidity, and address damaged planks quickly to prevent further problems.
Vacuum or dry-mop weekly, spot-clean with manufacturer-approved products, keep humidity between 35–55%, use mats at entries, and repair or replace warped or cracked planks immediately to avoid spread.
When to call a professional vs. DIY
If you’re handy and comfortable with basic tools, you can tackle routine maintenance and small repairs yourself, but call a professional for structural issues, persistent moisture, or large-area work that affects subfloor integrity.
You should also hire pros for leveling, moisture testing, or complex installations.
DIY is fine for plank replacement, refinishing, and simple changes if you follow guidelines and have proper tools.
Product Selection and Comparison
You’ll want to compare adhesives, underlayments, and moisture membranes to match your concrete’s conditions and installation method.
Pick engineered boards with an appropriate thickness, wear layer, and finish so they’ll hold up and look right over time.
Finally, weigh cost and the labor-versus-material trade-offs to get the best long-term value.
Comparing adhesives, underlayments, and moisture membranes
Choosing the right adhesive, underlayment, and moisture membrane makes the difference between a stable, long-lasting engineered floor and one that fails prematurely; you’ll want products matched to your concrete’s moisture level, the flooring’s installation method, and expected traffic.
| Product | Best use |
|---|---|
| Adhesive | High-moisture concrete, full-spread |
| Underlayment/membrane | Sound control, vapor barrier |
Choosing engineered board thickness, wear layer, and finish for concrete installations
When installing engineered flooring over concrete, pick board thickness, wear-layer depth, and finish based on traffic, subfloor conditions, and the installation method so your floor performs and wears predictably.
Choose 3/8″–3/4″ thickness for stability; thicker boards resist deflection. Prefer 3–6 mm hardwood wear layers for refinishability.
Select durable UV-cured polyurethane or aluminum-oxide finishes for high-traffic areas; matte tones hide scratches.
Cost considerations and labor vs. material trade-offs
After settling on thickness, wear layer, and finish, shift focus to how those choices affect your budget and labor requirements.
You’ll balance upfront material costs against installation complexity and long-term durability. Higher-grade planks cost more but cut refinishing and replacement labor; cheaper boards save now but may raise lifetime expenses.
- Material vs. installer hourly rates
- Prep time for concrete subfloors
- Warranty and lifecycle costs
Frequently Asked Questions (FAQ)
You’ll find answers here to common concerns like installing over radiant-heated concrete and using engineered flooring in basements.
I’ll cover required expansion gaps, acceptable moisture readings, and how long to wait after pouring concrete.
If you still have questions, you can check product specs or ask a pro for site-specific advice.
Can engineered wood be installed directly over radiant-heated concrete?
Can engineered wood go directly over radiant-heated concrete?
You can install engineered flooring over hydronic or electric radiant systems if the concrete is fully cured, dry, and within the manufacturer’s temperature limits.
Use an approved adhesive or floating method rated for radiant heat, monitor surface temperatures, and follow acclimation and installation guidelines to prevent warping, delamination, or warranty voidance.
How much expansion gap is required around the perimeter?
How wide should the expansion gap be?
You should leave 1/4″ to 1/2″ (6–12 mm) for standard plank widths; wider planks or long runs may need 3/4″ (18 mm).
Follow manufacturer recommendations and local codes.
Keep gaps continuous around walls, columns and fixed objects, and use matching trim or thresholds to conceal them while allowing the floor to expand and contract freely.
What level of moisture reading is acceptable for installation?
Before you install, measure both the concrete and the engineered planks’ moisture with a reliable meter—relative humidity (RH) tests in situ and a surface moisture reading or calcium chloride test give the clearest picture—and only proceed if readings meet the manufacturer’s limits (commonly ≤85% RH for concrete with 2–3% moisture content by calcium chloride or a surface reading within the plank spec).
Follow manufacturer tolerances; reject or remediate otherwise.
Can you install engineered flooring in basements?
Wondering whether engineered flooring works in basements? You can install engineered boards there if you control moisture and humidity, use a proper vapor barrier, and choose click-lock or glue-down systems approved for concrete.
Acclimate planks, level the slab, and follow manufacturer guidelines. Avoid direct glue without moisture mitigation, and monitor conditions to prevent warping, cupping, or mold growth.
How long after concrete pouring should you wait before installing flooring?
When can you install flooring after concrete pouring? You should wait until the slab fully cures and dries — typically 28 days for standard cure, but moisture testing (RH or calcium chloride) confirms readiness.
Engineered flooring needs moisture levels within manufacturer limits; use a vapor barrier or moisture mitigation if needed.
Faster installs risk adhesive failure, cupping, or mold, so test and follow specs.
Useful Resources and References
Check the manufacturer’s installation guide and warranty terms first so you know the required adhesives, moisture limits, and installation steps.
Consult relevant standards and local building codes (ASTM tests, moisture mitigation, etc.) to confirm compliance.
If you’re unsure, hire or consult recommended professionals and the right tools to guarantee a proper, code-compliant installation.
Manufacturer installation guides and warranty requirements
Because installation methods and warranty coverage vary by brand, you should always consult the manufacturer’s installation guide and warranty statement before you begin; those documents spell out approved adhesives, moisture limits, acclimation times, and required substrate prep that you’ll need to follow to keep your warranty valid.
- Check adhesive type and coverage rates.
- Verify allowable slab moisture and testing methods.
- Follow specified acclimation and installation steps exactly.
Standards, codes, and testing references (ASTM, local codes)
Although local building codes and industry standards each cover different details, you’ll need to reference both ASTM standards and your jurisdiction’s requirements before installing engineered flooring on concrete.
Consult test methods for moisture, flatness, and adhesive compatibility, and document compliance to preserve warranties and pass inspections.
- ASTM moisture and alkalinity tests (F2170, F1869)
- Local code inspection criteria
- Manufacturer-accepted test reports
Recommended professional services and tools
One essential step is to assemble the right team and tools before you set flooring on concrete: hire a qualified moisture-testing technician, a licensed flooring contractor familiar with engineered products, and—if needed—a structural or concrete specialist for slab repairs.
Equip them with calibrated hygrometers (ASTM F2170), calcium chloride kits (F1869) for comparison, a laser floor leveler or straightedge for flatness checks, and manufacturer‑approved adhesives and trowels.
- Confirm calibration and certifications
- Schedule moisture mapping and flatness survey
- Keep manufacturer installation guides and warranty paperwork on site