How to Fix Gaps in Vinyl Plank Flooring (Easy DIY Solutions)
You can fix most gaps in vinyl plank flooring yourself with simple tools and supplies; start by identifying the cause—temperature, moisture, subfloor movement, or poor installation—so you don’t just mask a bigger problem. For hairline gaps use color-matched seam filler or caulk, for moderate gaps relock or reseat floating planks and use a tapping block, and for large gaps you’ll likely replace planks and repair the subfloor. Follow humidity control and acclimation tips to prevent recurrence, and below you’ll find step-by-step fixes and pro guidance.
Quick Answer Can You Fix Gaps in Vinyl Plank Flooring Yourself?
You can fix small gaps in vinyl plank flooring yourself with basic tools and a bit of patience, and you’ll often get sturdy, discreet results.
Leave it to a pro if gaps are widespread, boards are buckling, or moisture and subfloor issues are involved.
If you’re unsure, start with a DIY patch and call a contractor if the problem worsens or returns.
Short summary of DIY viability and expected results
Although some gap repairs are simple, your DIY success depends on the cause and type of vinyl plank flooring.
You can often learn how to fix gaps in vinyl plank flooring with basic tools, filler, or re-seating planks.
Expect modest cosmetic fixes for minor gaps; structural issues or recurring movement may need more extensive work.
Results vary by skill, materials, and underlying damage.
When to call a pro vs. DIY
Wondering if you should tackle vinyl plank gaps yourself or call a pro?
If gaps are small, stable, and caused by seasonal shrinkage, you can fix them with simple tools and filler.
Call a pro if gaps are widespread, worsening, caused by moisture/subfloor issues, or if you’re uncomfortable with repairs.
Pros diagnose structural causes, replace damaged planks, and guarantee long-term results.
Basic Understanding What Causes Gaps in Vinyl Plank Flooring?
You’ll see gaps from natural expansion and contraction as temperature and humidity change, and from poor installation or inadequate acclimation of the planks.
Subfloor movement, unevenness, moisture, adhesive failure, or damaged locking seams can also open joints over time.
The gap’s size and location determine whether you’ll need a simple fill, a re-glue or lock repair, or partial plank replacement.
Natural expansion and contraction with temperature/humidity
When temperature or humidity swings, vinyl planks expand and contract because their layered materials absorb or release moisture and heat.
That movement can open gaps along seams and edges. You’ll notice gaps widen in dry, cold conditions and close in warm, humid ones.
Monitor indoor climate, use consistent HVAC settings, and allow natural shrink/expand cycles before assuming a permanent problem.
Poor installation or inadequate acclimation
If installers skip proper acclimation or rush layout and locking, gaps can appear almost immediately or after a short season of temperature swings.
You’ll see seams open, misaligned planks, or uneven pressure points when pieces weren’t fitted correctly.
Fixes start with checking plank alignment and re-seating or replacing affected boards; sometimes reinstalling sections after correct acclimation is the only reliable solution.
Subfloor movement, unevenness, or moisture
Beyond installation errors, the condition and behavior of the subfloor itself can cause gaps in vinyl planks.
If your subfloor shifts, sags, or wasn’t leveled, planks won’t stay tight. Moisture can warp or swell underlayment, loosening seams.
Check for movement, high or low spots, and dampness. Fix board or concrete issues, level surfaces, and address moisture before reinstalling planks.
Wear, adhesive failure, or damaged locking seams
As planks age and get walked on daily, wear and tear can break down surface layers, loosen adhesives, and damage the locking seams that keep pieces tight together.
You’ll notice gaps where glue failed or tongues wore smooth. Traffic, cleaners, and temperature swings accelerate this.
Inspect seam integrity, check for adhesive residue loss, and replace or reglue affected planks to restore a snug fit.
How gap size and location affect repair options
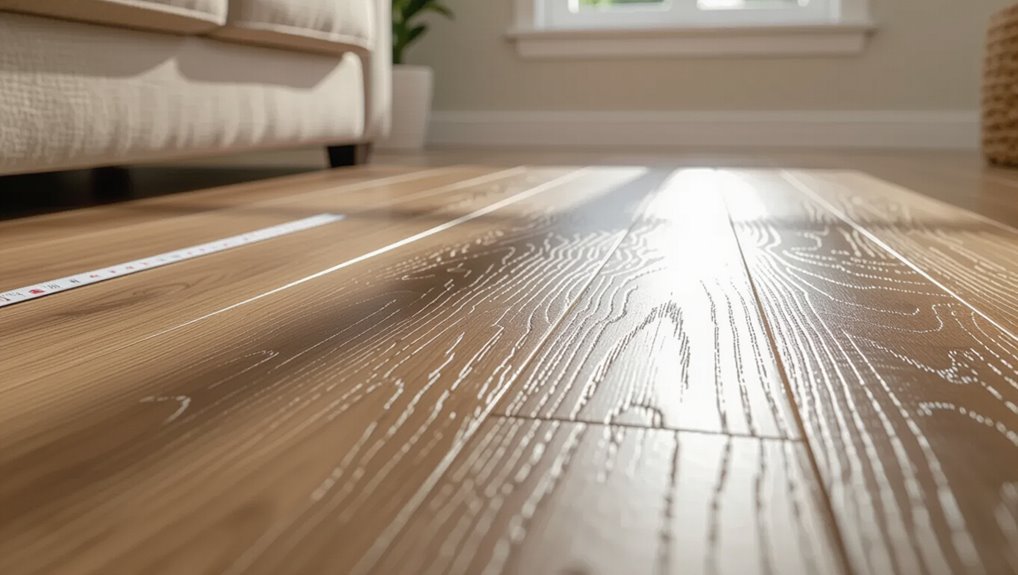
When gaps appear, their width and where they show up determine whether you can fix them yourself or need a pro; small, hairline separations along edges usually respond to adhesive or seam-clamping, while wide gaps in the middle of planks or at junction points often mean you’ll have to replace boards or refit sections.
Assess size and location, then choose glue, filler, clamp, patch, or replacement accordingly.
Tools, Materials, and Safety Precautions
Before you start repairing gaps, gather the right tools—tapping block, pull bar, utility knife, caulk gun, and a set of clamps—and check that your materials match the vinyl type.
Use recommended adhesives or seam fillers for glue-down, click-lock, or SPC/LVP floors, and have replacement planks or matching trim on hand.
Protect yourself with gloves, eye protection, and knee pads, and clear and clean the workspace for safe, accurate repairs.
Recommended tools list
Getting the right tools makes fixing gaps in vinyl plank flooring faster and avoids costly mistakes. You’ll need basic hand tools, a seam roller, spacers, and safety gear.
Use them properly to keep seams tight and floors even.
- Tape measure and utility knife
- Rubber mallet and tapping block
- Seam roller and pull bar
- Knee pads and safety glasses
Materials and adhesives for different vinyl types
Although vinyl planks vary in construction—luxury vinyl tile (LVT), rigid core (WPC/SPC), and glue-down sheets—you’ll pick adhesives and materials that match the type and the subfloor, not just the look.
Use compatible adhesive, seam filler, and underlayment; check manufacturer specs. Select moisture-tolerant products for concrete and flexible adhesive for floating systems.
- LVT: pressure-sensitive adhesive
- WPC/SPC: click-lock seam filler
- Glue-down: solvent or acrylic adhesive
- Subfloor: moisture barrier
Personal protective equipment and workspace prep
1 essential step is equipping yourself and prepping the area so you can work safely and efficiently: put on safety glasses, cut-resistant gloves, a dust mask or respirator when cutting or sanding, and knee pads for extended kneeling;
clear the room of furniture, tape off vents and doorways, and set up bright, even lighting and good ventilation to control dust and fumes.
Then keep a fire extinguisher nearby and use proper disposal for debris.
Quick Fixes for Small Gaps (Under 1/8 inch)
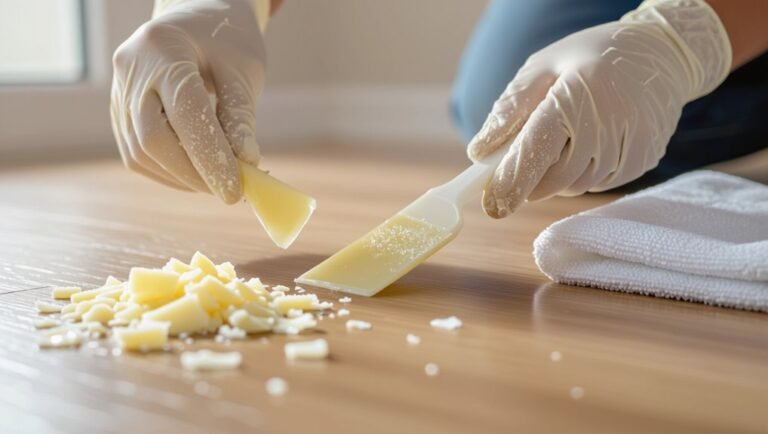
For small gaps under 1/8 inch, you can quickly fill them with a vinyl floor seam filler or caulk by cleaning the gap, applying the product, and smoothing it flush.
Alternatively, color-matched putty or wax sticks let you press and blend material into the seam for an almost invisible repair.
Use these methods for cosmetic fixes or short-term stops, but plan a more permanent repair if gaps keep reappearing or boards are shifting.
Using vinyl floor seam filler or caulk step-by-step
Grab a tube of vinyl floor seam filler or a paintable, flexible caulk and you can quickly fill gaps under 1/8 inch without pulling up planks.
Clean the seam, apply filler with a nozzle, smooth with a damp finger or tool, then let cure per instructions.
- Clean gap and remove debris
- Cut nozzle for desired bead
- Smooth flush with surface
- Allow full cure before traffic
Applying color-matched putty or wax sticks step-by-step
One quick way to hide tiny gaps under 1/8 inch is to press a color-matched putty or wax stick into the seam; you’ll get immediate coverage that blends with your vinyl without pulling up planks.
Clean the gap, warm the wax slightly, press and overfill, then scrape flush with a plastic card. Buff lightly and repeat if needed for a seamless finish.
When gap-filling is a temporary vs. permanent solution
Although color-matched putty or wax sticks can hide tiny gaps quickly, you should treat them as a temporary fix when gaps are caused by ongoing movement, moisture issues, or improper installation; use them as a long-term solution only if the floor is stable, humidity is controlled, and the gap stays under about 1/8 inch.
If movement or moisture persists, plan for proper repair or plank replacement to prevent recurrence.
How to Repair Moderate Gaps (1/8 to 1/4 inch) Step-by-Step
For moderate gaps (1/8 to 1/4 inch), you’ll start by inspecting and cleaning the joint so any dirt or debris won’t interfere with repairs.
If the flooring is floating, you can release and re-lock planks, then use compression or floor spacers to close the seams before filling any remaining voids with seam filler or adhesive.
Finish by blending color and texture so the repair matches the surrounding floor.
Step 1: Inspect and clean the gap area
Before you do any repairs, take a close look at the gap and clean it thoroughly so the fix will bond and sit flush.
Check gap length and depth, remove debris, and ascertain planks are dry before proceeding.
- Clear loose dirt and dust with a vacuum
- Scrape old adhesive or filler carefully
- Wipe with isopropyl alcohol
- Let area air-dry completely
Step 2: Release and re-lock floating planks (if possible)
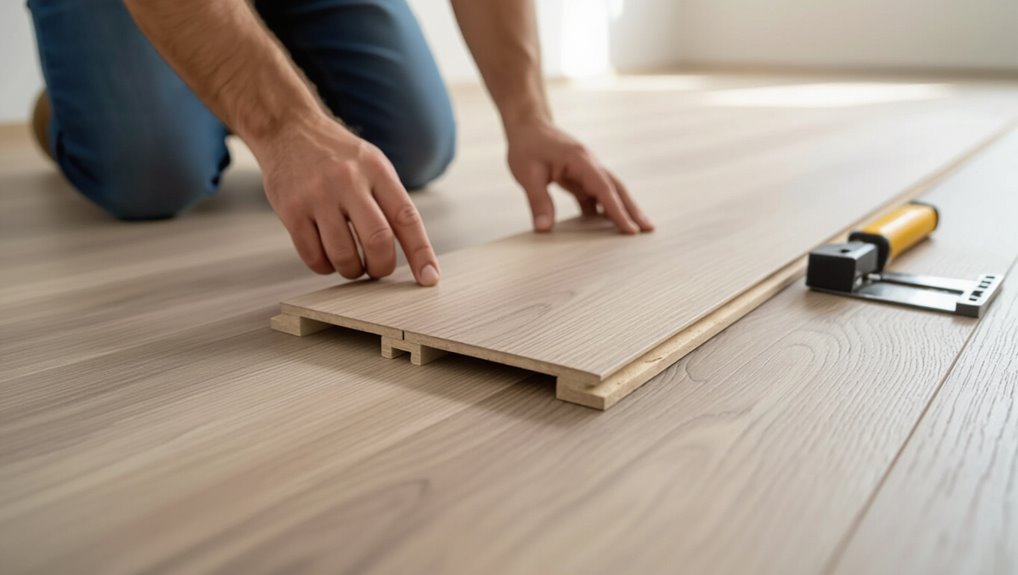
Now that the gap area is clean and dry, you can try releasing and re-locking any floating planks to close moderate gaps (about 1/8 to 1/4 inch).
Gently lift the affected plank edge, align tongues and grooves, then press back until it clicks. If needed, use a tapping block and mallet to secure the joint.
- Lift plank carefully
- Check alignment
- Tap with block
- Reinspect seam
Step 3: Use compression or floor spacers to close joints
Step 3 uses compression or floor spacers to gently close moderate gaps (1/8 to 1/4 inch) without forcing joints or damaging edges.
You’ll compress planks evenly, use spacers to hold alignment, and check fit before locking. Work slowly across the seam and avoid prying.
- Use a block and mallet gently
- Insert spacers evenly
- Check seams frequently
- Don’t over-compress
Step 4: Fill remaining voids with seam filler or adhesive
After you’ve compressed the boards and held them with spacers, any thin gaps that remain should be sealed to keep moisture and dirt out and to stabilize the seam.
Use seam filler or a vinyl-safe adhesive to fill voids, wiping excess before it skins. Work steadily and let cure time finish the bond.
- Choose compatible product
- Apply with a small nozzle
- Smooth with a putty tool
- Clean edges promptly
Step 5: Finish and blend color/texture
Once the filler’s cured and excess is removed, blend the repair into the surrounding planks so the patch disappears visually and feels consistent underfoot.
Lightly sand any rough spots, then match color using vinyl touch-up markers, diluted paint, or stain designed for vinyl.
Feather tones outward, texture with a sponge if needed, and seal with a compatible clear coat to protect and unify the finish.
Repairing Large or Structural Gaps (Over 1/4 inch) Step-by-Step
When gaps exceed 1/4 inch you’ll need a more involved fix that starts with evaluating the subfloor and checking for moisture problems.
Next you’ll remove and replace the damaged planks, then level or repair the subfloor where needed.
Finally, re-install the planks after proper acclimation and leave correct expansion gaps to prevent a repeat.
Step 1: Assess subfloor and moisture issues
Step 1 is to check the subfloor and moisture because most structural gaps larger than 1/4 inch come from uneven or damp foundations.
You’ll want to identify high spots, low spots, loose boards, and any signs of moisture before attempting repairs. Inspect, measure, and document issues, then address subfloor leveling and moisture control before proceeding.
- Look for soft or spongy areas
- Use a straightedge to find gaps
- Test for moisture with a meter
- Note loose or squeaky boards
Step 2: Remove and replace affected planks
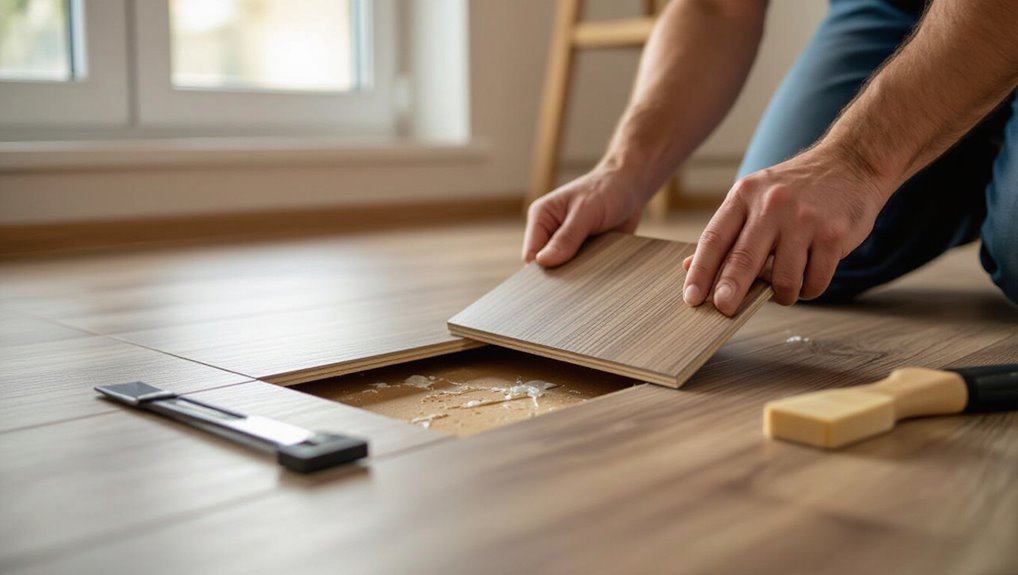
After you’ve fixed any subfloor and moisture problems, it’s time to remove and replace the damaged planks so gaps don’t reappear.
Work methodically: mark, cut, pry, and install matching planks with adhesive or click-lock. Check alignment and expansion gaps.
- Mark damaged planks
- Cut along seams carefully
- Pry out old pieces
- Fit and secure replacements, trim as needed
Step 3: Level or repair subfloor where needed
If you’re dealing with gaps larger than 1/4 inch, you’ll need to level or repair the subfloor before reinstalling planks to prevent recurring movement and damage.
Assess joist deflection, rot, or high spots. Fix with plywood patches, self-leveling compound, sistered joists, or shims. Confirm surface is clean, dry, and flat before proceeding.
- Inspect for rot or movement
- Patch low areas
- Sand or grind highs
- Verify flatness
Step 4: Re-install planks with correct expansion gaps and acclimation
Start by acclimating your new planks in the room for at least 48–72 hours and plan the layout so you restore proper expansion gaps (typically 1/4–3/8 inch at walls and 1/2 inch for large runs or around islands).
Then reinstall planks, stagger seams, use spacers, and check tight locks. Finish with trim that doesn’t impede movement.
- Use spacers at every wall
- Stagger end joints
- Test locking mechanism
- Leave appliance gaps
Special Cases by Vinyl Type
Your approach will change depending on the vinyl type, so you’ll want to match fixes to the construction.
For click-lock floating planks, I’ll cover best practices and simple reseating or seam repair methods; for glue-down planks, you’ll get adhesive tips and patching techniques.
I’ll also point out how LVT differs in thickness, grout lines, and repair options so you know which methods work best.
Floating vinyl plank (click-lock) best practices and fixes
When you’re dealing with floating (click-lock) vinyl planks, the assembly and movement allowances differ from glued or loose-lay types, so you’ll want to treat gaps and recovery techniques accordingly.
Check expansion gaps at edges, guarantee boards weren’t installed too tight, and re-click or realign loose joints.
Use tapping blocks, pull bars, or replace damaged planks.
Monitor humidity and leave proper perimeter clearance.
Glue-down vinyl plank repair and adhesive tips
Glue-down vinyl planks demand a different approach than floating floors because gaps usually mean adhesive failure, substrate issues, or improper acclimation.
Inspect substrate for moisture and flatness, remove loose planks, and clean adhesive residue.
Reapply manufacturer-recommended adhesive or use seam sealer for small gaps.
Weigh re-gluing versus replacing damaged sections, and always follow acclimation and trowel-size guidelines to prevent recurrence.
Luxury vinyl tile (LVT) differences and considerations
Luxury vinyl tile (LVT) differs from plank-style vinyl in construction, wear layer options, and installation nuances, so you’ll need to treat gaps and repairs differently. You’ll focus on groutable seams, smaller tiles, and matching patterns. Use appropriate filler and flexible grout; avoid planks’ click-lock methods when repairing.
| Feature | Tip |
|---|---|
| Seams | Use flexible grout |
| Pattern | Match tiles |
Preventing Future Gaps Best Practices and Maintenance
To prevent gaps from coming back, you should acclimate planks properly before installation and follow manufacturer installation tips.
Keep indoor humidity and temperature stable, run routine inspections on seams, and stick to a simple maintenance schedule.
Use recommended sealants, adhesives, or vapor barriers to minimize shrinkage and movement.
Proper acclimation and installation tips
Because temperature and humidity directly affect vinyl planks, you should acclimate the flooring in the room where it will be installed for at least 48–72 hours and follow the manufacturer’s specific guidelines.
You’ll also prep the subfloor, maintain proper expansion gaps, and use recommended adhesives or locking techniques to prevent gaps.
- Inspect and level the subfloor
- Keep planks sealed from moisture
- Stagger end joints correctly
- Use spacers for expansion
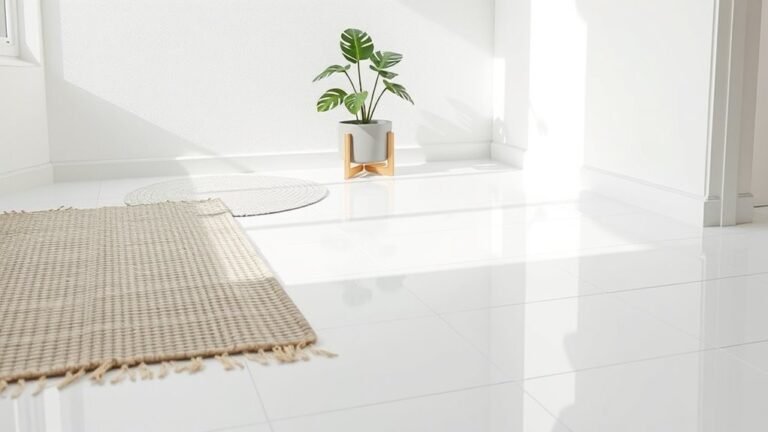
Controlling indoor humidity and temperature
When you keep indoor humidity and temperature stable, vinyl planks stay snug and resist shrinking or swelling that causes gaps.
Use a humidifier or dehumidifier and a programmable thermostat to maintain 35–55% relative humidity and 60–80°F (15–27°C).
Monitor conditions with a hygrometer, ventilate after showers or cooking, and avoid rapid temperature swings from space heaters or open windows.
Routine inspection and maintenance schedule
Keeping humidity and temperature steady is only part of the story; regular inspections and simple maintenance will catch small issues before they become gaps.
Check seams monthly, note any separation, and tighten or re-seat loose planks promptly.
Clean gently to avoid grit abrasion, protect high-traffic areas with rugs, and address spills immediately.
Schedule seasonal checks and document findings to track changes.
Recommended products to minimize shrinkage or movement
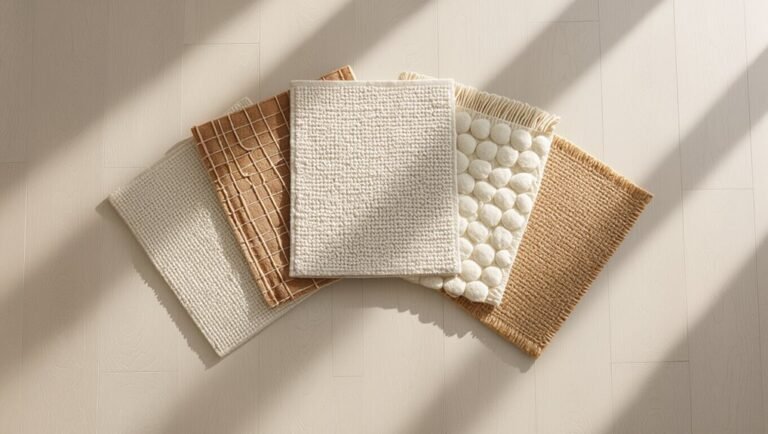
A few targeted products can greatly reduce vinyl plank shrinkage and movement: a high-quality moisture barrier, a dimensional-stable underlayment, and the right adhesive or seam sealer for your installation type.
Choose a vapor barrier with documented perm ratings, a dense, closed-cell underlayment for stability, and manufacturer-recommended adhesive or heat-activated seam sealer to lock seams and prevent future gaps.
Common Mistakes to Avoid When Fixing Gaps
When you fix gaps, don’t use adhesives or fillers that aren’t rated for vinyl—wrong products can cause staining or failure.
Don’t force planks into place or you’ll damage the locking profiles, and don’t ignore subfloor or moisture issues that keep gaps coming back.
Also, don’t skip acclimation before reinstalling planks, or they’ll expand and reopen seams.
Using incompatible adhesives or fillers
Although it might seem easier to grab any adhesive or filler, using incompatible products can damage your vinyl planks or make gaps worse; you should always match the repair material to your flooring type and manufacturer recommendations.
Pick vinyl-specific adhesives or flexible fillers labeled for plank flooring, test a small area first, and avoid solvents or hard-setting compounds that can discolor, warp, or prevent proper expansion.
Forcing planks and damaging locking profiles
If you push planks together with brute force, you risk snapping or deforming the locking profile, and that damage will make gaps worse rather than fix them.
Don’t force misaligned boards; lift and realign panels, check for debris, and use a tapping block and mallet gently.
If the profile’s damaged, replace affected planks instead of trying to cram them back together.
Ignoring subfloor or moisture problems
Because subfloor and moisture issues create the conditions that cause planks to gap, you can’t ignore them and expect repairs to hold.
Check for unevenness, rot, or high moisture before fixing gaps. Address leveled underlayment, repair damage, and fix leaks or humidity sources.
Otherwise new planks or caulking will fail and gaps will return, wasting time and money.
Skipping acclimation before reinstallation
When you skip acclimating new or replacement vinyl planks before reinstalling them, they’ll expand or contract after installation and reopen the gaps you just fixed.
Let planks sit in the room for 48–72 hours so temperature and humidity stabilize. You’ll avoid buckling, shrinkage, and repeated repairs.
Always follow manufacturer recommendations for acclimation time to guarantee a lasting, gap-free floor.
Cost and Time Estimates
You’ll usually spend only a few dollars to $50 on materials for simple DIY gap fixes, while more extensive repairs or replacement planks can push costs into the low hundreds.
A small repair often takes 30–60 minutes, a moderate job a few hours, and large projects can span a day or more depending on how many planks you need to remove and refit.
Use these ranges to plan whether you can tackle the work yourself or should hire a pro.
Typical DIY cost breakdown
A straightforward DIY repair for small gaps in vinyl plank flooring will usually cost you between $20 and $150 in materials and take about 30 minutes to a few hours, depending on the scope—basic filler and a seam sealer are cheap and quick, while replacing planks or installing underlayment raises both time and expense.
| Task | Typical Cost | Notes |
|---|---|---|
| Filler & sealer | $20–$40 | Quick |
| Single plank | $30–$80 | Moderate |
| Underlayment+planks | $80–$150 | More work |
Time required for small, moderate, and large repairs
Cost and time go hand in hand, so after looking at typical DIY costs it helps to estimate how long each repair will take.
Small gaps: 15–45 minutes—clean, apply filler, wipe.
Moderate gaps: 1–3 hours—remove a plank, adjust underlayment, reinstall or replace.
Large repairs: half a day to two days—replace multiple planks, acclimate new flooring, finish connections, allow adhesives to cure.
When to Hire a Professional
If gaps keep widening, planks are buckling, or the subfloor looks damaged, it’s a sign the job may be beyond DIY.
When you call a flooring contractor, ask about their experience with vinyl plank, whether they’ll inspect the subfloor, and what warranty they offer.
Get at least two written estimates that itemize materials, labor, and any preparatory work so you can compare accurately.
Signs the problem is beyond DIY
When should you call in a pro? If gaps keep returning despite proper acclimation and installation, moisture readings are high, subfloor damage exists, or entire planks buckle, you should hire a professional.
Also call one if the issue spans large areas, involves structural concerns, or you lack tools/experience for systematic repairs.
Professionals diagnose hidden causes and guarantee lasting fixes.
What to ask a flooring contractor
What should you ask a flooring contractor before hiring them?
Ask about their experience with vinyl plank repairs, licensing and insurance, reference contacts, and warranty specifics.
Clarify timelines, who handles subfloor issues, and whether they provide a written scope of work.
Confirm cleanup responsibilities and payment terms.
Trust clear, direct answers and documented agreements before you commit.
How to get accurate repair estimates
After you’ve gathered answers about experience, licensing, and warranties, it’s time to focus on getting accurate repair estimates so you can decide whether to DIY or hire a pro.
Get three written bids detailing labor, materials, timeline, and cleanup. Ask about hidden costs, warranty coverage, and payment terms.
Compare line items, not just totals, and trust reputable refs and local reviews.
FAQ Quick Answers to Common Questions
You’ll find quick answers here to common concerns like whether you can just glue gaps shut, if gaps will return after repairs, and how long vinyl should acclimate before installation.
You’ll also learn when humidity control is enough and whether colored caulk or markers are safe for cosmetic fixes.
Read on for clear, practical guidance.
Can I just glue the gaps shut?
Can you simply glue the gaps shut? You can use vinyl floor adhesive or a clear silicone gap filler for small, stable gaps, but only if planks sit flat and subfloor movement is minimal.
Don’t force glue into large, shifting gaps—proper repair may require reseating, replacing, or refastening boards.
Clean debris first, apply sparingly, then wipe excess for a neat finish.
Will gaps come back after I fix them?
Yes—gaps can return if the underlying cause isn’t fixed.
If temperature swings, moisture changes, subfloor movement, or improper installation caused gaps, they’ll likely reappear.
Fix the root issue—stabilize humidity, repair the subfloor, or re-install correctly—to prevent recurrence.
Simple cosmetic fixes may hold briefly but won’t stop gaps permanently unless you address what created them.
How long should vinyl acclimate before installation?
Most manufacturers recommend letting vinyl plank flooring acclimate for 48 to 72 hours in the room where it will be installed; this helps the planks reach the same temperature and humidity as the space so they expand and contract correctly.
Unbox and lay boards flat, keep room at normal temperature, avoid direct sunlight or HVAC blasts, and check moisture levels.
Longer acclimation may help in extreme conditions.
Can humidity control alone fix existing gaps?
How well humidity control helps depends on what’s causing the gaps.
If gaps result from seasonal swelling and shrinking, stabilizing indoor humidity can reduce movement and prevent new gaps.
But humidity alone won’t close large, permanent gaps caused by poor installation, damaged planks, or subfloor issues.
You’ll need repairs—relocking, replacing planks, or fixing the subfloor—to fully resolve those.
Is it safe to use colored caulk or markers for cosmetic fixes?
Wondering if colored caulk or floor markers make a safe quick fix? You can use them for small cosmetic gaps, but choose products labeled for vinyl and flexible movement.
Test color match and adhesion in an inconspicuous spot. Avoid rigid or solvent-based fillers that can damage plank edges.
Remember these are cosmetic only—repair or seam sealing is better for structural gaps.