How to Install Mosaic Tile Backsplash (A Beginner-Friendly Guide)
You can install a mosaic tile backsplash yourself with basic tools, patience, and careful prep. Measure and plan your layout, repair and level the wall, then dry-fit mesh-backed sheets to minimize cuts. Mix and trowel thin-set, press sheets into place with spacers, let the mortar cure, then grout and clean for a smooth finish. Seal porous tiles and grout as needed and allow proper curing times; keep going and you’ll pick up pro tips and troubleshooting advice.
Quick Answer Can You Install a Mosaic Tile Backsplash Yourself?
Yes—you can install a mosaic tile backsplash yourself with basic tools like a trowel, tile spacers, a wet saw or tile cutter, and grout float.
Expect the project to take a weekend for a typical kitchen, depending on prep and drying times.
It’s a moderate-difficulty job that’s manageable if you follow instructions carefully and take your time.
Short summary of outcome, time, tools, and difficulty
If you’ve got basic DIY skills, a few hours on a weekend, and the right tools, you can install a mosaic tile backsplash yourself and get professional-looking results.
Expect a durable, stylish finish; set aside 4–8 hours for a small area.
Tools: tile cutter, notched trowel, spacers, level, grout float.
Difficulty: beginner–intermediate.
Ask: how do you install mosaic tile backsplash?
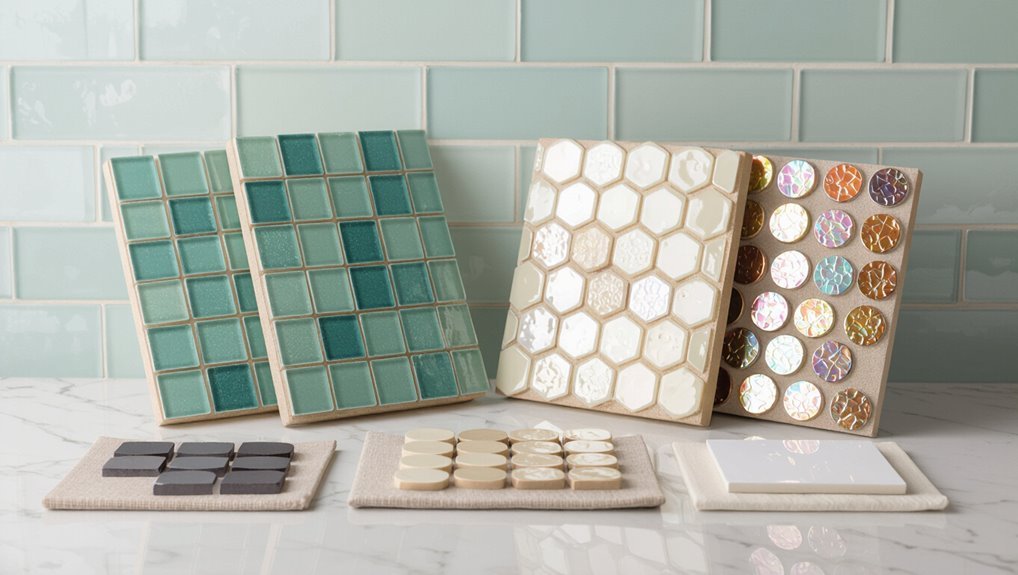
What Is a Mosaic Tile Backsplash and Why Choose It?
A mosaic tile backsplash is a patterned or random arrangement of small tiles made from glass, ceramic, metal, or stone that you can use to protect and decorate your wall.
You’ll find mosaics offer huge design flexibility—from subtle texture to bold color—and they hold up well to heat, moisture, and scrubbing.
Choosing mosaic tiles gives you both lasting durability and easy-to-clean aesthetics for your kitchen.
Definition and common materials (glass, ceramic, metal, stone)
Mosaic tile backsplashes mix small pieces of glass, ceramic, metal, or stone into decorative patterns that protect your wall and lift a room’s style.
You’ll choose materials based on look, budget, and placement; each offers distinct texture and finish.
Consider options:
- Glass — translucent, vibrant.
- Ceramic — versatile, affordable.
- Metal — sleek, modern.
- Stone — natural, tactile.
Design benefits and practical advantages (durability, easy cleaning, aesthetics)
Choosing between glass, ceramic, metal, or stone affects more than just the look—you’re also picking how the backsplash will perform day to day.
You’ll get durability that resists heat and stains, surfaces that wipe clean quickly, and styles that complement any kitchen—sleek glass, rustic stone, or modern metal.
Mosaic tiles hide grout lines and add texture without overwhelming the space.
Before You Start Planning and Preparation
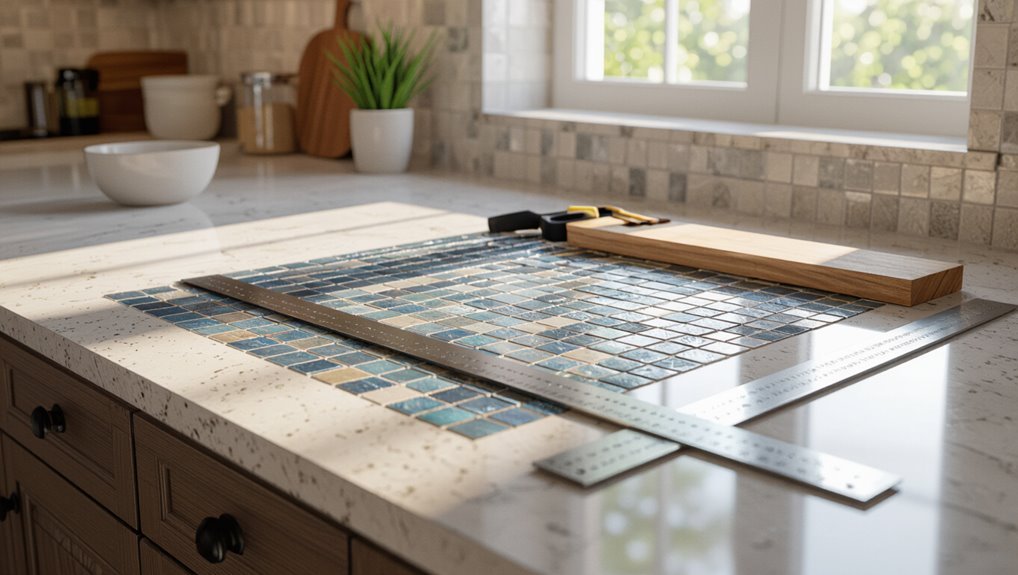
Before you start, measure the backsplash area so you can calculate how much tile, adhesive, and grout you’ll need.
Pick your tile type, grout color, and any edge trim, and make a concise tools-and-materials checklist.
Set up your workspace and follow basic safety precautions—gloves, eye protection, ventilation, and a clean, well-lit surface.
Measure the area and calculate tile and adhesive quantities
Start by measuring the full backsplash height and width, including outlets and corners, so you know exactly how much tile and adhesive you’ll need for the job.
Multiply area by tile coverage, add 10–15% for cuts/waste, then calculate adhesive spread rate per square foot.
Use these steps to order materials accurately:
- Measure total area.
- Calculate tile needed + waste.
- Determine adhesive coverage.
- Round up quantities.
Choose tile type, grout color, and edge trim
1 clear decision you’ll make now is what tile, grout, and edge trim to use, since those choices set the backsplash’s look, durability, and maintenance needs.
Pick tile material and size for style and cleaning ease—glass, ceramic, stone, or metal.
Choose grout color to hide stains or highlight patterns.
Select edge trim for a finished, water-resistant perimeter that matches the aesthetic.
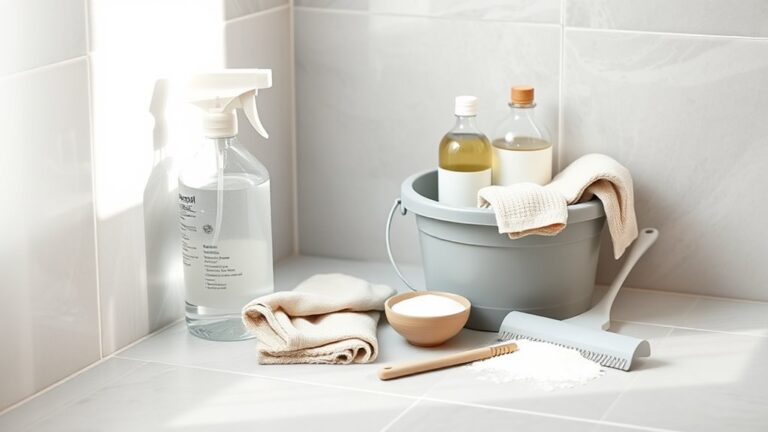
Required tools and materials checklist
Because having the right tools and materials saves time and prevents mistakes, gather everything on this checklist before you mix mortar or peel back any protective film.
You’ll need quality items and enough supplies to finish without runs to the store. Check quantities and compatibility with your chosen tile and grout.
- Tile sheets, spacers, edge trim
- Thin-set mortar, grout, sealer
- Notched trowel, grout float, sponge
- Tile cutter, wet saw or scored tile cutter
Safety precautions and workspace setup
Before you begin, clear and secure your workspace so you can move safely and work efficiently: remove loose items, cover nearby surfaces with drop cloths, tape off cabinets and appliances, and make sure lighting and ventilation are adequate.
Wear safety gear, keep tools organized, and prep a clean work area. Follow these essentials:
- Gloves and eye protection
- Mask for dust
- Stable ladder or step stool
- Accessible first-aid kit
Quick Project Timeline and Cost Estimate
You can usually finish a mosaic backsplash in a weekend if you plan for prep (1–3 hours), installation (3–8 hours), grouting (1–2 hours), and curing time (24–48 hours).
Expect total costs to range from $100 for basic materials to $1,000+ for premium tile or professional labor.
You can save by prepping yourself, choosing mesh-backed sheets, and shopping clearance tiles.
Let’s run through a quick timeline and some practical ways to keep the budget in check.
Typical time breakdown (prep, installation, grout, curing)
Start by planning a realistic timeline: prepping the wall and layout takes about 1–2 hours for a small backsplash (more for patching or removing old tile).
Tile setting for a 6–10 sq ft area usually runs 2–4 hours.
Grouting takes 1–2 hours, plus 24 hours for initial cure and 48–72 hours for full strength before heavy use.
Budget ranges and cost-saving tips
When budgeting your mosaic tile backsplash, factor in materials, labor (if you’re hiring help), and small extras like adhesive, grout, and trim pieces so you won’t get blindsided by add-ons. You can save by DIYing prep, choosing budget tiles, and reusing trim. Prioritize quality adhesive and tools to avoid costly fixes.
| Item | Low | High |
|---|---|---|
| Tiles | $50 | $400 |
| Adhesive & grout | $10 | $60 |
| Labor | $0 | $300 |
| Tools | $20 | $100 |
| Extras | $5 | $50 |
Step-by-Step Installation Guide
Now you’ll tackle the installation step by step, starting with removing the old backsplash and prepping the wall.
Repair, level, and prime the surface before dry-fitting your mosaic sheets to plan cuts and pattern alignment.
Then mix thin-set, spread it evenly, set the sheets with spacers for consistent joints, and make any final adjustments.
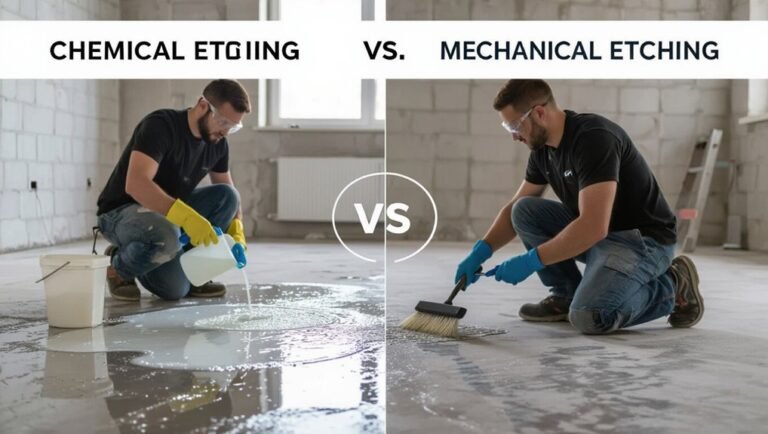
Step 1 Remove existing backsplash and prepare the wall
Clear away the old backsplash and you’ll make room for a solid, flat surface that lets your new mosaic tiles adhere properly.
Turn off power, remove outlet covers, and score grout lines.
Pry off tiles, adhesive, and backing with a putty knife and pry bar.
Scrape remaining debris, sand rough spots, and wipe the wall with a damp cloth to remove dust before tiling.
Step 2 Repair, level, and prime the substrate
Step 2 guarantees your wall’s surface is solid, flat, and moisture-resistant so the mosaic tiles bond evenly; you’ll patch holes, feather joint compound over uneven areas, sand smooth, and apply a primer or waterproofing membrane where needed before laying tile.
Remove dust, check for hollows with a straightedge, fill gaps and joints, sand feathered patches, clean surface, then roll or brush on appropriate primer or membrane.
Step 3 Lay out tiles (dry-fit, pattern alignment, cutting plan)
1. Dry-fit the mosaic across the wall, starting at your focal point and working outward to check pattern alignment and grout line consistency.
Mark where full sheets sit and note edges needing cuts. Measure and sketch a cutting plan, prioritizing larger pieces at visible areas.
Use a tile marker to transfer cut lines so installation proceeds efficiently and symmetrically.
Step 4 Mix and apply thin-set mortar or adhesive
Mix the thin-set to the manufacturer’s specs and apply it promptly so it stays workable—use a clean bucket, a margin trowel for adding mortar to the wall, and a notched trowel sized for your mosaic backing (usually 1/8″–3/16″ V-notched or square-notch).
Comb consistent ridges, work only small sections, and keep edges buttered for full coverage. Clean excess before it skins.
Step 5 Set mosaic sheets and use spacers for consistent joints
Press each mosaic sheet firmly into the notched thin-set, aligning the mesh backing with your layout lines so tiles sit flat and level.
Tap gently with a rubber float to guarantee full contact.
Insert small spacers between sheets for uniform grout joints.
Check alignment frequently with a straightedge and adjust before the mortar skins over.
Wipe excess thin-set from mesh and tile faces.
Step 6 Cut tiles around outlets, corners, and edges (tools and techniques)
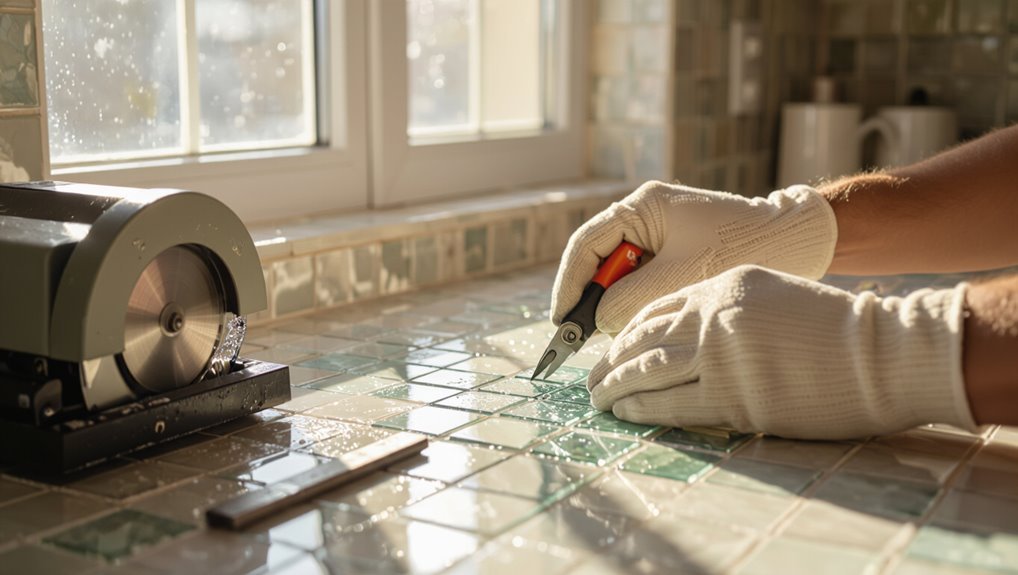
Measure and mark each cut carefully before you touch the tile—accurate layout makes the difference around outlets, corners, and edges.
Use a tile nipper for small curves, a wet saw for straight or plunge cuts, and a carbide scoring tool for glass mosaics.
Turn off power, remove cover plates, and cut slightly oversized openings to allow final adjustment.
Smooth edges with a rubbing stone.
Step 7 Allow mortar to set and then grout the joints (grout types and mixing)
Wait for the mortar to cure fully before you touch the tile—this prevents lippage and guarantees the sheets won’t shift while you grout.
Choose sanded grout for joints 1/8″ or wider, unsanded for narrower gaps. Mix to a creamy, lump-free consistency per manufacturer instructions.
Work small areas, push grout into joints with a float, then let it firm before initial cleanup.
Step 8 Clean excess grout, seal if necessary, and install trim/caulk
Now that the grout has set, clean off the excess grout from the tile surface while it’s still slightly tacky so you don’t smear or gouge the joints later.
Use a damp sponge, rinse frequently, then buff with a dry cloth.
Apply sealer if your grout or stone needs protection.
Install trim or silicone caulk along edges for a neat, waterproof finish.
Step 9 Final inspection and curing time before use
Before you start using the backsplash area, give everything a careful final inspection and allow the grout and sealer to cure fully.
Check for hairline gaps, uneven grout lines, loose tiles, and any remaining haze, and confirm manufacturer-recommended cure times for both grout and sealer so you don’t expose the surface to water or heavy use too soon.
After curing, wipe residue, test edges, and avoid washing for the full recommended period.
Common Problems and How to Fix Them
You’ll likely run into a few common issues like lippage, tiles popping off, grout problems, or chipped edges, and knowing the causes helps you fix them fast.
I’ll show how to spot and correct uneven tiles, resecure or replace adhesive-failed pieces, stop and repair grout discoloration or cracks, and touch up cutting mistakes and edge chips.
With the right checks and quick repairs you’ll keep your backsplash looking professional.
Uneven tiles or lippage causes and remedies
If tiles end up uneven or show lippage, it’s usually because the substrate, tile thickness, or setting technique wasn’t uniform—so you’ll want to diagnose which factor is at fault before attempting a fix.
Check substrate flatness with a straightedge, shim low tiles, replace mismatched tile sheets, and use a leveling system during reset.
Grind high edges slightly and regrout for a smooth finish.
Adhesive failure or tiles popping off diagnosis and correction
Uneven tiles and lippage can sometimes be symptoms of poor adhesion, so when tiles start popping off you’ll want to inspect the bond before replacing anything.
Check for loose mortar, contaminated substrate, or wet thinset; tap tiles to locate hollow spots.
Remove failed tiles, scrape old adhesive, clean and prime the surface, apply fresh thinset with proper coverage, and press tiles firmly using spacers.
Grout discoloration or cracking prevention and repair
Prevent grout discoloration and cracks by keeping joints clean, dry, and properly sealed from the start.
Wipe spills promptly, ventilate the area, and use a high-quality penetrating sealer after curing.
For hairline cracks or stains, clean with a pH-neutral cleaner, rinse, and re-seal.
For wider cracks, remove damaged grout, apply new grout, cure fully, then seal to prevent recurrence.
Cutting mistakes and edge chips fixes and touch-ups
When you’re cutting mosaic tiles, small slips or the wrong blade angle can leave jagged edges or chips that stand out once installed.
Fix chips by sanding with a fine diamond file, smoothing edges, then sealing with matching paint or epoxy glaze.
For larger breaks, replace the piece or trim surrounding tiles slightly.
Always test fit and wear safety gear.
Best Practices and Professional Tips
Plan your tile layout first so you minimize cuts and obvious seams, especially near outlets, cabinets, and corners.
Pick an adhesive and grout suited to your tile material and the kitchen environment to prevent future failures.
Finish with proper sealing and simple maintenance routines so your mosaic stays looking new.
Tile layout strategies to minimize cuts and visual seams
Wondering how to lay out mosaic tile so you end up with few cuts and seamless sightlines? Plan on paper, dry-fit sheets, and center your focal point.
Adjust spacing to hide partial tiles at edges, and rotate sheets for pattern continuity.
- Measure and mark centerlines
- Dry-fit full sheets first
- Shift layout to avoid tiny edge cuts
- Use consistent grout lines
Choosing the right adhesive and grout for different tile materials
After you’ve settled the layout and sightlines, pick adhesives and grouts that match the tile material, substrate, and environment to prevent failures down the line.
Use polymer-modified thinset for ceramic and porcelain, epoxy or high-performance thinset for glass or metal-backed mosaics, and flexible thinset for painted or drywall substrates.
Choose grout (sanded vs. unsanded, epoxy vs. cement) by joint width and moisture exposure.
Working around outlets, cabinets, and corners
When you reach outlets, cabinets, and corners, take your time and cut tiles to fit accurately so seams sit clean and grout lines remain consistent.
Use a template or cardboard mock-up to trace irregular shapes, score and snap small pieces with a nippers or wet saw, and leave proper clearance for outlet covers and cabinet edges so tiles won’t be pinched or cracked during installation.
Mark power off, remove covers, and dry-fit pieces.
Maintenance tips to keep mosaic backsplash looking new
Once the tiles are set and outlets and cabinets are refitted, you’ll want a straightforward care routine to keep your mosaic backsplash looking new.
Wipe spills promptly with mild detergent and a soft cloth, avoid abrasive cleaners, reseal grout annually, inspect for loose tiles or grout cracks, and address issues quickly.
Use gentle brushes and non-acidic cleaners for regular maintenance.
Comparison: DIY vs Hiring a Pro
Decide whether you’ve got the skill, time, and budget to tackle the job yourself or if it makes more sense to hire a pro.
Choose a professional for complex layouts, tricky substrates, or when you want a warranty and guaranteed finish.
We’ll compare costs, time commitments, and when hiring is the smarter choice.
Skill, time, and cost comparison
Although tiling looks straightforward, picking between DIY and hiring a pro comes down to the skills you have, the time you can commit, and how much you want to spend. You’ll save labor costs DIY but spend more time and risk mistakes; pros are faster, pricier, and more precise.
| Factor | DIY vs Pro |
|---|---|
| Skill needed | Moderate vs High |
| Time | Longer vs Shorter |
| Cost | Lower materials + time vs Higher labor |
| Risk | Higher redo risk vs Lower |
When to hire a professional (complex layouts, substrates, warranties)
If your backsplash involves irregular shapes, multiple offsets, or uneven substrates, hire a pro—those complexities demand experience, specialized tools, and judgment you mightn’t have from a weekend project.
A pro guarantees proper substrate prep, waterproofing, and pattern alignment, avoids costly mistakes, and often provides a warranty.
Hire when structural issues, custom cuts, or time constraints exceed your skills or tools.
Tools, Materials, and Product Recommendations
You’ll want the right tools for each step—wet saw or tile nippers for cutting, notched trowel and spacers for setting, and rubber float for grouting.
Choose tile and grout brands known for durability and colorfastness, and match grout type to your tile material.
Don’t forget a quality sealer for porous tiles and grout to protect your work.
Recommended tools by task (cutting, setting, grouting)
Tools matter: having the right cutters, setting tools, and grouting gear will make the job faster and give you cleaner results.
You’ll need specific tools for each task so cuts are precise, tiles bond well, and grout finishes smoothly.
- Tile nipper or wet saw for cutting
- Notched trowel for setting
- Tile spacers and level
- Rubber float and sponge for grouting
Tile and grout brand considerations and sealers
Now that you’ve got the right cutters, trowels, and grout gear, pick tile and grout products that match your skill level, budget, and the backsplash environment.
Choose reputable tile brands for consistent sizing and finish; match grout type—sanded for wider joints, unsanded for thin mosaic seams.
Buy premixed grout if you want ease.
Seal porous tiles and grout with a penetrating sealer to resist stains and moisture.
FAQ
You’ll want quick answers to common concerns like drying and curing times, whether you can stick tiles over paint or drywall, and which grout color works best.
Learn how to cut mesh-backed sheets cleanly without cracking tiles and whether glass, metal, or stone mosaics need sealing.
These FAQs will help you avoid mistakes and finish the job confidently.
How long does a mosaic tile backsplash installation take to dry/cure?
Drying and curing times vary, but you can generally expect adhesive to set in 24–48 hours and grout to cure in 72 hours before light use.
Full grout strength often takes up to 7 days.
Humidity, temperature, and product type affect times, so follow manufacturer guidelines.
Avoid heavy loads or cleaning until full cure to prevent shifting, staining, or weakened bonds.
Can mosaic tiles be installed directly over paint or drywall?
Although you can install mosaic tiles over painted drywall in some cases, you’ll get the best, longest-lasting results by prepping the surface first.
Remove loose paint, sand glossy finishes, and clean grease or dust.
Prime bare drywall or use a cement backer board for wet areas.
Use a suitable adhesive for painted surfaces and follow manufacturer instructions to guarantee a secure, durable bond.
What grout color should I choose for mosaic tiles?
Once your surface is prepped and tiles are set, pick a grout color that either blends with the mosaic for a seamless look or contrasts to highlight the pattern.
Consider grout shade to mask stains in high-use areas, complement countertop and cabinet tones, and reinforce grout line visibility.
Test samples on a spare sheet under your lighting before committing to confirm the final effect matches your vision.
How do I cut mesh-backed mosaic sheets without breaking tiles?
Score your cutlines on the mesh with a pencil, then use a sharp utility knife to slice through the mesh backing—don’t try to snap the tiles themselves.
Support the sheet on a flat surface, cut slowly along scored lines, and remove excess mesh.
For individual tile adjustments, use a wet tile saw or diamond nippers, working with light passes to avoid chipping and keep pieces stable.
Is sealing necessary for glass/metal/stone mosaics?
Do you need to seal glass, metal, or stone mosaics? You usually don’t seal glass or metal, but natural stone often needs sealing to prevent stains and grout discoloration.
Seal stone before grouting and reseal periodically. Follow manufacturer recommendations for treated metals.
- Glass: no sealant
- Metal: usually no
- Stone: yes, pre-grout
- Reseal: as directed