How to Install Vinyl Flooring on Plywood the Right Way
You can install vinyl flooring directly over well-prepared plywood if you make the subfloor clean, flat, dry, and securely screwed down. Acclimate the vinyl 48–72 hours, fix loose or damaged panels, fill gaps, and test moisture to meet the manufacturer’s limits. Use underlayment or adhesive primer only when needed for porosity or comfort, stagger seams, and roll the floor after installation for full contact. Follow the step-by-step guidance below to get professional results.
How to Install Vinyl Flooring on Plywood Quick Answer and Overview
You can install vinyl flooring directly over smooth, structurally sound plywood using click-lock planks, glue-down sheets, or loose-lay vinyl depending on the product.
This method’s best for dry rooms with a flat, screwed-down subfloor—like living areas, bedrooms, and renovated basements that meet moisture limits—and won’t work well over bowed or rotted plywood.
At a glance, you’ll need a tape measure, straightedge, utility knife, underlayment or seam tape (if required), adhesive or flooring planks, plus about a day for a small room and $1–$6 per sq ft for materials (higher for premium products and glue systems).
One-sentence direct answer
Start by confirming the plywood subfloor is clean, flat, dry, and securely fastened.
For a quick one-sentence direct answer: measure and level the plywood, repair gaps, install an appropriate underlayment if needed, then follow manufacturer instructions to glue, click-lock, or float your vinyl; that’s the essential process for how to install vinyl flooring on plywood efficiently and correctly.
When this method is appropriate (rooms, subfloor conditions)
Although vinyl on plywood works in many areas, it’s best suited to dry, stable rooms with flat, structurally sound subfloors—like living rooms, bedrooms, hallways, and finished basements that don’t see moisture or heavy water exposure.
You’ll also use it where the plywood is level, free of soft spots, and securely fastened; avoid areas prone to flooding, constant humidity, or uneven, spongy subfloors.
Tools and materials at a glance
Now that you’ve identified suitable rooms and checked your plywood for flatness and stability, gather the right tools and materials so the job goes smoothly.
You’ll need basics and prep items, plus flooring and finishing supplies. Consider:
- Tape measure, utility knife, straightedge, chalk line, roller
- Underlayment, vinyl planks or sheet, adhesive (if required)
- Threshold strips, trim, caulk, and safety gear
Estimated time and cost ranges
Time and cost depend on room size, your skill level, and the product you choose, but for a typical 12×12 room expect 4–8 hours of labor for a DIY floating vinyl-plank install and 1–2 days if you’re gluing sheet vinyl or working alone.
Expect materials $1–$5 per sq ft for vinyl, $50–$200 for underlayment, and $100–$400 in tools; pro installation adds $1–$3/sq ft.
Basic Understanding What Is Vinyl Flooring and Why Plywood Matters
Vinyl comes in sheet, luxury vinyl plank/tile (LVP/LVT), and peel-and-stick formats, and you’ll choose based on look, durability, and installation method.
Plywood is a common subfloor because it’s stable and easy to work with, though it can transfer moisture or show movement if it’s old or uneven.
Before you install vinyl, make sure the subfloor is flat, dry, and structurally sound to avoid telegraphing, gaps, or adhesion problems.
Types of vinyl flooring (sheet, luxury vinyl plank/tile, peel-and-stick)
Flooring comes in three main vinyl varieties—sheet, luxury vinyl plank/tile (LVP/LVT), and peel-and-stick—each with different construction, durability, and installation needs you’ll want to match to your room and subfloor.
- Sheet: seamless, water-resistant, needs smooth substrate.
- LVP/LVT: rigid or flexible planks/tiles, click or glue options, very durable.
- Peel-and-stick: easy DIY, best for smooth, level surfaces.
Why plywood is a common subfloor (advantages and limitations)
After you pick the vinyl type that suits your room, you’ll need a stable underlayer — and that’s where plywood often comes in.
You’ll appreciate its strength, uniformity, and ease of fastening, which make installation faster and more reliable. It resists sagging and accepts adhesives well, but it can rot if wet, varies in quality, and may need repair or replacement over time.
Subfloor requirements for vinyl (flatness, moisture, structural stability)
A solid subfloor is essential for a long-lasting vinyl installation: it must be flat, dry, and structurally sound so the vinyl can lay smoothly and bond properly.
You should check flatness (≤3/16″ over 10′), repair dips or humps, guarantee moisture under 2-4% or per manufacturer, and confirm joists and plywood don’t flex.
Tack down loose panels and level as needed.
Pre-Installation Assessment and Preparation
Before you lay any vinyl, inspect the plywood subfloor for damage, rot, and deflection and remove old flooring or seam contaminants.
Measure the room and calculate material needs, test moisture with a reliable meter or calcium chloride kit against acceptable thresholds, and gather the necessary tools.
Make sure your workspace is clean, level, and prepped so installation goes smoothly.
Inspecting plywood subfloor for damage, rot, and deflection
Start by walking the room and scanning the plywood subfloor for soft spots, stains, and visible cracks so you know where to focus further inspection.
Probe suspect areas with a screwdriver, check joist spans below for bounce, and look for dark or musty signs indicating rot.
Mark repairs, note high or low spots, and confirm the subfloor’s structure is stable before proceeding.
Measuring and calculating material needs
Measure the room carefully so you know exactly how much vinyl, underlayment, and adhesive you’ll need.
Then calculate square footage, add waste, and plan seam placement. Use a floor plan sketch and tape measure to confirm.
Consider connections and threshold strips.
- Square footage + 10% waste
- Underlayment type and roll width
- Adhesive quantity by coverage rate
Moisture testing methods and acceptable thresholds
Because excess moisture ruins vinyl and adhesives, you’ll test subfloors thoroughly and compare results to manufacturer limits before installing.
Use these quick checks:
- Measure with a moisture meter (pin or non‑pin) across multiple spots.
- Do an anhydrous calcium chloride or relative humidity test for concrete subfloors.
- Confirm readings meet manufacturer thresholds; delay or remediate if they exceed limits.
Tools and workspace preparation
Gather the right tools and clear your workspace before you lay a single plank: having everything organized—trowels, seam roller, utility knife, straightedge, spacers, moisture meter, and safety gear—cuts installation time and prevents mistakes, while a clean, level, and well‑lit area makes accurate measuring and adhesive work far easier.
- Inspect tools and replace dull blades.
- Sweep, level, and dry the subfloor.
- Arrange materials by sequence for efficient workflow.
Removing old flooring and preparing seams
Now that your tools are ready and the subfloor is clean, it’s time to remove the old flooring and inspect seams so the new vinyl lays flat and lasts.
Pull nails, adhesive, and underlayment; use a scraper and pry bar.
Sand high spots, fill gaps with plywood-safe filler, and fasten loose boards.
Verify seams are flush, smooth, and dry before installing vinyl.
Direct Answer Do You Need Underlayment or an Adhesive Primer?
If your subfloor is uneven, noisy, or concrete, you’ll need an underlayment—foam for comfort, cork or rubber for sound, and plywood or cement board for stability.
Use an adhesive primer or floor-leveler when the surface is porous, has old adhesives, or needs slope correction to guarantee the vinyl bonds and lays flat.
Check manufacturer compatibility charts for your vinyl type (LVT, sheet, or plank) to match the right underlayment and adhesive so you don’t void the warranty.
When underlayment is required (types and benefits)
1 key decision before laying vinyl is whether you need underlayment or an adhesive primer — and the choice depends on the subfloor type, the vinyl product, and the condition of the surface.
You’ll need underlayment for uneven plywood, to reduce telegraphing, add cushioning, or improve sound reduction. Options include foam, cork, and thin plywood underlayment; each offers varying support and moisture protection.
When an adhesive primer or floor-leveler is needed
Because the choice hinges on your subfloor and vinyl type, you’ll need an adhesive primer or a floor-leveler when the surface is porous, chalky, stained, or uneven enough to telegraph through the vinyl;
primers seal and promote bond on porous concrete or gypsum, while self-leveling compounds fill dips, cracks, and height variations greater than the vinyl manufacturer’s tolerance.
Choose primer for absorption issues; use leveler for flatness.
Compatibility charts for vinyl types vs. underlayment/adhesives
When you’re matching vinyl types to underlayment or adhesives, use a compatibility chart to quickly tell whether you need an underlayment, an adhesive primer, or neither. Check vinyl construction, subfloor condition, and manufacturer notes. Use recommended adhesives for porous plywood and primers for smooth surfaces.
| Vinyl Type | Underlayment? | Adhesive/Primer? |
|---|---|---|
| LVT | Optional | Manufacturer-specific |
| Sheet | Recommended | Primer if glossy |
| SPC | Optional | Direct-glue usually |
Step-by-Step Installation Process
Before you start laying planks, you’ll acclimate the vinyl and inspect the subfloor for loose or damaged plywood that needs screws, filler, or patching.
Then smooth any high or low spots with patching compound or sanding, install underlayment if the product requires it, and follow the manufacturer’s recommended techniques.
Finally, snap a starting line and plan board orientation so your first row’s placement and stagger are accurate.
Step 1 Acclimate vinyl planks/sheets
1. You need to acclimate vinyl planks/sheets before installation to prevent warping or gaps. Follow these steps:
- Unpack and lay materials flat in the room for 48–72 hours.
- Keep room temperature between 60–80°F (16–27°C) and stable humidity.
- Stack boxes no more than two high, avoid direct sunlight, and inspect for damage.
Step 2 Repairing and reinforcing plywood (screws, filler, patching)
Inspect the subfloor carefully and repair any soft spots, loose boards, or gaps so your plywood base is solid and flat for the vinyl.
Then:
- Fasten loose panels with screws every 6–8 inches along edges and seams.
- Fill small gaps and screw holes with a compatible wood filler; let cure.
- Patch larger voids with plywood inserts glued and screwed flush to the surface.
Step 3 Smoothing plywood with patching compound or sanding for flatness
Smooth the plywood surface so your vinyl lays flat and seam-free: start by identifying any high or low spots with a straightedge or long level and mark them.
Then decide whether sanding or a floor-leveling patch is best based on the depth of the depressions.
Sand high spots with a floor sander or hand block; fill low spots with an appropriate patch, feather edges, let cure, and recheck flatness.
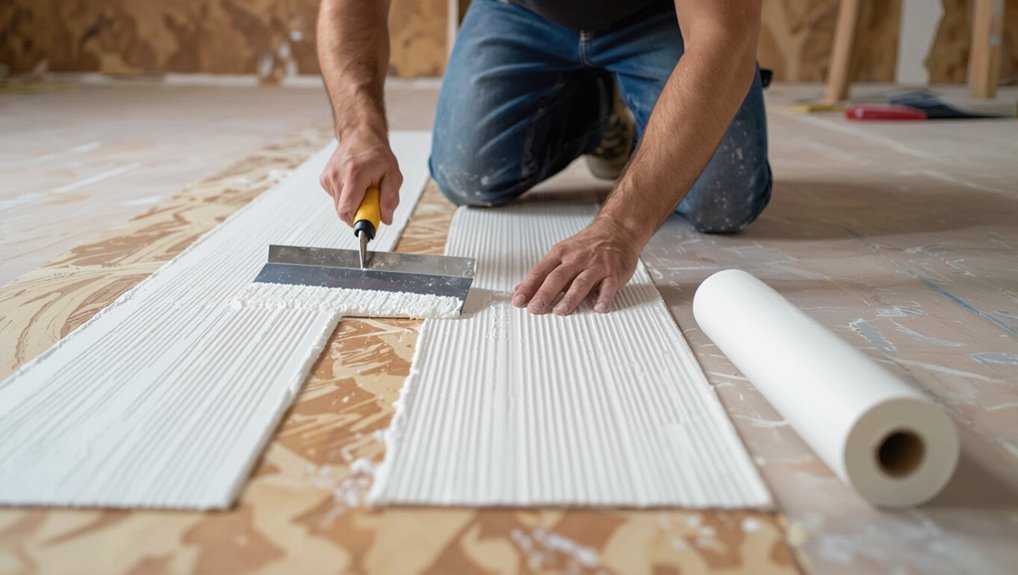
Step 4 Installing underlayment (if required) materials and techniques

Before you lay the vinyl, decide whether your subfloor needs underlayment and which type will work best—foam, cork, felt, or a plywood overlay—and gather the materials and tools so installation goes smoothly.
Roll or lay the underlayment per manufacturer instructions, butt seams tightly or overlap/adhere as directed, trim to fit, tape seams if required, and fasten or float correctly to guarantee a stable, smooth surface.
Step 5 Laying out a starting line and planning board orientation

Start by snapping a straight chalk line across the room to mark your starting edge. Align the first row of boards with that line, working outward.
Stagger seams at least 6–8 inches from adjacent rows for strength and appearance.
Dry-fit several rows to confirm pattern and fit near walls and obstacles.
Adjust board orientation for light, traffic flow, and visual balance before securing.
Step 6 Applying adhesive (full-spread, pressure-sensitive, or loose lay) methods and timing
With your starter row set and dry-fit checked, you’re ready to choose and apply the adhesive method that matches your vinyl type and subfloor: full-spread glue for permanent installs, pressure-sensitive (PSA) adhesive for repositionable planks, or loose-lay for heavy, interlocking tiles without adhesive.
Follow manufacturer trowel size, open time, and working time; spread evenly, press firmly, and roll per instructions before edges set.
Step 7 Installing vinyl planks/sheets: tapping, seams, stagger patterns
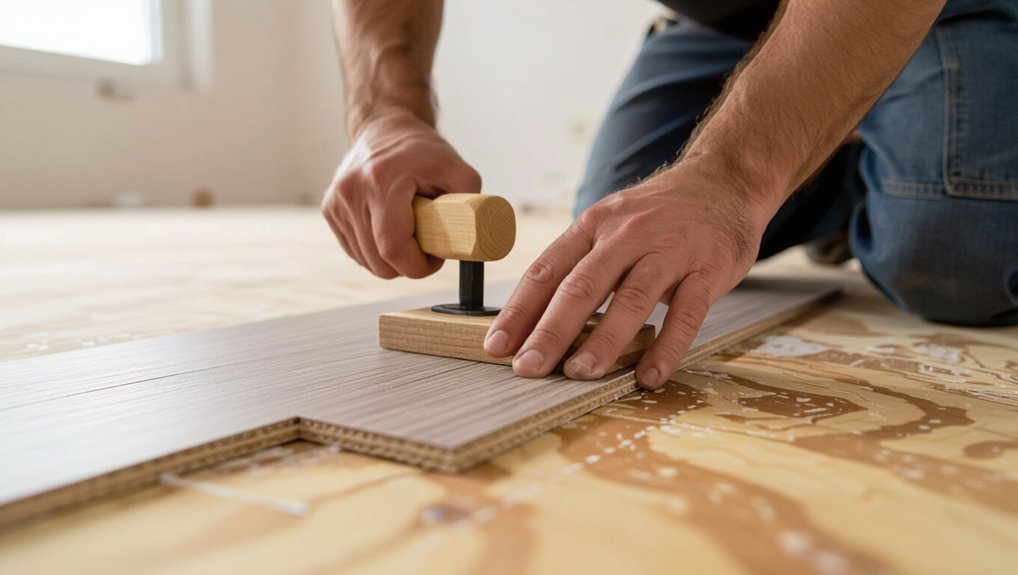
Lay the first plank along your chalk line, align its edge to the spacer and snug it against the starter row.
Then continue across the room tapping each plank into place so seams close tightly without crushing the tongue-and-groove.
Stagger end joints at least 6–12 inches, trim starter and end pieces precisely, tap seams with a block and mallet, and check alignment frequently.
Step 8 Rolling and weighting adhesive joints; curing times
After you’ve fitted all the planks, roll the floor with a 100–150 lb floor roller to press the vinyl into the adhesive and remove air pockets; make slow, overlapping passes lengthwise and crosswise to guarantee even contact.
- Weight seams with clean, flat boards or rolls for 24–48 hours.
- Keep traffic off until adhesive cures per manufacturer specs.
- Ventilate and maintain recommended temperature for consistent curing.
Step 9 Trimming, transitions, and finishing edges (thresholds, baseboards, quarter round)
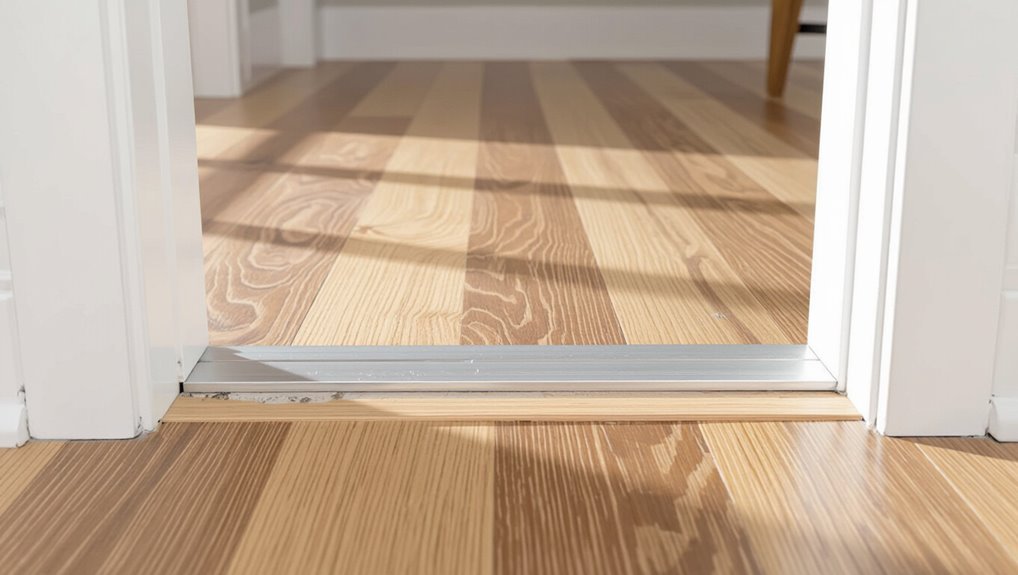
Now that the adhesive has cured and the roller has removed air pockets, you’ll move on to trimming and finishing the edges so the installation looks tidy and functions properly.
Trim excess vinyl with a straightedge and sharp utility knife.
Install junctions at doorways, fit thresholds flush, reattach baseboards or install quarter round to cover expansion gaps, and fasten trim without pinching the flooring.
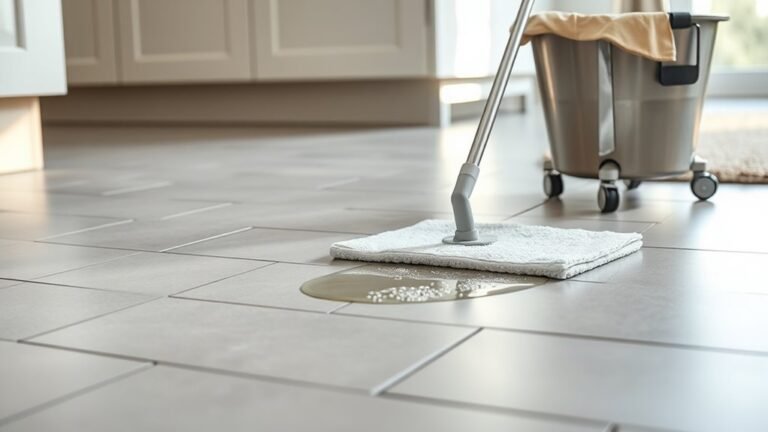
Step 10 Cleanup and initial care instructions
1 final sweep and quick inspection will get the space ready: pick up loose debris, vacuum thoroughly (including seams and under trim), and wipe the surface with a manufacturer‑recommended cleaner to remove adhesive residue and dust.
Let flooring cure per instructions, avoid heavy traffic for 24–48 hours, reinstall trim, protect with felt pads, and clean spills promptly.
Monitor and follow maintenance guidelines.
Troubleshooting Common Installation Problems
If you run into bubbling, gapped seams, or telegraphing, you’ll want to check substrate moisture, adhesive application, and whether planks were acclimated properly.
For adhesive failures you can clean, reapply the right glue, or use re-bonding techniques recommended by the manufacturer.
If the subfloor has uneven plywood, slight deflection, or a damaged plank appears after install, you’ll learn when to level, reinforce, or replace individual pieces to fix the problem.
Bubbling, seams gapping, and telegraphing causes and fixes
When bubbles rise, seams pull apart, or subfloor imperfections telegraph through your vinyl, the result is both unsightly and preventable.
Check plywood for moisture, warps, or loose panels and sand high spots. Confirm panels are flat, clean, and primed per manufacturer.
Use correct underlayment and acclimate planks. Tighten seams with proper seam roller and maintain recommended expansion gaps to prevent stress.
Adhesive failure and re-bonding techniques
After checking for bubbles, gaps, and telegraphing, you’ll often find the root problem is the adhesive losing grip.
Remove loose vinyl, scrape old adhesive, and clean substrate with recommended solvent.
Check moisture and porosity; apply primer if needed.
Use the correct vinyl adhesive, trowel size, and open time.
Roll the floor, weight seams, and allow full cure before traffic.
Dealing with uneven plywood or slight deflection after installation
Because vinyl follows the contours of its substrate, even slight plywood unevenness or deflection will show up as ridges, hollow spots, or bounce underfoot.
So you’ll want to assess and address the problem promptly. Inspect subfloor for soft spots, loose screws, or gaps.
Tighten fasteners, add screws and washers, sister joists or install a 1/4″ underlayment to stiffen and level before reattaching vinyl.
Repairing damaged planks post-install
Spot and fix damaged planks promptly to prevent moisture intrusion, tripping hazards, or worsening gaps.
Inspect regularly, remove only affected planks, and keep adjacent pieces intact.
Use matching replacement planks or same-batch remnants, cutting precisely and ensuring tight seams.
Clean subfloor, apply recommended adhesive or click-lock technique, and acclimate replacements.
Finish with seam sealant where specified and test stability before traffic.
Mistakes to Avoid
Don’t skip moisture testing or ignore needed vapor barriers, because trapped moisture will ruin vinyl.
Make sure the subfloor is stable and fastened, and pick the correct adhesive or underlayment for your vinyl type.
Also acclimate the planks, leave proper expansion gaps, and avoid rushing adhesive setup so installations don’t buckle or separate.
Skipping moisture testing or ignoring moisture barriers
If you skip moisture testing or ignore a proper moisture barrier, you’re inviting warping, mold, and adhesive failure under your new vinyl floor.
Test plywood moisture with a reliable meter, follow manufacturer limits, and install an approved vapor barrier or primer.
Don’t assume dry conditions—hidden dampness ruins installations.
Address sources of moisture before laying vinyl to guarantee a durable, healthy finished floor.
Installing over unstable or improperly secured plywood
1 common but avoidable mistake is installing vinyl over unstable or poorly secured plywood; doing so hands you a floor that squeaks, flexes, or fails prematurely.
You should inspect, repair, and firmly fasten loose panels, replace delaminated or warped sheets, and stiffen joists or add blocking where needed.
Don’t skip leveling or solid substrate prep—vinyl needs a stable base to last.
Wrong adhesive or underlayment choice for vinyl type
Because each vinyl type bonds differently, choosing the wrong adhesive or underlayment will sabotage even a well-prepared subfloor.
Don’t grab generic glue or cushioned pad without confirming compatibility with your vinyl—luxury vinyl, sheet, and click-plank each need specific adhesives or none at all.
Check manufacturer specs, test a small area, and use recommended products so the floor adheres, lays flat, and won’t blister or delaminate.
Poor acclimation, inadequate expansion gaps, and rushed adhesive setup
Now that you’ve matched adhesive and underlayment to your vinyl type, don’t shortchange the acclimation and spacing steps—skipping them will undo careful prep.
Let planks sit in the installation room for the recommended 48–72 hours. Leave consistent expansion gaps around edges and at thresholds.
Don’t rush adhesive open time or press times; wrong timing causes buckling, peaking, or delamination.
Best Practices and Pro Tips
Before you start laying planks, let the vinyl acclimate in the room for the recommended time and store it flat and protected to avoid warping.
Plan your layout to reduce cuts and waste while balancing seams for a cleaner look, and use a straightedge and leveling compound to quickly check and fix subfloor flatness.
Finally, seal seams where needed and follow simple maintenance—regular sweeping, gentle mopping, and controlling moisture—to keep vinyl on plywood looking great longer.
Optimal acclimation times and storage conditions
1–3 days is a good rule for most rigid vinyl and 48 hours for many luxury vinyl planks, but you should always follow the manufacturer’s spec and your jobsite conditions when acclimating.
Store unopened boxes flat, off damp floors, in the installation room. Keep temperature and relative humidity stable.
Rotate boxes occasionally, avoid direct sun, and never install cold or wet planks.
Layout patterns for minimizing waste and improving aesthetics
When you plan your layout thoughtfully, you’ll cut waste and boost the finished look by aligning planks with the room’s longest sightlines and focal points; stagger end joints at least 6–8 inches, trim starter rows to balance widths at walls, and dry-fit runs to minimize short scraps.
Use a centerline or offset pattern for symmetry, and keep connections consistent to preserve flow and reduce cutting.
Fastest ways to ensure subfloor flatness and stability
Start by quickly identifying and correcting any high or low spots so your vinyl has a stable, flat base to stick to or click over.
Walk the floor, mark irregularities, sand or plane high areas, and fill low spots with a fast-setting floor patch.
Secure loose plywood with screws, add blocking where needed, and recheck with a long straightedge to confirm flatness before installing.
Maintenance tips to prolong vinyl life on plywood
Although plywood provides a strong base, you’ll extend your vinyl’s life by keeping moisture, heavy point loads, and surface abrasion in check; regularly sweep or vacuum grit, wipe up spills immediately, use felt pads under furniture, and avoid dragging heavy items across the floor.
- Clean: dry-mop weekly, vacuum edges.
- Protect: pads, rugs in high traffic.
- Inspect: seal gaps, fix raised seams promptly.
Comparison: Installation Methods by Vinyl Type
When choosing installation methods you’ll compare LVP floating systems, glued or loose-lay options to see which fits your subfloor and traffic.
For sheet vinyl you’ll weigh welded seams for a watertight finish against adhesive methods for stability.
If you’re considering peel-and-stick, check plywood suitability and know its limitations for long-term adhesion.
Luxury vinyl plank (LVP) floating vs. glued vs. loose lay
If you’re weighing LVP options, the three main installation methods—floating (click-lock), glued (full-spread or perimeter), and loose lay—each change how the floor performs, how long installation takes, and what prep you’ll need. You’ll choose floating for easy DIY, glued for permanence and moisture control, or loose lay for speed and replaceability.
| Method | Speed | Best use |
|---|---|---|
| Floating | Fast | Rental/DIY |
| Glued | Slow | High traffic |
| Loose lay | Very fast | Temporary/repairable |
Sheet vinyl welded seams vs. adhesive installation
Moving from plank systems to sheet vinyl, you’ll find two common ways installers join and secure seams: hot welding and adhesive installation. You’ll choose welding for waterproof, durable seams in commercial or wet areas; use full-spread adhesive for stability on plywood and easier repairs. Consider traffic, moisture, and subfloor preparation when deciding.
| Method | Best use |
|---|---|
| Hot weld | Wet/commercial |
| Adhesive | Residential |
| Repair ease | Adhesive |
| Waterproofing | Welding |
Peel-and-stick suitability and limitations on plywood
Although peel-and-stick vinyl can seem like the quickest option, it’s not always the best choice for plywood subfloors; you’ll need a smooth, clean, and fully cured surface to get a lasting bond. You should test adhesion, fill gaps, and avoid high-moisture areas.
| Vinyl Type | Suitability | Notes |
|---|---|---|
| Luxury vinyl planks | Moderate | Needs flat surface |
| Sheet vinyl | Low | Hard to bond seams |
| Tiles | High | Easier replacement |
Materials and Cost Comparison
You’ll need a basic materials list—vinyl planks or sheets, underlayment, adhesive or click-lock trim, and finishing pieces—with typical costs ranging from budget options around $1–$3 per sq ft to premium products at $4–$8 per sq ft plus supplies.
Weigh the pros and cons: doing it yourself saves on labor but can take longer and risks mistakes, while hiring a pro raises costs by $2–$6 per sq ft but guarantees speed and a cleaner finish.
Use these ranges and trade-offs to decide what fits your budget and skill level.
Typical materials list with cost ranges
Before you start buying anything, get familiar with the basic materials you’ll need for a vinyl flooring project and the typical price ranges so you can budget accurately. You’ll need: vinyl planks ($1–$5/ft²), underlayment ($0.20–$1/ft²), adhesive or click system ($0–$2/ft²), trim/transition pieces ($10–$50 each), and tools ($30–$150).
| Item | Typical Cost |
|---|---|
| Vinyl planks | $1–$5/ft² |
| Underlayment | $0.20–$1/ft² |
| Adhesive/click | $0–$2/ft² |
| Trim | $10–$50 |
| Tools | $30–$150 |
Pros and cons of DIY vs. professional installation
When weighing DIY against hiring a pro, consider how materials, labor, and time affect your total cost: doing it yourself can save on labor but may require buying or renting extra tools and underlayment you don’t already own, while a professional will bundle labor with materials and bring experience that reduces waste and rework.
- DIY: lower labor cost, higher time investment.
- Pro: higher upfront, fewer mistakes.
- Hybrid: hire for prep, DIY finish.
Frequently Asked Questions (FAQ)
You’ll find a few common questions about installing vinyl over plywood—like whether you can lay it directly on plywood or need underlayment, how much subfloor deflection is acceptable, and if it’s suitable for bathrooms or basements.
You’ll also want to know how long to wait before moving furniture onto new vinyl and what warranty problems can result from poor plywood preparation. Below are clear answers to help you avoid mistakes and protect your floor’s warranty.
Can I install vinyl directly over plywood without underlayment?
Can you install vinyl directly over plywood without underlayment? You can in some cases if the plywood is smooth, clean, structurally sound, and moisture-stable.
Glue-down vinyl often tolerates direct installation; floating vinyl may still benefit from a thin underlayment for sound and minor subfloor imperfections.
Always follow vinyl manufacturer recommendations and repair any gaps, splinters, or unevenness before installing to guarantee warranty compliance and long-term performance.
How much deflection is acceptable in a plywood subfloor?
How much deflection can a plywood subfloor tolerate before it affects vinyl flooring?
You should aim for L/360 or better for vinyl—meaning the floor deflects less than the span divided by 360 under load.
For most residential joist spans that’s sufficient.
Excessive bounce or sag can cause seams to open, wear patterns, or adhesive failure, so reinforce or add underlayment if needed.
Can vinyl flooring be installed in bathrooms or basements on plywood?
If your plywood subfloor meets stiffness and flatness requirements, vinyl can work fine in bathrooms and basements, but moisture and installation method change the details.
You should use moisture barriers, seam-sealed underlayment, or waterproof vinyl planks.
Make certain subfloor is dry, vapor-tested, and screwed tight.
Floating installations may need perimeter gaps; glued or click-lock waterproof products often perform best in damp areas.
How long before I can move furniture onto newly installed vinyl?
Wondering when you can put your furniture back in place? Wait at least 24–48 hours for adhesive-set vinyl to cure and bond fully; check manufacturer instructions for specific cure times.
For floating or click-lock vinyl, you can usually replace furniture immediately, but avoid dragging heavy items for a few days.
Use felt pads to prevent indentations and redistribute weight gradually.
What warranty issues arise from improper plywood preparation?
After waiting the proper cure time for your vinyl, don’t overlook the subfloor: improper plywood prep can void manufacturer warranties.
If you skip moisture testing, fail to flatten, or use incompatible adhesives, manufacturers may deny claims for delamination, warping, or adhesive failure.
Keep records, follow prep instructions, and use approved materials so coverage stays valid and future repairs aren’t on you.
Visual Guides and Checklists
Before you start, use a pre-installation checklist to confirm subfloor prep, acclimation, and tools are ready.
Follow a concise step-by-step installation checklist while you work so you don’t miss cutting, locking, or trimming steps.
Keep key inspection photos and simple diagrams handy to compare seams, passages, and edge details as you go.
Pre-installation checklist
If you want a smooth, trouble-free vinyl installation, use a concise pre-installation checklist and clear visual guides to confirm your space, tools, and materials are ready.
You’ll verify subfloor flatness, acclimate planks, and gather adhesive, spacers, and a straight edge.
Follow this quick numeric guide:
- Measure room and inspect plywood.
- Check moisture and level.
- Assemble tools and safety gear.
Step-by-step installation checklist for DIY
Start with a clear map of the room and a numbered checklist so you can follow each step without guessing; you’ll mark plank layouts, note where cuts go, and track progress from subfloor prep to final trim.
Then follow this concise installation checklist:
- Clean, level, and acclimate plywood.
- Dry-fit planks, stagger seams, cut edges.
- Apply adhesive/lock, roll, install trim, and inspect.
Key inspection photos and diagrams to reference
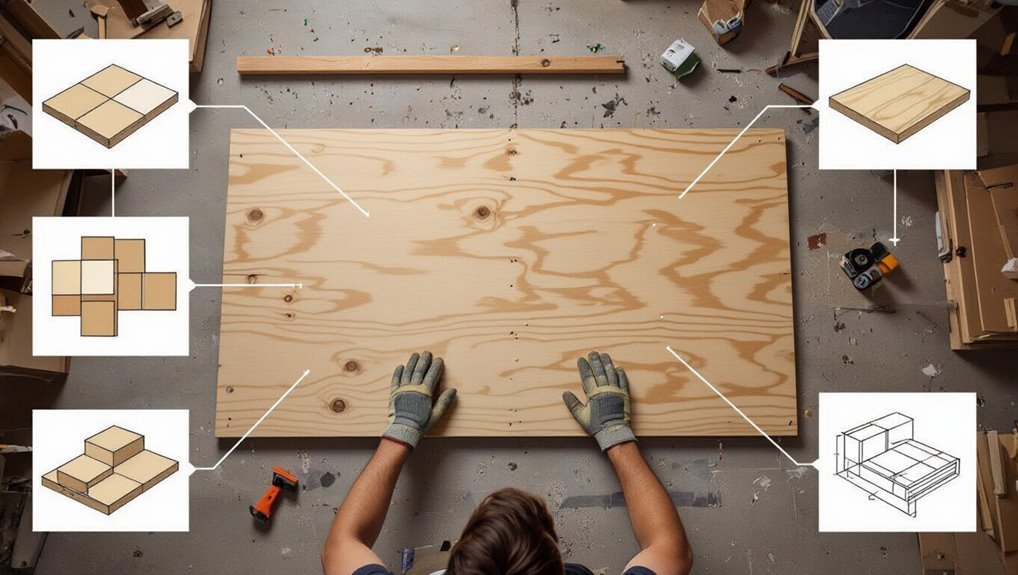
Photographs and clear diagrams will save you time and prevent costly mistakes, so keep a visual checklist handy as you inspect each stage of the install.
Capture subfloor flatness, seam alignment, adhesive coverage, plank orientation, and edge gaps. Include close-ups of imperfections, moisture readings, and junction profiles.
Label images with date, location, and corrective actions so you can track issues and verify repairs.