
How to Polish Stained Concrete Floors for a Smooth, Glossy Finish
You can turn stained concrete into a smooth, glossy floor by first repairing and thoroughly cleaning the surface, then grinding with progressively finer diamond pads to expose and refine the stain, applying a densifier to harden the slab, and finishing with high-grit polishing plus a compatible sealer for durable shine. Work methodically, control dust, and use proper safety gear. Follow-up steps cover tools, grit progression, troubleshooting, and maintenance if you want more guidance.
Quick Answer How to Polish Stained Concrete Floors for a Smooth, Glossy Finish
You can polish stained concrete by cleaning, repairing, progressively grinding with finer diamond pads, and sealing for a glossy finish.
Expect a half-day to several days depending on floor size and repairs, moderate equipment cost, and a medium difficulty level if you follow instructions.
If you want, I’ll give a quick time/cost breakdown and step-by-step tips.
One-sentence summary of the process
Start by stripping, repairing, and cleaning the stained concrete. Then progressively grind with finer diamond pads, apply a densifier, re-polish to a high grit, and finish with a protective sealer to achieve a smooth, glossy surface.
To learn how to polish stained concrete floors, follow staged grinding, densifying, and sealing steps. Work methodically, and keep surfaces clean between grits for consistent shine.
Time, cost, and difficulty at a glance
A typical DIY polish job on stained concrete takes a weekend for a small room (8–12 hours of hands‑on work) while a whole house or commercial space can run several days to a week; expect pros to finish faster but budget time for prep, curing, and multiple passes between grits. You’ll pay $2–$8/ft² DIY, $3–$15/ft² pro; difficulty: moderate.
| Scope | Cost | Difficulty |
|---|---|---|
| Small room | $2–$8/ft² | Moderate |
| Whole house | $3–$10/ft² | Challenging |
| Commercial | $5–$15/ft² | Difficult |
Basic Understanding What Is Concrete Polishing and Why Stain First?
Concrete polishing means grinding and buffing the slab to expose aggregates and create a smooth, glossy surface.
You’ll choose stains—acid-based, water-based, or dye—based on color depth, permanence, and how they react with your concrete. Staining first locks in color that shows best under polish.
Note that polishing isn’t right for very thin overlays, damaged concrete, or surfaces that need heavy coatings for protection.
What polishing means for concrete surfaces
Polishing transforms a raw floor into a hard, glossy surface by grinding away imperfections and then progressively smoothing the concrete with finer abrasives.
You’ll end up with increased shine, density, and durability rather than just a topcoat. You remove surface porosity, expose aggregate where desired, and create a compact, reflective layer that resists stains and abrasion while improving light return and ease of maintenance.
Types of concrete stains (acid-based, water-based, dye)
When you stain before polishing, you lock color into the slab rather than sitting it on top, and that makes your final finish more durable and natural-looking.
You’ll choose:
- Acid-based — reacts chemically, rich variegation.
- Water-based — stable pigments, wider palette.
- Dye — vibrant, penetrates deeply but can fade.
Pick based on desired look, longevity, and site conditions.
Benefits of staining before polishing
Because staining soaks color into the slab before you grind and buff it, you get a more durable, integrated finish that won’t flake or look like a surface coating.
You’ll achieve deeper, more consistent color, hide minor imperfections, and extend longevity.
Staining before polishing also improves adhesion for sealers and enhances gloss clarity, so your polished floor stays vibrant and easier to maintain over time.
When polishing is not appropriate
If your slab has major cracks, severe spalling, thick coatings, or high moisture issues, you shouldn’t expect polishing to be a suitable fix.
You’ll need structural repair, coating removal, or moisture mitigation first. Polishing won’t conceal deep defects or stop active water intrusion.
Assess substrate condition, address repairs, and only polish once the surface is stable, clean, and free of ongoing deterioration.
Preparation Assessing and Preparing Stained Concrete for Polishing
Before you start polishing, thoroughly inspect the stained concrete for cracks, spalling, and any existing coatings that could affect the process.
Test the stain for adhesion and color uniformity, then set up safety gear and a clean, ventilated workspace.
Finally, gather the right tools and materials—grinders, diamonds, pads, densifiers, and sealers—so you’re ready to proceed.
Inspecting the floor: cracks, spalling, existing coatings
Start by closely inspecting the stained concrete for cracks, spalling, and any existing coatings so you’ll know what repairs and prep are required. Small hairline cracks often just need filling, while active or wide cracks and extensive spalling can demand patching or structural fixes before polishing.
Note coatings (sealers, paint) that block penetration; mark damaged areas, measure crack widths, and plan appropriate repair materials.
Testing stain adhesion and color uniformity
When you test stain adhesion and color uniformity, perform small, systematic checks across the floor so you’ll spot areas that won’t take polish or show uneven color after work starts.
Use a damp cloth and a mild solvent on discrete spots, let stains dry, then abrade tiny sections with fine-grit pads.
Note blotchy areas, adhesion failures, and plan targeted re-staining or etching before polishing.
Required safety gear and workspace setup
After you’ve mapped out adhesion and color issues, gear up and set the workspace to protect yourself and the surface.
Wear a respirator, eye protection, earplugs, gloves, and knee pads.
Ventilate and dust-control the area, and isolate it from occupants and pets.
- Personal protection
- Environmental containment
- Surface protection
Tools and materials checklist (grinders, diamonds, pads, densifiers, sealers)
1 essential step is gathering the right tools and materials so you’re not stopping mid-job: a floor grinder (or angle grinder for edges), a full set of diamond pads and cup wheels in progressive grits, backup sanding pads, a dust shroud and vacuum, densifier, stain-compatible sealer, mixing buckets, trowels or applicator pads, and basic supplies like extension cords, markers, and safety gear.
| Grip | Grit | Glow |
|---|---|---|
| Power | Progress | Pride |
| Dust | Densify | Finish |
Step-by-Step Polishing Process
Now you’ll follow a clear sequence to bring the stained concrete to a finished shine.
Start with repairs and surface prep, then grind to expose the stain, refine and burnish the color, apply a densifier, and finish by polishing to your desired sheen.
Each step builds on the last, so work systematically and check results as you go.
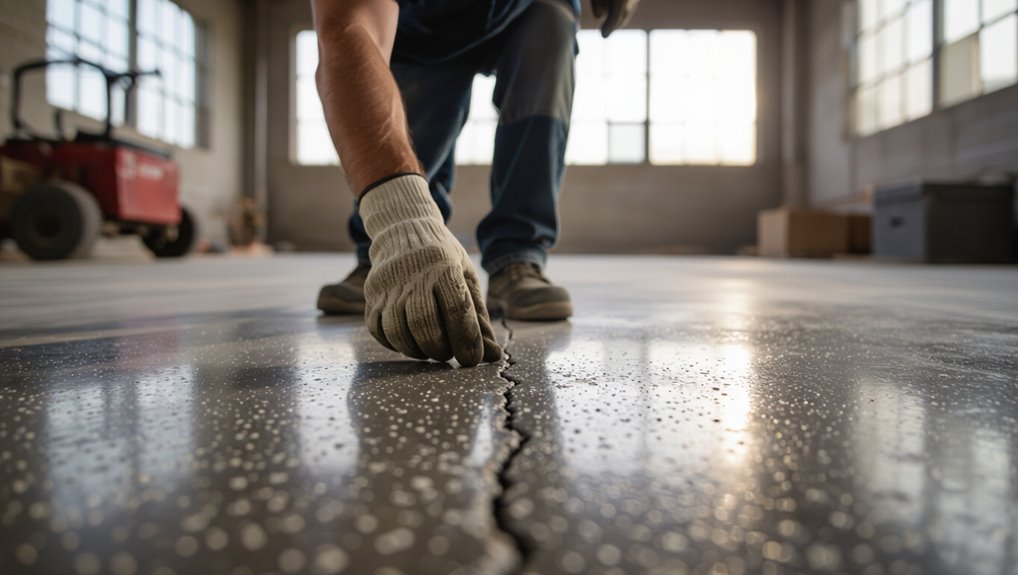
Step 1 Repair and surface prep
Before you start polishing, fix any cracks and level low spots with a suitable repair mortar so the surface grinds evenly.
Next, remove contaminants, waxes, or old coatings with a stripper or mechanical abrasion to guarantee the stain and polish will bond.
Once repairs and cleaning are complete, sweep and vacuum thoroughly to leave a clean, dry surface ready for grinding.
Filling cracks and leveling low spots
When you find cracks or low spots in stained concrete, fix them before you grind or polish so the surface will look smooth and last longer; small repairs also prevent polishing tools from catching and causing further damage.
Clean debris, widen hairline cracks slightly, then fill with a compatible epoxy or cementitious patch.
Trowel and level low areas, let cure fully, and sand flush before polishing.
Removing contaminants, waxes, or previous coatings
Strip away any surface films so the polish can bond to the concrete rather than to old wax, sealer, paint, or grease.
Use a commercial stripper or degreaser, scrub with a stiff brush or floor machine, then rinse thoroughly.
For stubborn coatings, consider mechanical removal—grinding or shot blasting.
Dry completely and inspect; any residue will ruin adhesion and the final sheen.
Step 2 Grinding to expose stained surface
Now you’ll grind to expose the stained surface, starting with coarse grits (30–50) and working up through medium to fine (up to 400+), matching progression to the stain depth and desired sheen.
Decide whether to grind wet or dry based on dust control, equipment, and stain sensitivity—wet reduces dust but can affect some stains and requires cleanup.
Keep each pass consistent and test a small area to confirm grit choice and method before continuing.
Choosing grit progression (30“50 to 400+)
As you grind to expose the stained surface, pick a grit progression that removes material efficiently without overworking the concrete; start coarse to cut through coatings and stains, then move incrementally finer (for example, 30–50, 80–120, 200, 400+) to refine the surface and reveal the true color and texture.
Change grits systematically, inspect frequently, and stop at the level that shows uniform stain penetration and minimal scratches.
Wet vs dry grinding considerations
When you start grinding to expose the stained surface, decide between wet and dry methods based on the stain type, site conditions, and dust control needs; wet grinding keeps dust down and can cool pads for longer life, while dry grinding speeds work in some situations and avoids slurry disposal but needs strong dust collection and PPE.
Choose wet for heavy dye or poor ventilation; use dry with good extraction and slower, controlled passes.
Step 3 Refining and burnishing the stain
Now you’ll switch to mid-range grits to bring out the stain color and reveal the true tones in the concrete.
Use resin-bond diamond pads as you progress to increase clarity and start building gloss.
Keep consistent passes and overlap to guarantee an even, high-shine finish.
Mid-range grits for color clarity and stain reveal
Although you’ve removed most imperfections with coarse pads, mid-range grits are where the stain’s true color and patterns start to appear.
So switch to 400–800 grit diamond pads and work methodically in overlapping passes to refine the surface and reveal the stain evenly.
Keep consistent speed and pressure, clean debris frequently, inspect progress under good light, and stop when color clarity is uniform.
Using resin-bond diamonds for higher gloss
After the mid-range grits have revealed the stain’s color uniformly, switch to resin-bond diamond pads to push gloss and refine the surface further.
You’ll move through progressively finer resin pads—2000 to 3000 grit equivalents—keeping pressure steady and overlapping passes.
Monitor shine, wipe residue, and reduce water as you burnish.
Finish when the floor reflects evenly and feels glass-smooth underfoot.
Step 4 Densifying the concrete
Now you’ll apply a densifier to lock in the stain and prepare the slab for high-gloss polishing.
Choose between silicate, silica-based, or lithium products and follow manufacturer timing—some go on after initial grinding, others after final cleaning.
Proper densifying increases surface hardness and makes the floor easier to achieve a durable, higher shine.
Types of densifiers and application timing
One key choice you’ll make during densifying is which type of silicate-based densifier to use—sodium, potassium, or lithium—because each reacts differently with your concrete and affects cure time, penetration, and long-term hardness.
Choose lithium for fast penetration and compatibility with additives, potassium for deeper reaction in larger pores, or sodium for economical general use.
Apply after cleaning; follow manufacturer dwell and rinse instructions.
Effects on hardness and polishability
Because densifiers chemically react with the cement matrix, they’ll noticeably increase surface hardness and make subsequent polishing steps more effective; you’ll get tighter, glossier grinds with fewer haze issues when the concrete has been properly treated.
You’ll notice faster cut rates, improved edge retention, and more consistent sheen. Treat weak spots again, and always let the densifier cure fully before advancing grits for best results.
Step 5 Polishing to desired sheen
Now you choose final grits based on the sheen you want: lower grits for satin, higher (up to 3000) for high-gloss.
Use progressive grit passes with consistent pressure and overlap, then burnish with a high-speed machine and a diamond-impregnated or polyester pad at the manufacturer’s recommended RPM to lock in shine.
Adjust machine speed and weight as needed for heat control and even sheen across the floor.
Final grit choices for satin to high-gloss
Choose your final grits based on the sheen you want: lower-numbered diamonds (800–1500) will give a satin finish, while ultra-fine grits (3000 and up) are needed for a high-gloss mirror effect.
Start with progressively finer diamonds, inspect for uniformity, and remove haze or micro-scratches before each step.
Stop when the surface reflects light to your target sheen.
Burnishing technique and machine settings
After you’ve reached the desired grit and verified the surface is free of haze and micro-scratches, it’s time to burnish to lock in the sheen.
Use a high-speed burnisher (1,500–3,000 RPM) with a soft pad for gloss or a stiffer pad for more cut. Move steadily in overlapping passes, avoid stopping, keep weight even, and inspect frequently—adjust speed or pad to refine reflectivity.
Step 6 Sealing and protective topcoats
Now you’ll choose between penetrating sealers, which soak into the concrete, and topical coatings that form a surface film—each offers different protection and maintenance needs.
Apply sealers with a sprayer, roller, or mop and follow the manufacturer’s recommended cure times before light use.
Give the coating the full cure window to reach maximum hardness and stain resistance.
Penetrating sealers vs topical coatings
While both penetrating sealers and topical coatings protect polished concrete, they work very differently and suit different needs:
Penetrating sealers soak into pores, preserve natural look, resist stains, and don’t alter traction.
Topical coatings form a surface film, boost gloss, and offer stronger chemical and abrasion resistance but can change texture and require maintenance.
Choose based on appearance, durability, and traffic.
Application methods and cure times
When you apply sealers or topcoats, pick a method that matches the product and traffic — spray for even coverage on penetratives, roller for quick, consistent film coats, and a microfiber or lambswool pad for thin, high-gloss finishes.
Follow manufacturer cure times: penetratives often need 24–72 hours, topcoats 24–48 hours between coats, and full service usually 7 days.
Check humidity and temperature.
Troubleshooting Common Problems and Mistakes
As you finish polishing, you’ll want to check for common issues like stain bleeding or color washout and uneven gloss or haze.
Inspect for scratch marks, grinding rings, and poor sealer or topcoat adhesion, and address overheating, dust control, and respiratory hazards before proceeding.
I’ll walk you through how to identify each problem and the practical fixes.
Stain bleeding or color washout
If you notice uneven color, fuzzy edges, or puddled pigment across your floor, you’ve likely got stain bleeding or color washout—issues that blur designs and ruin the finish.
Stop work, blot excess liquid, and let the slab dry fully.
Test-etch and reseal problem areas, use primer or a penetration reducer, and apply stain in controlled passes to prevent recurrence.
Uneven gloss or haze
Though you may have sanded and sealed carefully, uneven gloss or a hazy film can still show up and ruin the look of polished concrete; it usually means the topcoat wasn’t applied uniformly, contaminants were trapped, or the sealer reacted poorly with the substrate.
Fix by cleaning with a solvent-appropriate cleaner, lightly scuffing dull areas, then reapplying thin, even coats and allowing full cure between layers.
Scratch marks and grinding rings
When you see fine scratches or concentric grinding rings on stained concrete, they usually come from using overly aggressive abrasives, skipping grit steps, or applying uneven pressure during polishing.
These marks catch light and make the floor look dull and amateurish.
Fix them by reworking with finer grits, keep consistent overlap and pressure, clean frequently, and inspect under good light to confirm removal before sealing.
Poor adhesion of sealers or topcoats
Because sealers bond to a clean, properly prepared surface, poor adhesion usually points to contamination, insufficient profiling, or applying a product that’s incompatible with the substrate or previous coatings.
Check for oil, wax, or curing agents; abrade to create mechanical tooth; fully remove old coatings if needed.
Test compatibility, follow manufacturer recoat windows, and verify surfaces are dry and at recommended temperature before sealing.
Overheating, dust management, and respiratory hazards
Power tools and grinders can get hot fast, so keep an eye on motor temperature and pad heat to avoid burns, damaged equipment, or discoloration of the concrete.
Don’t force tools; let them cool, swap pads, and work in short intervals.
Use HEPA vacuums, water suppression where appropriate, and wear N95 or P100 respirators and eye protection to control dust and inhalation risks.
Best Practices and Tips for a Lasting Glossy Finish
To keep that stained concrete shining, follow an efficient grit progression (and know when it’s safe to skip a grit) while controlling humidity and temps during polishing.
Set a simple maintenance schedule—regular dust-mopping, periodic neutral-cleaner washes, and scheduled re-polish touch-ups—to preserve gloss.
Call a pro if you hit uneven spots, deep stains, or large areas that need heavy grinding instead of a DIY fix.
Optimal grit progression and when to skip grits
Start with a clear plan for grit progression so you get a smooth, durable shine without wasting time on unnecessary steps.
Begin around 30–40 grit for heavy imperfections, move to 80–120 grit for leveling, then 200–400 for refining.
Skip intermediate grits only if the surface responds cleanly and you avoid swirl marks.
Test a small area before skipping.
Environmental and moisture control tips
1 simple habit will protect your polished stained concrete’s gloss: control moisture and environment before, during, and after polishing.
Keep humidity below 60% and temperature stable to guarantee even curing. Fix leaks, seal nearby damp sources, and use dehumidifiers or heaters as needed.
Allow concrete to reach proper dryness before sealing or coating to prevent blushing, delamination, and reduced shine.
Maintenance schedule to preserve shine
When you follow a simple, regular maintenance schedule, your polished stained concrete will keep its gloss longer and need fewer costly restorations; clean, protect, and inspect on a routine basis.
- Daily: dry mop to remove grit.
- Weekly: damp mop with pH-neutral cleaner; spot-treat stains.
- Quarterly: inspect for wear, reapply a maintenance coat where needed.
When to call a professional vs DIY
Keeping a regular maintenance routine will delay major repairs, but you’ll still face choices about what you can handle yourself and when to call in a pro.
Do DIY for routine polishing, light staining, and spot repairs if you have proper pads and safety gear.
Call a professional for deep etching, large cracks, moisture issues, or when you need uniform color and a guaranteed warranty.
Product and Tool Comparison
Now you’ll compare the right gear and supplies so the job’s efficient and durable.
Look at popular polishing machine types and models, recommended diamond pad grits, and which stains and sealers hold up best on polished concrete.
I’ll point out pros, cons, and what works together for different budgets and finishes.
Comparison of popular polishing machines and models
Because the right machine shapes both the finish and the time you spend, you’ll want to compare key features—motor power, pad speed, weight, and dust control—before buying or renting. Choose a heavy-duty planetary grinder for speed, a walk-behind for control, or a lightweight buffer for edges. Match machine to project size, budget, and noise limits.
| Model | Best for |
|---|---|
| Planetary | Large areas |
| Walk-behind | Control |
Recommended diamond pad types and grits
When you want consistent color and a durable sheen on stained concrete, pick diamond pads by grit and bond type to match the stain, hardness of the slab, and desired finish. Choose coarse pads for leveling, medium for smoothing, and fine for gloss. Use resin bonds for soft mixes, metal bonds for hard aggregates.
| Grit | Use | Bond |
|---|---|---|
| 30–80 | Leveling | Metal |
| 100–400 | Smoothing | Hybrid |
| 800–3000 | Polishing | Resin |
Best stains and sealers for polished floors
If you want a durable, vibrant finish on stained concrete, pick stains and sealers that match your project’s exposure, desired look, and maintenance level.
Choose acid or water-based stains for tone control, then seal.
Consider:
- Acid stains + penetrating sealer — depth, low sheen maintenance.
- Water-based stains + acrylic sealer — color consistency, easy touch-ups.
- Dyes + urethane — bold color, high gloss, more upkeep.
Cost, Timeframe, and Project Planning
You’ll want a clear budget that breaks costs into materials, labor, and any equipment rental so you know where your money goes.
Expect timelines of a day or two for small jobs, several days for medium projects, and a week or more for large areas, and plan your schedule accordingly.
Also check local permit requirements, plan for proper disposal of grinding slurry, and follow environmental rules for stains and sealers.
Typical cost breakdown (materials, labor, equipment rental)
A clear cost breakdown helps you budget realistically for polishing stained concrete: expect material costs (grits, diamond pads, densifier, stain and sealer) to run $0.50–$3.00 per sq ft, labor to account for the largest chunk—typically $1.50–$6.00 per sq ft depending on skill and region—and equipment rental or amortized purchase to add another $0.25–$2.00 per sq ft for grinders, vacuums, and polishers.
| Item | Low | High |
|---|---|---|
| Materials | $0.50/sq ft | $3.00/sq ft |
| Labor | $1.50/sq ft | $6.00/sq ft |
| Equipment | $0.25/sq ft | $2.00/sq ft |
| Contingency | 5% | 15% |
Estimated timeline for small, medium, and large jobs
Now that you’ve got a clear cost breakdown, let’s map that to time and planning so you can schedule the work and set expectations.
Small rooms (up to 300 sq ft): 1–2 days including prep and polishing.
Medium areas (300–1,000 sq ft): 2–4 days.
Large projects (over 1,000 sq ft): 4–10+ days; factor drying, staging, and unexpected repairs.
Permits, disposal, and environmental considerations
Because local rules and waste handling can affect cost and timing, check permits and disposal requirements before you start work.
Contact your municipality about permits, VOC limits, and stormwater rules.
Plan for hazardous waste like grinding slurry and sealers—arrange proper disposal or recycling.
Factor permit fees, inspection windows, and certified haulers into your schedule and budget to avoid delays and fines.
FAQs
You’ll find answers to common concerns like whether you can polish over a stain or if the process will alter the color.
I’ll also cover how long a polished stained concrete floor typically lasts, indoor grinding safety, and how to restore shine if it dulls.
Read on for clear, practical guidance on each question.
Can you polish over stained concrete without removing the stain?
Wondering if you can polish over stained concrete without stripping the stain first? Yes—you can, provided the stain is well adhered, fully cured, and clean.
Test a small area to confirm color stability and adhesion. Use progressive grit polishing and compatible densifiers/sealers.
Avoid acidic cleaners that may lift stain. If the stain flakes or fades, you’ll need to reapply or strip before polishing.
How long does a polished stained concrete floor last?
How long will a polished stained concrete floor last?
With proper sealing, maintenance, and moderate traffic, you can expect 10–20 years of attractive performance.
High-traffic or harsh conditions shorten lifespan; periodic resealing and prompt cleaning extend it.
Inspect finishes annually, address scratches or dull spots, and buff or recoat as needed to preserve gloss and durability.
Will polishing change the color of the stain?
Curious whether polishing will alter your stained concrete’s color?
Polishing itself doesn’t change the stain pigment, but it can deepen and enrich tones by enhancing sheen and revealing aggregate.
Mild lightening may occur if grinding removes a thin surface layer of stain.
Test a small area first and consult your installer to match finish and sheen without unexpected color shifts.
Is it safe to grind stained concrete indoors?
Since polishing can reveal more of the stain and change surface appearance, you’ll also want to contemplate whether it’s safe to grind stained concrete indoors.
You can, but take precautions: guarantee proper ventilation, use wet grinding or a HEPA-equipped dust extractor, wear respiratory protection and eye protection, and seal off adjacent areas.
Consider noise, fumes from sealers, and local regulations before starting.
How do I restore shine if the polished floor dulls?
Want your polished concrete to look like new again?
Clean gently with pH-neutral cleaner, remove grit, and dry.
For light haze, buff with a high-speed floor buffer and a soft pad.
If dulled from wear, re-polish with progressively finer diamond pads or hire a pro for densifier and burnishing.
Reseal if the finish no longer repels water or stains.
Visual Guides and Before/After Examples
You’ll find a clear step-by-step photo guide of a sample polishing project to follow from start to finish.
Compare before-and-after shots to see how staining and progressive grit changes affect the finish.
I’ll also show gloss level examples so you know what to expect for sheen and maintenance.
Step-by-step photo guide of a sample project

1 clear, photo-driven walkthrough will show you how stained concrete goes from dull to glossy, step by step.
You’ll see prep—cleaning, patching, and masking—then progressive sanding grits, stain touch-ups, and densifier application.
Photos capture pad changes, edge work, and final burnishing. Each image includes concise captions with tools, settings, and timing so you can replicate the sequence confidently.
Gloss level examples and what to expect
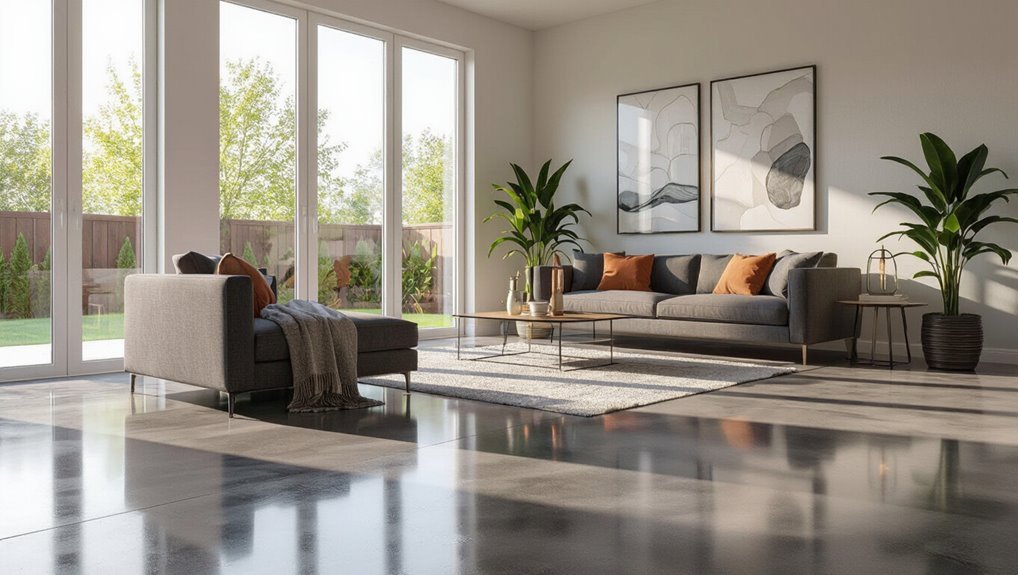
Now that you’ve seen the step-by-step process, let’s look at how different gloss levels change the final look and feel of stained concrete.
Low sheen mutes reflections and hides imperfections—good for industrial or rustic spaces.
Semi-gloss balances depth and durability for living areas.
High gloss maximizes color, clarity, and reflectivity but reveals flaws and needs more maintenance.
Choose by style and use.